
Move or copy cells and cell contents
Use Cut, Copy, and Paste to move or copy cell contents. Or copy specific contents or attributes from the cells. For example, copy the resulting value of a formula without copying the formula, or copy only the formula.
When you move or copy a cell, Excel moves or copies the cell, including formulas and their resulting values, cell formats, and comments.
You can move cells in Excel by drag and dropping or using the Cut and Paste commands.

Move cells by drag and dropping
-
Select the cells or range of cells that you want to move or copy.
-
Point to the border of the selection.
-
When the pointer becomes a move pointer
 , drag the cell or range of cells to another location.
Move cells by using Cut and Paste
-
Select a cell or a cell range.
-
Select Home > Cut
or press Ctrl + X. -
Select a cell where you want to move the data.
-
Select Home > Paste
or press Ctrl + V.
Copy cells by using Copy and Paste
-
Select the cell or range of cells.
-
Select Copy or press Ctrl + C.
-
Select Paste or press Ctrl + V.
Need more help?
You can always ask an expert in the Excel Tech Community or get support in the Answers community.
See Also
Move or copy cells, rows, and columns
Need more help?
When you move or copy rows and columns, by default Excel moves or copies all data that they contain, including formulas and their resulting values, comments, cell formats, and hidden cells.
When you copy cells that contain a formula, the relative cell references are not adjusted. Therefore, the contents of cells and of any cells that point to them might display the #REF! error value. If that happens, you can adjust the references manually. For more information, see Detect errors in formulas.
You can use the Cut command or Copy command to move or copy selected cells, rows, and columns, but you can also move or copy them by using the mouse.
By default, Excel displays the Paste Options button. If you need to redisplay it, go to Advanced in Excel Options. For more information, see Advanced options.
-
Select the cell, row, or column that you want to move or copy.
-
Do one of the following:
-
To move rows or columns, on the Home tab, in the Clipboard group, click Cut
or press CTRL+X. -
To copy rows or columns, on the Home tab, in the Clipboard group, click Copy
or press CTRL+C.
-
-
Right-click a row or column below or to the right of where you want to move or copy your selection, and then do one of the following:
-
When you are moving rows or columns, click Insert Cut Cells.
-
When you are copying rows or columns, click Insert Copied Cells.
Tip: To move or copy a selection to a different worksheet or workbook, click another worksheet tab or switch to another workbook, and then select the upper-left cell of the paste area.
-
 or press CTRL+X.
 or press CTRL+C.
Note: Excel displays an animated moving border around cells that were cut or copied. To cancel a moving border, press Esc.
By default, drag-and-drop editing is turned on so that you can use the mouse to move and copy cells.
-
Select the row or column that you want to move or copy.
-
Do one of the following:
-
Cut and replace
Point to the border of the selection. When the pointer becomes a move pointer, drag the rows or columns to another location. Excel warns you if you are going to replace a column. Press Cancel to avoid replacing. -
Copy and replace Hold down CTRL while you point to the border of the selection. When the pointer becomes a copy pointer
, drag the rows or columns to another location. Excel doesn’t warn you if you are going to replace a column. Press CTRL+Z if you don’t want to replace a row or column. -
Cut and insert Hold down SHIFT while you point to the border of the selection. When the pointer becomes a move pointer
, drag the rows or columns to another location. -
Copy and insert Hold down SHIFT and CTRL while you point to the border of the selection. When the pointer becomes a move pointer
, drag the rows or columns to another location.
Note: Make sure that you hold down CTRL or SHIFT during the drag-and-drop operation. If you release CTRL or SHIFT before you release the mouse button, you will move the rows or columns instead of copying them.
-
Note: You cannot move or copy nonadjacent rows and columns by using the mouse.
If some cells, rows, or columns on the worksheet are not displayed, you have the option of copying all cells or only the visible cells. For example, you can choose to copy only the displayed summary data on an outlined worksheet.
-
Select the row or column that you want to move or copy.
-
On the Home tab, in the Editing group, click Find & Select, and then click Go To Special.
-
Under Select, click Visible cells only, and then click OK.
-
On the Home tab, in the Clipboard group, click Copy
or press Ctrl+C. . -
Select the upper-left cell of the paste area.
Tip: To move or copy a selection to a different worksheet or workbook, click another worksheet tab or switch to another workbook, and then select the upper-left cell of the paste area.
-
On the Home tab, in the Clipboard group, click Paste
or press Ctrl+V.If you click the arrow below Paste
, you can choose from several paste options to apply to your selection.
 or press Ctrl+V.
Excel pastes the copied data into consecutive rows or columns. If the paste area contains hidden rows or columns, you might have to unhide the paste area to see all of the copied cells.
When you copy or paste hidden or filtered data to another application or another instance of Excel, only visible cells are copied.
-
Select the row or column that you want to move or copy.
-
On the Home tab, in the Clipboard group, click Copy
or press Ctrl+C. -
Select the upper-left cell of the paste area.
-
On the Home tab, in the Clipboard group, click the arrow below Paste
, and then click Paste Special. -
Select the Skip blanks check box.
-
Double-click the cell that contains the data that you want to move or copy. You can also edit and select cell data in the formula bar.
-
Select the row or column that you want to move or copy.
-
On the Home tab, in the Clipboard group, do one of the following:
-
To move the selection, click Cut
or press Ctrl+X. -
To copy the selection, click Copy
or press Ctrl+C.
-
-
In the cell, click where you want to paste the characters, or double-click another cell to move or copy the data.
-
On the Home tab, in the Clipboard group, click Paste
or press Ctrl+V. -
Press ENTER.
Note: When you double-click a cell or press F2 to edit the active cell, the arrow keys work only within that cell. To use the arrow keys to move to another cell, first press Enter to complete your editing changes to the active cell.
When you paste copied data, you can do any of the following:
-
Paste only the cell formatting, such as font color or fill color (and not the contents of the cells).
-
Convert any formulas in the cell to the calculated values without overwriting the existing formatting.
-
Paste only the formulas (and not the calculated values).
Procedure
-
Select the row or column that you want to move or copy.
-
On the Home tab, in the Clipboard group, click Copy
or press Ctrl+C.
-
Select the upper-left cell of the paste area or the cell where you want to paste the value, cell format, or formula.
-
On the Home tab, in the Clipboard group, click the arrow below Paste
, and then do one of the following:-
To paste values only, click Values.
-
To paste cell formats only, click Formatting.
-
To paste formulas only, click Formulas.
-
When you paste copied data, the pasted data uses the column width settings of the target cells. To correct the column widths so that they match the source cells, follow these steps.
-
Select the row or column that you want to move or copy.
-
On the Home tab, in the Clipboard group, do one of the following:
-
To move cells, click Cut
or press Ctrl+X. -
To copy cells, click Copy
or press Ctrl+C.
-
-
Select the upper-left cell of the paste area.
Tip: To move or copy a selection to a different worksheet or workbook, click another worksheet tab or switch to another workbook, and then select the upper-left cell of the paste area.
-
On the Home tab, in the Clipboard group, click the arrow under Paste
, and then click Keep Source Column Widths.
You can use the Cut command or Copy command to move or copy selected cells, rows, and columns, but you can also move or copy them by using the mouse.
-
Select the cell, row, or column that you want to move or copy.
-
Do one of the following:
-
To move rows or columns, on the Home tab, in the Clipboard group, click Cut
or press CTRL+X. -
To copy rows or columns, on the Home tab, in the Clipboard group, click Copy
or press CTRL+C.
-
-
Right-click a row or column below or to the right of where you want to move or copy your selection, and then do one of the following:
-
When you are moving rows or columns, click Insert Cut Cells.
-
When you are copying rows or columns, click Insert Copied Cells.
Tip: To move or copy a selection to a different worksheet or workbook, click another worksheet tab or switch to another workbook, and then select the upper-left cell of the paste area.
-
Note: Excel displays an animated moving border around cells that were cut or copied. To cancel a moving border, press Esc.
-
Select the row or column that you want to move or copy.
-
Do one of the following:
-
Cut and insert
Point to the border of the selection. When the pointer becomes a hand pointer, drag the row or column to another location -
Cut and replace Hold down SHIFT while you point to the border of the selection. When the pointer becomes a move pointer
, drag the row or column to another location. Excel warns you if you are going to replace a row or column. Press Cancel to avoid replacing. -
Copy and insert Hold down CTRL while you point to the border of the selection. When the pointer becomes a move pointer
, drag the row or column to another location. -
Copy and replace Hold down SHIFT and CTRL while you point to the border of the selection. When the pointer becomes a move pointer
, drag the row or column to another location. Excel warns you if you are going to replace a row or column. Press Cancel to avoid replacing.
Note: Make sure that you hold down CTRL or SHIFT during the drag-and-drop operation. If you release CTRL or SHIFT before you release the mouse button, you will move the rows or columns instead of copying them.
-
 , drag the row or column to another location
Note: You cannot move or copy nonadjacent rows and columns by using the mouse.
-
Double-click the cell that contains the data that you want to move or copy. You can also edit and select cell data in the formula bar.
-
Select the row or column that you want to move or copy.
-
On the Home tab, in the Clipboard group, do one of the following:
-
To move the selection, click Cut
or press Ctrl+X. -
To copy the selection, click Copy
or press Ctrl+C.
-
-
In the cell, click where you want to paste the characters, or double-click another cell to move or copy the data.
-
On the Home tab, in the Clipboard group, click Paste
or press Ctrl+V. -
Press ENTER.
Note: When you double-click a cell or press F2 to edit the active cell, the arrow keys work only within that cell. To use the arrow keys to move to another cell, first press Enter to complete your editing changes to the active cell.
When you paste copied data, you can do any of the following:
-
Paste only the cell formatting, such as font color or fill color (and not the contents of the cells).
-
Convert any formulas in the cell to the calculated values without overwriting the existing formatting.
-
Paste only the formulas (and not the calculated values).
Procedure
-
Select the row or column that you want to move or copy.
-
On the Home tab, in the Clipboard group, click Copy
or press Ctrl+C.
-
Select the upper-left cell of the paste area or the cell where you want to paste the value, cell format, or formula.
-
On the Home tab, in the Clipboard group, click the arrow below Paste
, and then do one of the following:-
To paste values only, click Paste Values.
-
To paste cell formats only, click Paste Formatting.
-
To paste formulas only, click Paste Formulas.
-
You can move or copy selected cells, rows, and columns by using the mouse and Transpose.
-
Select the cells or range of cells that you want to move or copy.
-
Point to the border of the cell or range that you selected.
-
When the pointer becomes a
, do one of the following:
 , do one of the following:
|
To |
Do this |
|---|---|
|
Move cells |
Drag the cells to another location. |
|
Copy cells |
Hold down OPTION and drag the cells to another location. |
Note: When you drag or paste cells to a new location, if there is pre-existing data in that location, Excel will overwrite the original data.
-
Select the rows or columns that you want to move or copy.
-
Point to the border of the cell or range that you selected.
-
When the pointer becomes a
, do one of the following:
|
To |
Do this |
|---|---|
|
Move rows or columns |
Drag the rows or columns to another location. |
|
Copy rows or columns |
Hold down OPTION and drag the rows or columns to another location. |
|
Move or copy data between existing rows or columns |
Hold down SHIFT and drag your row or column between existing rows or columns. Excel makes space for the new row or column. |
-
Copy the rows or columns that you want to transpose.
-
Select the destination cell (the first cell of the row or column into which you want to paste your data) for the rows or columns that you are transposing.
-
On the Home tab, under Edit, click the arrow next to Paste, and then click Transpose.
Note: Columns and rows cannot overlap. For example, if you select values in Column C, and try to paste them into a row that overlaps Column C, Excel displays an error message. The destination area of a pasted column or row must be outside the original values.
See also
Insert or delete cells, rows, columns
When you create tables or worksheets in Excel, sometimes you have to move columns or rows. Often, you may also need to move specific cells in Excel. During this process, problems frequently arise if contents, formulas, cell references or formatting are accidentally changed. However, there are several simple options for moving cells in Excel without making unwanted changes. Once you’ve selected the cell or range of cells that you want to move, there are three different ways to move their contents from A to B. We’ll explain these methods and show you exactly how they work.
Contents
- Moving cells in Excel using drag and drop
- Moving cells in Excel using Copy and Paste
- Moving cells in Excel without changing the contents
Moving cells in Excel using drag and drop
Using drag and drop to move cells in Excel is one of the most convenient ways of transferring contents in your spreadsheet. Follow these steps to use this option:
1. First, select the range of cells you want to move.
2. Place the mouse pointer on the border of the selected range. The mouse pointer becomes a four-sided arrow or a hand symbol.

3. Click and hold down the left mouse button.
4. Drag the cells to the desired location.

You can copy the selected cell(s) to the new area using drag-and-drop by holding down the Ctrl key on a PC or the Alt key on a Mac and hovering over the border of the selection. If the area is already filled, the cell contents are overwritten.

Moving cells in Excel using Copy and Paste
As an alternative to drag and drop, you can move cells in Excel using Copy and Paste.
1. Once again, select the range of cells you want to move.
2. Press Ctrl + X to cut.

3. Press Ctrl + V to paste the cell(s) into the destination cell(s).
The advantage of this option is that it requires one less step than Copy and Paste using Ctrl + C because the contents are transferred directly. This saves you the additional step of deletion.

Fact
If you move or copy a formula, Excel automatically changes the cell references to the new location.
Moving cells in Excel without changing the contents
If you tend to use formulas or specific cell references often, you should use the $ sign in your formulas.
If a reference is anchored using $[column]$[row], the cell reference is retained even if you move the Excel cell with the formula.
1. Anchor the cell references by using $ signs in the formula.
2. Copy the range of cells.
3. You don’t have to adjust cells that you wish to remain flexible.
")
If you want the cell reference in the first column to move when copied, only anchor part of the formula using the $ sign. In the following example, only “B” moves in the row, whereas “C6” was anchored using the $ sign. This means that the formula in “E6” returns a different result.

You can also easily transfer formulas to other cells by dragging the lower-right corner of the formula. In this case, it’s important to anchor the formula so that it’s correctly duplicated.

Splitting Cells in Excel: How to Divide Cell Content Among Multiple Columns
If a table field contains several values, it often makes sense to split the respective Excel cell. Although the Microsoft spreadsheet program doesn’t offer a general function for this, you can split the cell content among multiple columns by configuring and using separators. We explain how you can use this option in your Excel document.
Splitting Cells in Excel: How to Divide Cell Content Among Multiple Columns

Combining and merging cells in Excel – explained in simple steps
Do you want to combine or merge cells or columns in your Excel table, but are not sure how? This guide explains how to combine, center, and split cells in Excel using clear and simple examples. You’ll also learn how you can use the “&” sign to combine cells.
Combining and merging cells in Excel – explained in simple steps

Moving columns and rows in Excel – a step-by-step guide
Moving columns and rows in your Excel spreadsheet is effortless when you use the drag-and-drop function or keyboard shortcuts. In this guide, we’ll show you how to move columns or rows in Excel or cut and paste them into a different location. That way, you can transfer values in Excel without worrying about formula errors or formatting problems.
Moving columns and rows in Excel – a step-by-step guide

Using the percentage formula in Excel
Want to know how to calculate percentages in Excel? With the most important formulas for calculating percentages in Excel, the process is a cinch. In this article, you’ll learn how to calculate percentages of totals and growth rates, and how to figure out proportions and totals based on percentages. We’ll also give you tips on increasing and decreasing numbers by percentages.
Using the percentage formula in Excel
Содержание
- Move or copy cells and cell contents
- Need more help?
- Move or copy cells, rows, and columns
- How To Move Cells In Excel With Arrow Keys?
- How do you move cells in Excel using the keyboard?
- Why can’t I use my arrow keys to scroll in Excel?
- When I hit arrow keys in Excel Do they scroll?
- How do I turn off scroll lock on my laptop?
- What is the shortcut key to move the content of a cell?
- What key is Scroll Lock?
- How do I enable scrolling in Excel?
- How do I move the cursor in Excel?
- What is Ctrl R in Excel?
- What does Alt do in Excel?
- Is the keyboard shortcut for moving up one cell?
- How do you scroll with the keyboard?
- How do I move a cell cursor in Excel?
- How can you move the cursor to the right cell to select it?
- What is Ctrl D in Excel?
- What is F4 in Excel?
- What does Alt R do?
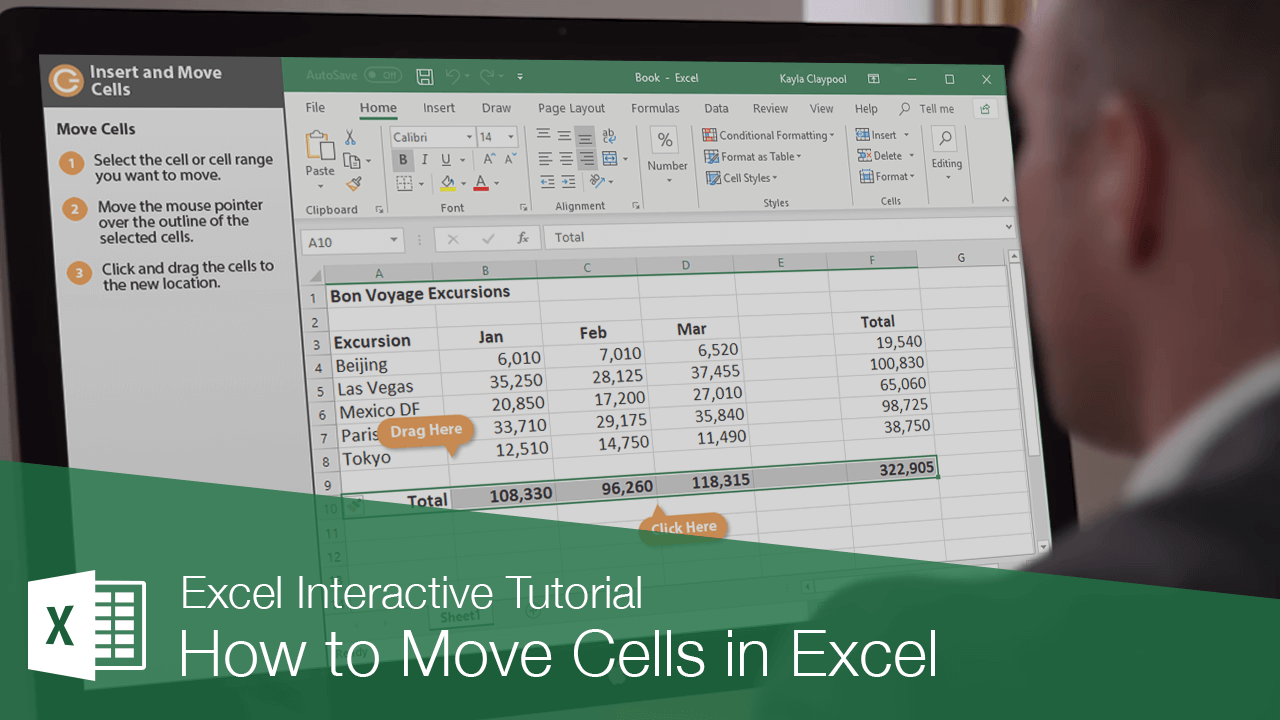
- How to Move Cells in Excel
- How to Insert and Move Cells in Excel
- Insert Cells
- Insert Rows or Columns
- Move Cells
- FREE Quick Reference
Move or copy cells and cell contents
Use Cut, Copy, and Paste to move or copy cell contents. Or copy specific contents or attributes from the cells. For example, copy the resulting value of a formula without copying the formula, or copy only the formula.
When you move or copy a cell, Excel moves or copies the cell, including formulas and their resulting values, cell formats, and comments.
You can move cells in Excel by drag and dropping or using the Cut and Paste commands.
Move cells by drag and dropping
Select the cells or range of cells that you want to move or copy.
Point to the border of the selection.
When the pointer becomes a move pointer  , drag the cell or range of cells to another location.
Move cells by using Cut and Paste
Select a cell or a cell range.
Select Home > Cut  or press Ctrl + X.
Select a cell where you want to move the data.
Select Home > Paste  or press Ctrl + V.
Copy cells by using Copy and Paste
Select the cell or range of cells.
Select Copy or press Ctrl + C.
Select Paste or press Ctrl + V.
Need more help?
You can always ask an expert in the Excel Tech Community or get support in the Answers community.
Источник
Move or copy cells, rows, and columns
When you move or copy rows and columns, by default Excel moves or copies all data that they contain, including formulas and their resulting values, comments, cell formats, and hidden cells.
When you copy cells that contain a formula, the relative cell references are not adjusted. Therefore, the contents of cells and of any cells that point to them might display the #REF! error value. If that happens, you can adjust the references manually. For more information, see Detect errors in formulas.
You can use the Cut command or Copy command to move or copy selected cells, rows, and columns, but you can also move or copy them by using the mouse.
By default, Excel displays the Paste Options button. If you need to redisplay it, go to Advanced in Excel Options. For more information, see Advanced options.
Select the cell, row, or column that you want to move or copy.
Do one of the following:
To move rows or columns, on the Home tab, in the Clipboard group, click Cut  or press CTRL+X.
To copy rows or columns, on the Home tab, in the Clipboard group, click Copy  or press CTRL+C.
Right-click a row or column below or to the right of where you want to move or copy your selection, and then do one of the following:
When you are moving rows or columns, click Insert Cut Cells.
When you are copying rows or columns, click Insert Copied Cells.
Tip: To move or copy a selection to a different worksheet or workbook, click another worksheet tab or switch to another workbook, and then select the upper-left cell of the paste area.
Note: Excel displays an animated moving border around cells that were cut or copied. To cancel a moving border, press Esc.
By default, drag-and-drop editing is turned on so that you can use the mouse to move and copy cells.
Select the row or column that you want to move or copy.
Do one of the following:
Cut and replace Point to the border of the selection. When the pointer becomes a move pointer  , drag the rows or columns to another location. Excel warns you if you are going to replace a column. Press Cancel to avoid replacing.
Copy and replace Hold down CTRL while you point to the border of the selection. When the pointer becomes a copy pointer  , drag the rows or columns to another location. Excel doesn’t warn you if you are going to replace a column. Press CTRL+Z if you don’t want to replace a row or column.
Cut and insert Hold down SHIFT while you point to the border of the selection. When the pointer becomes a move pointer , drag the rows or columns to another location.
Copy and insert Hold down SHIFT and CTRL while you point to the border of the selection. When the pointer becomes a move pointer , drag the rows or columns to another location.
Note: Make sure that you hold down CTRL or SHIFT during the drag-and-drop operation. If you release CTRL or SHIFT before you release the mouse button, you will move the rows or columns instead of copying them.
Note: You cannot move or copy nonadjacent rows and columns by using the mouse.
Источник
How To Move Cells In Excel With Arrow Keys?
Pressing an arrow key while SCROLL LOCK is on will scroll one row up or down or one column left or right. To use the arrow keys to move between cells, you must turn SCROLL LOCK off. To do that, press the Scroll Lock key (labeled as ScrLk) on your keyboard.
How do you move cells in Excel using the keyboard?
Move around a workbook using the keyboard
- To move to the next cell, press the Arrow Keys.
- To move to the next cell to the right, press TAB.
- To move to the next cell to the left, press SHIFT + TAB.
- To move to the edge of a data region, press CONTROL + Arrow Keys.
- To move to the first cell in the row, press HOME.
One of the common reasons why the arrow keys don’t work in Excel is because you’ve enabled the scroll lock feature on your computer. For as long as it remains enabled, the keys won’t do what they’re supposed to do.Simply press the scroll lock button on your keyboard and the lock will be disabled.
When the scroll lock feature is turned on, pressing an arrow key causes Microsoft Excel to move the entire spreadsheet, instead of moving to the next cell. Although helpful for a user viewing a large worksheet, it’s also quite annoying for those who have mistakenly enabled this feature.
Turn off Scroll Lock
- If your keyboard does not have a Scroll Lock key, on your computer, click Start > Settings > Ease of Access > Keyboard.
- Click the On Screen Keyboard button to turn it on.
- When the on-screen keyboard appears on your screen, click the ScrLk button.
What is the shortcut key to move the content of a cell?
Keyboard shortcuts for formatting cells
| To do this | Press |
|---|---|
| Copy a formula from the cell above the active cell into the cell or the Formula Bar. | Ctrl+apostrophe (‘) |
| Move the selected cells. | Ctrl+X |
| Copy the selected cells. | Ctrl+C |
| Paste content at the insertion point, replacing any selection. | Ctrl+V |
The Scroll Lock key on a laptop is often a secondary function of another key, located near the Backspace key. If a laptop uses two keys as one key, you must press the Fn key with the second key you want to use. On a laptop, the Scr Lk, Pause, and Break functions are usually part of another key and are in blue text.
Click File > Options. On the Advanced tab, scroll to the Display section. Select Show horizontal scroll bar and Show vertical scroll bar, and then click OK.
How do I move the cursor in Excel?
Just press the “Enter” key. Moving between the cells by using arrows keys. (All the arrows on the keyboard affect the movement of the cursor respectively with its direction). Point your mouse at the cell with address A2 and click the left mouse button.
What is Ctrl R in Excel?
Ctrl+R in Excel and other spreadsheet programs
In Microsoft Excel and other spreadsheet programs, pressing Ctrl+R fills the row cell to the right with the contents of the selected cell. To fill more than one cell, select the source cell and press Ctrl+Shift+Right arrow to select multiple cells.
What does Alt do in Excel?
It is a shortcut to quickly access the first nine buttons on the Quick Access Toolbar (the toolbar above or below the ribbon). ALT + 1 is the first button. So you can rearrange the buttons to allow you to quickly access them with the ALT key.
Is the keyboard shortcut for moving up one cell?
Enter – Move the active cell one cell in a direction based on your settings. This is down by default. Shift + Enter – Moves the active cell up to the previous cell in the range. Tab – Moves the active cell to the right in the range.
How to Scroll With a Laptop Keyboard
- Use the arrow up and arrow down keys. In the lower right side of your keyboard (usually between the letter keys and number keypad) is a set of four arrow keys.
- Use the page up and page down keys.
- Use the home and end keys.
- Scroll numerically.
How do I move a cell cursor in Excel?
Press the Home key to move to cell A4. Pressing Home moves the cursor to the beginning of the current row, which in this case, is row 4. Press the Page Down key.
How to Move the Cell Cursor in Excel 2013.
| Press This . . . | To Move . . . |
|---|---|
| Arrow keys | One cell in the direction of the arrow |
| Tab | One cell to the right |
| Shift+Tab | One cell to the left |
How can you move the cursor to the right cell to select it?
Moving the Cursor Within a Selected Range
- Move the cell pointer downward through a selected range by pressing ENTER.
- move the pointer upward (or left) by pressing SHIFT-ENTER.
- To move from left to right within a range, press TAB.
- To move from right to left, press SHIFT-TAB.
What is Ctrl D in Excel?
Ctrl+D in Excel and Google Sheets
In Microsoft Excel and Google Sheets, pressing Ctrl + D fills and overwrites a cell(s) with the contents of the cell above it in a column. To fill the entire column with the contents of the upper cell, press Ctrl + Shift + Down to select all cells below, and then press Ctrl + D .
What is F4 in Excel?
When you are typing your formula, after you type a cell reference – press the F4 key. Excel automatically makes the cell reference absolute! By continuing to press F4, Excel will cycle through all of the absolute reference possibilities.
What does Alt R do?
Alt+R is a keyboard shortcut most often used to open the Review tab in the Office programs Ribbon.
Источник
How to Move Cells in Excel
How to Insert and Move Cells in Excel
While working on a worksheet, cells themselves may need to be inserted, moved, or deleted. When cells are changed and moved, the existing cells shift, along with their content, to adjust for the changes to adjacent cells.
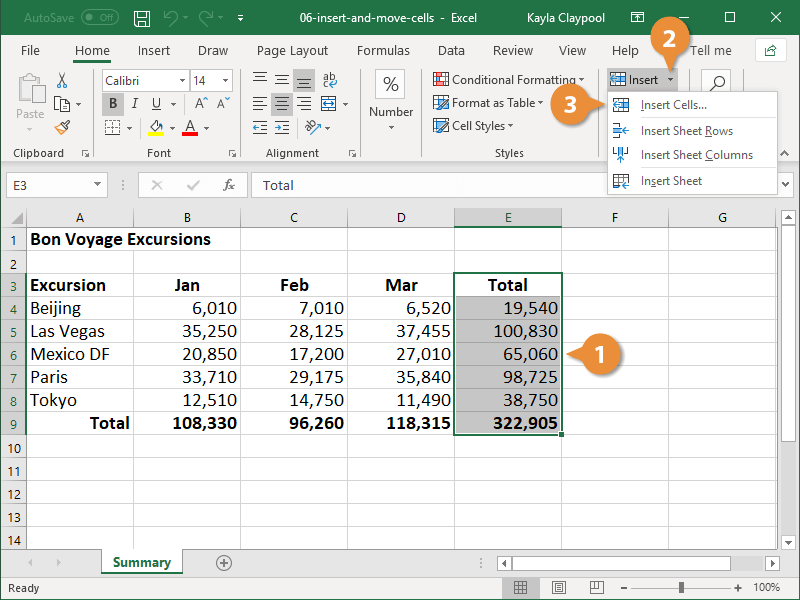
Insert Cells
First, you’ll want to select the cells next to where you want the new ones.
- Select the cell or cell range where you want to insert the new cells.
- Click the Insert button list arrow.
- Select Insert Cells.
The Insert dialog box appears.
- Shift cells right: Shift existing cells to the right.
- Shift cells down: Shift existing cells down.
- Entire row: Insert an entire row.
- Entire column: Insert an entire column.
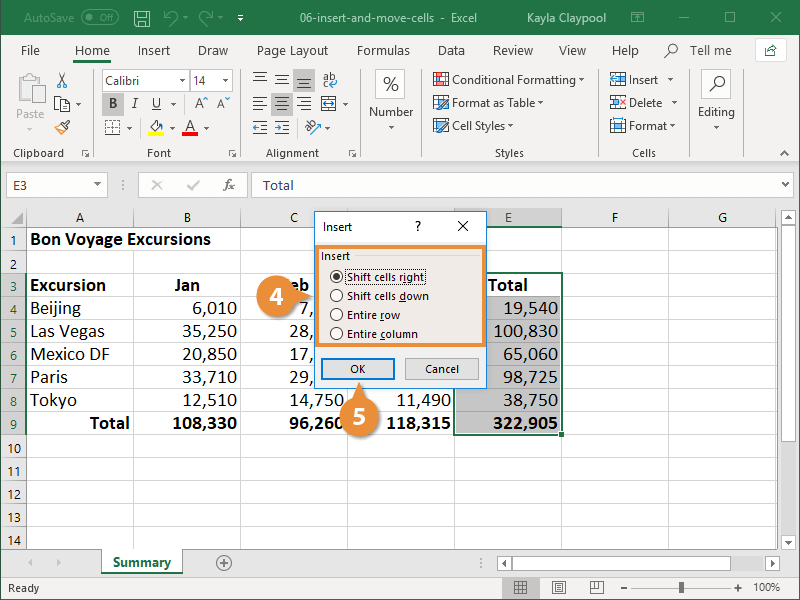
Right-click the selected cell(s) and select Insert from the contextual menu.
Blank cells are inserted and the existing ones move according to your selection.
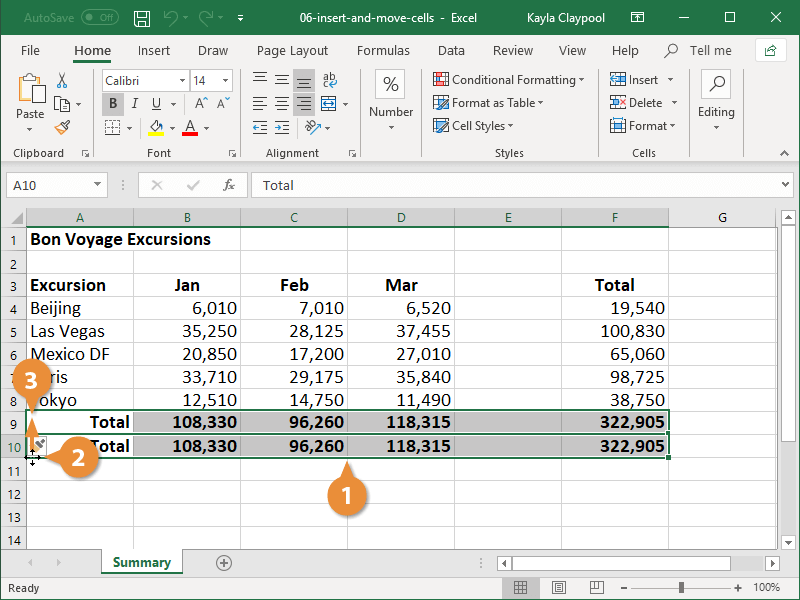
Insert Rows or Columns
- Select the column or row heading next to where you want to insert new cells.
- Click the Insert button.
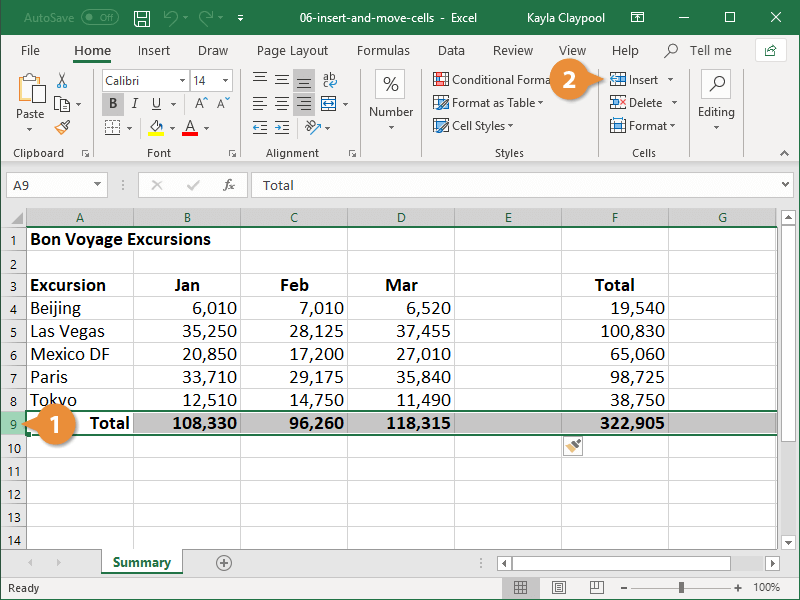
You can also right-click a row or column heading and select Insert from the contextual menu.
The row or column is inserted. Existing rows are shifted downward, while existing columns are shifted to the right.
Move Cells
Now let’s check out how to move cells to a different area of a spreadsheet.
- Select the cell or cell range you want to move.
- Move the mouse pointer over the outline of the selected cells.
- Click and drag the cells to the new location.
And the cells are moved.
FREE Quick Reference
Free to distribute with our compliments; we hope you will consider our paid training.
Источник
Moving Cells
There are two ways to move cells: Drag and drop or by copy and paste.
Drag and Drop
Let’s start by typing or copying some values that we can work with:
Next, start by marking the area A1:B4:
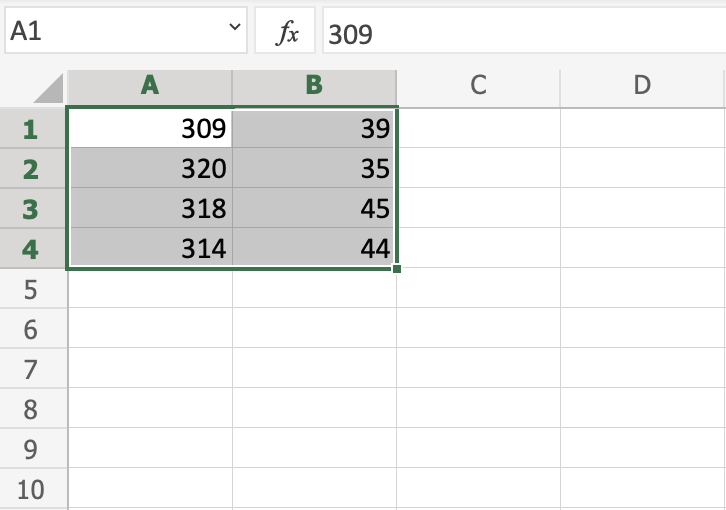
You can drag and drop the range by pressing and holding the left mouse button on the border. The mouse cursor will change to the move symbol when you hover over the border.
Drag and drop it when you see the symbol.
Move the range to B2:C5 as shown in the picture:

Great! Now you have created more space, so that we have room for more data.
Note: It is important to give context to the data, making the spreadsheet easy to understand. This can be done by adding text which explains the data.
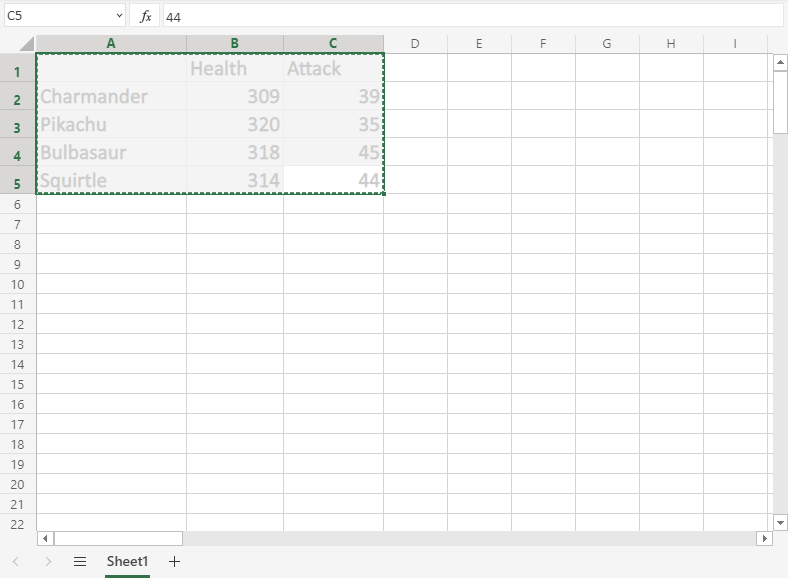
Let’s go ahead and give the data more context. Type or copy the following values:
Yes, that is right, we are looking at Pokemons! Giving context to the data is always helpful.
Next, lets see how we can move data by using cut and paste.
Cut and Paste
Ranges can be moved by cutting and pasting values from one place to another.
Tip: You can cut using the hotkey CTRL+X and paste by CTRL+V. This saves you time.
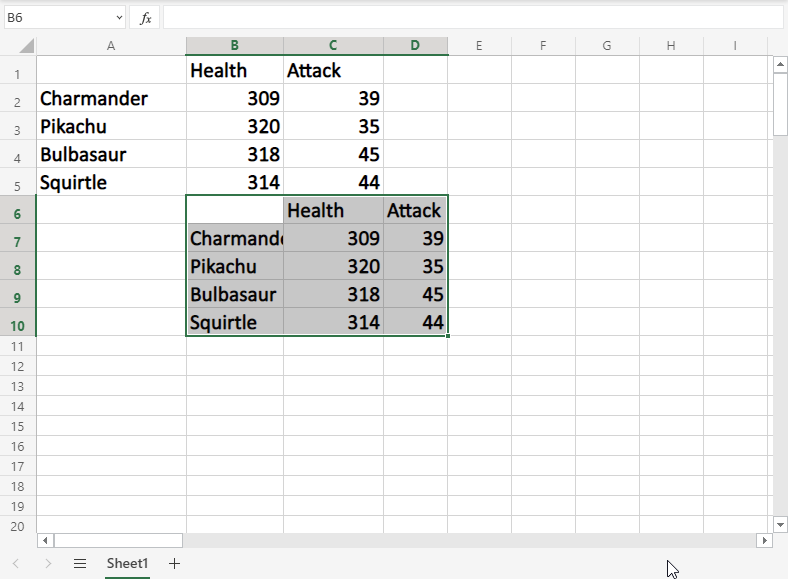
Mark the range A1:C5
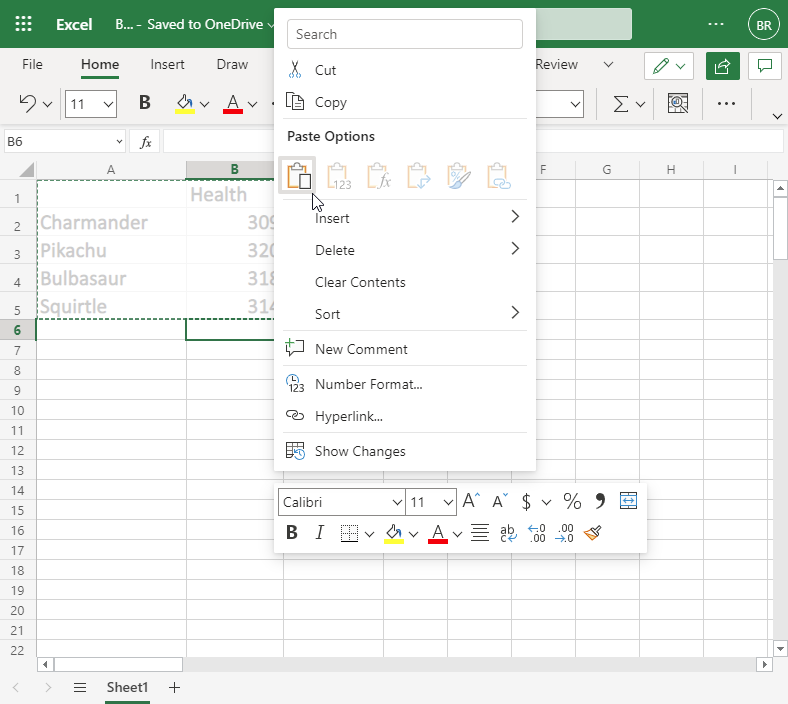
Right click the marked area, and click on the «Cut» command, which has scissors as its icon:

Cutting makes the range white-grey with dotted borders. This indicates that the range is cutted and ready for pasting.
Right click the paste destination B6 and left click the paste icon.
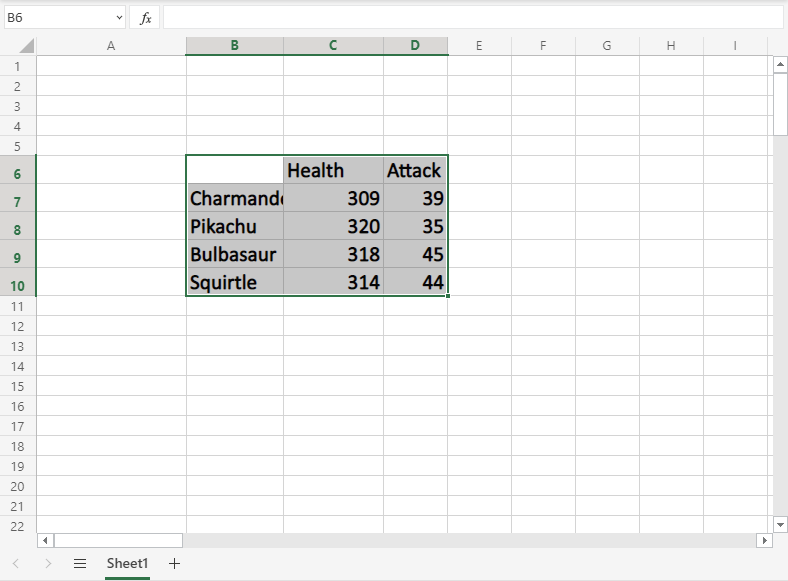
You have successfully cutted and pasted the range from A1:C5 to B6:D10.
Copy and paste
Copy and paste works in the same way as cut and paste. The difference is that it does not remove the original cells.
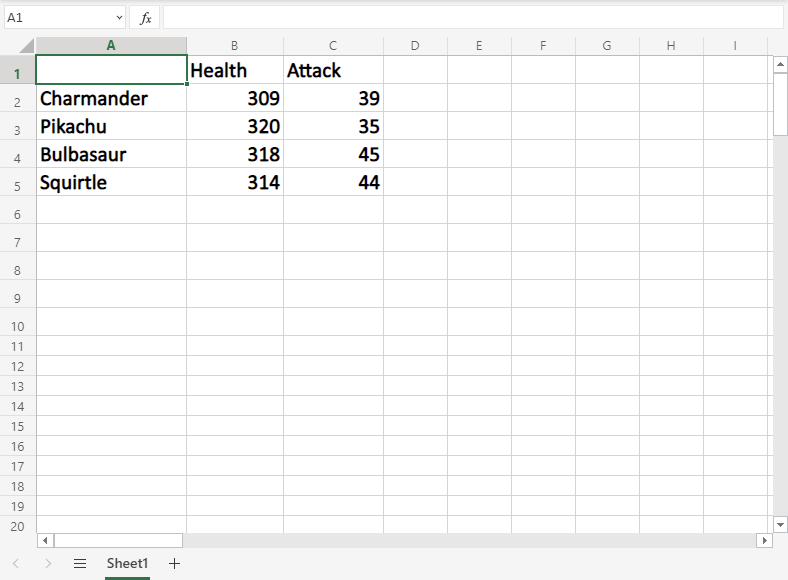
Let’s copy the cells back from B6:D10 to A1:C5.
Tip: You can copy using the hotkey CTRL+C and paste by CTRL+V. This saves you time. Try it!
Mark the range B6:D10.
Right click the marked area, and click on the «Copy» command which has two papers as its icon.
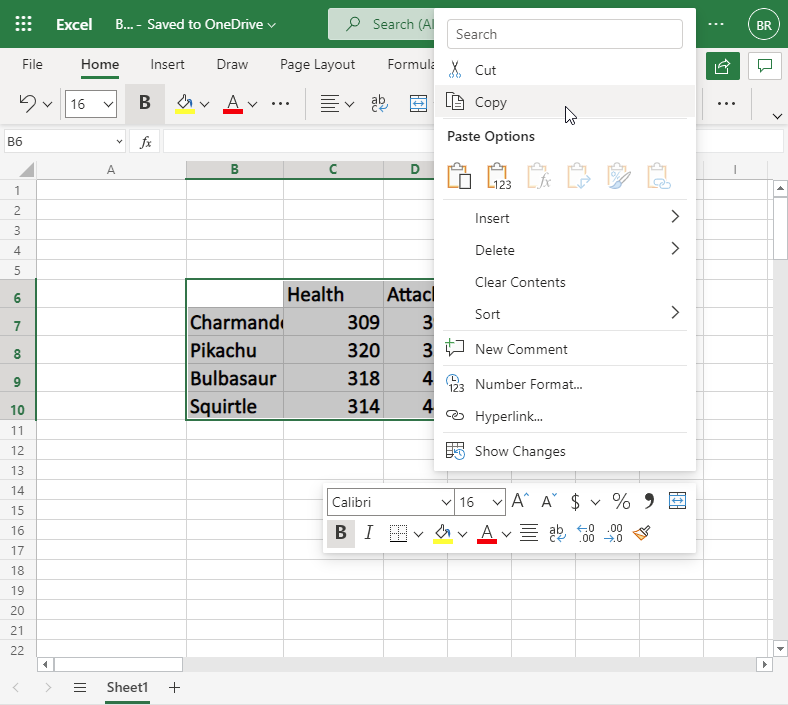
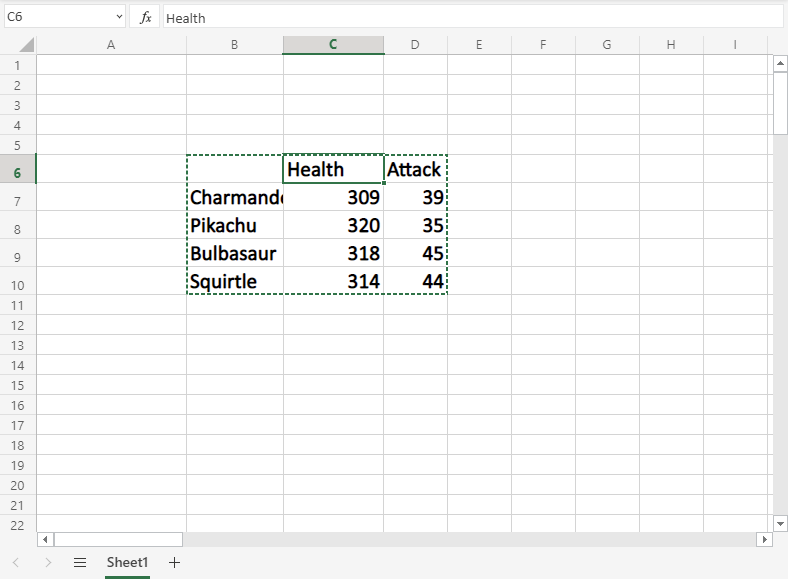
Copying gives the range a dotted green border. This indicates that the range is copied and ready for pasting.
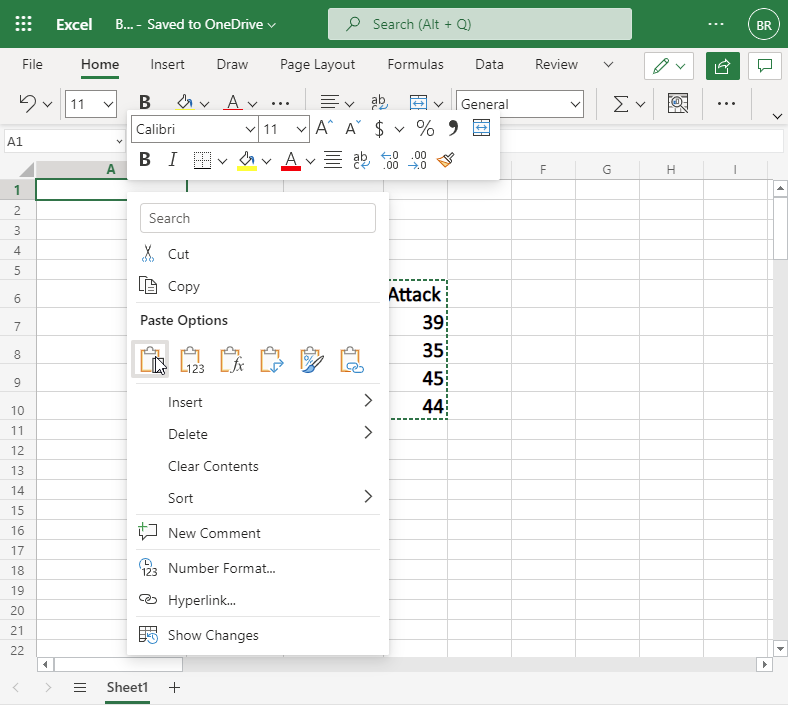
Right click the paste destination A1 and left click the paste icon:
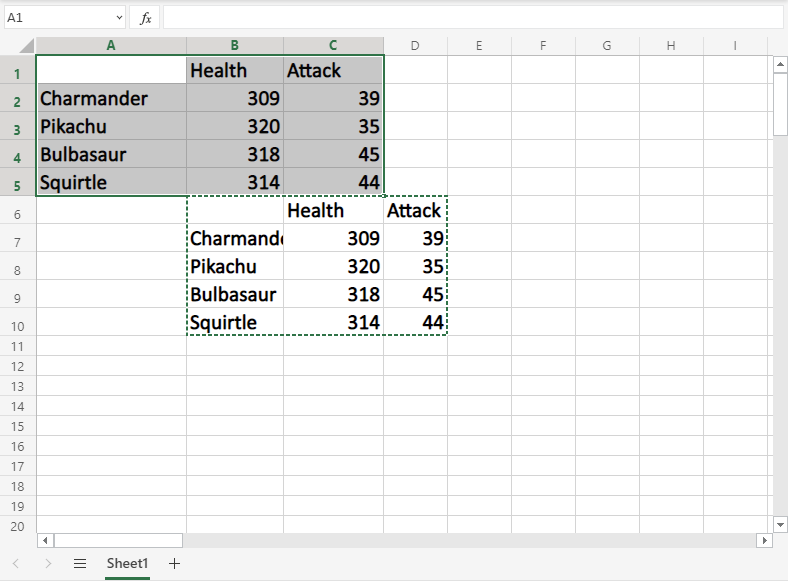
The difference between cutting and copying, is that cutting removes the originals, while copying leaves the originals.
Next, let’s delete the original data and keep the data in the A1:C5 range.
Delete Data
Select the original cells and remove them by pressing the «Delete» button on the keyboard:
Test Yourself With Exercises
Excel Exercise:
Type the cell in the bottom right corner of the range B2:C5:
Start the Exercise