
You can use either a text box or WordArt to add text on top of a photo in Word, Outlook, PowerPoint, or Excel.
Text box over a photo

If your text is longer or doesn’t need fancy styling, a text box may be suitable. You can format the text any way you like.
WordArt over a photo

If the text is brief and you want a stylized look—similar to what you might see on a postcard—then WordArt might be your best option.
Which app are you using?
Word or Outlook | PowerPoint or Excel
Word or Outlook
Use a text box to add text on top of a photo
-
In your document, click to select an insertion point.
-
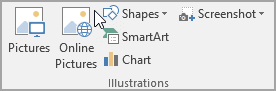
On the Insert tab, in the Illustrations group, click Shapes, and then click New Drawing Canvas.

-
Click the drawing canvas, and then, on the Insert tab, in the Illustrations group, click Pictures.
-
Browse to and double-click the photo that you want to use, and then click outside the drawing canvas.
-
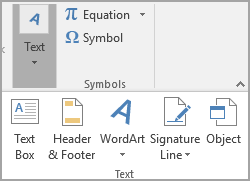
On the Insert tab, in the Text group, click Text Box, and then at the bottom of the menu, click Draw Text Box.
-
Type the text that you want to appear in the text box, and then drag the text box to the location that you want on top of the picture.
-
To change the font or style of the text, highlight the text and then select the text formatting you want on the shortcut menu.
-
Click the outside edge of the text box, and then drag the text box to position it over your photo.
-
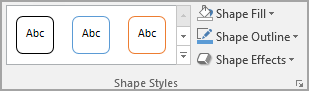
Make sure that the text box is still selected, and then, on the Shape Format tab, in the Shape Styles group, do the following:
-
Click Shape Fill, and then click No Fill.
-
Click Shape Outline, and then click No Outline.
-
-
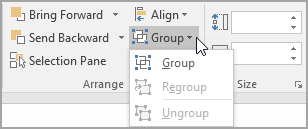
Click the outside edge of the photo, press and hold Ctrl, and then click the edge of the WordArt so that both items are selected.
-
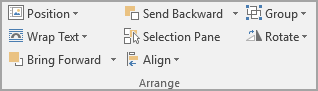
On the Shape Format tab, in the Arrange group, select Group > Group.


Use WordArt to add text on top of a photo
-
In your document, click to select an insertion point.
-
On the Insert tab, in the Illustrations group, click Shapes, and then click New Drawing Canvas.
-
Click the drawing canvas, and then, on the Insert tab, in the Illustrations group, click Pictures.
-
Browse to and double-click the photo that you want to use.
-
On the Insert tab, in the Text group, click WordArt, click the style of text you want, and then type your text.
-
Click the outside edge of the WordArt to select it, drag the text over your photo and then, if you want, rotate the text to the angle that works best for your photo.
-
Click the outside edge of the photo, press and hold Ctrl, and then click the edge of the WordArt so that both items are selected.
-
On the Picture Format tab, in the Arrange group, select Group > Group.
PowerPoint or Excel
Use a text box to add text on top of a photo
-
In your file, make sure that you’ve inserted a photo.
-
On the Insert tab, in the Text group, click Text Box, drag to draw a text box anywhere near the picture, and then type your text.
-
To change the font or style of the text, highlight the text, right-click it, and then select the text formatting you want on the shortcut menu.
-
Click the outside edge of the text box, drag the text over your photo and then, if you want, rotate the text to the angle that works best for your photo.
-
Make sure that the text box is still selected, and then, on the Shape Format tab, in the Shape Styles group, do the following:
-
Click Shape Fill, and then click No Fill.
-
Click Shape Outline, and then click No Outline.
-
-
Click the outside edge of the photo, press Ctrl, and then click the edge of the text box so that both items are selected.
-
On the Shape Format tab, in the Arrange group, select Group > Group.
Use WordArt to add text on top of a photo
-
In your file, make sure that you’ve inserted a photo.
-
On the Insert tab, in the Text group, click WordArt, click the style of text you want, and then type your text.
-
Click the outside edge of the WordArt to select it, drag the text over your photo and then, if you want to, rotate the text to the angle that works best for your photo.
-
Click the outside edge of the photo, press and hold Ctrl, and then click the edge of the WordArt so that both items are selected.
-
On the Shape Format tab, in the Arrange group, select Group > Group.
Which app are you using?
Word or Outlook | PowerPoint or Excel
Word or Outlook
Use a text box to add text on top of a photo
-
In your document, click to select an insertion point.
-
On the Insert tab, in the Illustrations group, click Shapes, and then click New Drawing Canvas.
-
Click the drawing canvas, and then, on the Insert tab, in the Illustrations group, click Pictures.
-
Browse to and double-click the photo that you want to use, and then click outside the drawing canvas.
-
On the Insert tab, in the Text group, click Text Box, and then at the bottom of the menu, click Draw Text Box.
-
Type the text that you want to appear in the text box, and then drag the text box to the location that you want on top of the picture.
-
To change the font or style of the text, highlight the text and then select the text formatting you want on the shortcut menu.
-
Click the outside edge of the text box, and then drag the text box to position it over your photo.
-
Make sure that the text box is still selected, and then, under Drawing Tools, on the Format tab, in the Shape Styles group, do the following:
-
Click Shape Fill, and then click No Fill.
-
Click Shape Outline, and then click No Outline.
-
-
Click the outside edge of the photo, press and hold Ctrl, and then click the edge of the WordArt so that both items are selected.
-
Under Drawing Tools, on the Format tab, in the Arrange group, select Group > Group.
Use WordArt to add text on top of a photo
-
In your document, click to select an insertion point.
-
On the Insert tab, in the Illustrations group, click Shapes, and then click New Drawing Canvas.
-
Click the drawing canvas, and then, on the Insert tab, in the Illustrations group, click Pictures.
-
Browse to and double-click the photo that you want to use.
-
On the Insert tab, in the Text group, click WordArt, click the style of text you want, and then type your text.
-
Click the outside edge of the WordArt to select it, drag the text over your photo and then, if you want, rotate the text to the angle that works best for your photo.
-
Click the outside edge of the photo, press and hold Ctrl, and then click the edge of the WordArt so that both items are selected.
-
Under Picture Tools, on the Format tab, in the Arrange group, select Group > Group.
PowerPoint or Excel
Use a text box to add text on top of a photo
-
In your file, make sure that you’ve inserted a photo.
-
On the Insert tab, in the Text group, click Text Box, drag to draw a text box anywhere near the picture, and then type your text.
-
To change the font or style of the text, highlight the text, right-click it, and then select the text formatting you want on the shortcut menu.
-
Click the outside edge of the text box, drag the text over your photo and then, if you want, rotate the text to the angle that works best for your photo.
-
Make sure that the text box is still selected, and then, under Drawing Tools, on the Format tab, in the Shape Styles group, do the following:
-
Click Shape Fill, and then click No Fill.
-
Click Shape Outline, and then click No Outline.
-
-
Click the outside edge of the photo, press Ctrl, and then click the edge of the text box so that both items are selected.
-
Under Drawing Tools, on the Format tab, in the Arrange group, select Group > Group.
Use WordArt to add text on top of a photo
-
In your file, make sure that you’ve inserted a photo.
-
On the Insert tab, in the Text group, click WordArt, click the style of text you want, and then type your text.
-
Click the outside edge of the WordArt to select it, drag the text over your photo and then, if you want to, rotate the text to the angle that works best for your photo.
-
Click the outside edge of the photo, press and hold Ctrl, and then click the edge of the WordArt so that both items are selected.
-
Under Drawing Tools, on the Format tab, in the Arrange group, select Group > Group.
On the Insert tab, in the Text group, click Text Box, drag to draw a text box anywhere near the picture, and then type your text. To change the font or style of the text, highlight the text, right-click it, and then select the text formatting you want on the shortcut menu.
Contents
- 1 How can I write on top of a picture?
- 2 How do I put text over an image in CSS?
- 3 How can I edit writing on a picture?
- 4 How can I edit a picture in Word?
- 5 How do I insert a picture in Word without moving text?
- 6 How do you type over a picture in Google Docs?
- 7 How do you put an image on another image in CSS?
- 8 How do I put text over a picture in HTML?
- 9 How do I put text over an image in HTML?
- 10 How do you edit text in a JPEG?
- 11 How can I extract text from an image?
- 12 How can I edit a JPEG image?
- 13 How do you change the text of a screenshot?
- 14 How do I edit text in a picture without changing the background?
- 15 What app adds text to photos?
- 16 How do I add text to a picture in Windows 10?
- 17 How do I insert a photo into a Word document without it being embedded?
- 18 How do I insert a moving picture into Word?
- 19 How do I insert a picture in Word without resizing?
- 20 How can I draw on a picture?
How can I write on top of a picture?
Add Text to Photos on Android Using Google Photos
- Open a photo in Google Photos.
- At the bottom of the photo, tap Edit (three horizontal lines).
- Tap the Markup icon (squiggly line). You can also select the color of text from this screen.
- Tap the Text tool and enter your desired text.
- Select Done when you’ve finished.
How do I put text over an image in CSS?
CSS position property is used to set the position of text over an image. This can be done by enclosing the image and text in an HTML “div”. Then make the position of div “relative” and that of text “absolute”. The absolute elements are positioned relative to their parent (div).
How can I edit writing on a picture?
How to Add Text to Photo?
- Open your collage, design, or photo in Fotor.
- Using the “Text” button, select and drag a text box to the desired location.
- Modify the text, change the font, color, size, background or transparency.
- Preview and save your work, choosing the size and format you wish.
How can I edit a picture in Word?
Edit text in an image
Edit the style and content of any Type layer. To edit text on a type layer, select the type layer in the Layers panel and select the Horizontal or Vertical Type tool in the Tools panel. Make a change to any of the settings in the options bar, such as font or text color.
How do I insert a picture in Word without moving text?
To insert an image into Word without moving any text is to set the image’s default wrapping to no wrapping before entering it into the document.
- Click the location in your document where you want to insert a picture.
- On the Insert tab, click Pictures.
- Select the option you want to use for inserting pictures.
How do you type over a picture in Google Docs?
Go to Insert > Drawing. Paste the image (Ctrl/Cmd V) in the Drawing application. Select the Text tool and drag the text box to wherever you want it over the image, resizing it as needed. Type in the text you want to add, using the font of your choice.
How do you put an image on another image in CSS?
As the simplest solution. That is: Create a relative div that is placed in the flow of the page; place the base image first as relative so that the div knows how big it should be; place the overlays as absolutes relative to the upper left of the first image. The trick is to get the relatives and absolutes correct.
How do I put text over a picture in HTML?
in order to have text on the left or right of the image you can style your img as style=”float:left”; or style=”float:right“; If the text is too close to the image you can play with padding: 10px; or less.
How do I put text over an image in HTML?
Chapter Summary
- Use the HTML element to define an image.
- Use the HTML src attribute to define the URL of the image.
- Use the HTML alt attribute to define an alternate text for an image, if it cannot be displayed.
How do you edit text in a JPEG?
You can not “edit” a text in a JPG file. A Jpg file has no editable text. It is just a bunch of pixels of some colors diferent that the other pixels that you percive as a background. What you do is smudge, paint or copy some other pixels above thoose to “errase them”.
Extract text from a single picture
- Right-click the picture, and click Copy Text from Picture.
- Click where you’d like to paste the copied text, and then press Ctrl+V.
How can I edit a JPEG image?
Editing a JPEG file is as easy as editing any other raster-based image file. A designer needs to open the file in their chosen image editing program and make whatever changes they need to make. Once they are done, they can use the program’s “Save” function to save the changed file back in the JPEG format.
How do you change the text of a screenshot?
Ways to Edit Screenshots on Android
- Take a screenshot on your stock Android phone using the shortcut: pressing the power button and volume down button simultaneously.
- When it is captured, you will see three options- Edit, Delete and Share.
- Tap on Edit and it will take you to Google Photos editor.
How do I edit text in a picture without changing the background?
How to Remove Text in Photoshop
- Check if the Text Has a Separate Layer. The first thing you should is to check the Layers panel to see if the text has a separate layer.
- Create a Selection.
- Expand the Selection.
- Restore the Background.
- Adjust the Selection Fill.
- Deselect.
- Done!
What app adds text to photos?
- Instasize. If you don’t want an app that is solely focused on typography, Instasize is exactly what you need.
- Phonto. It is brilliantly designed, user-friendly app for adding text to your photos, which is available for both Android and iOS.
- PicLab – Photo Editor.
- Word Swag.
How do I add text to a picture in Windows 10?
If you have Windows 10, use Microsoft Paint to add text to an image. Right-click a photo in Windows Explorer and select “Microsoft Paint.” Then click the “A” text box icon in the Tools section of the ribbon. Enter the text you want and adjust its size, color and font style.
How do I insert a photo into a Word document without it being embedded?
Luckily, there’s a simple workaround. In the Insert Picture dialog box, click the down arrow next to the Insert button, and then click either “Link to File” or “Insert and Link”.
How do I insert a moving picture into Word?
Double-click the picture to add it to your Word document. Back on Word’s editing screen, right-click the image that you just added and select Wrap Text > In Front of Text from the menu. Your picture is now freely movable. Drag and drop it anywhere you want in your document.
How do I insert a picture in Word without resizing?
CTRL+Arrow key(s). and have the ability to move it around. text-area from the drawing options and then insert a picture into it. EXACTLY its original size.
How can I draw on a picture?
How to draw on a photo or graphic
- Choose the tip. With your image open, click Draw in the side tabs.
- Choose a color. Use one of the preselected swatches or use our millions-of-options color picker tool.
- Draw lines. Drag your mouse across your image to create lines.
- Adjust, adorn, adore.

- Using a Text Wrapping Style
- Inserting a Text Box
- Inserting a WordArt
Method 1: Place Text Over Image Using Text Wrapping Style
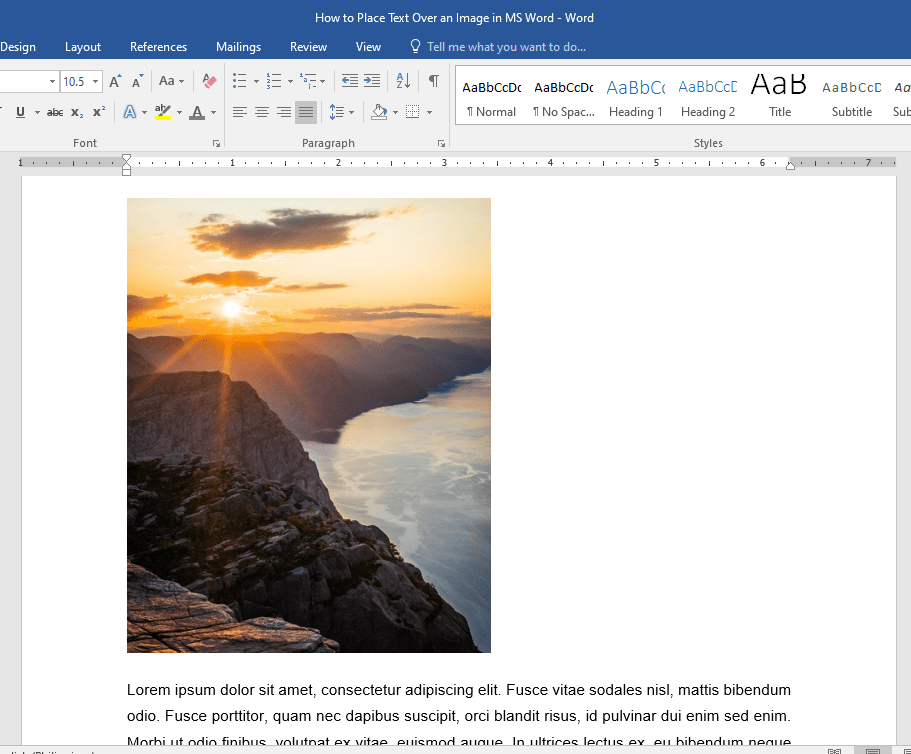
If you have a long chunk of text and you just want to put a background image or a watermark on a document, then this method is best for you.
Step 1: Open up a Word document.

Step 2: Set the image as background.
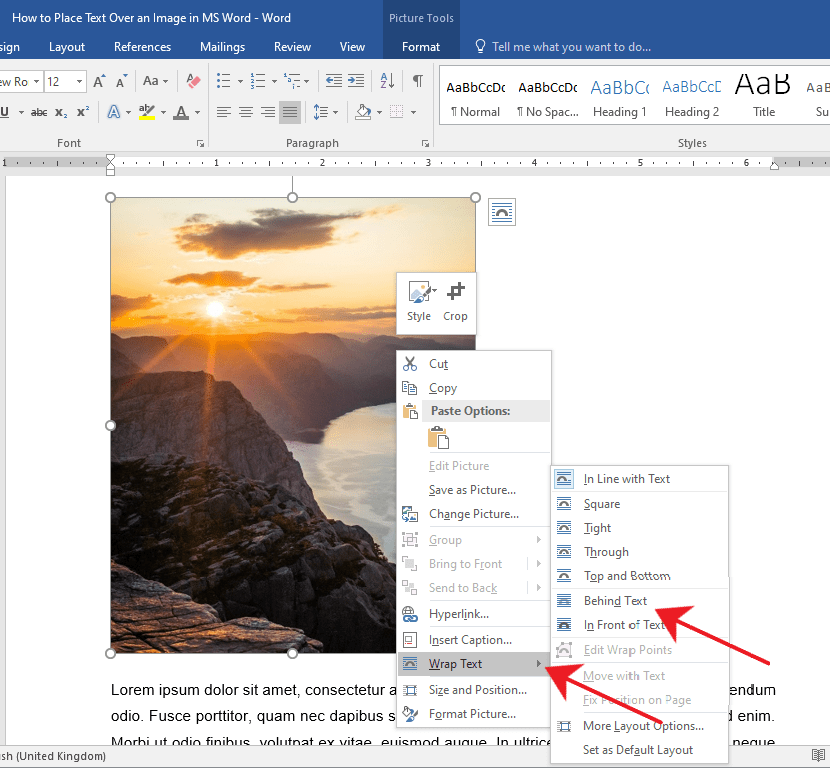
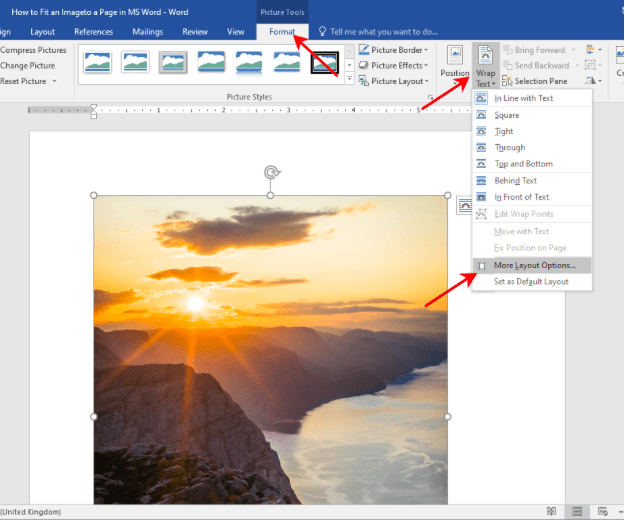
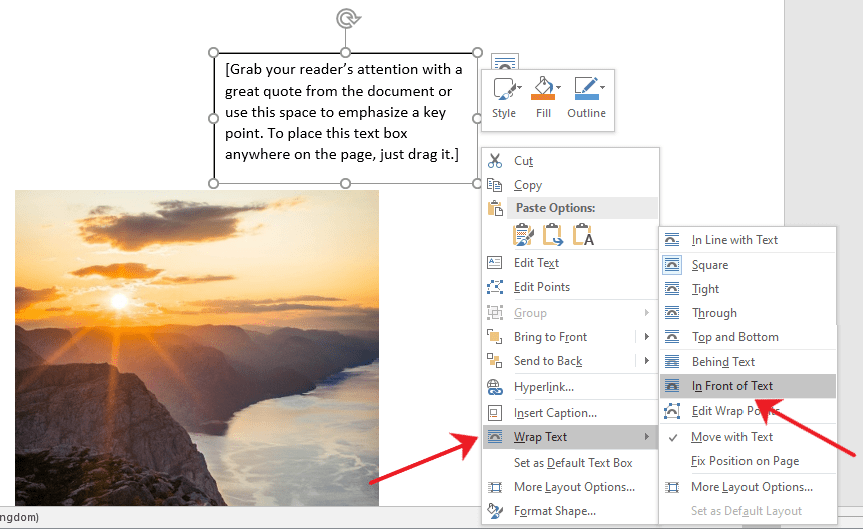
Right-click on the image and select the Wrap Text option.
This will display a horizontal drop-down menu on the right. Once you see the drop-down menu, select Behind Text.
You’ll notice the images and text will rearrange automatically as you hover over the text wrapping options.
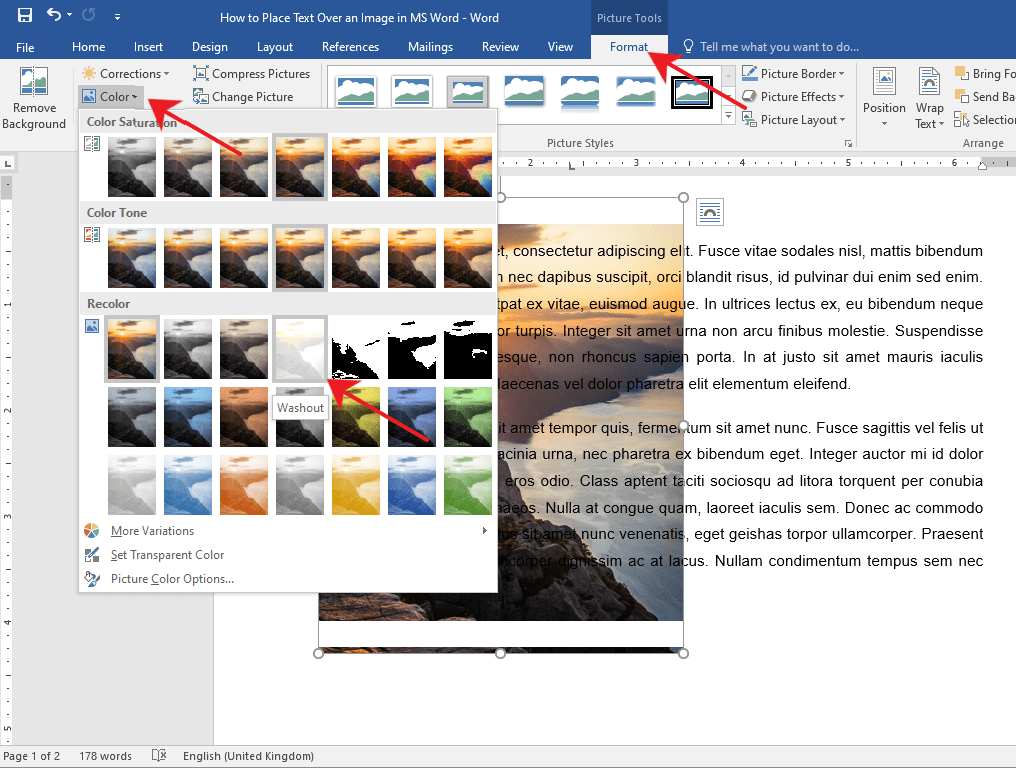
If after you’ve inserted a background image and the text becomes unreadable, you can change the image’s opacity or color.
Simply double-click on the image to activate the Format tab in the Ribbon.
After that, click on the Color drop-down menu and select Washout under the Recolor group.
You can also get creative and explore other options to suit your needs.
Method 2: Place Text Over Image Using a Text Box
Step 1: Open up a Word document.
Step 2: Insert a text box.
Go to the Insert tab on the Ribbon.
Now, navigate to the right side of the Ribbon and click on the Text Box drop-down menu.
Then, select a text box style of your preference. For this example, we’ll use the Simple Text Box.
Step 3: Type in the text.
Type in the text that you want to put on top of your image.

Step 4: Set the text wrapping style of the text box.
Select the text box and click the Layout button found at the upper right-hand corner of the text box.
Then, select the In Front of Text option.
Step 5: Place the text box over the image.
Click and drag the text box to place it over your image. You’ll notice that your text box has a background color by default and is covering a part of the image.

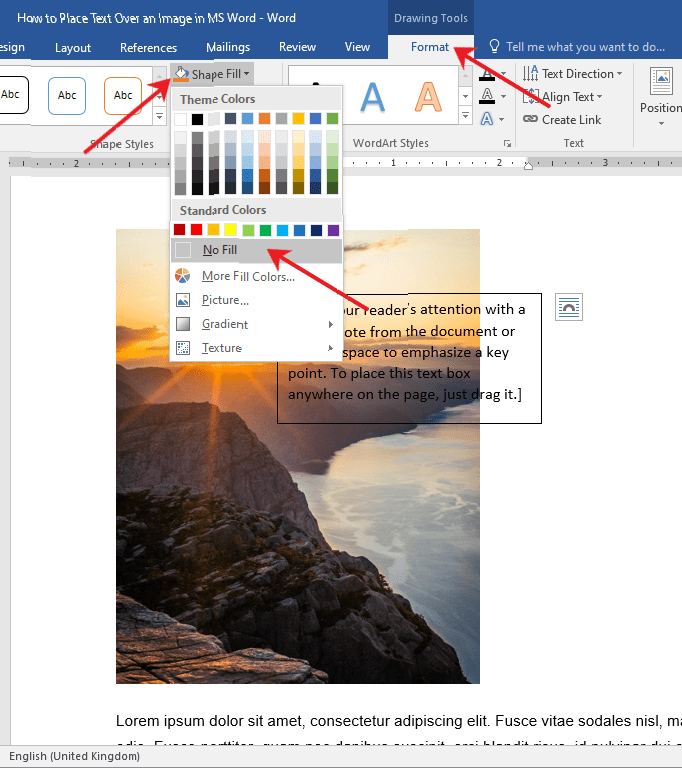
You can change your text box’s background and border color by accessing the Format tab.
This way, only the text will be visible on top of your image. Now, Double-click the text box and go to the Format tab.
From there, click on the Shape Fill drop-down menu and choose No Fill.
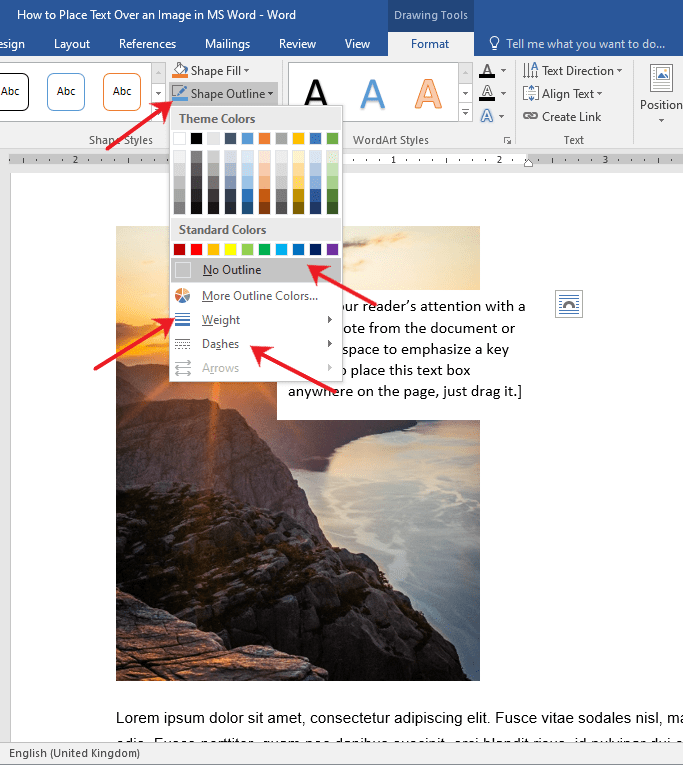
To change the border color, select the Shape Outline drop-down menu and choose No Outline.
You can also change the border’s weight and design by exploring the Dashes and Weight options.
Method 3: Place Text Over Image Using Word Art
If you find yourself needing to put a title, a name, or a couple of words over an image, then this method has got you covered.
Step 1: Open up a Word file.

Step 2: Insert the WordArt
Click the Insert tab on the Ribbon.
Now, click the WordArt button found at the right side of your screen.
It’s the slanted letter A icon under the Text group. After that, choose a WordArt that suits the style of your document.
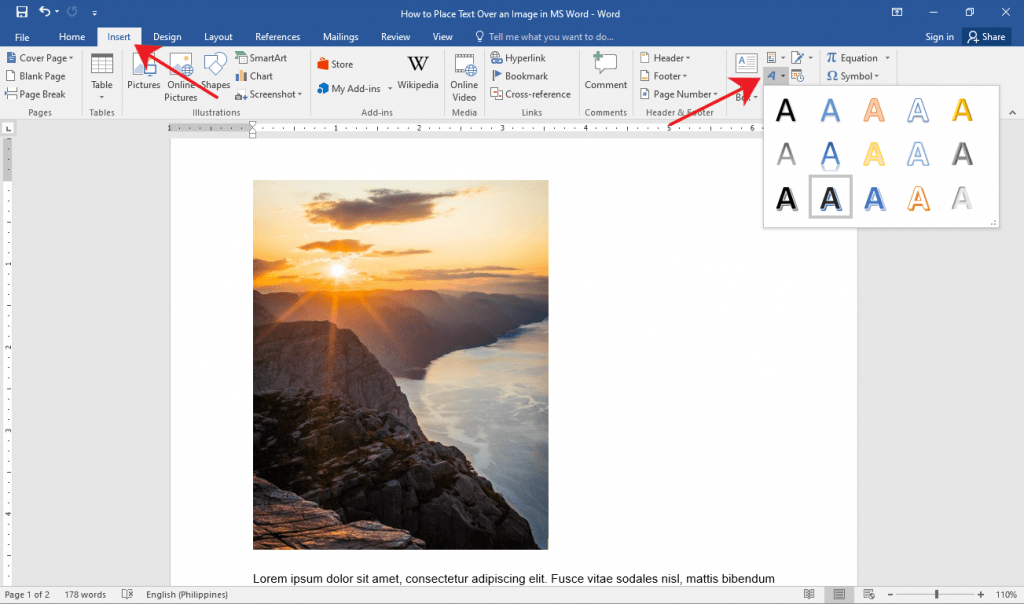
Step 3: Place the WordArt over the image.
Click on the WordArt and type in the text you want.
From there, select and drag the WordArt to easily move it around to the perfect location on your document.
You can also resize the WordArt like any other text box by grabbing either one of its corners.

Tip: If you’re using a pen or touch-enabled computer, you can directly write text over an image using the Draw option.
Editing and Deleting Text Over an Image
If you used Method 1, simply select the erroneous text and edit or delete it just as you would with any other text.
For Methods 2 and 3, click on the inside of the text box or the WordArt and start editing.
If you want to delete the entire text box or WordArt, click on any of the borders of the text box or WordArt and hit the Delete button on your keyboard.
Conclusion
That’s the rest of it. We hope you’ve found this article helpful!
![]()
Download Article
![]()
Download Article
This wikiHow will show you how to use Microsoft Word to add text to an image on your computer, phone, or tablet. The Microsoft Word app is freely available for Androids, iPhones, and iPads, but you’ll need to purchase the app from Microsoft if you’re using a Windows or macOS.
Things You Should Know
- If you’re using a computer, use a text box with no fill and no outline to overlay text on an image.
- If you’re using the mobile Word app, insert a text box with no fill and no outline. Move the text box onto the image and edit the text.
- Make sure to tap the checkmark on mobile app Word documents to save your work!
-
1
Open your project in Word. You can do this by clicking Open from the File tab, or by right-clicking the file icon in your file browser and choosing Word from the «Open with…» dialog.
-
2
Click the Insert tab. You’ll find this above the document in the menu toolbar or along the top of your screen.
Advertisement
-
3
Click Text Box. You’ll find this in the Text group. A menu will dropdown.
-
4
Click Draw Text Box. You’ll see this at the bottom of the menu that drops down.
-
5
Enter your text. You’ll see your text entered into a moveable object.
- You can highlight your text and change the font size, color, and style before continuing.
-
6
Drag and drop your text box over the picture. Don’t deselect the text box yet.
-
7
Click the Format tab. You’ll find this above the document in the menu toolbar or along the top of your screen.
-
8
Format your text box in «Shape Styles.» You’ll want to make sure your text is not hidden by other elements.
- Click Shape Fill and select No fill.
- Click Shape Outline and select No outline.
-
9
Group the picture and text box. You can do this by clicking the picture to select it, then pressing and holding Ctrl (PC) or ⌘ Cmd (Mac) and clicking the text box to select it as well. Under the Format tab, click Group.[1]


Advertisement
-
1
Open your project in Word. This app icon looks like a blue page with white writing on it, and you can find this app on your home screen, in the app drawer, or by searching. To open your project in Word, you’ll need to tap Open from the File tab.[2]
-
2
Tap the pencil icon (optional). If you don’t see the pencil icon above the document, you may already be in editing mode.
-
3
Tap the upwards-pointing arrow
. You’ll see this on the right of the options menu.
-
4
Tap Home. You’ll open up a list of toolbar options.
-
5
Tap Insert. You’ll see the Insert menu options.
-
6
Tap Text Box. You might have to scroll down to see this option.
- After you tap this, you’ll see a text box with dummy text inserted on your page.
-
7
Format your text box. After you’ve inserted your text box, you’ll notice the main menu shifts to Shape. You’ll want to edit this text box from this menu.
- From Fill, choose ‘No fill.
- From Outline, choose No outline.
-
8
Tap inside the text box. A menu will pop up.
-
9
Tap Edit Text. Your cursor will appear in the text box. You’ll first need to delete what’s already in the text box.[3]
-
10
Tap the checkmark when you’re done to save your work. You’ll see this in the upper left corner of the app.


Advertisement
Ask a Question
200 characters left
Include your email address to get a message when this question is answered.
Submit
Advertisement
Thanks for submitting a tip for review!
References
About This Article
Article SummaryX
1. Open the picture in Word.
2. Insert a new text box from the Insert tab.
3. Type in your text.
4. Drag and drop the new text box over the picture.
5. Group the picture and text box.
Did this summary help you?
Thanks to all authors for creating a page that has been read 54,628 times.
Is this article up to date?
On the Insert tab, in the Text group, click Text Box, drag to draw a text box anywhere near the picture, and then type your text. To change the font or style of the text, highlight the text, right-click it, and then select the text formatting you want on the shortcut menu.
How do I write text over a picture?
To allow text to wrap over a picture, select the picture. The “Layout Options” menu will be displayed near the picture. Click on the menu and choose “Behind Text.” This option will cause the picture to be treated as background and text will flow over the picture as you type.
How do you write text on a picture?
In Windows 10: Open the Photos app and select an image. In the upper-right portion of the screen, select Edit & Create > Edit with Paint 3D. At the top of the screen, select Text. Click and drag to draw a text box. Enter your desired text. In the upper-left corner, select Menu. Select Save or Save as.
How can I add text to a picture for free?
How it works Upload a single photo from your computer, Google Drive or Dropbox. Add a text or a logo. Edit your text or logo using the editing toolkit. Drag your text or logo to any place within the picture. Click on “Save image” and download a copy of your image with the text or logo.
How do I add text to a JPEG image?
Open the photo, select “Edit” and tap the “More” () icon. Select “Markup,” tap the “+” icon and select “Text.” When the text box appears on the photo, double-tap it to raise the keyboard. Type the caption and use the options at the bottom of the screen to change the font, color and size.
How do I insert text into text in Word?
Word Options Click “File,” “Options” and then the “Advanced” tab. Check “Use Overtype Mode” in the Editing Options section. Click “OK” to enable Overtype and close the Word Options window. Click anywhere in the document and start typing to overwrite text to the right of the cursor.
Click the picture to reveal the “Format” tab. Press the “Corrections” option to reveal the dropdown. This will reveal to you how to edit image text in word. Apply the required correction to complete the process in full.
How do you edit text in a JPEG in Word?
While there is no way to turn a JPEG image directly into a Word document that you can edit, you can use a free Optical Character Recognition (OCR) service to scan the JPEG into a Word document file, or you can convert the JPEG file into a PDF and then use Word to convert the PDF into an editable Word document.
How do I select an image behind text in Word?
Selecting a Graphic that is Behind Text Make sure the Home tab of the ribbon is displayed. Click the Select tool (in the Editing group) and then choose Select Objects. Click on the graphic you want to select, without regard to any text that may be covering it.
Can we edit text in image?
Edit text in an image Edit the style and content of any Type layer. To edit text on a type layer, select the type layer in the Layers panel and select the Horizontal or Vertical Type tool in the Tools panel. Make a change to any of the settings in the options bar, such as font or text color.
How do I edit text in a picture in Word Online?
How to convert Image to Text, Word, or Excel free online: Upload your image to our free online OCR tool. Choose an option to convert your Image to Text, Word, or Excel. Click on the “Convert Image” button in order to start the conversion. Wait for the conversion to finish & then download your file.
How do you edit writing on a picture?
How to Add Text to Photo? Open your collage, design, or photo in Fotor. Using the “Text” button, select and drag a text box to the desired location. Modify the text, change the font, color, size, background or transparency. Preview and save your work, choosing the size and format you wish.
Can you overlay text in Word?
In the Word Options dialog box, choose Advanced. Under Editing options, do one of the following: To use Insert key to control Overtype mode, select the Use Insert key to control overtype check box. To keep Overtype mode enabled always, select the Use overtype mode check box.
Can you layer text in Word?
To layer items in any Word document, including label templates, you need to use the “Arrange” tools. The key tools that you need are “Bring Forward”, “Send Backward”, and (if you are using pictures or shapes) “Wrap Text”. To find the Arrange tools, left click on an image to select it.
How do I put text under a line in Word?
Add Bottom Borders This technique works best on Headings. Click in the paragraph of text you want a line under. Click on the HOME Tab > BORDERS button — Bottom Border is usually the default. This places a line across the page, underlining not just the text but the rest of the row, too.
How do I edit text in a screenshot?
Ways to Edit Screenshots on Android Take a screenshot on your stock Android phone using the shortcut: pressing the power button and volume down button simultaneously. When it is captured, you will see three options- Edit, Delete and Share. Tap on Edit and it will take you to Google Photos editor.
How do you send an image to the back in Word?
To bring an object to the front or back: Select an object. The Format tab will appear. From the Format tab, click the Bring Forward or Send Backward drop-down box. From the drop-down menu, select Bring to Front or Send to Back. Sending an object to the back. The objects will reorder. The reordered objects.
How do I send a picture to the background in Word?
Insert a background Picture or image in Word On the Design tab, select Watermark > Custom Watermark. Choose Picture Watermark and select a picture. Select or clear Washout. Select OK.
How do I select part of an image in Word?
Using the Selection Pane Select one of the objects you want to manage. Go to Shape Format or Picture Format> Arrange. > Selection Pane. The Selection Pane opens with all your objects listed, and you can do any of the following: Drag an item up or down in the list to change the order.