
Want to rotate a table in Word? It’s easier than you think! Check out these simple steps to learn how to rotate tables and present data in new ways.

Microsoft Word is one of the best productivity apps available. Word allows you to do a lot of things. But, when it comes to rotating tables, it isn’t a walk in the park. In this article, you will learn how to rotate any table within Microsoft Word. Read on to find out.
How to Create a Table in Microsoft Word
Before we go ahead to rotate a table, we’ll show you how to create one in Word if you haven’t already. To create a table in Word:
- Open Microsoft Word on your PC, and select Blank document to create a new document.
- Select Insert menu from the menu toolbar > Insert Table.
- Enter the number of rows and columns your table should have and tap OK.
- Alternatively, move the cursor over the table structure provided to select the table rows and columns, and left-click to insert the table.
You should now have a table ready. If not, check out our tips on how to create perfect tables in Microsoft Word. And if you need to create more complicated tables, use Microsoft Word’s Draw Table feature instead.
How to Rotate a Table in Microsoft Word
Once you have your table ready, there are three ways to rotate the table in Word. But none of these methods are official ways of changing table orientation in Word.
1. By Changing the Text Direction
One easy way to rotate your table in Word is by using the built-in Text Direction feature. It’s not an official way of changing table orientation, but it can be an easy way if you want to flip your table.
- Select the entire table by moving the cursor over it and hitting the four-fold arrow that shows up on the top.

- Choose the Layout tab from the top menu bar.

- Tap Text Direction from the tools bar. Word will rotate all the table text 90 degrees clockwise. Another tap on Text Direction will flip the text from 90 degrees to 180 degrees, and so on.


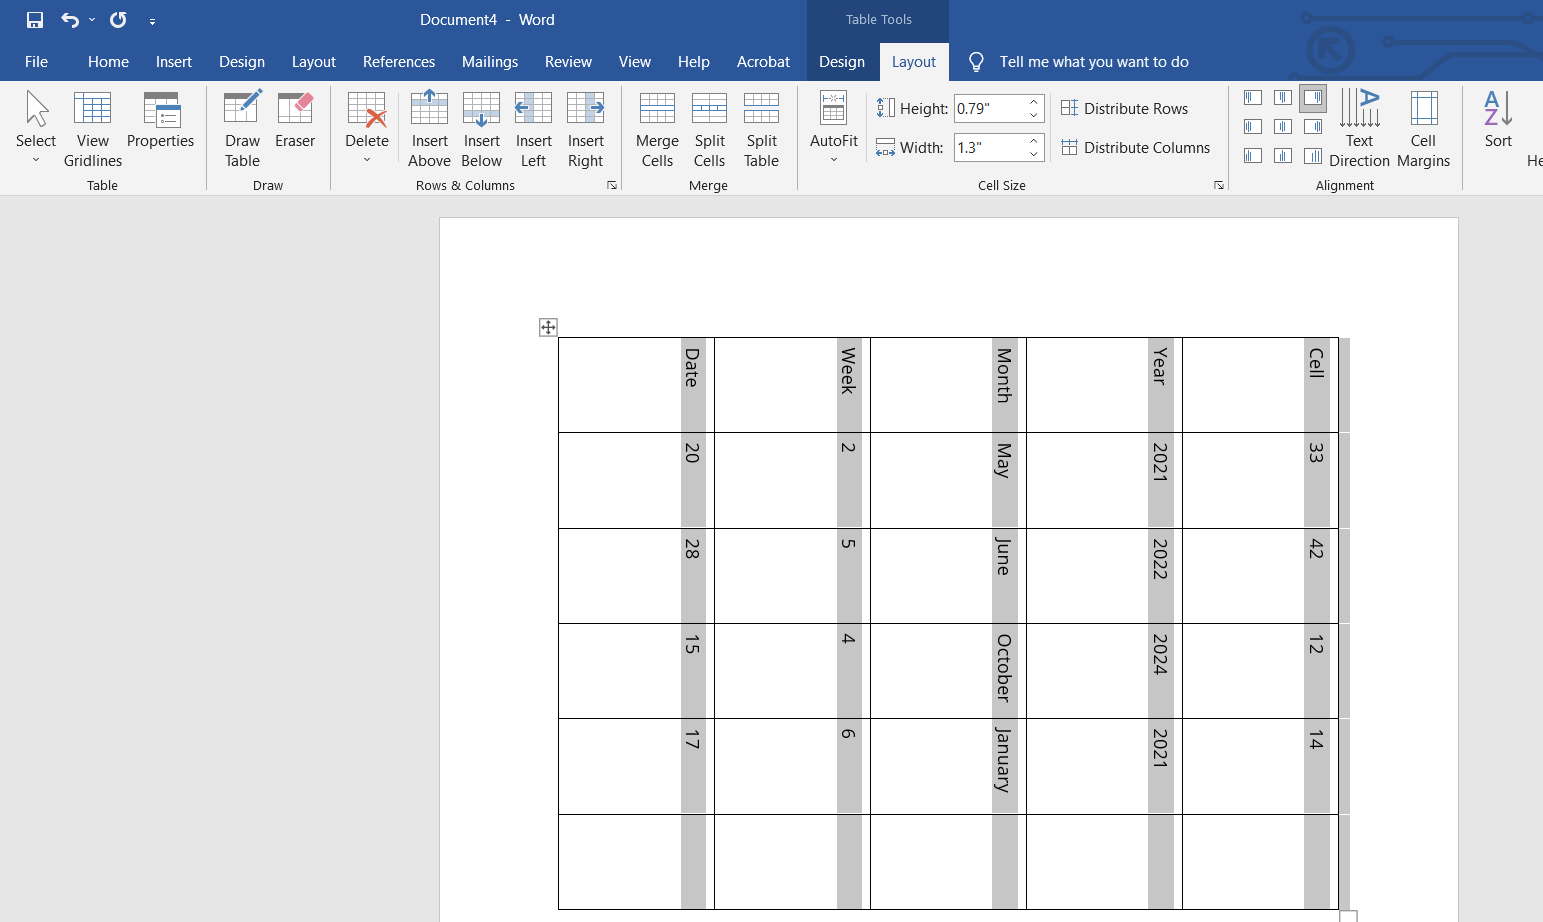
As you may have noticed, Text Direction doesn’t give you full autonomy on which angles your table should be rotated. Additionally, it doesn’t rotate the table itself, but only the text within it.
To get full autonomy, we’ll have to use a workaround. That brings us to method number two.
2. Converting a Table to an Image
Unlike the text direction method, the image method will give you a lot more freedom to rotate your table. The major problem with this method is that you cannot edit the table once you convert it to an image.
- Open your Word document with a table.
- Select the entire table by moving the cursor on top of it and tapping the four-fold arrow button.
- Right-click anywhere on the table and select copy. Alternatively, you can use Ctrl + C for Windows or Cmd + C for Mac to copy the table. Here is a comprehensive list of Microsoft Word shortcuts.
- Delete the original table.
- Tap the same spot on the document where the original table was located.
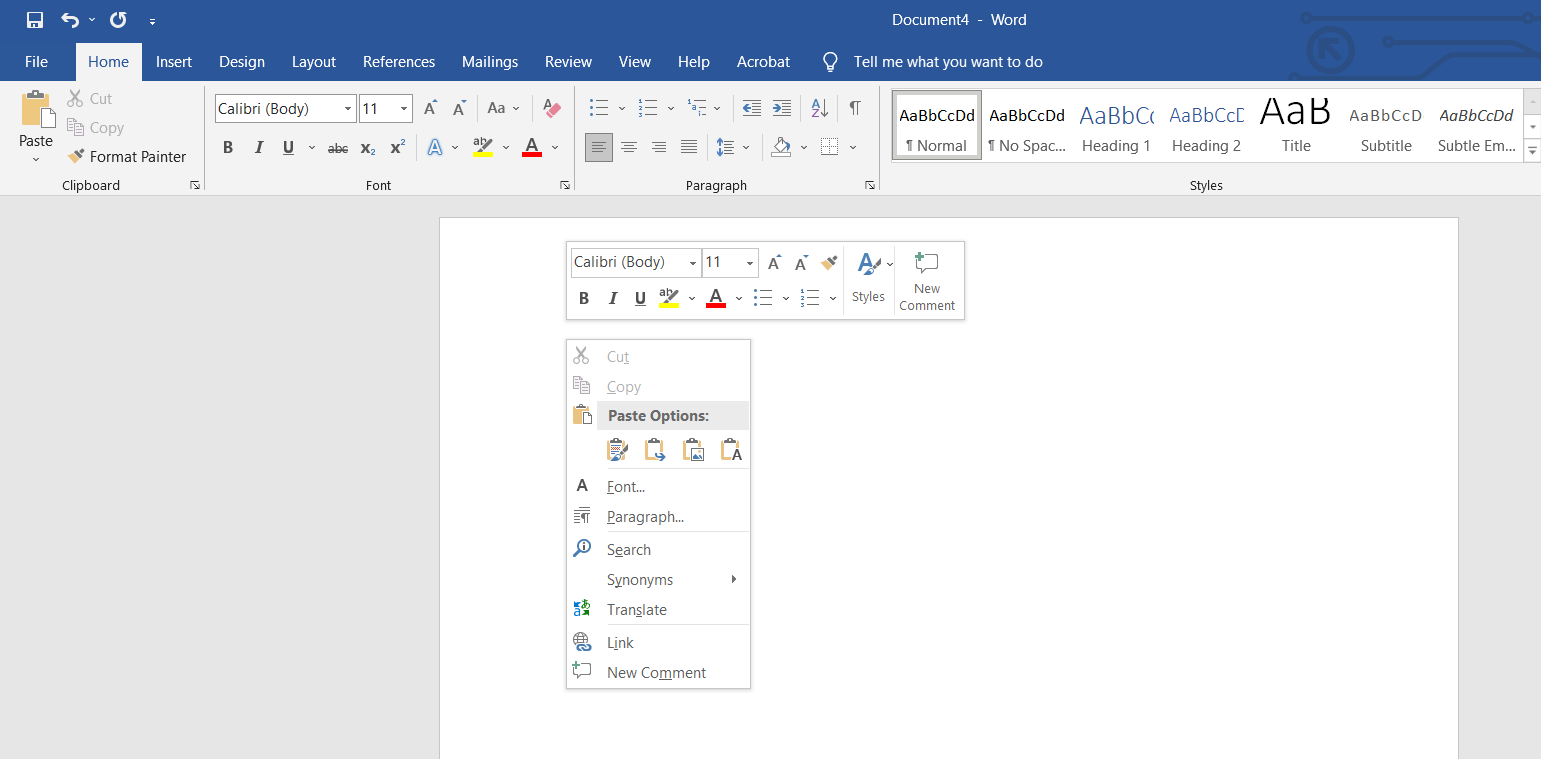
- Right-click and select Picture (shown as a clipboard with an image) under Paste Options.

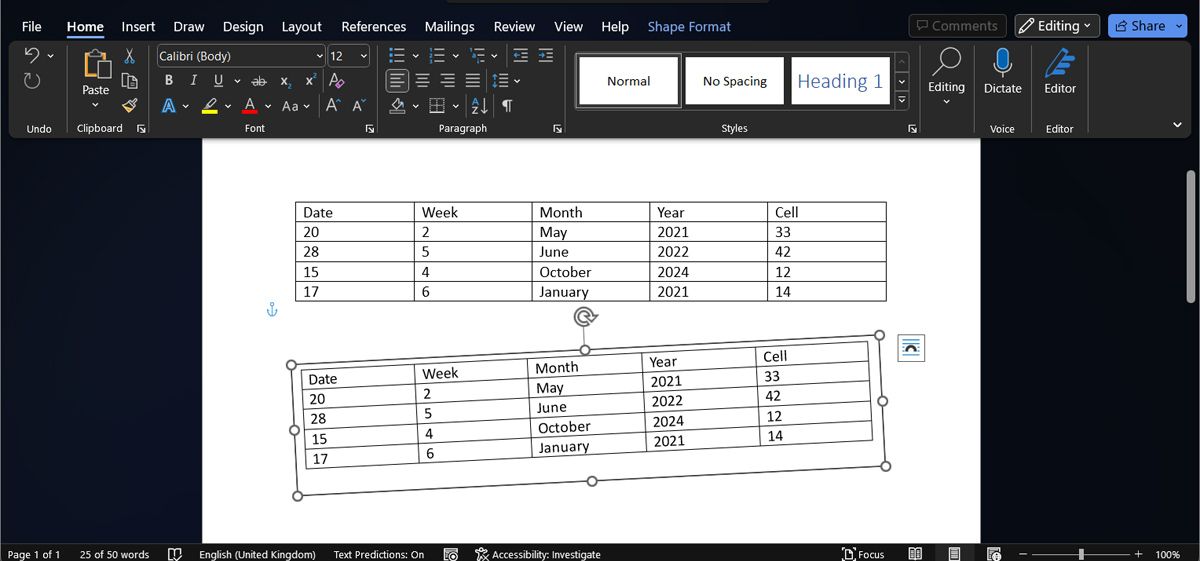
The table will now be pasted as an image. With an image table, it’s pretty easy to rotate the way you want.
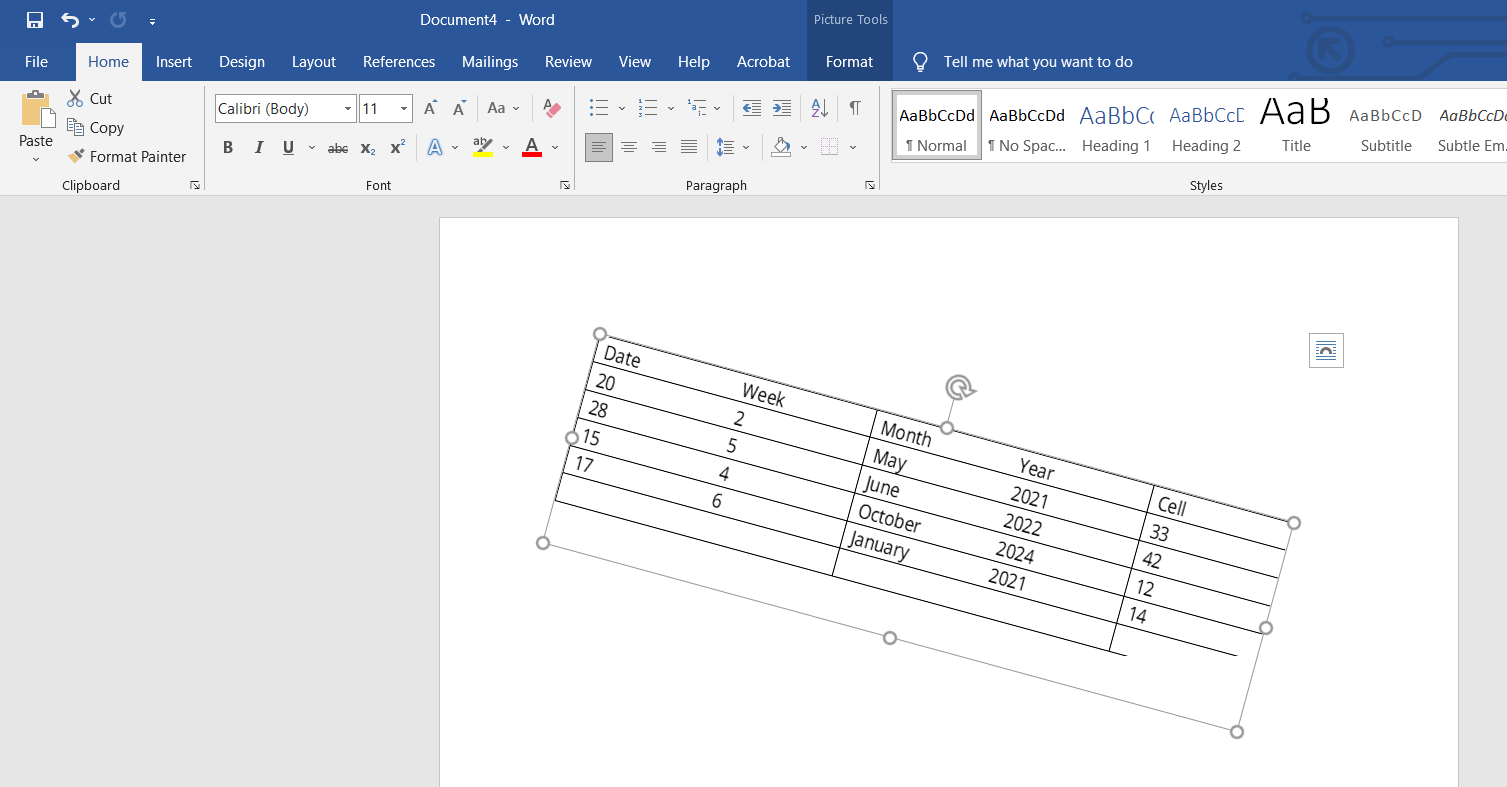
- Tap the image to select, and place your cursor above the rotate icon on top of the table.

- Hold the left-click button on the mouse, then move your table around to rotate it to your preferred orientation.
Once you turn the table into an image and rotate it, you can stop the image from moving around your Word document, no matter how you edit it.
3. Using a Text Box
Turning your table into an image is an easy way to rotate it, but you no longer can edit the content of the table. To keep the content editable, while rotating the table, you could use a Text Box. Here’s how you can do it:
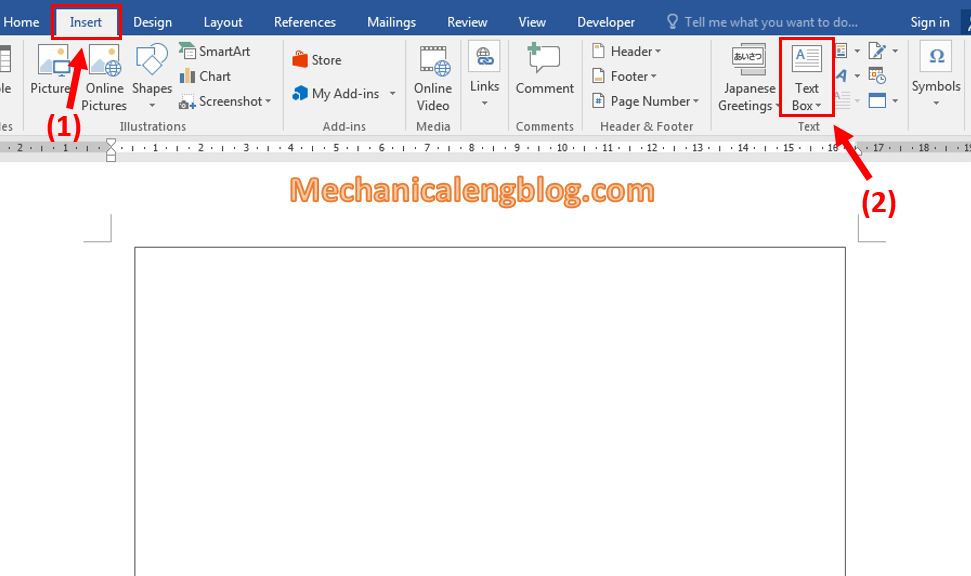
- Open the Insert tab.
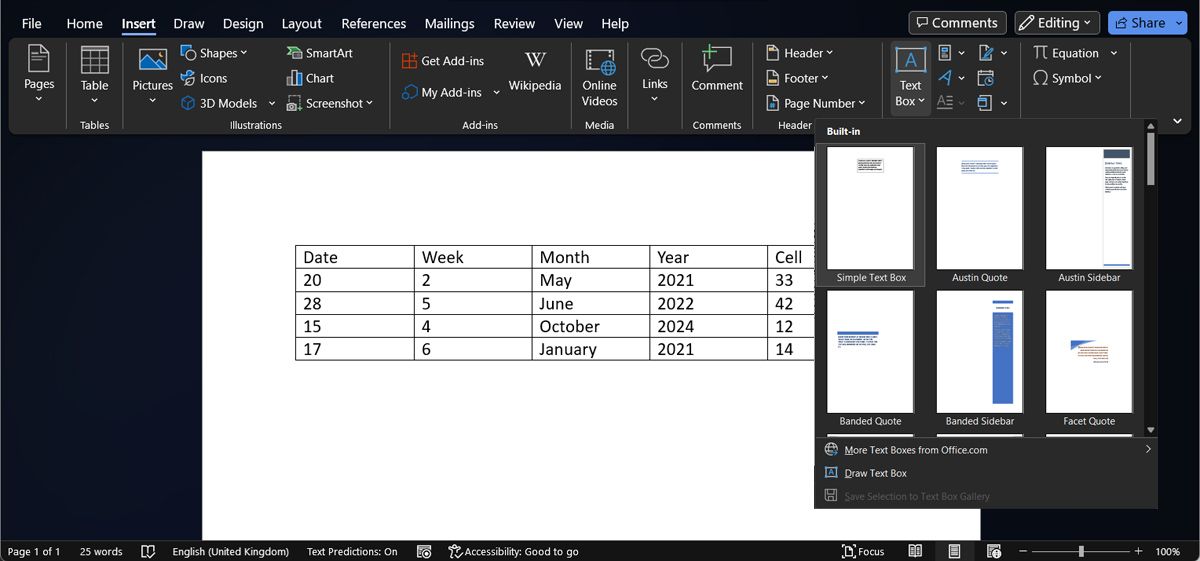
- From the Text section, select Text Box > Simple Text Box.

- Place the Text Box and delete its text.
- Cut or copy the table and paste it inside the text box.
- Readjust the text box size so it doesn’t cut any part of the table.
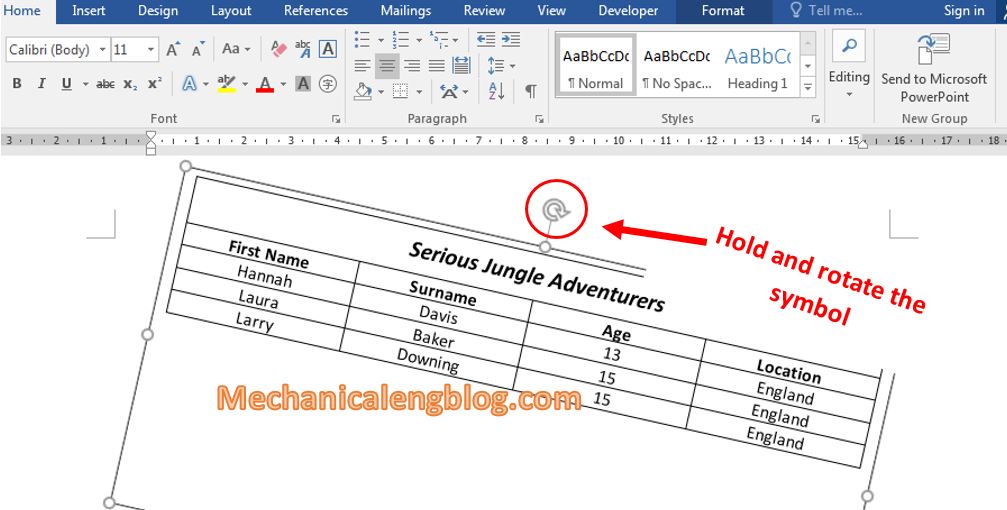
- Use the handle to rotate it.
4. Using Microsoft Excel
If you use Word, high chances are you also use Excel. So, in the third and final method, we use Excel to help rotate your table in Word.
- Copy your table in Microsoft Word.
- Open Microsoft Excel, and create a new document by selecting Blank Workbook.
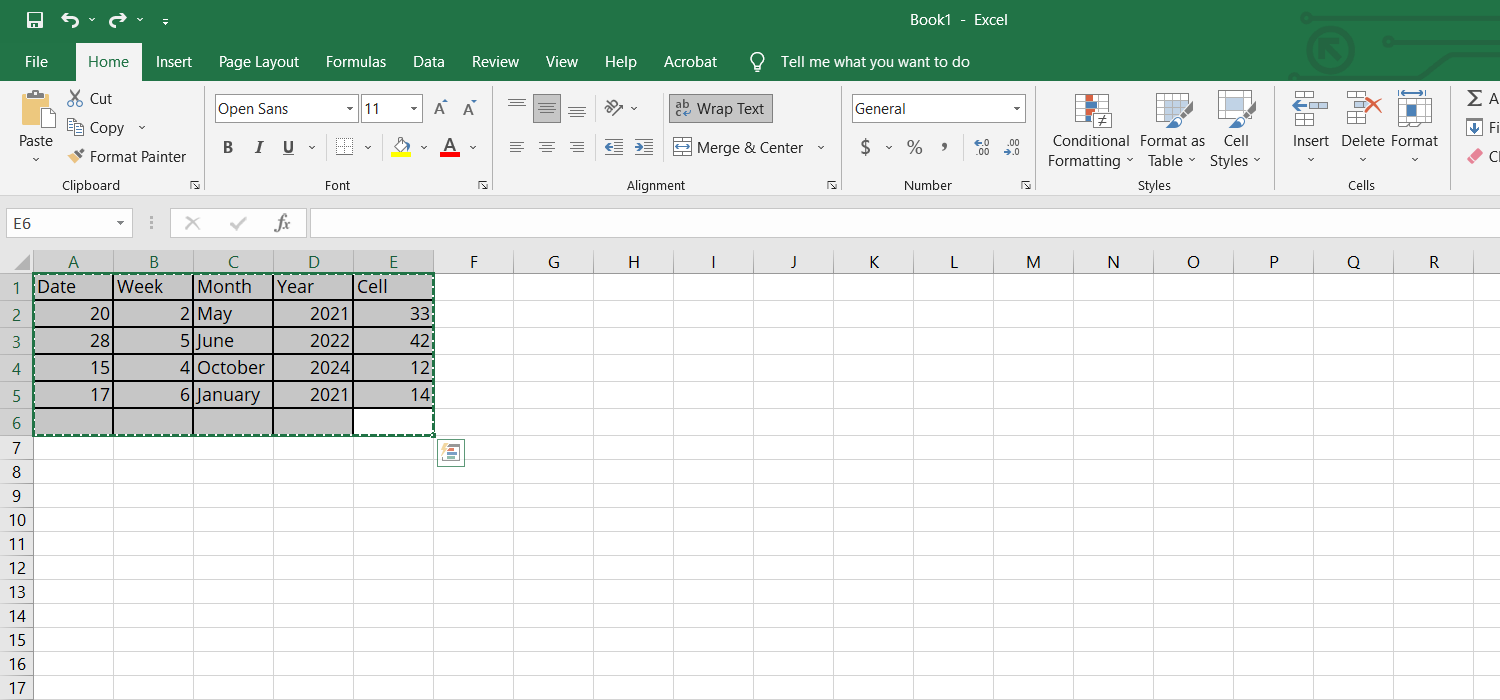
- Paste your table by using Ctrl + V or Cmd + V.

- Copy your pasted table in Excel.
- Click in an empty cell and right-click. A pop-up menu will appear.
- Select Transpose under Paste Options. If you can’t find the transpose option under Paste Options, go to Paste Special > Transpose.

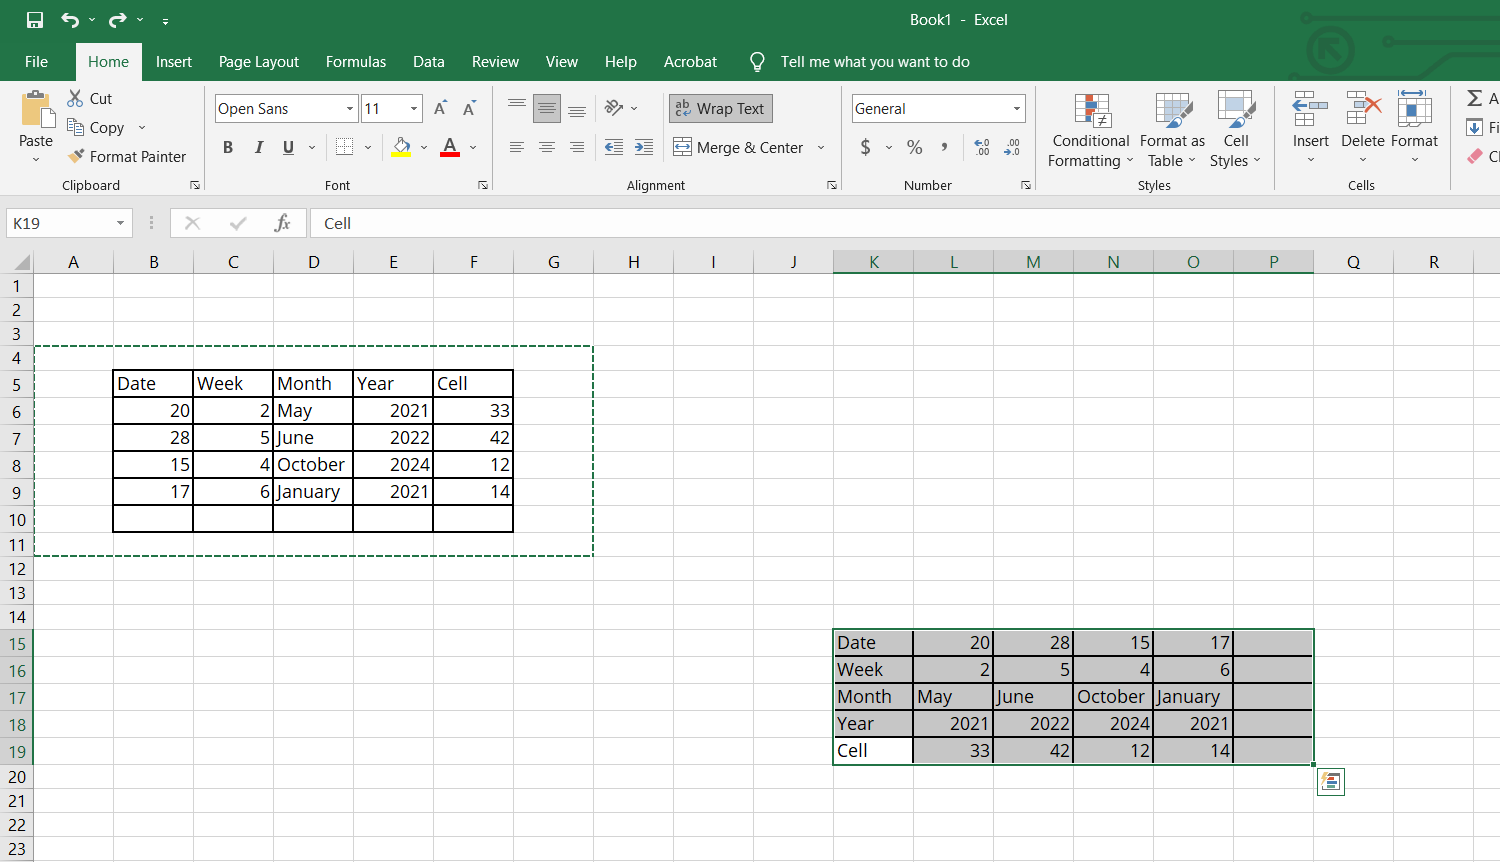
The transpose option will rotate the table from portrait to landscape mode.

- Next, copy the transposed table and paste it inside your Word document.

If you often have to copy data from other apps, you should take a look at our guide on how to import data into Microsoft Word.
Transform Your Tables in Word
If you want to rotate your tables in Microsoft Word, this tutorial has you covered. Depending on what you want to do, you can choose one of the three methods. The Excel trick only turns your tables into landscape orientation, but you get more freedom by using the image option.
But if you want the possibility to edit the table after rotating it, you should insert a text box. Hopefully, Microsoft Word will add a native option to rotate tables, which should make the process a lot easier and help you put together professional Microsoft Word documents.
Using tables help make your document look more professional and visually appealing. It makes your text and numbers look neat and well-organized within the main content. Some tables are best presented in a different orientation, especially when it contains a lot of columns.
However, MS Word doesn’t give you a straightforward way to accomplish the task.
Fortunately, we found more than one clever way to get the job done!

Now, there are about three ways to rotate a table in Word.
- Using the Text Direction button
- Using a textbox
- By converting your table into an image
Without any delay, let’s get right to it!
Method 1: Using the Text Direction Button
This method utilizes the text direction feature of MS Word. While it doesn’t literally rotate the table, this method allows you to view it in a different orientation as the words rotate. You’ll have to redo any formatting you’ve done on the table itself to make it look the way it needs to.
Here’s how you can access the Text Direction button.
Step 1: Open up a Word document.
Before we get started, we’ll need to open up an MS Word file with a table in it. Feel free to open a fresh new one. If you’re already working on a document, feel free to use that. Don’t worry about messing up your file, as you can easily revert any unwanted changes.

Step 2: Select the table.
Once your document is ready, select the table by clicking the Move icon at the top right corner of the table.

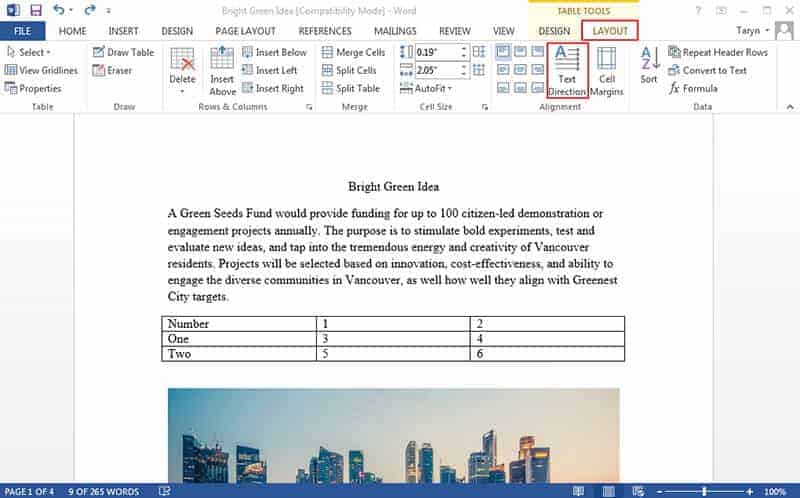
Step 3: Click the Text Direction button.
Go to the Layout tab under the Table Tools category. Note that this category will only be visible once a table is selected. Now, under the Alignment group, click the Text Direction button. You can click on the button several times to cycle through the available directions.

Voila! You’ve just used the Text Direction button to rotate a table in MS Word.
Method 2: Using a Text Box
In this method, we’ll show you the steps on how to insert a table into a text box. This will easily rotate the table at any angle. You’ll also find this method helpful, especially when you’re handling multiple tables in a document.
Here’s how you can do that!
Step 1: Open up a Word document.
To get started, let’s open up a Word document first. If you already have one open, feel free to use that. Otherwise, you can always create a new one to follow us along the way. Just make sure to insert a table in it.

Step 2: Insert a text box.
Go to the Insert tab and click the Text Box drop-down menu at the top right of your window. Next, select Simple Text Box from the choices. Now, delete the default text in the text box by hitting the Delete key on your keyboard.

Step 3: Move your table into the text box.
Once we have the text box ready, drag and drop your table in it. Alternatively, you can select the entire table and press CTRL + X keys to cut the table. Then, click inside the text box and press CTRL + V to paste the table.

At this point, you may have noticed that your table gets cut, don’t fret. You’ll have to resize the text box to fit the entire table in. Simply drag the bottom right circle of the text box toward the bottom right corner of your document until the whole table becomes visible.

Step 4: Rotate the text box.
After moving the table into the text box, you’re now ready to rotate it.
Click and hold the Rotate icon at the top center of the text box. Rotate it clockwise or counterclockwise according to your preference.

Voila! You’ve just used a text box to rotate a table in Word.
Method 3: By Converting Your Table into an Image
Images are relatively easy to move around in Word documents. It’s for this reason that you’ll want to convert your table into an image. However, once converted, you won’t be able to edit the contents of your table anymore.
So, if you have no further changes to your table, then let’s dive right in.
Step 1: Open up an MS Word file.
Before anything else, we’ll need to open an MS Word document with a table in it first. Feel free to use your own personal file to follow the steps laid out here. Otherwise, you can always create a new one. Remember to simply press the CTRL + Z keys to easily revert any unwanted changes.

Step 2: Take a snapshot of the table.
To take a screenshot of your table, press the Windows Logo + Shift + S keys on your keyboard. This will launch the Windows 10 Snip & Sketch Tool. Click and drag your mouse from the top left corner of the table to its bottom right. This will highlight your table in a rectangular shape.

Finish the snapshot by letting go of the mouse cursor. A notification will appear at the lower right corner of your window. Click this notification to launch the Snip & Sketch work window and click CTRL + C to copy the snapshot. If you don’t want to recheck anymore, you can simply click CTRL + C without opening the work window.

Step 3: Paste the image.
On your Word document, click on the part of the page where you want the image to be placed. Then, hit the CTRL + V keys on your keyboard to paste the image.
For this example, we’ll paste the image right below our table.

Step 4: Delete the table.
Now that you have your table as an image, you can already delete the original table.
If you think you’ll still need the original table in the future, then cut and paste it onto a new document. Otherwise, select the table by clicking the Move icon found at the top left corner of it. After that, right-click on the table and select Delete Table.

Step 5: Rotate the image.
Finally, click the Rotate icon at the top center of the image. Then, rotate the image clockwise or counterclockwise to suit your needs.

Congratulations! You’ve just rotated a table in Word.
Conclusion
Congratulations! You’ve finally reached the end of this article. We hope we’ve helped figure out how to rotate a table in MS Word. Before you go, here’s a quick recap of what we covered.
In this guide, we’ve presented three different methods to rotate a table in MS Word. One technique employs preset text directions using the Text Direction button. Another makes use of the text box feature while the last one utilizes the image rotation function. Note that the first method can be more cumbersome than the others.
We hope you’ve found this article helpful!
Microsoft word is a word processing tool that allows you format your content. Over the years Microsoft have evolved from just manipulating text to organizing the text in the form of tables and more. Tables feature of word is used by almost all its users. And if you are new to word you will find difficulty in rotating the table in your word document as doing it is not easy. If you are finding the same difficulty then here is the solution to your problem.
Let us see how to rotate a table in word in a detailed guide below and most importantly in a most easy way. We will discuss methods to rotate table in word.
Introduction:
MS Word was launched by Microsoft Corporation on October 25, 1983. It is used as word processor that means it is used to edit text based documents. Over the years Microsoft have brought major updates to MS word and it is one of the favourite tools of many students and people who work on text based documents.
MS word provides many features that help you optimize the text like font, color, style, etc.MS Word has inbuilt spell checker to help write users with correct spellings. One of the best features of MS Word is tables. Tables allow you to organize and sort your data however you like.
MS Word provides different templates for creating brochures, letters, newsletters, notes articles etc. It is mostly used by students to edit their Assignments.
What is a Table in MS Word:
Table in MS Word not different from regular tables that are a grid of small cells that act as rows and columns. People use table to organize their text, numerical data, etc. in order to sort them according to their needs.
We can apply different formatting like changing the text font, size, color etc. options on the content inside the table. We can delete, add, cells in the table. Table menu in word allows you to merge two cells.
When we insert our data inside the table it auto formats the data however we can modify it according to our requirements.
How to create a table in word
1 Go to MS Word in your computer
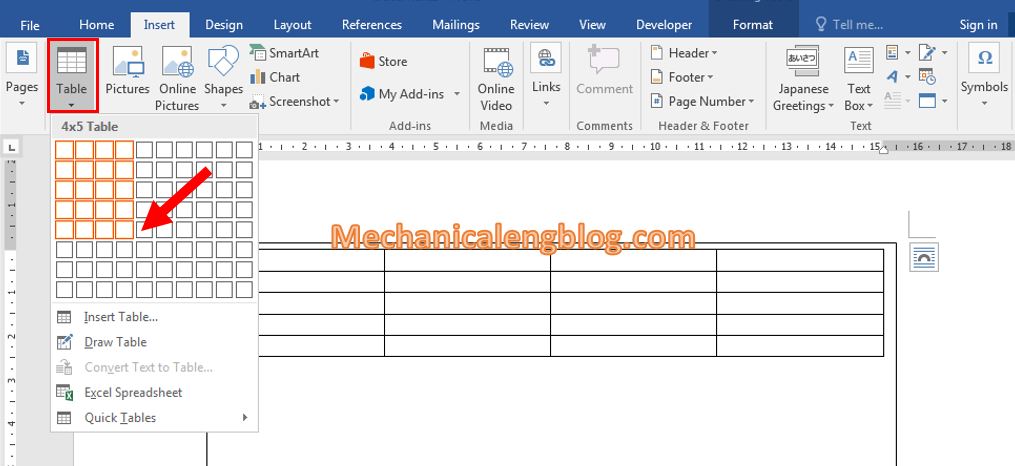
2 In the ribbon go to Insert and click on Table and then click on insert table
3 Select the number of rows and columns and then click on OK
4 A table will be generated according the number of rows and columns you entered
5 Start filling the cells with data and apply different formatting features

Microsoft does not provide you normal options to rotate the table in your Word document. However, we can different methods to rotate table in MS word. The methods include changing the text orientation, using Excel and converting the table as image to rotate the table. Let us see how to apply this methods to get our work done.
Method 1:
As we all know MS word does not allow to rotate the table in the document straightway. However, we can do it by changing the text orientation this will rotate the table. We can change the text orientation only to 90° and 270° and you don’t need to specify angle it automatically shows yo the available orientation angles. MS word does not allow users to change the text orientation other than 90° and 270° so we cannot rotate the table to other angles other than these. To do it perform these steps
step 1: Open MS Word on your computer
step 2: Select the table you want to rotate
step 3: Go to ribbon at the top and click on Layout. Note that there are two Layout in the ribbon. Click on the Layout that is under table tools after the help menu and not the Layout before the references menu.

step 4: In Layout search for Text Direction in the top right corner and click on the Text Direction to change the orientation. Click it multiple times to go through all the available orientations.

Method 2:
Another thing we can try to rotate our table is by converting our table to image. But there is one drawback to this method and it is that we will not be able to edit in our table after we convert it to image. So if you want to edit the data in your table after you convert it to image you’ll have to first convert it to text. There are many free websites available on the internet that convert text to Image for free.
The advantage of this method is that you can rotate it to whatever angles you want. There is no restriction to how much you can rotate your table. To perform this method follow these steps:
step 1: Go to the MS word in your PC/Computer and select the table you want to rotate and copy it.
step 2: Go to some other place in your document, right click on the screen and select paste as picture

step 3: Delete the table from its place and paste the table which you converted as image to that place
step 4: Now click on the rotate arrow and rotate your table to whatever angle you want to.

Method 3:
In this method we will make use of Microsoft Excel. It is best if you want to make your columns your rows or in technical term rotate your table to transpose. Follow the below steps to rotate your table using this method
step 1: Open the document in word whose table you want to rotate and copy the table from the word
step 2: Go to Microsoft Excel, open a a new sheet and paste your table in that. And again select and copy it.
step 3: Now right click on an empty cell and click on the Transpose icon to paste it to Transpose.

step 4: If you don’t find paste to Transpose icon then right click on an empty cell and go to paste special and in that drag over the paste icons to see the paste options in that click on Transpose

step 5: Select and copy the new table and paste it on the word document.
All the methods will help you rotate you table in MS Word however, if you are trying to rotate just because your table has many columns and the document page width is too short for your table then you can try changing the orientation of your page from Potrait to Landscape. To do it just follow these steps
1: Go to the page in your Word document that contains the table
2: On the ribbon above Go to Layout
3: In that search for orientation and click on it and select Landscape.

4: This will rotate the whole page to landscape and you’ll have enough space for you r table columns
Conclusion:
In the above article, we have explained different methods ( Text direction, pasting table as image, and using excel) to rotate a table in word. If you are having difficulties in rotating a table in Word please go through the above article for solution.
Adding a table to your Microsoft Word document can be useful in a lot of situations. Presenting data more professionally is the most popular use of Word’s table feature, but you can also use it to arrange lists or delegate tasks.
A known response to users moving and rotating tables (and images) on Microsoft Word is your document’s text rearranging itself. That brings us to the important question of how to rotate a table in Word.
Even just slightly rotating a table can improve the layout of a document. Unlike when you insert an image, though, it’s not as easy to find the table rotate feature. So, we’ll show you how to do this in Microsoft Word without hassle.
PS: Here, you will learn more about how to recover unsaved Word documents.
Steps to Rotate Table in Word
You aren’t going to need a third-party program to do this. It’s relatively straightforward to rotate tables in Word, but not every user is aware of where this feature is located. Follow the steps below to find out what steps you need to take.
- Step #1 – Launch Microsoft Word and open the document.
- Step #2 – Click on the table to select it.
- Step #3 – Click “Layout” from the navigation menu at the top of the window.
- Step #4 – Click on the rotate 90-degree icon.
- Step #5 – If necessary, click and drag the corner buttons to resize the table. Move the table to correct its positioning.
Unfortunately, you won’t be able to rotate the table to position it at any angle you want. You can only rotate the table in Word at either 90, 180, or 270 degrees.
How a PDF File is Advantageous
Because of the inconvenience of locating these relatively simple formatting features, consider switching from Word to PDF.
The latter has always been seen as a more professional format, but recently more people have chosen to use it. Here are a few advantages of using PDF format:
-
Add Protection.
Microsoft Office’s most recent version added the ability to password-protect documents. PDF files have always had this ability, and as a result, they are more secure than Word documents. For sensitive documents, PDF security is superior.
-
Easily Restrict Editing.
Following on from above, both Word and PDF files can have editing restrictions. However, PDF files’ editing restrictions are harder to bypass and can only be edited if you allow them to be.
-
Professional.
PDFs generally have a more professional look to them. This combined with how easy it is to integrate digital signatures in a PDF file, makes them the better option.
-
Compatibility.
Unless a computer has Microsoft Word installed on it, you can’t open Word documents. This is a long-term criticism of the word processor. PDF files can be opened on any computer that has an internet browser or Adobe installed.
-
Preserves Formatting.
If you send someone a Word document and they have a different version, the formatting could be disrupted, whereas PDF files don’t experience this issue.
There is nothing but benefits to PDF files, and you’ll never have to deal with issues like how to rotate a table in Word.
“Can I Save Word Files as PDF?”
Yes! If you want to continue using Microsoft Word but you want to indulge in the advantages we detailed above, you can indeed save your Word documents in PDF format. Here’s how.
- Step #1 – Run Microsoft Word and open the relevant document.
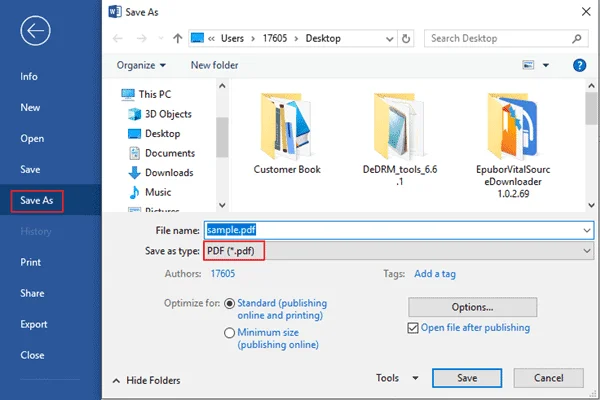
- Step #2 – Click “File” at the top-left and select “Save As.”
- Step #3 – On the right, click the drop-down menu and select “PDF.”
- Step #4 – Enter a name for the file and press “Save.”
The new file will now act like any other PDF file, but what if you don’t just want to save your files in PDF format? What if instead, you want a fully capable PDF file editor to replace Microsoft Word?
Best Solution for Managing PDF Files
Now we come to PDFelement, the top PDF solution that allows users to create PDF files and edit them freely. This program is comparable to Adobe, although, unlike Adobe, PDFelement doesn’t have an extortionate price. You can download and try it out for free!
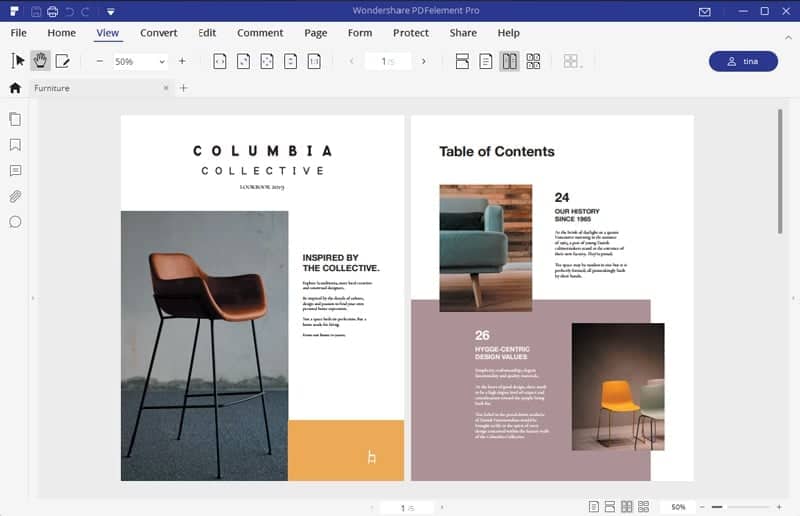
This is a program that is perfect for creating business contracts, presenting financial reports, outlining product designs, and so much more. If you find yourself unaware of how to rotate a table in Word, PDFelement is definitely worth looking into. Below are some notable features that it includes.
-
Merge PDFs
Combining multiple PDFs into a single file can be beneficial. Perhaps you wrote a few eBooks and want to create a collection, or you have related sensitive documents. Either way, PDFelement enables you to merge them. You can also split a PDF document into multiple files in the same manner.
-
Password Protection
Password protection is crucial if you don’t want the wrong people to view the PDF. With PDFelement, you can add a password and limit users from making edits to the file. This means that only people who you’ve given the password to will have access and be able to view the file’s contents.
-
Optimize PDFs
Sometimes a PDF file can get too large to send over the internet. Complex legal contracts, user guides, novel drafts, and even just PDF files that include images – they can all result in large files. If you open a PDF in PDFelement, you can take advantage of 3 different optimization options.
-
Watermark
Do you want to protect your hard work from being stolen? Adding a watermark ensures that nobody can claim the PDF to be their own. PDFelement lets you add watermarks to PDF files and offers various customization options too.
-
Digital Signatures
A common use of PDF files is to create contracts. Given that all contracts require signatures from various parties, it’s very useful to send a contract over the internet and for those parties to be able to sign it. PDFelement makes adding a digital signature box incredibly easy, and if you have a PDF that includes a digital signature, you should also use password protection!
Learn more about PDFelement
How to Optimize Your PDFs
After you’ve made a PDF file using PDFelement and understand the equivalent method to rotate the table in Word, you should optimize it.
PDFelement contains a few different optimization options so that you can prepare the file for any use. Follow these steps to find out how.
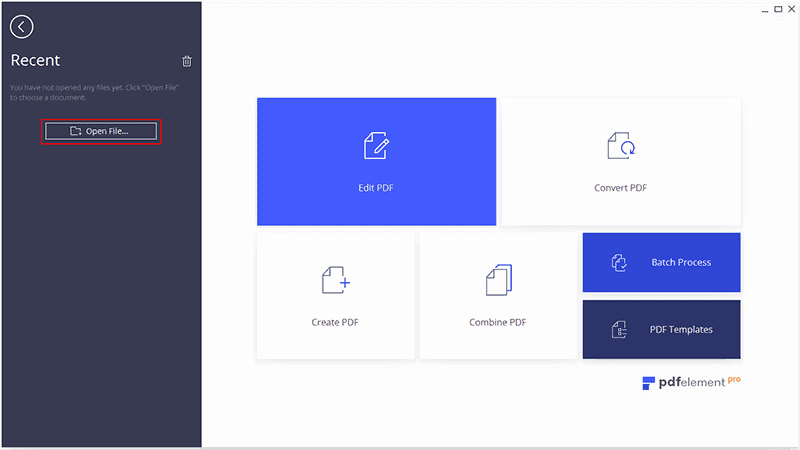
- Step #1 – Launch PDFelement and open the PDF file that you want to optimize.
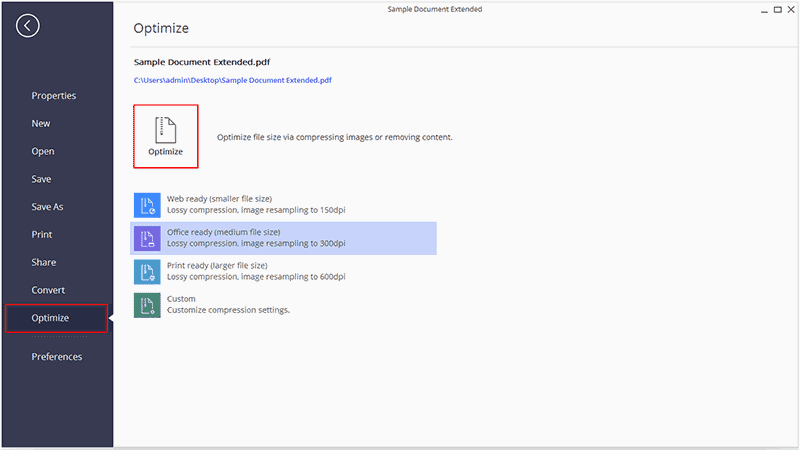
- Step #2 – Click the “File” tab and select the Optimize feature.
- Step #3 – Choose one of the optimization options and click “Optimize” to save a new PDF version.
You might be wondering what the different optimization options mean. To help you decide:
- Web-ready. This option uses the highest level of compression. It is suitable for sending PDF files with many pages and would otherwise have a large file size. PDF files that will be uploaded on the internet are also the best option.
- Office ready. This option uses minimal compression and reduces image quality to reduce file size, therefore saving storage space.
- Print-ready. This option uses the least amount of compression. Optimizing a file with this will keep all of the images intact, and there will be very little compression, making it perfect for printing documents.
Custom allows you to define the optimization settings yourself. Unless you know what these settings mean, you shouldn’t change them.
This optimization feature is one of the many you’ll enjoy if you switch from Word to PDFelement because you don’t know how to rotate a table in Word.
Try PDFElement Now
To Conclude
Microsoft Word continues to be the best in terms of word processors. This title doesn’t exclude it from having several flaws, including how some users struggle to learn how to rotate a table in Word. Moving the feature’s icon to be easily accessible would do the trick.
However, if you’d rather get to enjoy those PDF benefits above, then make a move and start using PDFelement. We guarantee that it won’t disappoint you, and as an incredibly easy-to-use PDF solution, anyone can learn all of its capabilities within hours.
In this post, I will show to you 2 ways to rotate table in word . We can do it by using text bos and Capture the table then rotate.
Working with Word, when inserting objects such as images, drawings, Textbox …, we can easily rotate it as we want, but for tables, there is no support for rotation.
So how can we rotate a table? In this article I will guide you how to rotate a table in Word. There will be some different ways like rotate from portrait to landscape or rotate for a specific degrees. So, according to your need, choose the way that suits you best.
I. Rotate table in word by using text box.
Because tables don’t have the rotate option, so we will create a Textbox – which can be rotated – then insert a table inside that Textbox, so when we rotate the Textbox the table will also be rotated.
1: Go to Insert, Textbox then choose Draw Texbox to create one.
2: Place the cursor inside the textbox, then create a table by go to Insert and choose Table.
3: At this point fill the content in the table as normal. If the table is too big, just drag the Textbox to increase the size, as long as the table is fitted inside.

4: To rotate, select the textbox and you can see the rotate icon as shown below. Click and hold it to drag left or right to rotate the Textbox as well as the table inside.
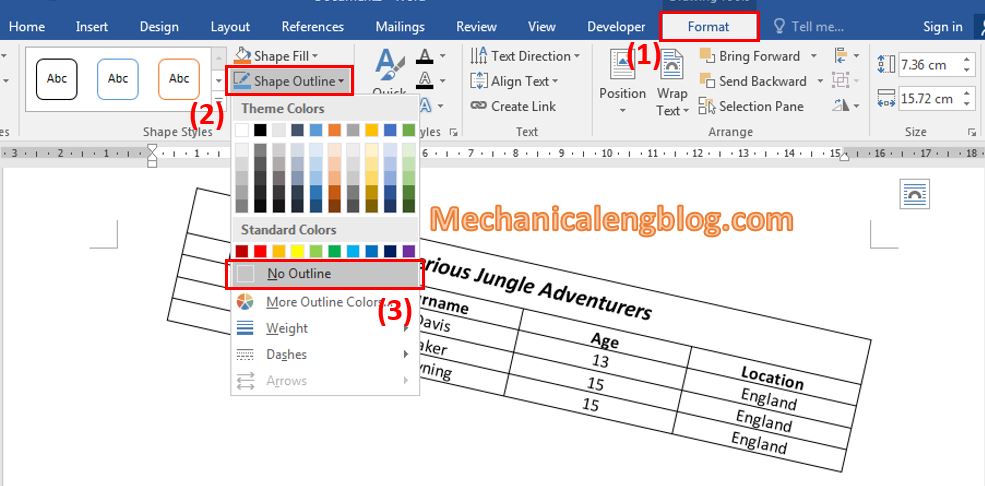
5: After rotating, you might want to delete the border that is the textbox so the table will look better. Select the textbox then go to Format, in the Shape Outline section choose No Outline. The border will be remove.
II. Capture the table then rotate.
In addition, you can also rotate a table by capturing it. At this time the table is shown as an image file. There are many ways to take a screenshot of your screen that you can refer to at the link of this article:
https://mechanicalengblog.com/how-to-take-screenshot-in-word-document/
When done capturing, you can now insert the picture into Word and proceed to rotate it easily. To rotate picture you can find out some ways in this link below:
https://mechanicalengblog.com/4-ways-to-rotate-image-in-word/
Paste the image of the table you have captured into Word and use the rotate button to rotate the table.

However with this way, if you want to edit the content from the table you will have to recapture it, then paste it again in the new Word file, that will take a lot of time so I would not recommend using this way too often, just when necessary.
CONCLUSION
So below are 2 ways to rotate a table in Word. For the other versions you can still follow these steps. Usually, with tables, people will not rotate it unless for presentation or some specific purposes, but sometimes the table can be rotated from portrait to landscape. So that even though it is not used commonly, I still want to share with you. Hope it will come to help you someday. Thanks for reading and wish you the best success!
See you in the next posts.
-hhchi
Reader Interactions