
Excel for Microsoft 365 Word for Microsoft 365 Outlook for Microsoft 365 PowerPoint for Microsoft 365 Excel 2021 Word 2021 Outlook 2021 PowerPoint 2021 Excel 2019 Word 2019 Outlook 2019 PowerPoint 2019 Excel 2016 Word 2016 Outlook 2016 PowerPoint 2016 Excel 2013 Word 2013 Outlook 2013 PowerPoint 2013 More…Less
Microsoft Office Picture Manager isn’t included in recent versions of Office, but you can use Word, Outlook, PowerPoint, or Excel to edit photos in place in an Office document. These apps have many built-in photo editing features, so you might not need a separate program for the basic photo-editing tasks you want to accomplish.
You can read more below this video on how Doug uses the built-in tools to get pictures looking great in a document.

After you insert a picture in your document, click it, and then click the Picture Tools Format tab.
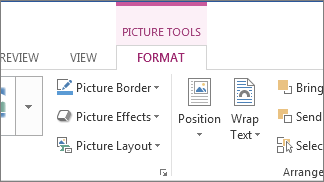
In Word, you can choose color variations, crop, compress at different levels, and apply some special effects.

For more details on formatting and resizing a picture in an Office document, see these articles:
Change the brightness, contrast, or sharpness of a picture
Change the color of a picture
Crop a picture
Reduce the file size of a picture
If you still need more specialized features like eliminating red eye or straightening, the Microsoft Photos app is your best bet.
Need more help?

Microsoft Word includes several image editing tools that allow you to make changes to images in your documents. Here’s how to use them.
You don’t need expensive photo editing software like Photoshop to edit photos and other images for Microsoft Word documents. Although the Microsoft Office Picture Manager has been retired, there are still plenty of built-in tools to edit images in Word.
Microsoft Word allows you to format colors and brightness, add borders, crop image sizes, add special effects, and more, so here’s how to do it. While the instructions may vary, these instructions should work for Word 2016 and higher, including Microsoft 365 (formerly O365) and Online.
There are a few ways to crop an image in Microsoft Word. Start by inserting the image into your Word document (Insert > Pictures) and selecting the image.

To begin formatting your selected image, click Format > Crop (or Format > Crop > Crop). You can also enter the image cropping mode by right-clicking the image and selecting Crop.
This will change the outline around your image from resizing to cropping.

Move the crop outline tools around your image to reduce the image area to its final size. Grayed-out areas will be removed from the final image once the crop edit has been confirmed.
Once you’re happy, click once outside of the image or press Enter on your keyboard.

Formatting Image Colors
Word allows you to format the colors used in your image without exporting it to a photo editor first. You can customize the image sharpness, brightness, saturation, tone, and contrast levels, either manually or using one of several preset filters.
To access the image formatting tools, right-click on your image and press Format Picture at the bottom.

This will bring up the Format Picture menu on the right-hand side. Click the Picture icon (furthest right) to access the image color editing tools.
Under Picture Corrections, move the sliders for each category to sharpen or soften an image or increase or decrease the brightness and contrast levels. You can also click Presets for each category, selecting one of the thumbnails to apply those changes to your image instead.

Under Picture Color, you can change the tone and saturation levels for your selected image. Move the sliders for each option left or right to increase or decrease each level.
Click Presets to set these levels using one of the provided preset options.

If you’re unhappy with any of the color changes you’ve made, click the Reset button underneath each category to return your image to its original state.
Adding Special Effects to Images
Microsoft Word also includes several special effects that can be easily applied to images. These include image shadow, glow and reflection, soft edges, and a 3D bevel effect.
To add these special effects, enter the Format Picture menu (right-click > Format Picture) and click the Effects icon (second from the left). Click on each sub-category to access each setting.
To add a shadow to your image, click Shadow and move the sliders to set transparency, size, angle, color, etc. You can also click Preset to preview and add a Word-defined drop shadow instead.

Click Reflection and follow the same instructions to add a custom or preset image reflection to your image. Do the same to Glow to add an image glow and Soft Edges to soften the edges around your image.
To add a 3D bevel effect to your image, click 3-D Format. Select the effect you want for both the top and bottom sections of your image by clicking Top Bevel and Bottom Bevel, selecting one of the pre-defined options.
You can also customize the depth, contour, material effect, and lighting levels for your 3D bevel effect using the drop-down menus and option boxes.

You can also add one of several preset artistic effects to your image. These combine several effects into one to change your image design.
To do this, click the Artistic Effects sub-category, then click the Artistic Effects icon. Select one of the preset options using your mouse to apply it to your image.

Compressing Images in Microsoft Word
Adding images to a Word document can vastly increase its size. By compressing the images, you can reduce the file size of your document as a whole.
To format a single picture, click Format > Compress Images and ensure that the Apply only to this picture checkbox is enabled. If you want to compress all of your attached images, click to uncheck this checkbox.
Compressing images will reduce the quality on a sliding scale from HD quality (330 pixels per inch) to basic email quality (96 pixels per inch).
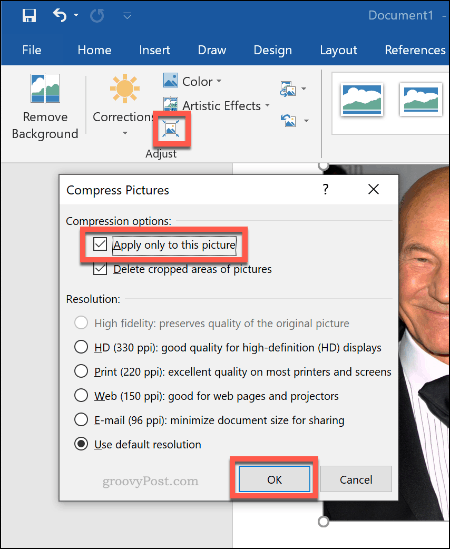
The higher the quality, the bigger the Word file, so choose your preferred quality, then click OK to compress your images.
Basic Image Editing Made Easy
These editing tools make it easy to make basic changes to images in Microsoft Word. You can also resize images in Windows 10 without needing an image editor too.
If you need to make bigger changes to your images, you can try some of these free Photoshop alternatives instead.
![]()
Follow the steps as under to make corrections to the picture.
- Click the picture to reveal the “Format” tab.
- Press the “Corrections” option to reveal the dropdown. This will reveal to you how to edit image text in word.
- Apply the required correction to complete the process in full.
Contents
- 1 How do I edit a picture in a Word document?
- 2 How do I freely edit a picture in Word?
- 3 Why can’t I edit picture in Word?
- 4 How do I cut part of a picture in Word?
- 5 How do I write text over a picture in Word?
- 6 How do I insert a picture in Word without moving text?
- 7 Can I edit text in a picture in Word?
- 8 How do I edit photos?
- 9 How do I remove unwanted parts of a photo?
- 10 How do you crop around a picture?
- 11 How do I insert a picture in Word without resizing?
- 12 How do I put a picture in front of text?
- 13 How do I move clip art in Word?
- 14 How do I move a picture in Word 2013?
- 15 How do you move an object freely in Word?
- 16 How do I edit a picture in Word 2010?
- 17 How do you edit text in a JPEG?
- 18 How can I edit pictures on my laptop?
- 19 How can I edit text in a picture?
- 20 How do I start editing photos?
How do I edit a picture in a Word document?
Start by inserting the image into your Word document (Insert > Pictures) and selecting the image.
- To begin formatting your selected image, click Format > Crop (or Format > Crop > Crop).
- Move the crop outline tools around your image to reduce the image area to its final size.
- Formatting Image Colors.
How do I freely edit a picture in Word?
Double-click the picture to add it to your Word document. Back on Word’s editing screen, right-click the image that you just added and select Wrap Text > In Front of Text from the menu. Your picture is now freely movable. Drag and drop it anywhere you want in your document.
Why can’t I edit picture in Word?
It sounds like the problem is that the Picture Placeholders setting has been turned on. You can control this setting in this manner: Display the Word Options dialog box. (In Word 2007 click the Office button and choose Word Options.
How do I cut part of a picture in Word?
On the Home tab of the toolbar ribbon, select Select, and then choose Free-form selection. Click and drag on the image to trace the outline of the area that you want to cut out or cover. Press the Delete key.
How do I write text over a picture in Word?
On the Insert tab, in the Text group, click Text Box, drag to draw a text box anywhere near the picture, and then type your text. To change the font or style of the text, highlight the text, right-click it, and then select the text formatting you want on the shortcut menu.
How do I insert a picture in Word without moving text?
To insert an image into Word without moving any text is to set the image’s default wrapping to no wrapping before entering it into the document.
- Click the location in your document where you want to insert a picture.
- On the Insert tab, click Pictures.
- Select the option you want to use for inserting pictures.
Can I edit text in a picture in Word?
Word can only edit text in a graphic that is made with the Office drawing tools. Any graphic created in another program is just a graphic for Word – it can’t access the individual content inside.
How do I edit photos?
- Open the photo you want to edit.
- Tap Edit. Tools.
- Select the tools you want to use with your photo and make changes.
- When you finish, tap Done.
- To undo an effect, deselect the option or tap Cancel.
How do I remove unwanted parts of a photo?
5 Free Android Apps to Remove Unwanted Objects from Photos:
- Adobe Photoshop Fix. This app is widely used by Android users to remove unwanted objects from images.
- Remove Object.
- PixelRetouch.
- YouCam Perfect.
- TouchRemove.
How do you crop around a picture?
If you want to change the outline of a picture and make it a shape (like a circle or a star), use the cropping tools on the PICTURE TOOLS FORMAT tab. Select the picture (or pictures) that you want to crop. On the PICTURE TOOLS FORMAT tab, click Crop > Crop to Shape, and then pick the shape you want.
How do I insert a picture in Word without resizing?
CTRL+Arrow key(s). and have the ability to move it around. text-area from the drawing options and then insert a picture into it. EXACTLY its original size.
How do I put a picture in front of text?
Open Layout Options
- Select a picture.
- Select the Layout Options icon.
- Choose the layout options you want: To bring your picture in front of the text and set it so it stays at a certain spot on the page, select In Front of Text (under With Text Wrapping), and then select Fix position on page.
How do I move clip art in Word?
Moving Clip Art
- Click on your image to get the sizing handles back.
- Hold down your left mouse button.
- Keep the left mouse button held down.
- Drag your mouse to the right.
How do I move a picture in Word 2013?
In your Word 2013 document, select the picture you would like to move. Choose Picture Tools Format→Position button to open a menu of positions. Choose the position that shows the picture in the upper-right corner of the document. Drag the picture downward so that its top aligns with the top of the first body paragraph.
How do you move an object freely in Word?
First, confirm that the object is not set to In Line with Text: With the object selected click the Arrange button on the Shape Format contextual tab. From the Wrap Text choices select the method you prefer. You then should be able to freely drag the object to any location.
How do I edit a picture in Word 2010?
How to Edit an Image in a Word 2010 Document
- Click to select the image. The image grows handles.
- Hold down the Shift key.
- Use the mouse to drag one of the image’s four corner handles inward or outward to make the image proportionally smaller or larger.
- Release the Shift key.
How do you edit text in a JPEG?
Use Kapwing’s tools to crop, resize, rotate, flip, filter, recolor, and frame your pictures, or add text, shapes, animations, watermarks, logos, and overlays.
Edit your pictures with your own personality, style, and flair, no matter what you use them for.
- Upload your image.
- Make your edits.
- Export.
How can I edit pictures on my laptop?
Crop or rotate a photo
- On a computer, go to photos.google.com.
- Open the photo you want to edit.
- At the top right, click Edit. . Tip: While you edit, click and hold the photo to compare your edits to the original. To add or adjust a filter, click Photo filters. . Click to apply a filter.
- At the top right, click Done.
How can I edit text in a picture?
Google Photos has a similar tool for adding text to photos:
- Open a photo in Google Photos.
- At the bottom of the photo, tap Edit (three horizontal lines).
- Tap the Markup icon (squiggly line).
- Tap the Text tool and enter your desired text.
- Select Done when you’ve finished.
How do I start editing photos?
Here are the key steps for editing your photos:
- Crop your images and clean them up.
- Adjust white balance.
- Adjust exposure and contrast.
- Adjust color vibrancy and saturation.
- Sharpen images.
- Finalize and share.
How to Edit a Picture in Microsoft Word in 2023 – PDFgear
Summary :
Learn from this guide about how to edit a picture in Microsoft Word: change color, add border, locate picture, cut out, adjust width/height, compress the picture, artistic effects, etc. The best PDF editor that converts between and edits Word document and image files is also introduced.
Content Table
-
Part 1. How to Insert Picture in Word
-
Part 2. How to Edit Picture in Word
-
Part 3. Best Online Tool for Converting and Editing Word
-
Part 4. Edit a Picture in Word FAQs
How to Edit a Picture in Word
As familiar office software, Word is usually used to edit text documents. But, do you know that it can also be used to edit pictures? It not only allows you to insert pictures into documents to allow better interpretation of the text but also allows you to edit the inserted pictures to meet your needs. This article will explain in detail how to edit a picture through Word in three parts.
⭐ You May Also Like
To add a picture in Word, you can follow the steps below:
- Enter Word, find, and click the “Insert” option in the toolbar.
- Click “Picture”, select the picture you want to add, and done. (In general, the location of the added image is where the cursor is located)

Insert Picture to Word from Device or Online
Part 2. How to Edit Picture in Word
Word provides a variety of tools for editing the picture. Here are some common options:
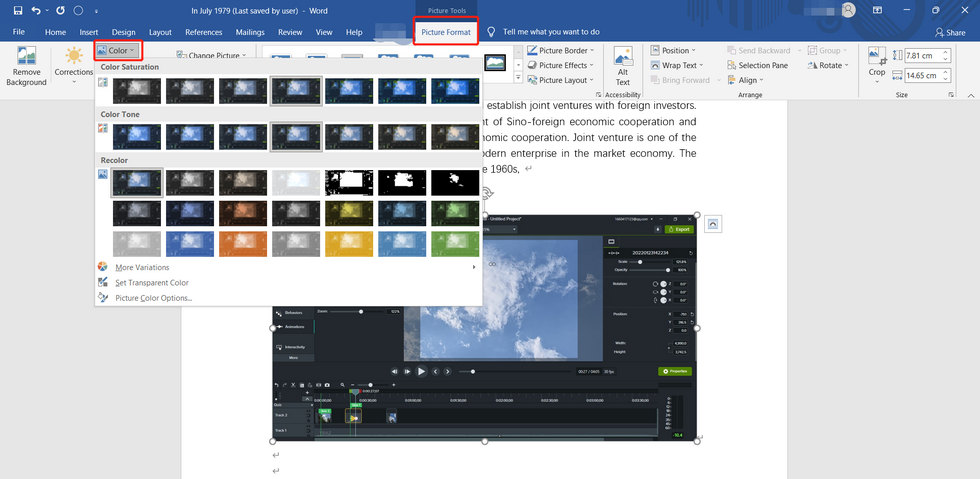
Change Color
For the added picture, usually, we can adjust its color through Word to make it better conform to the context. Select the added picture, click the “Picture Format” button in the toolbar, and click the drop-down box of the “Color” options. Here, we can adjust the image color options such as Color Saturation, Color Tone, Recolor, More Variations, Transparent Color, etc.
Change Color to Enhance the Expression in Word
Add Border
Setting the border can make the inserted picture more beautiful. The following steps can make it easy for a picture to get a border:
- Insert the picture to be bordered.
- Click “Picture Format ” options
- Find “Picture Border” and click the drop-down option to the right of this button. You can set the Theme Colors, Weight, and Dashes of the border.
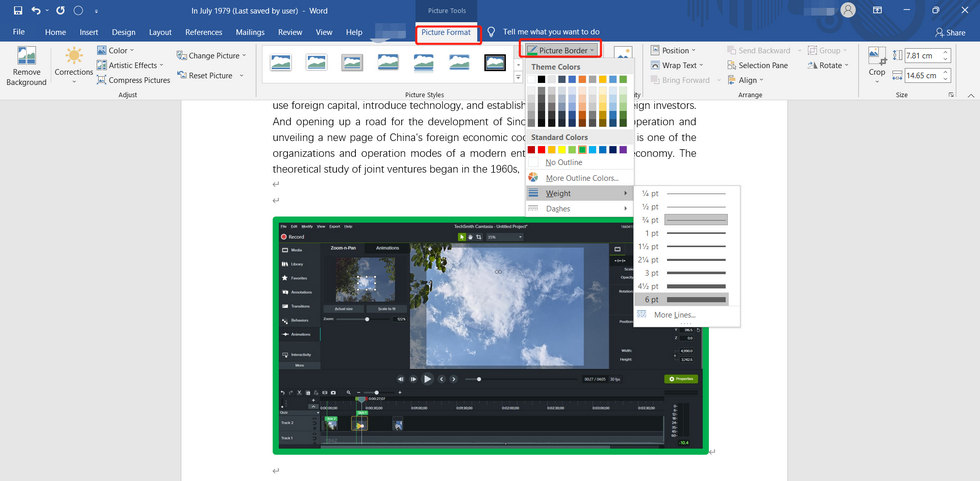
Word Border Play a Role of Emphasis
Locate the Picture
According to the following steps, you can arbitrarily adjust the position of the picture.
- Click Picture Tools > Picture Format.
- Select the Position button. The default format of Word is that the picture is embedded in the text, but we can set the format arbitrarily in the “Wrap Text ” option. Or click “More Layout Options” directly to set the picture position according to your needs.
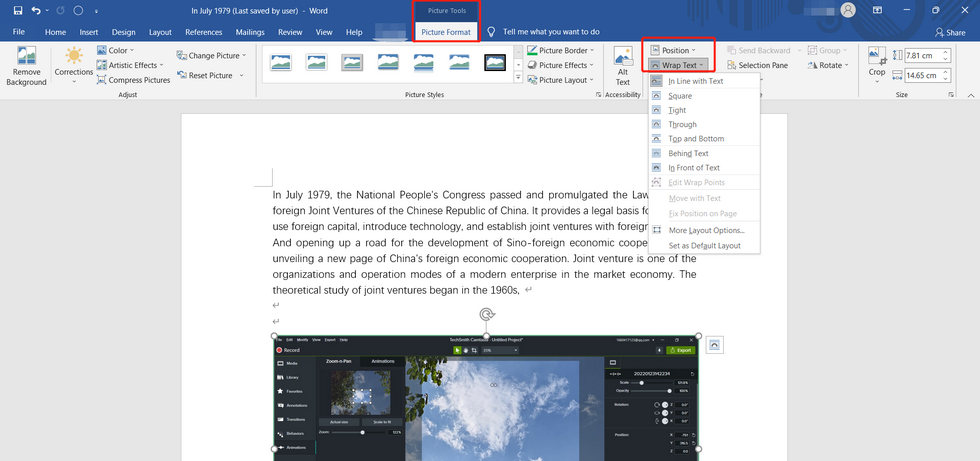
Proper Location Can Make Typesetting Neat and Comfortable
Cut Out
There are two main ways to achieve clipping in Word:
- Click on the picture, and the button for clipping the picture will appear below the function key on the right. Click the button and drag the black line at the edge with the mouse to achieve clipping.
- Select “Picture Format” in the toolbar and click the drop-down box of “Crop”. You can cut it freely or choose to Crop to Shape or Aspect Ratio, etc.

Different Scenes Require Different Picture Sizes
Adjust the Width and Height
Similarly, there are two ways to set the inserted picture. The first is to directly locate the height and width in the upper right corner of the page and directly type the value you want to change. The second is to directly select the picture, click the right mouse button, and choose “Format Picture”. Change the height and width in the toolbar that appears on the right.
You can change the size of the picture by adjusting the width and height
Compress the Picture
To compress a picture in Word, there are only a few simple steps: insert the picture > Picture Tool > Picture Format > Compress Pictures > select the Compression Options and set the Resolution.

Compressing the Picture Will Reduce the Clarity of the Picture
Artistic Effects
As we all know, Word can be added with artistic words to attract readers’ attention or increase the viewing experience. Similarly, the picture that we inserted into Word can also be added with the artistic effect that comes with Word.
Click the picture > Artistic Effects > Choose the one you prefer or click “Artistic Effects Options” > A toolbar will pop up on the right > There are seven types of special effects for you to choose from, such as Shadow, Reflection, and Glow.

Artistic Effects Increase the Beauty of Pictures
Part 3. Best Online Tool for Converting and Editing Word, PDF, JPG, etc.
PDFgear is a highly recommended online service for converting any format between Word, PDF, and JPG. For convenience, it can also convert online in real-time. PDFgear takes users’ privacy and security into consideration, and it won’t save any files you upload. And it is compatible with multiple platform devices such as Linux, Windows, Mac, Android, and iOS.
1. It provides conversion between multiple formats, such as Word to PDF, JPG to PDF, PDF to Word, and PDF to JPG.
2. A simple and friendly user interface allows you to use it easily, which is suitable for everyone.
3. High conversion efficiency, no long waiting time.
4. Completely free, no need to spend any money.
5. Lossless compression and hyper compression for PDF documents are both supported.
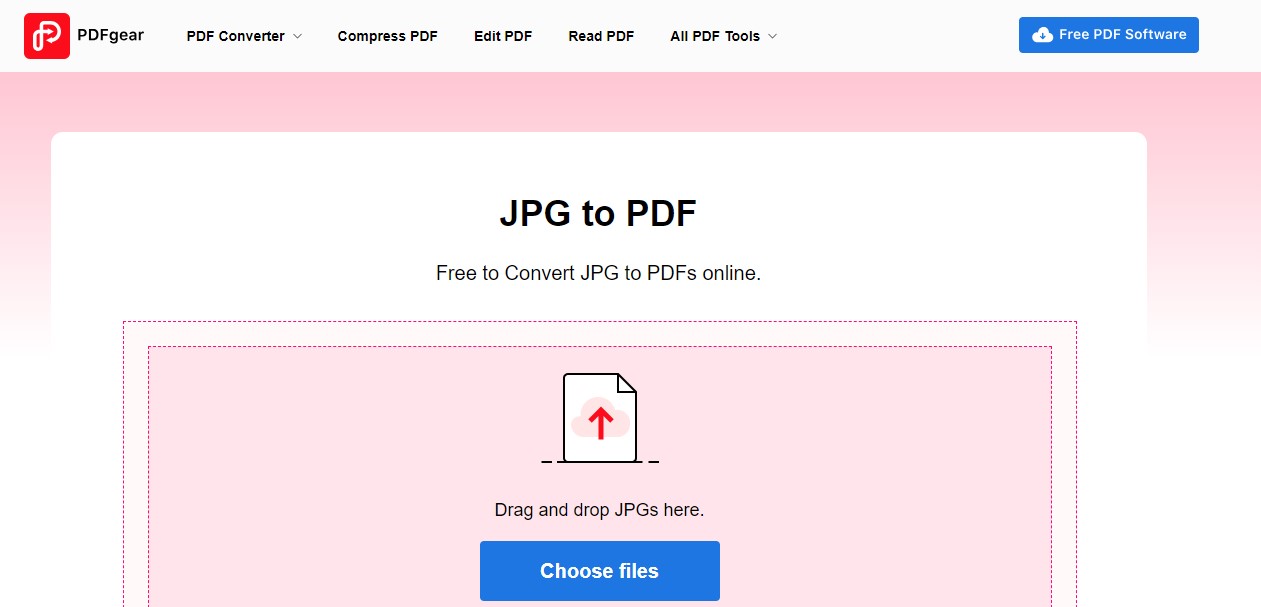
A Variety of Online PDF Tools Available to You
Part 4. Edit a Picture in Word FAQs
The Inserted Picture Shows only the Border but not the Content
Lacking content is a common issue when you’re using Microsoft Word, to resolve this issue, you should: File > Options > Advanced tab > Show document content > Uncheck “Show picture placeholders” option > OK.
Unable to Move the Position of the Inserted Picture
This is related to the way the picture surrounds, in general, the default picture surround in Word is “In line with Text”. So, it can not be arbitrarily moved. You can operate it by following the steps below:
Picture Format > Wrap Text > Select any wrap-around method, for example, Top and Bottom and In front of Text.
Inserted Pictures are Distorted and Blurred
To avoid distortion and blur, you can do this: File > Options > Advanced > Image Size and Quality > Uncheck Do not compress images in files > OK.
The Inserted File is Not Fully Displayed
This problem can be solved by adjusting the line spacing.
Select the image > Click “Home” > Select “Paragraph” > Choose “Indents and Spacing” > Set “Line Space” to “Single Spacing” or other options in the “Line Spacing” column > Click “OK” button.
How to Align Multiple Files
Bring up the gridlines by following these steps: View > Gridlines > Align > Grid Settings > Vertical Spacing > OK. Then assist in aligning the inserted pictures through these gridlines.
Part 5. Conclusion
The image editing function of Word is very convenient and powerful. Several common editing functions introduced in this article are very easy to learn. If you study carefully, it can effectively save your time cost and improve the quality of your work.
More Related Articles
- 16 Best Sites to Read Free Books Online without Downloading
- The 15 Best Free LaTeX Editors for Windows, Mac, Linux
- The 13 Best Free PDF Scanner Apps for iPhone and iPad
- The 11 Best EPUB Readers for iPhone and iPad
- The 11 Best Audiobook Torrent Websites
![]()
Download Article
![]()
Download Article
Ever been frustrated by trying to create a brochure or flier in Microsoft Word? This article offers 4 simple steps to follow along with editing instructions to make your job easier. To create your own great-looking marketing materials using Microsoft Word and Publisher, start with a template to give yourself a head start. Template resources are listed below.
-

1
Ungroup objects — Text and graphics may be grouped.
- To ungroup objects:
- Word:
- Select the object. On the Drawing toolbar*, click Draw, and then click Ungroup.
- Publisher:
- Select the object. On the Arrange menu, click Ungroup or Ctrl+Shft+G.
- Word:
- Group objects:
- Word:
- Select the objects you want to group. Shift-click to select multiple objects. On the Drawing toolbar*, click Draw, and then click Group.
- Publisher:
- Select the object. On the Arrange menu, click Group or Crtl+Shft+G.
- Word:
- To ungroup objects:
-
2
Resize a picture
- Select the picture you want to resize.
- Position the mouse pointer over one of the sizing handles.
- Drag the sizing handle until the object is the shape and size you want. To maintain the object’s proportions, drag one of the corner sizing handles.
Advertisement
-
3
Crop a picture
- Select the picture you want to crop.
- Click Crop on the Picture toolbar.
- Position the cropping tool over a cropping handle and drag the handle inward until the object is cropped the way you want it.
-
4
Format a picture or drawing object. Pictures can be resized, cropped, and color adjusted using brightness and contrast, converting color to black and white or grayscale. To change specific colors, you need to use a photo editing or drawing program. Drawing objects can be resized, rotated, flipped, and colored. Add borders, patterns and other effects. Formatting options vary depending on the type of graphic you are editing.
- Select the picture or drawing object you want to edit.
- Click the editing option you would like to use on the Picture toolbar or the Drawing toolbar .
- Position or size graphics exactly: On the Format menu, click Picture or AutoShape. Then, enter your settings in the dialog box.


Advertisement
Add New Question
-
Question
How do I group edit photos in Word?

You need to have two pictures you want in the document, shift-click each image, then go to «Format.» Then click «Group» on the right.
-
Question
How do I change fonts on my PC?
In Word, go to the Home tab. In the Font section you will see a little field with a number beside it. In the field is normally written ‘Calibri’. If you click on it, you’ll see all the installed fonts and you can choose one now. To install go to dafont.com, pick your font, download it, then unzip it and put the file in the ‘fonts’ folder in the Windows library.
-
Question
How do I change text on an original document in MS Office?
Highlight the text you want to change, go into «format» and choose the changes you wish to make.
Ask a Question
200 characters left
Include your email address to get a message when this question is answered.
Submit
Advertisement
Thanks for submitting a tip for review!
About This Article
Thanks to all authors for creating a page that has been read 168,074 times.