
More than ever, pictures are critical to the effectiveness of your communication materials. With the image formatting and layout tools in Microsoft Word, it’s possible to add and manipulate pictures in your document—even if you’re a beginner.


Starting with a Microsoft Word template makes it even easier. With a well-designed Word template, the positioning and formatting of pictures have already been done for you. All you’ve got to do is to drag your pictures into the image placeholders.
Even if you’re using a template for Word, it’s good to know how to format pictures so you can make your document look exactly the way you want it to.
In this article, you’re going to see, step-by-step, how to work with pictures in Microsoft Word.
(Note: The screenshots below show Microsoft Word for Mac. The screens and steps may be slightly different if you’re using a different version of Word.)
How to Insert a Picture in Word
To add a picture to a Word document, click Insert > Pictures. From here, you’ve got three options:
1. Photo Browser
If you choose this option, you’ll be able to select an image from the existing photo sets on your computer. On a Mac, that includes photos in iPhoto and Photo Booth. When you find the picture you want to use, click on it, then drag it into the document.


2. Picture From File
This option lets you insert an image from another location on your computer. Find the image file, select it, then click Insert.


3. Online Pictures
Insert pictures in Word from the web by selecting Online Pictures…. This opens a Bing image search right inside your document. Type a keyword or phrase in the search bar.


By default, the Creative Commons only filter is checked. Keep this selected to make sure you don’t violate any copyright laws. Click on the filter icon to filter the image results by other parameters.


Select an image by clicking on it, then click Insert. You can select several images before clicking the Insert button.


Microsoft Word automatically includes the image attribution and license details as a caption.


Note: While you can import many image formats into Word, the ones that work best are JPG and PNG.
How to Format Pictures in Word
After importing pictures into Word, you can apply different formatting settings to each Microsoft Word picture and control its appearance. Below are some of the most basic image formatting you can apply in Word:
1. Resize an Image
Resize a picture in two ways:
Resizing Method 1
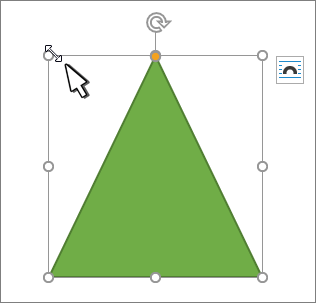
Click on the picture. Press and hold the Shift key, then click and drag one of the sizing handles either towards or away from the center.


Holding the Shift key ensures that the proportion of the picture is retained. Otherwise, it would become distorted and your entire document will look amateurish.
Resizing Method 2
This method allows you to resize the picture to a specific length or width. Click on the picture, then click on the Picture Format tab. Type the length or width you wish the image to have.


By default, the original proportion of the image is retained even when you change either the length or width of the image. Keep this checked to avoid distorting the image.
2. Rotate or Flip Images
To rotate an image, do so either manually or by a specific amount.
Manual Image Rotation
To rotate an image manually, click on the image to select it. Click on the rotation handle and drag it in the direction you want.


Flip or Rotate an Image By a Specific Amount
Rotate a picture by a specific amount. Click on the picture, then go to Picture Format > Rotate. From here, you’ve got the option to:
- Rotate Right 90°
- Rotate Left 90°
- Flip Vertical
- Flip Horizontal
- Select More Rotation Options
To rotate a picture to an exact angle, choose Select More Rotation Options.


Type in the amount you wish to rotate the object, then click OK.


How to Crop Photos in Word
If you’re wondering how to crop a picture in Microsoft Word, it’s not difficult. Follow the steps below to not only crop an image, but also to dress it up by cropping it to a shape or adding decorative borders:
1. Basic Image Cropping
To crop a picture, select the picture, then go to Picture Format > Crop > Crop.
Black cropping handles appear on the sides of the picture. From here:
- Crop one side. Drag one side handle inward.
- Crop two adjacent sides at the same time. Drag one corner inward.
Click outside the image to apply the crop.
2. Crop Image to a Shape
To crop the picture to a specific shape, select the picture. Go to Picture Format > Crop > Crop to Shape. Select a shape from the selection that appears.


Click away from the picture to apply the new shape.


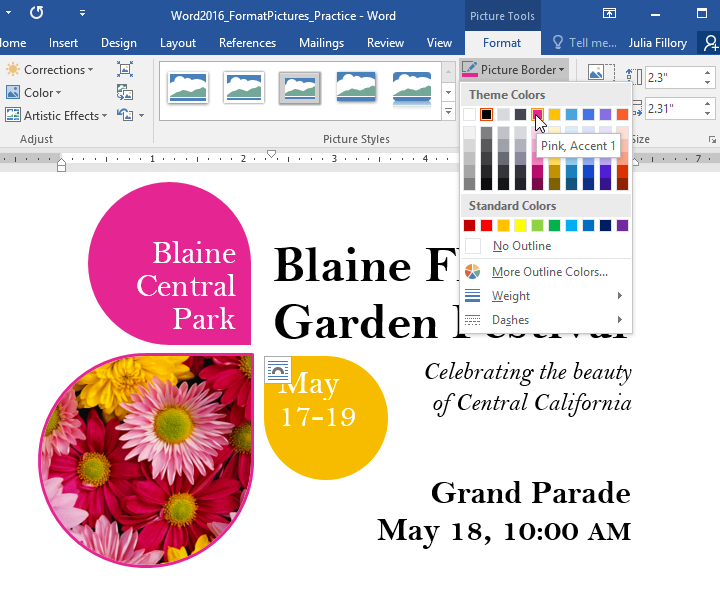
3. Frames and Borders
Borders are an easy way to dress up a picture in Microsoft Word. To add a border, select the picture, go to Picture Format. Click on the Picture Border button on the ribbon to reveal the border options.


From here, choose the color, weight, and dash style you wish to use for the border.


To add a frame, click on the picture, then go to Picture Format. Click on the Picture Quick Styles button on the ribbon. Select the border you want to use.


How to Use Image Editing Tools
There are many Word image editing tools. Learn how to format pictures in Word by removing the background or adjusting the brightness. Here’s how:
1. Remove Background
Microsoft Word allows you to remove the background from your pictures. This feature works best if the color of the background is distinct from the colors on the main subject of the picture.
To remove the background, select the image. Go to Picture Format > Remove Background.


Use the tools provided to select which parts of the image you wish to keep and which parts you want to remove.


The parts that’ll be removed are colored pink.
When you’re happy with the selection, click Keep Changes.


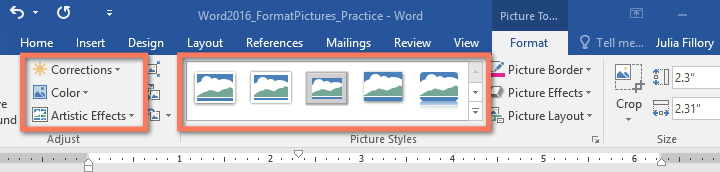
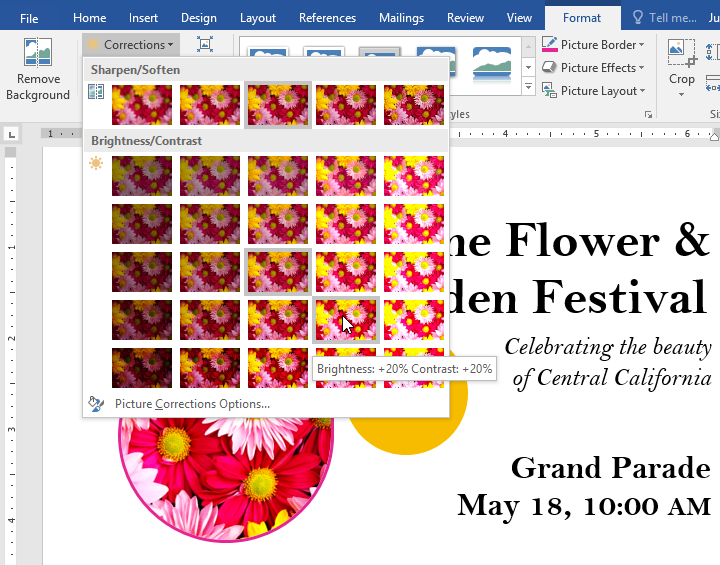
2. Sharpness and Brightness Corrections
Improve the sharpness and brightness of your pictures in Microsoft Word. To adjust these, select the picture. Go to Picture Format > Corrections. Select the sharpness and brightness/contrast settings you wish to use.


To more finely control these settings, go to Picture Format > Corrections > Picture Corrections Options. The Format Picture sidebar appears. It allows you to provide specific settings for sharpness, brightness, and contrast.


3. Picture Color
Microsoft Word also allows you to control the color saturation and tone of your picture. And you can recolor the entire picture for special effects. Select the picture, go to Picture Format > Color. Select any of the options that appear.


From here choose:
- More Variations. Recolors the image with a different color from the options provided.
- Set Transparent Color. Makes certain colors transparent so that the color of the background shows through.
- Picture Color Options. Opens the Format Picture sidebar, where you can fine-tune the settings for color saturation, tone, and recolor.
How to Use Layout Options
Microsoft Word’s layout options for images lets you control how photos are displayed alongside text.
By default, a picture is set to be «In line with text.» This means the picture is treated as an object that moves with the text. This means whatever formatting is applied to the text applies to the picture as well, which may not be how you want it to appear. When a picture is in line with text, you won’t be able to drag and drop it to a different part of the document.
To set up a picture’s layout options, select the image, then go to Picture Format > Position. Select one of the pre-configured layout options to position your picture on the page.


Gain more control by going to Picture Format > Wrap Text.


Select one of the text wrapping options:
- Square — wraps text around the picture in a square shape


- Tight — wraps text following the shape of the picture


- Through — shows text through all the “open” parts of the picture (may only be visible with certain picture shapes)


- Top and Bottom — wraps text only above and below the picture


These text wrapping options allow you to overlay pictures in Word or merge them together into a collage-type layout.
You’ve got other options:
- Behind text. Overlays the text in front of the picture
- In Front of Text. Places text behind the picture, covering it
- Edit Wrap Boundary. Lets you fine-tune how text wraps around the picture, which is especially useful if it’s irregularly shaped
- Move with text. Keeps the picture anchored to the text
- Fix position on page. Keeps the picture on the same position relative to the page, even if the text moves
- More Layout Options …. Gives you precise control over the picture layout
How to Move Pictures in Word and Arrange them on the Page
You may be wondering how to move a picture in Microsoft Word. The easiest way to move a picture is by clicking and dragging it. If this doesn’t work, the picture is probably set to be inline with text. Follow the instructions above to select a different text wrapping option.
To move multiple images, hold the shift key down as you click on each picture. Then, drag and drop them into place.
You can also move images using precise measurements. Select the image, go to Picture Format > Position > More Layout Options …. Specify the horizontal and vertical position of the picture relative to an element of the page.


Get Creative With Pictures in Word
Use the skills you learned above to add pictures in your Word documents and display them exactly the way you envision. As you’ve seen, it’s easy to control the appearance and placement of images on the page. By following the steps above, you can produce professional-looking documents all by yourself. However, we’ve only scratched the surface of the many ways you can work with pictures in Word!
Of course, if you prefer to have these design choices made for you, you’ve got the option to start with a Microsoft Word template. If you make a lot of Word documents, then you’ll like the cost-effectiveness of Envato Elements. You get unlimited downloads of templates as well as fonts, stock photos, and more for one low subscription price. On the other hand, GraphicRiver may be a better option if you only need the one-off template.
This gives you the ultimate convenience because professionally-designed Word templates have image placeholders. All you’ve got to do is to drag and drop your own pictures into the placeholders. The picture formatting steps in this article will help you fine-tune the image settings as you wish.
Now you, too, can get more creative—and effective—with pictures in Microsoft Word. But first, get your head start by downloading your favorite MS Word Template from Envato Elements or GraphicRiver.
Some documents have digital photographs and images created and saved in other programs that make documents entertaining or convey information better than words. These types of images are referred to as pictures.
Insert an image
To insert a picture in a Word document, on the Insert tab, in the Illustrations group, click the Pictures button, then choose the option you prefer:

- Select This Device to choose an image stored on the local computer, laptop, shared locations, or network server:

Select an image in the Insert Picture dialog box and click the Insert button.
- Select Stock Images to choose Stock Images, Icons, Cutout People, Stickers, and Illustrations from the stock image library:

Select one or several objects (see the number near the Insert label) and click the Insert button.
- Select Online Pictures to find and insert images from Bing, Microsoft’s search engine, or OneDrive:
Select one or a few objects (see the number near the Insert label) and click the Insert button.


Note: Another option is to insert the image as a linked object that creates a link between the document and the external image but does not embed the image in the Word document. Using linked objects can help minimize the file size of the final document while preserving images, photographs, and other objects that can take up storage space. However, if image files are not available when you open a Word document, the images are not displayed. This option is not recommended to create documents distributed to other users, as they may not access the images.
When you click on a picture, Word shows the Picture Format tab:

Using features from that tab, you can:
- Adjust picture characteristics:
- Remove the background by designating either the areas you want to keep or those you want to remove
- Sharpen, soften, and adjust the brightness of images for better printing or on-screen presentation
- Apply different color masks to achieve antiquing, sepia tone, grayscale, and a variety of other color effects
- Choose one of 23 special effects, such as pencil sketch, blurring, charcoal sketch, paint strokes, and others
- Apply effects such as shadows, reflections, and borders; or apply combinations of these effects
- Choose a picture transparency
- Compress the pictures in the document
- Format picture by using predefined picture styles or choosing some of the proposed features such as shape and orientation, borders, and other effects
- Arrange the picture to specify its relationship to the page and other elements on the page
- Crop the parts of the picture or crop the picture to a shape
- Resize, scale, and rotate the picture by using its sizing handles or appropriate fields in the Layout dialog box (see below)
- Position the object in any of several predefined locations on the page
- Specify how other text should wrap around the object.
Resize an image
To resize a picture, select it and do one of the following:
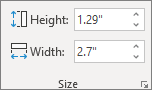
- On the Picture Format tab, in the Size group, change the Height and Width for the picture in the appropriate fields:

- Click and drag the side sizing handles to stretch it horizontally or vertically:


Scale an image
To scale a picture, select it and do one of the following:
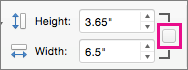
- On the Picture Format tab, in the Size group, click the dialog box launcher:
- Click and drag one of the corner sizing handles to maintain the image’s current shape. The image will change size while keeping the same proportions:
- Open the Layout dialog box by one of the methods:
- On the Picture Format tab, in the Size group, click the dialog box launcher.
- Right-click the selected picture and choose Size and Position… in the popup menu:


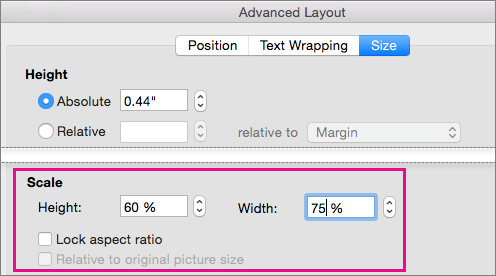
In the Layout dialog box, on the Size tab, in the Scale section:

- Rescale the picture by changing the height and width percentages.
- Select the Lock aspect ratio check box (selected by default) to scale the picture by height and width using the same percentage.
Deselect the Lock aspect ratio check box to scale height and width separately.
- Select the Relative to original picture size check box (selected by default) to scale the picture height and width as percentages of the original size.
Note: See the picture’s original size in the Original size section.
Rotate an image
To rotate a picture, do one of the following:
- Click and drag the rotation handle at the top of the border:

- Open the Layout dialog box by one of the methods:
- On the Picture Format tab, in the Size group, click the dialog box launcher.
- Right-click the selected picture and choose Size and Position… in the popup menu.
In the Layout dialog box, on the Size tab, select or type a rotation in the Rotation field.

Hide and display images on the page
The picture can be hidden using the Selection pane (see how to open it). For example, Picture 6:

To hide the picture, click the Showing icon ![]() to the right of the object name. After clicking that icon, it will change to a simple icon indicating that the object is Hidden
to the right of the object name. After clicking that icon, it will change to a simple icon indicating that the object is Hidden ![]() from view. To show the object once again, click the Hidden icon
from view. To show the object once again, click the Hidden icon ![]() , and it will reappear.
, and it will reappear.
Note: You can hide all images in the document by changing global Word options:

See Hiding pictures for more details.
Copy the formatting
To copy the formatting of one picture to another picture, do the following:
1. Select the formatted picture, which formatting you need to copy.
2. On the Home tab, in the Clipboard group, click the Format Painter button:

3. Click another picture to apply the color adjustments, color corrections, or picture style from the first picture.
Add an Alternative text for images
The Alternative text (Alt text) for pictures is a common requirement. By default, Word generates Alt text for all inserted pictures (see how to turn off that feature).
Alt text is:
- Read aloud when a screen reader will encounter such an image.
- Shown if there are some problems with displaying an image.
You can see the generated Alt text at the bottom of the object immediately after inserting it in a document:

or

To change or add Alt text to a picture, do the following:
1. Select the picture.
2. Open the Alt text pane by doing one of the following:
- On the Picture Format tab, in the Accessibility group, click the Alt Text button:

- Right-click and choose Edit Alt Text… in the popup menu:
- On the Review tab, in the Accessibility group, click the Check Accessibility button, then choose Alt Text:


3. On the Alt Text pane:

- Modify or enter an Alt text you need.
Alt text should briefly describe the purpose or content of the image, photo, icon, table, or equation. It is recommended to use no more than 15 words.
- Select the Mark as decorative check box if the picture is purely decorative and does not provide helpful information for the document content.
Note: If the option for automatic generation of Alt text for pictures is turned on (see how to turn on and turn off that feature), after modifying a generated Alt text, you can regenerate it by clicking the Generate a description for me:

See also how to create picture captions.
Word for Microsoft 365 Word for Microsoft 365 for Mac Word for the web Word 2021 Word 2021 for Mac Word 2019 Word 2019 for Mac Word 2016 Word 2016 for Mac Word 2013 Word 2010 Word for Mac 2011 More…Less
You can easily resize pictures, text boxes, shapes, and WordArt in your Office file. You can also remove unwanted portions of a picture by cropping it.
Resize a picture, shape, WordArt, or other object
-
Select the picture, shape, WordArt, or other object to resize.
-
To increase or decrease the size in one or more directions, drag a sizing handle away from or toward the center, while doing one of the following:
-
To keep the center in the same place, press and hold Ctrl while you drag the sizing handle.
-
To maintain the proportions, press and hold Shift while you drag the sizing handle.
-
To both maintain the proportions and keep the center in the same place, press and hold both Ctrl and Shift while you drag the sizing handle.

-
Note: Resizing a WordArt object doesn’t resize the text, only the container. If you want to resize the text, select the text and change the font size on the Home tab.
Resize an item to an exact height and width
-
Select the picture, shape, WordArt, or other object to resize.
To resize multiple objects at the same time, press and hold Shift while selecting each object.
-
Select Shape Format, Picture Tools Format, or Drawing Tools Format and enter the new measurements into Height and Width.
Notes:
-
If you don’t see Height and Width, press the down arrow in the Size group
-
-

If you’re not able to change the height and width independently, you’ll need to unlock the aspect ratio:
-
Select the dialog box launcher
in the Size group. -
Clear the Lock aspect ratio check box.
 in the Size group.
Resize to an exact proportion
-
Select the picture, shape, WordArt, or other object to resize.
To resize multiple objects at the same time, press and hold Shift while selecting each object.
-
Go to Shape Format, Picture Tools Format, or Drawing Tools Format, in the Size group, select the dialog box launcher
.Notes:
-
If your screen size is smaller, you might need to select the down arrow in the Size group to see the dialog box launcher.
-
-
-
To choose between the original or a different proportion, select or clear Lock aspect ration and enter a Scale percentage for Height or Width.
 .
.Resize a picture, shape, text box, or WordArt
Resize manually
-
Select the picture, shape, WordArt, or other object to resize.
-
To increase or decrease the size in one or more directions, drag a sizing handle away from or toward the center, while doing one of the following:
-
To keep the center of an object in the same place, press and hold CTRL while you drag the sizing handle.
-
To maintain the object’s proportions, press and hold SHIFT while you drag the sizing handle.
-
To both maintain the object’s proportions and keep its center in the same place, press and hold both CTRL and SHIFT while you drag the sizing handle.
-
Resize to an exact height and width
-
Select the picture, shape, WordArt, or other object to resize.
-
Under Picture Tools or Drawing Tools, on the Format tab, in the Size group, enter the measurements that you want into the Height and Width boxes.
-
In the Size group, select the Size and Position dialog box launcher
. -
On the Size tab, under Size and rotate, clear Lock aspect ratio.
Resize to an exact proportion
-
Select the picture, shape, WordArt, or other object to resize.
-
Under Picture Tools or Drawing Tools, on the Format tab, in the Size group, select the Size and Position dialog box launcher
. -
On the Size tab, under Scale, enter the percentages of the current height and width that you want to resize to, in the Height and Width boxes.
-
Clear the Lock aspect ratio check box.
Tip: To apply the same size to different objects, select all objects to have the same dimensions, and then set Height and Width. To select multiple objects, click the first object, and the press and hold SHIFT while you click the other objects.
Quickly resize a picture, shape, WordArt, or other object
-
Select the picture, shape, WordArt, or other object to resize.
-
To increase or decrease the size in one or more directions, drag a sizing handle away from or toward the center, while doing one of the following:
-
To keep the object’s center in the same place, press and hold the OPTION key while you drag the sizing handle.
-
To maintain an object’s proportions while resizing it, press and hold the SHIFT key while you drag a corner sizing handle.
-
-
Select the picture, shape, WordArt, or other object to resize.
-
Select Picture Format or Shape Format and then make sure the Lock aspect ratio check box is cleared.
-
Go to Picture Format or Shape Format and enter the measurements in the Height and Width boxes.

-
Select the picture, shape, WordArt, or other object to resize.
-
Go to Picture Format or Shape Format > Position > More Layout Options.
-
Go to Size and under Scale, make sure the Lock aspect ratio check box is clear.
Enter percentages you want for Height and Width.
-
Select OK when finished.
Tip: To apply the same dimensions to different objects, select all objects and then enter the dimensions in the Height and Width boxes. To select multiple objects, select the first object, and then press and hold SHIFT while you select the other objects.
Resize a picture, shape, WordArt, or other object
-
Select the picture, shape, WordArt, or other object to resize.
-
To increase or decrease the size in one or more directions, drag a sizing handle away from or toward the center, while doing one of the following:
-
To keep the center in the same place, press and hold Ctrl while you drag the sizing handle.
-
To maintain the proportions, press and hold Shift while you drag the sizing handle.
-
To both maintain the proportions and keep the center in the same place, press and hold both Ctrl and Shift while you drag the sizing handle.
-
Note: Resizing a WordArt object doesn’t resize the text, only the container. If you want to resize the text, select the text and change the font size on the Home tab.
For more precise control, use the desktop version of Word Size options on the Picture Tools Format tab or the Drawing Tools Format tab.
Need more help?
Want to make your Word document more attractive? Then inserting images will do that job. Do you know how to insert and format images in Word Document? Here, I am giving you an easy method to insert and format pictures in a word (Microsoft 365 Word and MS Word) document. In this article, I am showing you, how to insert pictures in word and how to format pictures.
You can also do some modifications to the image as well as just adding an image. You can use MS word very effectively if you know how to use it. This tutorial is a part of my MS word tutorial.
- You may also like: How to insert and remove watermark in word
- Simple tips to insert, remove and edit hyperlink in word
Table of Contents
Video Tutorial:
Some people interested to watch video tutorials instead of reading the article which takes more time. For those who are willing to watch video tutorial we have provided the following video. You can understand the entire article with this video tutorial.
1. How to Insert Pictures?

Word documents generally need some pictures for more clarification about the content that you have entered. So in order to make the document more professional and detail we will insert pictures. In this section, we are going to see how to insert pictures into Microsoft 365 word document, follow the below steps.
Total Time: 3 minutes
Step 1: Open document and click Insert

The first thing you need to do is, open the word document in Microsoft 365 in which you want to insert the pictures. Once you open the document you will see many options for editing and viewing that document.
In that Microsoft 365 menu bar, you will see a list of options like File, Home, Insert, Layout, etc. Click on Insert option as shown in the below image.

Step 2: Click on Picture

When you click on the Insert menu then options in that menu will be displayed on the screen just below that menu bar. Our requirement is to insert the pictures so click on the Picture option as shown in the above image.
Step 3: Select a way for insertion

Once you click on the picture option then it will display three options for inserting pictures. Those are This device, Stock images, Bing images.
If you want to insert the pictures which are stored on your device then click on the “This device” option.
If you want to insert the pictures from online then click on the Stock images or Bing pictures which you wish.
Here I clicked on the stock images, so the result images are shown as below. Select any one or more images from those images and then click on the Insert option which is placed at the bottom of the Stock images screen.


This is the procedure for inserting pictures into Microsoft 365 Word document.
Estimated Cost: 9.99 USD
Supply:
- Microsoft 365
Tools:
- Microsoft 365
Materials: software
2. How to format pictures?
In the previous section, we have seen the procedure for inserting pictures into Microsoft 365 Word document. In this section we will see how to format those inserted pictures.
- Open the document
- Give a Double-click on the picture which you want to format
- Now Format options will open for that picture

You can apply Styles for Picture, you can crop it, rotate it, or even you can reduce/increase the size by changing the height, width. Use those options for formatting pictures.
In Older MS word document:
Note: It is not recommended to use the older version of word. We recommend buying Microsoft 365 for the best features.
3. How to Insert Pictures?
Video Tutorial:
Understand this whole article just in 2 mins with this tutorial video.
You can insert pictures in word by following two methods.
i). Using Insert option:
- Open word document.

- Place the cursor where you want to insert the image.
- Click “Insert” on the top menu.
- Click “picture”. You will see a window from where you can browse your computer folders.
Select the image. You will see selected picture in word document.
ii). Using Copy, Paste method
- Open the folder where your image is stored.
- Copy image using Ctrl+C or any other method (Give a right-click and then copy option)
- Open word document.
- Place the cursor where you want to insert the image. Paste the image using Ctrl + V or any other method.
Now you have inserted image. Word Document will be like below figure.

You can do modifications to this image. Now let us discuss, how to format pictures in word.
4. How to format Pictures?
- Select picture.
- Click on “Format” in the top menu. Now you can see all the options available to modify the picture.
- In the middle, you will see “Picture styles” options. Place the cursor on any style, you will see a change in the picture.

- Left side you will see options to change brightness, contrast, and to refill the color. Click any option to change the property.
- Right side you will see options to change the Picture shape, picture border. Click on any option to change the property.
- You can apply effects like 3D, shadow, reflection, bevel, or glow by going into the “Effects” option. For example, I will show you how to apply the 3D effect.
How to apply 3D effects to Pictures in word?
- Click “Picture Effects”. You will see possible options shows that in the below screenshot.
- Go to “3-D Rotation”. You will see all the possible 3D models.
- Place the cursor on any model you will see a change in the picture effect.

Conclusion:
I hope you like this tutorial about how to insert and format pictures in Microsoft 365 Word and Older version MS word document. Once again we recommend to buy Microsoft 365. Because it gives you many features.
If you like it, do me favor by sharing it with your friends and follow WhatVwant on Facebook and Twitter for more tips. Subscribe to whatVwant channel on YouTube for regular updates.
How to Insert and Format pictures in Microsoft 365 Word and MS Word document?- FAQ
Can I insert multiple Pictures at a time into Word document?
Yes, you can insert multiple pictures at a time. While you are selecting pictures for insertion select multiple pictures instead of single picture.
Can I insert pictures directly from my web browser?
Yes, you can insert pictures from web browser into Word document.
Can I replace the picture from one place to another place in document?
Yes, you can replace the picture from one place to another by using cut and paste options. Place the cursor on the picture, give a right click and click on the Cut option from available options or press Ctrl+X. Now place the cursor in a place to which you want to replace and click paste or press Ctrl+V.
![]()
Download Article
Free steps to turn a picture into a Word document that you can edit
![]()
Download Article
- Using OnlineOCR
- Using a PDF on Windows
- Using a PDF on Mac
- Tips
- Warnings
|
|
|
|
Don’t you wish you could open a JPEG image in Microsoft Word and make changes to the text? While that might seem impossible, we’ve actually found two easy ways to get the job done—one is to scan for text using an online OCR tool, and the other is to simply «print» the JPEG to a PDF and then convert it to a Word document that you can edit. This wikiHow article teaches you how to easily convert a JPEG into an editable Word document.
Things You Should Know
- Use an online service, like OnlineOCR, to convert your images into editable Word documents. Just go to the website and select your JPEG to convert to PDF.
- For Mac or Windows computers, use Preview or Photos to change your JPEG to PDF.
- Once the JPEG is a PDF, you can open it in Word to edit the text!
-
1
Open OnlineOCR. Go to https://www.onlineocr.net/ in your computer’s web browser. This website will allow you to convert a few different file types (JPEG included) into a Word document.
- You can also use other online services if you don’t want to use OnlineOCR. Try Small PDF or a similar PDF converter.
-
2
Click Select file…. It’s in the lower-left side of the webpage. Doing so opens a File Explorer (Windows) or Finder (Mac) window in which you can select your JPEG file.
Advertisement
-
3
Select your JPEG file. Go to the folder in which your JPEG is stored, then click once the JPEG file you want to convert.
-
4
Click Open. It’s in the bottom-right corner of the window. Doing so uploads the JPEG file to the OnlineOCR website.
- On a Mac, you may click Choose here.
-
5
Select a language. If you want to use a language other than the one listed in the middle text box, click the current language and then click the language you want to use.
-
6
Make sure you’re converting to a Word document. If the third text box doesn’t have «Microsoft Word (docx)» written in it, click the text box and then click Microsoft Word (docx) in the drop-down menu.
-
7
Click CONVERT. It’s on the far-right side of the page. Doing so prompts OnlineOCR to begin converting your JPEG file into a Word document.
-
8
Click Download Output File. This link is below the Select file… button. Your converted Word document will download onto your computer.
- Depending on your browser’s settings, you may need to select a save location or confirm the download before the file will download.
-
9
Open your new Word document. Double-click the converted Word document to do so.
-
10
Click Enable Editing. It’s in a yellow bar at the top of the Word document. Doing so will make the Word document editable.
- This is necessary because, since you downloaded the Word document from the Internet, Word views it as potentially dangerous.
- Remember to save any changes you make by pressing Ctrl+S (Windows) or ⌘ Command+S (Mac).


Advertisement
-
1
Open the JPEG file you want to convert. Double-click the JPEG file to do so. This will open the JPEG file in the Photos app.
-
2
Click the «Print»
icon. It’s the printer-shaped icon in the top-right corner of the window. Doing so opens the Print window.
- Don’t panic if you don’t have a printer attached to your computer—you won’t actually be printing anything.
-
3
Click the «Printer» drop-down box. This is at the top of the Print window. A drop-down menu will appear.
-
4
Click Microsoft Print to PDF. It’s in the drop-down menu.
-
5
Click Print. This is at the bottom of the window. A pop-up window will appear.
-
6
Enter a name. In the «Name» text field, type in the name you want to use for your converted document.
-
7
Select a save location. Click a folder name (e.g., Desktop) on the left side of the window.
-
8
Click Save. It’s at the bottom of the window. Doing so saves a PDF version of your JPEG file in your selected folder.
-
9
Go to the PDF’s location. You’ll find it in the folder you selected before saving the PDF.
-
10
Right-click the PDF. Doing so prompts a drop-down menu.
-
11
Select Open with. This is in the drop-down menu. A pop-out menu will appear.
- If you don’t see Open with in the drop-down menu, click anywhere to close the drop-down menu, then click once the PDF to select it before you right-click it again.
-
12
Click Word. It’s in the pop-out menu. Microsoft Word will open.
-
13
Click OK when prompted. Word will begin attempting to convert the PDF into a Word document.
- This may take a few minutes.
-
14
Review your Word document. The PDF-to-Word conversion process isn’t perfect, so you may need to clean up some of the text or remove images that aren’t properly positioned.[1]
- If your document isn’t entirely editable or a large group of the document’s text is inaccurate, you might want to use Online OCR instead.


Advertisement
-
1
Select your JPEG file. Go to the folder location of the JPEG file that you want to convert, then click once the file to select it.
-
2
Click File. It’s a menu item at the top of the screen. A drop-down menu will appear.
-
3
Select Open With. This is in the File drop-down menu. Selecting it prompts a pop-out menu to appear.
-
4
Click Preview. It’s in the pop-out menu. Doing so opens the JPEG file in Preview.
-
5
Click File again. The drop-down menu will reappear.
-
6
Click Export as PDF…. This is in the drop-down menu. Clicking it prompts a new window to appear.[2]
-
7
Select a save location. Click the «Where» drop-down box, then click the name of the folder in which you want to save your converted PDF.
-
8
Click Save. It’s at the bottom of the window.
-
9
Select your new PDF. Go to the folder in which you saved the PDF version of your JPEG file, then click the PDF to select it.
-
10
Click File, then select Open With. The Open With pop-out menu will open.
-
11
Click Microsoft Word. This should be in the pop-out menu. Doing so will open Microsoft Word.
- If you don’t see Word here, you can still open the PDF by opening Word, clicking File, clicking Open, and selecting the PDF in the Finder window that appears.
-
12
Click OK when prompted. Word will begin attempting to convert the PDF into a Word document.
- This may take a few minutes.
-
13
Review your Word document. The PDF-to-Word conversion process isn’t perfect, so you may need to clean up some of the text or remove images that aren’t properly positioned.[3]
- If your document isn’t entirely editable or a large group of the document’s text is inaccurate, you might want to use Online OCR instead.


Advertisement
Our Most Loved Articles & Quizzes
Ask a Question
200 characters left
Include your email address to get a message when this question is answered.
Submit
Advertisement
-
The higher the quality of the JPEG file, the better results you’ll have when converting it to a Word document.
Thanks for submitting a tip for review!
Advertisement
-
OCR technology isn’t perfect, so you may need to make some adjustments to your Word document before it resembles accurately the JPEG file’s contents.
Advertisement
About This Article
Thanks to all authors for creating a page that has been read 533,000 times.
Is this article up to date?
Lesson 19: Formatting Pictures
/en/word/pictures-and-text-wrapping/content/
Introduction
There are many ways to format pictures in Word. For instance, you can change the size or shape of an image to better suit your document. You can also enhance its appearance using Word’s image adjustment tools.
Optional: Download our practice document.
Watch the video below to learn more about formatting pictures.
To crop an image:
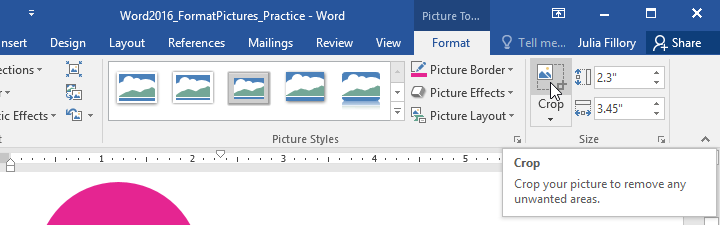
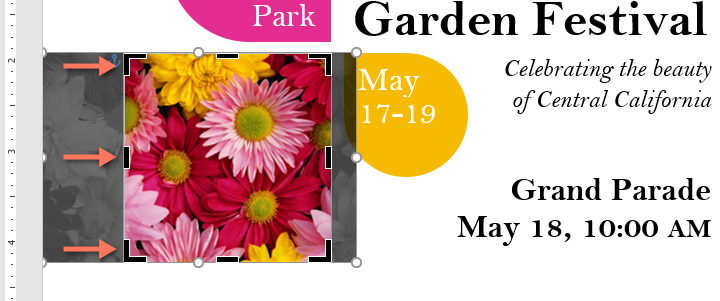
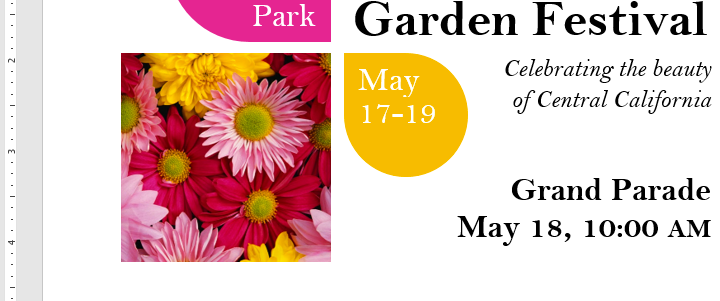
When you crop an image, part of the picture is removed. Cropping can be useful if you’re working with an image that’s too big and you want to focus on only part of it.
- Select the image you want to crop. The Format tab will appear.
- From the Format tab, click the Crop command.
- Cropping handles will appear on the sides and corners of the image. Click and drag any handle to crop the image. Because the cropping handles are near the resizing handles, be careful not to drag a resizing handle by mistake.
- To confirm, click the Crop command again. The image will be cropped.
The corner handles are useful for simultaneously cropping the image horizontally and vertically.
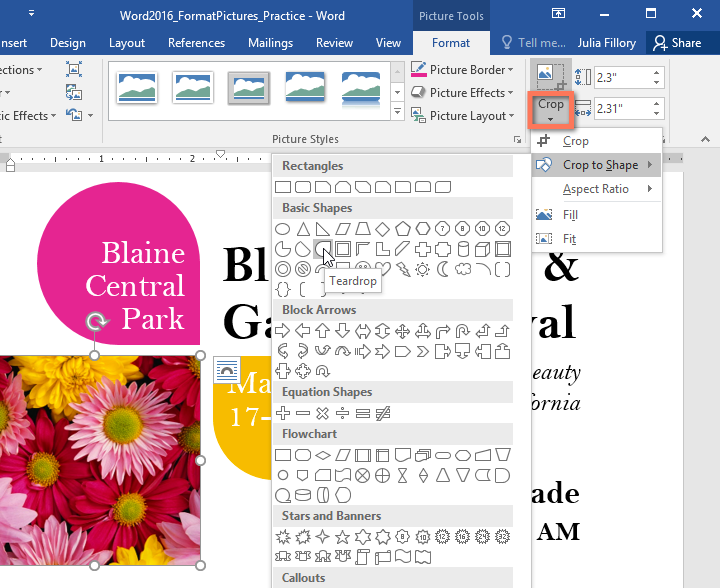
To crop an image to a shape:
- Select the image you want to crop, then click the Format tab.
- Click the Crop drop-down arrow. Hover over Crop to Shape, then select the desired shape from the drop-down menu.
- The image will be cropped to the chosen shape.
To add a border to a picture:
- Select the picture you want to add a border to, then click the Format tab.
- Click the Picture Border command. A drop-down menu will appear.
- From here, you can select a color, weight (thickness), and whether the line is dashed.
- The border will appear around the image.
Making image adjustments
With Word’s image adjustment tools, you can easily change properties like color, contrast, saturation, and tone. Word also offers built-in picture styles, which can be used to add a frame, drop shadow, and other predefined effects.
When you’re ready to adjust an image, simply select it. Then use the options below, which can be found on the Format tab.
Corrections
From here, you can sharpen or soften the image to adjust how clear or blurry it appears. You can also adjust brightness and contrast, which affect the image’s lightness and general intensity.
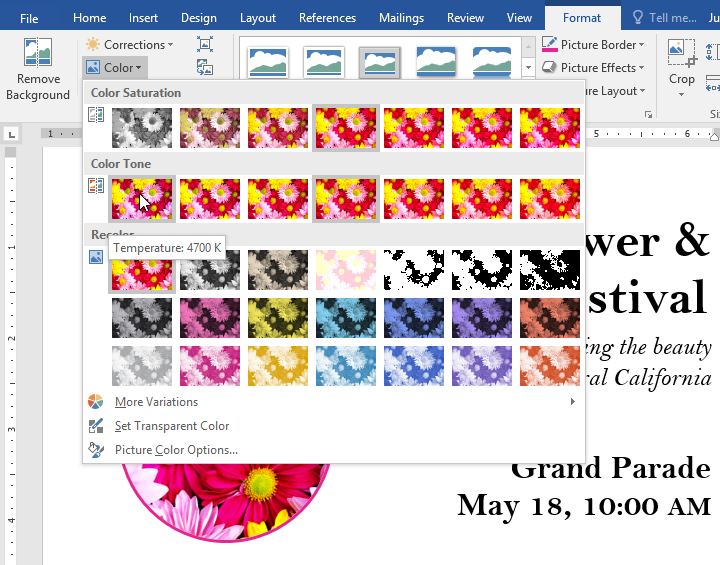
Color
Using this command, you can adjust the image’s saturation (how vibrant the colors appear), tone (the color temperature of the image, from cool to warm), and coloring (the overall tint of the image).
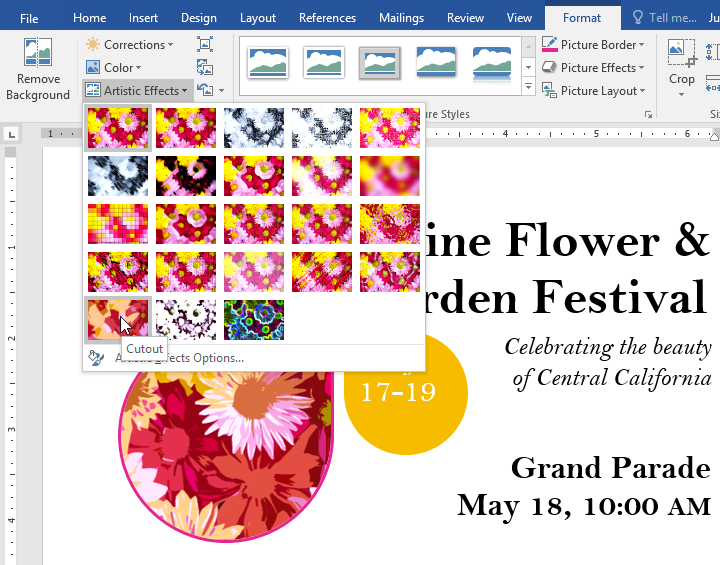
Artistic Effects
Here, you can apply special effects to your image, such as pastel, watercolor, or glowing edges. Because the results are so bold, you may want to use these effects sparingly (especially in professional documents).
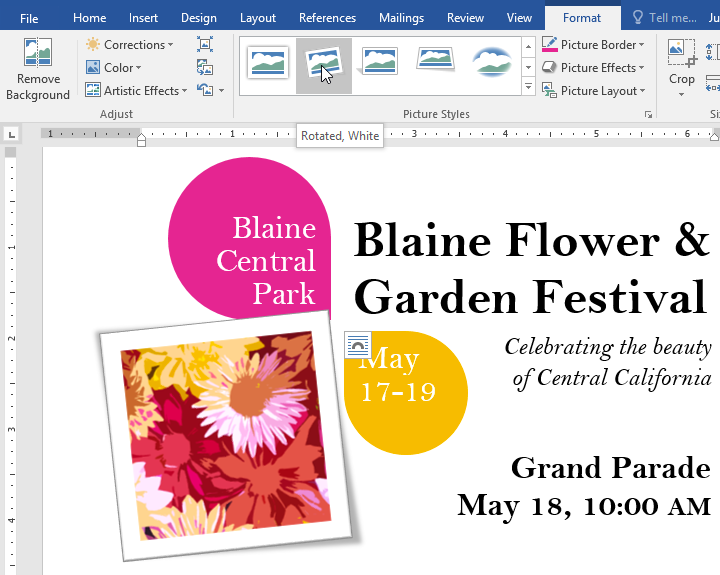
Picture Styles group
This group contains different predefined styles that make image formatting even easier. Picture styles are designed to frame your image without changing its basic settings or effects.
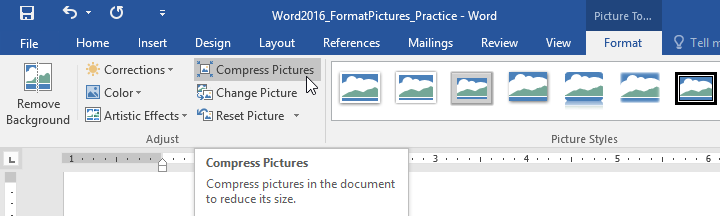
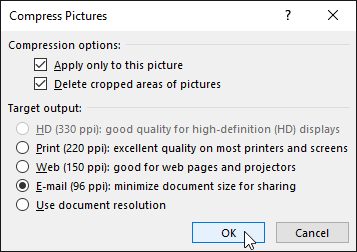
Compressing pictures
If you plan to email a document that contains pictures, you’ll need to monitor its file size. Large, high-resolution images can cause your document to become very large, which may make it difficult to attach to an email. Additionally, cropped areas of pictures are saved within the document by default, which can add to the file size.
Thankfully, you can reduce your document’s file size by compressing your pictures. This will lower their resolution and delete cropped areas.
Compressing a picture may noticeably affect its quality (for instance, the image may become blurry or pixelated). Because of this, we recommend saving an extra copy of your document before compressing pictures. Also, be prepared to use the Undo command if you’re dissatisfied with the results.
To compress a picture:
- Select the picture you want to compress, then navigate to the Format tab.
- Click the Compress Pictures command.
- A dialog box will appear. Check the box next to Delete cropped areas of pictures. You can also choose whether to apply the settings to this picture only or to all pictures in the document.
- Choose a Target output. If you are emailing your document, you may want to select Email, which produces the smallest file size.
- Click OK.
Challenge!
- Open our practice document.
- Scroll to page 2 and select the picture of the sailboats.
- In the Format tab, change the style to Simple Frame, White.
- With the picture still selected, use Crop to Shape and crop to the Double Wave shape in the Stars and Banners category. Hint: The shape names will appear when you hover over them.
- Select the picture of the anchor.
- In the Format tab, use the Color drop-down menu to re-color the anchor to Gold, Accent color 2 Light.
- When you’re finished, your page should look like this:


/en/word/shapes/content/
This tutorial shows how to insert images in Microsoft Word. We will also look at how to resize images, align images with the text, and add a border.
Quick Links:
- How to Insert an Image
- How to Resize an Image
- How to Align an Image with the Text
- How to Add a Border to an Image
Do you want to insert shapes instead of images? Please see “How to Insert and Modify Shapes in Microsoft Word (PC & Mac).”
This tutorial is also available as a YouTube video showing all the steps in real time.
Watch more than 200 other writing-related software tutorials on my YouTube channel.
The images below are from Word for Microsoft 365. These steps also apply to Word 2021, Word 2019, Word 2016, and Word 2013. However, the stock image options will be limited in those older versions of the software.
- Place your cursor where you want to insert the image. (This is an approximate placement. You can change the alignment with the text after inserting the images, as shown in the section below.)
- Select the Insert tab in the ribbon.

- Select the Pictures button in the Illustrations group.

- Select the location of the image from the Insert Picture From menu:
-
- This Device lets you choose an image stored on your computer or network server.
- Stock Images lets you choose stock images, icons, cutout people, stickers, and illustrations. The full stock image library is only available to users signed into Word for Microsoft 365.
- Online Pictures lets you search for images through Bing, Microsoft’s search engine. This option also provides a link to OneDrive.

For this tutorial, we will insert an image stored on the device.
- (For “This Device” option only) Locate the image in the Insert Picture dialog box.

- Select the Insert button.

Your image should now appear in your Word document.
How to Resize an Image in Microsoft Word
- Select the image. A border with resizing handles will appear when the image is selected.
- Select one of the resizing handles and then drag the image to a new size.
Pro Tip: Choose a corner handle to maintain the image’s current shape.

Optional Steps: How to Rotate an Image in Microsoft Word
- Select the image.
- Select the rotation handle at the top of the border.
- Rotate the image to the left or right.

How to Align an Image with the Text in Microsoft Word
- Select the image.
- Select the Layout Options button.

- Select an option from the layout menu:
-
- In Line with Text
- Square
- Tight
- Through
- Top and Bottom
- Behind Text
- In Front of Text
The visual effectiveness of each option will depend on the size of your image and the density of your text. So, you may need to experiment with several options to find the one most suited to your content.

Pro Tip: If you select an option other than In Line with Text, you can select and “grab” the image, and then move it almost anywhere in the document.
How to Add a Border to an Image in Microsoft Word
- Select the image.
- Select the Picture Format tab in the ribbon. (This tab only appears when an image is selected.)

From here, you can add a built-in border or edge effect or manually create a border.
How to Add a Built-In Border or Edge Effect to an Image
- Select the bottom menu arrow in the Picture Styles group.
![]()
- Select a frame or other edge effect from the Picture Styles menu.

Your new border or edge effect should appear immediately.

How to Add a Manual Border to an Image
- Select Picture Border in the Picture Styles group.

- Select a color from the drop-down menu.

- Reselect Picture Border, select Weight, and then choose a line thickness.

- Reselect Picture Border, select Dashes, and then choose a line style.

Your new manual border should appear immediately.

Documents with a lot of images can negatively affect Word’s performance. If you notice Word reacting slowing, please see “How to Make Microsoft Word Faster by Hiding Images.”
Related Resources
How to Write Figure Captions for Graphs, Charts, Photos, Drawings, and Maps
How to Insert Figure Captions and Table Titles in Microsoft Word
How to Change the Style of Table Titles and Figure Captions in Microsoft Word
How to Update Table and Figure Numbers in Microsoft Word
How to Save Tables and Figures as Images in Microsoft Word (PC & Mac)
Updated February 20, 2023
How to Edit, Reposition, and Compress Images in Microsoft Word
Ways to work with images in Word
Updated on October 17, 2021
When you insert an image in a Microsoft Word document, resize and position it to customize the document layout and choose how the text appears around the image, for example, have it seamlessly wrap around the photo. An image with a large file size can be compressed so that the document downloads quickly from a web page or is suitable for an email attachment. And, for images that need more explanation, add a caption.
Instructions in this article apply to Word for Microsoft 365, Word 2019, Word 2016, Word 2013, and Word 2010. For Microsoft Word Online, disable the Simplified Ribbon.
How to Insert a Picture in Word
The easiest way to insert a picture is to drag the photo from Windows File Explorer to the Word document. However, if you want more control over the image placement, use the Word Insert menu.
-
Place the cursor where you want the image to appear.
-
Go to the Insert tab, then select Pictures. In Word 2010, select Picture. In Word Online, select Picture or Online Pictures.
-
In the Insert Picture dialog box, choose an image to insert into the document, then select Insert or Open.
To insert several images simultaneously, hold Ctrl and select each image.
-
To move the image, drag the image to a different location in the document.
How to Edit the Picture Size in Word
Ideally, pictures should be enhanced in a photo editing program, but Microsoft Word contains a few simple editing tools. To quickly resize a photo in Word, select the image, then drag a sizing handle in or out to make the picture smaller or larger.
To set a specific size for the image:
-
Right-click the image, then select Size and Position.
-
In the Layout dialog box, go to the Size tab and select Lock aspect ratio to ensure that the height and width remain proportional.
-
Change the value in the Height or Width text box to adjust the size of the image in inches.
To change the height and width by percentage, go to the Scale section and change the Height or Width value. For example, make the image 75% or 120% of the size it was.
-
Select OK.
How to Compress an Image in Word
Compressing photos in Word reduces the file size of documents that contain images.
Images cannot be compressed in Word Online.
-
Select the picture you want to compress.
To compress all the images in a Word document, select any photo.
-
Go to the Picture Format tab and select Compress Pictures.
-
In the Compress Pictures dialog box, select Apply only to this picture to compress only the selected image. Clear the Apply only to this picture check box to compress all the photos in the Word document.
-
Select Delete cropped areas of pictures to remove the parts of the images that were cropped.
Cropped areas are hidden so that you can undo the crop. When cropped areas are deleted, file size is reduced because cropped pieces are permanently removed.
-
In the Resolution section, choose a resolution or target output option to compress the image and save it with a specific number of pixels per inch, which indicates the picture quality. If you’re not sure what to select, choose Use default resolution or Use document resolution.
-
Select OK.
How to Edit the Picture Layout in Word
Word provides a variety of options that change the layout of pictures. For example, have the text wrap around the photo or insert the picture inline with the document text.
To change how the image appears in the document, select the image, then go to the Layout tab. In Word 2013 and 2010, go to the Format tab. In the Arrange group, you’ll find options that allow for more precise placement of the image and the content that surrounds it.
- Select Position, then choose where the image should appear on the page.
- Select Wrap Text, then choose how the text should flow around the image.
Hover over an option to see a preview of how the layout or text wrapping will appear in the document.
In Word Online, you can only customize the wrap text options, not the image layout. To make this adjustment, select Format > Wrap Text.
How to Add a Caption to a Photo in Word
A caption clarifies your picture to readers. It can be used to attribute the photo to a specific source or to reference a picture in another part of the document.
Captions are not supported in Microsoft Word Online.
To add a caption, right-click the image and select Insert Caption. In the Caption dialog box, enter a caption, then choose the type of label and the position of the caption. Select Numbering to configure automatic captioning based on a specific number style or chapter number.
To edit the caption, highlight the text and type a new caption.
Thanks for letting us know!
Get the Latest Tech News Delivered Every Day
Subscribe
Microsoft Word interface
When you open Word for the first time, you can see the Start Screen. From here, you’ll be able to create a new document or choose from many available templates, or to get access your recently edited documents.

Action: On the Start Screen, locate and select Blank document to access the Word interface (see highlighted on the screen below).

Working with the Word interface
Microsoft Word 2016 continues to use features like the Ribbon and the Quick Access Toolbar—where you will find commands to perform common tasks in Word—as well as Backstage view.
Ribbon
Microsoft Word uses a Ribbon interface instead of traditional menus. The Ribbon contains multiple tabs, with key functions, which you can find near the top of the Word window. Tabs represent key functions user can using Word: File, Home, Insert, Design, Layout, References, Mailings, Review, View and Help:

You can expand information in each group by clicking “small arrow”.

Once you click on the small arrow you will see additional information on related group (below example captures additional information on the font group)

Users can zoom in and zoom out the document, using controls in the bottom right corner. User can click plus or minus buttons or drag the slider to change the zoom

User can switch between different views of the document by using controls to the left of the zoom interface:
- Read Mode
- Print Layout
- Web Layout

Copy, Cut and Paste Text
To perform any operations you need to select text first
Once text is selected click Copy function in Clipboard group on the ribbon

To Cut text click Cut function in Clipboard group on the ribbon

After copy is completed you can paste the text by putting cursor into the new place and clicking Paste button

If you would like to learn more about Microsoft Word to for your interview make sure to click on the link below to get a discounted price on the training course:
%CODE-MASTER-MICROSOFT-WORD-BEGINNER-TO-ADVANCED%