
You can add shapes, such as boxes, circles, and arrows, to your documents, email messages, slide shows, and spreadsheets. To add a shape, click Insert, click Shapes, select a shape, and then click and drag to draw the shape.
After you add one or more shapes, you can add text, bullets, and numbering to them, and you can change their fill, outline, and other effects on the Format tab.
Tip: You can add individual shapes to a chart, or add shapes on top of a SmartArt graphic to customize the chart or the graphic.
Add a shape in Excel, Outlook, Word, or PowerPoint
-
On the Insert tab, click Shapes.

-
Click the shape you want, click anywhere in the workspace, and then drag to place the shape.
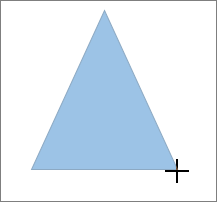
To create a perfect square or circle (or constrain the dimensions of other shapes), press and hold Shift while you drag.


To follow these steps, you need to open or create a report. To do that, on the Report tab, click Recent to open an existing report, or click More Reports to select a report from the list in the Reports dialog box or create a new report.
-
In the open report, on the Design tab, click Shapes.
-
Click the shape you want, click anywhere in the workspace, and then drag to place the shape.
To create a perfect square or circle (or constrain the dimensions of other shapes), press and hold Shift while you drag.
Insert a shape, or click an existing shape, and then enter text.
-
Right-click the shape and click Add Text or Edit Text, or just start typing.
Note: The text that you add becomes part of the shape — if you rotate or flip the shape, the text rotates or flips also.
-
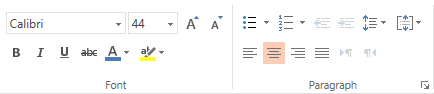
To format and align your text, click the Home tab, and then choose options from the Font, Paragraph, or Alignment groups, depending on the program you’re using and what kind of formatting you want to apply. (Text formatting options are limited in Project.)
Note: These commands aren’t available in Project.
-
Click the shape you want to change.
To change multiple shapes, press Ctrl while you click the shapes that you want to change.
-
On the Format tab, in the Insert Shapes group, click Edit Shape
, point to Change Shape, and then click the new shape that you want.
 , point to Change Shape, and then click the new shape that you want.
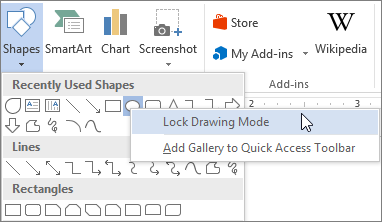
If you need to add the same shape repeatedly, you can do so quickly by using Lock Drawing Mode.
Note: Instead of adding individual shapes to create a drawing, you might want to Choose a SmartArt graphic. In a SmartArt graphic, the arrangement of the shapes and the font size in those shapes is updated automatically as you add or remove shapes and edit your text.
-
On the Insert tab, click Shapes.
-
Right-click the shape you want to add, and then click Lock Drawing Mode.
-
Click anywhere in the workspace, and then drag to place the shape.
-
Repeat step 3 to add the shape as many times as you like.
Tip: To create a perfect square or circle (or constrain the dimensions of other shapes), press and hold Shift while you drag.
-
After you add all the shapes you want, press Esc to turn off Lock Drawing Mode.
Note: This feature isn’t available in Project.
-
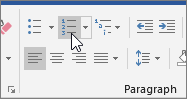
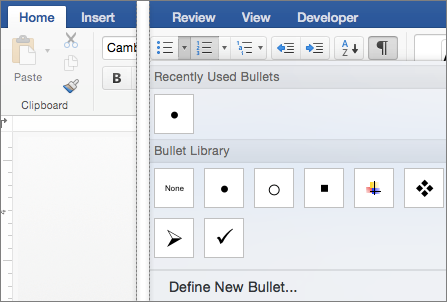
Select the text in the shape that you want to add bullets or numbering to.
-
Select the Home tab on the ribbon, and in the Paragraph group, select Bullets or Numbering.
You can find different bullet styles and numbering formats by clicking the down arrow next to Bullets or Numbering.
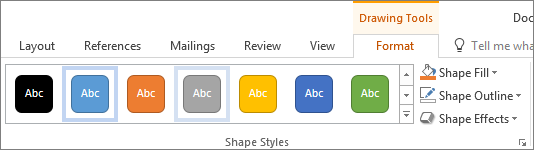
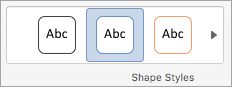
Quick Styles let you apply a style to your shape with one click. You’ll find the styles in the Quick Style gallery. When you rest your pointer over a Quick Style thumbnail, you can see how the style affects your shape.
-
Click the shape you want to change.
-
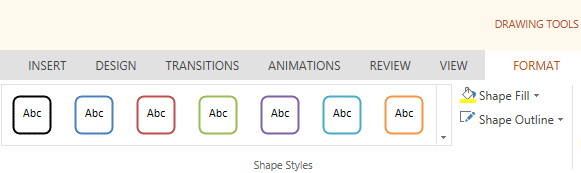
Select the Format tab, and in the Shape Styles group, select the Quick Style you want to use.
To see more Quick Styles, click the More button
.
 .
.Click the shape that you want to delete, and then press Delete. To delete multiple shapes, press Ctrl while you click the shapes that you want to delete, and then press Delete.
See Also
Draw or delete a line, connector, or freeform shape
Rotate a text box, shape, WordArt, or picture
Change the colors in a text box or shape
Draw a decorative line in Word or Outlook
Choose a SmartArt graphic
Create a chart from start to finish
Add clip art to a file
Draw and sketch notes on a page
After adding a shape to a document, you can modify it by adding connector lines, changing the style, adding a mirror image, changing the color, and applying a variety of other effects, such as shadows, glow, and 3-D.
Add a shape
-
On the Insert tab, click Shapes.
-
Click the shape you want, click anywhere in the workspace, and then drag to place the shape.

-
Right-click the shape and click Add Text or Edit Text, or just click inside the shape and start typing .
Note: The text that you add becomes part of the shape — if you rotate or flip the shape, the text rotates or flips also.
-
To format and align your text, click the Home tab, and then choose the available formatting options. For example, you can change font color, styles, sizes, change alignment or indentation, change the text orientation, to name a few.
-
Click the shape you want to change.
To change multiple shapes, press
while you click the shapes you want to change. -
On the Shape Format tab, click
, point to Change Shape, and click the new that you want.
 while you click the shapes you want to change.
 , point to Change Shape, and click the new that you want.
-
Select the shape you want to copy.
-
Press the option key and drag the shape anywhere you want. Release the mouse, and a copy of the shape is created. You can drag and release the shape as many times as necessary.
Note: Adding lists is not available in Excel 2016 for Mac.
-
Select the text in the shape that you want to add bullets or numbering to.
-
On the Home tab, click the arrow next to Bullets or Numbering.
-
Press Enter every time you want a new bullet or number, or press Enter twice to end the list.
-
Click the shape you want to change.
-
Click the Shape Format tab, and in the style gallery, click the style you want.
To see more styles, click
below the style gallery.
 below the style gallery.
-
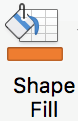
Click the shape you want to change.
-
Click the Shape Format tab, and click
(Shape Fill icon). -
Do one of the following:
-
To use a different fill color, under Theme Colors or Standard Colors, click the color that you want to use.
-
To remove the color from the selected chart element, click No Fill.
-
To use a fill color that is not available under Theme Colors or Standard Colors, click More Fill Colors. In the Colors dialog box, use the available options to pick a color, and then click OK.
-
To fill the shape with a picture, click Picture. In the Insert Picture dialog box, click the picture that you want to use, and then click Insert.
-
To use a gradient effect for the selected fill color, click Gradient, and then click the gradient style that you want to use.
For additional gradient styles, click More Gradients, and then in the Format Chart Area pane, under Fill, click the gradient options that you want to use.
-
To use a texture fill, click Texture, and then click the texture that you want to use.
-
 (Shape Fill icon).
-
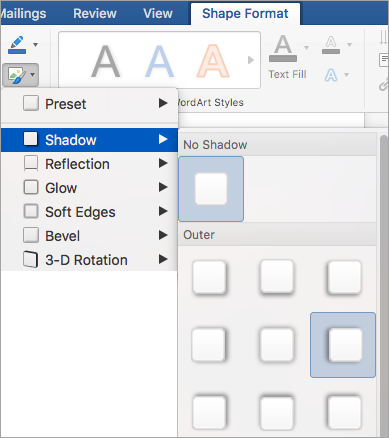
Click your shape, and then click the Shape Format tab.
-
In the Shape Styles group, click Shape Effects, point to an effect category, and then click the effect that you want.
-
On the Shape Format tab, click Format Pane.
-
In the Format Shape pane, click the Fill & Line tab, and then click either Fill or Line.
-
Drag the Transparency slider to achieve the effect you want.


Click the shape that you want to delete, and then press Delete. To delete multiple shapes, press Command while you click the shapes that you want to delete, and then press Delete.
See also
Change the size of an object
Crop a picture
Move, rotate, or group a picture, text box, or other object
Align objects in Word for Mac
Group or ungroup objects
You can add shapes, such as boxes, circles, and arrows, to your workbooks and presentations. (Word for the web doesn’t support shapes.) To add a shape, select Insert on the ribbon, select Shapes, and then choose a shape.
After you add a shape, you can move it and resize it; add text, bullets, or numbering; and you can change the fill color or outline.
-
On the Insert tab, select Shapes.
-
Select the shape you want from the drop-down gallery.
A default-sized shape is immediately inserted in the middle of the visible page.
-
Select a sizing handle on the perimeter of the shape and drag inward or outward to change the size of the shape.
To create a perfect square or circle (or constrain the dimensions of other shapes), press and hold Shift while you drag.
-
To move the shape, point the mouse at it until the pointer turns into a four-headed arrow. Then click and drag to move the shape where you want it.
When a shape is selected in your document, a Shape tab appears on the toolbar ribbon. It has buttons for things you can do with the shape such as adding a fill color or outline, or choosing a predefined shape style.
Note: If you have the Simplified Ribbon turned off, the tab name in step #4 is Format. For more information on the Simplified Ribbon see The new look of Microsoft 365.

Insert a shape, or click an existing shape, and then enter text, as follows:
-
Right-click the shape and select Edit Text.
A blinking cursor appears in the center of the shape.
-
Type the text you want to add to the shape.
-
To format and align your text, select the Home tab, and then choose options from the Font, Paragraph, or Alignment groups.
Quick Styles let you apply a style to your shape with one click. You’ll find the styles in the Shape gallery.
-
Select the shape you want to change.
-
On the Shape tab (or the Format tab if you have the Simplified Ribbon turned off), open the Shape Style gallery and select the Quick Style you want to use.
Select the down arrow on the end of the gallery to open it and see the complete list of options:
You can pause the mouse pointer over an option in the gallery to see a short description of it.

-
Select the shape you want to change.
-
On the Shape tab (or the Format tab if you have the Simplified Ribbon turned off), select the down arrow next to Fill to open the gallery of fill colors.
-
Select a color.
-
To make the shape transparent, select No Fill at the bottom of the color gallery.
-
Select the shape you want to change.
-
On the Shape tab, (or the Format if you’re still using the classic ribbon) select the down arrow next to Outline to open the gallery of outline colors.
-
Select a color.
-
At the bottom of the gallery there are also options for the thickness (Weight) of the outline, and whether the outline is solid, dotted, or a dashed line. Point at Weight or Dashes to see a pop-out list of options.
Click the shape that you want to delete, and then press the Delete key. To delete multiple shapes, press Ctrl while you select the shapes that you want to delete, and then press Delete.
Click the shape that you want to delete, and then press the Delete key. To delete multiple shapes, press Ctrl while you select the shapes that you want to delete, and then press Delete.
Why do we use shapes in a Word document?
Word documents can contain more than just words—they can also contain drawing objects such as lines and simple shapes. Word provides an easy way to add such objects to a document. AutoShapes are very useful for adding common drawing shapes to your document.
Where is shape styles in Word?
To simply remove an embedded file or object, select it and press Delete.
How do we use AutoShapes?
AutoShapes is a tool to help you draw objects on your document. You can choose to have an AutoShapes toolbar or use the AutoShapes menu on the Draw toolbar. Once you insert an AutoShape, you can also put a Text Box inside it, or other shapes. You can move or resize them as you wish.
How do I delete text boxes in Word?
Go to the “tools” menu, and select “options.” A box will open. Click on the “general” tab, and unselect (remove the checkmark in front of) “automatically create drawing canvas when inserting AutoShapes.” Press “OK.”
What is AutoShape computer?
What is word art?
WordArt is a text modifying feature in Microsoft Word, a popular word processing program. It includes effects such as shadows, outlines, colors, gradients, and 3D effects that can be added to a word or phrase. WordArt can also bend, stretch, skew, or otherwise modify the shape of the text.
What do you mean by text wrapping?
Text wrap is a feature supported by many word processors that enables you to surround a picture or diagram with text. The text wraps around the graphic. Text wrap in HTML is most fequently used to describe wrapping of text around an image in the HTML code.
How do you select all shapes in Word?
In addition to working with numbers and text within cells of a workbook, Excel allows you to highlight your worksheets by adding simple drawings. One classification of drawing objects you can add are called AutoShapes. ExcelTips is your source for cost-effective Microsoft Excel training.
How do I get rid of SmartArt in Powerpoint?
To delete an entire SmartArt graphic, click the border of the SmartArt graphic that you want to delete, and then press Delete.
You can add one shape to your 2007 Microsoft Office system document or combine multiple shapes to make a drawing or a more complex shape. Available shapes include lines, basic geometric shapes, arrows, equation shapes, flowchart shapes, stars, banners, and callouts.
After you add one or more shapes, you can add text, bullets, numbering, and Quick Styles to them.
This article is about shapes. For more information about shapes in SmartArt graphics, see Add a shape to a SmartArt graphic. For more information about inserting symbols, see Insert ASCII or Unicode Latin-based symbols and characters. For more information about using charts or SmartArt in your document, see When should I use a SmartArt graphic and when should I use a chart?
What do you want to do?
-
Add a shape to your document
-
Add multiple shapes to your document
-
Add text to a shape
-
Add a bulleted or numbered list to a shape
-
Add a Quick Style to a shape
-
Change from one shape to another shape
-
Delete a shape from your document
Add a shape to your document
Which 2007 Microsoft Office system program are you using?
-
Excel
Excel
-
On the Insert tab, in the Illustrations group, click Shapes.
-
Click the shape that you want, click anywhere in the document, and then drag to place the shape.
To create a perfect square or circle (or constrain the dimensions of other shapes), press and hold SHIFT while you drag.

You can add individual shapes to a chart or add shapes on top of a SmartArt graphic to customize the chart or SmartArt graphic.
Top of Page
Outlook
-
Insert a drawing canvas. On the Insert tab, in the Illustrations group, click Shapes, and then click New Drawing Canvas.
-
Under Drawing Tools, on the Format tab, in the Insert Shapes group, click the More button
. -
Click the shape that you want, click anywhere in the document, and then drag to place the shape.
To create a perfect square or circle (or constrain the dimensions of other shapes), press and hold SHIFT while you drag.

 .
.You can add individual shapes to a chart or add shapes on top of a SmartArt graphic to customize the chart or SmartArt graphic.
Top of Page
PowerPoint
-
On the Home tab, in the Drawing group, click Shapes.
-
Click the shape that you want, click anywhere in the document, and then drag to place the shape.
To create a perfect square or circle (or constrain the dimensions of other shapes), press and hold SHIFT while you drag.

You can add individual shapes to a chart or add shapes on top of a SmartArt graphic to customize the chart or SmartArt graphic.
Top of Page
Publisher
-
On the Objects toolbar, do one of the following:
-
To add a predefined AutoShape, such as a star or diamond, click AutoShapes
, point to a category, and then click the shape you want. -
To add a circle or a square, click Oval
or Rectangle .
-
-
Drag until the shape is the size that you want.
To create a perfect square or circle (or constrain the dimensions of other shapes), press and hold SHIFT while you drag.
To add a shape with a predefined size, click the place that you want to insert the shape.
 , point to a category, and then click the shape you want.
 or Rectangle
  .
.Top of Page
Word
-
Insert a drawing canvas. On the Insert tab, in the Illustrations group, click Shapes, and then click New Drawing Canvas.
-
Under Drawing Tools, on the Format tab, in the Insert Shapes group, click the More button
. -
Click the shape that you want, click anywhere in the document, and then drag to place the shape.
To create a perfect square or circle (or constrain the dimensions of other shapes), press and hold SHIFT while you drag.
You can add individual shapes to a chart or add shapes on top of a SmartArt graphic to customize the chart or SmartArt graphic.
Top of Page
Add multiple shapes to your document
Which 2007 Microsoft Office system program are you using?
-
Excel
Excel
Instead of adding individual shapes to create a drawing, you may want to create a SmartArt graphic. In a SmartArt graphic, the arrangement of the shapes and the amount of text within those shapes is updated automatically as you add or remove shapes and edit your text. You can always add a shape to a SmartArt graphic or replace a shape if none of the layouts are exactly right for you.
-
On the Insert tab, in the Illustrations group, click Shapes.
-
Right-click the shape that you want to add, and then click Lock Drawing Mode.
-
Click anywhere in the document, and then drag to place the shape. Repeat this for each shape that you want to add.
To create a perfect square or circle (or constrain the dimensions of other shapes), press and hold SHIFT while you drag.
-
After you add all of the shapes that you want, press ESC.
Top of Page
Outlook
Instead of adding individual shapes to create a drawing, you may want to create a SmartArt graphic. In a SmartArt graphic, the arrangement of the shapes and the amount of text within those shapes is updated automatically as you add or remove shapes and edit your text. You can always add a shape to a SmartArt graphic or replace a shape if none of the layouts are exactly right for you.
-
Insert a drawing canvas. On the Insert tab, in the Illustrations group, click Shapes, and then click New Drawing Canvas.
-
Under Drawing Tools, on the Format tab, in the Insert Shapes group, click the More button
. -
Right-click the shape that you want to add, and then click Lock Drawing Mode.
-
Click anywhere in the document, and then drag to place the shape. Repeat this for each shape that you want to add.
To create a perfect square or circle (or constrain the dimensions of other shapes), press and hold SHIFT while you drag.
-
After you add all of the shapes that you want, press ESC.
Top of Page
PowerPoint
Instead of adding individual shapes to create a drawing, you may want to create a SmartArt graphic. In a SmartArt graphic, the arrangement of the shapes and the amount of text within those shapes is updated automatically as you add or remove shapes and edit your text. You can always add a shape to a SmartArt graphic or replace a shape if none of the layouts are exactly right for you.
-
On the Home tab, in the Drawing group, click Shapes.
-
Right-click the shape that you want to add, and then click Lock Drawing Mode.
-
Click anywhere in the document, and then drag to place the shape. Repeat this for each shape that you want to add.
To create a perfect square or circle (or constrain the dimensions of other shapes), press and hold SHIFT while you drag.
-
After you add all of the shapes that you want, press ESC.
Top of Page
Publisher
-
On the Objects toolbar, click AutoShape
. -
Point to a category, point to the dotted line, and then drag to make the menu float.
-
Click the shape that you want to insert, and then drag until the shape is the size that you want. Repeat this step for each shape that you want to add.
-
After you add all of the shapes that you want, press ESC.
Top of Page
Word
Instead of adding individual shapes to create a drawing, you may want to create a SmartArt graphic. In a SmartArt graphic, the arrangement of the shapes and the amount of text within those shapes is updated automatically as you add or remove shapes and edit your text. You can always add a shape to a SmartArt graphic or replace a shape if none of the layouts are exactly right for you.
-
Insert a drawing canvas. On the Insert tab, in the Illustrations group, click Shapes, and then click New Drawing Canvas.
-
Under Drawing Tools, on the Format tab, in the Insert Shapes group, click the More button
. -
Right-click the shape that you want to add, and then click Lock Drawing Mode.
-
Click anywhere in the document, and then drag to place the shape. Repeat this for each shape that you want to add.
To create a perfect square or circle (or constrain the dimensions of other shapes), press and hold SHIFT while you drag.
-
After you add all of the shapes that you want, press ESC.
Top of Page
Add text to a shape
Which 2007 Microsoft Office system program are you using?
-
Excel
Excel
-
Click the shape that you want to add text to, and then type your text.
-
To resize the shape, click it, and then drag its sizing handles.
-
The text that you add becomes part of the shape — if you rotate or flip the shape, the text rotates or flips also.
Top of Page
Outlook
-
Right-click the shape that you want to add text to, click Add Text, and then type your text.
-
To resize the shape, click it, and then drag its sizing handles.
-
The text that you add becomes part of the shape — if you rotate or flip the shape, the text rotates or flips also.
Top of Page
PowerPoint
-
Click the shape that you want to add text to, and then type your text.
-
To resize the shape, click it, and then drag its sizing handles.
-
The text that you add becomes part of the shape — if you rotate or flip the shape, the text rotates or flips also.
Top of Page
Publisher
-
Click the shape that you want to add text to, and then type your text.
-
To resize the shape, click it, and then drag its sizing handles.
-
The text that you add becomes part of the shape — if you rotate or flip the shape, the text rotates or flips also.
Top of Page
Word
-
Right-click the shape that you want to add text to, click Add Text, and then type your text.
-
To resize the shape, click it, and then drag its sizing handles.
-
The text that you add becomes part of the shape — if you rotate or flip the shape, the text rotates or flips also.
Top of Page
Add a bulleted or numbered list to a shape
Which 2007 Microsoft Office system program are you using?
-
Excel
Excel
-
Select the text in the shape that you want to add bullets or numbering to.
-
On the Mini toolbar, click the arrow next to Bullets and Numbering, and then click Bullets and Numbering.
-
Do one of the following:
-
To add bullets, click the Bulleted tab, and then choose the options that you want.
-
To add numbering, click the Numbered tab, and then choose the options that you want.
-
Top of Page
Outlook
-
On the Message tab, in the Basic Text group, click one of the following:
-
Select the text in the shape that you want to add bullets or numbering to.
-
-
To add bullets, click the arrow next to Bullets, and then choose the options that you want.
-
To add numbering, click the arrow next to Numbering, and then choose the options that you want.
-

Top of Page
PowerPoint
-
Select the text in the shape that you want to add bullets or numbering to.
-
On the Mini toolbar, click the arrow next to Bullets and Numbering, and then click Bullets and Numbering.
-
Do one of the following:
-
To add bullets, click the Bulleted tab, and then choose the options that you want.
-
To add numbering, click the Numbered tab, and then choose the options that you want.
-
Top of Page
Publisher
-
Select the text in the shape that you want to add bullets or numbering to.
-
On the Formatting toolbar, click one of the following:
-
To add bullets, click Bullets
. -
To add numbering, click Numbering
.
-
 .
. .
.Top of Page
Word
-
Select the text in the shape that you want to add bullets or numbering to.
-
Do one of the following:
-
On the Home tab, in the Paragraph group, click one of the following:
-
-
-
To add bullets, click the arrow next to Bullets, and then choose the options that you want.
-
To add numbering, click the arrow next to Numbering, and then choose the options that you want.
-

Top of Page
Add a Quick Style to a shape
Important: Quick Styles are available only in these 2007 Office release programs: Excel, Outlook, Word, and PowerPoint.
Quick Styles are combinations of different formatting options that are displayed in a thumbnail in the Quick Style gallery in the Shape Styles group. When you place your pointer over a Quick Style thumbnail, you can see how the Shape Style (or Quick Style) affects your shape.
Which 2007 Microsoft Office system program are you using?
-
Excel
Excel
-
Click the shape that you want to apply a new or different Quick Style to.
-
Under Drawing Tools, on the Format tab, in the Shape Styles group, click the Quick Style that you want.
To see more Quick Styles, click the More button
.
You can also add a fill or effect to your shape.
Top of Page
Outlook
-
Click the shape that you want to apply a new or different Quick Style to.
-
Under Drawing Tools, on the Format tab, in the Shape Styles group, click the Quick Style that you want.
To see more Quick Styles, click the More button
.
You can also add a fill or effect to your shape.
Top of Page
Word
-
Click the shape that you want to apply a new or different Quick Style to.
-
Under Drawing Tools, on the Format tab, in the Shape Styles group, click the Quick Style that you want.
To see more Quick Styles, click the More button
.
You can also add a fill or effect to your shape.
Top of Page
Change from one shape to another shape
Which 2007 Microsoft Office system program are you using?
-
Excel
Excel
-
Click the shape that you want to change to a different shape.
To change multiple shapes, press CTRL while you click the shapes that you want to change.
-
Under Drawing Tools, on the Format tab, in the Insert Shapes group, click Edit Shape
, point to Change Shape, and then click the new shape that you want.
 , point to Change Shape, and then click the new shape that you want.
Top of Page
Outlook
To change from one shape to another shape, delete the shape, and then add the new one.
To change multiple shapes, press CTRL while you click the shapes that you want to change.
Top of Page
PowerPoint
-
Click the shape that you want to change to a different shape.
To change multiple shapes, press CTRL while you click the shapes that you want to change.
-
Under Drawing Tools, on the Format tab, in the Insert Shapes group, click Edit Shape
, point to Change Shape, and then click the new shape that you want.
Top of Page
Publisher
-
Click the AutoShape that you want to change.
To change multiple AutoShapes, press CTRL while you click the AutoShapes that you want to change.
-
On the Arrange menu, point to Change AutoShape, point to a category, and then click the new shape that you want.
Top of Page
Word
To change from one shape to another shape, delete the shape, and then add the new one.
To change multiple shapes, press CTRL while you click the shapes that you want to change.
Top of Page
Delete a shape from your document
Do the following for all programs listed in the Applies To at the top of the article.
-
Click the shape that you want to delete, and then press DELETE.
To delete multiple shapes, press CTRL while you click the shapes that you want to delete, and then press DELETE.
For more information about selecting a shape to delete, see Select a shape or other object.
Top of Page
Author:
Frank Hunt
Date Of Creation:
15 March 2021
Update Date:
10 April 2023
Right-click the edge of the rectangle. Select Edit Points. Right-click the side you want to remove. Select Delete Segment.

Content
- can you erase part of a shape in PowerPoint?
- how do I edit a shape in Word?
- where is eraser option in MS Word?
- Does Microsoft Word have an eraser tool?
Here, can you erase part of a shape in PowerPoint?
You place shapes —or «objects»—into yourdrawing and then you modify the shapes , or youcan remove them entirely, but you can ’t «rub them out»like with an eraser.
Additionally, how do I edit a shape in Word?
Click the shape that you want to change .Under Drawing Tools, on the Format tab, in the Insert Shapes group, click Edit Text . If you do not see the Drawing Toolsor Format tabs, make sure that you selected a shape . To change multiple shapes , press and hold SHIFT whileyou click the shapes that you want to change .
Furthermore, where is eraser option in MS Word?
Microsoft Word – Quick Tip — Format Eraser
- Select the text or graphic that has the formatting you want toerase.
- If not already selected, click on the «Home» tab on yourribbon.
- In the «Font» section, there will be a «Clear Formatting» icon.It is a letter «A» with an eraser in front. Click it to erase theformat.
Also Know, Does Microsoft Word have an eraser tool?
Select the text or graphic that has the formatting you wantto erase. If not already selected, click on the «Home» tab on yourribbon. In the «Font» section, there will be a «Clear Formatting»icon.
These days, if you want to delete a part of a shape in Word that is not on the border of another object, you have two options: Press Ctrl-X (Command X) and then press Delete. If this option doesn’t work for you or there aren’t enough spaces around the object that needs deleting, select Edit > Cut followed by Edit > Paste.
The “how to delete shape in word smartart” is a question that has been asked before. The “smart art” feature in Word allows you to create shapes and text using the tools on the left side of the screen. Shapes can be deleted by clicking on them, but sometimes it’s easier to select part of a shape and then delete it.
- Right-click the rectangle’s edge.
- Select Edit Points from the menu.
- Remove the side you desire by right-clicking it.
- Select Delete Segment from the drop-down menu.
People sometimes wonder whether they can delete part of a shape in PowerPoint.
You sketch shapes—or “objects”—into your picture and then edit or delete them, but you can’t “rub them out” way you can with an eraser.
How can I alter a form in Word, too? Change the shape by clicking on it. Click Edit Text under Drawing Tools, on the Format tab, in the Insert Shapesgroup. Make sure you’ve picked a shape if you don’t see the Drawing Tools or Format tabs. Press and hold SHIFT while clicking the forms you wish to edit to change several shapes.
So, in MS Word, where is the eraser option?
Format Eraser in Microsoft Word – Quick Tip
- Choose the text or picture with the formatting you’d want to remove.
- Click the “Home” tab on yourribbon if it isn’t already chosen.
- There will be a “Clear Formatting” icon in the “Font” section. It’s a “A” with an eraser in front of it. To remove the format, click it.
Is there an eraser tool in Microsoft Word?
Select the text or graphic that has the formatting you wantto erase. Click the “Home” tab on yourribbon if it isn’t already chosen. In the “Font” section, there will be a “Clear Formatting”icon.
Answers to Related Questions
In Word, how do you rub a line?
In the Draw Borders group (Word 2007 and Word 2010) or the Draw group, choose the Eraser tool (Word 2013 and Word 2016). Select the table lines you wish to delete by clicking and dragging them. Press the Esc key or click the Eraser tool one more. The Erasertool is now turned off.
What is the best way to use a pen in PowerPoint?
Tools and features for presenting
- In the bottom-left corner, look for and pick the Pen Tools button.
- Depending on your choice, choose between a pen and a highlighter. The Pen tool may be accessed.
- To mark your slides, click and drag the mouse. You may also access the pen tool by pressing Ctrl+P on your keyboard while presenting your slide presentation.
In PowerPoint, how do you color a portion of a shape?
A shape’s hue may be changed.
- Change the shape in the SmartArt graphic by clicking it.
- Choose the arrow next to Shape Fill under SmartArt Tools, on the Format tab, in the Shape Stylesgroup, and then click the color you desire. Click No Fill if you don’t want to use a color.
What is the procedure for removing anything from PowerPoint?
Remove a text box from the screen.
- Press Erase after clicking the border of the text box you wish to delete.
- Hold CTRL and click the border of each text box in turn, then pressDELETE to erase several check boxes at once.
In PowerPoint, how can I cut a circle off of a picture?
Simply type: to crop a photo into a circle, triangle, or any PowerPoint shape:
- Choose the image you wish to crop to fit the form.
- Go to the Format tab of the Picture Tools.
- Select Cropping Tool from the dropdown menu.
- Crop to Shape is an option.
- Choose the shape to which you wish to crop.
Is it possible to crop in Visio?
Click Crop Tool in the Arrangegroup on the Format tab, under Picture Tools. Only the section of the painting, photograph, or object that you wish to see is displayed by dragging the selection handles. After you’ve finished, click Crop Tool once again to turn it off.
In Word 2007, how do I use the eraser?
Using the Eraser Tool in MS Word 2007 Tables
- As you would at any other time, set up a table.
- Check to see whether the insertion point is in the table.
- The Ribbon’s Design tab should be visible.
- In the Draw Borders group, choose the Eraser tool.
- To choose the table lines you want to delete, click and drag.
- Press the ESC key or click the Eraser tool one more.
How can I use the eraser to remove files?
Permanently deleting files using the Eraser
- To delete a file or folder, right-click it, choose Eraser from the context menu, and then click Erase.
- To confirm that you wish to delete the chosen items, click Yes.
- When the job is completed, a notice shows in the system notification area.
Press Erase after selecting the line, connection, or form you wish to delete. Tip: To erase several lines or connections, pick the first one, then press and hold Ctrl while selecting the others. Finally, hit Delete.
In Excel, where is the eraser?
Click the arrow next to Borders in the Font group on the Home tab, then pick Erase Border. Then perform one of the following:
- To delete a single border, use the erasertool to click on it.
- Drag the eraser tool over the borders you wish to remove to remove multiple borders.
On Word, how do you combine cells?
Cells that have been split
- To divide several cells, click on a cell or pick multiple cells.
- Under Table Tools, on the Layout tab, in the Merge group, clickCells that have been split.
- Enter the number of columns or rows into which you wish the chosen cells to be divided.
In Word 2007, how can I remove a table?
Remember that removing a table also deletes all of its data.
- 1Click within the table with your mouse. The Table Tools are shown.
- 2If the Layout tab isn’t visible, click it to bring it up.
- 3Choose Delete—Table. This command is located in the Rows& Columns group on the Layout tab.
In Word, how can I adjust the shape of a picture?
You may now adjust the form of the image in your Word document by using the Crop Shape option, as seen below:
- Choose a photo.
- Click the Crop drop down in the Sizegroup on the contextual tab.
- Select Crop To Share, then select a shape to apply to the image.
What are the different types of shapes in Microsoft Word?
Word includes a number of handy shapes (known as AutoShapes) that are ready to use in your projects. Lines, bubbles, curves, and other basic forms may offer a required visual aspect to any page.
In Word, how do you build a three-dimensional shape?
Drawing 3D Objects (Method 1)
- Select Insert > Shape. You’ll find the “Insert”menu at the top of the screen.
- Choose a 3D form. You’ll notice a tiny selection of pre-formatted 3D objects as you navigate through the available forms, including a cube, a cylinder (“can”), and a bevel.
- Create a three-dimensional shape.
- Change the contour of your body.
The “cannot delete shape in powerpoint” is a question that has been asked by many people. The answer to this question is that you can’t delete part of a shape in Word, but you can do it in PowerPoint.
3
Я хочу удалить все формы в слове. Как я могу сделать?
Пожалуйста, помогите мне.
Я пометил красным, чтобы увидеть:

microsoft-word microsoft-word-2007
поделиться|источник
изменён phuclv10k
задан user327854116
1 ответ
3
VBA — один из способов сделать это. Следуй этим шагам:
- Вкладка разработчика
- Макросы (новое название как «RemoveShapes» (или как вы хотите))
- нажмите «плюс»
- копировать / вставить (ниже)
- запустить (просто выберите этот макрос в следующий раз)
For i = ActiveDocument.Shapes.Count To 1 Step -1
    ActiveDocument.Shapes(i).Delete
Next i
кредит: https://social.msdn.microsoft.com/Forums/en-US/a514a54a-fc33-4c8b-9e9c-1f179b5e1d46/word-vba-to-delete-all-shapes?forum=isvvba

поделиться|источник
изменён Máté Juhász15k
ответ дан Nathan Reitinger31
Всё ещё ищете ответ? Посмотрите другие вопросы с метками microsoft-word microsoft-word-2007.
Как убрать границы фигуры в ворде?
Как удалить фигуры в ворде?
Щелкните границу фигуры, которую вы хотите удалить. Нажмите клавишу DELETE.
…
Примечания:
- Чтобы удалить фигуру, необходимо щелкнуть ее границу. …
- При попытке удалить фигуру, которая вместе с другими фигурами входит в состав большой фигуры (связанную фигуру), будет удален только текст в ней.
Как изменить контур фигуры в ворде?
Добавление контура, тени, отражения или светящегося текста
- Выберите текст или объект WordArt.
- Нажмите Главная > Текстовые эффекты.
- Выберите нужный эффект. Чтобы просмотреть дополнительные варианты, наведите указатель на пункт Контур, Тень, Отражение или Свечение и выберите необходимый эффект.
Как убрать границы картинки в ворде?
Удаление границы рисунка
- Выберите рисунок, границу которого требуется удалить.
- На вкладке Разметка страницы в группе фон страницы нажмите кнопку границы страниц.
- Откройте вкладку Границы.
- В разделе Параметрывыберите пункт нет.
Как убрать рамки вокруг текста в ворде?
Удаление обрамления страницы
- На вкладке Конструктор нажмите кнопку Границы страниц.
- В диалоговом окне Границы и заливка в списке Применить к выберите страницы, с которых нужно удалить границу.
- В разделе Тип щелкните Нет.
- Нажмите кнопку ОК.
Как удалить часть схемы в ворде?
Удаление разделов из схемы документа в ms Word 2007
- В схеме документа выделите левой кнопкой мыши тот элемент, который необходимо удалить. …
- В тексте документа выделите фрагмент текста, соответствующий удаляемому элементу. …
- Форматирование выделенного элемента может нарушиться.
Как убрать надпись на полях в ворде?
Щелкните границу надписи, которую вы хотите удалить, и нажмите клавишу DELETE. Примечание: Убедитесь, что указатель находится на границе надписи, а не внутри ее. В противном случае удалится текст, а не надпись.
Как сделать тень у фигуры в ворде?
Добавление тени к фигуре
- Щелкните фигуру. Совет: Чтобы добавить тень к нескольким фигурам, щелкните первую фигуру, а затем, удерживая нажатой клавишу CTRL, щелкните остальные фигуры.
- На вкладке средства рисования | формат нажмите кнопку эффекты фигуры > тени, а затем выберите нужную тень.
Как сделать контур в шрифте?
В Ворде 2010 Шрифт / Текстовые эффекты / Контур текста.
…
Добавление эффектов, производится следующим образом:
- Выделите интересующий фрагмент документа.
- Перейдите во вкладку «Главная».
- В блоке «Шрифт», активируйте команду «Текстовые эффекты и оформление».
- Выберите из выпадающего списка, интересующий эффект.
Как обвести что то в ворде?
меню «границы и заливка» – вкладка «граница» – «рамка» – «применить к *тексту* – ок. . тогда вставка – фигуры – круг. ну и в контекстном меню выберите пункт «порядок» – «поместить за текстом».
Как убрать линию в ворде если она не выделяется?
Для того чтобы убрать невесть откуда взявшиеся линии, появившиеся в следствии неправильного форматирования — нужно найти в меню Word-а пункт «Границы и заливка» и на закладках этого «Граница» и «Страница» выбрать параметр «Тип» — «нет» (без рамки).
Как убрать стиль рисунка в ворде?
Выберите рисунок, для которого вы хотите удалить эффект. В разделе Работа с рисункамина вкладке Формат в группе Стили рисунков нажмите кнопку эффекты для рисунка. Выберите категорию эффектов для рисунков , которую вы хотите удалить. В появившемся меню первый вариант не имя эффекта (например, без тени или отражения).
Как убрать пунктирную рамку вокруг текста в ворде?
Откройте любой документ Ворд или просто пустой, кликните по вкладке разметка, в подразделе «фон страницы», кликните по функции (кнопке) «границы страниц». Откроется диалоговое окно «границы и заливка». В подразделе «страница», кликните по верхнему рисунку под надписью «тип», где рядом с ним написано «нет». «ОК».
Как убрать выделение с текста в ворде?
Удаление выделения из части документа или из всего документа
- Выделите текст, из него нужно удалить выделение, или нажмите CTRL+A, чтобы выделить весь текст.
- Перейдите на главная и выберите стрелку рядом с цветом выделения текста.
- Выберите Нет цвета.
Как установить границы текста?
Добавление границы для текста
- Выделите слово, строку или абзац.
- Перейдите на вкладку главная > границыи откройте меню с помощью вариантов границы.
- Выберите нужный тип границы.
Как удалить часть фигуры в ворде?
Как в ворде удалить часть рисунка?
Щелкните рисунок, который нужно удалить и нажмите клавишу DELETE. Чтобы удалить несколько рисунков, удерживая клавишу CTRL щелкните рисунки, которые нужно удалить и нажмите клавишу DELETE.
Как удалить фигуры в ворде?
Щелкните границу фигуры, которую вы хотите удалить. Нажмите клавишу DELETE.
…
Примечания:
- Чтобы удалить фигуру, необходимо щелкнуть ее границу. …
- При попытке удалить фигуру, которая вместе с другими фигурами входит в состав большой фигуры (связанную фигуру), будет удален только текст в ней.
Как изменить контур фигуры в ворде?
Добавление контура, тени, отражения или светящегося текста
- Выберите текст или объект WordArt.
- Нажмите Главная > Текстовые эффекты.
- Выберите нужный эффект. Чтобы просмотреть дополнительные варианты, наведите указатель на пункт Контур, Тень, Отражение или Свечение и выберите необходимый эффект.
Как сделать обрезку по фигуре?
Обрезка до указанной фигуры
- Выберите рисунок, который вы хотите обрезать по форме определенной фигуры.
- Откройте вкладку Формат рисунка. …
- В разделе Коррекция щелкните стрелку рядом с командой Обрезка, выберите пункт Маска к фигуре, выберите тип фигуры и щелкните фигуру, до которой требуется обрезать изображение.
Как удалить рисунок в ворде если он за текстом?
- На вкладке Главная в группе команд Редактирование нажмите кнопку Выделить.
- Из раскрывшегося списка выберите команду Выбор объектов.
- Наведите указатель мыши на рисунок и щелкните по нему левой кнопкой мыши. Рисунок будет выделен.
Как в ворде замазать рисунок?
В разделе Средства рисования на вкладке Формат в группе Стили фигур щелкните Заливка фигуры и сделайте следующее:
- Чтобы применить или изменить цвет заливки, выберите его или вариант Нет заливки. …
- Чтобы добавить или изменить рисунок заливки, выберите Рисунок, найдите и щелкните нужный файл и нажмите кнопку Вставить.
Каким образом можно удалить графический объект из документа?
Удаление всего рисунка или его части
- Выделите объект-рисунок, который вы хотите удалить.
- Нажмите клавишу DELETE.
Как убрать надпись в ворде?
На панели инструментов Word зайти в раздел «Разметка страницы». В этом разделе есть опция «Фон страницы». Выбираем команду «Подложка», открывается закладка с командами, где вам нужно нажать на командную строчку «Удалить подложку».
Как убрать надпись на полях в ворде?
Щелкните границу надписи, которую вы хотите удалить, и нажмите клавишу DELETE. Примечание: Убедитесь, что указатель находится на границе надписи, а не внутри ее. В противном случае удалится текст, а не надпись.
Как сделать тень фигуры в ворде?
Добавление тени к фигуре
На вкладке средства рисования | формат нажмите кнопку эффекты фигуры > тени, а затем выберите нужную тень. Когда вы наводите указатель мыши на один из эффектов тени, он отображается как образец на фигуре. Совет: Чтобы настроить тень, в нижней части вариантов тени нажмите кнопку параметры тени .
Как в ворде сделать букву нужного размера?
Изменение размера шрифта выделенного текста
- Выделите текст или ячейки с текстом, который нужно изменить. Чтобы выделить весь текст в документе Word, нажмите клавиши CTRL+A.
- На вкладке Главная в поле Размер шрифта выберите нужный размер шрифта. Вы также можете ввести любой размер с учетом следующих ограничений:
Как сделать контур в шрифте?
В Ворде 2010 Шрифт / Текстовые эффекты / Контур текста.
…
Добавление эффектов, производится следующим образом:
- Выделите интересующий фрагмент документа.
- Перейдите во вкладку «Главная».
- В блоке «Шрифт», активируйте команду «Текстовые эффекты и оформление».
- Выберите из выпадающего списка, интересующий эффект.
Как можно обрезать картинку?
- Выберите рисунок, который вы хотите обрезать.
- На ленте выберите вкладку «Рисунок».
- Выберите стрелку вниз рядом с пунктом «Обрезать» …
- С помощью мыши наводите указатель мыши на кнопку обрезки, а затем щелкните и перетащите указатель внутрь, чтобы обрезать поля изображения.
Как обрезать картинку в Power Point?
Выделите картинку и нажмите команду Crop (Обрезка) в разделе Size (Размер) на вкладке Format (Формат). Из появившихся вариантов выберите Crop to Shape (Обрезать по фигуре) и укажите одну из предложенных фигур. Ваша картинка будет обрезана по форме выбранной фигуры.
Как в фотошопе обрезать картинку по фигуре?
Воспользуйтесь инструментом «Вырезание по фигуре», чтобы вырезать из фотографии фрагмент интересной формы.
- В режиме «Эксперт» выберите инструмент «Рамка».
- На панели Параметры инструмента нажмите значок Вырезание по фигуре и выберите фигуру. …
- Дважды нажмите фигуру, чтобы выделить ее.
Как убрать фигуру в ворде?
Как вставить фигуру в Ворде 2020?
На вкладке Вставка нажмите кнопку Фигуры. Щелкните правой кнопкой мыши фигуру, которую вы хотите добавить, и выберите команду Зафиксировать режим рисования. Щелкните любое место рабочей области, а затем перетащите указатель, чтобы нарисовать фигуру.
Как удалить часть фигуры в ворде?
- Выберите надпись или фигуру. Если вы хотите изменить несколько надписей или фигур, щелкните первую, а затем, удерживая нажатой клавишу CTRL, по очереди щелкните другие надписи или фигуры.
- На вкладке Формат нажмите кнопку Контур фигуры и выберите пункт Нет контура.
Каким образом можно удалить графический элемент из документа MS Word?
Для работы с рисунками из графических файлов и коллекции клипов в Microsoft Word применяют контекстную вкладку Формат группы вкладок Работа с рисунками. Эта вкладка автоматически отображается при выделении рисунка. Для удаления рисунка достаточно выделить его и нажать клавишу Delete.
Как разделить фигуру в ворде?
Чтобы разгруппировать изображения, на вкладке Работа с рисунками | Формат выберите Группировать > Разгруппировать. Чтобы разгруппировать фигуры и объекты, на вкладке Средства рисования | Формат выберите Группировать > Разгруппировать.
Где находится Формат фигуры в ворде?
Щелкните надпись или фигуру правой кнопкой мыши и выберите команду Формат фигуры. В левой области диалогового окна Формат фигуры выберите Поворот объемной фигуры.
Как в Ворде вставить фигуру и в ней писать?
Вставить текст в фигуру совсем несложно. Щелкни правой кнопкой мыши границу фигуры и выбери пункт Добавить текст. Текст будет добавлен в фигуру. Текст добавлен!
Как удалить фигуру из документа?
Удаление фигуры непосредственно из графического элемента SmartArt
- Щелкните границу фигуры, которую вы хотите удалить.
- Нажмите клавишу DELETE.
Как удалить часть линии в Визио?
Откройте вкладку Разработчик. В группе Конструктор фигур выберите элемент Операции, а затем — команду Обрезать. Щелкните правой кнопкой мыши линию или фигуру, которую хотите переместить, а затем выберите команду Вырезать. Повторяйте шаг 4, пока не доделаете чертеж или схему.
Каким образом можно удалить графический объект из документа?
Удаление всего рисунка или его части
- Выделите объект-рисунок, который вы хотите удалить.
- Нажмите клавишу DELETE.
Как выделить все графические объекты в ворде?
Выделение нескольких объектов. Щелкните нужные объекты, удерживая нажатой клавишу Shift или CTRL. Выделение объекта, который находится под другими объектами, и перебор стопки перекрывающихся объектов по направлению к переднему плану. Выделите верхний объект и нажмите клавишу TAB.
Как перевести рисунок из Paint в Word?
К примеру, изображение из программы Paint можно скопировать в Word следующим способом: Рисуем картинку, выбираем команду Выделить и задаем границы нужного фрагмента. Нажимаем Копировать (или Ctrl+C). Переходим в Word, щелкаем Вставить (или Ctrl+V) в разделе Главная.14 мая 2018 г.
Как вставить картинку в текстовый документ?
Вставка изображения или рисунка с компьютера
- Выберите то место документа, куда вы хотите вставить изображение.
- Нажмите клавиши ALT+С, 9, чтобы открыть диалоговое окно Вставка рисунка.
- Перейдите в папку с изображением на компьютере, выберите файл и нажмите ВВОД. …
- По умолчанию в Word вставляется рисунок с текстом.
Как редактировать фигуры в ворде?
- Щелкните фигуру, которую нужно изменить.
- В контекстных инструментах Средства рисования на вкладке Формат в группе Вставка фигур нажмите кнопку Изменить текст . …
- В контекстных инструментах Работа с надписями на вкладке Формат в группе Стили надписей нажмите кнопку Изменить фигуру и выберите нужную фигуру.
Как в ворде объединить фигуры в рисунок?
- Выберите фигуры, которые нужно объединить. Нажмите и удерживайте клавишу Shift, выбирая по очереди каждую фигуру. …
- На вкладке Средства рисования | Формат в группе Вставка фигур выберите Объединить фигуры, затем выберите нужный вариант.
Как сделать объемную фигуру в ворде?
- Щелкните рисунок, к которому требуется применить данный эффект, и откройте вкладку Формат рисунка.
- В разделе Стили рисунков щелкните Эффекты, наведите указатель на элемент Поворот объемной фигуры, а затем выберите нужный эффект, например Изометрический, влево вниз.
– Right-click the edge of the rectangle.
– Select Edit Points.
– Right-click the side you want to remove.
– Select Delete Segment.
If you are referring to the Eraser command that you can use in a table, note that you’ll find it on the Table Tools Layout tab (when the insertion point is inside a table). If you can’t get it to work, you can use the Merge Cells command instead.
Subsequently, Where is the eraser tool in Microsoft Word?
If you are referring to the Eraser command that you can use in a table, note that you’ll find it on the Table Tools Layout tab (when the insertion point is inside a table). If you can’t get it to work, you can use the Merge Cells command instead.
Also, Can you erase part of an image in Word?
Select the image. Go to the Picture Format tab and select Remove Background. In Word 2016 and older, go to the Format tab. … To highlight a section of the image that should be deleted, select Mark Areas to Remove, then select the parts of the image that should be removed.
How do I remove unwanted parts of a photo?
– 1Click the “Edit a Photo” button on Fotor’s homepage, and import your image.
– 2Go to “Beauty” and then choose “Clone”.
– 3Adjust the brush size, intensity, and fade.
– 4Use brush to clone one natural part of the image to cover the unwanted object.
Last Review : 12 days ago.
Related Contents
- 1 How do I erase part of a picture in Word?
- 2 How do you erase part of a picture in Word?
- 3 How do I use the eraser tool in Word?
- 4 How do you use the eraser in Word?
- 5 Where is the eraser tool in Word 2010?
- 6 Where is the Tools button on Microsoft Word?
- 7 Can I remove an object from a photo?
- 8 Which tool is used to remove unwanted part of a picture?
- 9 What app removes things from pictures?
- 10 How do I remove unwanted objects from photos?
- 11 How do I run the Eraser program?
- 12 Is there an eraser tool in Word?
- 13 How do you use Eraser in Word?
- 14 Where is the eraser in Word 2010?
- 15 Where is the eraser in Microsoft Word 2013?
How do I erase part of a picture in Word?
To highlight a section of the image that should be deleted, select Mark Areas to Remove, then select the parts of the image that should be removed. In Word for Mac, click What to remove. You may need to switch back and forth between the keep and remove tools to highlight the background area to be removed.
How do you erase part of a picture in Word?
To highlight a section of the image that should be deleted, select Mark Areas to Remove, then select the parts of the image that should be removed. In Word for Mac, click What to remove. You may need to switch back and forth between the keep and remove tools to highlight the background area to be removed.
How do I use the eraser tool in Word?
Where is the Eraser Tool in MS Word? Select the text or graphic that has the formatting you want to erase. If not already selected, click on the “Home” tab on your ribbon. In the “Font” section, there will be a “Clear Formatting” icon.
How do you use the eraser in Word?
Select the text or graphic that has the formatting you want to erase. If not already selected, click on the “Home” tab on your ribbon. In the “Font” section, there will be a “Clear Formatting” icon. It is a letter “A” with an eraser in front.
Where is the eraser tool in Word 2010?
Display the Design tab of the ribbon (Word 2007 and Word 2010) or the Layout tab of the ribbon (Word 2013 and Word 2016). These tabs are visible only when the insertion point is within the table. Click on the Eraser tool, in the Draw Borders group (Word 2007 and Word 2010) or the Draw group (Word 2013 and Word 2016).
Where is the Tools button on Microsoft Word?
So just going to the Tools drop down menu, you will view all familiar tools menu commands. Classic Menu for Office 2007 will bring Tools menu into Microsoft Word, Excel, PowerPoint, Outlook, and Access 2007.
Can I remove an object from a photo?
It’s easy to remove unwanted content It is called as photo unwanted object remover. All you need to do is check our “Edit-Beauty-Clone” function, and it will allow you to get rid of any unwanted object from pictures in a minute. Apply the effect, and save it.
Which tool is used to remove unwanted part of a picture?
Clone Stamp is a tool in Photoshop that lets you copy pixels from one part of an image and transfer them onto another. It functions much as the Brush tool does, except it’s used for painting pixels. It’s a great way to remove an unwanted background object without a trace.
What app removes things from pictures?
TouchRetouch
How do I remove unwanted objects from photos?
– Step 1: Open TouchRetouch and either take a new picture, or choose one from your Gallery (the app calls this Choose from Folder).
– Step 2: Pick a tool for removing the unwanted object(s) and adjust the size of the tool with the slider that appears.
How do I run the Eraser program?
– To erase a file or folder, right-click the file or folder, hover over Eraser, and then click Erase. …
– Click Yes to confirm that you want to erase the selected items.
– A notification appears in the system notification area when the task is complete.
Is there an eraser tool in Word?
If you are referring to the Eraser command that you can use in a table, note that you’ll find it on the Table Tools Layout tab (when the insertion point is inside a table). If you can’t get it to work, you can use the Merge Cells command instead.
How do you use Eraser in Word?
Click on the Eraser tool, in the Draw Borders group (Word 2007 and Word 2010) or the Draw group (Word 2013 and Word 2016). Click and drag to select the table lines you want to erase. Click on the Eraser tool again or press the Esc key.
Where is the eraser in Word 2010?
Display the Design tab of the ribbon (Word 2007 and Word 2010) or the Layout tab of the ribbon (Word 2013 and Word 2016). These tabs are visible only when the insertion point is within the table. Click on the Eraser tool, in the Draw Borders group (Word 2007 and Word 2010) or the Draw group (Word 2013 and Word 2016).
Where is the eraser in Microsoft Word 2013?
You have to be in a table. The Draw Group is on the left side of the Layout Tab in Word 2013/365. You have to be in a table first. Than go to >LAYOUT and you will see the Eraser on the left, right next to Draw Table.
- Reference 1
- Reference 2
- Reference 3
Spread the word ! Don’t forget to share.
How to remove shape in Ms Word using VBA Macro
In Microsoft word, it provides the approach to write VBA Function known as Macro to perform automatically tasks in Ms Word. We can also implement VBA class objects with VBA’s function for the automatically tasks. First, write your own function to remove all shapes which contain in Word File. VBA contains a Class Object called Shape and Shapes to deal with all shapes. We can use Shape Object to delete, select or duplicate the shape.
Code Sample to delete all shapes
Here is complete code example to remove all shapes. This example uses Shapeobject in VBA:
SubRemoveShapes()
Dim oShape AsShape
Do
For EachoShape In ActiveDocument.Shapes
‘ Delete the shape
oShape.Delete
NextoShape
Loop UntilActiveDocument.Shapes.Count = 0
Set oShape = Nothing
End Sub
How to test this Code
1. Open Ms Word
2. Open VB Editor or Alt+F11
3. Create new module
4. Copy and paste the Code
5. Go back to you word and go to Macro Dialog then select the Macro Name RemoveShape and Click on Run
That’s all on how to remove all shapes in Ms Word.