
Word for Microsoft 365 Word for Microsoft 365 for Mac Word 2021 Word 2021 for Mac Word 2019 Word 2019 for Mac Word 2016 Word 2016 for Mac Word 2013 Word 2010 Word for Mac 2011 More…Less
Before you share your document, remove any markup by accepting or rejecting tracked changes and deleting comments.
Important: To remove tracked changes, you must accept or reject them. To remove comments, you must delete them. Choosing the No Markup view only temporarily hides changes and comments. They will be visible again the next time someone opens the document.
Accept or reject changes one at a time
-
Click or tap at the beginning of the document.
-
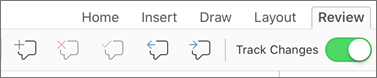
On the Review tab, go to Changes.
-
Select Accept or Reject. As you accept or reject changes, Word will move to the next change.

-
Repeat until you’ve reviewed all changes in your document.

Tip: To review changes in the document without accepting or rejecting them, select Next or Previous.
Accept or reject all changes
-
On the Review tab, go to Changes.
-
Do one of the following:
-
In the Accept drop-down list, select Accept All Changes.
-
In the Reject drop-down list, select Reject All Changes.
-
Delete Comments one at a time
-
Select a comment.
-
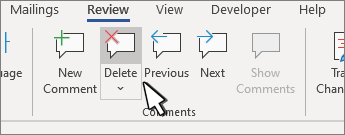
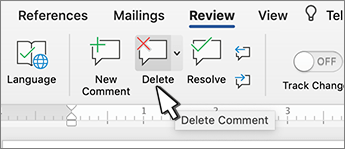
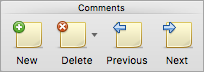
On the Review tab, go to Comments and select Delete.
Delete all comments
-
Select a comment.
-
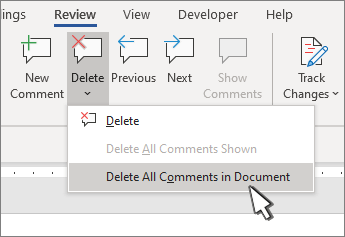
On the Review tab, go to Comments.
-
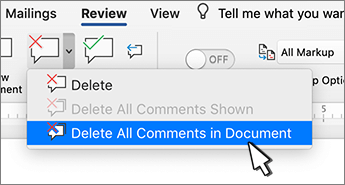
In the Delete drop-down list, select Delete All Comments in Document.
Tips:
-
To do a final check, run Document Inspector. This tool checks for tracked changes and comments, hidden text, personal names in properties, and other information.
-
To run Document Inspector, go to File > Info > Check for Issues and select Inspect Document.
Accept or reject changes one by one
-
Click or tap at the beginning of the document
-
On the Review tab, select Accept or Reject. As you accept or reject changes, Word will move to the next change.
-
Repeat until you’ve reviewed all of the changes in your document.
Tip: To move through changes in the document without accepting or rejecting them, select Next or Previous.
Accept or reject all changes
-
Go to the Review tab.
-
Do one of the following: Changes and do one of the following:
-
In the Accept drop-down list, select Accept All Changes.
-
In the Reject drop-down list, select Reject all Changes.
-
Delete comments one by one
-
Select a comment.
-
On the Review tab, select Delete.
Delete all comments
-
Go to the Review tab.
-
In the Delete drop-down list, select Delete All Comments in Document.
Remove tracked changes
-
Click at the beginning of the document.
-
On the Review tab, go to Changes.
-
Select Accept or Reject. As you accept or reject changes, Word will move to the next change.
-
Repeat until you’ve removed all changes in the document.
Tip: To review changes in the document without accepting or rejecting them, select Next or Previous.
Accept or reject a single change
When you accept or reject a single change, Word will not move to the next change in the document.
-
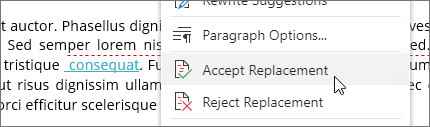
Right-click the change and select the option to accept or reject it.
Remove comments
You need to remove comments separately from tracked changes.
-
Select a comment.
-
On the Review tab, go to Comments.
-
Select Delete.
Remove all comments at once
-
Go to the Review tab
-
In the Delete drop-down list, select Delete All Comments in Document.
Resolve conflicting changes
When multiple authors are collaborating on a document, they might make changes that conflict with one another. Conflicts can occur when one person works offline and then saves the document to the server, or when two people work on the same part of a document and save to the server before refreshing the document with updates made by other authors.
When edits conflict, you must resolve them before you can save the document to the server. All changes in the document are saved on your computer in the Microsoft Upload Center, even when the document contains conflicts. However, the changes aren’t saved to the server until the conflicts are resolved. When conflicts exist, Word notifies you by displaying a message bar at the top of the document window and a notification in the status bar.
-
In the message bar, click Resolve Conflicts.
Word displays the Your conflicting changes pane that lists the conflicts, and the Conflicts tab appears on the ribbon.
-
In the Your conflicting changes pane, click a conflicting change to highlight the conflicting part of the document.
Word uses pink highlighting to mark the conflicting changes that you made and green highlighting to mark changes made by other authors. Any other tracked changes that are in the document are temporarily hidden.
-
Do one of the following:
To
Do this
Keep your change
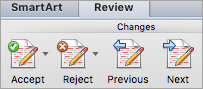
On the Conflicts tab, under Conflicting Changes, click Accept My Change.
Remove your change
On the Conflicts tab, under Conflicting Changes, click Reject My Change.
Accept or reject changes
You can review each change in sequence and decide whether to accept or reject the change.
-
Click or tap at the beginning of the document.
-
On the Review tab, go to Tracking.
-
Select Accept or Reject. As you accept or reject changes, Word will move to the next change.
Tip: To review changes in the document without accepting or rejecting them, select Next or Previous.
-
Repeat until you’ve reviewed all of the changes in your document.

Accept or reject a single change
Rather than move through changes in sequence, you can accept or reject a single change. When you accept or reject the change, Word will not move to the next change in the document.
-
Right-click the change and select the option to accept or reject it.
Accept changes
-
Tap twice on a change in the document to select it.
-
On the Review tab, tap the Accept icon.
-
Do one of the following:
-
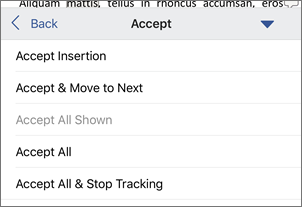
Tap Accept & Move to Next to accept the change and move to the next change in the document.
-
Tap Accept Deletion, Accept Insertion, or Accept Change to accept the selected change, identified contextually by type, and not move to the next change in the document.
-
Tap Accept All Shown to accept all changes that are visible, but not changes that are hidden. For example, if you’re viewing only changes made by a specific reviewer, tapping Accept All Shown accepts only the changes made by that reviewer.
-
Tap Accept All to accept all changes in the document.
-
Tap Accept All & Stop Tracking to accept all changes in the document and turn off Track Changes.
-
-
To move to another change without accepting or rejecting it, tap the Previous or Next icon.
Reject changes
-
Tap twice on a change in the document to select it.
-
On the Review tab, tap the Reject icon.
-
Do one of the following:
-
Tap Reject & Move to Next to reject the change and move to the next change in the document.
-
Tap Reject Deletion, Reject Insertion, or Reject Change to reject the selected change, identified contextually by type, and not move to the next change in the document.
-
Tap Reject All Shown to reject all changes that are visible, but not changes that are hidden. For example, if you’re viewing only changes made by a specific reviewer, tapping Reject All Shown rejects only the changes made by that reviewer.
-
Tap Reject All to reject all changes in the document.
-
Tap Reject All & Stop Tracking to reject all changes in the document and turn off Track Changes.
-
-
To move to another change without accepting or rejecting it, tap the Previous or Next icon.
Delete comments
-
Tap twice on a comment in the document to select it.
-
Tap the Review tab.
-
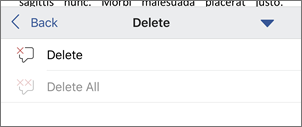
Tap the Delete icon to delete the comment or press and hold the Delete icon until the Delete list appears, and then do one of the following:
-
Tap Delete to delete only the selected comment.
-
Tap Delete All to delete all comments in the document.
-
-
To move to another comment without deleting it, tap the Previous or Next icon.
Accept changes
-
Tap twice on a change in the document to select it.
-
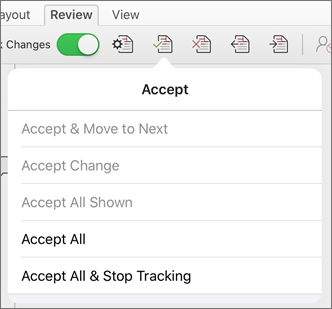
On the Review tab, tap Accept.
-
Do one of the following:
-
Tap Accept & Move to Next to accept the change and move to the next change in the document.
-
Tap Accept Deletion, Accept Insertion, or Accept Change to accept the selected change, identified contextually by type, and not move to the next change in the document.
-
Tap Accept All Shown to accept all changes that are visible, but not changes that are hidden. For example, if you’re viewing only changes made by a specific reviewer, tapping Accept All Shown accepts only the changes made by that reviewer.
-
Tap Accept All to accept all changes in the document.
-
Tap Accept All & Stop Tracking to accept all changes in the document and turn off Track Changes.
-
Reject changes
-
Tap twice on a change in the document to select it.
-
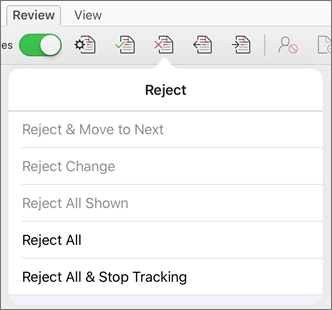
On the Review tab, tap Reject.
-
Do one of the following:
-
Tap Reject & Move to Next to reject the change and move to the next change in the document.
-
Tap Reject Deletion, Reject Insertion, or Reject Change to reject the selected change, identified contextually by type, and not move to the next change in the document.
-
Tap Reject All Shown to reject all changes that are visible, but not changes that are hidden. For example, if you’re viewing only changes made by a specific reviewer, tapping Reject All Shown rejects only the changes made by that reviewer.
-
Tap Reject All to reject all changes in the document.
-
Tap Reject All & Stop Tracking to reject all changes in the document and turn off Track Changes.
-

Delete comments
-
Tap twice on a comment in the document to select it.
-
One the Review tab, tap Delete, and then do one of the following:
-
Tap Delete to delete only the selected comment.
-
Tap Delete All to delete all comments in the document.
-
To move to another comment without deleting it, tap the Previous or Next icon.
-
Need more help?
Accept or reject all changes at once
- Place the pointer at the beginning of the document.
- To accept all changes, select Review, select the arrow below Accept, and then select Accept All Changes. To reject all changes, select Review, select the arrow below Reject, and then select Reject All Changes.
Contents
- 1 How do I accept all changes in a Word Document?
- 2 Can you bulk accept changes in Word?
- 3 How do you accept and remove all track changes in Word?
- 4 How do I accept all changes in Word for Mac?
- 5 Is there a way to accept all formatting changes?
- 6 How do I accept all changes in pages?
- 7 Why can’t I accept or reject changes in Word?
- 8 How do you accept changes?
- 9 Why won’t my track changes turn off?
- 10 How do I show track changes and markups in Word?
- 11 What are the steps involved in accepting all the changes in a document?
- 12 How do I get a word document to stop showing markup?
- 13 How do I enable editing in Word for Mac?
- 14 How do I get rid of formatting changes in Word?
- 15 How do I accept changes in Word 2016?
- 16 Why is accept changes grayed out?
- 17 What are ligatures in Pages?
- 18 How do I remove changes in Pages?
- 19 How do I use consistent text formatting in Pages?
- 20 Why is change so hard to accept?
How do I accept all changes in a Word Document?
Accept or reject all changes
- On the Review tab, go to Changes.
- Do one of the following: In the Accept drop-down list, select Accept All Changes. In the Reject drop-down list, select Reject All Changes.
Can you bulk accept changes in Word?
It’s easy to accept or reject all changes in one Word document.You just need to click “Review” tab, then click the drop-down button on “Accept” or “Reject” command. Next choose “Accept All Changes in Document” or “Reject All Changes in Document”.
How do you accept and remove all track changes in Word?
To accept all changes, click Accept All Changes in Document. To reject all the changes, click the Reject down arrow > Reject All Changes in Document. To selectively accept or reject changes, click Accept and Move to Next or Reject and Move to Next. Click Next to move to the next tracked change.
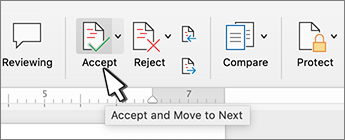
How do I accept all changes in Word for Mac?
To accept all changes in the document, click the dropdown arrow of the Accept icon and select Accept All Changes in Document. Editor comments will need to be addressed separately.
Is there a way to accept all formatting changes?
Click the drop-down arrow to the right of the Accept Change icon. Select the Accept All Changes Shown option. This accepts all the formatting changes in the document.
How do I accept all changes in pages?
Select a range of text, then click Accept or Reject in the review toolbar. All tracked changes within the range are accepted or rejected together. in the review toolbar, then choose Accept All Changes or Reject All Changes. If you accept all changes, markup is removed and the changes are kept.
Why can’t I accept or reject changes in Word?
The most common reason is that the document is Protected. Go to Tools> Protect Document in the main menu to see whether the box for Protect document for: is checked. If so you may need a password to remove the protection.
How to start gracefully accepting this change:
- Admit and surrender to the words: “I don’t know.”
- Avoid asking everyone you know for their help and opinions.
- Stay moving.
- Externalize the change.
- Lean on your practice.
Why won’t my track changes turn off?
While Word normally lets you turn off the Track Changes feature by clicking its icon in the Ribbon, the program may prevent you from doing so if either you or a third party locked the feature with a password. Unlock Track Changes by clicking Lock Tracking and entering the password.
How do I show track changes and markups in Word?
Show or hide comments or tracked changes
- On the Review tab, go to Tracking.
- Select Show Markup.
- Point to Balloons and select Show All Revisions Inline.
What are the steps involved in accepting all the changes in a document?
Accept or reject all changes at once
Place the pointer at the beginning of the document. To accept all changes, select Review, select the arrow below Accept, and then select Accept All Changes. To reject all changes, select Review, select the arrow below Reject, and then select Reject All Changes.
How do I get a word document to stop showing markup?
Click the “Show Markup” menu on the Tracking section of the ribbon, then uncheck any boxes to hide those markups from the Word document.
How do I enable editing in Word for Mac?
Enable editing in your document
- Go to File > Info.
- Select Protect document.
- Select Enable Editing.
How do I get rid of formatting changes in Word?
Clear formatting from text
- Select the text that you want to return to its default formatting.
- In Word: On the Edit menu, click Clear and then select Clear Formatting. In PowerPoint: On the Home tab, in the Font group, click Clear All Formatting .
How do I accept changes in Word 2016?
To accept all changes at once, click the Accept drop-down arrow, then select Accept All. If you no longer want to track your changes, you can select Accept All and Stop Tracking.
Why is accept changes grayed out?
If the Accept and Next buttons are grayed out, the document’s locked for editing or locked for tracked changes.The changes are not deleted, and they’ll show up again the next time anyone opens the document. To delete the tracked changes permanently, accept or reject them.
What are ligatures in Pages?
Some fonts include ligatures, a decorative joining of two characters to form a single typographic character. You can use ligatures in your document if the font you’re using supports them.
How do I remove changes in Pages?
Undo the last action: Choose Edit > Undo (from the Edit menu at the top of your computer screen), or press Command-Z.
How do I use consistent text formatting in Pages?
If you already have styles in one Pages document, you can reuse them in another, saving time and ensuring consistency in your written materials. Choose Format -> Import Styles, navigate to the document in the open dialog box that appears, and then click Open. You’ll see a list of every style in that document.
Why is change so hard to accept?
People resist change because they believe they will lose something of value or fear they will not be able to adapt to the new ways.It’s a significant change to their daily routine, which is deeply emotional because it threatens their level of safety and security.
При совместной работе над документом в Microsoft Word вы увидите изменения, внесенные соавторами. Возможно, вы захотите сохранить некоторые изменения, но отклонить другие. Наилучший подход — использовать отслеживание изменений, чтобы вы могли просматривать изменения и решать, как с ними обращаться.
Здесь мы расскажем, как отображать изменения в Word, а также принимать, отклонять и скрывать эти изменения. Это вы охватывали на протяжении всего процесса отслеживания изменений.
Включить отслеживание изменений
Чтобы отслеживать все изменения в документе, вы можете включить функцию отслеживания изменений для всех или даже только для себя. Это полезный способ убедиться, что никакие изменения не останутся незамеченными.
- Откройте документ Word и перейдите на вкладку «Рецензирование».
- Нажмите кнопку «Отслеживание изменений» в разделе «Отслеживание» на ленте.
- Выберите «Для всех», чтобы отслеживать изменения, внесенные вами и вашей командой, или «Только мои», чтобы отслеживать только ваши изменения.

Как только функция включена, вы можете заблокировать ее, чтобы никто другой не мог ее отключить. Выберите Блокировать отслеживание в раскрывающемся меню Отслеживание изменений и следуйте инструкциям.
Как показать изменения в Word
Когда вы будете готовы проверить документ и увидеть изменения, у вас есть несколько способов.
- Перейдите на вкладку «Обзор» и раздел «Отслеживание» на ленте.
- В раскрывающемся списке вверху выберите «Вся разметка» или «Простая разметка». All Markup отображает индикатор изменения в документе и редакции. Простая разметка показывает только индикатор.

- Затем выберите стрелку раскрывающегося списка «Показать разметку». Здесь вы можете настроить то, что вы видите и как это отображается.
- Вставки и удаления: установите этот флажок, чтобы отображать добавление и удаление элементов.
- Форматирование: отметьте эту опцию, чтобы показать изменения форматирования.
- Выноски: выберите способ отображения изменений. Вы можете выбрать «Показать исправления во всплывающих подсказках», чтобы отобразить их во всплывающем окне справа, «Показать все исправления в строке», чтобы отобразить изменения в самом документе, или «Показать только форматирование во всплывающих подсказках», чтобы сделать именно это.
- Конкретные люди: выберите «Все рецензенты», чтобы увидеть все изменения, или свое имя, чтобы увидеть только свои.

В дополнение к вышеперечисленному у вас есть возможность отобразить панель просмотра. Это полезно, если вы решите использовать простую разметку, потому что вместо этого вы увидите изменения на панели.

Выберите стрелку раскрывающегося списка «Панель просмотра» и выберите вертикальный (левая панель) или горизонтальный (нижняя панель) параметр.

Кроме того, вы можете просматривать изменения, переходя непосредственно к каждому из них, а не выискивая их в документе.
В разделе «Изменения» на ленте используйте кнопки «Предыдущее изменение» и «Следующее изменение», чтобы просмотреть их по одному.

Как принять изменения в Word
Теперь, когда вы знаете, как отображать изменения в Word, следующим шагом будет принятие этих изменений. Вы можете принять отдельные изменения или все изменения сразу.
Принять индивидуальные правки
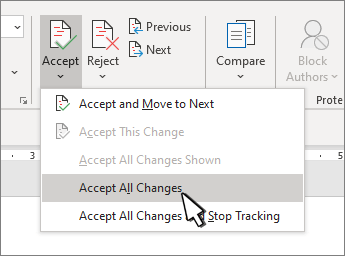
Чтобы принять изменения по отдельности, начните с выбора первого. Затем откройте раскрывающееся меню «Принять» в разделе «Изменения» на ленте.
Выберите «Принять и перейти к следующему», чтобы просмотреть и принять по одному, или «Принять это изменение», чтобы принять его, а затем остановить процесс проверки.

Кроме того, вы можете щелкнуть правой кнопкой мыши изменение и выбрать «Принять» для вставки, удаления или изменения формата.

Принять все изменения
Если вы хотите принять все изменения в документе, откройте раскрывающийся список «Принять» на ленте. Выберите «Принять все изменения» или «Принять все изменения и остановить отслеживание» в зависимости от ваших предпочтений.

Как отклонить правки в Word
Отклонить изменения в Word так же просто, как и принять их, и следует тому же основному процессу. Вы можете отклонить одно или все в документе.
Выберите изменение, щелкните стрелку раскрывающегося списка «Отклонить» на ленте и выберите «Отклонить и перейти к следующему» или «Отклонить изменение». Вы также можете щелкнуть правой кнопкой мыши и выбрать «Отклонить» для вставки, удаления или изменения формата в контекстном меню.

Чтобы отклонить все изменения в документе, выберите стрелку раскрывающегося списка «Отклонить» и выберите «Отклонить все изменения» или «Отклонить все изменения и остановить отслеживание» в соответствии с вашими предпочтениями.

Как скрыть правки в Word
Не все при совместной работе над документом связано с просмотром, принятием или отклонением изменений. Если вы хотите скрыть изменения, чтобы сосредоточиться на содержимом, вы можете сделать это, не отключая функцию отслеживания изменений.
- Перейдите на вкладку «Обзор» и раздел «Отслеживание» на ленте.
- Выберите верхний раскрывающийся список и выберите «Без пометок» или «Исходный». Без разметки — лучший вариант, чтобы увидеть документ без индикаторов редактирования. Оригинал показывает именно это — исходный документ, каким он был до каких-либо изменений.

- Если вы включили панель просмотра, описанную выше, вы можете закрыть ее, нажав X в правом верхнем углу или сняв флажок с кнопки «Панель просмотра» на ленте.
Вернитесь в тот же раскрывающийся список, чтобы снова отобразить изменения, как описано ранее.
Дополнительные способы совместной работы над документами Word см. в статье о добавлении и удалении комментариев. Если вы также используете Microsoft Excel, узнайте, как поделиться файлом, а затем также узнать, как отслеживать изменения.
 Please Note:
This article is written for users of the following Microsoft Word versions: 2007, 2010, 2013, 2016, 2019, and Word in Microsoft 365. If you are using an earlier version (Word 2003 or earlier), this tip may not work for you. For a version of this tip written specifically for earlier versions of Word, click here: Accepting All Formatting Changes.
![]()
Written by Allen Wyatt (last updated June 19, 2021)
This tip applies to Word 2007, 2010, 2013, 2016, 2019, and Word in Microsoft 365
Graciela has a huge document with many changes that were made with Track Changes turned on. Some of these changes are formatting changes and some of them are of other types, such as textual edits. Graciela would like to accept all the formatting changes but not the other types of changes. She is curious if there is an «accept all» command that will accept only the formatting changes.
It is relatively easy to accomplish this task. Just follow these steps:
- Make sure the Review tab of the ribbon is displayed.
- Click the Show Markup tool (in the Tracking group). Word displays some options that control what changes are shown.
- Clear all the checkmarks, except the Formatting checkmark. (You will need to repeat step 2 for each checkmark you need to remove.)
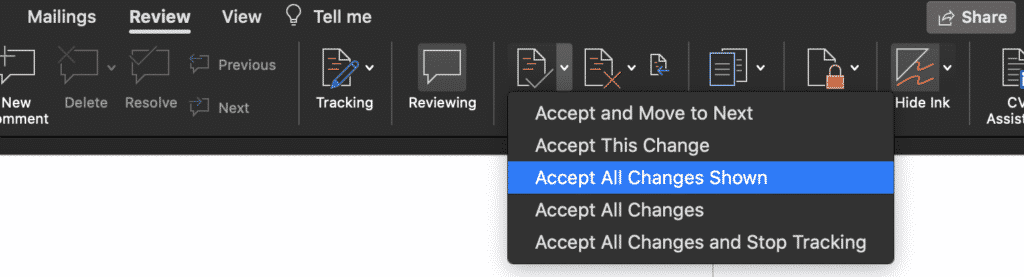
- Click the down-arrow under the Accept tool (in the Changes group). Word displays some different ways you can accept changes.
- Choose Accept All Changes Shown. All the formatting changes (which is all that are shown) are accepted. (Don’t select Accept All Changes in Document; that would accept all the changes whether they are shown or not.)
- Use the Show Markup tool to select which changes you want Word to show.
If you find yourself getting rid of the formatting changes quite a bit, you can instruct Word to not track formatting changes at all. Follow these steps if you are using Word 2007 or Word 2010:
- Make sure the Review tab of the ribbon is displayed.
- Click the down-arrow under the Track Changes tool (in the Tracking group) and then click Change Tracking Options. Word displays the Track Changes Options dialog box. (See Figure 1.)
- Clear the Track Formatting check box.
- Click OK.
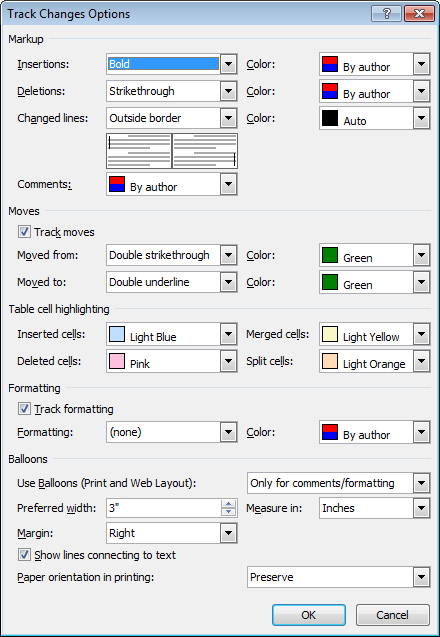
Figure 1. The Track Changes Options dialog box.
If you are using Word 2013 or a later version, follow these steps instead:
- Make sure the Review tab of the ribbon is displayed.
- Click the small icon at the lower-right corner of the Tracking group. Word displays the Track Changes Options dialog box.
- Click the Advanced Options button. Word displays the Advanced Track Changes Options dialog box. (See Figure 2.)
- Clear the Track Formatting check box.
- Click OK to close the Advanced Track Changes Options dialog box.
- Click OK to close the Track Changes Options dialog box.
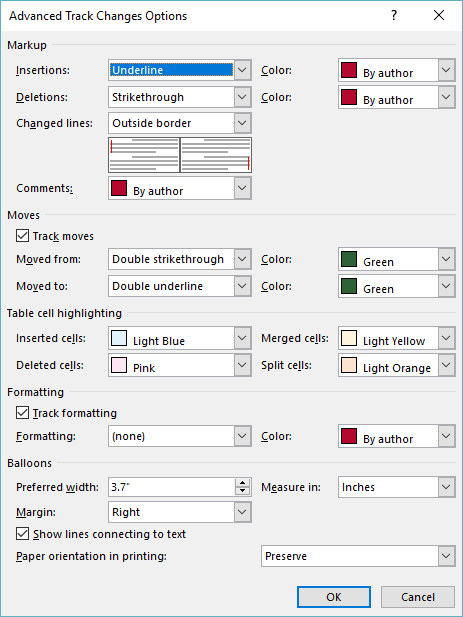
Figure 2. The Advanced Track Changes Options dialog box.
Now Word won’t track any of the formatting changes you make in the document. If you find that the setting is not persistent from one Word session to another, you can create a small macro to run whenever a document is opened. Simply add this single line to the macro:
ActiveDocument.TrackFormatting = False
WordTips is your source for cost-effective Microsoft Word training.
(Microsoft Word is the most popular word processing software in the world.)
This tip (8834) applies to Microsoft Word 2007, 2010, 2013, 2016, 2019, and Word in Microsoft 365. You can find a version of this tip for the older menu interface of Word here: Accepting All Formatting Changes.
Author Bio
With more than 50 non-fiction books and numerous magazine articles to his credit, Allen Wyatt is an internationally recognized author. He is president of Sharon Parq Associates, a computer and publishing services company. Learn more about Allen…
MORE FROM ALLEN
Creating Thin Spaces
Thin spaces are a typographic device that allows you add a bit of space between elements of a document. There are no thin …
Discover More
Functions that Can Access Closed Workbooks
When creating a workbook, you can include formulas that reference data stored in other workbooks. Some functions will …
Discover More
Preventing Straggling Heads
Undoubtedly you will want to format your document so that headings stay with the paragraph that follows the heading. …
Discover More
More WordTips (ribbon)
Displaying Edits by Date
Track Changes is a great tool; it allows you to see what changes were made in a document and then determine whether you …
Discover More
Setting Default Options for Track Changes
The Track changes feature in Word is a great help in editing documents, particularly if you are working with others or …
Discover More
Examining Tracked Changes in a Macro
The Track Changes feature in Word is very handy when you need to see what edits are made to a document. Using a macro, …
Discover More
When you turn on Tracked Changes in Microsoft Word, Word will automatically track all text, formatting and ink changes for you.
Tracking all changes is a handy way to show your colleagues what you have updated in the document, leaving the document owner to manage these changes, accepting and rejecting them before they are saved into the documents text body.

Formatting refers to the way in which the document is laid out, an example of a formatting change would be indenting a paragraph or inserting a page break.
Often formatting changes can be reviewed at a glance.
Quickly accepting all formatting changes before you begin reviewing all other changes one-by-one is an easy way to de-clutter your document and leave you to review the changes the remaining changes individually.
In this blog, we will show you how to accept all formatting changes at once, while leaving all other tracked changes to be reviewed separately.
How to accept all formatting changes at once in Word?
- Open Word
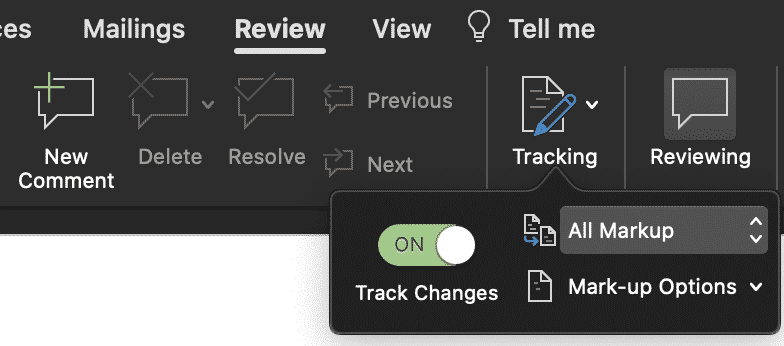
- Click the Review Tab

- Find and Press Tracking
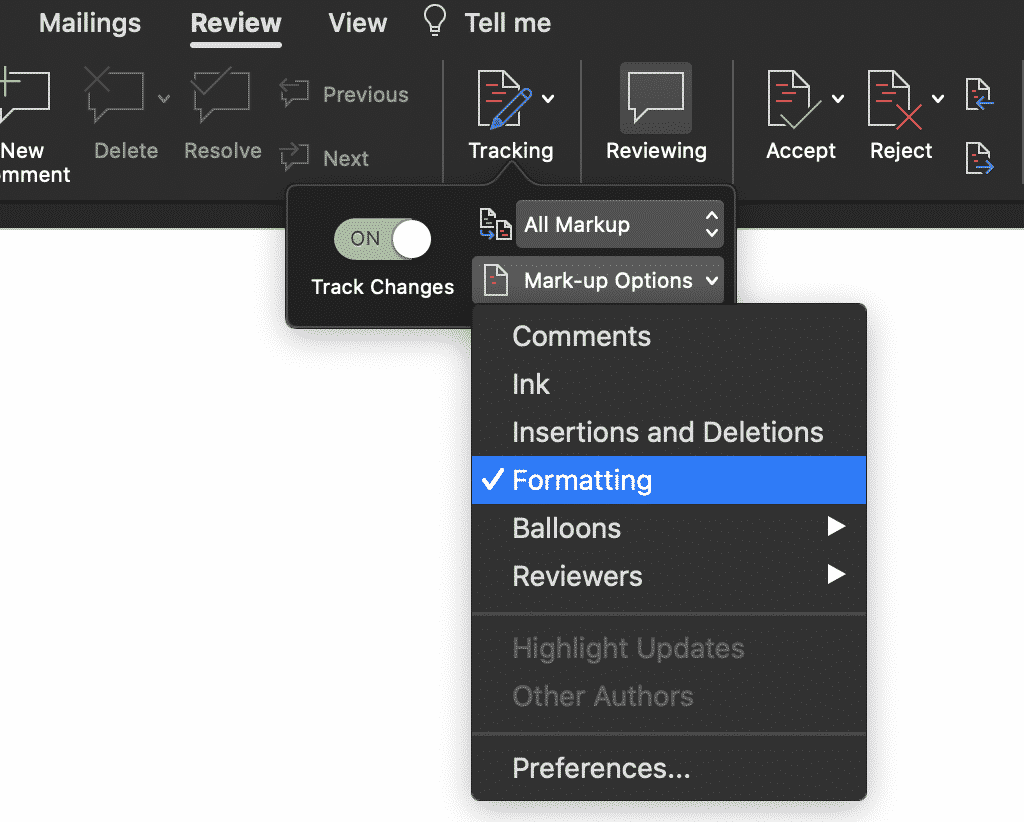
- Under Tracking, Press Mark-up Options
- In the Mark-up Options options, clear all checkmarks, except for the formatting line. Leave the tick next to formatting
- Note here, you may need to repeat steps 2-3 and clear the checkmarks individually depending on the version of Word you are working in
- Once all checkmarks are cleared, find and click Accept
- Press Accept All Changes Shown (aka, just your formatting changes)
After you have accepted all changes shown, you can review the remaining comment, ink and insertion/deletion mark-ups by re-ticking them as you did back in step 5 above.
Looking for a better way to manage version control?
When you are collaborating with more than one other person on a Microsoft Word document keeping track of every version is often harder than it needs to be.
There are a number of commonly used methods to manage version control, such as; adding version numbers or dates to the end of the document name. Inserting your initials, or your initials and the date at the end of the document.
These methods do work, if your team are all following the same version control system and no two people are working on the document simultaneously, leaving you with two different versions of report_v18.
Too often, these methods just don’t work.
Your file name ends up being so long that you can’t read it without expanding the size of your documents window, or someone places the word _final at the end of your document prematurely leaving you with something along the lines of document_v18.2_final_v4 and so on.
The only way to find the latest version now is to look at the most recently updated file, cross your fingers and hope you have just opened the correct version.

With so many of us facing the same frustrations when collaborating in Microsoft Word, it’s no surprise that there are now some amazing purpose-built tools on the market that are here to make version control easy.
Tools such as Simul Docs.
Numerical file names is the best way to manage version control, you’ve been using some form of this method for a while now. But Simul takes it to a whole new level.
Removing the variable of individual decisions or file name preferences, Simul will automatically save a document under a new name when a change is made.
Simul makes version control easy and fool proof, like it should be.
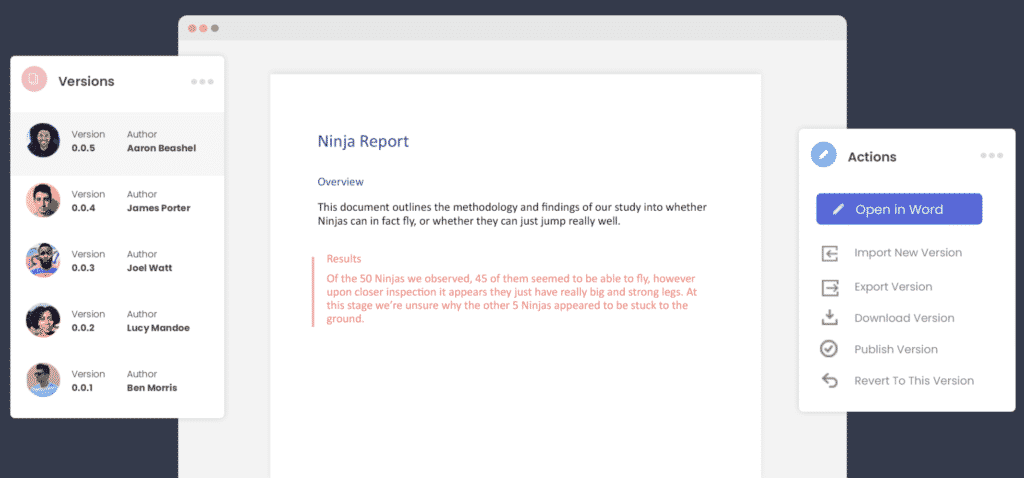
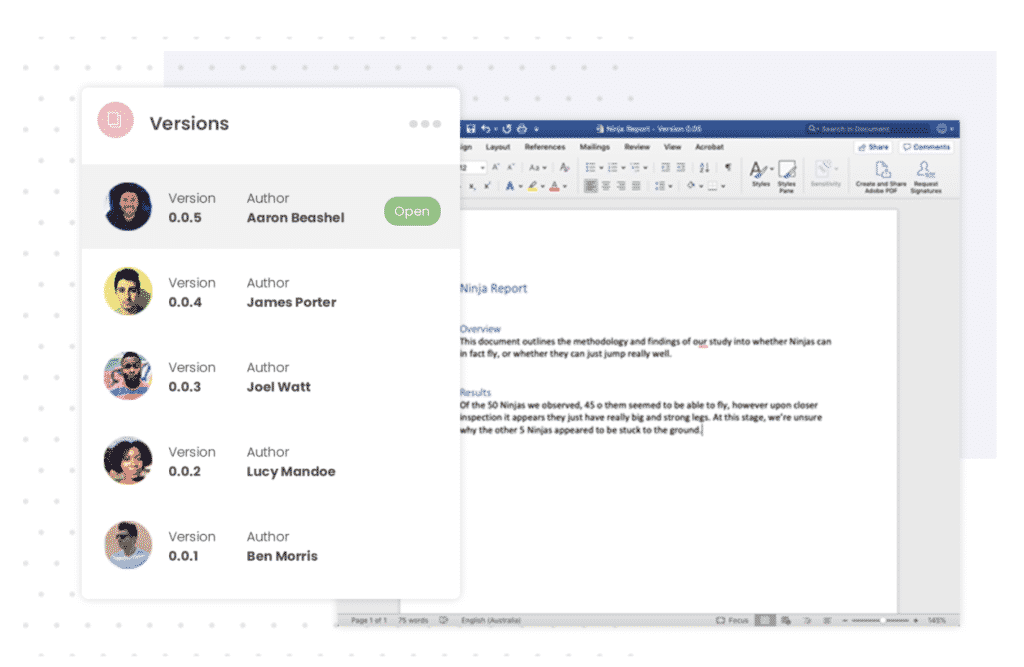
When working in Simul you own the first draft, Simul would call this version 0.0.1.
Someone else opens version 0.0.1 and makes a few minor changes and without this author having to think about pressing save, or coming up with a new file name, Simul has automatically saved the document for them and called it version 0.0.2.
Then you jump back in and add a few extra pieces of information, this version is automatically saved as version 0.0.3.
Its version control done right. The way you’ve always dreamt it would be done.
With Simul managing version control for you, you will never have to search through a long list of documents and crazy file names again to find the latest version. You also won’t accidentally save over an old version without realising.
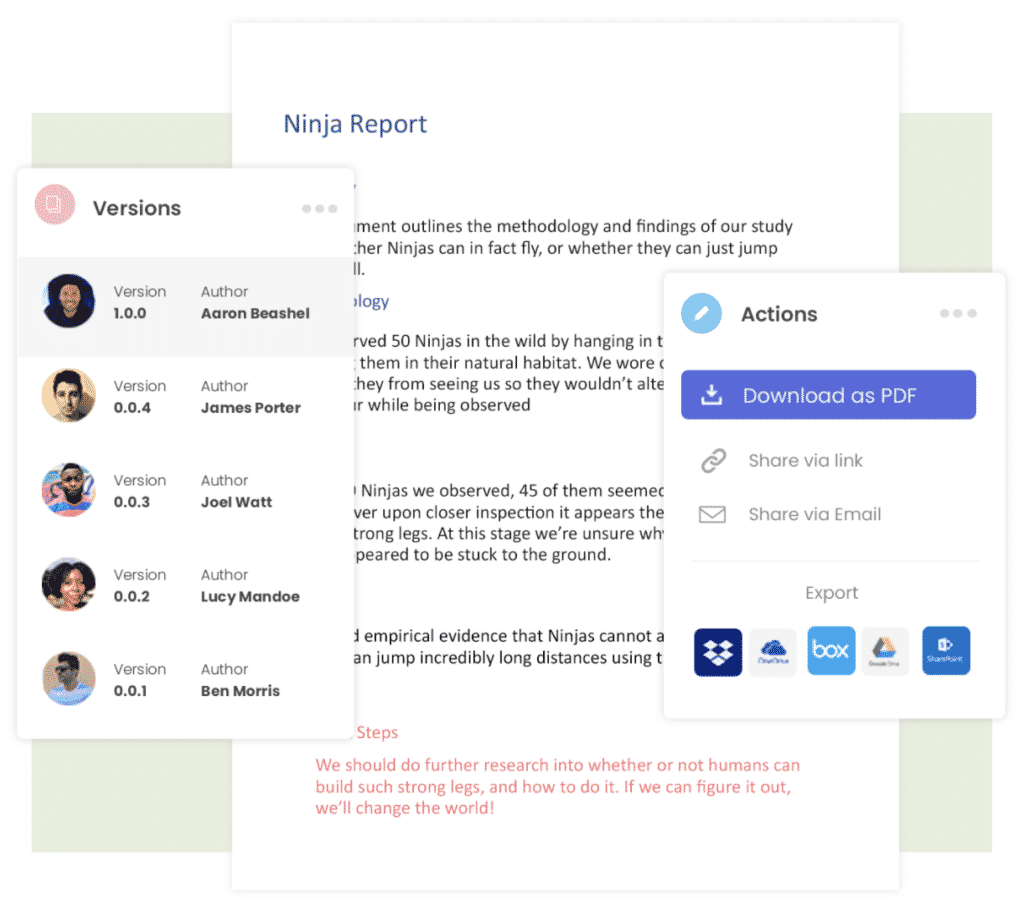
So you’ve finished collaborating and you now have a final version. Congratulations!
You can easily export or share your document directly from Simul Docs. Use the export button to take the file out in either Word or PDF formate, or use the share button to share the file using a direct link, email or any cloud sharing system such as Dropbox, GoogleDrive, OneDrive and Sharepoint.
If you share the working file with someone outside of your organisation and they would like to track a few last updates for you or make a comment on the document, that’s ok. Simul is happy for you to share the document with anyone and allow them to collaborate with you using all of the amazing Simul Docs features.
Leaving you to collaborate, share and work on your document without any of the painful bits, the bits we all wish weren’t a part of collaborating in Word.
Simul Docs is the answer to collaboration done right.