Не редко для рабочих задач требуется распечатать календарь. Один из вариантов – найти в интернете готовую картинку с календарем на нужный месяц или год. Но, такой вариант не подойдет, если перед распечаткой календарь нужно отредактировать, например, записать в него запланированные мероприятия.
В данной статье мы расскажем о том, как сделать календарь в Word на месяц и год с помощью шаблонов или таблиц. Статья будет актуальной для современных версий Word, таких как Word 2010, 2013, 2016, 2019 и 2021.
Шаблоны Word
В последних версиях Word доступен такой инструмент как готовые шаблоны. С их помощью можно быстро создавать различные документы, например буклеты, письма, визитки, календари и т. д.
Чтобы создать календарь с помощью шаблонов нужно нажать на кнопку «Файл» на панели инструментов и перейти в «Другие шаблоны».


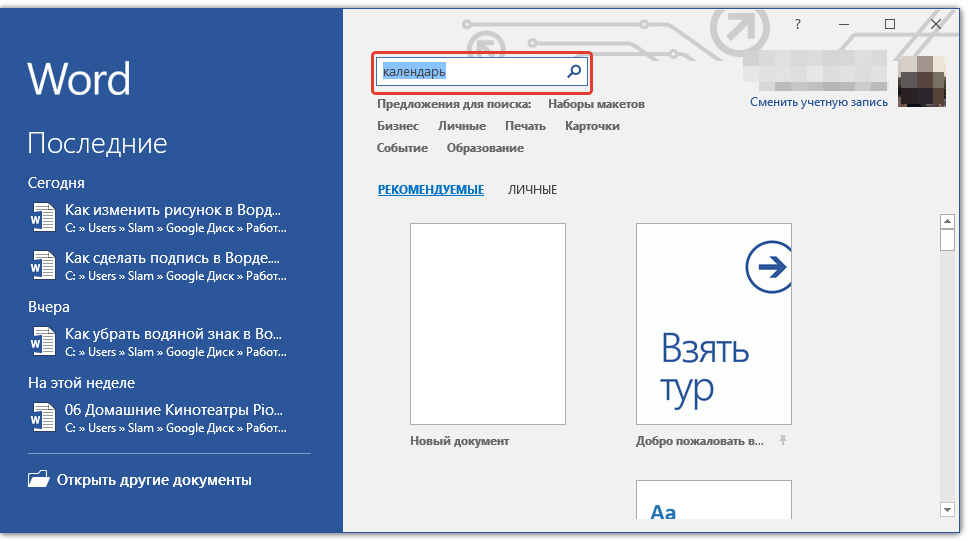
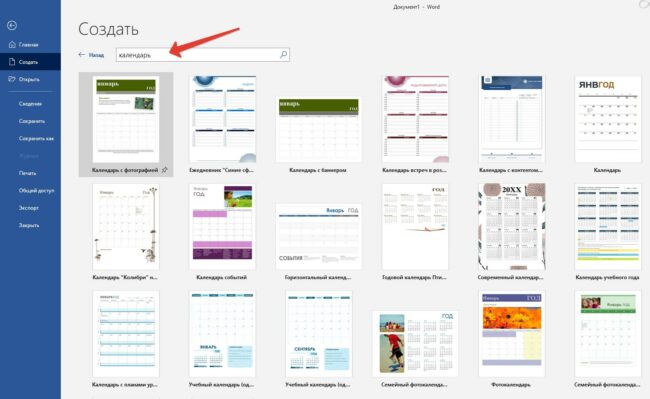
После этого перед вами появится каталог шаблонов. Здесь нужно ввести в поиск слово «календарь» и нажать на кнопку ввода.

В результате перед вами появятся шаблоны для создания календаря. Некоторые из шаблонов уже настроены на текущий год, а некоторые позволяют выбрать год или месяц, после чего календарь генерируется автоматически.

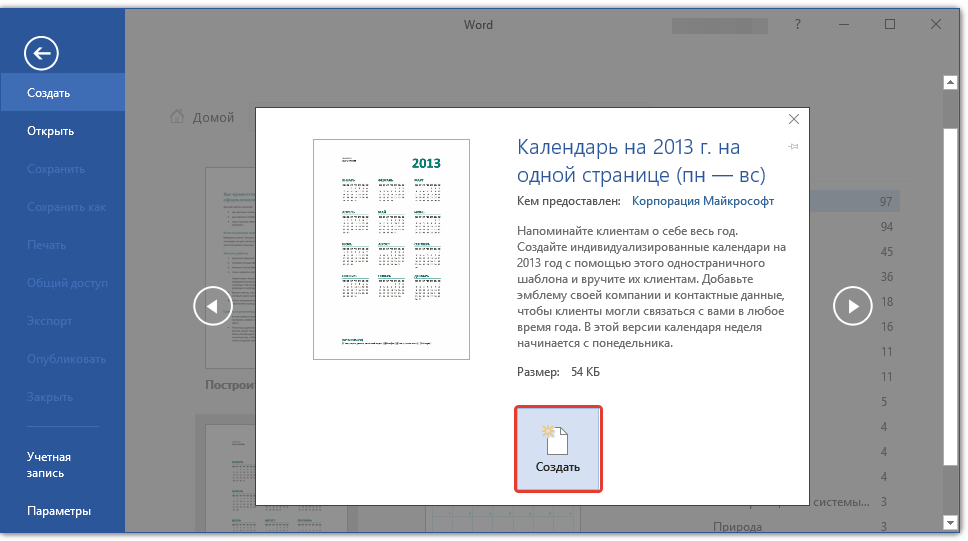
Кликнув по шаблону, можно посмотреть его описание. Если шаблон предлагает пользователю выбор месяца, то это будет указано в описании. Для того чтобы создать календарь по выбранному шаблону достаточно нажать на кнопку «Создать».

Если шаблон календаря предполагает выбор месяца или года, то появится меню, в котором можно будет указать эти данные.

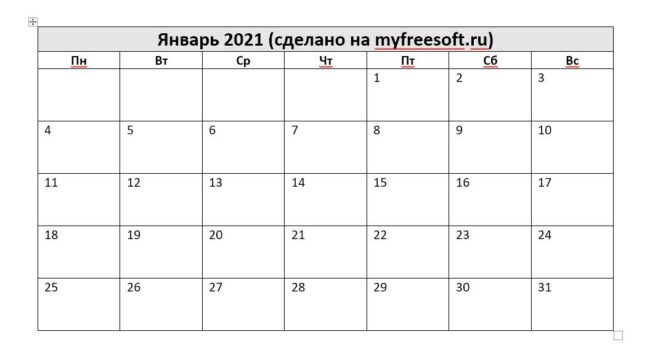
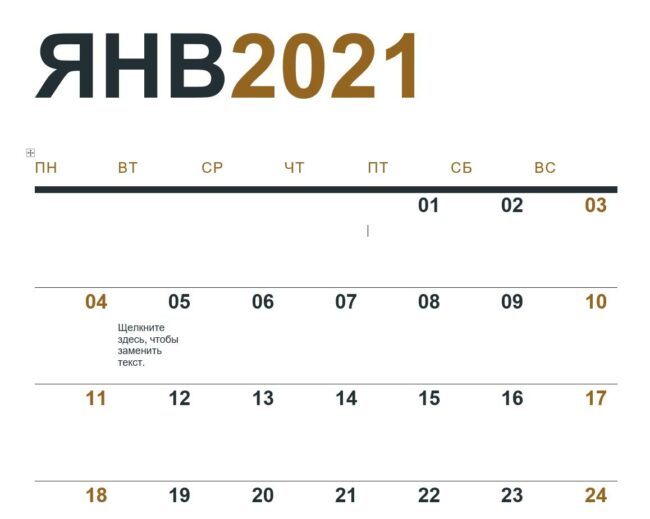
В результате вы создадите календарь в Word, который можно будет отредактировать, сохранить как файл или распечатать.

Если шаблон предполагал настройки, то на панели инструментов появится новая вкладка «Календарь». На которой можно будет изменить дату или дизайн страницы.

Поскольку шаблон построен на основе таблицы, то дизайн созданного календаря также можно изменить через настройки таблиц, которые доступны на вкладках «Конструктор таблиц» и «Макет».

Здесь можно изменить используемые цвета, отредактировать линии, заливку и т. д.
Экспресс-таблицы
Еще один способ создания календаря в Word – это Экспресс-таблицы. Чтобы воспользоваться этим вариантом нужно создать новый документ, перейти на вкладку «Вставка», нажать на кнопку «Таблица» и выбрать пункт «Экспресс-таблицы».
В результате появится список шаблонов таблиц, которые можно создать в один клик. Выберите подходящий вариант и нажмите на него.

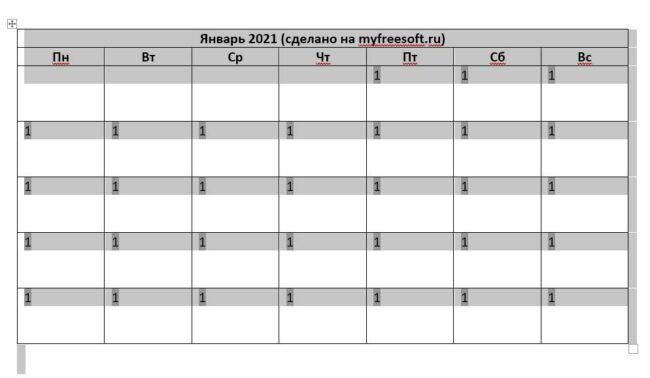
В результате на страницу будет вставлена таблица с календарем на месяц.
К сожалению, здесь не предусмотрено возможности автоматического создания календаря для подходящего месяца, поэтому правильные числа в таблице придется расставлять вручную.

Для редактирования внешнего вида данного календаря также можно использовать настройки таблиц на вкладках «Конструктор таблиц» и «Макет».
Посмотрите также:
- Как перевернуть страницу в Word
- Как построить график в Excel
- Как сделать альбомную страницу в Word
- Как сделать вертикальный текст в Word
- Как закрепить область в Экселе
Автор
Александр Степушин
Создатель сайта comp-security.net, автор более 2000 статей о ремонте компьютеров, работе с программами, настройке операционных систем.
Остались вопросы?
Задайте вопрос в комментариях под статьей или на странице
«Задать вопрос»
и вы обязательно получите ответ.
![]()
Download Article
![]()
Download Article
This wikiHow teaches you how to make a calendar in Microsoft Word for Windows and Mac. You can either use a Microsoft calendar template to quickly create a calendar, or you can manually create your own calendar using a table.
-

1
Open Microsoft Word. It’s a dark-blue app with a white «W» on it.
-
2
Click the search bar. It’s at the top of the Word window.
- On Mac, first click File in the upper-left corner, then click New from Template… in the drop-down menu.
Advertisement
-
3
Type in calendar, then press ↵ Enter. Doing so will search the template store for calendar templates.
- You must be connected to the Internet in order to do this.
-
4
Select a calendar template. Click on a calendar that you want to use. The calendar’s page will open.
-
5
Click Create. It’s to the right of the calendar. This will prompt the calendar template to download.
- If you are prompted to enable Macros, select Enable Macros, as this will make it easier to make additional calendars for future months and dates.
-
6
Wait for the calendar to load. Once the template finishes downloading, it will open automatically in Microsoft Word.


Advertisement
-
1
Open Microsoft Word. It’s the dark-blue app with a white «W» on it. The Word home page will open.
-
2
Click Blank document. This option is in the upper-left side of the home page.
- Skip this step on a Mac.
-
3
Enter the month. Type in the name of the month for which you want to create your calendar, then press ↵ Enter. Doing so ensures that your month is above your calendar.
-
4
Click the Insert tab. It’s in the blue ribbon at the top of the Word window. The Insert toolbar will open below the ribbon.
-
5
Click Table. You’ll find this in the «Tables» section of the toolbar.
-
6
Create a table. Drag your mouse cursor seven boxes to the right and five (or six, depending on the month) boxes down, then click. This will create a seven-by-five(or seven-by-six) table to serve as your calendar.
-
7
Enter the days of the week. In the top row of boxes, type in a day of the week for each column.
- For example, you’d put «Sunday» in the top-left box, «Monday» in the box to the right of that, and so on.
-
8
Expand your calendar’s boxes. Starting with the third horizontal line from the top of the calendar, click and drag the line downward to enlarge the second row of boxes. Repeat this process for each row of boxes until your calendar is the right size for you.
-
9
Add day numbers. Click the box in which the first day of your month starts, type in 1, press Tab ↹, and proceed to number the rest of the days.
-
10
Add information to your calendar. Once you’ve numbered the days, you can go back and add events, holidays, appointments, and so on by clicking a day’s box, pressing ↵ Enter to start a new line, and typing in the event’s name or details.
-
11
Create other months. You can add more months to your calendar by clicking below the current month’s calendar, pressing ↵ Enter a couple of times, and then repeating the calendar creation process.
-
12
Save your calendar. Press either Ctrl+S (Windows) or ⌘ Command+S (Mac), then select a save location, enter your calendar’s name, and click Save.


Advertisement
Add New Question
-
Question
How do I go to the following month on the same Word document?

You can copy and paste the document and then change the months and dates. This is an advantage because the boxes are the size you wanted, but you will need to adjust the month name and swap the dates over to the corresponding day.
-
Question
How can I create a calendar that includes pictures?
Yes, just choose one of the calendar templates that includes pictures, and paste or insert the pictures you want. See How to Add an Image in Word if you need help with that.
-
Question
How do I include the dates from my Calendar app?
It depends on what calendar app you have.
See more answers
Ask a Question
200 characters left
Include your email address to get a message when this question is answered.
Submit
Advertisement
Thanks for submitting a tip for review!
About This Article
Thanks to all authors for creating a page that has been read 679,295 times.
Is this article up to date?
В Microsoft Word есть большой набор шаблонов документов разного типа. С выходом каждой новой версии программы этот набор расширяется. Те же пользователи, кому и этого покажется мало, могут скачать новые с официального сайта программы (Office.com).
Урок: Как в Ворде сделать шаблон
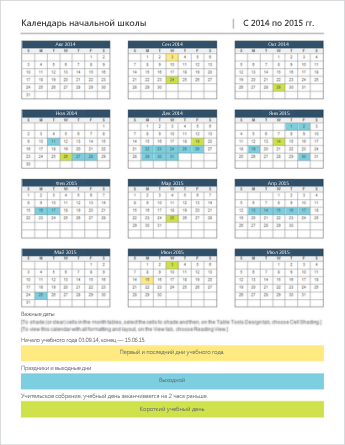
Одной из представленных в Word групп шаблонов являются календари. После добавления в документ их, конечно же, нужно будет подредактировать и подстроить под собственные нужды. Именно о том, как все это сделать, мы и расскажем вам в данной статье.
Вставка шаблона календаря в документ
1. Откройте Ворд и перейдите в меню “Файл”, где необходимо нажать на кнопку “Создать”.
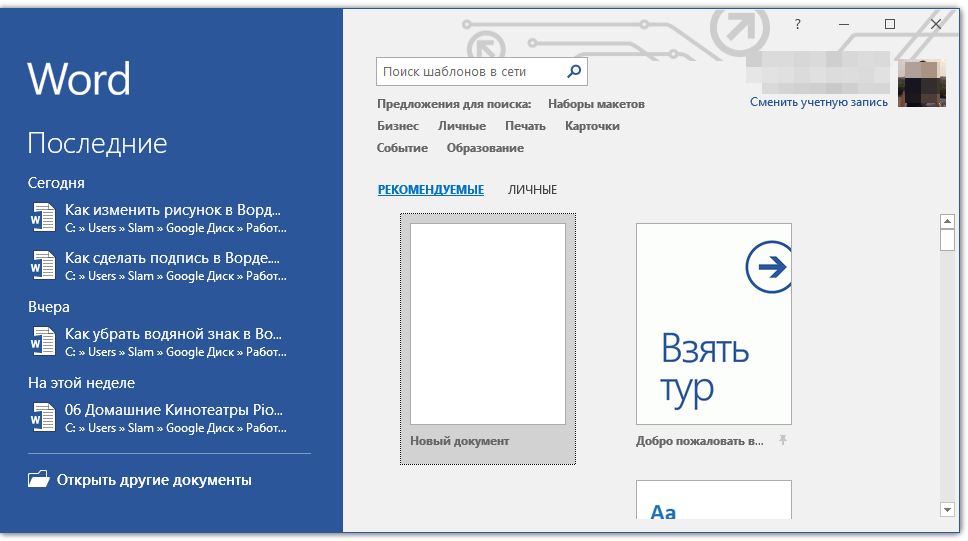
Примечание: В последних версиях MS Word при запуске программы (не готового и ранее сохраненного документа), сразу открывается необходимый нам раздел “Создать”. Именно в нем мы и будем искать подходящий шаблон.
2. Чтобы долго не искать все шаблоны календарей, доступные в программе, тем более, что многие из них хранятся в вебе, просто напишите в строке поиска “Календарь” и нажмите “ENTER”.
- Совет: Помимо слова “Календарь”, в поиске вы можете указать и год, для которого вам нужен календарь.
3. В списке параллельно со встроенными шаблонами будут также показаны и те, что находятся на сайте Microsoft Office.
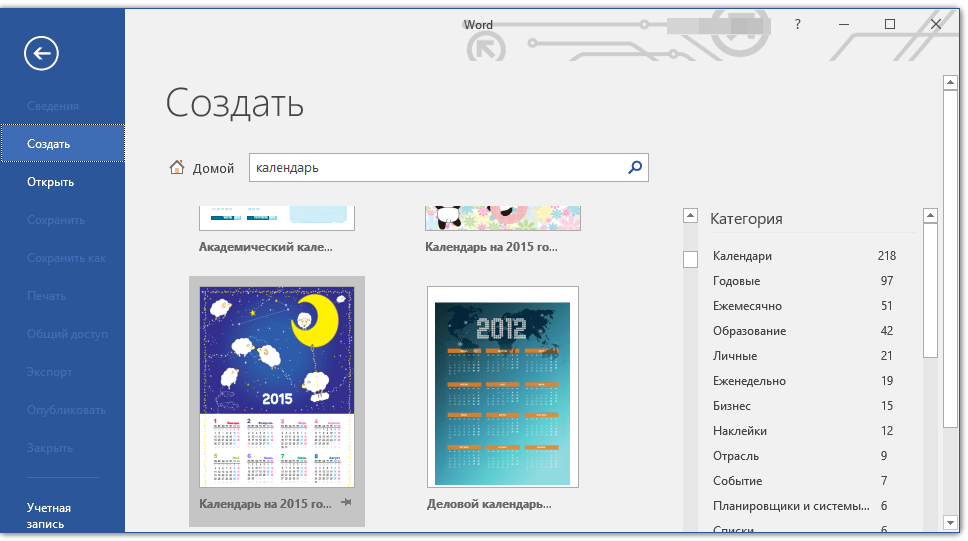
Выберите среди них понравившийся шаблон календаря, нажмите “Создать” (“Скачать”) и дождитесь, пока он будет скачан из интернета. Это может занять некоторое время.
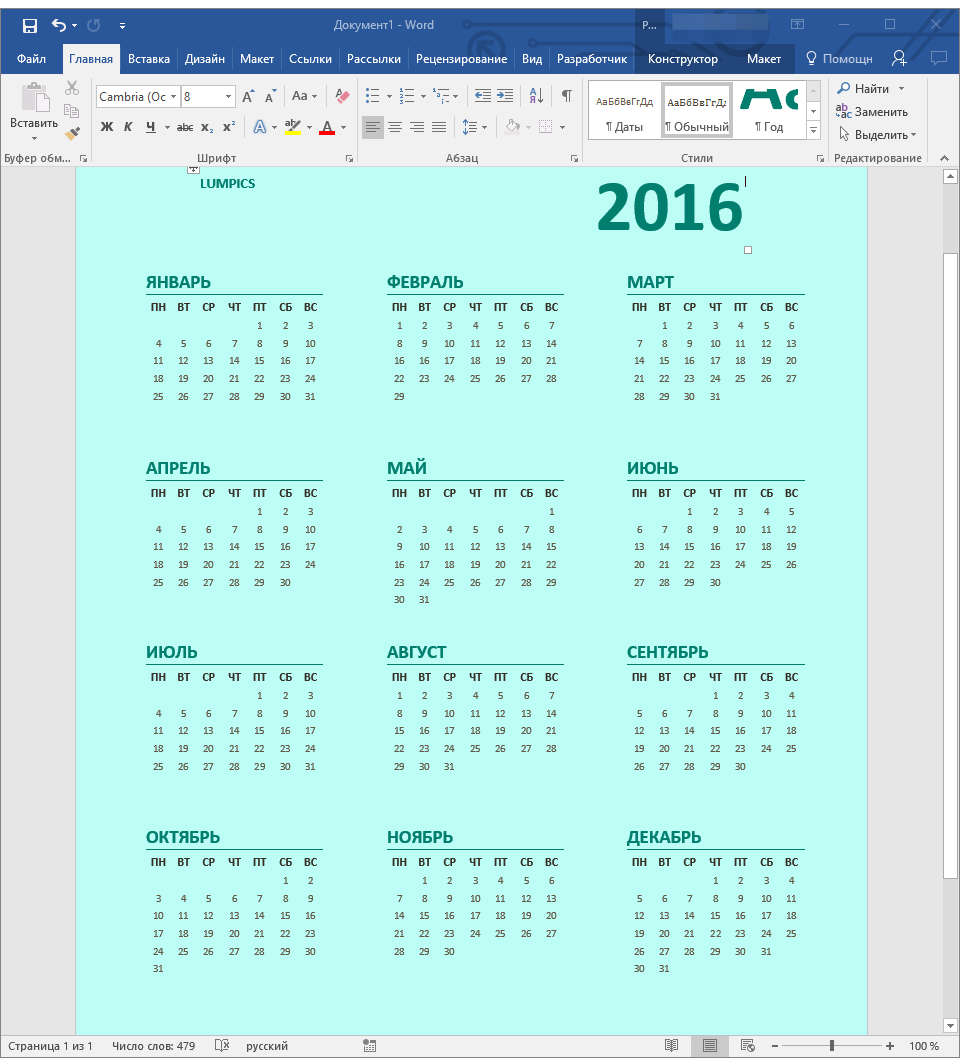
4. Календарь откроется в новом документе.
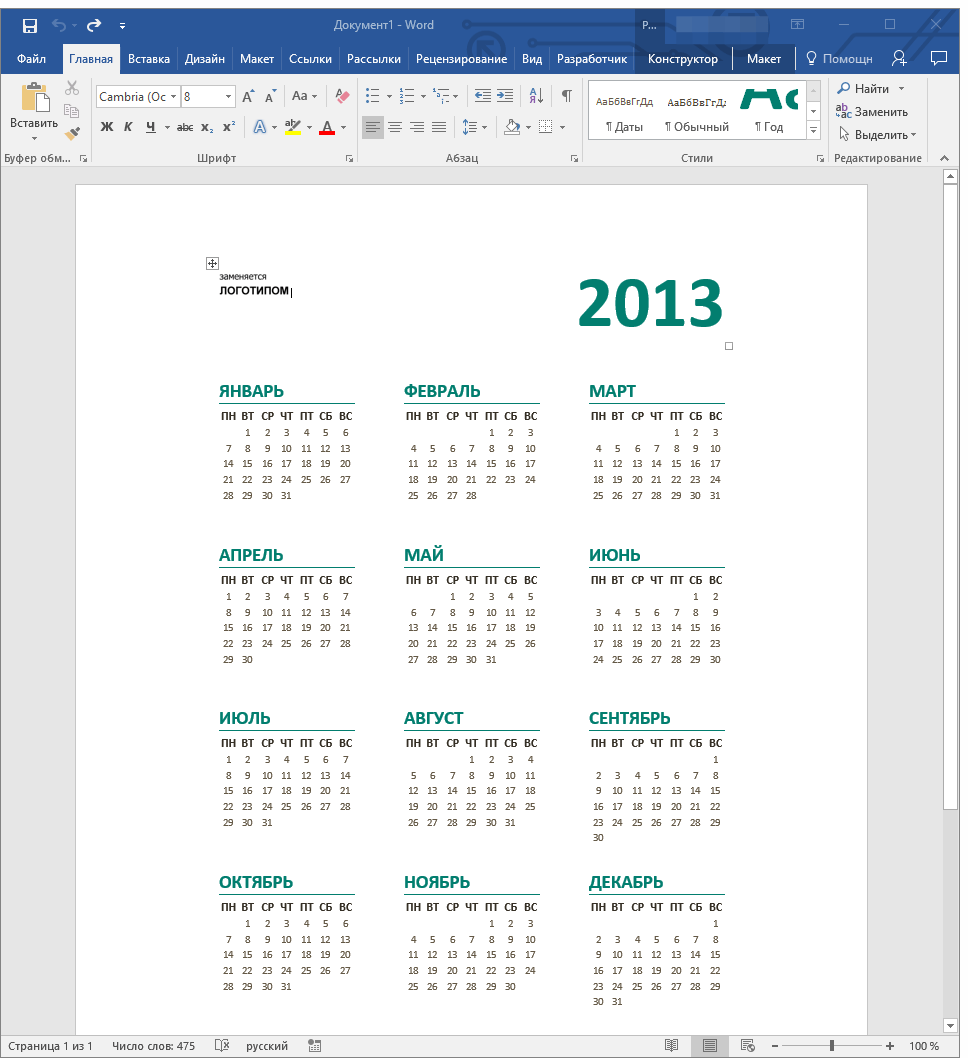

Примечание: Элементы, представленные в шаблоне календаря, можно редактировать точно так же, как и любой другой текст, меняя шрифт, форматирование и другие параметры.
Урок: Форматирование текста в Ворде
Некоторые шаблонные календари, доступные в Word, автоматически “подстраиваются” под любой, указанный вами год, черпая необходимые данные из интернета. Однако, некоторые из них придется изменять вручную, о чем мы подробно расскажем ниже. Ручное изменение также необходимо и для календарей за уже прошедшие года, которых в программе тоже немало.
Примечание: Некоторые календари, представленные в шаблонах, открываются не в Ворде, а в Excel. Инструкция, описанная в этой статье ниже, применима только для вордовских шаблонов.
Редактирование шаблонного календаря
Как вы понимаете, если календарь автоматически не подстраивается под необходимый вам год, сделать его актуальным, правильным придется вручную. Работа, конечно, кропотливая и продолжительная, но оно явно того стоит, ведь в результате вы получите уникальный календарь, созданный своими руками.
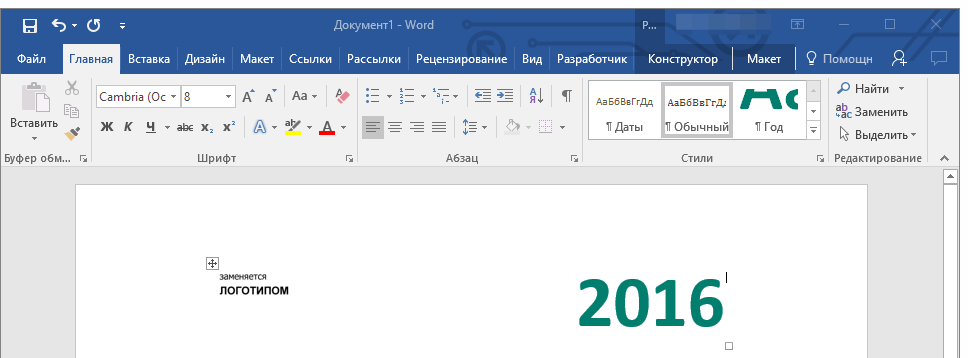
1. Если на календаре указан год, измените его на текущий, следующий или любой другой, календарь для которого вы хотите создать.
2. Возьмите обычный (бумажный) календарь на текущий или тот год, календарь для которого вы создаете. Если календаря нет под рукой, откройте его в интернете или на мобильном телефоне. Вы также можете ориентироваться на календарь на компьютере, если вам так будет удобнее.
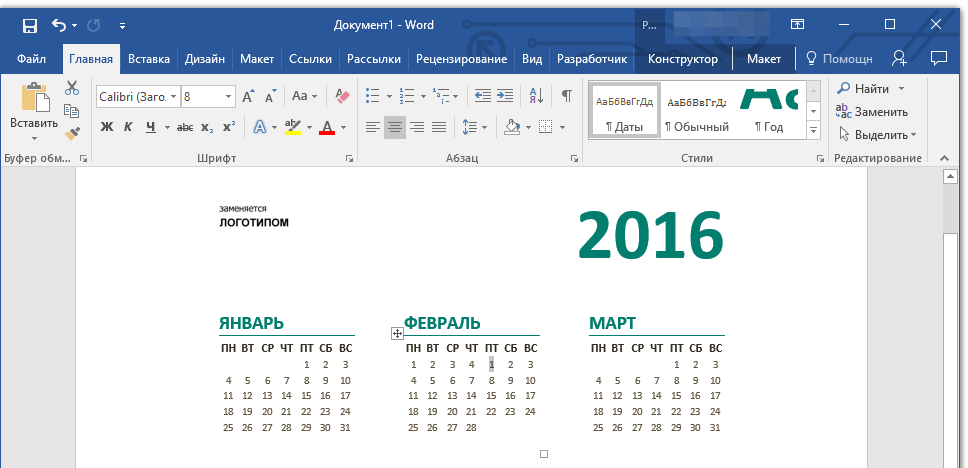
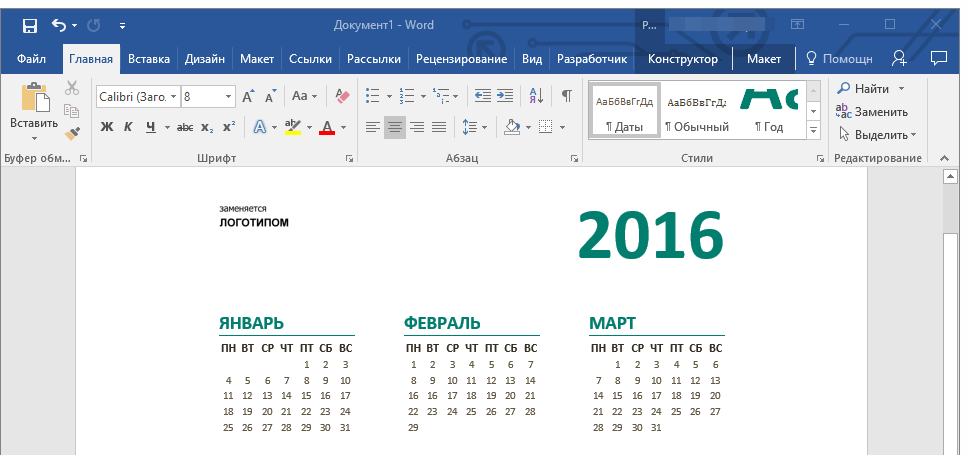
3. А теперь самое сложное, точнее, самое продолжительное — начиная с января месяца, измените даты во всех месяцах в соответствии с днями недели и, соответственно, календарем, на который вы ориентируетесь.
- Совет: Чтобы быстрее перемещаться по датам в календаре, выделите первую из них (1 число). Удалите или измените на необходимую, либо же установите курсор в пустой клетке, где должна находиться цифра 1, введите ее. Далее перемещайтесь по следующим клеткам с помощью клавиши “TAB”. Установленная там цифра будет выделяться, и на ее месте вы сможете сразу поставить правильную дату.
В нашем примере вместо выделенной цифры 1 (первое февраля) будет установлена 5, соответствующая первой пятнице февраля 2016 года.
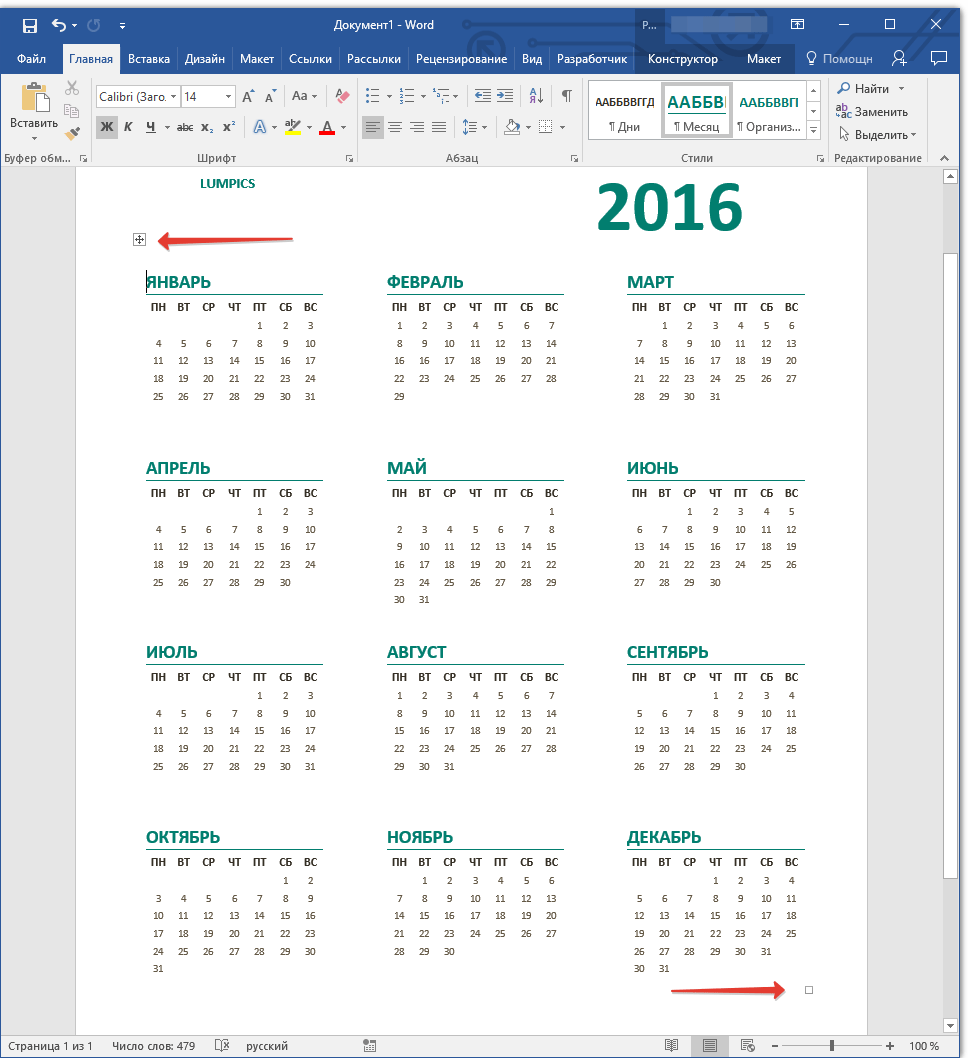
Примечание: Переключаться между месяцами с помощью клавиши “TAB”, к сожалению, не получится, поэтому делать это придется с помощью мышки.
4. Изменив все даты в календаре в соответствии с выбранным вами годом, вы можете перейти к изменению стиля оформления календаря. При необходимости, вы можете изменить шрифт, его размеры и прочие элементы. Воспользуйтесь нашей инструкцией.
Урок: Как в Word изменить шрифт
Примечание: Большинство календарей представлены в виде цельных таблиц, размеры которых можно изменять — достаточно потянуть за угловой (правый нижний) маркер в нужном направлении. Также, эту таблицу можно переместить (плюсик в квадрате в левом верхнем углу календаря). О том, что еще можно сделать с таблицей, а значит, и с календарем, находящимся внутри нее, вы можете прочесть в нашей статье.
Урок: Как сделать таблицу в Ворде
Сделать календарь более красочным можно с помощью инструмента “Цвет страницы”, который меняет ее фон.
Урок: Как в Word изменить фон страницы
5. В конечном итоге, когда вы выполните все необходимые или желаемые манипуляции по изменению шаблонного календаря, не забудьте сохранить документ.
Рекомендуем включить функцию автосохранения документа, которая предостережет вас от потери данных в случае сбоев в работе ПК или при зависании программы.
Урок: Функция автосохранения в Ворде
6. Обязательно распечатайте созданный вами календарь.
Урок: Как в Word распечатать документ
Вот, собственно, и все, теперь вы знаете, как сделать календарь в Ворде. Несмотря на то, что мы с вами использовали готовый шаблон, после всех манипуляций и редактирования на выходе можно получить действительно уникальный календарь, который не стыдно будет повесить дома или на работе.
Иногда бывает нужно сделать календарь на месяц в Word. Например, для отметки рабочих смен, расписания занятий и прочих задач. Расскажу наиболее простой способ как это сделать в виде пошаговой инструкции. Тем, кто уже владеет Word хорошо, понравится предложенный нами способ нумерации дней. Уверен, не все знали, что так было можно.
Создаем таблицу
В новом документе создаем таблицу 7×7 ячеек. Для этого выберите пункту Вставка, Таблица.
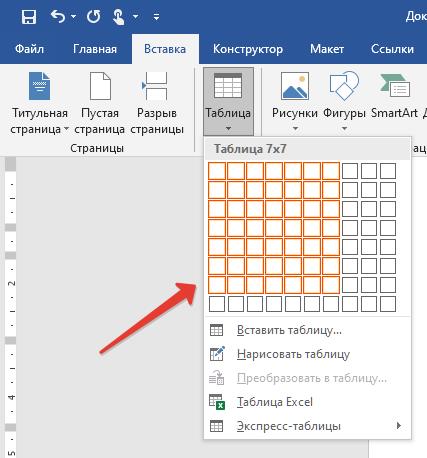
Ширина, 7 дней, выбрана по числу дней недели. Высота — по числу недель плюс пара строчек на название месяца и названия дней.
Делаем название месяца
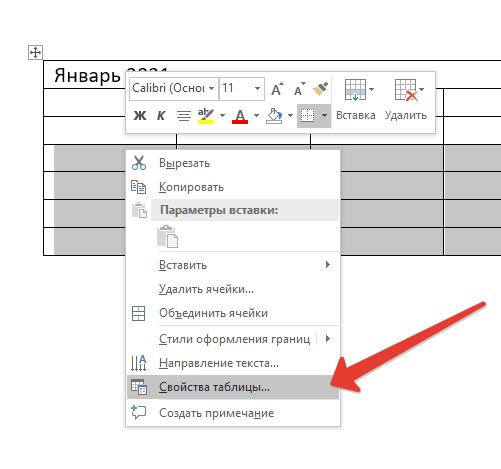
Ячейки в верхней строке выделяем мышью и объединяем в единую ячейку с помощью меню, вызываемого по правой кнопке мыши.
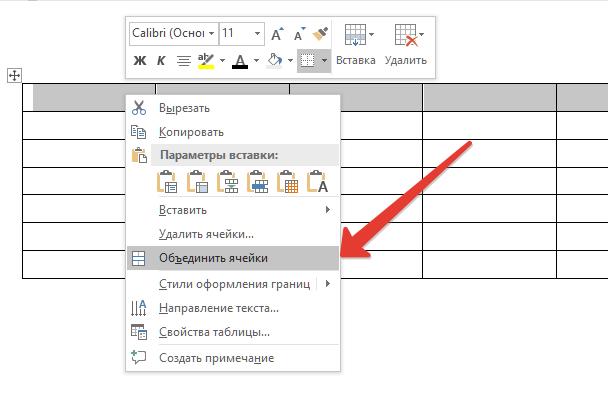
Название вводим в ячейку и центруем текст по ширине.
Выравниваем высоту ячеек
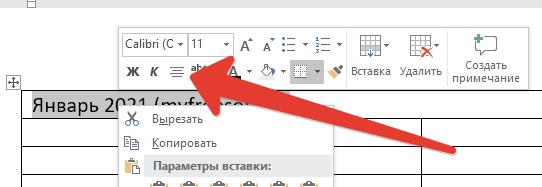
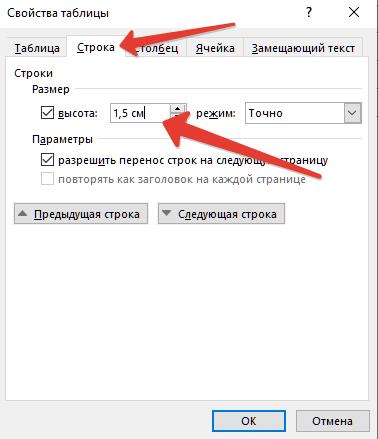
Экспериментально установлено, что для печати календаря в портретной ориентации наиболее удобная высота ячейки — 1,5 см. Выделяем ячейки в пяти последних строках мышью, в контекстном меню выбираем Свойства таблицы.
Переходим на вкладку Строка, ставим 1,5 см, Точно.
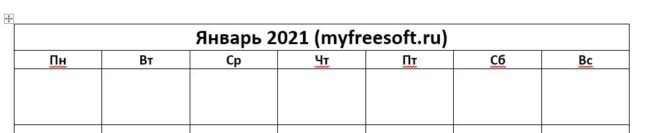
Вводим названия дней недели
Тут без хитростей. Просто набираем на клавиатуре названия дней недели.
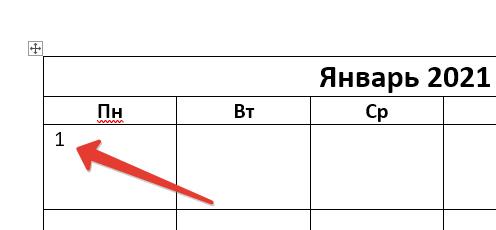
Вводим числа в календарь Word
Тут мы сэкономим время с помощью Экспресс-блоков. Встаем в первую ячейку и через меню Вставка вставляем в нее автополе Seq.
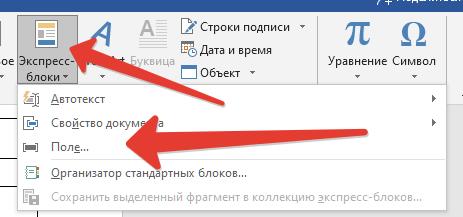
После фразы Seq в формуле дописываем идентификатор. Например, DAY. Подойдет любой, важно, чтобы не совпадал со стандартными нумерациями Word.
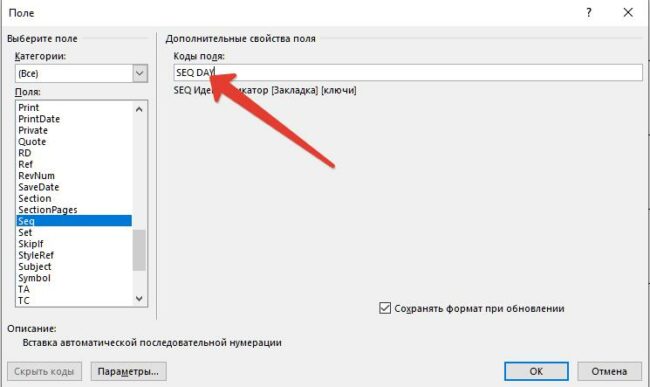
Должно получиться вот так.
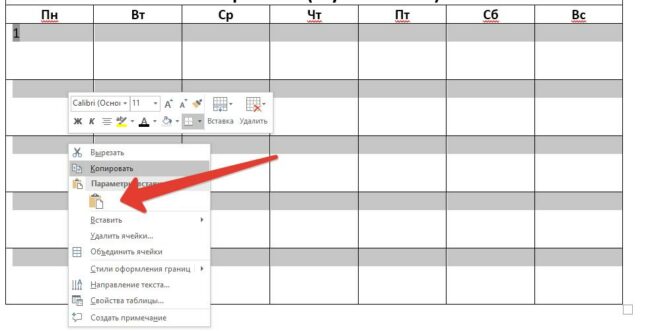
А теперь выделяем единичку. Копируем ее через правую клавишу мыши или по Ctrl-С.

Теперь выделяем все ячейки с днями и вставляем скопированный фрагмент.
Первое число приходится на пятницу. Поэтому первые 4 ячейки выделяем и нажимаем Del.
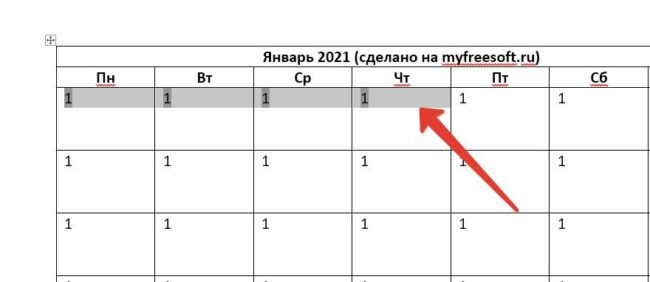
Теперь выделяем всю таблицу и нажимаем F9 — обновление полей.
Удалите лишние дни в нижней строке (при необходимости).
Календарь готов! Дальнейшее украшение — по вашему вкусу.
А можно сделать проще?
Если вы хотите нарисовать красивый календарь в Ворд, то помогут тысячи шаблонов готовых макетов. Просто наберите в строке поиска «календарь при создании нового документа».
Мне понравился вот такой.
Понравилась статья? Поделитесь!
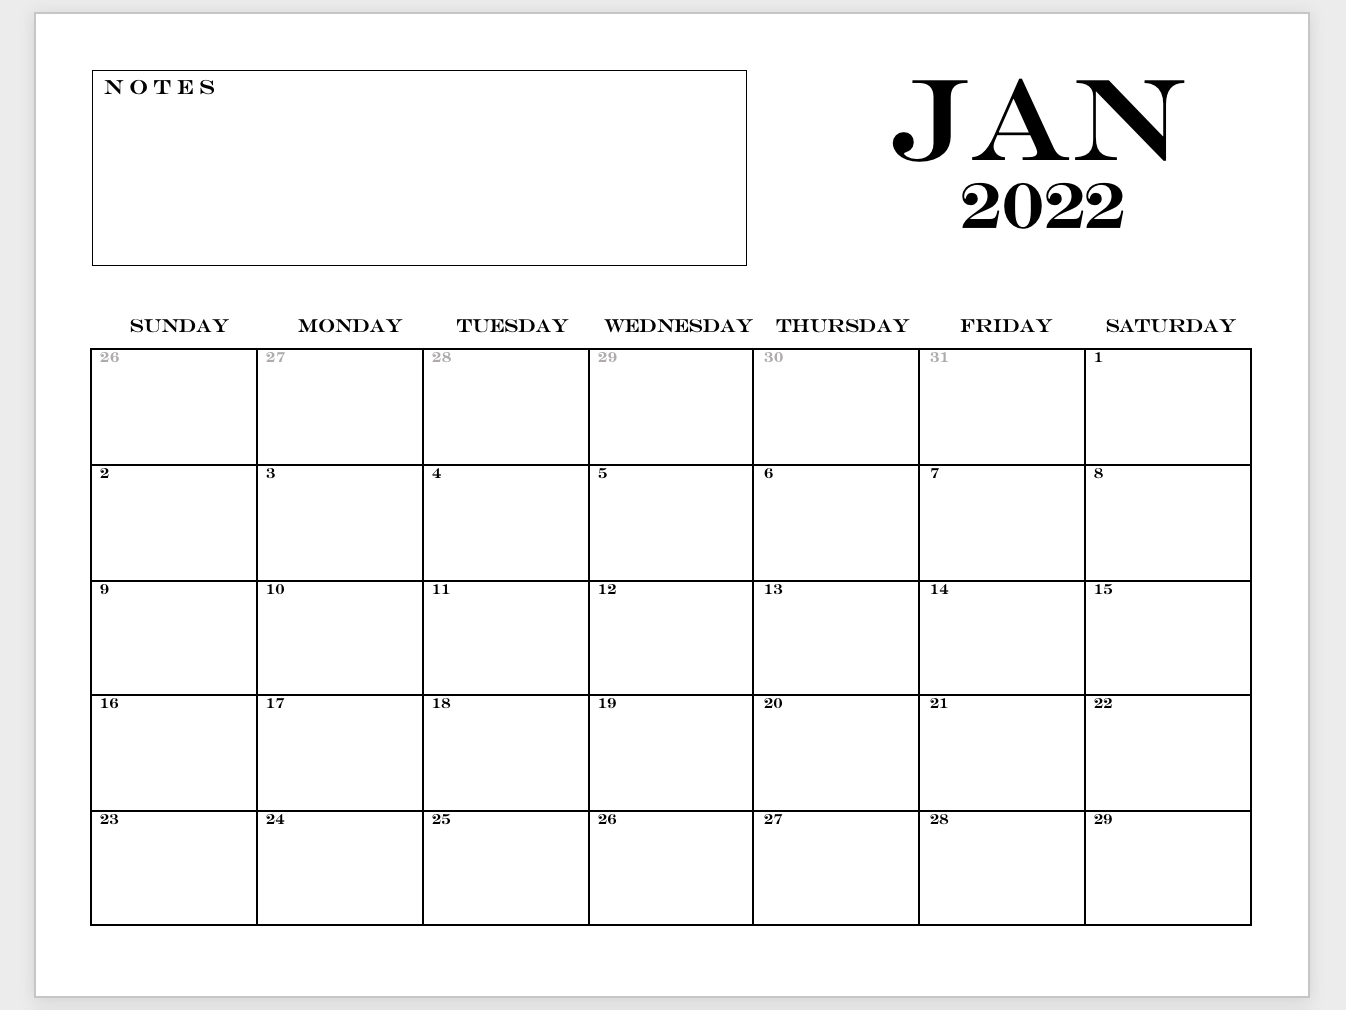
Building a custom, organized calendar is key for time management and productivity, so let’s learn how to create a calendar template in Word instead of reinventing the wheel.
Ready when you are! 🏁
How to Create a Calendar in Word With a Table
Note: In this tutorial, we use Microsoft Word for Mac Version 16.54. The steps and features may look different if you’re on another platform or version.
1️⃣ Open a new Word document
1. Open Microsoft Word, select Blank Document > Create
2. Under the Layout tab, select Orientation > Landscape
3. Go to the View tab, check the Ruler box

2️⃣ Insert the table
1. Place your cursor at the top left corner of the page and press enter ten times to bring the cursor farther down
2. Under the Insert tab, select Table, hover over a 7×6 table, and click to populate seven columns and six rows

3️⃣ Adjust the table rows and columns
1. Click and drag the bottom row to the bottom of the page
2. Click and drag to highlight all the table’s cells except the first row
3. Under the Layout tab, click Distribute Rows

⚡️ Tip: Press Command + P ( Ctrl + P for PC users) or select File > Print any time during your build to preview how it will print/save
4️⃣ Add and customize the text
1. In the first row, type Sunday through Saturday (you can start the week on Monday if you’d like!)
2. Highlight the days in the first row, and under the Layout tab, select Align Center
3. Add the calendar dates to the remainder of the cells starting with the second row
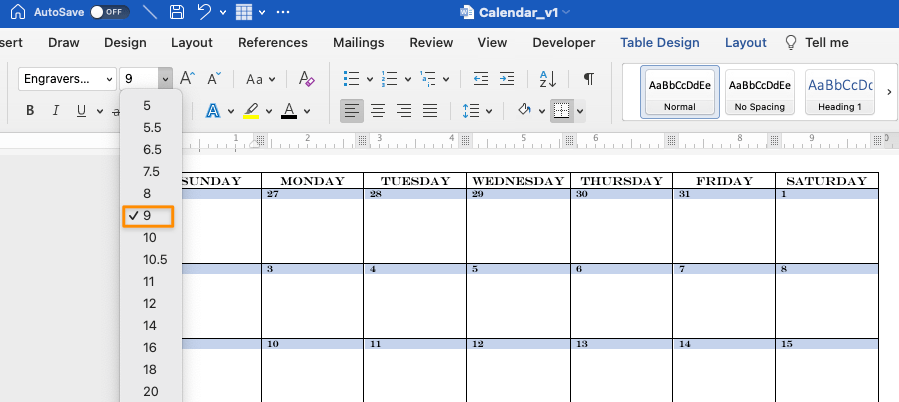
4. Customize the text
- Document font: ENGRAVERS MT
- Days of the week font size: 11
- Calendar dates font size: 9
Optional: Highlight the previous or next month’s dates and change the font color to grey

5️⃣ Format the table
1. Highlight the days in the top row, and under the Table Design tab, select Borders > No Border
2. While the text is still highlighted, select Borders > Bottom Border

6️⃣ Create a Notes section at the top of the page
1. Under the Insert tab, select Shapes > Text Box
2. Click and drag to create a rectangular box using the ruler for measurement guidance
3. Click inside the Text Box and type: N O T E S
4. Highlight the text and change the font type to match your calendar’s font

7️⃣ Add the year and month name
1. Under the Insert tab, select Shapes > Text Box
2. Click and drag to create a rectangular box using the ruler for measurement guidance
3. Type in the month, adjust the font to your liking, and change the font size to 72
4. Copy and paste the Text Box, type the year, adjust the font to your liking, and change the font size to 40
5. Use the rulers to align both text boxes
6. Remove the text borders from the month and year text boxes by holding down the shift key and selecting both. Under the Shape Format tab, select Shape Outline > No Outline

8️⃣ Save as a template
Note: Save the document as a template to reuse again before you add any events.
1. Go to File > Save as Template… and a dialog box will appear
2. Enter your calendar template name under Save As
3. Add relevant tags under Tags (for Mac users)
4. Choose where you want to save your calendar template
5. Check the File Format is set to Microsoft Word template (.dotx)

Related 👉 Learn how to make a timeline in Microsoft Word!
How to Customize a Microsoft Word Calendar Template
1️⃣ Select any MS Word calendar template
1. Launch Microsoft Word
2. At the top right corner, click More templates
3. Type calendar in the Search bar to populate calendar-specific Word templates
4. Or click on an image below to download free online templates from the Microsoft template store:
2️⃣ Customizing your Word template
1. If you have macros enabled, go to the Calendar tab > Select New Dates
2. Choose your Month and Year from the dialog box and click OK
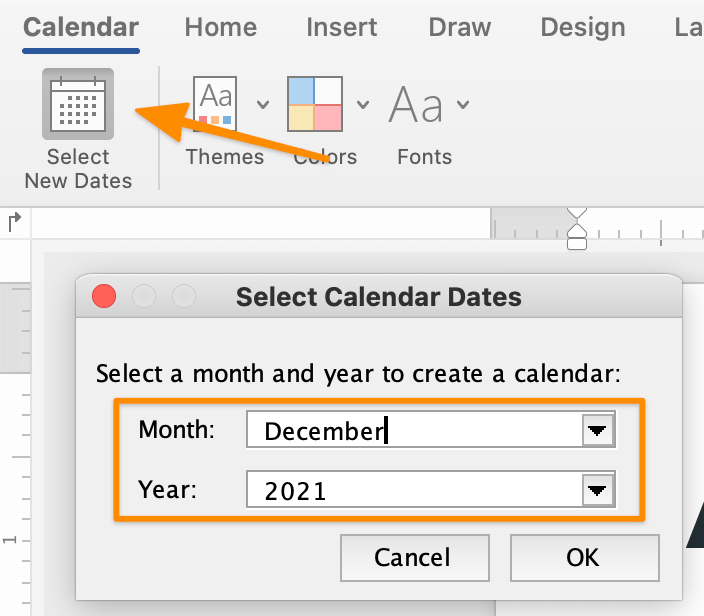
Pause. ⏸
Let’s talk about macros for a minute. Macros are a series of commands used to automate a repeated task. For example, the macros in the Word calendar templates allow you to choose any month and year, and the dates will automatically populate for you.
⚠️ Remember: don’t enable macros from an untrusted source. Check out Microsoft’s support page for more information about enabling or disabling macros.
3. Change the template theme under the Calendar tab > Themes > explore the drop down menu for more options

4. Change the colors of the template theme under the Calendar tab > Colors > explore the drop down menu for more options

5. Change the font of the template theme under the Calendar tab > Colors > explore the drop-down menu for more options

⚡️ Tip: If you want to reset to the original calendar theme at any time, go to Calendar tab > Themes > Reset to Theme from Calendar Template
6. Under the Table Design tab, click the down arrow to scroll and find dozens of options available to change the overall table design

7. Add events to your calendar, and you’re all set!
If you’re looking for other handy calendar guides, check out these resources:
- How to Make a Calendar in Google Docs
- How to Make a Calendar in Excel
- How to Make a Calendar in Google Sheets
- How to Make a Flowchart in Word
- Schedule Templates
Microsoft Word Tips, Tricks, and Troubleshooting
If searching through Word functions feels as cluttered as your catch-all kitchen drawer, you’re not alone! Get the facts here. ⬇️
What calendar size should I use for print?
- Common weekly, monthly, and yearly calendar sizes for home and office:
- Weekly or Monthly Calendar: 8.5” x 11″ or 7″x 9″
- Wall Calendar: 11.75” x 16.5” or 11.75” x 8.25″
- Poster Calendar (includes pictures): 11” x 17” or 27” x 39”
- Standing Desk Calendar: 6.5″ x 5.9″ or 6.9″ x 8.3″
- ⚡️ Tip: Press
Command+Por select File > Print any time during your build to preview how it will print/save. This will help spot any issues before you’ve gone too far
How do I add and modify logos, pictures, and images in my calendar without messing up everything in my document?
- 👾 To insert a logo, pictures, or image…
- Drag and drop a photo directly into the Word application or go to the Insert tab > Pictures and import a file
- 👾 To convert a photo/image into a shape…
- Select the photo/image
- Under the Picture Format tab > click the arrow next to Crop to modify the photo into any shape or ratio
- Hold the Shift key and click and drag one of the corners to adjust the size
- 👾 To adjust the placement of a logo, photo, or image…
- Click and drag the ruler to move your object towards the right or left of the document
Can I move the photo anywhere on the page? And I mean, anywhere?
- Under the Insert tab > select Shapes > Text Box
- Drag the photo into the Text Box
- Drag the Text Box anywhere in your document
- If you find that the text box cuts off your photo, increase the text box size, or decrease the photo size
How do I share my awesome Word calendar?
- Save your file to your OneDrive account (or a different location)
- Click Share at the top right of the Word application (you must be signed in to your Microsoft account)
- Optional: Edit settings
- Allow anyone or specific people access to the document
- Allow editing or review only
- Set an expiration date
- Create a document password
- Type the name, group, or email address
- Include a message
- Click Send
- Other sharing options:
- Click Copy Link and share
- Click Mail to send within an email application
How do I go to the following month on the same Word document?
- After you’ve created your calendar with the formatting and design complete and before you add any deliverables/events, copy and paste the calendar into a new page and adjust the date. Here’s how:
- For Mac users:
- 1. Press
Command+Ato select all - 2. Press
Command+Cto copy - 3. Go to the next page and press
Command+Vto paste - 4. Repeat steps 1-3 for the remainder of the months
- 1. Press
- For PC users:
- 1. Press
Ctrl+Ato select all - 2. Press
Ctrl+Cto copy - 3. Go to the next page and press
Ctrl+Vto paste - 4. Repeat steps 1-3 for the remainder of the months
- 1. Press
- For Mac users:
Any tips to organize the contents of my calendar? Don’t be shy.
- The best way to organize your calendar is whatever method that optimizes your time and planning needs. What works for others may not work for you, and that’s perfectly okay! Here are a few suggestions to organize your calendar:
- Color-coded categories: Use a different font or highlight color for each category type
- Emojis: Assign a unique emoji to quickly identify the category type
- Commuting 🚘
- 1:1 Meeting 👥
- Team Meeting 👩💻
- Status Meeting 🤷♀️
- After School Sport Event ⚽️
- Doctor’s Appointment 🩺
- Lunch 🥑
- Traveling ✈️
- Vacation 🏝
- Celebration 🎉
- Workout 🏋️♀️
- Announcements 📣
- Deep Work 🧠
- Priority❗️
On top of calendars, learn how to create a mind map in Word!
Beware of the Microsoft Feature Creep
Trying to master the sea of “basic” functions to create a document in MS Word can be summed up in one word: stressful. Let us know if this is an accurate representation of using MS Word:
1. You insert an image
2. You move it slightly to the right
3. Everything below the image breaks formatting
4. You move the image back to its original place
5. Everything below the image laughs
Here’s what you should know before investing time, energy, and resources in Microsoft Word:
❌ Although Microsoft Word is a versatile platform, it’s also time-consuming to get to the desired result
❌ Microsoft Word functions on the toolbar/Ribbon are different from version to version
❌ Microsoft Office desktop applications (including Microsoft Powerpoint, Microsoft Excel, and more) are pricey. The Word app alone starts at $159.99
❌ Difficulties with aligning text, tables, lines, and images for the desired effect are common problems
❌ It’s a complex program to learn and use efficiently
Don’t worry—you have options!
Bonus: Check out some of these Microsoft Word alternatives.
ClickUp: the Best Calendar Alternative to Microsoft Word
These realities about MS Word are why it’s essential to use an intuitive software tool to remove the manual work and update in real-time like ClickUp. ✨
ClickUp is the ultimate productivity platform allowing teams to manage projects, collaborate smarter, and bring all work under one tool. Whether you’re new to productivity apps or a seasoned project manager, ClickUp’s customization can stretch to any team size for consistent collaboration.
🔗 Sync Your Calendar Details From Google, Outlook, Apple, and More
ClickUp offers calendar feeds that let you send scheduled tasks directly to your favorite calendar app: Apple Calendar, Outlook, or any calendar that allows you to subscribe with a URL feed. You can even connect as many calendars as you want to different ClickUp Spaces, Folders, and Lists.
Prefer a two-way sync? Connect ClickUp and Google Calendars! ✨

Bonus: Content Calendar Templates!
👩 View Your Schedule From Home in ClickUp
Home in ClickUp provides a panoramic view of your most important items so you always know where your focus should be. So your calendar will always be next to your work!
Your calendar in Home shows your scheduled tasks and reminders for the day. You can also add and display your Google Calendar events and national holidays alongside your ClickUp tasks and reminders.

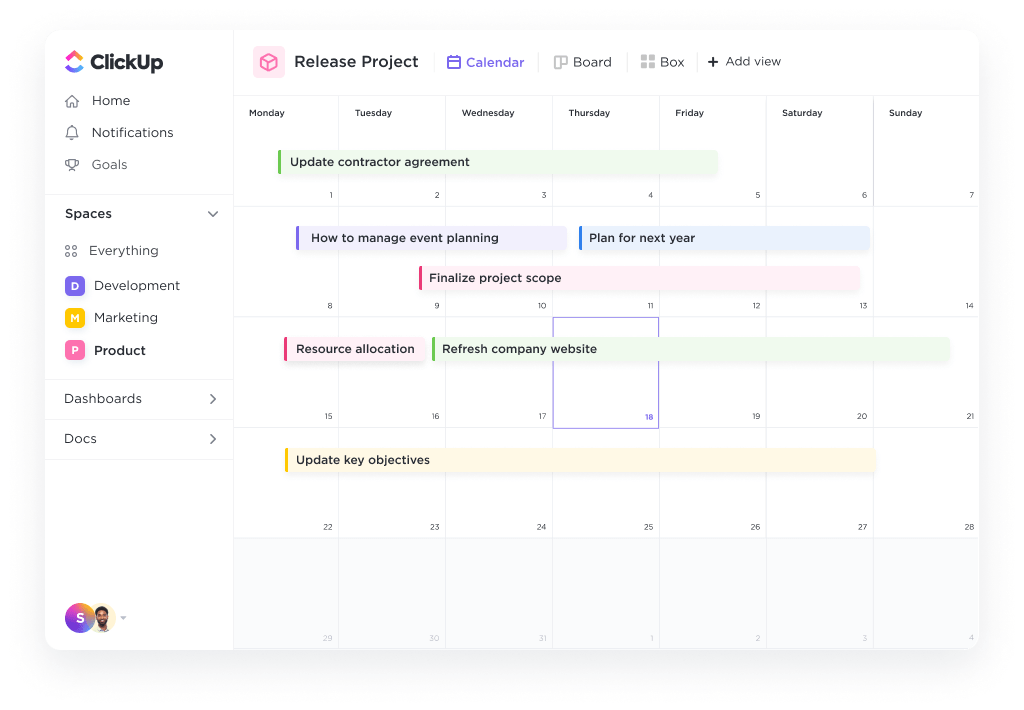
⏰ Use the ClickUp Calendar View for Project Management
The Calendar view in ClickUp is your source of truth for scheduling, planning, and resource management.
- Day: See scheduled tasks for any given day
- 4-Days: See a rolling four day period
- Week: Visualize a whole week and move tasks around from day to day as needed
- Month: Get a bird’s-eye view of your entire month
- Me Mode: only see tasks assigned to you, including assigned subtasks, assigned checklist items, and assigned comments
Or, get started with ClickUp calendar templates made for you:
- Content Calendar
- Promotional Calendar
- Event Planning
🤳 Take Your Calendar With You Anywhere
If you prefer using a paper calendar for project management but still want a digital copy as a backup, ClickUp’s got you covered! The Calendar view is optimized for mobile, so you can create tasks or reminders within the mobile app while you’re on the go!

What’s Next?
We spend about 90% of our time experiencing formatting pains using Microsoft Word and 10% using our calendars for the intended purpose. Try ClickUp’s calendar feature today, or kindly send this article to a friend who doesn’t know the difference between macaroons and macros.
Create a multi-sheet monthly calendar
On the File menu, click New from Template.
In the left navigation pane, under TEMPLATES, click Time Management.
Double-click the Multi-Page Calendar template. …
Click cell K1, and in the pop-up list that appears, select the calendar year that you want.
Therefore, Is there a 2022 calendar template in Word?
The Free 2022 daily planner word template is available with United States holidays and draws horizontal lines on the calendar to add additional details of your day. Effortlessly modify it through the word creator tool to accomplish your requirements.
As well, How do I create a 2022 calendar in Word? Many more Word 2022 calendars
There is an ‘any year’ Word calendar template which makes a calendar document for any year you specify. Choose that calendar then Create. Wait while the template downloads and opens in Word. Then just select the year and month you want.
Furthermore, Does Microsoft Office have a calendar template? Browse through the calendar templates, choose an Excel calendar template that is best for you. Click the Download button on the template page, open the template file in Excel, and then edit and save your calendar.
How do I create a custom calendar?
Set up a new calendar
- On your computer, open Google Calendar.
- On the left, next to “Other calendars,” click Add other calendars. …
- Add a name and description for your calendar.
- Click Create calendar.
- If you want to share your calendar, click on it in the left bar, then select Share with specific people.
How do I Create a calendar in Microsoft Office?
Create a calendar
- On the File menu, click New.
- In the Publication Types list, click Calendars.
- Under Calendars, click the type of calendar that you want to create (for example, Full Page or Wallet Size), and then click the design that you want.
Is there an editable calendar in Word?
Word has a nice variety of calendars readily available. To choose one, open Microsoft Word and click the “New” tab in the left-hand pane. Next, type “Calendar” in the online templates search box. Scroll through the library and select a calendar template you like by clicking it.
Is there a free printable calendar in Word?
Free Word Calendar templates available for download. Weekly and Monthly Calendar planners are blank and printable. Ideal to use as a work or school calendar planner. All Calendar Word files are in docx (macro free) format.
Can I download 2022 calendar?
The blank calendar 2022 is a classic one-page calendar which is available for download in Microsoft Word, Excel, or PDF. If you like to add reminders or events to the calendar, you can simply download this calendar. The blank 2022 PDF calendar is also available free to download or print.
How do I create a calendar in Microsoft Office?
On the File menu, click New. In the Publication Types list, click Calendars. Under Calendars, click the type of calendar that you want to create (for example, Full Page or Wallet Size), and then click the design that you want. In the Customize task pane, click the options that you want, such as color or font scheme.
How do I create a monthly calendar in Excel?
Here’s how to use a pre-made template available in Excel:
- Click File > New.
- Type Calendar in the search field.
- You’ll see a variety of options, but for this example, click the Any year one-month calendar and click Create.
How do I print a monthly calendar?
Print your calendar
- On your computer, open Google Calendar.
- To select a date range, at the top right, click: Day. Week. Month. Year. Schedule. 4 days.
- At the top right, click Settings. Print.
- On the “Print preview” page, change details such as font size or color. To select size options, click Print.
- Click Print.
How do I make a calendar on Shutterfly?
- Go to www.shutterfly.com/digitalscrapbooking and select Calendars Intro.
- Select “Create your calendar” from the selection at right.
- Select starting month.
- Select number of months (12- or 18- months)
- Select “Get started”
Is there a calendar in Microsoft Office?
The Web version of Office 365 Calendar lets you add three kinds of schedule—or calendar—to your calendar: your own; a friend’s; and a prepared calendar. You can only add these new calendars on your computer. It’s not an option included in the mobile app.
How do I Create a monthly calendar in Excel?
Here’s how to use a pre-made template available in Excel:
- Click File > New.
- Type Calendar in the search field.
- You’ll see a variety of options, but for this example, click the Any year one-month calendar and click Create.
How do you make a homemade calendar?
Steps
- Bind 13 sheets of sturdy A4-sized paper or cardstock. …
- Line every other pages with a grid of 42 boxes. …
- Fill in the days, months, and dates on your grids. …
- Decorate each page above the binding of the calendar. …
- Mark important dates like birthdays, holidays, the first day of school, and so on.
How can I create a calendar?
Set up a new calendar
- On your computer, open Google Calendar.
- On the left, next to “Other calendars,” click Add other calendars. …
- Add a name and description for your calendar.
- Click Create calendar.
- If you want to share your calendar, click on it in the left bar, then select Share with specific people.
Is Microsoft calendar free?
The free version of Office 365 Calendar is fully embedded into Outlook. There’s no stand-alone Microsoft calendar app or even a separate website like there is for Google or iCal. You have to go through the Outlook app or web interface, so you need a login.
What Microsoft program is best for calendars?
One of the more popular programs, Microsoft Word, can be used to create helpful calendars by following a few simple steps.
- Launch the Microsoft Word program. …
- Click on the “File” drop-down menu and select the “New” option.
- Reference 1
- Reference 2
- Reference 3
- Reference 4
- Reference 5
Free Word Calendar Template Service
Through Calendarlabs, you can create and download free printable calendars for 2023, 2024, and so on in the Word format. We provide monthly, quarterly, and yearly word calendar templates in several varieties. These templates can be customized to fulfill the various requirements like personal task management, holiday planning, or project planning for the business. You can choose the different colors scheme available for the word calendar template. It has a space for notes and US federal holidays which are available in all 2023 word calendar templates. All of our word calendars templates are available for both personal and business use. You can customize these templates for any year according to your requirements. You can download these templates in .doc and .docx format and print them on different page styles like A4, letter, and legal. So why the delay, go onward and make your word calendar using our online word calendar maker tool.
Microsoft Word — полезное приложение не только для создания документов. Вы можете создавать этикетки, делать поздравительные открытки, создавать буклеты и настраивать заполняемые формы, так почему бы не создать календарь?
Преимущество создания календаря в Word заключается в том, что у вас есть гибкие возможности. Вы бы предпочли портрет или пейзаж? Вам нужен год, месяц или неделя? Будет ли удобен интерактивный календарь?
Мы не только покажем вам, как сделать календарь в Word, но и дадим вам несколько вариантов использования именно того типа календаря, который вам нужен.
Используйте шаблон календаря в Word
Вы можете создать календарь с нуля, вставив таблицу, отформатировав ее как календарь и добавив даты и месяцы, но в этом нет необходимости. Microsoft Office предлагает несколько шаблонов, которые вы можете использовать для своего календаря. Они позволяют вам создавать собственный календарь в настольном приложении Word или в Интернете и пользоваться интерактивным календарем, если это то, что вы ищете.
Мы объясним, как найти шаблон календаря непосредственно в Word, а также добавим веб-ссылки, если вы предпочитаете создать свой календарь в Интернете или загрузить его из Интернета.
Поиск шаблона календаря в Word
Вы можете просмотреть шаблоны календаря в Word для Windows, Mac и в Интернете. Процесс немного различается.
Шаблоны в Word для Windows
- Откройте Microsoft Word в Windows и выберите « Домой » слева. Если у вас уже открыт документ Word, выберите « Файл», а затем « Главная».
- Выберите Дополнительные шаблоны справа.

- Введите «календарь» в строке поиска вверху и нажмите клавишу Enter.

- Выберите шаблон, чтобы просмотреть дополнительные сведения о нем. Затем вы можете использовать стрелки справа и слева для просмотра каждого параметра по отдельности.

- Когда вы найдете нужный шаблон, выберите « Создать», и ваш шаблон готов к использованию.
Обратите внимание, что если вы выберете интерактивный календарь, он, скорее всего, использует макросы, которые вам нужно будет включить в верхней части страницы, чтобы использовать шаблон.

Шаблоны в Word на Mac
- Откройте Microsoft Word на своем Mac и выберите « Файл» > « Создать из шаблона » в строке меню.

- Введите «календарь» в поле поиска в правом верхнем углу.
- Убедитесь, что вверху выбрана вкладка « Шаблоны », а затем просмотрите параметры.

- Выберите тот, который вы хотите, нажмите « Создать », и вы уже в пути!

Как и в Windows, если вы выберете интерактивный календарь, использующий макросы, вам нужно будет включить их в диалоговом окне, чтобы использовать шаблон.

Шаблоны в Word в Интернете
- Откройте Word в Интернете и войдите в систему.
- Выберите Дополнительные шаблоны и просмотрите параметры. Если вы видите тот, который вам нравится, выберите его, чтобы открыть в Word онлайн.

- Кроме того, вы можете просмотреть дополнительные шаблоны. Прокрутите вниз и выберите Исследуйте все шаблоны.

- Вы перейдете на сайт шаблонов Microsoft. Затем вы можете развернуть «Обзор по категориям » слева и выбрать « Календари », чтобы увидеть все доступные варианты.

- Выберите один из них, чтобы просмотреть сведения о нем, и выберите Открыть в браузере, чтобы использовать его в Word в Интернете. Если вы хотите использовать его в настольном приложении Word, вместо этого выберите « Загрузить ».

Если вы подписаны на Microsoft 365, у вас также есть доступ к премиум-шаблонам. Кроме того, вы можете просматривать шаблоны календарей для Excel и PowerPoint, находясь там!
Шаблоны календаря Word
В зависимости от ваших потребностей вы можете выбрать из множества шаблонов календаря Word, каждый из которых предлагает что-то свое. Рассмотрим несколько вариантов!
Если вам нужен простой и понятный календарь, посмотрите Календарь баннеров. Это дает вам месяц за раз, в альбомной ориентации, с каждым месяцем на новой странице. Он предлагает большие ящики для записи событий или встреч.

Этот Горизонтальный Календарь похож на Баннерный Календарь. На странице указан один месяц, а в текстовом поле внизу есть несколько советов по быстрому началу работы. Вы также можете просмотреть тот же календарь, но с понедельником, а не с воскресенья.

Если вы хотите, чтобы это было просто, но с небольшим чутьем, посмотрите Фотокалендарь. Этот больше похож на настенный календарь с областью для фотографий вверху, куда можно вставить свое изображение.

Возможно, вам нравится идея с фотографией, но вы предпочитаете иметь больше места для записей в полях. Этот семейный фотокалендарь отвечает всем требованиям. Вы можете использовать свою маленькую картинку вверху. Это календарь на один месяц, и вы просто выбираете название месяца на вкладке «Календарь».

Если вы надеетесь найти современный стиль в шаблоне календаря, вам нужен этот Calendar. Вместо ящиков на каждый день у вас есть открытые пространства для ощущения простора. Календарные недели идут с воскресенья по субботу, и у вас есть страница для каждого месяца.

Вы ищете календарь, который отображает весь год на одной странице? Семейный фотокалендарь (на любой год, 1 страница) идеален и предлагает места для ваших фотографий.

Еще один календарь, который вам может понравиться, если вы хотите получить представление о годе с первого взгляда, — это Годовой календарь «Птицы на ветке». Недели начинаются в воскресенье, а птицы внизу добавляют приятное тонкое украшение.

Если цифровой вариант, такой как Календарь Google или Календарь Outlook, не подходит, и вы не хотите искать настенный календарь, ознакомьтесь с этими и другими вариантами непосредственно от Microsoft. Вы можете сделать календарь в Word практически без усилий, который точно соответствует вашим потребностям и стилю.
How do I make a continuous calendar in Word?
Customizing and inserting a calendar into your Word document is easy–here’s how to do it.
- In Word, go to File > New from Template > scroll down and select the Calendar option or do a search for “calendar” in the search bar in the top-right corner.
- Select a calendar.
- You can also tweak the appearance a little bit.
How do I make an annual calendar in Word?
Create a single-page yearly calendar
- On the File menu, click New from Template.
- In the left navigation pane, under TEMPLATES, click Time Management.
- Double-click the One Page Calendar template.
- Click the cell that displays the year, and in the pop-up list that appears, select the year that you want.
- Save the workbook.
How do I create a 2021 calendar in Word?
How do I create a 12 month calendar in Word 2021?
There is an ‘any year’ Word calendar template which makes a calendar document for any year you specify. Choose that calendar then Create. Wait while the template downloads and opens in Word. Then just select the year and month you want.
Is there a printable calendar in Word?
Create printable calendars formatted for Microsoft Word®
You’ll get professional-looking printable calendars in moments. Your calendar is a perfectly formatted Microsoft Word® document, ready to go — you never need to fill in the dates.
How do I create a printable calendar?
How to make a custom printable calendar
- Pick a template. Visit the Microsoft Office template gallery and select ‘Calendars‘ to see designs for Microsoft PowerPoint, Excel and Word.
- Insert your own photos. To add your own photos, right-click one of the preset images and select ‘Change picture’.
- Add new events.
- Print or export your calendar.
How do I create a school calendar in Word?
How to Create a Calendar in Word – Tutorial
- > Step 1: Open a New Word Document.
- > Step 2: Open Calendar Templates.
- > Step 3: Open Calendars Templates.
- > Step 4: Search for Online Calendar Templates.
- > Step 5: Download the Calendar Template you find more Appealing and Fit for your Calendar.
- > Step 6: Create your Calendar.
- > Step 7: Edit the Fields you want to Change.
Does Google have a calendar template?
Does Google have a calendar template? Yes, Google does have an array of calendar templates. All you need to do is sign in to your Google account, open your Drive, choose New, select Google Sheets, and then select From a template option.
Does Google have a 2021 calendar template?
1. Free 2021 Monthly Calendar Template Google Docs is a simple template in shades of green.
How do I insert a calendar into Google forms?
How do you create a calendar?
Create a new calendar
- On your computer, open Google Calendar.
- At the left, next to “Other calendars,” click Add other calendars. Create new calendar.
- Add a name and description for your calendar.
- Click Create calendar.
- If you want to share your calendar, click on it in the left bar, then select Share with specific people.
How do I create a Personalised calendar?
How To Make A Calendar Online
- Choose Your Theme.
- Choose Your Size And Month.
- Upload Your Photos.
- Choose Your Background.
- Choose Your Embellishments.
- Add Extras And Customize.
Where can I make a calendar with my pictures?
Shutterfly has everything you need to create unique photo gifts, from calendars to blankets. Create a custom calendar and bring your favorite photos to life in calendar mouse pad, calendar easel, monthly planner, or calendar poster form.
How do I make a digital dashboard?
How Do I Make A Digital Dashboard: Best Practices
- Take care of your design.
- Communicate with stakeholders.
- Take advantage of the 5-second rule.
- Set the right key performance indicators (KPIs)
- Select the right charts and visualizations.
- Utilize professional digital dashboard development software.
How can I make my own photo calendar for free?
How to Make a Photo Calendar
- Decide if you want a daily, monthly, or two-month template.
- Click on the relevant button to open the photo calendar app.
- Select the month.
- Click on the photo icon to upload your photo.
- Add text, stickers, or embellishments if you want to mark any of the days.
- Download to your PC.
- Print.
How do I show calendar on screen?
Right-click the desktop to open a list of options. Click “Gadgets” to open the thumbnail gallery of gadgets. Double-click the “Calendar” icon to open a calendar on your desktop. Double-click this gadget to cycle through the views of the calendar, such as month or day.
How do I add a calendar widget to my home screen?
- 1 On the home screen, tap and hold on any available space.
- 2 Tap “Widgets“.
- 3 Tap and hold the widget you would like to add. If you’re looking for the Google Search bar, you will need to tap Google or Google Search, then tap and hold the Google Search bar widget.
- 4 Drag and drop the widget onto the available space.
How do I add a calendar to my home screen on my laptop?
For Windows users, you can create a shortcut by opening the start button in your taskbar. Find your calendar app and drag it over to your desktop. To open, double-click the app. Or, by using Explorer, visit your calendar’s website and locate the security symbol — it should be on the left side of the site address.
How do I add a widget to my calendar?
Important: You must have the Google Calendar app installed.
Download the Google Calendar app.
- On your iPhone or iPad, touch and hold the home screen.
- In the top left, tap Add .
- Search for the Google Calendar app and tap it.
- To customize your widget size, swipe left.
- Tap Add widget.
- In the top right, tap Done.
How do I add a calendar widget to IOS 14?
Add Calendar widget to your iPhone or iPad
- On the lock screen of your iPhone or iPad, swipe left to right until you see a list of widgets.
- Scroll to the bottom and tap Edit.
- Tap Add Google Calendar .
- Tap Done. You should see upcoming events from your Calendar in the Today view.
How do I customize my widgets?
Customize your Search widget
- Add the Search widget to your homepage. Learn how to add a widget.
- On your Android phone or tablet, open the Google app .
- At the bottom right, tap More. Customize widget.
- At the bottom, tap the icons to customize the color, shape, transparency and Google logo.
- When you’re finished, tap Done.
Создавать письма в Интернете можно быстро и легко.
Выберите один из шаблонов календаряи откройте его в программе Office в Интернете, чтобы сделать ее более недоступной для редактирования в Word в Интернете, в некоторых случаях в Excel в Интернете и других — в Веб-приложение PowerPoint ).
Совет: Если вы уже подключены к Word в Интернете, ознакомьтесь со всеми шаблонами календарей, перейдя в раздел » файл » > создать, а затем под изображениями шаблона нажмите Дополнительно в Office.com.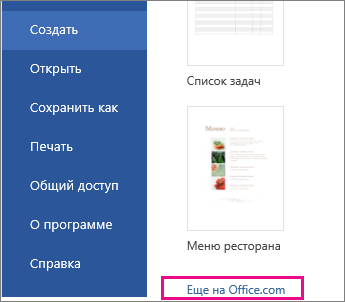
Вы будете на странице шаблоны для Word. В списке категорий выберите Календари.
При работе с календарем вы, возможно, захотите Переименовать файл в нем. Если в календаре есть изображения, вы можете заменить изображения-заполнители. Удалите ненужные рисунки, а затем вставьте рисунки с компьютера или добавьте в файл картинку.
Предоставление доступа к календарю
Когда все будет готово, распечатайте календарь или поделитесь им в Интернете. Это можно сделать в том случае, если календарь по-прежнему открыт в Word в Интернете. Нет необходимости предварительно сохранять его (это уже сделано за вас).
Печать
Чтобы распечатать письмо, нажмите клавиши CTRL+P; откроется диалоговое окно «Печать».
Примечание: Если это окно не открывается, щелкните ссылку, чтобы открыть копию своего календаря в формате PDF. В этом окне воспользуйтесь командой печати в программе просмотра PDF-файлов.
Общий доступ
Чтобы поделиться календарем в Интернете, отправьте ссылку на него.
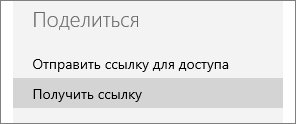
-
В верхней части экрана нажмите кнопку Общий доступ.
-
В разделе Общий доступ щелкните элемент Получить ссылку.
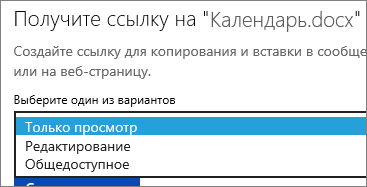
-
В списке Выберите один из вариантов выберите пункт Только просмотр.
-
Нажмите кнопку Создать ссылку.
-
Щелкните веб-адрес, чтобы выделить его, а затем скопируйте и вставьте его в сообщение электронной почты, текстовое сообщение или запись блога.