
| title | keywords | f1_keywords | ms.prod | api_name | ms.assetid | ms.date | ms.localizationpriority |
|---|---|---|---|---|---|---|---|
|
Worksheet.Calculate method (Excel) |
vbaxl10.chm175078 |
vbaxl10.chm175078 |
excel |
Excel.Worksheet.Calculate |
7e807ae0-cd97-d95b-f4c4-af1e5674943e |
05/30/2019 |
medium |
Worksheet.Calculate method (Excel)
Calculates all open workbooks, a specific worksheet in a workbook, or a specified range of cells on a worksheet, as shown in the following table.
Syntax
expression.Calculate
expression A variable that represents a Worksheet object.
Remarks
| To calculate | Follow this example |
|---|---|
| All open workbooks | Application.Calculate (or just Calculate) |
| A specific worksheet | Worksheets(1).Calculate |
| A specified range | Worksheets(1).Rows(2).Calculate |
Example
This example calculates the formulas in columns A, B, and C in the used range on Sheet1.
Worksheets("Sheet1").UsedRange.Columns("A:C").Calculate
[!includeSupport and feedback]
Home / VBA / VBA Calculate (Cell, Range, Row, & Workbook)
By default, in Excel, whenever you change a cell value Excel recalculates all the cells that have a calculation dependency on that cell. But when you are using VBA, you have an option to change it to the manual, just like we do in Excel.

Using VBA Calculate Method
You can change the calculation to the manual before you start a code, just like the following.
Application.Calculation = xlManualWhen you run this code, it changes the calculation to manual.

And at the end of the code, you can use the following line of code to switch to the automatic.
Application.Calculation = xlAutomatic
You can use calculation in the following way.

Sub myMacro()
    Application.Calculation = xlManual
        'your code goes here
    Application.Calculation = xlAutomatic
End Sub
Calculate Now (All the Open Workbooks)
If you simply want to re-calculate all the open workbooks, you can use the “Calculate” method just like below.
CalculateUse Calculate Method for a Sheet
Using the following way, you can re-calculate all the calculations for all the
ActiveSheet.Calculate
Sheets("Sheet1").Calculate
The first line of code re-calculates for the active sheet and the second line does it for the “Sheet1” but you can change the sheet if you want.
Calculate for a Range or a Single Cell
In the same way, you can re-calculate all the calculations for a particular range or a single cell, just like the following.
Sheets("Sheet1").Range("A1:A10").Calculate
Sheets("Sheet1").Range("A1").Calculate
Return to VBA Code Examples
In this Article
- Calculate Now
- Calculate Sheet Only
- Calculate Range
- Calculate Individual Formula
- Calculate Workbook
- Calculate Workbook – Methods That Don’t Work
This tutorial will teach you all of the different Calculate options in VBA.
By default Excel calculates all open workbooks every time a workbook change is made. It does this by following a calculation tree where if cell A1 is changed, it updates all cells that rely on cell A1 and so on. However, this can cause your VBA code to run extremely slowly, as every time a cell changes, Excel must re-calculate.
To increase your VBA speed, you will often want to disable automatic calculations at the beginning of your procedures:
Application.Calculation = xlManualand re-enable it at the end:
Application.Calculation = xlAutomaticHowever, what if you want to calculate all (or part) of your workbooks within your procedure? The rest of this tutorial will teach you what to do.
Calculate Now
You can use the Calculate command to re-calculate everything (in all open workbooks):
CalculateThis is usually the best method to use. However, you can also perform more narrow calculations for improved speed.
Calculate Sheet Only
You can also tell VBA to calculate only a specific sheet.
This code will recalculate the active sheet:
ActiveSheet.CalculateThis code will recalculate Sheet1:
Sheets("Sheet1").CalculateCalculate Range
If you require a more narrow calculation, you can tell VBA to calculate only a range of cells:
Sheets("Sheet1").Range("a1:a10").CalculateCalculate Individual Formula
This code will calculate only an individual cell formula:
Range("a1").CalculateCalculate Workbook
There is no VBA option to calculate only an entire workbook. If you need to calculate an entire workbook, the best option is to use the Calculate command:
CalculateThis will calculate all open workbooks. If you’re really concerned about speed, and want to calculate an entire workbook, you might be able to be more selective about which workbooks are open at one time.
Calculate Workbook – Methods That Don’t Work
There are a couple of methods that you might be tempted to use to force VBA to calculate just a workbook, however none of them will work properly.
This code will loop through each worksheet in the workbook and recalculate the sheets one at a time:
Sub Recalculate_Workbook()
    Dim ws As Worksheet

    For Each ws In Worksheets
        ws.Calculate
    Next ws
End Sub
This code will work fine if all of your worksheets are “self-contained”, meaning none of your sheets contain calculations that refer to other sheets.
However, if your worksheets refer to other sheets, your calculations might not update properly. For example, if you calculate Sheet1 before Sheet2, but Sheet1’s formulas rely on calculations done in Sheet2 then your formulas will not contain the most up-to-date values.
You might also try selecting all sheets at once and calculating the activesheet:
ThisWorkbook.Sheets.Select
ActiveSheet.Calculate
However, this will cause the same issue.
VBA Coding Made Easy
Stop searching for VBA code online. Learn more about AutoMacro — A VBA Code Builder that allows beginners to code procedures from scratch with minimal coding knowledge and with many time-saving features for all users!

Learn More!
VBA Range Calculate — Explained with Examples
We calculate the particular range using VBA. Calculate method in Excel help us to calculate all opened workbooks, specific workbooks, specific worksheets, Ranges, columns or rows. This method will be useful when your Excel Calculation method is set to manual mode. or if you have many formulas in the workbook and want to refresh or recalculate a particular range you can use Range.Calculate method.
VBA Range Calculate – Syntax
You can use the calculate method of the range to calculate any range.
Range(“YourRange”).Calculate
VBA Range Calculate – Examples
Here is the simple example to calculate a specific Range. This example will calculate Range “A2:D10” using VBA.
Sub VBA_Calculate_Range()
    Range("A2:D10").Calculate
End Sub
VBA Range Calculate – Instructions
Please follow the below step by step instructions to execute the above mentioned VBA macros or codes:
- Open an Excel Workbook from your start menu or type Excel in your run command
- Enter some formula at B2 as “=D2” and enter some value at D2. Now you can see the D2 value at B2.
- Set the caluclation mode to manual to test this macro
- Change the value at D2, now you can see that B2 value is not change even you have made changes at D2
- Press Alt+F11 to Open VBA Editor or you can goto Developer Table from Excel Ribbon and click on the Visual Basic Command to launch the VBA Editor
- Insert a Module from Insert Menu of VBA
- Copy the above code (for Calculating a Range using VBA) and Paste in the code window(VBA Editor)
- Save the file as Macro Enabled Workbook (i.e; .xlsm file format)
- Press ‘F5′ to run it or Keep Pressing ‘F8′ to debug the code line by line.
Now you can observe that the value at B2 is changed as per D2.
Calculate the Columns using VBA
Here is the simple example to calculate a specific Columns. This example will calculate the columns “A to D” using VBA.
Sub VBA_Calculate_Columns()
    Columns("A:D").Calculate
    'Or Range("A:D").Calculate
End Sub
Calculate the Rows using VBA
Here is the simple example to calculate a specific rows using VBA. This example will calculate the Rows”1 to 20″ using VBA.
Sub VBA_Calculate_Rows()
    Rows("1:20").Calculate
End Sub
A Powerful & Multi-purpose Templates for project management. Now seamlessly manage your projects, tasks, meetings, presentations, teams, customers, stakeholders and time. This page describes all the amazing new features and options that come with our premium templates.
Save Up to 85% LIMITED TIME OFFER

All-in-One Pack
120+ Project Management Templates
Essential Pack
50+ Project Management Templates
Excel Pack
50+ Excel PM Templates
PowerPoint Pack
50+ Excel PM Templates
MS Word Pack
25+ Word PM Templates
Ultimate Project Management Template
Ultimate Resource Management Template
Project Portfolio Management Templates
VBA Reference
Effortlessly
Manage Your Projects
120+ Project Management Templates
Seamlessly manage your projects with our powerful & multi-purpose templates for project management.
120+ PM Templates Includes:
Effectively Manage Your
Projects and Resources
ANALYSISTABS.COM provides free and premium project management tools, templates and dashboards for effectively managing the projects and analyzing the data.
We’re a crew of professionals expertise in Excel VBA, Business Analysis, Project Management. We’re Sharing our map to Project success with innovative tools, templates, tutorials and tips.
Project Management
Excel VBA
Download Free Excel 2007, 2010, 2013 Add-in for Creating Innovative Dashboards, Tools for Data Mining, Analysis, Visualization. Learn VBA for MS Excel, Word, PowerPoint, Access, Outlook to develop applications for retail, insurance, banking, finance, telecom, healthcare domains.
Page load link
Go to Top
The benefits of using Excel for calculation
We are well aware that in today’s world, a machine’s brain works orders of magnitude faster than a human’s brain. By this, I mean that when there is a requirement to calculate some numbers mathematically, we have quickly defaulted to taking out our calculators, mobile phones, and laptops to guarantee quick and accurate results. This is the great boon of the science and technology.
Microsoft Excel is a host application that makes maintenance of documents easy using formulas. For example, formulas can be put to great use with applications like:
- Loan calculation
- Budgeting
- Business relationship documents
- Grade sheet maintenance
- Database maintenance
- Savings calculation
And those formulas can be reused, over and over again. In Excel, if you select a formula in one cell and drag it down, it can easily be copied to other cells and the result is calculated accordingly in each cell.
How a formula is calculated
There is a category named “Calculations” under the “Formulas” menu. It offers three modes of calculation options:
- Automatic
- Automatic except for data tables
- Manual

These options help us decide when and how the calculation of formulas should be carried out in cells.
Automatic
By default, all calculations are automatic. For example, let us assume that cell A1 has a value of 10 and cell B1 has a value of 5. Now, in cell C1, if I enter a formula to add A1 and B1, and press enter, “15” will immediately –automatically — be visible in the cell C1.
This means that we do not need to manually invoke the calculation. It happens as soon as the cursor leaves the cell.

Automatic except for data tables
This option enables Excel to calculate all cells automatically except the ones involving data tables. Here data tables do not mean the normal tables, or the ones loaded through external connections explicitly. It is specifically the Data What-if Analysis Data Table.
Manual
Let us assume we have the same scenario above where cell A1 as a value of 5 and B1 has a value of 10 . Cell C1 is the sum of A1 and B1 ( =sum( A1, B1) ).
Since the default option is “Automatic,” we can see the value of C1 is 15. Now, change the calculation option to “Manual.” Change the value of A1 to 30 and click on enter. You will see that there is no change in the value of cell C1.

Manually, click on the “calculate now” option in the same menu “Formulas & Calculation.” Now we can see that the value of cell C1 has changed to 40.

Using VBA to turn off or turn on Automation Calculations
The code to set or change the calculation options in VBA is very simple and uses application.calculation.
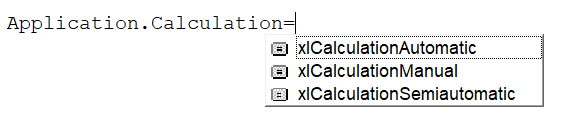
Syntax
Application.Calculation= <mode>
Where the mode can be one of the three below options
- xlCalculationManual
- xlCalculationAutomatic
- xlCalculationSemiAutomatic
Examples
Addition of 2 numbers
Just like above, we’ll add two numbers together in this example. Here we switch the calculation mode to Manual and then again to Automatic to see the difference.
The sum’s value is printed, and a screenshot of the run is also provided for reference.
Sub calculate_demo()

'Initiating values in 2 cells and setting a formula in the 3rd cell

Cells(1, 1).Value = "5"
Cells(1, 2).Value = "10"
Range("C1").Select
    ActiveCell.FormulaR1C1 = "=SUM(RC[-2],RC[-1])"

' print the value of the third cell before changing the calculation options

Debug.Print Cells(1, 3).Value

'Change the calculation option to "Manual" and print the 3rd cell value.
'There would be no change

Application.Calculation = xlCalculationManual
Cells(1, 1).Value = "10"
Debug.Print Cells(1, 3).Value

'Use the option to calculate explicitly and try printing again.
'Value of 3rd cell would have got re-calculated

Application.Calculate
Debug.Print Cells(1, 3).Value

'Change the calculation mode to Automatic again.
'As soon as the values of cells change the 3rd cell ( with formula ) value also changes

Application.Calculation = xlCalculationAutomatic
Cells(1, 1).Value = "3"
Debug.Print Cells(1, 3).Value


End Sub

Validate if a mark is a pass or fail grade
In this example, the first cell is a number and the second cell holds an “if” formula. The value is “Pass” if the value of first cell is greater than 49. If not, the value remains “Fail.”
Sub calculate_demo()

'Initiating values in 2 cells and setting a formula in the 3rd cell

Cells(1, 1).Value = "5"
Cells(1, 2).Value = "10"
Range("C1").Select
    ActiveCell.FormulaR1C1 = "=SUM(RC[-2],RC[-1])"

' print the value of the third cell before changing the calculation options

Debug.Print Cells(1, 3).Value

'Change the calculation option to "Manual" and print the 3rd cell value.
'There would be no change

Application.Calculation = xlCalculationManual
Cells(1, 1).Value = "10"
Debug.Print Cells(1, 3).Value

'Use the option to calculate explicitly and try printing again.
'Value of 3rd cell would have got re-calculated

Application.Calculate
Debug.Print Cells(1, 3).Value

'Change the calculation mode to Automatic again.
'As soon as the values of cells change the 3rd cell ( with formula ) value also changes

Application.Calculation = xlCalculationAutomatic
Cells(1, 1).Value = "3"
Debug.Print Cells(1, 3).Value


End Sub

Concatenate first name and last name to get the full name
This example sets first name, last name, and then uses a formula to concatenate and display the full name. Again, we toggle between the two calculation options to understand its working.
Sub calculate_demo()

'Initiating value in the 1st cell and setting a formula in the 2nd cell

Cells(1, 1).Value = "57"
Range("B1").Select
    ActiveCell.FormulaR1C1 = "=if(RC[-1]>49,""Pass"",""Fail"")"

' print the value of the second cell before changing the calculation options

Debug.Print Cells(1, 2).Value

'Change the calculation option to "Manual" and print the 2nd cell value.
'There would be no change

Application.Calculation = xlCalculationManual
Cells(1, 1).Value = "10"
Debug.Print Cells(1, 2).Value

'Use the option to calculate explicitly and try printing again.
'Value of 2nd cell would have got re-calculated

Application.Calculate
Debug.Print Cells(1, 2).Value

'Change the calculation mode to Automatic again.
'As soon as the value of cell changes, the 2nd cell ( with formula ) value also changes

Application.Calculation = xlCalculationAutomatic
Cells(1, 1).Value = "86"
Debug.Print Cells(1, 2).Value


End Sub

Conclusion
Although the default calculation option of “Automatic” is simple and easy to use, sometimes due to a huge size or volume of data in any Excel workbook, its performance might slow down. In order to handle this situation, we can switch to “Manual” or the “Semi-Automatic” i.e. the “Automatic except for data tables” options to perform calculations only as required.
We may explicitly use the “calculate now” and “calculate sheet” options in our code depending on the area of recalculation. Hence these options are available to users in order to improve performance.