
Insert a table

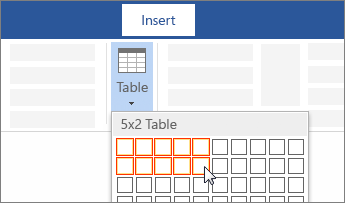
For a basic table, click Insert > Table and move the cursor over the grid until you highlight the number of columns and rows you want.
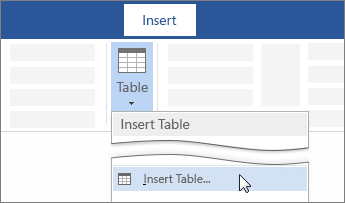
For a larger table, or to customize a table, select Insert > Table > Insert Table.
Tips:
-
If you already have text separated by tabs, you can quickly convert it to a table. Select Insert > Table, and then select Convert Text to Table.
-
To draw your own table, select Insert > Table > Draw Table.
Need more help?
Want more options?
Explore subscription benefits, browse training courses, learn how to secure your device, and more.
Communities help you ask and answer questions, give feedback, and hear from experts with rich knowledge.
Tables in Word are useful in so many situations. In this post you’ll discover how to create tables, then manipulate and design them in the quickest and easiest way to provide that visual punch.
Clickable Table of Contents
Enhance your Word tables with these advanced features
1. What are tables in Word good for?
Tables are useful for 2 distinct reasons.
- To show an actual table of data, or
- To organise and postion text, images and other elements on the page.
Many years ago, typewriters ruled the world. And a feature of a good typewriter was the tab stop, which was a device that essentially let you control indentation.
Over the years many people have continued to use tabs to indent text, because of its convenience, but they are hard work to set up properly.
Tables provide a much easier way to organise content on a page.
1. Select the Insert tab.
2. Click the Tables icon in the Tables group.
3. Move your mouse pointer into the table grid until the required number of rows and columns are highlighted orange, then left-click.

An empty table is inserted into the document.
Two new tabs, Design and Layout are also added to the ribbon area, under the banner of Table Tools.


3. MOVING AROUND A Word TABLE
- While the table is empty, you can use the cursor keys to move around the cells. However, when the cells contain information, using the cursor keys will move through the cell content first before moving to the next cell
- You can left-click in any cell to position the cursor.
- Press Tab to move to the next cell. The cursor will move across and then down the table.
- Press Shift + Tab to move to the previous cell.

NB. Using Tab is better than using the cursors as it will move to the next/previous cell regardless of whether there is information in the cells.
NB2. If you press Tab while you are in the last cell, a new row will be added to the bottom of your table
4. SELECTING A CELL, ROW, COLUMN OR THE ENTIRE TABLE
To select a cell:
1. Position the mouse pointer inside the cell on the bottom-left corner of the cell.
The pointer will change shape to a solid black arrow that points up and right.
2. Left-click.

To select a row of a table:
1. Position the mouse pointer in the left margin in line with the row you want to select.
The mouse pointer will change to a white arrow that points up and right.
2. Left-click.

To select a column
1. Position the mouse pointer so that it rests on the top border of the table, above the column you want to select.
The mouse pointer will change to a solid black arrow pointing down.
2. Left-click.

To select the entire table:
1. Position your mouse pointer over the 4-headed arrow icon situated at the top-left of the table.
2. Left-click.

5. INSERTING AN EXTRA ROW OR COLUMN
To insert an extra row:
1. Position the cursor in a cell.
2. Select the Layout tab, under the Table Tools banner.
3. Click Insert Above or Insert Below in the Rows and Columns group

Here is a quick way to insert new rows:
1. Position the cursor to the left of the table, but in close proximity.
2. A plus symbol will appear above or below the mouse pointer indicating where the new row will be added.

3. Nudge the mouse pointer up or down to move the plus sign above or below.
4. Left-click to insert the new row,
To insert an extra column:
1. Position the cursor in a cell.
2. Select the Layout tab, under the Table Tools banner.
3. Click Insert Left or Insert Right in the Rows and Columns group

Here is a quick way to insert a new column:
1. Position the cursor above a column, but in close proximity to the table.
2. A plus symbol will appear to the left or right of the mouse pointer indicating where the new column will be added.
3. Nudge the mouse pointer left or right to move the plus sign to the left or the right of the column.
4. Left-click to insert the new column,

6. DELETING A ROW OR COLUMN
To delete the current row or column:
1. Position the cursor in any cell of the row you want to delete.
2. Select the Layout tab, under the Table Tools banner.
3. Click the Delete icon in the Rows and Columns group.

4. Choose Delete Row or Delete Column from the drop-down menu.
7. Quickly fORMATTING tables in Word
Word provides you with a number of pre-set table designs. This means that it formats the headings and the data, applies a variety of borders and colours the cells in a way that makes it look like a professionally produced table. As a beginner this simple technique will give you a good-looking table.
1. Position the cursor in any cell in the table.
2. Select the Design tab under the Table Tools banner.
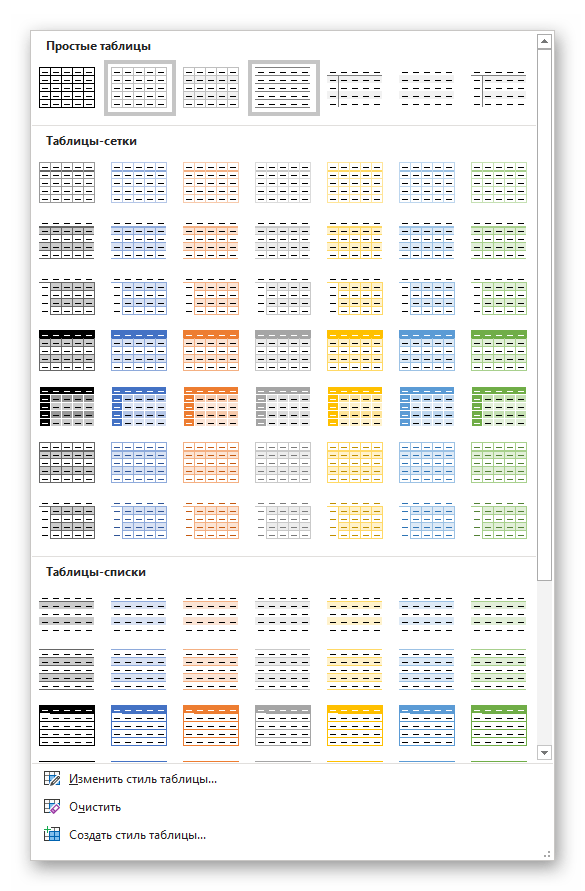
The Table Styles group lists a number of table designs. To get the full list, click the More button beneath the table styles scroll bar
The default table style is Table Grid in the Plain Tables category which adds simple gridlines but no shading to your table.
Live Preview allows you to hover over a design and see it applied to your table. If you like what you see, click to select the table design.

In the Table Style Options group of the Design tab, tick the components that you have in your table. For example, if your table has column headings, tick Header Row. In doing this, the various parts of your table are formatted accordingly

Header Row
This will emphasise the header row by making the text bold or applying a different cell colour (depending on the table style selected.
Total Row
This will emphasise the bottom table row by making the text bold or applying a different cell colour (depending on the table style selected.
First Column
This will emphasise the first column (for labels etc.) by making the text bold or applying a different cell colour (depending on the table style selected.
Last Column
This will emphasise the last column (for row totals etc.) by making the text bold or applying a different cell colour (depending on the table style selected.
Banded Rows
This will make odd rows one colour and even rows a different colour. This helps readability.
Banded Columns
This will make odd columns one colour and even columns a different colour. This helps readability.
8. SETTING THE BORDERS AND SHADING
The Table Styles Gallery allows you to completely format a table with one click. Whereas you used to need some nous, anybody can now create a professional looking design.
However, you will often still need to apply your own border and shading, and manually change a table design. With a little effort can add a lot of flavour to your page and dramatically enhance the overall appearance of the document.
To set the borders for tables in Word:
1. Select the portion of the table that you wish to set the borders for. This may be the entire table, a row or rows, a column or columns or a selection of cells.
2. Select the Design tab under the Table Tools banner.
3. Select the Borders icon. A drop-down list appears. This list shows every combination of border that can be turned on or off. The icons with a shaded background are currently switched on. The rest are switched off.
4. Click any icon to switch the border on or off. The border style that is applied is the default style (½ pt solid black line ) or the last style that was used.

5. To apply customised borders, with different colours, styles and widths, click the Borders & Shading option at the bottom of the list to display the Borders and Shading dialog box.


Your selection will always have an outer border, and if you selected more than one cell, you will have some inside borders as well. The easiest way to use the dialog box is to start on the bottom-middle and work your way up and right.
1. Select the colour and width (thickness) that you would like for your border.

2. Choose a style (e.g. dotted, dashed, double, solid etc.)

3. Paint your borders. There are two ways to do this.
- The first way is to click directly on a border in the Preview itself.
- The second way is to click the appropriate icon around the edge of the Preview section that represents each border. Depending on which cells you selected in your table, some of these icons may not be available.

On the left-hand side of the dialog box, there are some pre-defined border combinations which you can use to save yourself some time. Depending on your selection of cells, the pre-defined options may differ. Here’s a run-down:

To shade the cells of tables in Word:
1. Select the portion of the table that you wish to shade. This may be the entire table, a row or rows, a column or columns or a selection of cells.
2. Select the Design tab under the Table Tools banner.
3. Click the Shading icon.
The colours that you see displayed match the current them of the document. Themes were discussed earlier in the course.
4. Click a colour in the palette.
While you can pick any colour, it is recommended to stick with the light colour shades, otherwise your tables will appear very loud and ugly, like they’re shouting in your face. Subtle is the order of the day. The exception to this is column headings or other cells that you wish to differentiate. Under these circumstances, you can use a dark colour, but use a light font with it.

If you cannot find the exact colour you need,
- Click the More Colours link underneath the palette. This displays a larger, more accurate colour palette.
- And if that’s not enough, click the Custom tab and you’ll get a really fine selection of colours (you can even enter your own RGB settings if you know them)

9. REPEATING table HEADINGS ON EVERY PAGE WHEN PRINTING
When you have large tables that occupy two or more pages, many people insert manual page breaks, then copy and paste their table header rows at the top of each page.
When rows are added or removed from tables in Word, the table headers end up half way down the page.
There is a simple tool that will eliminate this problem
1. Ensure that the table is a single table, with no manual page breaks in the middle, and one header at the top. The table header may occupy more than one row, it doesn’t affect the way this feature works.
2. Position the cursor somewhere in the top row of the table.
3. Select the Layout tab under the Table Tools banner.
4. Click the Repeat Header Rows icon ion the Data group.

Now, it doesn’t matter how many rows tables in Word contain, if the table ever spills across into another page, the header row (which normally displays the column headings) will always appear at the top of the table.
10. All the key points again
- Tables in Word serve 2 distinct purpose: to display a table of data and to organise and position items on the page
- To create table, select 2 tabs — Design and Layout under the Table Tools banner.
- There are 2 tabs — Design and Layout under the Table Tools banner.
- You can press the TAB key to move direct to the next cell and SHIFT and TAB together to move backwards through a table.
- The four elements of a table are cells, rows, columns and the whole table. Each can be selected.
- Rows can be inserted by selecting the Layout tab under Table Tools, then clicking the Insert Above or Insert Below icons. Alternatively, hover to the left of a row and click the plus symbol that appears above or below the mouse pointer.
- Columns can be inserted by selecting the Layout tab under Table Tools, then clicking the Insert
Left or Insert Right icons. Alternatively, hover above a table column and click the plus symbol that appears to the left or right of the mouse pointer. - Columns and rows and be removed from the table, by positioning the cursor in the row or column to be removed, then clicking the Delete icon on the Layout tab of Table Tools and choosing Delete
Row or Delete Column. - Tables can be formatted using the Table Style gallery or by manually setting the shading and borders manually. Both sets of tools are found on the Design ribbon of the Table Tools.
- When using the Microsoft Table Styles, you can control the behaviour of the formatting by setting the Table Style options – 6 tick boxes that define the structure of your table.
- For long tables that spill across onto subsequent pages, the top row, which normally contains the column headings can be set to repeat automatically. So there is no excuse for cutting and pasting headings midway through your table or taping pages together to make sense of the table!
I hope you found plenty of value in this post. I’d love to hear your biggest takeaway in the comments below together with any questions you may have.
Have a fantastic day.


About the author
Jason Morrell
Jason loves to simplify the hard stuff, cut the fluff and share what actually works. Things that make a difference. Things that slash hours from your daily work tasks. He runs a software training business in Queensland, Australia, lives on the Gold Coast with his wife and 4 kids and often talks about himself in the third person!
SHARE
Many documents present some data in the form of figures or tables. Creating tables is often more efficient than describing the data in the paragraph text, especially when the data is numerical or large. The tabular data presentation makes it easier to read and understand.
A table is a collection of information or data, usually represented by horizontal rows and vertical columns. Each column and each row can have a header. Some tables have only column headings or only row headings. The box at the junction of each column and row is a cell that contains data such as text, numeric information, or images. Some cells can be merged or split (see more about formatting tables). E.g.:

Microsoft Word has many features that make working with tables simple and convenient.
Create a table
There are several ways how to insert or create a table:
- Create a blank table of up to 10 columns and 8 rows,
- Create a blank table with more than 10 columns or more than 8 rows,
- Create a blank table manually (Draw a table),
- Create a table using predefined templates (Quick Tables),
- Create a table from the existing data (Convert Text to Table),
- Insert a Microsoft Excel spreadsheet.
To create a blank table in a Word document, do the following:
1. Place your cursor where you want to insert the table.
2. On the Insert tab, in the Tables group, click the Table button:

3. Do one of the following:
Create a blank table of up to 10 columns and 8 rows
- To create a table of up to 10 columns and 8 rows, move the cursor right (to select columns) and down (to select rows) the grid to select as many cells as you need. E.g., the table of 5 columns and 3 rows (selected cells will turn orange):

Click on a cell in the grid with the expected number of rows and columns (or press Enter) to insert an empty table to fit the width of the text (paragraph).
The table has the specified number of single-line text rows in the current paragraph and equal-width columns. E.g., the table of 3 rows and 5 columns:


Create a blank table with more than 10 columns or more than 8 rows
- To create a table with more than 10 columns or more than 8 rows, do one of the following:
- Create a table with exactly 10 columns or 8 rows, then add as many columns or rows as you need (see below how to customize table).
- Click the Insert Table… option:
In the Insert Table dialog box:

- In the Table size group, specify the number of columns and rows,
- In the AutoFit behavior group, specify the width of the table and its columns:
- Select the Fixed column width option to customize width in the appropriate field: select Auto (used by default) or specify width. E.g., 0.75″:

- Select the AutoFit contents option to adjust cell sizes to the document content. E.g.:

- Select the AutoFit to window option to adjust the table’s width to the document content width. E.g.:

- Select the Remember dimension for new tables check box if you want to create tables with the same options later. Word will remember your customization.


Create a blank table manually
- To manually create an empty table, click the Draw Table option:
After clicking that option, the cursor changes to the pencil
 that allows drawing cells directly in the Word document to create a table:
Click anywhere in a document but the table itself by the pencil to stop drawing a table.
Notes:
- To draw additional lines, select a table, then on the Table Layout tab, in the Draw group, click the Draw Table button:

- If you draw a line in the wrong position, click the Eraser button in the Draw group of the Table Layout tab:
- We recommend displaying the rulers or gridlines to help you place the lines correctly.
- To draw additional lines, select a table, then on the Table Layout tab, in the Draw group, click the Draw Table button:


Create a table using predefined templates
To create a table using predefined Word templates of tables and calendars, do the following:
1. Place your cursor where you want to insert the table.
2. On the Insert tab, in the Tables group, click the Table dropdown list, then select Quick Tables list:

3. From the Quick Tables gallery, select the template you prefer.
For example:

Create a table from the existing data
To create a table from the existing data in a document data (either as regular text or as a tabbed list), do the following:
1. Select the document data you want to shape into a new table.
2. On the Insert tab, in the Tables group, click the Table dropdown list, then select Convert Text to Table…:

3. In the Convert Text to Table dialog box:

- In the Table size group, specify the number of columns,
- In the AutoFit behavior group, specify whether the width of the columns should be fixed (see details above),
- In the Separate text at group, select the character that separates text into columns in the selected text: paragraph marks, commas, tabs, or some other character.
E.g.:

Insert a Microsoft Excel spreadsheet
Note: It is possible to insert a Microsoft Excel spreadsheet in a document. To do so, on the Insert tab, in the Tables group, click the Table dropdown list, then select Excel Spreadsheet:

Word opens the Excel spreadsheet where you can enter the data. You can use Excel features such as functions and formulas to create or manipulate the data. Note that it is not a Word table.
Add rows and columns
To add a row and a column to a table, do the following:
1. Position the cursor:
- to a cell in a row above or below which you need to insert a row,
- to a cell in a column left or right which you need to insert a column.
2. Do one of the following:
- Click the Insert dropdown list in the Mini toolbar:

- On the Table Layout tab, in the Rows & Columns group:

- Click the Insert Above button to insert a row above the row with the cursor,
- Click the Insert Below button to insert a row below the row with the cursor,
- Click the Insert Left button to insert a column left to the column with the cursor,
- Click the Insert Right button to insert a column right to the column with the cursor.
- Right-click and select the Insert list:


Notes:
- To insert rows or columns, move the mouse over the table or left of the table until you see the Insertion indicator, then click the icon:
 and
and
- You can choose the option Insert -> Insert Cells… from the popup menu; Word opens the Insert Cells dialog box:

After selecting the option and clicking the OK button, Word adds an entire row or column, not a cell. Word just moves cells according to the selection.
 and
and 

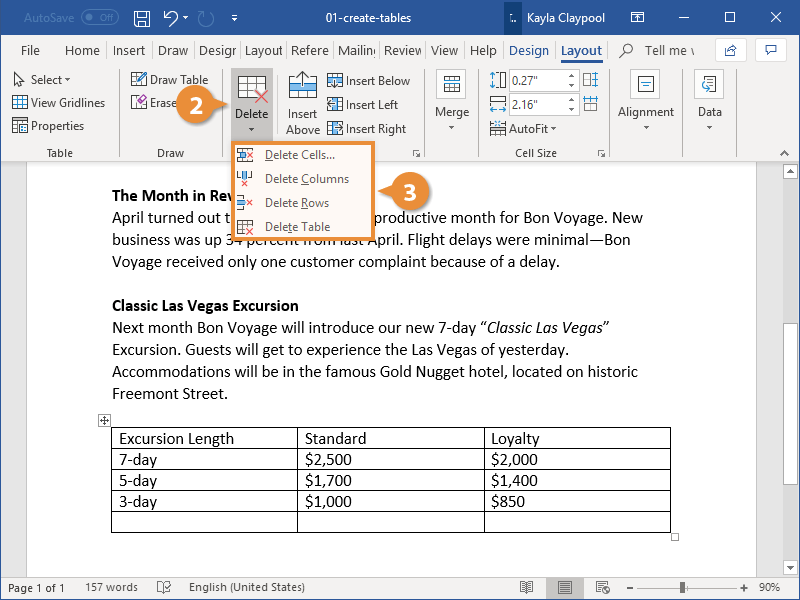
Delete a table element
To delete a table element, do the following:
1. Select the cell, multiple cells, the entire column or multiple columns, the entire row, or multiple rows.
2. Do one of the following:
- Click the Delete dropdown list in the Mini toolbar:

- On the Table Layout tab, in the Rows & Columns group, click the Delete dropdown list, then select one of the options:


3. Select one of the proposed options:
- Delete Cells… opens the Delete Cells dialog box, in which select the option you need:
- Delete Columns
- Delete Rows
- Delete Table

Note: You can select the element you want to delete, right-click on the selection and select the appropriate item in the popup menu. For example, if the entire table is selected or the column is selected:
 and
and

Convert a table into text
To convert a table into text in Word, follow the next steps:
1. Click anywhere in the table.
2. On the Layout tab, in the Format group, click the Convert to Text button:

3. In the Convert Table to Text dialog box, select the charter to separate cells data in the text:

4. Click OK.
-

1
Open Microsoft Word. Its icon resembles a blue background with a white «W» on top.
- If you’d rather edit an existing document, simply double-click the document in question.
-
2
Click Blank document. It’s in the top-left corner of the templates page.
- If you’re editing an existing document, skip this step.
Advertisement
-
3
Click the Insert tab. This tab is to the right of the «Home» tab in the top-left corner of the Word window.
-
4
Click Table. It’s the grid icon directly beneath the «Insert» tab.
-
5
Hover the mouse cursor over a square. You should see a drop-down menu with a series of squares below the Table button; hovering the cursor over a square will cause the pertaining table to appear in your document.
- For example, selecting a section four squares down and eight squares right will create a table with eight columns and four rows.
-
6
Click your preferred square. Doing so will create a table with your selected number of rows and columns.


Advertisement
-
1
Open Word. It’s a blue app with a blue «W» written on a white folder icon.
-
2
Tap New. You’ll see this option at the bottom-left side of the screen.
- If Word opens to a document, tap the «Back» button in the top-left corner of the screen first.
- If you’d rather load a pre-existing document, tap Open in the bottom-right corner of the screen and then tap a document’s name to open it.
-
3
Tap Blank Document. It’s in the top-left corner of the page.
- If you’re opening an existing document, skip this step.
-
4
Tap the «…» button. It’s in the middle-right section of the screen in the toolbar above the keyboard.
-
5
Tap Home. You’ll see this option on the left side of the toolbar.
-
6
Tap Insert. It’s below «Home» in the drop-down menu that appears.
-
7
Tap Table. This option is near the top of the options that are listed at the bottom of the page. Tapping it will insert a three-by-three table into your Word document.
-
8
Tap ▼. It’s on the right side of the toolbar. From here, you can format your table in a few different ways:
- Tap a cell to select it for writing.
- Tap the leftmost button in the toolbar to add a column to the left of your cursor.
- Tap the button to the right of the leftmost button to add a row below your cursor.


Advertisement
-
1
Open Word. It’s a blue app with a blue «W» written on a white folder icon.
-
2
Tap Blank document. It’s at the top of the screen.
- You can also tap a document’s name from the left side of the screen to open it.
-
3
Tap Insert. You’ll see this tab at the top of the screen, to the right of the «Home» tab.
-
4
Tap Table. It’s directly below the «File» tab in the top-left corner of the screen. A table will appear in your Word document.
-
5
Tap a cell in the table. Doing so will place a cursor in your selected cell. From here, you can add columns or rows by tapping the Insert button (below the «Insert» tab) and then tapping one of the following options:
- Insert Above — Add a row above the row in which your cursor sits.
- Insert Below — Add a row below the row in which your cursor sits.
- Insert Left — Add a column to the left of the column in which your cursor sits.
- Insert Right — Add a column to the right of the column in which your cursor sits.


Advertisement
Add New Question
-
Question
What if I created several cells, but later find I don’t need all of them? How can I make some disappear?

Right-click the cell you don’t want anymore. In the pop up menu, select «Delete» and select which cells you want to delete.
-
Question
How do I download Excel?
If you are using Windows 10, use the Microsoft Store. But if you are using Android (easier) download it on the Google Play Store. The website play.google.com has it for laptops and PCs.
-
Question
How do I increase my row line?
Go to Insert-Table on the main menu. This will open up a Table Tab with sub tabs for Design and Layout. Select Layout. Click in a row immediately above or below where you ant to add one or more rows. On the Table Layout menu, click Insert Below or Insert Above once for each row you want to add.
Ask a Question
200 characters left
Include your email address to get a message when this question is answered.
Submit
Advertisement
-
If you wish to change the cell formatting or the color of the table, select it and click Design at the top of the Word window to view formatting options.
-
You can use your table to create a custom calendar or a weekly schedule.
Thanks for submitting a tip for review!
Advertisement
About This Article
Article SummaryX
1. Open Microsoft Word.
2. Double-click Blank Document.
3. Click Insert.
4. Click Table.
5. Choose a table size/layout (rows x columns).
Did this summary help you?
Thanks to all authors for creating a page that has been read 160,140 times.
Is this article up to date?
Содержание
- Создание таблиц в Ворде
- Способ 1: Базовая таблица
- Способ 2: Таблица с настраиваемыми параметрами
- Способ 3: Самостоятельное рисование
- Способ 4: Экспресс-таблица
- Способ 5: Преобразование текста в таблицу
- Способ 6: Вставка и экспорт из Excel
- Способ 7: Вставка таблицы из интернета
- Заключение
- Вопросы и ответы

При работе с документами в Word нередко может понадобиться создать таблицу, внутри которой необходимо разместить те или иные сведения. Текстовый редактор от компании Microsoft, хоть и не предоставляет такие широкие возможности для создания и редактирования таблиц, как его собрат по офисному пакету Excel, но все же имеет в своем арсенале достаточный набор инструментов для работы с таблицами. В данной статье мы подробно рассмотрим то, как их создавать.
Создание таблиц в Ворде
Существует несколько способов создания таблицы в текстовом документе средствами самого Word. Точнее, как таковой способ всего один, но результаты его выполнения могут быть совершенно разными – все зависит от того, какой цели требуется достичь. Плюс ко всему, можно добавить таблицу «извне» — совместимого офисного приложения Excel или, например, с веб-сайта.
Способ 1: Базовая таблица
Создание и/или добавление в Ворд практически любых, отличных от текста элементов, осуществляется через вкладку «Вставка». К ней же нам потребуется обратиться для создания базовой таблицы.
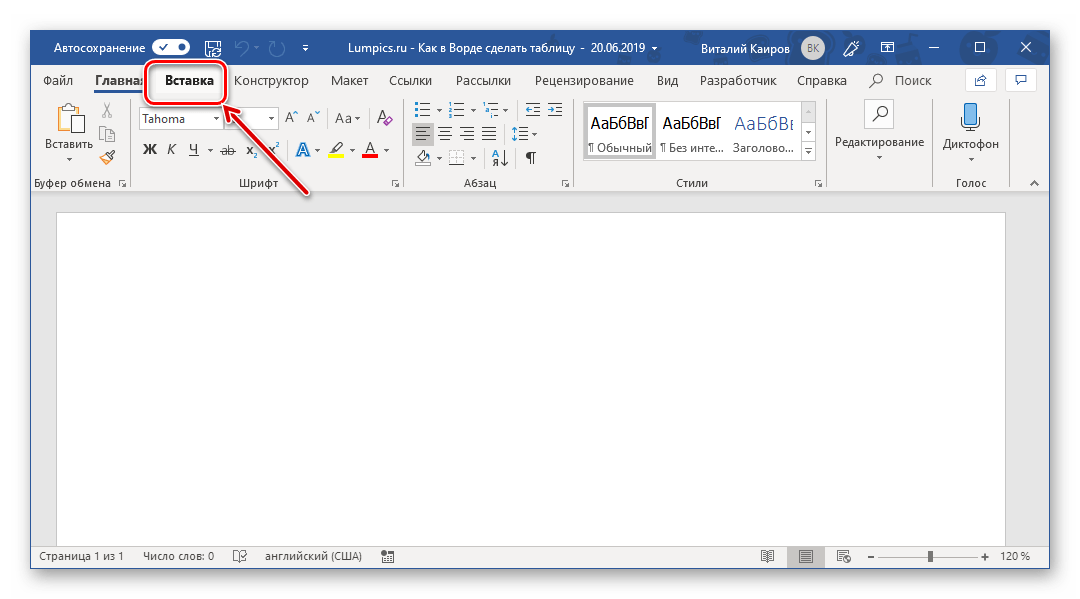
- Нажмите левой кнопкой мышки (ЛКМ) в том месте текстового документа, куда вы хотите добавить таблицу, и перейдите во вкладку «Вставка».
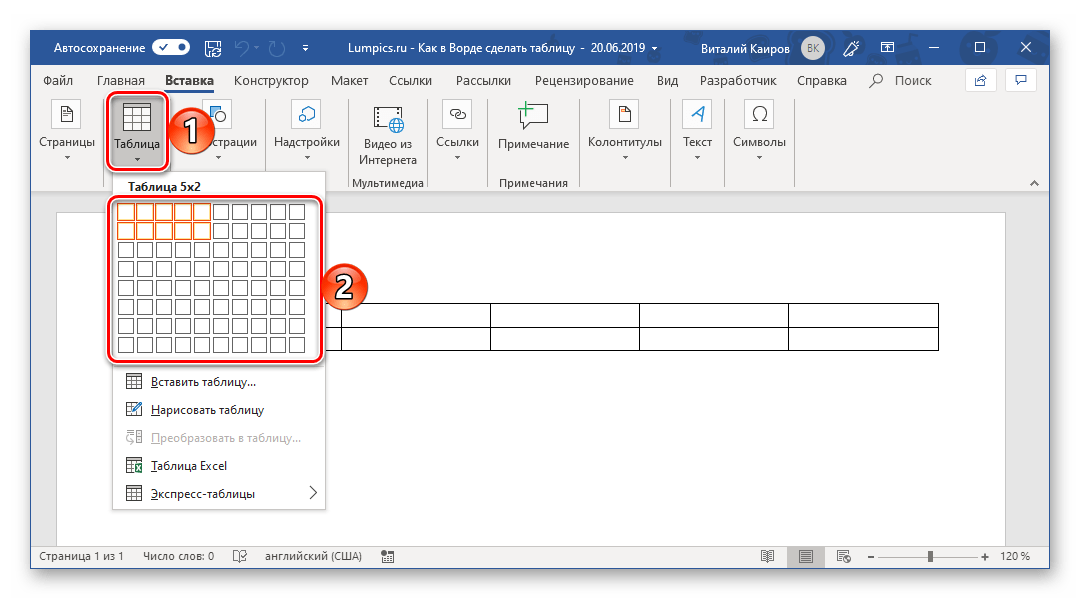
- Разверните меню кнопки «Таблица», расположенной в одноименной группе инструментов, и выберите желаемое количество строк и столбцов, передвигая мышку по изображению с превью таблицы, а затем, обозначив желаемый диапазон (он подсвечивается оранжевым). Кликните ЛКМ для подтверждения.
- Перед вами появится таблица выбранных размеров.
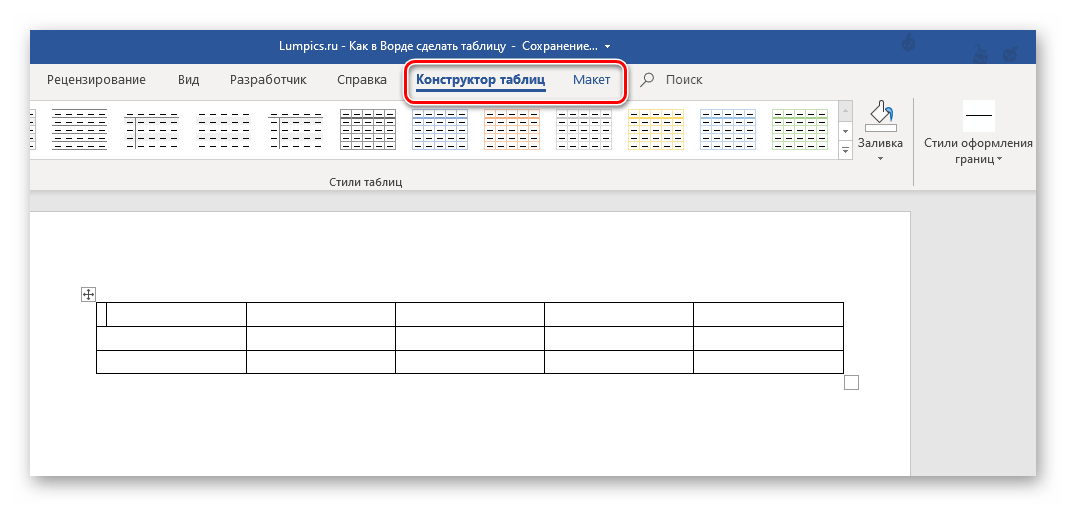
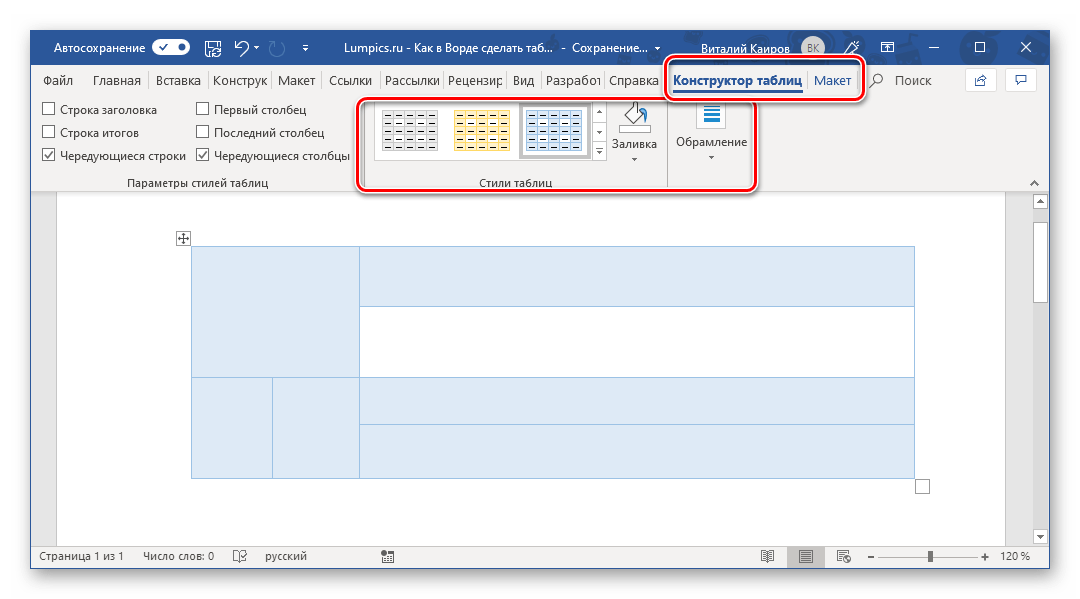
Одновременно с тем, как вы ее создадите, на панели управления (лента) Word появится группа вкладок «Работа с таблицами», состоящая из вкладок «Конструктор таблиц» и «Макет» и содержащая необходимый набор инструментов для работы с таблицами, их изменения и оформления.
Используя их, вы сможете придать своей таблице желаемый вид и стиль, добавить или удалить границы, сделать обрамление, заливку, вставлять различные формулы и т.д.

Читайте также: Вставка формулы в таблицу в Ворде
Это был самый простой, но далеко не единственный способ создания таблицы в Word.
Читайте также: Форматирование таблиц в Ворде
Способ 2: Таблица с настраиваемыми параметрами
Если же вы имеете более-менее точное представление о том, как должна выглядеть ваша таблица и какие приблизительно размеры она должна иметь, эти параметры можно определить непосредственно при ее создании.
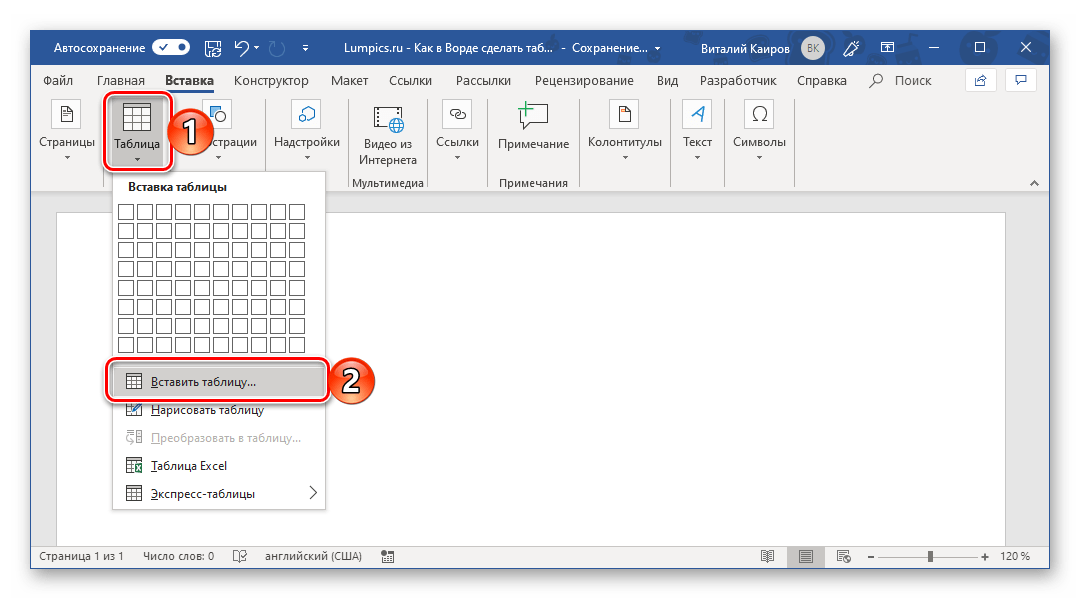
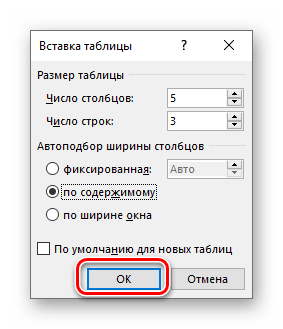
- Все в той же вкладке «Вставка» воспользуйтесь кнопкой «Таблица» и выберите в ее меню пункт «Вставить таблицу».
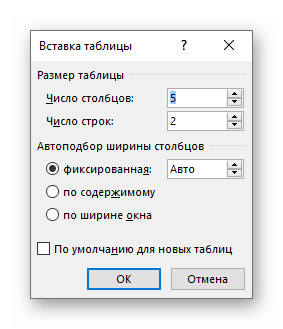
- В небольшом диалоговом окне, которое будет открыто, задайте желаемые параметры для таблицы. То есть укажите необходимое число строк и столбцов, дополнительно можно выбрать опцию подбора ширины столбцов (хотя для пустой таблицы это не слишком актуально). Доступны следующие варианты:
Вариант Описание Постоянная По умолчанию установлено значение «Авто», то есть ширина столбцов будет изменяться автоматически, по мере их заполнения По содержимому Изначально будут созданы узкие столбцы, ширина которых увеличивается по мере добавления содержимого По ширине окна Таблица автоматически будет изменять свою ширину в соответствие с размерами документа, с которым вы работаете 
Примечание: Если вам необходимо, чтобы таблицы, которые вы будете создавать в дальнейшем, выглядели точно так же, как и эта, установите галочку напротив пункта «По умолчанию для новых таблиц».
- Задав необходимые параметры в окне «Вставка таблицы», нажмите «ОК» для их подтверждения.
На странице документа появится созданная вами таблица, ширину столбцов и высоту строк которой, скорее всего, придется изменить, а после этого (или в процессе) заполнить информацией.


Читайте также: Как в Word добавить строку и/или столбец в таблицу
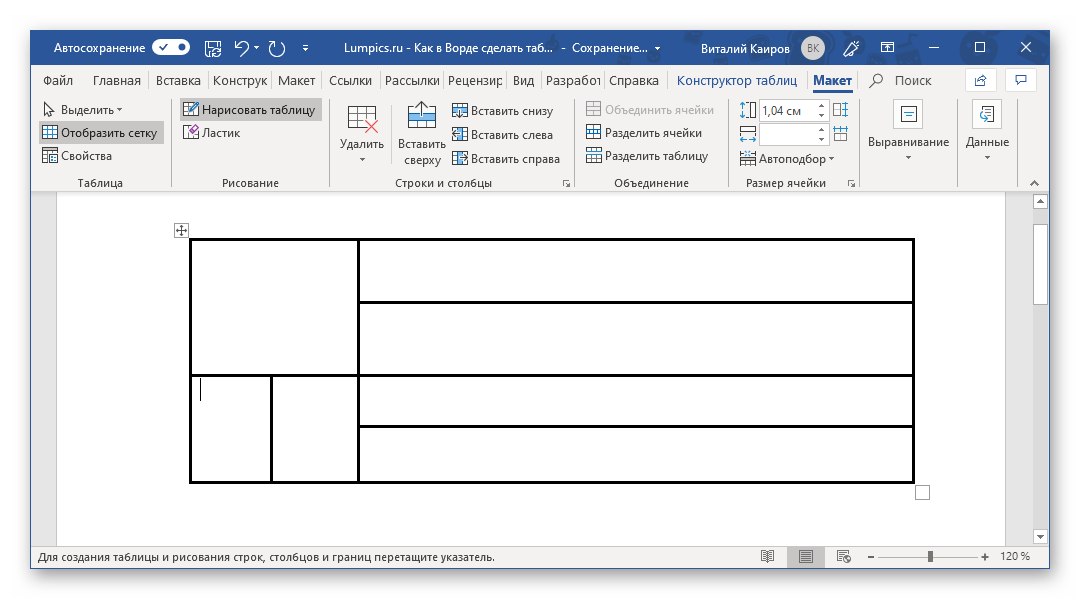
Способ 3: Самостоятельное рисование
В случае если вам нужна таблица произвольного размера и вида, например, с объединенными ячейками или с разной высотой и шириной таковых (а также строк и/или столбцов), потребуется нарисовать ее вручную, воспользовавшись соответствующей возможностью текстового редактора.

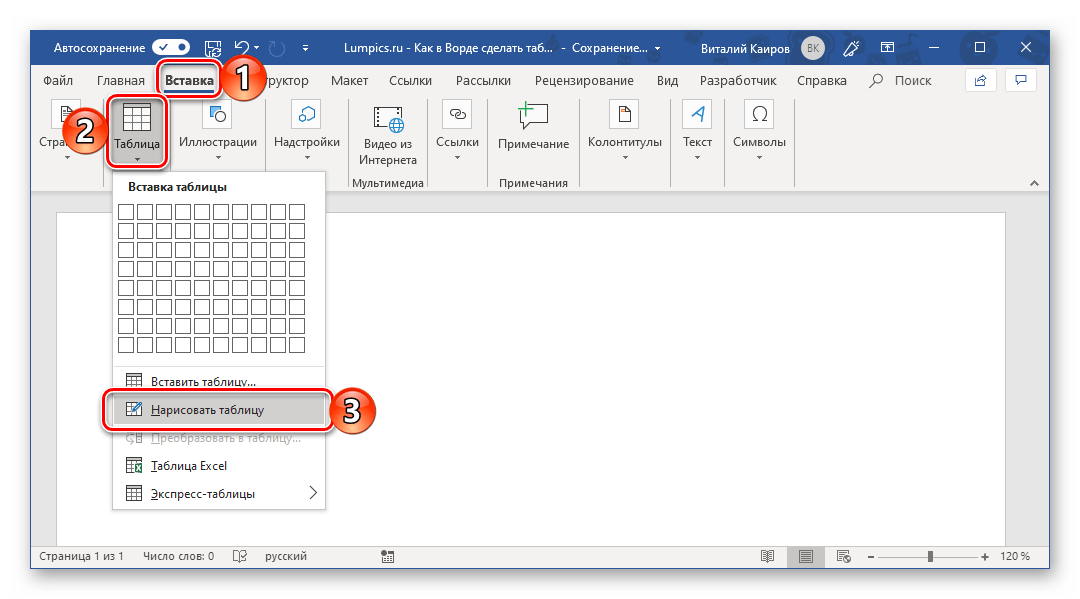
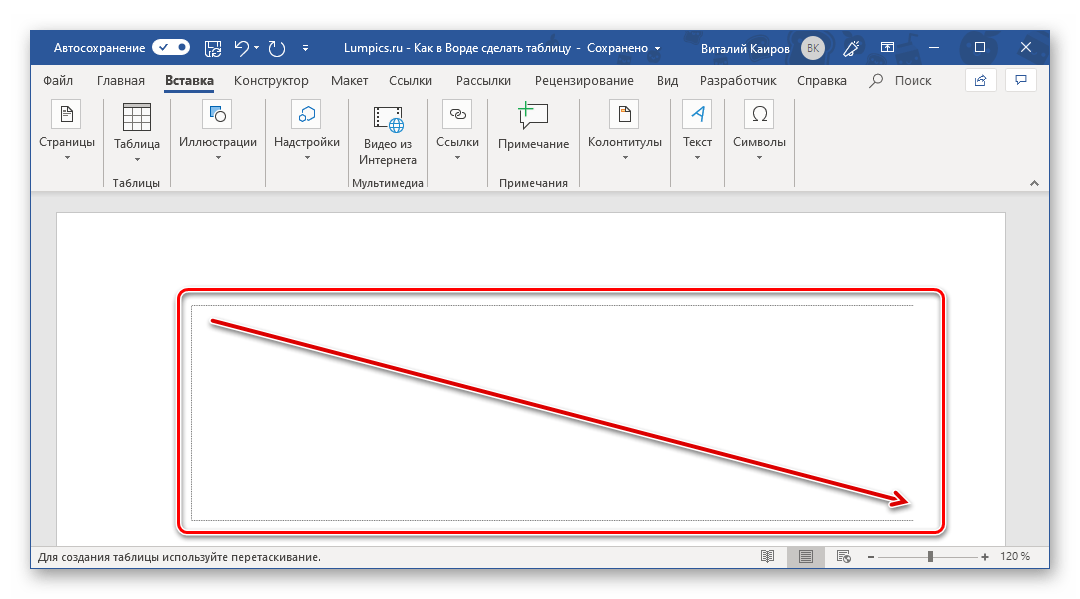
- В меню вставки таблицы выберите пункт «Нарисовать таблицу». Указатель курсора после этого действия примет вид карандаша.
- Обозначьте внешние границы таблицы, то есть просто нарисуйте прямоугольник с необходимой высотой и шириной (в дальнейшем эти параметры можно будет легко изменить).

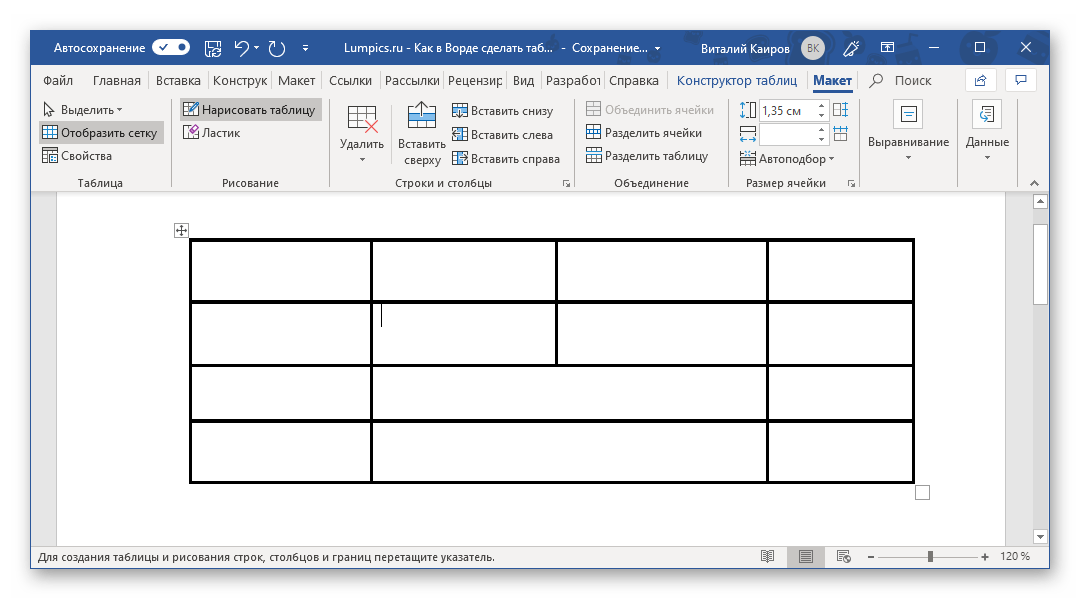
Далее нарисуйте внутри него строки и столбцы, проводя карандашом соответствующие горизонтальные и вертикальные линии. Сделав это, снова выберите пункт «Нарисовать таблицу» в меню вставки, чтобы выйти из режима рисования.
Как вы наверняка уже могли догадаться, высота строк и ширина столбцов изначально может быть произвольной (или просто желаемой), а не строго определенной, как это происходит при вставке базовой и настраиваемой таблицы. Также можно сразу нарисовать объединенные столбцы, строки, ячейки, если такая необходимость имеется.
Читайте также: Как объединить ячейки в таблице в Ворде - Как и в рассмотренных выше случаях, вся работа с таблицей, ее элементами и содержимым, выполняется в группе вкладок «Работа с таблицами»,
в которую входят «Конструктор таблиц» и «Макет».

Довольно часто именно произвольное, ручное рисование таблицы в Word является оптимальным решением и позволяет сделать в точности то, требуется (или просто хочется).
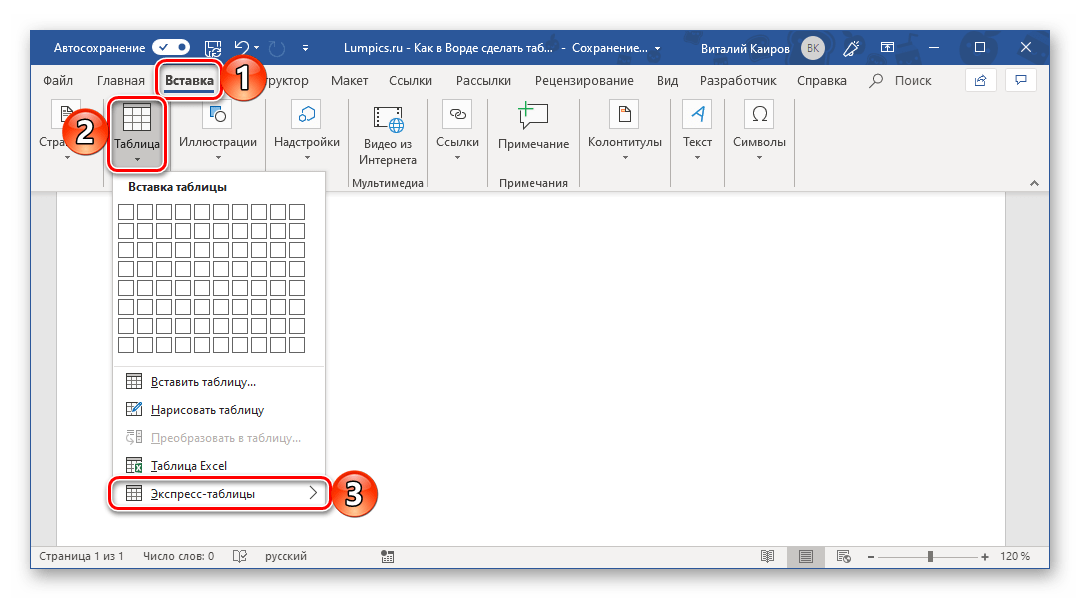
Способ 4: Экспресс-таблица
С каждой новой версией редактора Ворд в нем появлялось все больше шаблонов документов. Выбрать их можно при запуске программы или через меню «Файл» — «Создать». Есть в программе и шаблоны таблиц, причем расположены они не в стартовом окне, а во все том же, уже хорошо знакомом нам меню вставки.
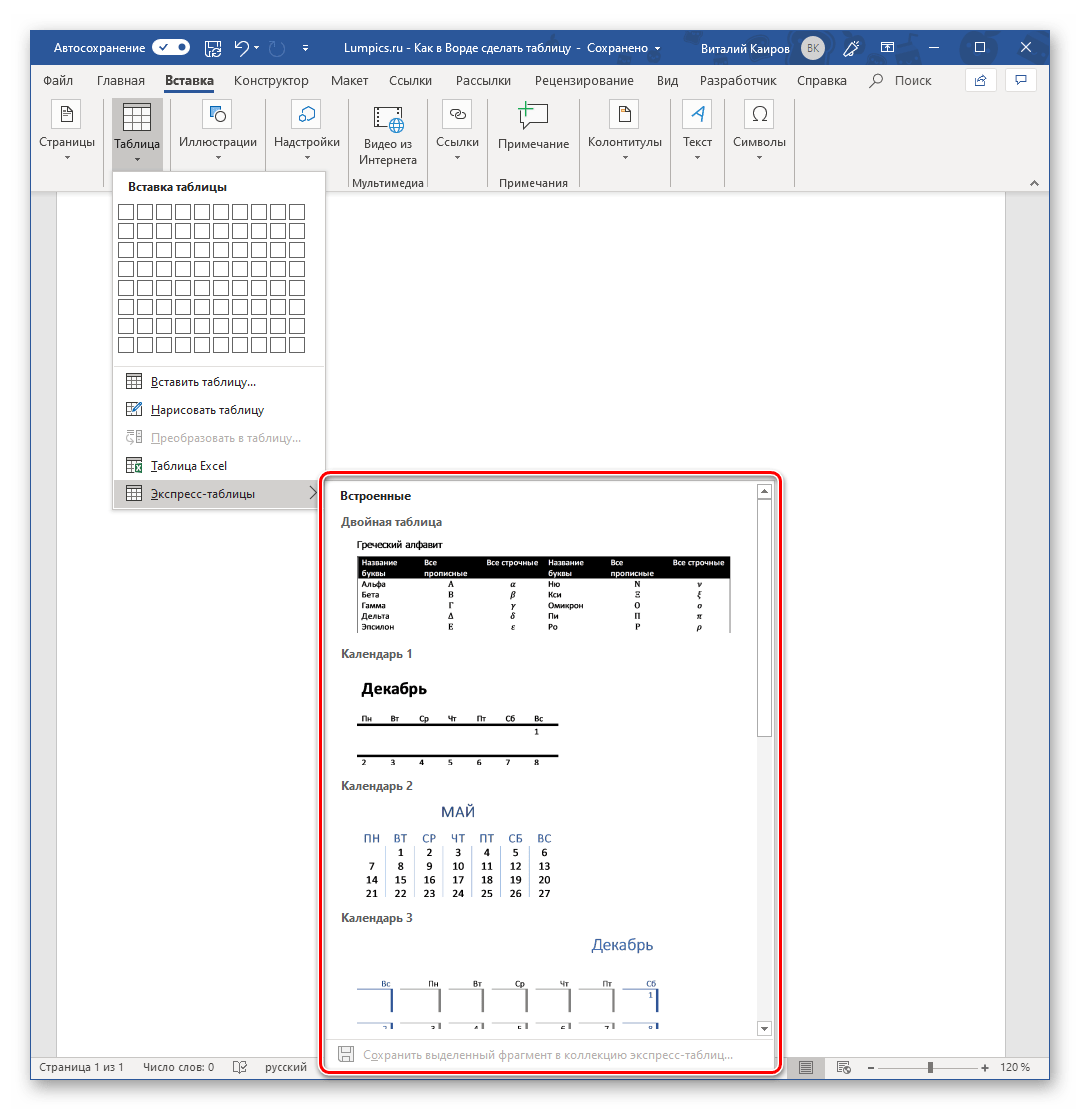
- Разверните меню кнопки «Таблица» и выберите пункт «Экспресс-таблицы».
- Выберите подходящий шаблон из небольшого списка «Встроенные», нажав по нему ЛКМ.
- Таблица будет добавлена в текстовый документ и заполнена шаблонным содержимым. Все эти данные можно и нужно заменить на свои.

К сожалению, набор шаблонных таблиц в Word довольно скромный, зато его легко можно расширить собственными проектами. То есть любую созданную вами таблицу можно добавить в этот набор, для чего необходимо выполнить следующее.
- Выделите таблицу вместе со всем ее содержимым и перейдите во вкладку «Вставка».
- В меню кнопки «Таблица» наведите указатель курсора на пункт «Экспресс-таблицы».
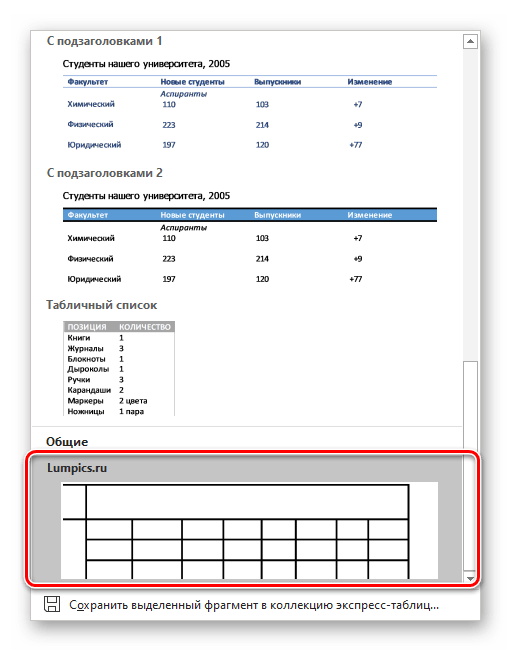
- Выберите расположенный в самом низу пункт «Сохранить выделенный фрагмент в коллекцию экспресс-таблиц…»

В появившемся окне создания нового блока дайте своей таблице «Имя» и по желанию добавьте «Описание». Остальные поля лучше оставить по умолчанию. Для сохранения шаблона нажмите «ОК».


С этого момента ваша таблица будет отображаться в списке «Экспресс-таблицы».
Читайте также: Как в Ворде создать шаблон документа
Способ 5: Преобразование текста в таблицу
Все рассмотренные нами выше способы позволяют создать таблицу, которая в дальнейшем будет заполняться необходимыми данными. Но что, если требуется пойти от обратного – то есть данные уже имеются, и теперь их нужно преобразовать в таблицу? Microsoft Word предоставляет нам с вами и такую возможность, а именно, программа позволяет преобразовать текст в таблицу. Проще всего таким образом представлять списки (чаще – маркированные), но это далеко не единственное применение функции.
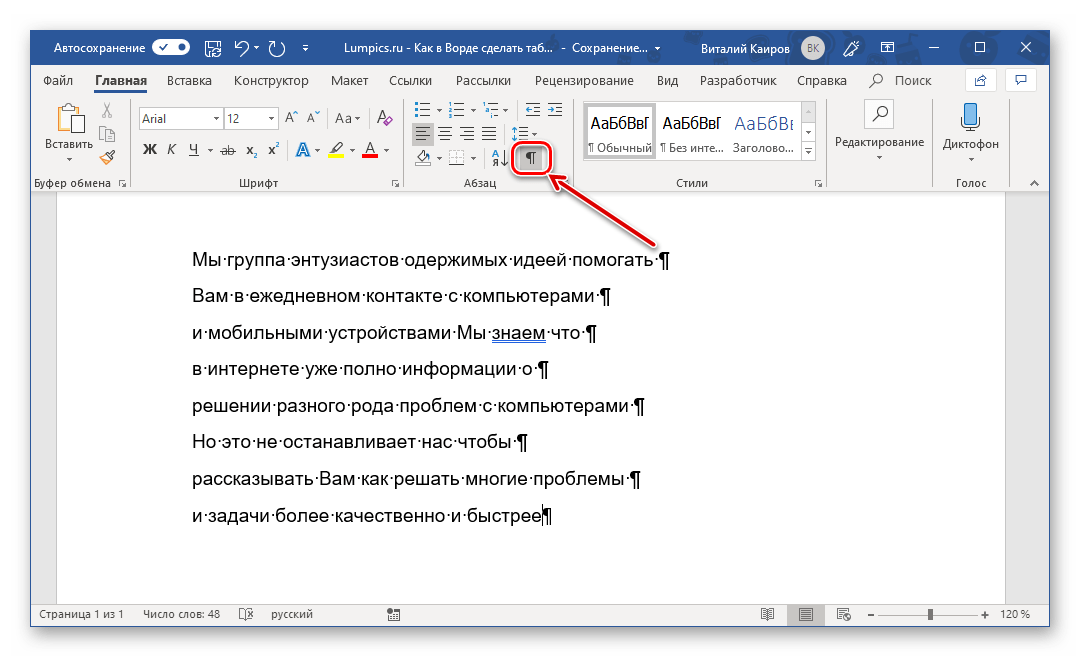
- Для того чтобы начать перевоплощение уже имеющегося текста в таблицу, необходимо включить отображение скрытых символов. Сделать это можно путем нажатия показанной на изображении ниже кнопки (вкладка «Главная», группа инструментов «Абзац») или закрепленной за ней комбинацией клавиш – «CTRL+*».

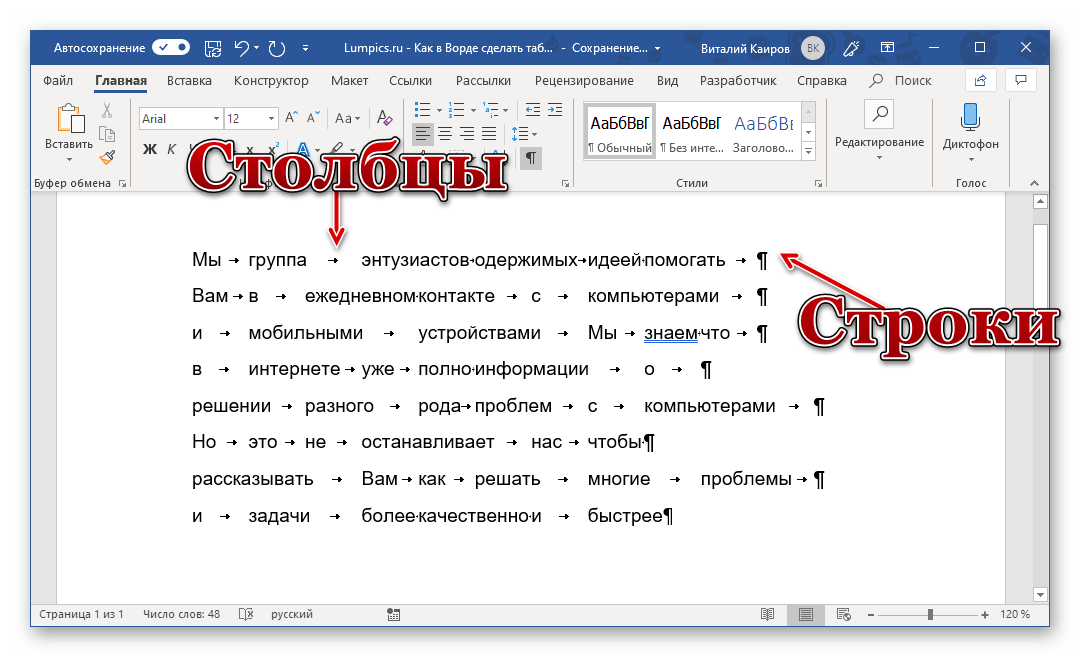
Читайте также: Отображение скрытых символов в Ворде - Теперь нам с вами требуется указать места разбивки будущей таблицы на столбцы. Для этого нужно вставить соответствующие знаки разделения, коими могут быть запятые, табуляция или точка с запятой, а также любой другой произвольный символ. Но, так как обычный текст чаще всего уже содержит запятые, для разделения будущих элементов таблицы лучше использовать знаки табуляции, что мы и сделали в нашем примере (скриншот в следующем пункте).
- С разделением текста на строки все проще – скорее всего, он уже правильно записан, а значит, и разделен (особенно, если это список или то, что таковым может стать). Знаки абзацев (буква «пи», такая же, как и кнопка вызова скрытых символов на панели инструментов), которые находятся в конце строки, и будут служить этим самым указателем на разбивку.
Примечание: Обязательно проследите за тем, чтобы в конце строк не было лишних символов-разделителей, а если таковые будут обнаружены, обязательно удалите их. Если там будет стоять и, например, знак табуляции, и знак абзаца, один (последний) столбец таблицы будет лишним и пустым.
Если же таковых в тексте еще нет или они есть не везде, просто кликните ЛКМ в конце строки, установив туда каретку (указатель курсора), и нажмите «ENTER» для переноса остального текста на следующую строку. Это же проделайте в конце каждой последующей строки, чтобы перенести ту, что идет за ней. То есть одна строка текста с нажатым в ее конце «ENTER» — это одна строка будущей таблицы
Примечание: На показанном выше примере знаки табуляции (указывающая вправо стрелка) обозначают будущие столбцы таблицы, а знаки абзаца — строки. Следовательно, в данной таблице будет 6 столбцов и 8 строк.
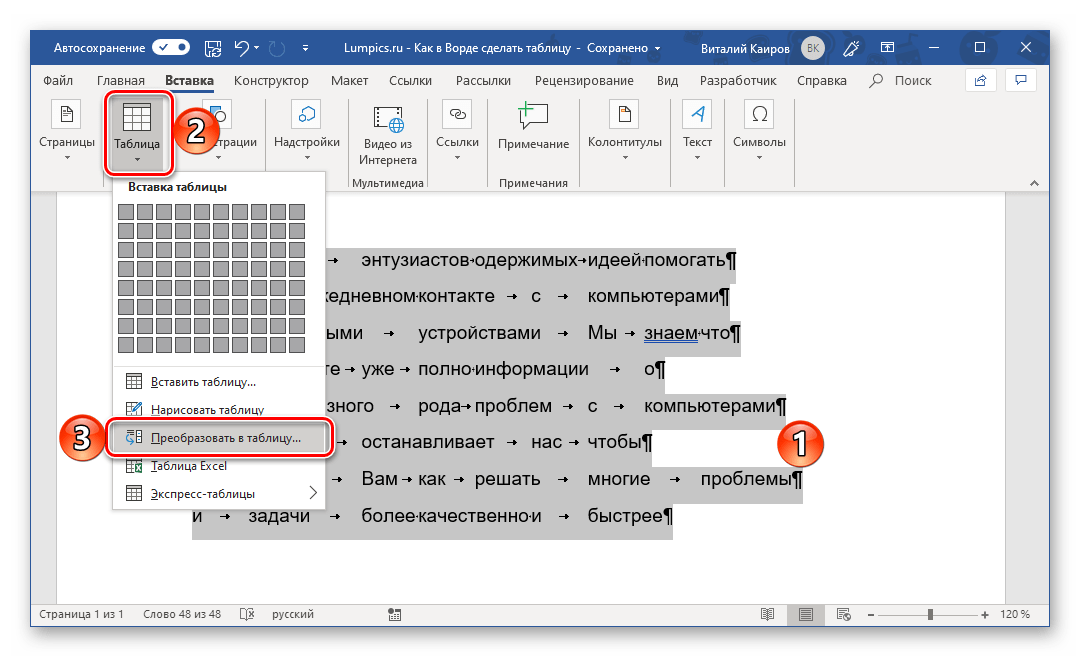
- Теперь выделите подготовленный текст и перейдите во вкладку «Вставка». Нажмите на значок «Таблица» и в открывшемся списке опций выберите пункт «Преобразовать в таблицу».
- Будет открыто небольшое диалоговое окно, в котором можно установить желаемые параметры для таблицы. Но, если до этого все было сделано правильно, основные из них будут определены автоматически.
Для закрытия диалогового окна «Преобразовать в таблицу» и непосредственного выполнения данной операции нажмите кнопку «ОК». Ниже показано то, что получилось в нашем примере.
Очевидно, что придется как минимум немного поиграться с размерами строк и столбцов и/или отдельных ячеек (либо с вариантом автоматического подбора размеров) для их выравнивания.

Дальнейшие действия по редактированию таблицы выполняются так же, как и в рассмотренных выше способах – с помощью инструментов группы вкладок «Работа с таблицами».
Осталось только отключить отображение скрытых символов в документе (это они отображаются в каждой ячейке таблицы сразу за текстом и за ее правой границей). Сделать это поможет следующая статья:
Подробнее: Как отключить непечатаемые символы в Ворде
Способ 6: Вставка и экспорт из Excel
Как известно, Word – это одно из нескольких приложений, входящих в пакет Microsoft Office. В составе этого же набора есть и табличный процессор Excel, который в значительно большей степени ориентирован на создание таблиц и работу с ними, чем рассматриваемый нами сегодня текстовый редактор. Ввиду тесной взаимосвязи компонентов офисного пакета от Майкрософт друг с другом, неудивительно, что практически любую таблицу, созданную в Эксель, можно буквально в несколько кликов перенести в Ворд. Сделать это можно с помощью простого копирования, специальной вставки или вставки из файла. Более подробно о каждом из доступных способов мы рассказывали в отдельной статье на нашем сайте.
Подробнее: Перенос таблицы из Excel в Word
Помимо экспорта таблицы из Эксель, в Ворд ее можно создать и самостоятельно (именно того вида, который они имеют в табличном процессоре от Майкрософт, а не как в рассмотренных выше случаях). Для этого:
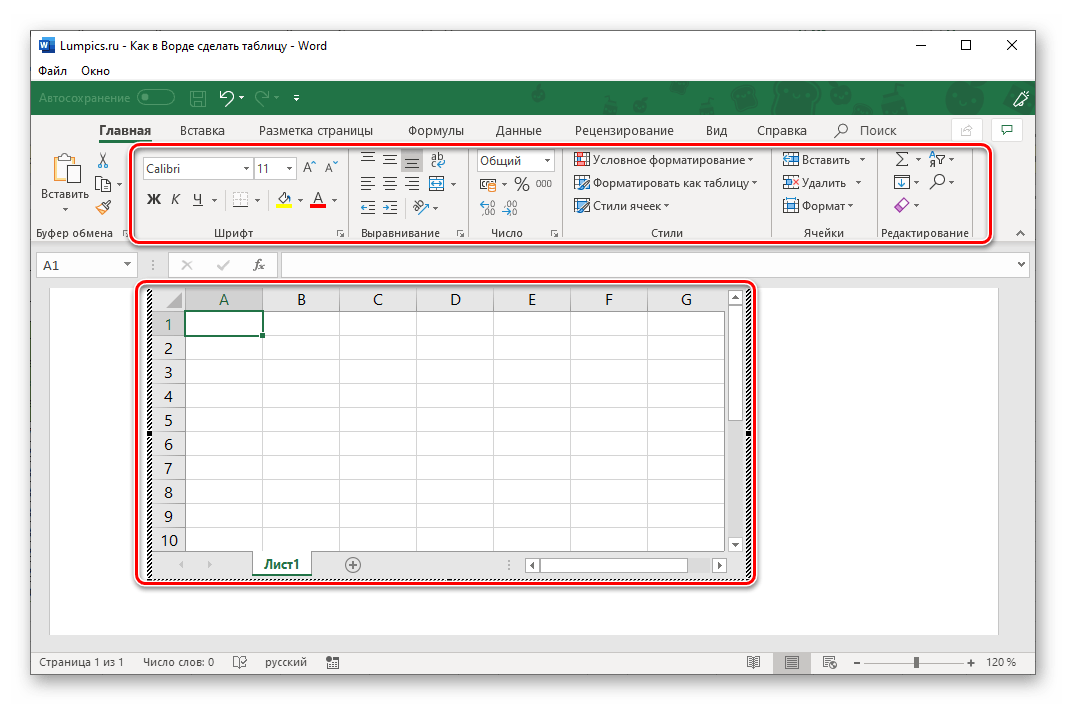
- Перейдите к меню вставки таблицы, нажмите по соответствующей кнопке и выберите пункт «Таблица Excel».
- В документе появится таблица, а точнее, лист из Эксель, сам же интерфейс Ворд (верхняя панель) преобразится и станет больше похож не на текстовый редактор, а на табличный процессор из пакета Майкрософт.
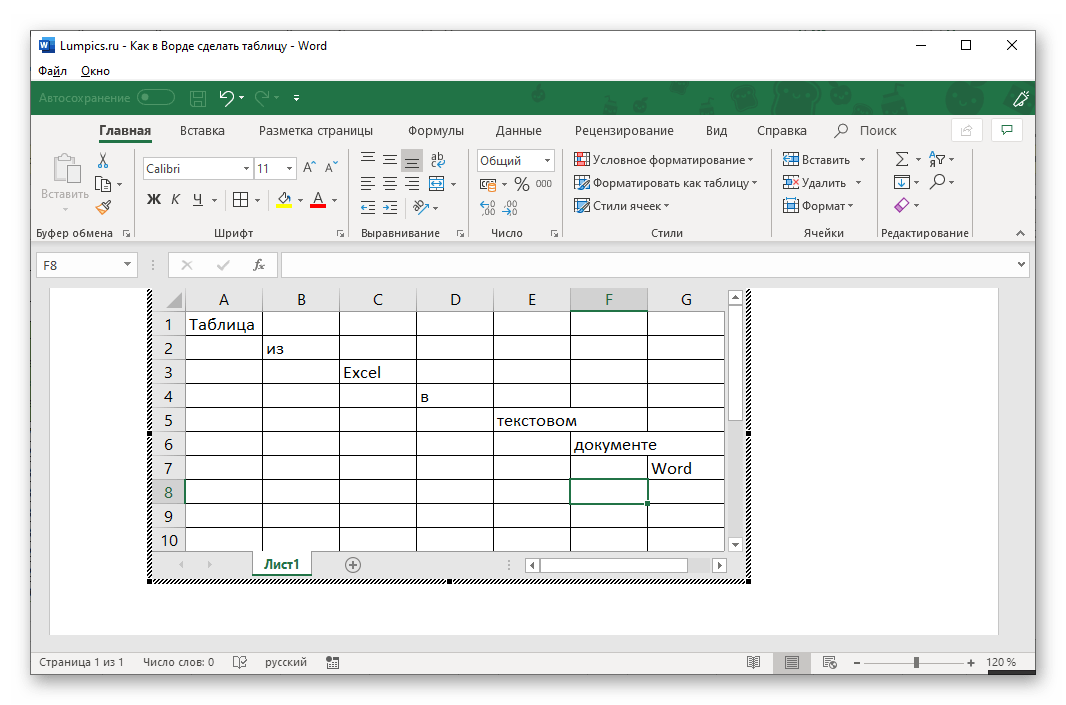
- Дальнейшие действия не отличаются от таковых в Excel, то есть вы просто создаете на листе таблицу желаемых размеров, заполняете, редактируете ее и форматируете, используя для всего этого уже не инструменты Word, а более продвинутый набор из Excel. Представленная по ссылке ниже инструкция поможет вам разобраться во всех нюансах.

Читайте также: Как создать таблицу в Microsoft Excel

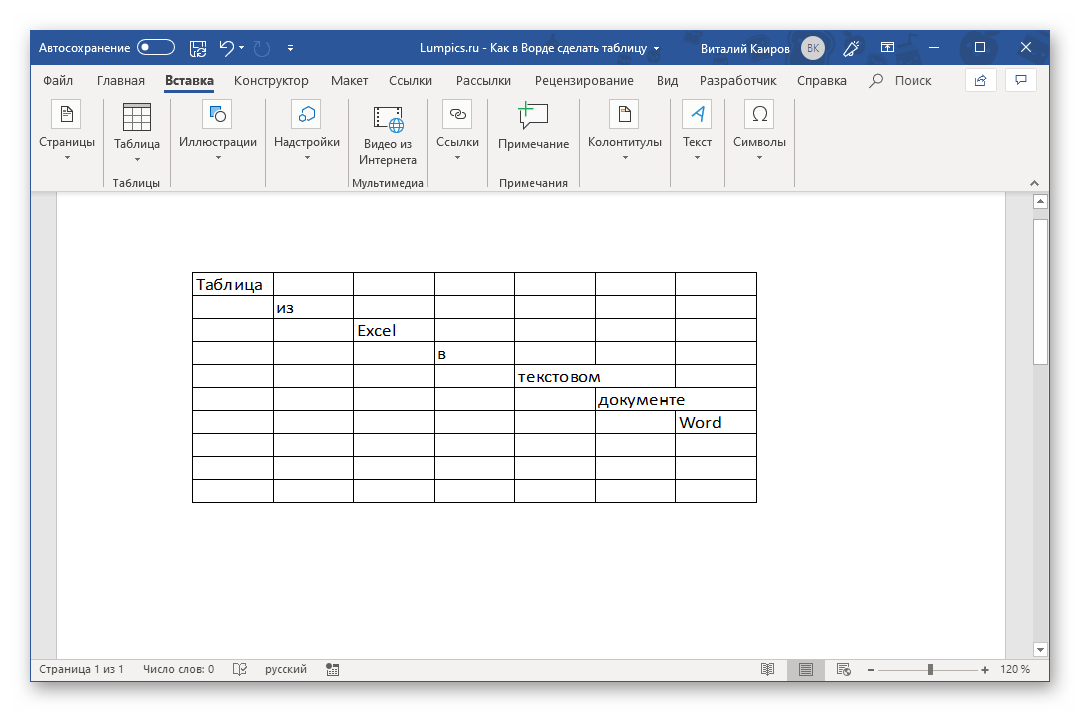
Для того чтобы выйти из режима работы с Эксель-таблицей, просто кликните по любому пустому месту на странице документа – перед вами снова появится привычный Ворд, но с несколько нетрадиционной для него таблицей.
Способ 7: Вставка таблицы из интернета
В арсенале Майкрософт Ворд есть довольно много стилей и шаблонов для создания и/или изменения, преобразования таблиц. Какая бы задача перед вами не стояла, какой бы идеей вы не вдохновлялись, вы всегда сможете придать созданной в текстовом редакторе таблице желаемый вид (в разумных пределах, так как для полноценной работы с таблицами все же следует обратиться к Эксель). Но бывает и так, что на таблицу оптимального вида вы наткнулись отнюдь не в библиотеке офисного приложения, а на просторах интернета или же вам просто потребовалось вставить опубликованную в вебе таблицу в текстовый документ. Сделать это довольно просто, то есть таблицу с сайта можно копировать, а затем вставить на нужную страницу. Правда, с ней придется еще немного поработать. О том, что именно потребуется делать в данном случае, мы ранее тоже писали.
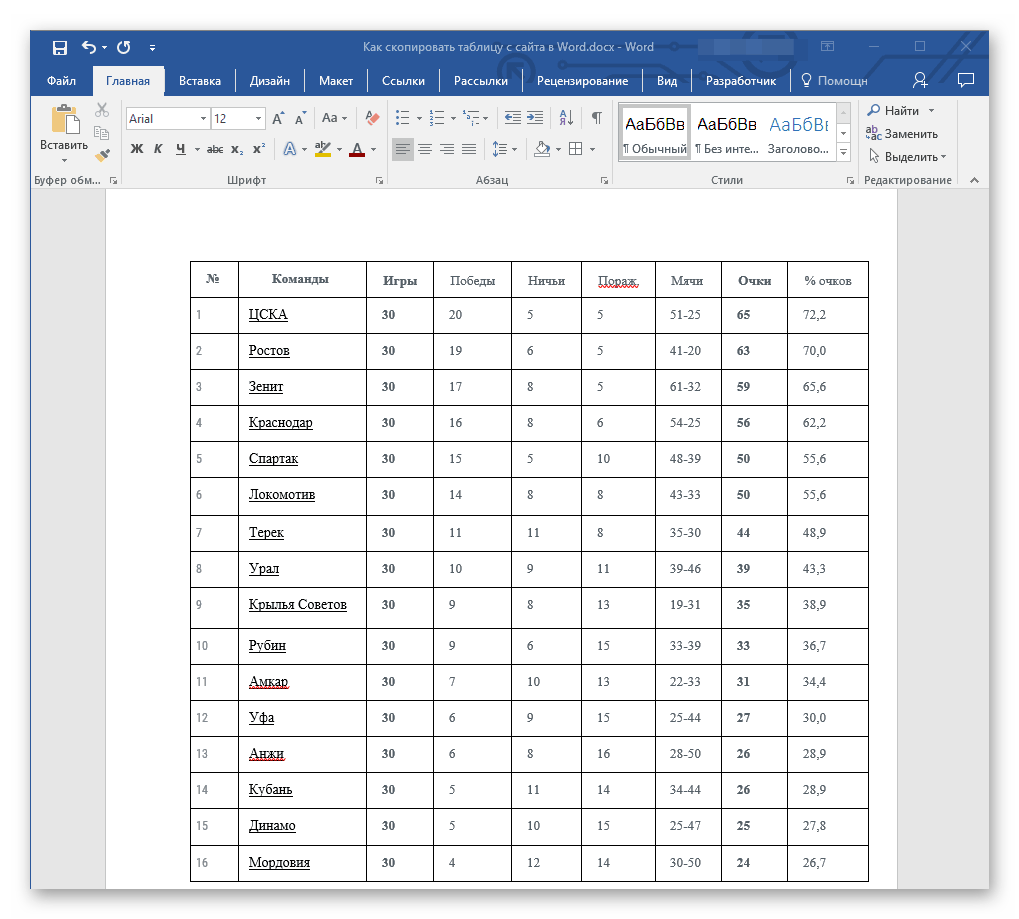
Подробнее: Копирование таблицы с веб-сайта в документ Word
Заключение
Ознакомившись с этой статьей, вы наверняка поняли, что Майкрософт Ворд предоставляет довольно широкие возможности для создания таблиц, и даже если в арсенале программы вы не найдете необходимые инструменты и/или функции, их можно добавить извне, просто вставив таблицу из Эксель или из интернета.
Are you struggling to get your message across? When your Microsoft Word project contains information, try presenting it in the form of a Word table. Learn how to make tables in Word quickly with a template.


A table is a kind of chart that organizes and presents data in rows and columns. It makes information easier to grasp, understand, and analyze at a glance, compared to explaining the same data through plain text.
Microsoft Word gives you various ways to insert or create a table. And you’ve got granular control over the formatting, layout, and appearance of Microsoft Word tables. Table charts are useful in different types of Word projects, whether for personal, educational, or business use.
This article will show you how to make a table in Word using a template. Then edit and format it to change its appearance.
(Note: The screenshots and instructions that follow are made using Microsoft Word for Mac version 16.4. If you’re using a different version of Word, then the interface and steps may be different.)
How to Make & Edit MS Word Tables (Video)
In this video, you’ll learn how to quickly make tables in Mircosoft Word. Find out how to start with a premium template. Quickly customize it to make an attractive, professional MS Word table you can use and reuse.
To learn even more about MS Word tables and about templates than can be used for tables, study the step-by-step tutorial below:
How to Make Basic Tables in Word
Let’s start by learning how to make a basic table in Microsoft Word:
1. Insert a Table
You can create a basic Microsoft Word table in one of two ways:
Method 1. The Insert Tab
Click on the Insert tab, then click the Table button on the ribbon.


The Insert Table panel appears. Drag the cursor over the squares to specify the number of columns and rows you want to create. Click to apply.


Method 2. The Insert Menu
Go to Insert > Table….


The Insert Table panel opens. Specify the number of columns and rows you need. (You can always add or remove columns and rows later.)


Also select the Autofit Behavior you want the table to have. You’ve got several options:
- Initial column width. The default setting is Auto, which divides the entire width of your page window across the number of columns in the table. Or, you can specify a different column width.
- AutoFit to contents. Resizes the column width based on the width of the content inside the column.
- AutoFit to window. Distributes the columns equally across the entire width of the page window.
- Set as default for new tables. Check this option if you want the settings to be applied globally to all new tables you create.
When you’re happy with the options you’ve selected, click OK.


2. Draw a Table
Or, you can draw a table in MS Word. This is a useful feature if you want to create an irregular or more complicated table with columns and/or rows of varying widths.
To draw a table, click Insert > Table > Draw Table.


With your mouse or trackpad, click and drag the cursor to start drawing your table. You can begin by drawing the outermost boundary of the table first.


Then, click and drag the cursor to create columns and rows inside the table. When you’re done, click anywhere outside the table.


Here’s an example of an “irregular” table you can draw using this feature.


If you make a mistake, click Layout > Eraser to erase a line from the table.


Click and drag the eraser along the line you wish to erase. The line that’ll be erased appears as a thick, red line. Release the mouse or trackpad to erase.


Click outside the table when you’re done.
3. Convert Text to Tables and Vice Versa
Another way to create a table is by converting text into a table. This means you can take non-tabular data from a CSV or plain TXT file and convert them into a table.
First, copy and paste the non-tabular data into your Word document.


With the text selected, go to Insert > Table > Convert Text to Table….


The Convert Text to Table panel opens. Specify the settings you wish to use. Click OK.


The text is then converted into a table.


You can also do the opposite, which is to convert a table into text.
Select the cells or entire table you want to convert. Next, click on the Layout tab then click the Convert Table to Text icon.


The Convert Table to Text panel opens. This is where you’ll decide how you want to separate text that’s currently in different columns. When you’ve made a selection, click OK.


For this example, I chose to separate text with commas. This is what the converted table looks like.


4. Advanced: How to Insert a Table from Excel
If you’ve already created a table in Excel, you can embed it into your Word document.
Open the Excel file. Click and drag the mouse to select the table.


Go back to your Word document. Go to Edit > Paste Special ….


In the Paste Special panel, select Microsoft Excel Binary Worksheet Object, then click OK.


This embeds the Excel table into Word. It’s still an Excel table, which means you can’t edit or format the table in MS Word. You’ve got to do so in Excel.


Double-click anywhere in the table to launch the source file in Excel. When you make any changes to the table in Excel, the table embedded in your Word project automatically updates to reflect those changes.
Now you know how to make a table in MS Word using various options.
How to Edit Tables
At any time after creating your table, you can edit and customize it to look the way you want it to. Here are some steps for editing tables in Microsoft Word:
1. Add a Column or Row
To add a row or column, click inside a table cell. Right-click on the mouse, then click Insert.


Select one of the following:
- Columns to the Left. Adds a column to the left of the current column
- Columns to the Right. Adds a column to the right of the current column
- Rows Above. Adds a row above the current row
- Rows Below. Adds a row below the current row
- Cells … Inserts a cell and shifts the rest of the cells either to the right or down from where the cursor is
- Table … Inserts a table inside the current cell
Or, with the cursor in one of the cells, you can click on the Layout tab.


Then choose of the following buttons on the ribbon:
- Insert Above. Inserts a row above the current cell
- Insert Below. Inserts a row below the current cell
- Insert Columns to the Left. Inserts a column to the left of the current cell
- Insert Columns to the Right. Inserts a column to the right of the current cell
Finally, you can add a new row when you’ve reached the last cell in the last row of your table. Simply press tab and a new row appears.
2. Delete a Column or Row
To delete a cell, column, row, or table, click on the Layout tab > Delete.


Select one of the options that appear:
- Delete Cells …
- Delete Columns
- Delete Rows
- Delete Table
You can use the same steps to edit a table you’ve drawn. Or, you can use the Layout tab to add or delete rows and columns.


Merge Cells
Sometimes you may want to merge cells to present information more clearly. To merge cells, click and drag the cursor to select the cells you wish to merge.


On the Layout tab, click on the Merge Cells button.


Or, after selecting the cells to be merged, right-click on your mouse, then click Merge Cells.


Now the cells have been merged into one.


Split Cells
After merging cells, you can always split them again into separate cells.
Place the cursor in the merged cell, then click Layout > Split Cells.


Or, right-click on your mouse, then click Split Cells….


Either way, the Split Cells panel pops up. Specify the number of columns and rows you want to split the cell into. Click OK.


Split Table
You may decide that it makes more sense to split up a table into two separate tables. Microsoft Word lets you do that easily, too.
In this example, I want to split the table right above the Accessories cell. And so, I’ll place the cursor in that cell. Next, click on the Layout tab, then click the Split Table button.


Now, we’ve got two separate tables.


Table Formatting
When you first create a table, it looks plain and boring. But Microsoft Word has many features so you can format tables to look exactly the way you want them. Here are some common ways to format tables:
1. Table Styles
The easiest way to format a table is by using one of the pre-formatted table styles. Put the cursor in any cell in the table. Click on the Table Design tab. Next, click on the arrow to expand the Table Styles group.


Click on a style you want to use and it’s applied immediately.


You can change any style you’ve selected. Again, click on Table Design, expand the Table Style group, then click Modify Style.


The Modify Style panel opens. Make the selections you want, then click OK.


2. Use Your Own Formatting
The Table Design tab gives you control over the appearance of every aspect of your table. Click on the Table Design tab and any of the appropriate buttons on the ribbon.


Resize a Table
You can also resize your table. Click on any cell to select the table, then click and drag one of the corners to resize it.


Or, you can use the Layout tab to resize individual cells, specific rows or columns, or the entire table. Select the columns or rows you wish to resize. Specify the height and/or width you wish to apply.


You can also adjust column width by hand by using the Table Ruler. Click inside a column you want to change. Then, drag the sliders in the Table Ruler to set to desired width.


Text Wrapping
If you want text to flow around the table, you can do so by changing its text wrapping.
Click in any cell to select the table. Click Table > Table Properties….


In the Table Properties panel and under Text Wrapping, click Around > OK.


Now the text flows around the table.


Take note that the Table Properties panel allows you to format other qualities of the table, including:
- Size
- Alignment
- Positioning
- Borders and Shading
On the other tabs, you can change:
- Column, Row, and Cell Size
- Allow row to break across pages
- Repeat as header row at the top of each page
- Cell Vertical Alignment
- Alt Text (Title and Description) — more information about the table, to help people with vision or cognitive impairment who may not see the table
Find Great Styles for Microsoft Word
You don’t have to start from scratch to create an impressive and effective Word document — even if you don’t have design skills. You can find great styles by using a template for Word.


One great source for great Microsoft Word templates and professional graphics is Envato Elements. For one low monthly subscription, you get unlimited downloads of templates, graphics, fonts, and other creative tools you need for your project. It’s a terrific option if you create plenty of materials.
For single projects, GraphicRiver is an outstanding source for templates for Word. This marketplace gives you access to thousands of creative elements on a pay-per-use basis.
Learn More
Microsoft Word has many robust features to help you realize the vision you’ve got for your document. But with power comes complexity. That’s why it’s a good idea to learn how to use Microsoft Word.
These articles will help you get started:
Visualize Your Data with Microsoft Word Tables
Make your information clearer and easier to understand by learning how to make a table in Microsoft Word. Tables organize data into rows and columns, which makes them easier to grasp at a glance. Follow the steps in this article to create, format, and customize tables in Word.
You can also use a premium Word template to get a premium design created by designers. Get Word templates from Envato Elements, if you want unlimited downloads of templates, graphics, and other creative tools you need — all for one flat monthly fee.
Or, get premium templates for Word from GraphicRiver if you prefer to pay for each use of an item. Both sources give you access to thousands of design elements created by professionals, so you can save time, energy, and effort while creating an outstanding Word document.
Did you find this post useful?

Marketing & Communications Professional and Lifelong Learner/Canada
Lexi Rodrigo is a marketing and communications professional, copywriter, and course creator who helps remarkable brands and people get seen, heard, and known. Writing for the web since 2008, she has over 100+ blog posts published on Envato Tuts, Acadium, Mirasee, Vero, Copyblogger, FreelanceFolder, Business2Community, and others.
Lexi has supported multimillion-dollar companies and nonprofits in various marketing and communication roles. She has driven results like tripling the organic search traffic of a blog in three months and generating over $65 million in revenues, donations, and sponsorships.
She has a Bachelor of Arts degree in communications. She is also the co-author of «Blog Post Ideas: 21 Proven Ways to Create Compelling Content and Kiss Writer’s Block Goodbye.» When she’s not reading or writing, Lexi bakes bread, grows food, and takes long walks.

Tables help you present information in a clear and organized way. There are three ways to add tables to your documents in Microsoft Word, each taking only a few easy steps. These instructions are based on Microsoft Word 2003, but the process is very similar in other versions of Word.
Here’s how to make a table from the Tables and Borders toolbar:
- Place the cursor where you want to place the table.
- Click the Insert Table icon on the Tables and Borders toolbar at the top of the window. [Microsoft]
- Drag the corner of the table until you have the desired number of columns and rows.
- Click the mouse to insert the table.
Here’s how to make a table from the Insert Table dialogue box:
- Click on Table from the menu bar. Select Insert, and then Table… A dialogue box will open.
- Enter the desired number of rows and columns.
- Choose AutoFit behavior if you want the table’s cells to automatically expand to fit the text inside them. Choose AutoFormat if you’d rather select a table with a specific format.
- Click OK to insert your table.
Here’s how to draw a table:
- Select Table from the menu bar.
- Select Draw Table.
- Drag the pencil diagonally across the page to make a rectangle where you want to place your table.
- Draw lines vertically and horizontally to create the columns and rows you need.
You can modify your table as follows:
- Select your table, or a portion of it.
- Right click your mouse. Choose Table Properties. You can also choose Table Properties from the Table menu in the menu bar. [Home & Learn]
- Adjust the alignment, as well as the row and column settings. You can also make use of the text wrapping feature. Click OK when you’ve made the desired changes.
Adjust your table’s colors and lines, as follows.
- Click the Table tab.
- Choose Table Properties.
- Click on the Borders and Shading… button. Make the desired selections and click OK, and then click OK again.
Originally Published: Apr 14, 2011
Make Table In Microsoft Word FAQ
How do you create a table in Word?
Follow these steps to make a table: (1) Put the cursor where you want to position the table, (2) On the Tables and Borders toolbar, click on the Insert Table icon, (3) Drag the table’s corner until you have the desired number of rows and column and (4) Insert the table by clicking the mouse.
How do I make a quick table in Word?
To make a table quickly, add one of the most used tables from the Quick Tables gallery.
How do I format multiple tables in Word?
Choose the table with the formatting you want to apply to other tables. Then, under the Table Tools, go to the Design tab. Click on the arrow mark under the group Table Styles and choose New Table Style. In the Properties group, set a name for the style, apply the format changes and then create new tables using the preset.
Can you do conditional formatting in a Word table?
You can use VBA to specify conditional formatting of colors in a word table. Choose Macros from the View tab > View macros. Set the name, create, replace all the content with the following code and hit Save.
How many ways are there to create a table in MS Word?
Microsoft offers five ways to create tables: draw table, insert table, the graphic grid, insert an existing or new spreadsheet table, quick tables and an option for converting existing text into a table.
Microsoft Word is probably the most popular software there is for word processing. The program makes it possible for users to write texts very quickly and in a way that is (in most situations) straightforward. However, with the software you can also integrate additional elements into your document, including images and tables. If you would like to quickly create a well-arranged table, no need for Excel: Word itself has a feature for this.
Contents
- Creating a Table: Easy to Do in Word
- Customizing Tables
- Insert Excel Table in Word
Creating a Table: Easy to Do in Word
Word has a special feature with which you can quite easily create a table. To make use of it, click in your open Word document on the “Insert” tab and then select the “Table” item. Here Word already offers you a very easy-to-use tool: just click with the mouse pointer to select how many rows and columns your table should have. With one click, the program then inserts the selected matrix into the document.

However, there are other options for creating tables in Word. Directly beneath the selection chart you’ll find the menu item “Insert Table…”. If you click on it, a menu will open with several options for customizing the table according to your preferences before it is created. For this as well, you must first determine the number of columns and rows but can then also specify the column width. You can determine if the column should be set to a specific width or you can leave the adjustment to Word. The program then configures the column width according to the content or window size.

Another feature allows you to draw tables. This way, you can create a cell in the size of your choice and then insert additional rows and columns, structuring your table step-by-step.

If you already have the table content in your document but would just like to format it as a table, there is another feature that will let you do this. First, however, your individual cell entries must be pre-formatted. Arrange the words or numbers in different cells and separate the entries from each other using tabulators. In this way, Word can determine how the content must be distributed among the rows and columns. Therefore, select the section and click beneath “Table” on the menu item “Convert Text to Table…”. In the window that opens, check if Word correctly understood the distribution, then create the table.

Note
You can also use other symbols in order to separate the entries from each other. In the menu of the appropriate feature, you can specify these so that Word correctly apportions the columns and rows.
Customizing Tables
If you have created your table in Word, it is usually not very visually appealing. However, you do have the option of customizing the layout. After you’ve created the table, the Table Tools open with two new tabs in the menu ribbon. Among other options, you can choose from different templates under “Design,” and in this way give your table a more professional design. If you find that the selection is insufficient, you have additional options for customization, such as adjusting the lines or coloring specific sections. Above the “Layout” tab you can also adjust the distribution of cells, rows and columns.

In addition, you also have the actual Word formatting options available. In this way you can make the content bold or italic, for example, or change the font size or text color.
Tip
If you would like to choose an appealing design when creating your table, you can try out the “Quick Table” option when inserting it. Here, Word provides you with tables that have already been formatted and that can be helpful in various situations.
Insert Excel Table in Word
For simple comparisons or lists, Word tables are enough. They can be created quickly and are easy to customize. However, if you have more complex requirements, and would like to, for example, have recourse to mathematical formulas and abundant data analyses, Excel would be more to your benefit. The Office suite’s table calculation software is specifically designed for such tasks. Its advantage is that it makes it possible to incorporate an Excel table into a Word document.
For this Microsoft provides you with two different versions: Either you integrate an existing Excel table into the document, or you create a new Excel table directly in Word. For the first approach, you must first create a table in the calculation program. Then you can select this table, copy it and insert it into Word. In word processing, you then format the table so that it is consistent with the rest of the document.

There is however another option that lets you incorporate an existing Excel table. If you link both files to each other, the table in the Word document inherits the changes that you make in Excel. For this as well, you select and copy the table in Excel. However, in the Word document you don’t simply paste the data as you normally would (for example, with the ctrl + V key combination), but instead use a special feature. In the “Start” tab you’ll see the “Insert” item all the way to the left. If you click here on the “Paste content…” option, you’ll be able to integrate the table as a link. Choose “Microsoft Excel Worksheet Object” from the list and confirm your decision.
However, Word also gives you the option of creating an Excel table directly in the document—with all the features that one is also familiar with from table calculation. For this you’ll find the “Excel Calculation Table” feature in the table menu. Word now generates an Excel-style table and completely transposes its features: Word’s characteristic blue ribbon becomes the green Excel menu. You can make use of the Excel features if you have activated the table.

Note
Would you also like to take advantage of the Office suite’s wide range of features? With Microsoft 365, IONOS provides you with the complete Microsoft package in the cloud.

Word documents: how to save as a PDF file
If you want to send a Word document or prepare it for printing, it’s recommended you know how to save it as a PDF file. This way, you can be sure that the formatting of your document won’t change and that others will not be able to edit it without permission. For simple conversion tasks, the save function in Word is often sufficient. However, there are some dedicated tools which offer a wider…
Word documents: how to save as a PDF file

How to create a table of contents in Word
Microsoft Word makes it easy to create smart text documents with its diverse template styles. This includes pre-formatted table of contents templates. With our illustrated, step-by-step guide, we’ll show you how to find the templates and how to customize the design.
How to create a table of contents in Word

How to insert a watermark in Word
Sometimes you need to clearly label your document with words like “Sample,” “Draft,” “Example” or “Confidential”. In Microsoft Word, you can use watermarks to do this. This practical design tool allows you to display barely visible but impressive text or graphics that sit behind the actual text. In this tutorial, we will teach you how to insert a watermark in Word.
How to insert a watermark in Word

Create a table of figures in Word
Whether for school, university or the office, introducing tables or figures into a text makes it easier for the reader to grasp data or concepts. But if you’ve added lots of tables, it may be a good idea to insert a table of figures at the end of your Word document. A table of figures is a great way to help anyone quickly view and retrieve important information. Here’s how to insert and format a…
Create a table of figures in Word

Inserting Excel into Word
Want to learn how to insert an Excel table into Word and aren’t sure how to proceed? We’ll explain how to insert an Excel file into Word. The easiest way is to use the copy and paste commands. But if you want to edit the data later, it’s better to link the Excel spreadsheet in Word. You can do this quickly and easily with our simple step-by-step guide.
Inserting Excel into Word
Tables are very useful tools when creating and formatting documents. For example, with a table you can:
- Align Text, Numbers, and Graphics: Many people prefer to use tables for alignment instead of tab stops because text can wrap to multiple lines in a table.
- Create a Form: You can use tables to store lists of telephone numbers, clients, and employee rosters.
- Share Information: You can use tables to share information between programs. For example, you can copy and paste a table’s information into a Microsoft Excel worksheet or Access database.
- Create a Publication: Tables make it easier to create calendars, brochures, business cards, and many other publications.
Insert a Table
To create a table, you must first determine how many columns (which run up and down) and rows (which run left to right) you want to appear in your table. Cells are small, rectangular boxes where the rows and columns intersect. The number of columns and rows determines the number of cells in a table.
- Click the Insert tab.
- Click the Table button.
- Use the grid to select how many columns and rows you’d like.

- Enter your content into your newly created table.
The table with the specified number of rows and columns is inserted.
You can use the arrow keys to navigate from cell to cell as you type. You can also press the Tab key to move to the next cell.
Select Cells
You can select a single cell in a table, or you can select multiple cells, entire rows or columns, or the entire table.
Add a Row or Column
You can add more columns and rows to a table after you’ve inserted it. This way, you’re not trapped using a fixed structure if you need to add more data later.
- Select a cell in a row or column adjacent to where you want the new row or column inserted.
- Click the Layout tab in the Table Tools ribbon group.
- Click one of the Insert buttons in the Rows & Columns group.
You can insert a row above or below the selected cell’s row, or a column to the left or right of the selected cell’s column.
Hover your mouse above the line between columns, or to the left of the line between rows, and click the + button that appears to quickly add a new column or row.
Delete a Row or Column
You can delete rows and columns that you don’t want, in case you made a table that was bigger than you needed.
- Select a cell in a row or column you want to delete.
- Click the Delete button on the Layout tab (in the Table Tools ribbon group).
- Select one of the options.
Here, you have the option to delete the specific cell, the column or row the selected cell is in, or the entire table.
If you decide to delete only the selected cell, you can choose how to move the rest of the cells around to fill the gap. You can shift the rest of the row’s cells to the left or shift the rest of the column’s cells up.

FREE Quick Reference
Click to Download
Free to distribute with our compliments; we hope you will consider our paid training.
Microsoft Word or MS-WORD is a graphical word processing program that users can type with. It allows the users to type and save documents very similar to other word processors. There are many versions of MS-word in market, which the user can install as per te. In this tutorial, we will learn about the tables in MS-Word.
Tables in MS Word are made up of rows and columns with an organized arrangement of text. These tables can be used to align numbers in columns and then various operations can be performed on them. Tables can also be used to create page layouts. Rows in a table are series of data banks laid out horizontally in a table or spreadsheet. Columns are vertical series of cells in a chart, table, or spreadsheet.
How to Create a Table?
Tables in MS Word can be created in the following two ways:
1. Using the Grid
2. Using Table Dialogue Box
Using the Grid
Following are the steps of creating a table using the Grid provided in MS Word:
Step 1: Go to the Insert tab and click on the Table button.

Step 2: In the dropdown menu, select the number of rows and columns from the Grid.

Using Table Dialogue Box
Following are the steps of creating a table using Table Dialogue Box in MS Word:
Step 1: Go to the Insert tab and click on the Table button.
Step 2: Under the grid, you will see an Insert Table button. Click on it.

Step 3: In the Insert Table Dialogue box, mention the number of rows and number of columns as per the requirement and click on OK button.

How to Modify a Table?
We can also edit/modify a table to make it more creative. Multiple operations can be performed on a table like changing the layout, splitting of cells, merging the cells, applying borders, etc. Here, we will see some of the operations performed on a table in MS Word.
Changing Layout of a Table
Changing the layout of a table can be done with the help of the following steps:
Step 1: Select the table for which the layout is to be changed. Go to the design tab.

Step 2: Click on the dropdown menu to get various different types of layouts for your table.

Step 3: Select any layout as per the need.

Splitting the Cell
Splitting of a cell can be done with the help of the following steps:
Step 1: Select the cell that you want to split into multiple cells. Then go to the Layout tab and click on the Split Cells button.

Step 2: In the dialogue box, mention the new dimensions as per the requirement.

Step 3: Click on the Ok button.

Merging the Cells
Merging of various cells can be done by the following steps:
Step 1: Select all the cells that are to be merged into a single cell. Then go over the layout tab, and you will see a Merge Cell button.

Step 2: Now click on the Merge Cell button and the selected cells will be merged.

Applying Borders and Styles on a Table
Borders and styles can also be applied to a table in a similar way as the layout of a table is changed. Go through the following steps to do the same:
Step 1: Select the entire table and go over the design tab.

Step 2: Select the style that you want to apply to your table.

Converting Text to a Table
MS Word allows the conversion of existing text into a table with the help of the following steps:
Step 1: Select the text that is to be converted into the table. Now go to the Insert Tab and you will see a Table button.

Step 2: Click on the Insert Table button and in the drop-down menu, click on the Convert Text to Table button.

Step 3: In the dialogue box, mention the dimensions of the required table and other data that is required.

Step 4: Click on the OK button and the selected text will be converted to a Table.

Inserting Images in a Table
MS Word allows adding images inside the table cells. To insert an image in a table, go through the following steps:
Step 1: Select the cell in which you want to add the Image. Go to the Insert tab and select the Pictures button.

Step 2: You can either choose a picture from your device or select one online.
Step 3: Choose a picture from the browser window and click on the Insert button.

Step 4: Selected Image will be added in the cell selected.

Performing Calculations in a Table
Mathematical calculations can also be performed on the values present in the table. Microsoft provides various formulas to perform these operations. By default, the sum of the values lying in the rows to the left or column lying above are calculated by Word. Following are the steps to do the same:
Step 1: Select the cell in which the result of the mathematical operations is required.

Step 2: Now go to the Layout tab and select the formula button.

Step 3: In the dialogue box, define the formula for the mathematical operation, the default formula is the sum of the values to the left or above.

Step 4: After defining the formula, click on the OK button to apply the formula on the cells given in the formula.
