
Occasionally text in paragraphs is not aligned correctly or cannot be positioned as you like. This problem could be a line break, also called soft return or text wrapping break.
A paragraph is created by entering text and pressing the Enter key. It can contain only one word or one sentence, or multiple sentences. Each paragraph ends with a paragraph mark that looks like a reverse P (¶).
The line break moves the next word to the beginning of a new line without starting a new paragraph. A line break character looks like a right-angle arrow pointing to the left ![]() .
.
For example:
- Text with two paragraphs where lines end with paragraph breaks:

- Text with two paragraphs where lines end with line breaks:

Note: You can also see a right-angle arrow between two vertical lines ![]() . This symbol shows the line break that separate text around an object, wrapping text such as a caption text or an image from the body text:
. This symbol shows the line break that separate text around an object, wrapping text such as a caption text or an image from the body text:
![]()
A line break character and other structural characters, such as spaces, paragraph marks, and tabs (also known as Whitespace characters in typography, nonprinting characters, or formatting marks) are usually hidden, but you can display them.
To insert a line break, do the following:
1. Position the cursor in front of the word you want to move to a new line.
2. Do one of the following:
- On the Layout tab, in the Page Setup group, click Breaks, and then click Text Wrapping:

- Press Shift+Enter.

Line breaks are used to delimit a specific text or break a line before a word that would otherwise be hyphenated (see more about automatic hyphenation and manual hyphenation).
To remove line breaks, follow the two-step procedure:
I. Replace two consecutive line breaks with one paragraph break:
1. Open the Find and Replace dialog box by doing one of the following:
- On the Home tab, in the Editing group, click the Find list and then choose Advanced Find…:

- Click Ctrl+H.
- On the Home tab, in the Editing group, click the Replace button:


2. In the Find and Replace dialog box, on the Replace tab:

- In the Find what field, type ^l^l (the caret symbol plus the lowercase Ls twice).
- In the Replace with field, type ^p (the code for a paragraph break).
3. Click the Replace All button.
II. Replace line breaks with spaces or remove them:
1. Open the Find and Replace dialog box.
2. In the Find and Replace dialog box, on the Replace tab:
- In the Find what field, type ^l (the caret symbol plus the lowercase Ls).
- In the Replace with field:
- Type a space if you need to place a space instead of each line break.
- Leave empty if you already have a space at the end of each line.
3. Click the Replace All button.
See more about replacing special characters.
Note: Word offers a helpful feature named AutoFormat that can format selected text with a paragraph break at the end of each full line to delete all the paragraph breaks but the last. In some cases, it can determine where the “real” paragraph breaks are and leave them intact. To run AutoFormat, click Alt+Ctrl+K.
Microsoft Word belongs to Microsoft 365 and significantly simplifies the workday for those that work with text-based documents on a regular basis. One of the reasons for its popularity is its variety of options for formatting text. One thing that’s especially practical is the fact that Word automatically takes care of many of these formatting challenges. Among these is the insertion of an automatic link break in Word when a word goes beyond a provided line length.
In many cases it can make sense to insert a line break manually to improve the document’s overall structure. We’ll explain the differences between a soft and a hard line break (also called a return) and how you can apply both types of line breaks to structure your document. Do you work with Microsoft Word regularly? Our guide provides many more helpful articles on topics like Word macros and instructions on how to combine Word documents.
Contents
- What is a line break?
- How do you insert a line break in Word?
- Example: manual line break in Word with bullet points
- Example: manual line break in Word with justified paragraphs
- Making line breaks visible in Word
What is a line break?
The text editing program Microsoft Word offers lots of options when it comes to formatting text: such as defining the font size, line spacing, and text alignment. In addition, there are so-called spacing settings, such as the space before and after a paragraph. To start a new line within a paragraph, you can insert a line break in Word. This lets you jump to the next line, without having to change the set paragraph formatting or starting a new bullet point.
How do you insert a line break in Word?
By pressing the Enter key, you can achieve a hard return and start a new paragraph in Microsoft Word. This is probably the most used break. One that’s less common, though, is the manual line break in Word, which can be achieved by pressing down the right key combination. Using the Enter + Shift keys generates a so-called soft return. In doing so, you move to the next line while maintaining the defined formatting.

Tip
The key combination also works in other common text editing programs, as well as on different internet sites that have text and format fields.
Example: manual line break in Word with bullet points
Bullet points are a popular means of clearly structuring long sections of text and summarizing related information into a single point. However, a clear structure is also recommended within a bullet point, especially if a point covers several lines. With a manual line break in Word, a section can be clearly structured with breaks and blank lines. In this example, those places where manual line breaks are inserted are marked. Only in the case of a hard return or a new paragraph is a new bullet point inserted.

Example: manual line break in Word with justified paragraphs

If you are justifying text in Word, then you’re probably very familiar with the following problem: when you insert a manual line break at the end of a paragraph, Word stretches the last sentence over the entire width of the page. Due to the wide spacing, the text looks “patchy” and is difficult to read.
Luckily, this problem can be easily avoided. At the end of the sentence, press the Tab key and then then insert the manual line break in Word by using the key combination [Enter] + [Shift]. This will avoid Word from stretching out the sentence.
Making line breaks visible in Word
Formatting options such as font size or font color are obvious in a document. In contrast, it’s not immediately apparent whether a hard or soft return has been inserted in Word. For this purpose, the word processing program offers a practical function to highlight this kind of “invisible” formatting. To do this, activate the formatting characters.
Select the “Start” tab from the main menu and click the “¶” symbol in the “Paragraph” section. Alternatively, the function can also be activated or deactivated with the key combination [CTRL] + [Shift] + [+]. Up to version 2003 in Word, the feature to activate paragraph formatting characters is located on the standard toolbar. After clicking on it, Word marks all inserted line breaks as follows:
- The ¶ symbol marks all hard returns or paragraphs.
- A corner arrow marks a soft return in Word.
It’s not necessary to deactivate this function before printing a document since the formatting characters – as displayed on the print preview – are not printed on the final document.

Besides Microsoft Word there are also other programs like PowerPoint and Excel that are a part of Microsoft 365. Our Digital Guide is packed full of articles on topics like line breaks in PowerPoint and wrapping text in Excel.
Tip
With Microsoft 365 you’ll have access to the entire suite of Office programs, including Microsoft Word, PowerPoint, Excel und Outlook.

Wrapping text in Excel: How to display the contents of your Excel cells on multiple lines
Excel cells often contain only a few numerical values or short text. But when you’re dealing with lengthy contents, the Microsoft application often hides a portion of the information. You can prevent this by wrapping text, which Excel allows you to do in two different ways. In this article, you’ll learn everything you need to know about this feature.
Wrapping text in Excel: How to display the contents of your Excel cells on multiple lines

How to change line spacing in Word easily
The default settings for Microsoft Word line spacing are not always enough. Fortunately, the software offers several options for customizing your documents. Unfortunately, these options are often hard to find. For example, if you want to change the line spacing in Word, you might have to search for this. We’ll help you find this feature so you can learn how to double-space in Word and more.
How to change line spacing in Word easily

Word table: Creating a table in Microsoft Word
In Word, tables prove useful in the most diverse situations, and you have several options for creating them. You can either use the table templates provided by the Microsoft tool, or you can design your own. This enables you to improve your reports, invoices or the performance of household tasks. Even data from Excel can be integrated as a table into a Word file.
Word table: Creating a table in Microsoft Word
How to turn spell check on and off in Word
In this guide, you’ll learn how to turn spell check on and off in Word. If you want to check your spelling in Word, you can set the application to automatically display misspelled words and grammatical errors. Word can also suggest corrections, which you can accept or ignore. You can show or hide these highlighted errors at any time.
How to turn spell check on and off in Word
Removing Extra Breaks in Word Documents
Delete page breaks fast
Updated on December 10, 2020
What To Know
- Press Ctrl+Shift+8 to show section breaks. Place the cursor left of the break, and press Delete. Press Ctrl+Shift+8 again to hide.
- For find & replace, press Ctrl+H. Put ^p^p in Find, and Replace With ^p. Press Replace or Replace All.
This article explains how to remove remove extra breaks in Word documents using the find and replace tool or deleting them manually. Instructions in this article apply to Word for Microsoft 365, Word 2019, Word 2016, Word 2013, Word 2010, and Word for Mac.
Remove Line Breaks in Word: Show Section Breaks
A quick way to find section breaks is to show these breaks in the document.
-
Go to the Home tab and, in the Paragraph group, select Show/Hide. Or, press Ctrl+* (or Ctrl+Shift+8).
In Word for Mac, go to the Home tab and select Show all nonprinting characters.
-
All section breaks become visible in the document.
-
Place the cursor to the left of break you want to remove, then press Delete.
-
Select Show/Hide to hide the section breaks.
Remove Line Breaks in Word Using Find and Replace
Use the Find and Replace tool to delete extra breaks in a document.
-
Go to the Home tab and, in the Editing group, select Replace. Or, press Ctrl+H to open the Find and Replace dialog box.
In Word for Mac, use the Search box in the upper-right corner of the document.
-
In the Find what text box, enter ^p^p (the letter p must be lower case).
In Word for Mac, go to the Search box and enter ^p^p.
-
In the Replace with text box, enter ^p.
In Word for Mac, select the magnifying glass, then select Replace. In the Replace With text box, enter ^p.
-
Select Replace All or Replace. Or, to view the breaks before deleting them, select Find Next.
This replaces two paragraph breaks with one. You can specify other options, depending on the number of paragraph breaks between paragraphs. You can also replace a paragraph break with another character.
Remove Line Breaks in Word Containing HTML
If you copied the text from the internet, this might not work for you. That’s because there are different types of breaks in HTML files.
-
Press Ctrl+H.
In Word for Mac, use the Search box in the upper-right corner of the document.
-
In the Find and Replace dialog box, go to the Find what text box and enter ^l (the lowercase letter L).
In Word for Mac, go to the Search box and enter ^l.
-
In the Replace With text box, enter ^p.
In Word for Mac, select the magnifying glass, and then select Replace. In the Replace With text box, enter ^p.
-
Select Replace All or Replace. To view the breaks before deleting them, select Find Next.
Thanks for letting us know!
Get the Latest Tech News Delivered Every Day
Subscribe
Word for Microsoft 365 Outlook for Microsoft 365 Word 2021 Outlook 2021 Word 2019 Outlook 2019 Word 2016 Outlook 2016 Word 2013 Outlook 2013 Word 2010 Outlook 2010 Word Starter 2010 More…Less
You can control where Word and Outlook position automatic page breaks by setting pagination options.
Keep lines of a paragraph together on a page or in a column
-
Select the paragraphs that contain lines you want to keep together.
-
On the Home tab in Word, or on the FORMAT TEXT tab in an Outlook email, select the Paragraph Dialog Box launcher
 .
. -
Select the Line and Page Breaks tab.
-
Under Pagination, select Keep lines together.
-
Select OK.
 .
.Keep paragraphs together on a page or in a column
-
Select the paragraphs you want to keep together on a page.
-
On the Home tab in Word, or on the FORMAT TEXT tab in an Outlook email, select the Paragraph Dialog Box launcher
. -
Select the Line and Page Breaks tab.
-
Under Pagination, select Keep with next.
-
Select OK.
Always force a page break before a paragraph
-
Select the paragraph that you want to follow the page break.
-
On the Home tab in Word, or on the FORMAT TEXT tab in an Outlook email, select the Paragraph Dialog Box launcher
. -
Select the Line and Page Breaks tab.
-
Under Pagination, select Page break before.
-
Select OK.
Control widow and orphan lines
-
Select the paragraphs in which you want to control widows and orphans.
-
On the Home tab in Word, or on the FORMAT TEXT tab in an Outlook email, select the Paragraph Dialog Box launcher
. -
Select the Line and Page Breaks tab.
-
Under Pagination, select Widow/Orphan control.
-
Select OK.
Note: This option is turned on by default.
Suppress line numbers from a paragraph or paragraphs
-
Select the paragraph or paragraphs.
-
On the Home tab in Word, or on the FORMAT TEXT tab in an Outlook email, select the Paragraph Dialog Box launcher
. -
Select the Line and Page Breaks tab.
-
Under Formatting, select Suppress line numbers.
-
Select OK.
Remove hyphens from a paragraph or paragraphs
-
Select the paragraph or paragraphs.
-
On the Home tab in Word, or on the FORMAT TEXT tab in an Outlook email, select the Paragraph Dialog Box launcher
. -
Select the Line and Page Breaks tab.
-
Under Formatting, select Don’t hyphenate.
-
Select OK.
Text box options
You can use the text box options to more tightly wrap the text that surrounds the text box. To use these options, the text box border must be transparent (no line and no fill), and the Wrap Text must be set at Tight or Through.
-
Inside the text box, right-click, and then select Paragraph.
-
Select the Line and Page Breaks tab.
-
Under Textbox options, in the Tight wrap list, select one of the following:
-
All
-
First and Last Lines
-
First Line Only
-
Last Line Only
Note: To undo changes, select None.
-
-
Select OK.
Need more help?
When we see two lines of words in an MS Word document, we don’t get to see what is separating them. There are severl characters that act as line break. There are several names; line break, new line, carriage return, paragraph break etc.
Today, while doing a bit of data processing, I was required to remove all the line breaks (carriage return) in an MS-Word document and replace line breaks with a comma. I was processing a long list of email addresses with one email address per line. And I wanted this list to become a comma separated list (CSV); so as to use it somewhere else.
In MS-Word, paragraph break is represented by invisible character (¶) which looks like a horizontally flipped P letter. You can toggle the visibility of this character by clicking a button given on the Home tab in MS Word. The button bears the same ¶ symbol. You should click this button to be able to see what exactly is separating the lines.
Our tips on MS-Word make your life easier and increase your productivity at work.
If lines are breaking because of paragraph break then ¶ will appear at the end of the lines. If lines are breaking due to line break (carriage return), a left-angled arrow symbol will appear at the end. Let’s first see how to deal with paragraph break:
How to Remove / Replace Paragraph Break
- Open the Word document that you want to work on
- Press CTRL + H to bring up the Find and Replace box
- In the “Find what” box type ^p [this upward arrow character is called caret and is usually available on a number key]
- In “Replace with” box type a comma
- Click on Replace All button.
Thus all the paragraph breaks in you document will get replaced by a comma. You can use whatever character(s) you like in “Replace with” box. For example, if you want to replace every paragraph break with two paragraph breaks –then you should type ^p^p in “Replace with” box.
If you simply want to remove paragraph breaks; just leave the “Replace with” box blank. And you’ll get a monolithic chunk of text!
READ ALSO: How to find ant replace formatting
How to Remove / Replace Line Break, Carriage Return (Enter key)
Follow the same process as given above. Instead of finding paragraph sign (^p), now you should look for line break or carriage return sign (represented by ^l). Therefore, type ^l in “Find what” box and replace it something else (or with nothing).
NOTE: This article is part of my MS Word Guide. This guide solves your day to day MS Word problems. Easily!
So, this is how you can replace line breaks, paragraph breaks and carriage returns in MS Word document. Please le t me know if you have any questions about this topic. I will be glad to try and assist you. Thank you for using TechWelkin.
In this article, you will learn about a very important topic related to paragraph formatting, such as page breaks, paragraph, line, and column breaks in a Word document.
Table of Contents
- Page Break in MS Word:
- Steps:
- Paragraph Break in MS Word:
- Break a Line in MS Word:
- Steps:
- Break a Column in MS Word:
- Steps:

When a new page is started or an additional page is added to the next from the current page, this is referred to as a “page break.” (Also, you can move the paragraphs to the next page from the current one.)
Steps:
To break the page of any content and move to the next page, you have to click at the beginning of the relevant content or click on that page to add another page under a page.
Then strike (press) the Ctrl + Enter.
Keyboard Shortcut: Ctrl + Enter
Paragraph Break in MS Word:
Splitting one Paragraph into two paragraphs is called the Paragraph Break.

Keep some text you want
Position the cursor at the beginning of the line in a paragraph that you want to break
Then strike (press) the Enter key.
Keyboard Shortcut: Enter.

Break a Line in MS Word:
It breaks one line of the paragraph into two lines in the Word document.

Steps:
Keep some text you want
Position the cursor at the beginning of a line in a paragraph that you want to break
Then strike (press) the Shift + Enter.
Keyboard Shortcut: Shift + Enter.

Break a Column in MS Word:
Breaks a column from the current left position to the right. To break a column, you should split the text into two, three, left, or right columns.

Steps:
Keep some text you want
Change the text/paragraph into 2 or more columns.
To change the paragraph into the column. Go to the Layout tab, click on the column, and then select one of the column options.

Now, position the cursor at the beginning of the line in the left column that you want to break
Then strike (press) the Shift + Ctrl + Enter.
Keyboard Shortcut: Shift + Ctrl + Enter.

What is the shortcut for Page Break in MS Word?
To start a new page from the current position or Move a Paragraph from the current page to the next page, Strike the Ctrl + Enter
What is the shortcut for Paragraph Breaks in MS Word?
To split one Paragraph into two or more two paragraphs, Strike the Enter Key.
What is the shortcut to break a line in MS Word?
To break one line of the paragraph into two or more than two lines or Sentences in the word document, Strike the Shift + Enter.
What is the shortcut for break a column in MS Word?
To break any column from the current left column position to the right. Strike the Shift + Ctrl + Enter.
![]()
Download Article
![]()
Download Article
Line breaks end a current line and lets you continue the text on another line. These are useful for separating paragraphs from each other, without the space registering as an empty line that can have characters on it. Manually putting in line breaks is useful for address blocks as well as poems because they omit the extra space between lines. To learn how to add a line break in MS Word, begin with step 1.
Steps
-
1
Find a Word document. Using your computer’s file browser, find a document with the extension .doc or .docx.
-
2
Open the document. Once you’ve found it, double-click the file and it will open in Microsoft Word.
Advertisement
-
3
Locate and click on the area where you want to insert a line break. Scroll through the document until you locate where you want to insert a line break, and click the area. This will place the cursor in that area.
-
4
Insert the line break. Hit the key combination Shift + Enter to create a line break. You will now be able to add content in the line right after the break.
- Notice that the cursor will not situate itself in the blank space where the break is when you click on the space. This is the line break.


Advertisement
Add New Question
-
Question
What is the difference between a line break and a paragraph break

The line break, which is done by hitting shift and enter, is a smaller break to just hop in a new line. A paragraph break, however, makes a bigger space and looks more like a new section.
Ask a Question
200 characters left
Include your email address to get a message when this question is answered.
Submit
Advertisement
Video
-
An alternative way of opening a Word file is to launch MS Word first. Once open, click “File” at the top-left of the screen then “Open.” Search for the document you want to open in the file browser that popped up. Once you’ve found it, select the file then click “Open” at the bottom right of the window.
Thanks for submitting a tip for review!
Advertisement
About This Article
Thanks to all authors for creating a page that has been read 217,946 times.
Is this article up to date?
The text copied from websites or PDF files usually contains a lot of line breaks. These line breaks make the text look messed up. You can not easily identify the paragraphs with all those line breaks messing the formatting. To arrange the text in paragraphs, it is necessary to remove line breaks present in the copied text.
So, in this tutorial, we are going to explain two methods to remove line breaks from the text – one method uses Microsoft Office Word and other uses an online website tool for removing line breaks from the text. Let’s start with the first method.
SEE ALSO: How to Password Protect your MS Office Documents?
Method 1: Remove Line Breaks from the Text using MS Word
In this method, we will be using Microsoft Word to remove line breaks present in the text. Microsoft Word is commonly used software for word processing. Follow these steps:
Step 1: Paste the Text in MS Word Document
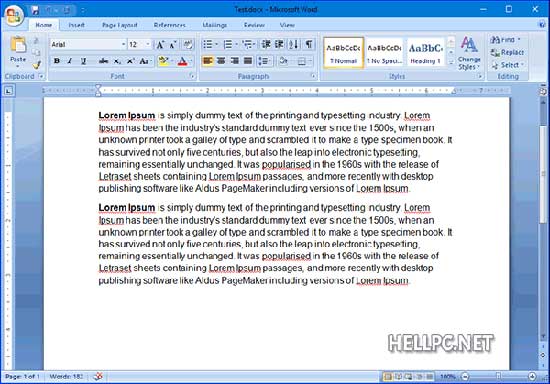
First copy the text with line breaks into a new Microsoft Word document and save it with any name. Saving the document will help us recover it if something goes wrong. We have taken example of dummy Lorem Ipsum text.

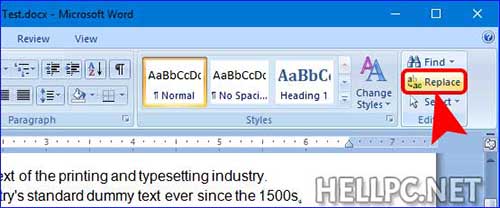
Step 2: Open Find and Replace
Now, when you have your text ready, click on Replace button in the Home menu. Alternatively, you can press Ctrl + H on Keyboard to launch Find and Replace.
We will use Find and Replace tool of Microsoft Office Word to remove line breaks from the text. Click on More >> button to see advanced options.

Step 3: Find and Remove Line Breaks from Text
In Advanced Options, click on Special button and select Manual Line Break. This will enter a special character in Find what: text box. Replacing this character with space will remove all Line Breaks present tin the document or text.
Now, enter SPACE in Replace with: text box and click on Replace All button. You will see a confirmation message showing the number of the words replaced, click OK to continue.
Step 4: Save your Clean Text
You can now close Find and Replace window. As you can see that all your unnecessary line breaks are gone and your text is now arranged in paragraphs.
This method is quite easy and simple. But if someone doesn’t have Microsoft Office installed in their PC or simply doesn’t want to use this method, they can easily get same results by using a website tool named as TEXTFIXER.COM. This website provides online tool for removing line breaks.
SEE ALSO:
1. List of All MS Word Shortcut Key Combinations
2. List of All MS Excel Shortcut Key Combinations
Method 2: Remove Line Breaks from the text using Online Tool
In this method we are going to use a website names as TextFixer.com. This website provides an online tool for removing line breaks present in the text. Just follow these steps.
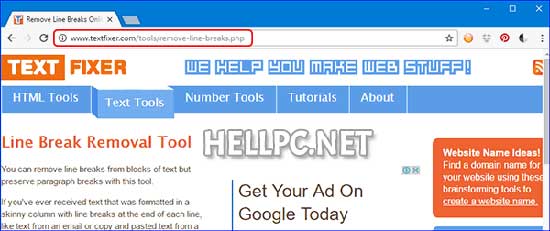
Step 1: Open TextFixer website
Click this link to access TextFixer online tool for removing line breaks present in the text. Alternatively, you can copy following URL into your web browser’s address bar.
http://www.textfixer.com/tools/remove-line-breaks.php
Step 2: Paste the Text to Remove Line Breaks
Scroll a bit down to see Line Break Removal Tool. You will see two text boxes – first text box is input box for pasting the text with line breaks and second one is for output text.
Above first text box, select Remove line breaks only option if not selected already. After that, paste your text with line breaks in first text input box and click on Remove Line Breaks button.

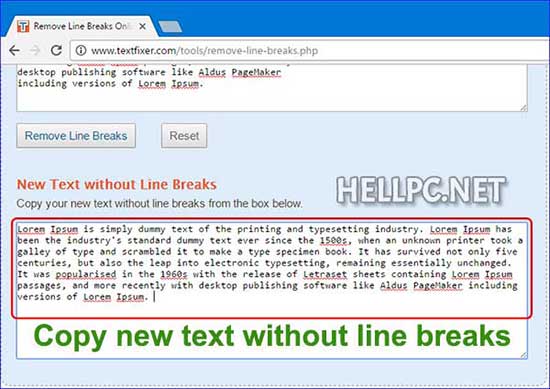
Step 3: Copy New Text without Line Breaks
You have successfully removed line breaks from your text. You have your text without line breaks in the second text box. Copy and use it the way you want.
Make your Text Free from unnecessary Line Breaks
The two methods explained above to remove line breaks from text are quite simple and straightforward to use and do the job quickly. There are many other websites available across the world wide web to do the same job. You can use any of them which suites you the best. Just do a simple Google search.
After removing line breaks, your text is ready to be used the way you want. Feel free to comment your problems and suggestions. You may also subscribe to receive such tips directly into your inbox.

Hi there, we are the editorial staff at WINDOSPC (former HELLPC). We are a team of funny and technical people. Feel free to get in touch with us via Contact-Us page.