Создание книги или брошюры
-
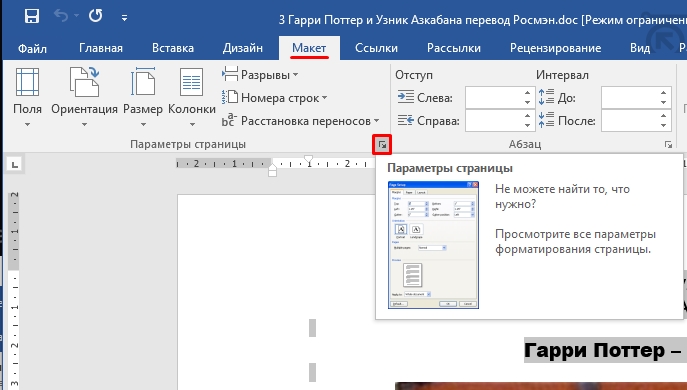
Перейдите в окно Макет и выберите значок запуска диалогового окно «Настройка страницы» в правом нижнем углу.
-
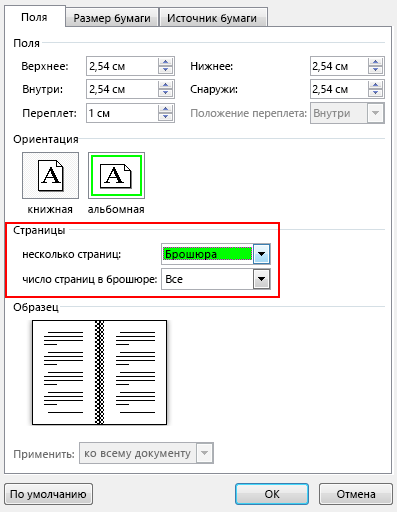
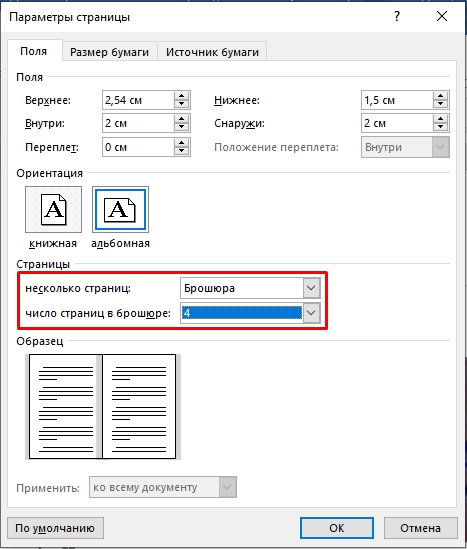
На вкладке Поля измените для параметра Несколько страниц параметр Брошюра. Ориентация автоматически изменится на Альбомная.
Совет: Если документ длинный, может потребоваться разделить его на несколько брошюр, а затем соединить их в одну книгу. В разделе число страниц в брошюре выберите нужное количество страниц в каждой брошюре.
-
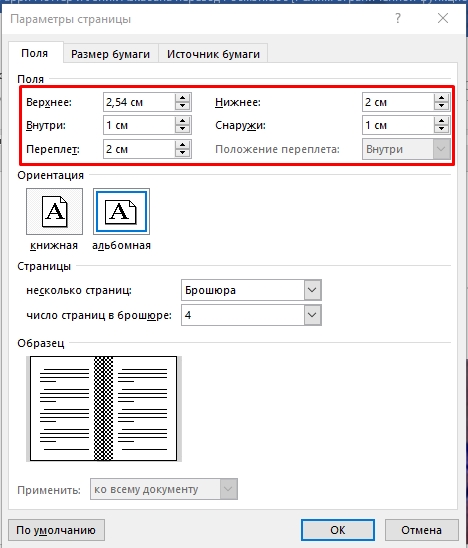
Вы можете выбрать и увеличить значение переплета, чтобы зарезервировать место во внутренней сгиб для переплета.
-
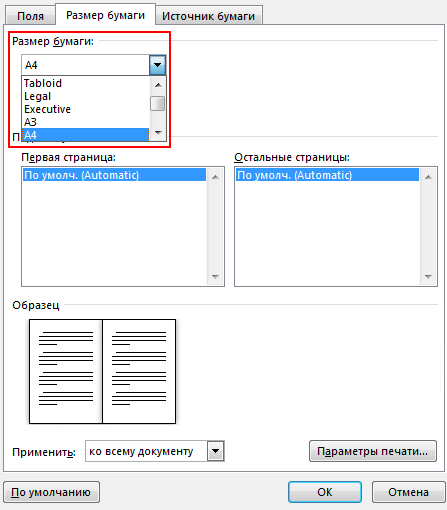
Перейдите на вкладку Бумага и выберите размер бумаги. Конечный размер брошюры — половина размера бумаги.
Совет: Вы можете оформить свою брошюру, используя различные средства. Например, чтобы добавить границы к каждой странице, на вкладке Макет окна Параметры страницы нажмите кнопку Границы.
-
Нажмите кнопку ОК. Если в документе уже есть содержимое, текст будет отформатирован автоматически, но вам может потребоваться вручную настроить такие объекты, как изображения и таблицы.
Параметры печати брошюр
При печати брошюры проверьте параметры печати, чтобы убедиться, что вы печатаете на обеих сторонах листа, а листы переворачиваются, как нужно.
-
Щелкните Файл > Печать.
-
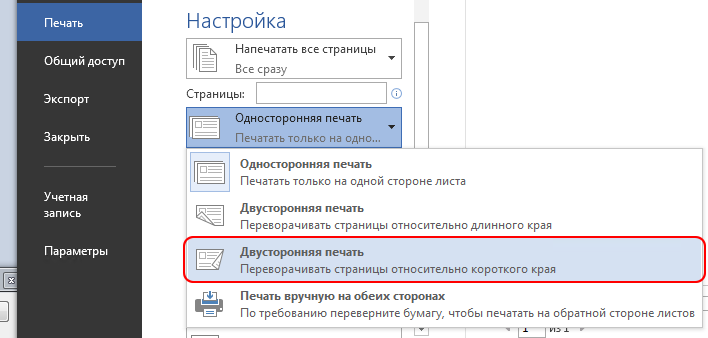
Если ваш принтер поддерживает автоматическую печать на обеих сторонах, измените Печататьодностороннюю на Печать на обеих сторонах. Выберите параметр Переворачивать страницы относительно короткого края, чтобы текст на обратной стороне не был перевернут.
-
Если ваш принтер не поддерживает автоматическую двустороннюю печать, выберите Печать вручную на обеих сторонах и вставляйте страницы в принтер при появлении соответствующего запроса. Чтобы страницы печатались правильно, переворачивайте их относительно короткого края бумаги согласно инструкциям принтера.
Совет: Чтобы документ выглядел профессионально, вы можете добавить номера страниц в верхний или нижний колонтитул. Дополнительные сведения см. в добавлении номеров страниц.
См. также
Создание брошюры на использование шаблона Word
Брошюра: советы по номеру страниц.
Создание разных колонтитулов для четных и нечетных страниц
Получить шаблоны публикации Майкрософт
Создание книги или брошюры
-
Перейдите в >макета поля >настраиваемые поля.
-
Измените параметр для параметра Несколько страниц наБрошюра. Ориентация автоматически изменится на Альбомная.
Совет: Если документ длинный, может потребоваться разделить его на несколько брошюр, а затем соединить их в одну книгу. В разделе число страниц в брошюре выберите нужное количество страниц в каждой брошюре.
-
Чтобы оставить место для переплета, увеличьте значение параметра Переплет.
-
Вы можете оформить свою брошюру, используя различные средства. Например, чтобы добавить границы к каждой странице, на вкладке Макет окна Настраиваемые поля выберите Границы.
-
Нажмите кнопку ОК.
Если в документе уже есть содержимое, текст будет отформатирован автоматически, но вам может потребоваться вручную настроить такие объекты, как изображения и таблицы.
-
Перейдите в >страницы и проверьте размер бумаги. Помните, что конечный размер брошюры — половина размера бумаги. Убедитесь в том, что в принтер загружена бумага необходимого размера.
Параметры печати брошюр
При печати брошюры проверьте параметры печати, чтобы убедиться, что вы печатаете на обеих сторонах листа, а листы переворачиваются, как нужно. Если принтер поддерживает автоматическую печать на обеих сторонах, выполните указанные здесь действия.
-
На вкладке Файл выберите пункт Печать.
-
В области Двунабнаявыберите Брошюра.
Совет: Чтобы документ выглядел профессионально, вы можете добавить номера страниц в верхний или нижний колонтитул. Дополнительные сведения см. в добавлении номеров страниц.
Примечание: Если ваш принтер не поддерживает автоматическую печать на обеих сторонах, необходимо напечатать каждую страницу вручную.
См. также
Создание брошюры на использование шаблона Word
Брошюра: советы по номеру страниц.
Создание разных колонтитулов для четных и нечетных страниц
Получить шаблоны публикации Майкрософт
Want to have your content ready for printing? If yes then you have landed on a right page. We are providing you here with free and editable book templates in Word. We have prepared these book designs in Word with great care, keeping everything perfectly set-up for print requirements.
These perfect book templates for Word are built with proper styling and easy-to-use layout. You should not even worry about the formatting as everything has already been set in these awesome book layout designs.
You can simply write your book from scratch or copy your existing material into any of these Word book templates, you are then good to go! You’ll find here some of the best fiction and non-fiction book templates for free.
In our printable book templates, margins, paper-size, bleed, gutter and table of contents are styled with proper typesetting. You would be amazed by using these clean and professional book writing templates in Microsoft Word.
Our Word book manuscript templates are perfect for every self-publisher. You can use these book designs for CreateSpace, Kindle Direct Publishing, Ingramspark or any other self-publishing company of your choice.
Go to any book template for Word below. Read the description there or at-least see the template features section. You can then simply download your book template in Microsoft Word format.
Need help for using these manuscript templates? No worries, write to us through inbox or in the comments box, we will definitely help you in preparing your book for printing.
You can also contact us with any queries regarding self-publishing a book. We can prepare an on-demand book template for Word, without any price.










Содержание
- 1 1. Создание шаблона документа
- 2 2. Добавление колонтитулов
- 3 3. Наполнение контентом
- 4 4. Как сделать книгу своими руками?
- 5 Самостоятельное создание макета книги по шагам
- 5.1 Что следует учесть при создании макета
- 6 Как подготовить макет к печати
- 6.1 Этапы предпечатной подготовки
- 6.2 Создание электронной версии книги
- 6.3 Печать созданной книги
- 6.4 Помогла ли вам эта статья?
- 7 Подготовка макета в Word
- 7.1 Формат (размер) книги
- 7.2 Поля
- 7.3 Колонцифры
- 7.4 Верстка
- 7.5 Формат (расширение файла, тип файла)
Блог
Эта статья посвящена верстке во всем известной, народной, программе Microsoft Word. Можно ли верстать в ворде? Можно! Верстать можно в любой программе, позволяющей добавлять в документ текст, фотографии и элементы оформления. Важно понимать, зачем это делается, и еще важнее знать основные правила набора текста, которым учат не на курсах верстки, а на первых занятиях по компьютерной грамотности. Если вы их не знаете — воспользуйтесь услугами дизайнера-верстальщика для верстки книги. Остальные вперед!
Сегодня я научу вас, как сверстать в Word простую книгу. Сделать книгу я хочу сам, своими руками, с помощью принтера, небольшого офисного резака, степлера и клея. Я думаю это актуально, ведь в поисковых системах десятки пользователей ежедневно набирают запросы: «верстка текста книжкой», «верстка в word», «word 2007 верстка», «верстка книг скачать», «книга сделай сам», «как сделать книгу в word» и т.д. Попробую ответить на их вопросы.
Для начала нужно должным образом подготовить текст: удалить двойные пробелы, ненужные знаки табуляции, абзацы, разрывы строк и т.д. Мы договорились, что основные правила компьютерного набора текста нам знакомы, поэтому здесь не останавливаемся. Я не буду пользоваться никакими макросами и плагинами, я знаю, что мне нужно, и сделать это достаточно просто.
1. Создание шаблона документа
Жмем Crtl-N (Файл > Создать новый документ). Настраиваем параметры документа (Файл > Параметры страницы), это очень важный этап. Во вкладке «Поля» устанавливаем значения как на примере. Во вкладке «Источник бумаги» не забываем поставить галочку «различать колонтитулы четных и нечетных страниц». Формат бумаги по умолчанию стоит верный — А4. Когда вы напечатаете несколько страниц, то поймете, почему эти параметры именно такие, и научитесь ими управлять, пока просто поверьте «на слово».
2. Добавление колонтитулов
Добавляем колонтитул, я выбираю верхний.
Далее два раза кликнув на появившемся номере страницы, я могу редактировать колонтитул, копирую туда название этой статьи. Это нужно сделать и для четной страницы, дальше колонтитулы появятся автоматически.
С помощью меню Формат > Границы и заливка установим горизонтальную линию для оформления колонтитула. Колонтитулы готовы.
3. Наполнение контентом
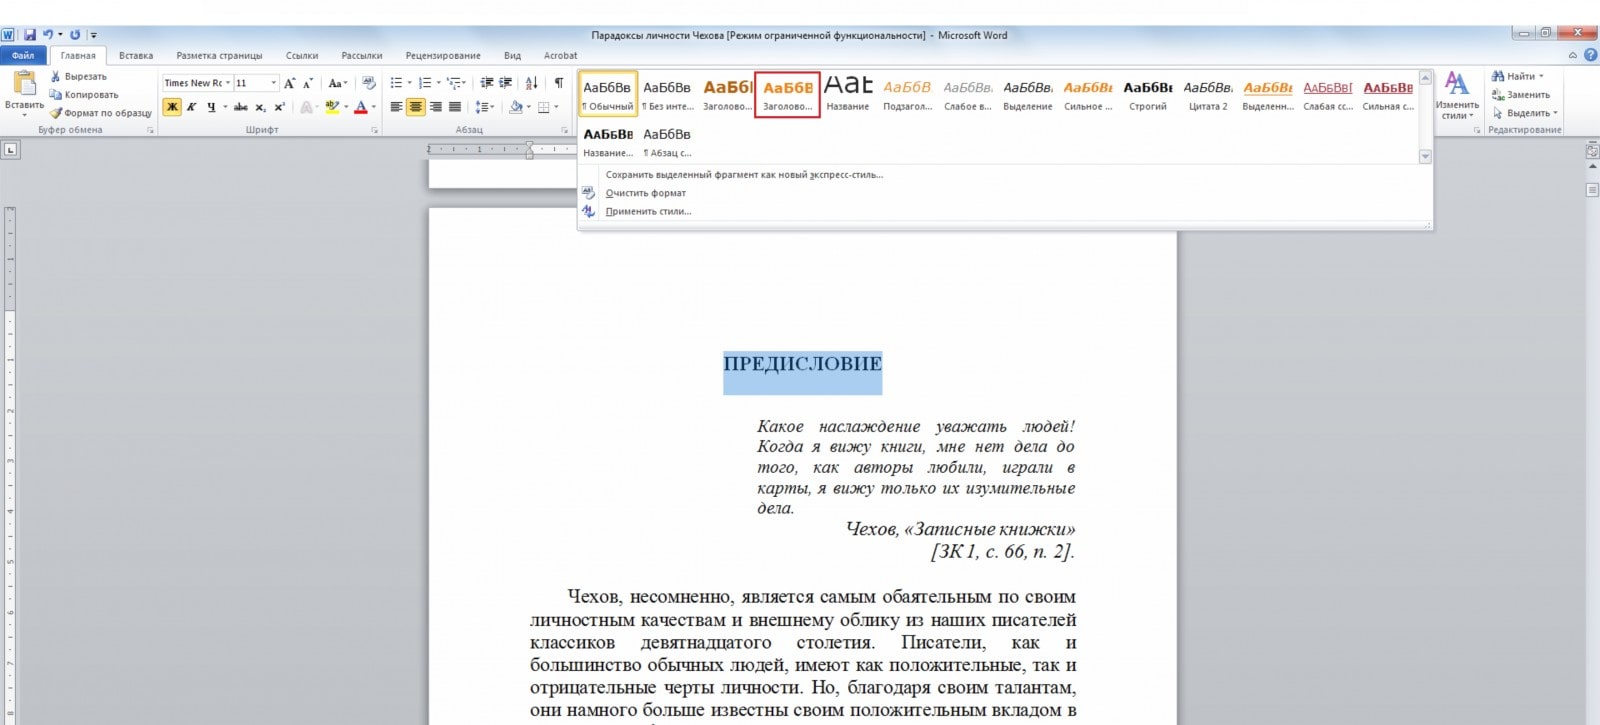
Копируем материал книги в подготовленный нами шаблон. Не забываем использовать стили оформления заголовков, текста, подписей и колонтитулов. Можно использовать стили по умолчанию, редактировать их, или создавать свои (Формат > Стили и оформление). Наш макет автоматически заполнился текстом. Скачать шаблон верстки книги.
4. Как сделать книгу своими руками?
Для этого нам понадобится принтер формата А4, офисный резак, степлер, бумага А4 (для обложки бумагу желательно взять поплотнее) и клей. Распечатываем книгу хитрым образом: каждую страницу нам необходимо прогнать в принтере дважды, перевернув на 180°. Выглядеть каждая напечатанная страница будет примерно так:
На обороте первой страницы печатаем вторую, но обороте третьей четвертую и т.д. Наловчившись, вы будете печать все страницы по порядку, нужно только переворачивать правильным образом пачку бумаги. Далее скрепляем скрепками блок с боковых сторон, с каждой по два или три раза. Приклеиваем сложенные вручную обложки, таким образом, чтобы закрыть скрепки, и режем резаком ровно посредине, или там докуда у вас хватило листа обложки (в идеале он должен быть длиннее А4). Получаем две готовые к употреблению книги!
Макет книги – это полноценная модель будущего издания, которая содержит эскизы оформительских элементов. Правильно созданный макет книги в значительной степени определяет успех задуманного издания. Какой бы простой и понятной ни была стилистика написания автора, неправильно сверстанная книга не будет читаться легко.
Перед началом работы над созданием макета важно определиться со следующими параметрами:
- формат книги (важнейший исходный момент);
- размер шрифта основного текста (выбирается исходя из формата книги и литературного направления произведения);
- оформление заголовков и колонтитулов.
При этом необходимо соблюсти:
- одинаковые размеры всех страниц макета;
- одинаковые отступы от краев бумаги до текста на четных и не четных страницах;
- одинаковое расположение номеров на всех страницах.
Обычно после согласования всех параметров будущего макета книги с автором верстальщик приступает к работе. Но Вы можете и самостоятельно сделать макет своей книги. Для этого надо сначала узнать все требования к макетам в издательстве или типографии, где планируете разместить заказ, и прочитать руководство в следующем разделе.
Самостоятельное создание макета книги по шагам
Вам потребуется Word 2007-2010, но можно воспользоваться и версией 2003. Здесь мы приводим пример по шагам для самого популярного формата книги А5 (60х90/16):
- Запустите редактор Word
- Если Вы используете Word 2003, то выберите команду меню Файл—Параметры страницы. В Word 2007-2010 на вкладке Разметка страницы щелкните на строке Параметры страницы в нижней части ленты. На экране появится диалог Параметры страницы.
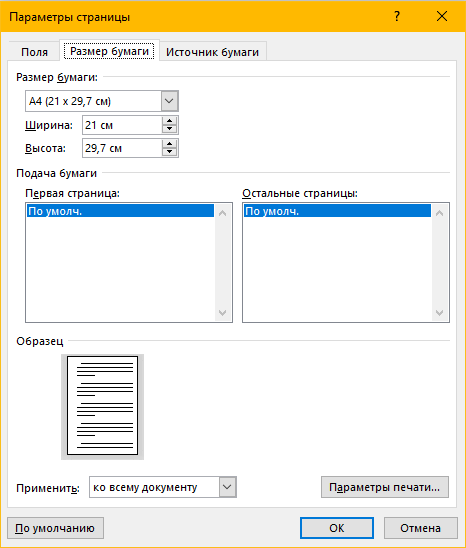
- В диалоге Параметры страницы на вкладке Размер бумаги установите в поле Ширина – 14,5 см, а в поле Высота – 20,5 см, обязательно убедитесь, что в списке Применить установлено Ко всему документу.
- На вкладке Поля установите все поля по 1,5 см, а в поле Переплет – 0 см, обязательно убедитесь, что в списке Применить отмечено Ко всему документу.
- На вкладке Источник бумаги выберите поля От края до колонтитулов по 1,5 см, а в поле Переплет – 0 см, обязательно убедитесь, что в списке Применить выбрано Ко всему документу.
- Вставьте номера страниц в макете командой Вставка—Номера страниц.
- Далее разметьте текст и заголовки шрифтами, выровняйте всё в соответствии с Вашим замыслом, соберите содержание.
Что следует учесть при создании макета
При создании макета следует учесть некоторые нюансы:
- первая страница книги выступит титулом, последняя будет использована под выходные сведения;
- в абзацах, начинающихся с буквицы, и в заголовках абзацный отступ должен отсутствовать;
- у эпиграфов, сносок и пр. также должен быть абзацный отступ;
- текст издания обязательно содержит переносы;
- не следует последнюю строку страницы заканчивать знаком переноса;
- не следует использовать более 3-х видов шрифтов в рамках одной книги;
- высота всех полос должна быть идентичной.
Как подготовить макет к печати
Макет создан, сохраните его в виде файла формата Word. Затем выберите команду Файл — Сохранить как и выберите формат PDF. Перед сохранением, еще раз проверьте макет на наличие ошибок. Сохранить формат PDF из Word 2003 не получится.
Важно: для печати книги понадобится еще макет обложки в виде отдельного файла. Подробнее о создании макета обложки читайте в этой статье.
Макет книги можно передавать в типографию. В типографии Вашему макету потребуется предпечатная подготовка, чтобы привязать макет книги к технологическим требованиям печати.
Этапы предпечатной подготовки
Можно выделить следующие самые важные этапы предпечатной подготовки:
- определение размеров печатного листа, размеров припусков на обрезку;
- определение типов раскладки страниц на листе и их количества;
- нанесение необходимых технологических элементов (метки для обрезки, монтажа и т.п.);
- преобразование шрифтов в кривые и цветных изображений – в цветовой формат CMYK.
После этого следует еще несколько проверок и настроек, перед запуском процесса печати.
Самостоятельное создание макета книги требует узкоспециализированных знаний и определенного опыта. Издание книги в типографии будет дешевле, если принести уже готовый макет, однако в случае допущенной ошибки, издание в конечном счете может обойтись и дороже.
Бумажные книги постепенно отходят на второй план и, если современный человек что-то и читает, то делает это, чаше всего, со смартфона или планшета. Дома для аналогичных целей можно использовать компьютер или ноутбук.
Существуют специальные форматы файлов и программы-читалки для удобного чтения электронных книг, но многие из них также распространяются в форматах DOC и DOCX. Оформление таких файлов зачастую оставляет желать лучшего, поэтому в данной статье мы расскажем, как сделать книгу в Ворде хорошо читабельной и пригодной для печати именно в книжном формате.
Создание электронной версии книги
1. Откройте текстовый документ Word, содержащий книгу.
Примечание: Если вы скачали файл DOC и DOCX из интернета, вероятнее всего, после открытия он будет работать в режиме ограниченной функциональности. Чтобы его отключить, воспользуйтесь нашей инструкцией, описанной в статье по ссылке ниже.
Урок: Как убрать режим ограниченной функциональности в Ворде
2. Пройдитесь по документу, вполне возможно, что в нем содержится много лишнего, информации и данных, которые вам не нужны, пустые страницы и т.д. Так, в нашем примере это газетная вырезка в начале книги и список того, к чему Стивен Кинг приложил свою руку к моменту написания новеллы “11/22/63”, которая и открыта в нашем файле.
3. Выделите весь текст, нажав “Ctrl+A”.
4. Откройте диалоговое окно “Параметры страницы” (вкладка “Макет” в Word 2012 — 2016, “Разметка страницы” в версиях 2007 — 2010 и “Формат” в 2003).
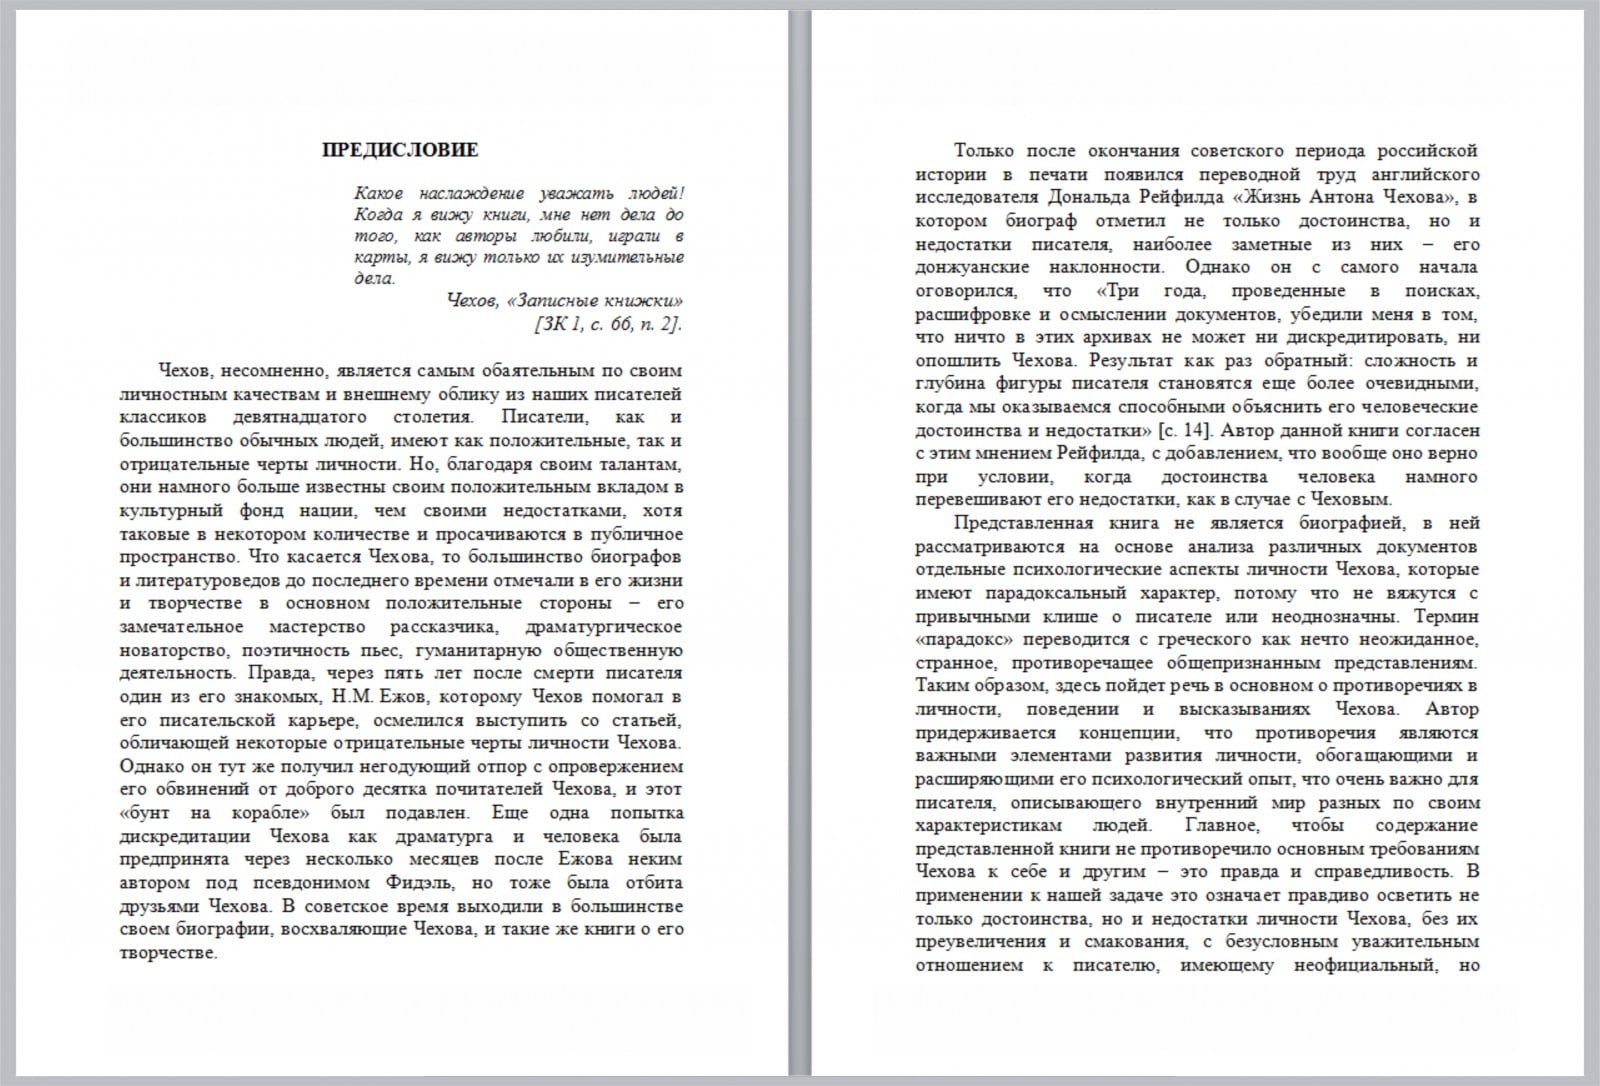
5. В разделе “Страницы” разверните меню пункта “Несколько страниц” и выберите “Брошюра”. Это автоматически изменит ориентацию на альбомную.
Уроки: Как сделать буклет в Ворде
Как сделать альбомный лист
6. Под пунктом “Несколько страниц” появится новый пункт “Число страниц в брошюре”. Выберите (по две страницы с каждой стороны листа), в разделе “Образец” вы можете увидеть, как это будет выглядеть.
7. С выбором пункта “Брошюра” настройки полей (их название) изменились. Теперь в документе есть не левое и правое поле, а “Внутри” и “Снаружи”, что логично для книжного формата. В зависимости от того, как вы будете скреплять свою будущую книгу после печати, выберите подходящий размер полей, не забыв о размере переплета.
Примечание: Поле “Внутри” отвечает за отступ текста от переплета, “Снаружи” — от внешнего края листа.
Уроки: Как сделать отступ в Ворде
Как изменить поля страницы
8. Проверьте документ, нормально ли он выглядит. Если текст “разъехался”, возможно, виной этому являются колонтитулы, которые необходимо подкорректировать. Для этого в окне “Параметры страницы” перейдите во вкладку “Источник бумаги” и задайте необходимый размер колонтитулов.
9. Снова просмотрите текст. Возможно, вас не устраивает размер шрифта или сам шрифт. Если это необходимо, изменить его, воспользовавшись нашей инструкцией.
Урок: Как изменить шрифт в Word
10. Вероятнее всего, с изменением ориентации страницы, полей, шрифта и его размера, текст сместился по документу. Для кого-то это не имеет значения, но кто-то явно пожелает сделать так, чтобы каждая глава, а то и каждый раздел книги начинался с новой страницы. Для этого в тех местах, где заканчивается глава (раздел), нужно добавить разрыв страницы.
Урок: Как добавить разрыв страницы в Ворде
Проделав все вышеописанные манипуляции, вы придадите своей книге “правильный”, хорошо читабельный вид. Так что можно смело переходить к следующему этапу.
Примечание: Если в книге по каким-то причинам отсутствует нумерация страниц, вы можете сделать ее вручную, воспользовавшись инструкцией, описанной в нашей статье.
Урок: Как пронумеровать страницы в Word
Печать созданной книги
Завершив работу с электронной версией книги, ее необходимо , предварительно убедившись в работоспособности способности принтера и достаточных запасах бумаги и краски.
1. Откройте меню “Файл” (кнопка “MS Office” в ранних версиях программы).
2. Выберите пункт “Печать”.
3. Выберите пункт “Печать на обоих сторонах” или “Двусторонняя печать”, в зависимости от версии программы. Поместите бумагу в лоток и нажмите “Печать”.
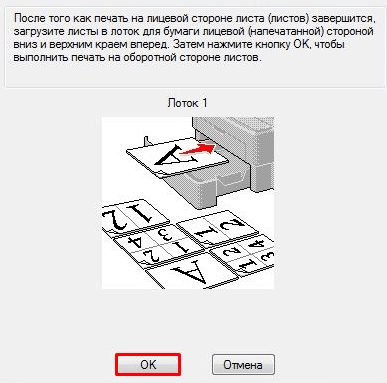
После того, как будет напечатана первая половина книги, Ворд выдаст следующее уведомление:
Примечание: Инструкция, которая отображается в данном окне, является стандартной. Следовательно, представленный в ней совет подойдет не для всех принтеров. Ваша задача — понять, как и на какой стороне листа печатает ваш принтер, как он выдает бумагу с распечатанным текстом, после чего ее нужно зеркально перевернуть и поместить в лоток. Нажмите кнопку “ОК”.
После того, как печать будет завершена, вы можете скрепить, сшить или склеить свою книгу. Листы при этом нужно складывать не так, как в тетрадке, а сгибать каждый из них посередине (место для переплета), а затем складывать друг за другом, согласно нумерации страниц.
На этом мы закончим, из этой статьи вы узнали, как в MS Word сделать книжный формат страницы, самостоятельно сделать электронную версию книги, а затем ее на принтере, создав физическую копию. Читайте только хорошие книги, осваивайте правильные и полезные программы, коей является и текстовый редактор из пакета Microsoft Office.
Мы рады, что смогли помочь Вам в решении проблемы.
Задайте свой вопрос в комментариях, подробно расписав суть проблемы. Наши специалисты постараются ответить максимально быстро.
Помогла ли вам эта статья?
Да Нет
В том случае, если вы отказываетесь от допечатной подготовки, мы рекомендуем вам подготовить текст к печати самостоятельно.
Формат (размер) книги
Наиболее распространенный формат книги — 140×200 мм (в таком формате обычно выходит художественная и учебная литература). После печати блока (всего того, что под обложкой) его края немного обрезаются, поэтому в Word нужно установить размер страницы А5 (сложенный пополам лист А4, 148×210 мм). После обрезания получится как раз 140×200 мм.
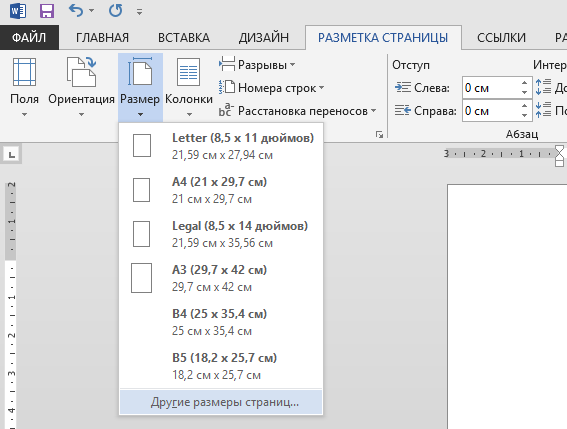
В меню «Разметка страницы» найдите иконку «Размер» и укажите значение А5 (по умолчанию там установлено А4):
Вы можете заказать книгу другого, нестандартного формата (например уменьшенный, 120 на 165 мм), предварительно договорившись об этом с менеджером. Тогда в Word нужно будет установить размер страницы, превышающий нужный формат книги на 5–10 мм с каждой стороны.
Поля
Обратите внимание на поля в вашем файле, они сильно влияют на внешний вид книги. По умолчанию Word устанавливает левое поле шире правого. Установите симметричные поля, чтобы страницы выглядели одинаково.
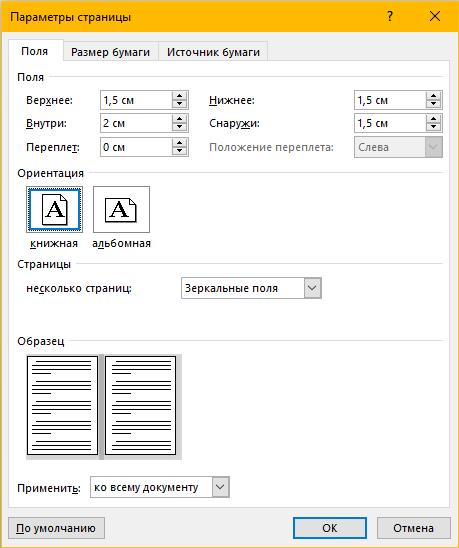
Если вы хотите, чтобы поля на странице различались (например, внутренние были шире внешних), во вкладке «Размер страницы» выберите «Поля» — «Настраиваемые поля». В появившемся окне укажите размер полей, а в пункте «несколько страниц» выберите значение «зеркальные поля». Теперь левые и правые страницы будут выглядеть в готовой книге симметрично.
Учтите, что клееный мягкий переплет не позволяет раскрывать разворот книги до предела, поэтому дополнительно к ширине внутренних полей следует прибавить несколько миллиметров — для наглядности используйте настройку «Переплет» в окне «Параметры страницы». Ширина внутреннего поля вместе с пространством под переплет должна составлять не меньше 20 мм, иначе будет неудобно читать текст по краям страницы.
Важно помнить, что после печати книга всегда обрезается, и если какие-то элементы текста (колонтитулы, иллюстрации, номера страниц) расположены слишком близко к краю страницы, они могут быть обрезаны. Стремитесь сделать поля как можно больше — 20–35 мм — чтобы быть уверенными в сохранности текста.
Колонцифры
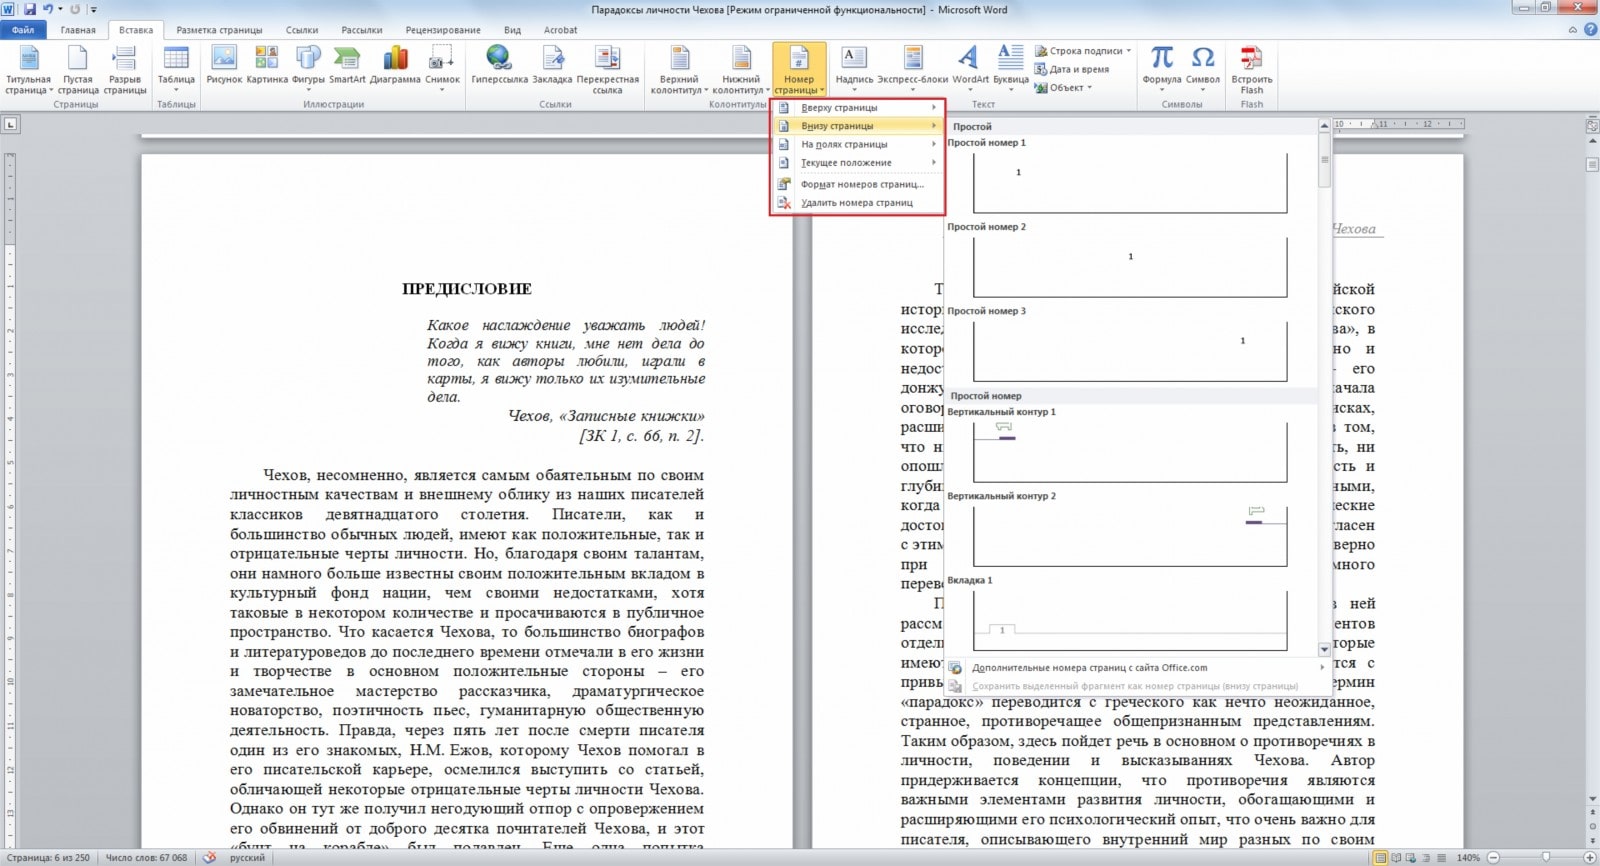
Колонцифра — это номер страницы, указанный обычно внизу страницы. В Word вы можете настроить колонцифры через вкладку «Вставка» — «Номер страницы». Вы можете выбрать подходящий стиль или настроить его самостоятельно. Проще всего выставить колонцифру по центру страницы, но если вы хотите, чтобы на нечетных страницах колонцифры стояли правее, а на четных — левее, то вам понадобится перейти в конструктор колонтитулов (два раза кликнуть в нижней части страницы около колонцифры) и выбрать в верхнем меню пункт «разные колонтитулы для четных и нечетных страниц». Там же вы можете отключить колонтитулы для первой страницы (обычно она не нумеруется) и настроить другие параметры колонцифр.
Верстка
Соблюдение простейших правил верстки позволит вам без больших затрат значительно улучшить внешний вид и читаемость текста.
Макет книги должен быть единообразен — заголовки должны строиться иерархически, одинаковые виды текста оформляться одинаково.
Избегайте использования большого количества шрифтов в макете (это затрудняет чтение). Не пользуйтесь в одном тексте несколькими способами выделения, если это возможно, избегайте подчеркнутого текста и набора ПРОПИСНЫМИ БУКВАМИ.
Цветные выделения заметно увеличат стоимость книги, поскольку весь текст придется печатать в режиме цветной печати. Старайтесь группировать цветные элементы, чтобы их можно было напечатать отдельно и «вклеить» в блок с основным текстом.
Помните, что между словами в предложении всегда используется длинное тире (—), а дефис (-) используется внутри сложных слов. Удалите из текста двойные пробелы (воспользуйтесь инструментом «найти и заменить, ctrl+H). Перед сохранением документа просмотрите его в режиме отображения скрытых символов форматирования.
Воспользуйтесь опцией автоматического переноса слов (Разметка страницы — Расстановка переносов), убедитесь в том, что Word сделал переносы корректно. В настройках абзаца желательно поставить флажок «запрет висячих строк», это заметно улучшит качество верстки.
Формат (расширение файла, тип файла)
Для того, чтобы напечатать вашу книгу, мы переводим файл в формат PDF, созданный специально для того, чтобы напечатанный документ выглядел точь-в-точь как на экране компьютера. Для уверенности мы рекомендуем вам самостоятельно сохранить документ в формате .pdf (Файл — Сохранить как — Тип файла: PDF), а затем открыть его с помощью программы Adobe Reader и убедиться в том, что все выглядит именно так, как вы хотели.
Профессиональная верстка книги включает множество аспектов и настроек, которые требуют большого опыта и делаются в программах, специально предназначенных для верстки. Если вы хотите, чтобы книга выглядела действительно хорошо — воспользуйтесь нашими услугами по допечатной подготовке.
I bet, like me, you’ve been using Microsoft Word for years.
One of the most common complaints you hear from professional book designers, cover designers, typographers, and some self-publishers is that you can’t create a “real” book in a word processing program like Microsoft Word. I’ve taken a few of those shots myself.
There is another camp of do-it-yourself self publishers who wouldn’t use anything else. Either Word or the open source program Open Office are their preferred tools.
They eliminate book designers and typographic design because they view them as unnecessary expenses. These publishers are in the information publishing business as far as they’re concerned. Their readers want the information, they’ll get it without the need for ligatures, Adobe fonts, or page layout programs.
I think some of these publishers go overboard. It’s almost as if they want to create books that don’t look like any book you’ve ever seen, just to show they can do it.
But quietly, under the radar, at least one author who uses Word but also loves typography was out there. Someone who can make Word jump through hoops I didn’t even suspect were there.
Today you’re going to meet her, Elizabeth Beeton of B10Mediaworx, who writes and publishes under the name Moriah Jovan.
Beeton/Jovan (Jovan from here on out), who is active in the Mormon writer scene, uses B10Mediaworx to publish her own books of genre romance and to provide ebook conversion services to other publishers. And she does her own design and typesetting.
The Design Review of “Stay”
I met Moriah on Twitter, and when I started reviewing self-published and largely self-designed books for Self-Publishing Review, Moriah was one of the first to send me a book, which I dutifully reviewed.
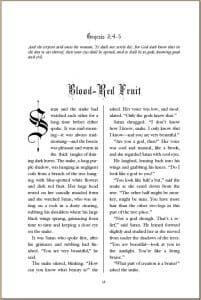
Click to enlarge. Notice how in this elegant spread from Stay, although there is no hyphenation, Moriah has eliminated the usual rivers of word-space gaps typical of word processor typography.
I was surprised at how good the book looked, since I’ve seen a lot of DIY self publishing. Moriah’s book was elegant, the typography was carefully done and sensitive. The few minor quibbles I had with the design did nothing to detract from the lovely look and feel of the book.
Later, I was surprised again to find out that Moriah had done the whole book in Word, and it made me start to question my assumption about the capabilities of the word processor.
Just because everyone else using Word was turning out pages in Times Roman or Palatino that looked primitive to my eyes, that didn’t mean you couldn’t do better.
A Whole New Look for Microsoft Word Typography
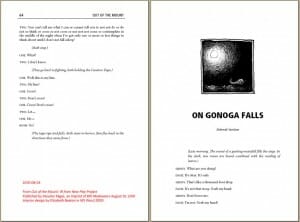
I asked Moriah to send me some screen shots of her work. Here’s a spread from Out of the Mount, a collection of 19 plays by a variety of authors:
Click to enlarge.
This is a pretty sophisticated piece of typography. Note the small cap lead ins for the dialogue, and the effective artwork and layout of the display page. Does this look like something you’ve ever seen in Microsoft Word? No, it didn’t look that way to me, either. But there was more to come.
The FOB Bible
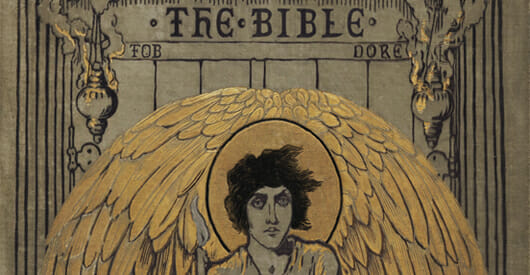
Then I got to look at The FOB Bible, and I was really blown away. This book, the work of eight authors, is described as:
The Old Testament re-imagined through poetry, verse, closet drama, e-mail, and short story. At once irreverent, whimsical, sexy, feminist, and poignant.
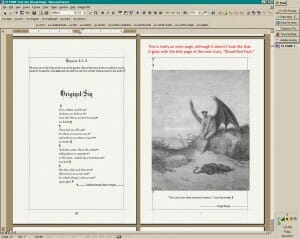
Here’s a spread in the book shown in Microsoft Word 2000 for Windows. This is Moriah’s preferred platform, and she has the program highly optimized for the kind of work she does in typography and ebook conversions. (She’s still using this program that’s almost 10 years old because her customizations can’t be ported to newer versions.)
Click to enlarge. Note the Word codes and page structure in this view.
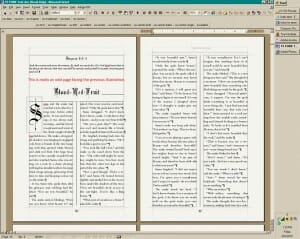
Here’s another page I want you to see. Here Moriah is constructing a 2-column spread in Word:
Click to enlarge.
‘
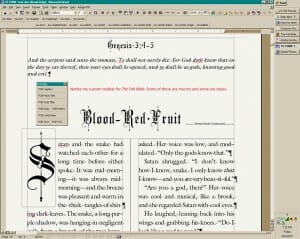
Once again she’s left the codes and page structure showing in this Word view. Here’s a detail:
Click to enlarge. Note Moriah’s use of Word Customization
And finally, here’s the page as it looks in the reproduction-quality PDF:
Click to enlarge
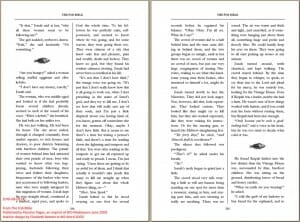
The typography is clean and appropriate, there’s an adept use of white space, and a lovely balance on the page. But not only that. These narrow columns are challenging for any typographer. Here she’s managed to get pretty good spacing and tone without the fine tuning and advanced handling of fonts available in InDesign.
Okay, before I stop, here’s one more spread from The FOB Bible, more multi-column goodness from Word:
Click to enlarge
Sure, if you look closely you’ll see lines that are too loose, that would not happen in InDesign or a similar typographic program. But when I look at these pages, I constantly have to remind myself they are from Word.
What Word Can’t Do
Despite Moriah’s artistry, there are still things a word processor can’t do as well as layout software.
- you cannot get the typographic functions of a program like Adobe InDesign in Word
- it’s much harder to get the same effect in Word than it is in InDesign
- you can’t use Word as an output engine in the same way you can use InDesign for reproduction
- no matter how good you get, you’re still using a tool designed for one purpose to do something different
Would I want to do a book design in Word? No, thanks. But that doesn’t mean you can’t do it.
A Few Tips from Moriah
I asked Moriah what tips she would share with other people trying to create great looking books in Word or Open Office. This is what she had to say:
- Styles: Using styles makes your work consistent. Assigning hotkeys and/or building a tool bar to assist you is imperative in streamlining the process. This takes time to set up, but you’ll find the end result a) saves you time and b) saves you grief.
- Macros: If you find yourself doing the same things over and over again, record a macro. Again, this is to streamline your process and to make everything consistent across the text. Assign hotkeys and/or build a tool bar.
- Hidden characters: Watching spaces, tabs, hard returns, soft returns, line breaks, section breaks lets you know why Word won’t let you do certain things and/or how to fix something. At first you will find it disorienting, but once you get used to it, you won’t work without it. Part of this is to use page view with margin lines on.
- Page breaks: Learn how to use section breaks properly. It saves you time and makes running headers much easier to deal with and it will help you not get lost as to which pages are even and odd.
To me, one thing Moriah’s work proves is that the books we see that look bad, only look that way because the author couldn’t work out how to make it look the way it ought to, or wasn’t as persistent as Moriah Jovan, or didn’t know any better. It isn’t because of the tool that was used the create them.
I called this article The Art of Moriah Jovan for a reason: she is a true typographic artist, no matter what tool she’s using. So when people tell you that you can’t make a good-looking book in Word, now you know the truth: you just can’t say that any more.
You can find out more about B10Mediaworx and Moriah Jovan’s books at B10Mediaworx.com and you can connect with Moriah on Twitter at @MoriahJovan
Всем привет! В нашем сегодняшнем уроке я покажу вам, как легко можно сделать и распечатать книгу в Ворде. Статью я разбил на два шага. В первой главе я покажу вам, как правильно подготовить текст и документ. Во второй мы уже приступим к печати. Советую прочесть статью от начала и до самого конца, так как по ходу я буду рассказывать о мелких нюансах, о которых вы должны знать заранее. Если у вас что-то будет не получаться, или возникнут вопросы – пишите в комментариях под этой статьей.
Содержание
- ШАГ 1: Создание самой книги
- ШАГ 2: Печать
- Задать вопрос автору статьи
ШАГ 1: Создание самой книги
В первую очередь откройте сам документ, который вы хотите оформить и превратить в книжку. Или вы можете создать его заново, напечатав сам текст. Если вы хотите попрактиковаться, то можете взять любой текст. Самое главное, чтобы там было как минимум 4 странички.
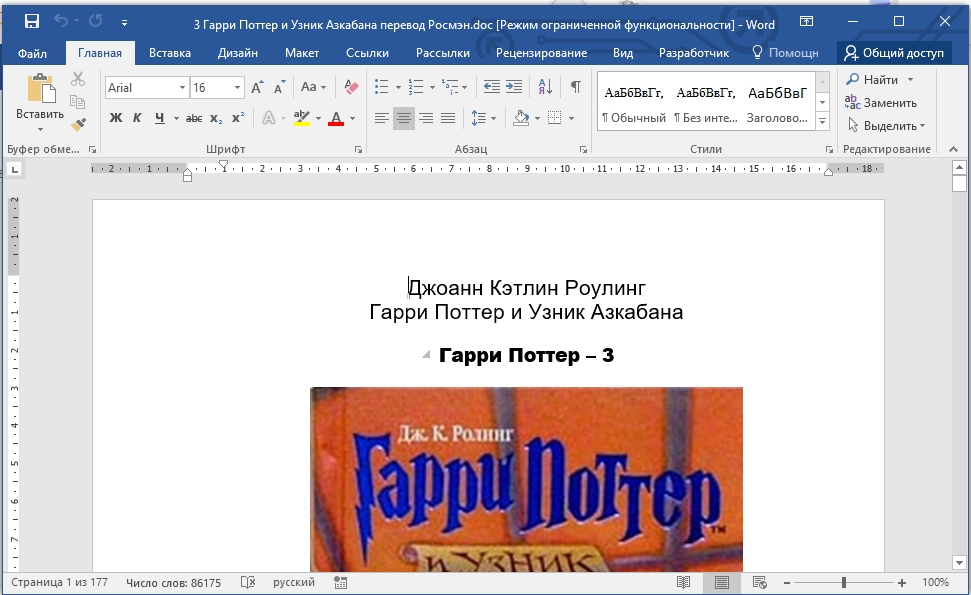
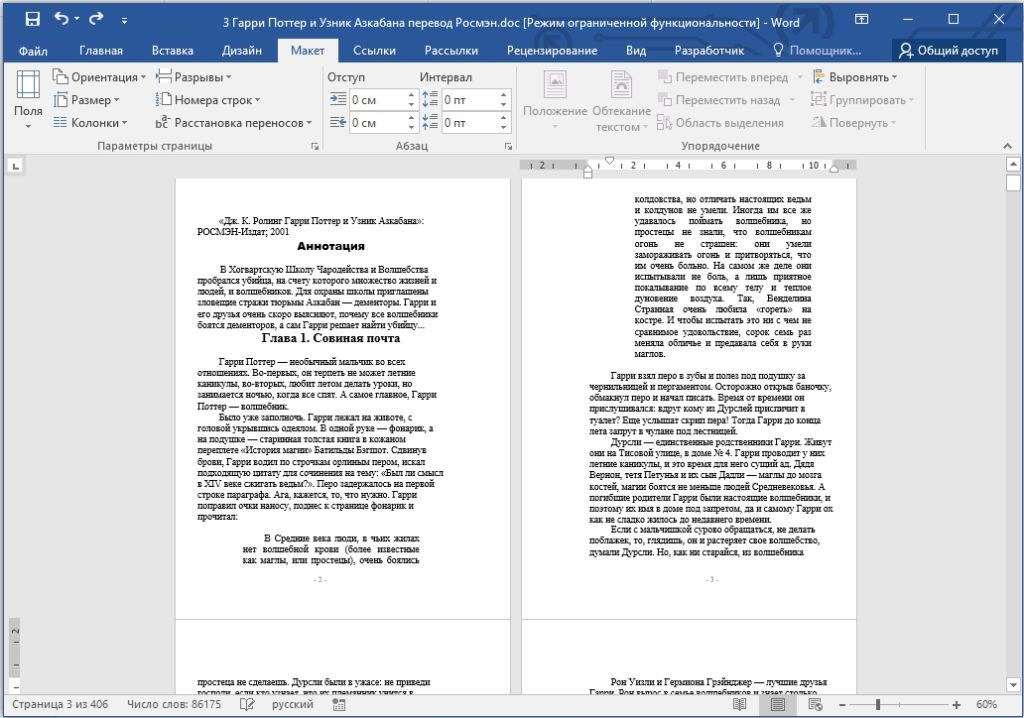
- В качестве примера я покажу на книге Джоанн Кэтлин Роулинг – Гарри Поттер и Узник Азкабана. Не переживайте, книгу я прикупил достаточно давно, поэтому авторские права не нарушаю. При открытии скаченных документов из интернета вы можете увидеть сообщение «Защищённый просмотр» – жмем «Разрешить редактирование».
- Если вы скачали книгу с интернета или облака, то я вам советую перед началом пройтись по всем страницам и отредактировать её. Например, стоит удалить некоторые пустые страницы, или посмотреть, чтобы слова и символы отображались корректно.
- Теперь нам нужно выделить весь текст. Чтобы не делать это вручную с помощью мыши, мы воспользуемся волшебными горячими клавишами. Зажимаем сначала кнопку «Ctrl», теперь, не отпуская её, жмем по английской букве «A» (Ctrl + A). Текст полностью выделится и будет подсвечен темным.
- Теперь сверху перейдите на вкладку «Макет». Если у вас старая версия Microsoft Word (2007 или 2010 года выпуска), то вам нужен раздел под названием «Разметка страницы». Теперь нам нужно открыть дополнительное меню с параметрами, для этого жмем по маленькой стрелочке с квадратиком в правом нижнем углу блока.
- В первой вкладке в блоке «Страницы» выставляем тип – «Брошюры», а ниже ставим число страниц на двух листах. Как вы уже догадались, на двух листах будет 4 странички с одной и с другой стороны. Ниже вы можете смотреть на образец.
- Теперь немного сложнее, нам нужно правильно указать отступ от переплета, в противном случае какой вообще толк от данной затеи. Сейчас вы все поймете. Посмотрите в первый блок под названием «Поля». В первую очередь нам нужно установить два отступа:
- «Внутри» – отступ текста непосредственно от переплета. Если страничка в книге расположена слева, а переплет справа, то это и есть правый переплет.
- «Снаружи» – отступ от внешней границы, так где заканчивается лист.
- «Верхний» и «Нижний» отступ выставляйте уже по своему вкусу. Ну и самое главное – это сам «Переплет», если вы выставите слишком маленькое значение, то текст при сшивании может попасть в слепую зону. Лучше ставить это значение не меньше 2 см, а лучше даже 2,5 – особенно если книга будет очень большой.
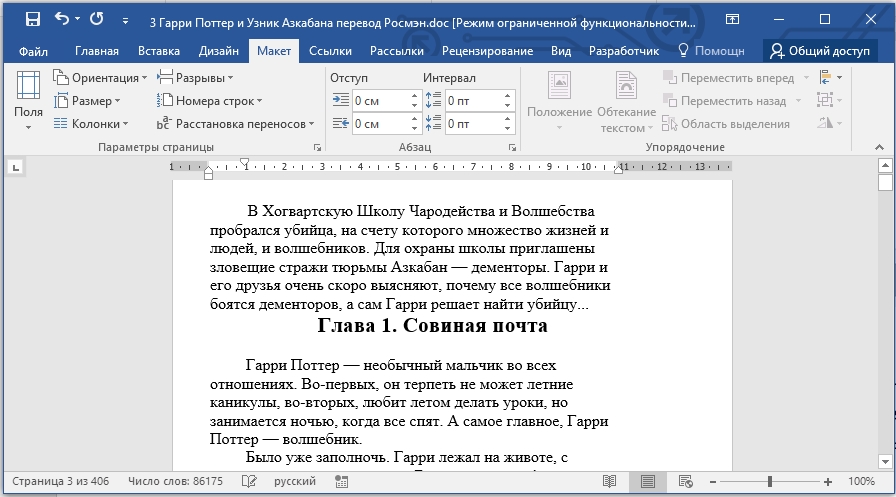
- Жмем «ОК» и проверяем, чтобы текст в документе не поплыл. Если вы видите, что отступы слишком большие, то можете их изменить. Помните, что значение «Переплета» и «Внутренний» отступ складываются. Возможно, нужно немного уменьшить отступ «Внутри»
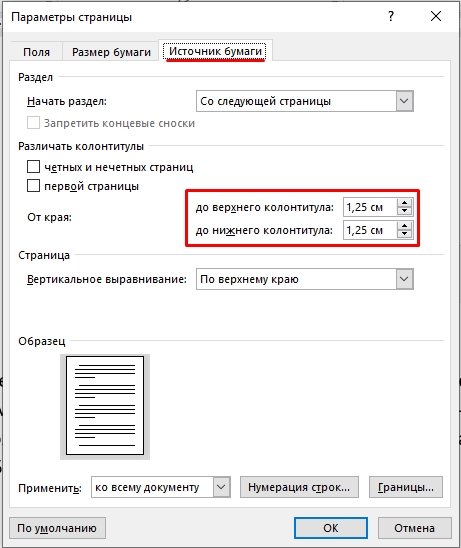
- Следующая проблема, с которой вы можете столкнуться – это неправильно выставленные отступы от колонтитулов. Нумерация страниц, которая расположена снизу или сверху, может дополнительно прибавлять расстояние – и их можно уменьшить. Зайдите в «Параметры страницы» и перейдите в «Источник бумаги». Здесь немного уменьшите нижний или верхний колонтитулы.
СОВЕТ! Вы можете почитать про колонтитулы отдельную статью. Также советую ознакомиться и с правильной нумерацией в документе.
- Еще раз просмотрите весь документ. Чтобы немного отдалить странички и просмотреть на разметку издалека – зажмите кнопку «Ctrl» и покрутите колесико мыши. Вы можете изменить шрифт текста или даже отдельных глав. Также в многих книгах добавляют разрыв страницы после каждой крупной главы – об этом подробно можно почитать тут.
СОВЕТ! Советую почитать про то, как добавить другой шрифт. Также посмотрите статью про изменение отступов – это может сильно сэкономить вам бумагу в будущем при распечатывании книжки.
Теперь давайте посмотрим, как можно напечатать книгу в Ворде. Проверьте, чтобы ваш принтер был подключен к компьютеру, а в нем было достаточно бумаги и краски. Теперь давайте приступим непосредственно к печати документа в книжном формате.
СОВЕТ! На всякий случай держите запасной картридж.
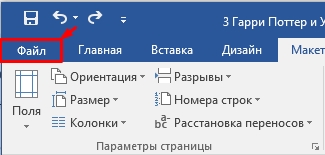
- Жмем по надписи «Файл» в правом верхнем углу окна.
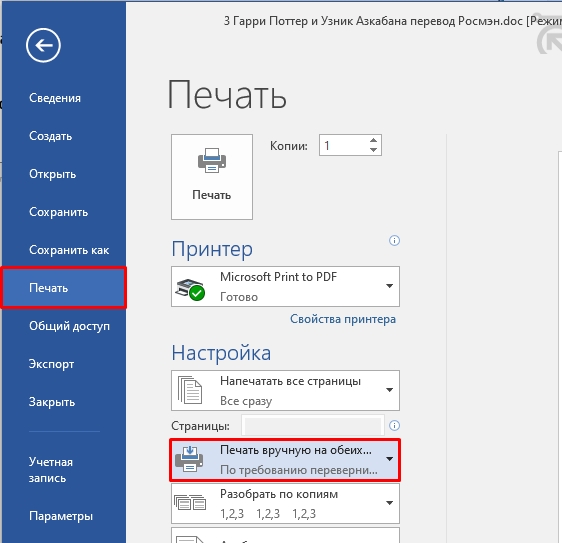
- В блоке слева откройте подраздел «Печать». Кстати туда же можно попасть с помощью горячих клавиш Ctrl + P. Теперь устанавливаем настройку (как на скриншоте ниже), которая позволяет делать ручную печать на двух сторонах каждого листа. В таком случае вам придется в определенное время перевернуть листы с бумагой. Если ваш принтер позволяет, то можно выставить настройку «Двусторонняя печать» – в таком случае устройство сделает все само.
Теперь жмем печать. Если вы выбрали ручной режим, то после того, как все листы будут напечатаны, вам нужно будет взять этот блок бумаги, перевернуть другой стороной и установить его обратно в лоток. Как только вы выполните все правильно, нажмите по кнопке «ОК».
Но тут хочу вас предупредить – вы увидите стандартную инструкцию, которая может немного отличаться в зависимости от вида и типа принтера. Поэтому вам нужно будет самостоятельно понять, какой стороной класть бумагу в лоток, таким образом, чтобы текст напечатался правильно.
СОВЕТ! Если вы не можете понять, каким образом класть бумагу, то советую выполнить пробную печать первых четырех страничек.
После этого можете склеивать или сшивать все листы. Ориентируйтесь на нумерацию. На этом все, дорогие друзья. В этом уроке мы узнали, как создать, отредактировать и распечатать документ в виде книги. Если я что-то упустил, или у вас остались дополнительные вопросы – пишите в комментариях.
(for Createspace, Lightning Source, or IngramSpark)
This is a guide to formatting your book in Microsoft Word (2010). We’ll be making a 6″x9″ PDF for print; but you can easily change the document to another size. You can watch these three videos, or go through the guide down below. You can start your own document from scratch, or download our free package of formatting templates to get started quickly.
Part 1: Setting Paragraph Styles
How to format a book for print in MS Word — Tutorial #1
Part 2: setting up headers, page numbers and footings
How to format a book for print in MS Word — Tutorial #2
Part 3: Front matter and back matter suggestions
How to format a book for print in MS Word — Tutorial #3
PS. Our FREE book formatting templates have this stuff built in. Click here to download them now.
A Quick Trick for Outlining your Book
Did you know you can drag and drop whole sections around in MS Word (just like you can in Scrivener)? It helps a ton with organization.
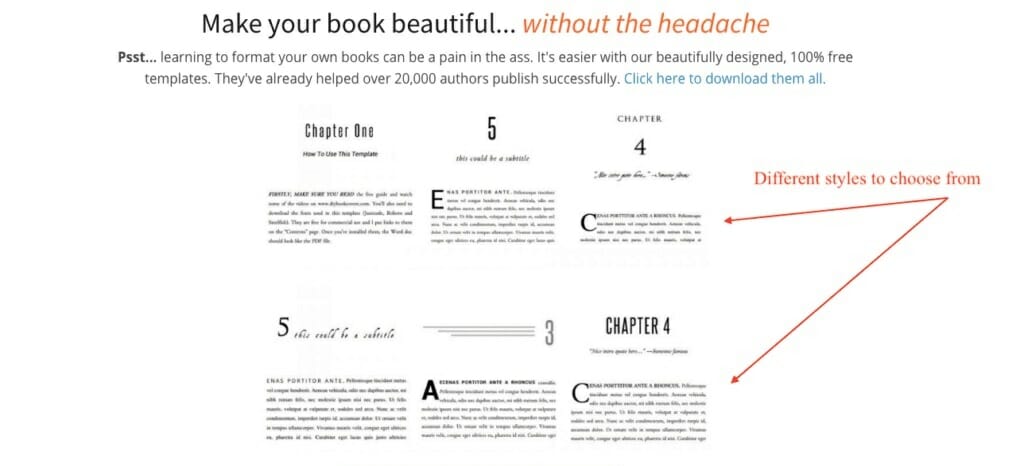
Make your book beautiful… without the headache
Psst… learning to format your own books can be a pain in the ass. It’s easier with our beautifully designed, 100% free templates. They’ve already helped over 20,000 authors publish successfully. Click here to download them all.

Keep scrolling for an in-depth tutorial. You should also check out our NEW book formatting tutorial series (updated in 2017 — don’t worry, it’s free too).

How to format a book in Microsoft Word (with pictures)
Getting started
Open a new document. Click “size”>> “More paper sizes” and set the document to 6”x9” (or your book size).
Then set the margins and gutter. Make sure to apply to the “whole document” instead of “this section.”
I set this one to 1″ margins on the top and bottom (a bit too much on the top). The «Gutter» is extra space on the inside. Recently (2014) I’ve noticed that Createspace book spines are much more glued-together, so the gutter may need to be a little bigger. Copy and paste your text into the document (or, if you’ve already been writing in Word, save the document as a new file (to be safe) and then start formatting.
Setting Paragraphs
Highlight some text and click on the «line options» tab. Set the indent for the first line of paragraphs to .2 or so (I started with .3, but that’s too much).
Make sure there’s no space before or after the paragraph, and justified text. Select the font you want to use. With that text still selected, right click, go to “Styles” and “Update Normal to Match Selection.” Now your whole document is using the “Normal style.”
Then select the first paragraph of your book, click line spacing options again, but set the first line indent at 0.0. This time, right click and “Save the selection as a new style.” Save it as “First Paragraph.”
Chapter Pages
Next, we’re going to separate all the chapters. This will be really important later when we start adding headers and footers. So put the cursor before any of the text, go to “Page Layout” >> “Breaks” and “Next Page.”
If you’ve done this right, the first page will say “First page Footer, Section 1” and the top of the next page will say “First Page Header, Section 2.”
Click into the headers area (by clicking the space at the top of the page) and make sure you’ve checked «Different First Page” and “Different Odd and Even Pages.”
Because this is the first page of the first chapter, you can begin styling the chapter pages. To make use of Word’s built in Table of Contents function, it’s best to start with Word’s preset “Heading One.”
Just type “Chapter One”, select it, pick “Heading 1” from the styles, then change the size and font, select the text and right-click, then under «styles» click “Update Heading One to match selection.” (I’ve changed the font to no-indent, black, and «Bebas Neue.») You may want to expand the text by bringing up the fonts menu (Ctrl+D on Windows) go to advanced, spacing and “expanded.”
You should also check to make sure there’s no indent on your chapter title, so that it’s really centered.
If you have a “Navigation” window open on the left side, this heading should show up right away.
Now you may want to style the first sentence. Select the first few words, and transform them to uppercase by going to the “Change Case” button on the Home menu.
Then, to add a Dropcap, put the cursor before the first letter of the first sentence, then go to the Insert panel and click the DropCap feature.
You can change the font of the drop cap to stand out even more, but getting the positioning right can be tricky. If you want the Dropcap to take two lines instead of three, choose “Drop Cap options” from the menu.
Now that our first page is ready, move down to the second page and click in the top area to select the header. Up on the menu, the “Link to Previous” is probably selected. You want to click on it to unlink it (just for the first pages, so they don’t link with the front matter. For the remaining pages, you’ll want link to previous selected). I’ll type in “Book Title”, get the style right and then save it as a new quick style (“headers”).
I’ll align right. If you have “gutter” set up, you can see that the “inside” of the page (on the left) has more spacing. You want to align your headers and footers to the outside, so make sure it’s on the side of the page with the smaller margins.
Then I’ll go into the footers area, click “Insert”, then page numbers>>current position>>plain number. This enters a page number field. Mine starts on page 3. If I want to change this, I could go to Insert>>page numbers>>Format page numbers and then choose “start at #…” instead of “continue from previous section.”
Then I can go down to the next page. Because I’ve selected “Different Odd & Even Pages” I can make this page a little different, by aligning left and typing “Author Name.”
Then, instead of inserting the page number again, I can just select and copy the page number field from the previous page, and paste it into the footer of this page – aligning it left like the header. To check my work, I’ll go to “View” and hit the “Two pages” so I can make sure that it looks OK.
There’s a little too much space between my headers and the content… but that’s because I set my top page margins to 1” (a bit much). I’ll leave it for now. The headings and page numbers look fine, so I’ll go back to View>> 100% and continue on. The whole first chapter should look pretty good now.
If I want to style section breaks I could… a simple way is to use the “First Paragraph” style again with all caps on the first few words, but no dropcaps.
When I get down to the bottom of the chapter, I’ll put the cursor below the text, select Page layout>>Breaks >> and hit “Next Page” again.
Because this is the first page of a new section, and we’ve selected “Different First Page” this page should be blank, with no headers and footers, so you can style it like the first Chapter Page. In Word, it’s hard to line up everything exactly.
The best way to get it 100% consistent is to select and copy from just above the first paragraph to the top of the page, including all the spaces and Chapter Header, and then pasting it the first page of the next chapter. That’s also a little faster than redoing everything manually. Then I can just change the text to “Chapter Two”.
The following pages in the book should have the same headers and footers, and the page numbers should be automatic. So all you need to do is skip through and adding «Next Page» breaks between every chapter, and styling the chapter pages. If your page numbers aren’t working for any reason, make sure the “Link to Previous” option is selected. If they still aren’t connecting, go to format page numbers and “continue from previous.”
You can also just select the page number field from the previous section and copy it into the one that’s broken. If you’ve been setting all your quick styles (first paragraph, normal, header, headings, page numbers) going through the chapters like this should be pretty fast.
If you get stuck with anything, it will probably be with the headings and footers and page numbers. When you finish styling your chapters, switch to Two-Pages view so you can check everything over. Right and left-align can be confusing, even if you are viewing it in Two-Pages mode, because Word may not show it as it actually prints.
Just keep in mind the extra wide margins are the inside gutter, so these are aligned on the outside, even though they look like they will be on the inside. If you’ve been using the “Heading 1” style, Word has automatically been adding in your chapters to the navigation, which you should see on the navigation panel on the left.
So let’s go back to the front and add the “front matter”, including the table of contents.
Still here? You’re working too hard.
A lot of this stuff is already done for you in my formatting templates. I made them to help indie authors save time and money, without making amateur book design and formatting mistakes. Seriously, you should download the free package. I’ll also send you my email series on publishing books that sell — I’ve been told it’s life changing.

🔒100% secure download. No spam, ever.
Adding the Copyright Page, Title Page and TOC
Put the cursor before chapter one and add a new “Next Page” break.
You’ll need these pages: 1. Title Page 2. Copyright page 3. Table of Contents 4. Dedication.
Your title page will want to match the cover pretty closely – see if your designer will give you the fonts he used – you may need to space out the lettering quite a bit. If you ask, your designer can probably save you a transparent PNG of the cover text (just like on the cover, but without the art) that you can add into the title page.
Your copyright page will look something like this (you can use this if you want):
TITLE Copyright © 2013 by Author Name.
All rights reserved. Printed in the United States of America. No part of this book may be used or reproduced in any manner whatsoever without written permission except in the case of brief quotations em- bodied in critical articles or reviews.
This book is a work of fiction. Names, characters, businesses, organiza- tions, places, events and incidents either are the product of the author’s imagination or are used fictitiously. Any resemblance to actual persons, living or dead, events, or locales is entirely coincidental.
For information contact; address www.website.com
Book and Cover design by Designer
ISBN: 123456789
First Edition: Month 2013
10 9 8 7 6 5 4 3 2 1
The «10 9 8 7 6 5 4 3 2 1» on the bottom refers to the editions, so if it goes until “1” it means first edition. If this was the fourth edition, you’d write: «10 9 8 7 6 5 4». These numbers should be close to the bottom of the page. It can be centered, left or right aligned, and with much smaller font size (9 or 10).
If you’re indie publishing, the copyright page isn’t a big deal – in fact you can stand out by using something more creative. I tend to use a simple message like “Feel free to share this – just don’t try to pass it off as your own! If you enjoy this book, I really hope you’ll do me the favor of leaving a review. You can connect with me @creativindie.” There’s something to be said for trying to look as professional as possible though, especially with the print book; but I also think it’s fine to «own up to» and even take pride in the fact that you self-published, as some skeptics may feel you’re «trying to hide it» otherwise. Make another “next page” break. Then go to the “references” tab and hit Table of Contents.
You should get an automatic Table of Contents. You may need to delete some areas, or change the fonts and styles (if you do, make sure to save it as a new style… it’s really annoying to keep restyling it if you forget to do this). Because this table is automatic, you can “Update Table” and “Update Page Numbers Only” if you do rewrites or add content later.
For the TOC, you probably need to make the text about 14pt, and add a little more spacing. If this is a novel, you don’t really need a table of contents, but that’s up to you. For the front pages, you’ll probably want to make sure there’s no indents anywhere, so everything is properly aligned.
Be a little careful on these front pages – if a header or footer gets added in, and a later page is set to “link to previous” – then when you delete it on the front pages it will erase the headers and footers throughout the book. Instead, go to the next page with headers and uncheck “link to previous” – then you can delete the headers on the front pages. Also, the copyright page is usually on the back of the title page (on the left hand side), while the dedication, Table of Contents and Chapter One usually starts on the right hand side – this means you’ll have to leave some blank pages in between.
You can zoom way out to see everything together. Sometimes I need to use a real book, or picture the pages on my hand and flip my palm back and forth, to get this right. Note – some books have all chapter pages on the right hand side – if you want to do that, just add an extra blank page by adding more “Next Page” breaks, and make sure they aren’t connected to any headers or footers so they stay blank.
That’s it – I’m going to attach the sample I made for this tutorial, you can download it by clicking these links: Template-sample(.docx) Template-sample (.doc) (They won’t look the same unless you have the same fonts… so the first thing you’ll want to do is change the
Chapter Heading font to something that matches your book. Hopefully you’ve already got a great book cover, but if not, take a look at my huge list of best fonts per genre here.) If you get stuck and are frustrated, I highly recommend finding someone on Fiverr.com. Pay them $10~25 to fix whatever problem you’re stuck on; it’s worth it.
Ps) It can save some time if you learn a few useful keyboard shortcuts for MS Word. There’s a full list here. The one I use the most is «Ctrl+z» which undoes your last action.
Was this useful?
If so, please share it! If you need a book cover, you should check out the sister site, www.diybookcovers.com — it has more free tools and templates to make your book look good. If you haven’t done so yet, you should sign up for my email list. Not only will you get a bunch of professional book design and formatting templates, I’ll also send a free email series on everything I’ve learned after helping launch hundreds of bestsellers (and making a full-time living from my own fiction and non-fiction books).
PS. I’m not just some guy on the internet… I’ve got a PhD in Literature, have spoken on book design at publishing conferences around the world, and was featured in CNN for renting castles to use as writing retreats. You can also check out my main book cover design site, or my blog Creativindie.com where I help authors and artists produce and sell their best work.
- Вариант 1: скачать шаблон 60 х 90/16 (145мм х 215мм)
или 84 х 108/16 (205мм х 260мм) для нужного формата книги,
скопировать туда текст вашей книги. После этого следует пропустить объяснения раздела
«Размер документа» и перейти сразу к разделу «Добавление колонтитулов» - Вариант 2: без шаблона. Примеры-картинки приведены для Word 2013
(для других версий Word интерфейс и вид, названия вкладок могут несущественно отличаться).
Открываем Word и создаем пустой документ. В нем настраиваем следующие параметры и стили
Разметка документа
- Открываем Word и создаем пустой документ
- В меню заходим в закладку «РАЗМЕТКА СТРАНИЦЫ»
- Выбираем пункт размер → Другие размеры страниц…
- В открывшемся окне параметров страницы в поле «Ширина:» и «Высота:» вписать правильные размеры книги:
| для формата 60х90/16 | для формата 84х108/16 |
| Ширина: 14,4см и Высота: 21,5см | Ширина: 20,5см и Высота: 26см |
!ВАЖНО:
- разделитель десятых — запятая!
- проверить пункт «Применить:» — должно быть выбрано значение «ко всему документу»
| для формата 60х90/16 поля: | для формата 84х108/16 поля: |
| Верхнее 1,5см; Нижнее 2см; Внутри 2см, Снаружи 1,5см | Верхнее 2см; Нижнее 2см; Внутри 2,5см, Снаружи 2см |
!ВАЖНО:
- проверить пункт «Ориентация» — «книжная»
- проверить пункт «Страницы» — должно быть выбрано значение «Зеркальные поля»
- проверить пункт «Применить:» — должно быть выбрано значение «ко всему документу»
- нажать кнопку «ОК»
Добавление колонцифр
Выбираем понравившийся вариант нумерации страниц.
- После выбора стиля нумерации откроется конструктор работы с колонтитулами, где можно настроить
отображение нумерации на странице, после чего конструктор можно закрыть, нажав «✖»
(«Закрыть окно колонтитулов») в верхнем правом углу. - чтобы не делать дополнительные настройки, связанные с левойправой страницей,
рекомендуем выбирать расположение колонцифры по центру страницы
!ВАЖНО:
PS В дальнейшем, для редактирования колонцифры, встаньте на нее и нажмите правую кнопку мыши.
Шрифт
- Заходим в меню в закладку «ГЛАВНАЯ»
- В блоке «Шрифт» выбираем шрифт и его размер(кегль)
- С помощью кнопок в блоке «Абзац» выравниваем текст(по ширине или по центру, взависимости от вида текста)

✔ Если все правильно сделано, должен получиться шаблон будущей книги.
Если все действия, описанные выше, вы проделали с пустым Word-файлом,
то далее нужно вставить текст вашей книги, после чего перейти к форматированию заголовков.
Если текст уже присутствует, переходим сразу к форматированию заголовков.
Такое форматирование нужно для того, чтобы при создании оглавления система правильно распознала
иерархию в тексте и вычленила разделы и главы содержания.
Заголовки
На картинке ниже показана, как выглядит поле «Стили» в панели инструментов,
где можно выбирать вид текста: Обычный текст / Заголовок.
Для заголовков нужно использовать стиль «Заголовок 1». Для подзаголовков использовать стиль «Заголовок 2».
Сноски
- Для вставки сноски нужно выбрать в меню закладку «ССЫЛКИ»
- Ставим курсор после нужного слова и нажимаем на пункт «Вставить сноску»;
после чего пишим определение(текст сноски) и возвращаем курсор в любое место.
Можно вставлять и концевые (в конце всей книги) сноски
Отделение страниц
В закладке «ВСТАВКА» в меню при необходимости можно вставить «разрыв страницы» или «пустую страницу».
Эти функции применяют, если нужно, например, отделить оглавление от текста книги или начать новою главу
(с новой страницы).
Нетекстовые элементы
Вставка изображения
- Для вставки изображения надо в меню перейти в закладку «ВСТАВКА» и нажать пункт «Рисунки»
- Откроется диалоговое окно, где надо выбрать требуемое изображение
- рисунки должны быть разрешением 225dpi для цветной и ч/б книги
!ВАЖНО:
Вставка таблиц
- Ставим курсор в то место текста, где требуется разместить таблицу
и выбираем в меню в закладке «ВСТАВКА» пункт «Таблица». В выпадающем списке выбрать
требуемое кол-во столбцов и колонок и нажать левую кнопку мыши
Как создать ОГЛАВЛЕНИЕ
- после каждого редактирования книги обязательно нужно удалять и заново создавать Оглавление.
В некоторых версиях Word достаточно выбрать опцию «обновить Оглавление» - количество страниц в книге, профессионально отпечатанной офсетным способом, должно быть кратное 16!
Если стили заголовков были выбраны правильно, то можно автоматически создать оглавление.
Для этого нужно поставить курсор в нужное место (начало или конец книги) и в меню в закладке
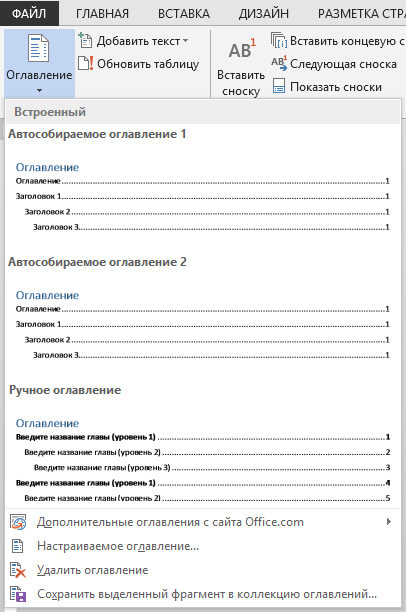
«ССЫЛКИ» выбрать пункт Оглавление, из выпадающего списка выбрать понравившийся вариант;
там же можно настроить стиль оглавления или удалить его.
!ВАЖНО:
!ВАЖНО:
PS Для «подгонки» под нужное количество страниц, а также для визуального отделения специфических
частей текста (эпиграф, цитаты, подсказки, поэтические строфы и т.д.)
можно менять межстрочное расстояние.
В заключение еще раз отметим моменты на которые следует обратить внимание:
- Кол-во стр. должно быть кратно 16. Добиваться этого можно увеличением или уменьшением
кегля (размера) шрифта или межстрочного расстояния, добавлением в начале книги титула
(страница после форзаца и до оглавления — с указанием автора и названия), добавлением или
сокращением числа иллюстраций, добавлением в конце книги списка рекомендованной литературы,
указателя имен и т.п. - Левые и правые поля страниц не должны быть одинаковыми, а должны «учитывать» левое
и правое расположение на развороте (т. е. у всех четных страниц будет один вариант ширины
левого и правого поля, а у всех нечетных — другой) - Аналогично и колонцифры (№ стр.) следует располагать слева — на левой странице разворота
и справа — на правой странице, либо по центру
Оба эти замечания уже учтены в готовом шаблоне.
Не обязательно, но лучше отформатировать эти элементы — так книга будет смотреться корректнее:
- Висячая строка: (это строка текста или заголовка, которая «оторвана» от своего абзаца
и «висит» в одиночестве на предыдущей или последующей странице) - Расположение картинок: картинки должны располагаться в границах текстовой ширины
и без захода на поля. Для этого картинкам не нужно применять абзацный отступ и их следует
сжать до ширины текстового поля
Do you need a book template to get started writing your book?
If so, you’ll want to download a book layout template before you start typing up your manuscript. This will save you a ton of wasted effort and formatting issues later on!
Whether you’re writing a fiction book or a nonfiction book, you’ll want to start writing as quickly as possible to reach your goal of becoming an author.
A book template can help you do just that by saving you time from having to set up your own book file.
Select your book writing software, then you can find a book template that is already set up and formatted to get started writing.
Using a book template, you’ll begin writing your book by typing your manuscript directly into your template.
Once your book is written and ready for edits and production, the template will come in handy since it’ll already be in a common format and file for you to start the book production and publishing process.
Even better – the book templates listed in this article are absolutely free. Since self-publishing costs come out of the author’s own pocket, it’s important to save money where you can, so that you can use that budget to hire professional editors and cover designers.
Here are the top free book templates:
- Free Fiction & Nonfiction Templates
- KDP
- BookBaby
- DiggyPOD
- DIYBookFormats
- 48HrBooks
- BookPrintingUK
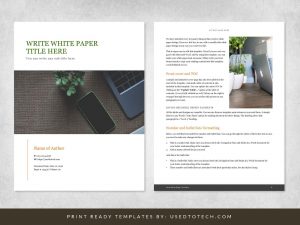
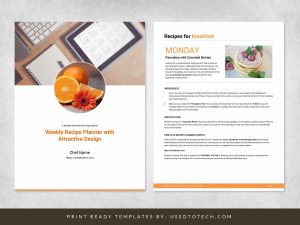
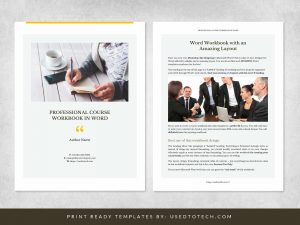
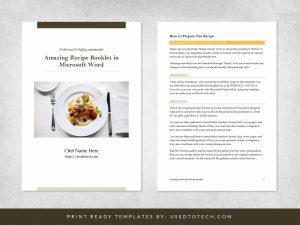
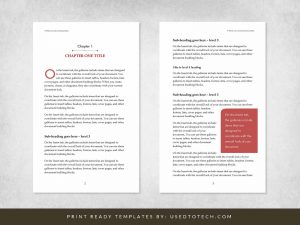
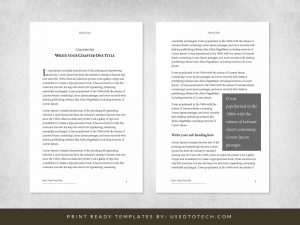
- UsedtoTech
- Book Template Generator
Please note that several of the sites listed here offer book production services. This article does not review the quality of the services provided by these sites, so we aren’t able to provide any endorsement or testament as to whether these companies are good to work with or not.
Get A Nonfiction Book Outline for Your Manuscript!
In this article, we are simply listing the free book template resources that self-published authors can utilize as they write a book.
Reasons to use a book template
Every author has their preference on writing tools, and one that continually tops the chart is Microsoft Word.
It’s your standard word processor, and while it seems basic, it’s super versatile and easy to use.
If you don’t need a fancy writing software, or are just getting started as an author on a low budget, Microsoft Word may be your best bet.
It’s readily available, user-friendly, and has all the nuts and bolts you need (including a powerful editor).
Ready to find your perfect Microsoft Word book manuscript template? Here we go!
Here’s 5 reasons why you should use a book template to write your book:
- There is little to no learning curve.
- It is readily available on most computers, and can be purchased at major retailers.
- It’s versatile for use on a variety of word processing projects.
- It has a powerful document editor for spelling and grammar checks.
- It has several formatting options and includes free templates.
If you don’t want to fuss with setting up a book template in Word, or want more variety in templates to chose from, consider downloading a pre-made book template for Word.
There are several sites that offer free downloadable book templates, and they are already set-up and formatted specifically for writing a book. You can download the template, then open it in Word, and get to writing!
These sites offer free, downloadable book templates for Microsoft Word.
Free Fiction & Nonfiction Templates
If you’re writing a book and need a template to help you organize your chapters, content, and format, then we have a book template for you!
When writing a book, templates are helpful to keep you on track and plan for which content your book needs to include.
Here’s where you can download a free template for book writing:
- Writing a Book: Template For Nonfiction
- Writing A Book: Template for Fiction
KDP Free Paperback Manuscript Templates
For a basic manuscript template, use these free book layout templates from Kindle Direct Publishing (KDP).
Download them here.
If you plan to publish your eBook to KDP, these templates will work just fine. They are available in all of the common standard book sizes.
Download blank templates, or pre-filled templates with sample content, if you want to have an overall example of how a book will appear with the template.
If you need a book template for Word in a language other than English, these templates will be helpful as they are available in a variety of different languages.
Once you download the files, a .zip folder will appear on your computer. Once you unzip the file, you will then see zipped folders for each language.
You can unzip the folder in the language you need, which will give you access to the various size book templates.
BookBaby Free Book Template
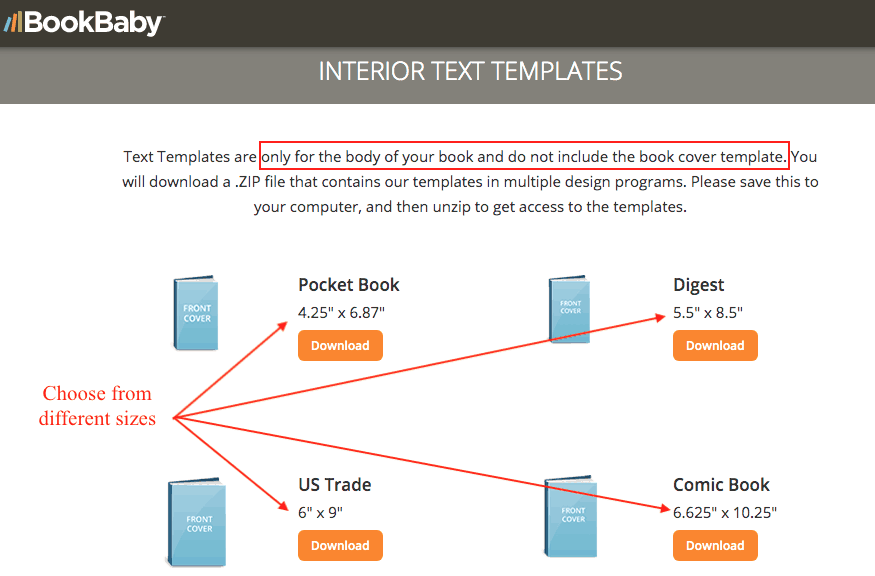
With several different sizes to choose from, BookBaby offers a variety of book layout templates depending on the type of book you are writing.
From standard book sizes to niche-specific sizing options, you’ll want to be clear on which type of book template size you need for your story.
Download them here.
The common standard sizing for most printed books is the US Trade 6” x 9” which is listed under the Interior Text Templates category.
Once you find the correct size for your book, you can download the free book layout template by clicking the orange “Download” button underneath the corresponding size.
The .zip file will then download to your computer, and it contains the template file. Once you unzip the file, you can then open the Word book template (it will be the file that ends in “.doc”).
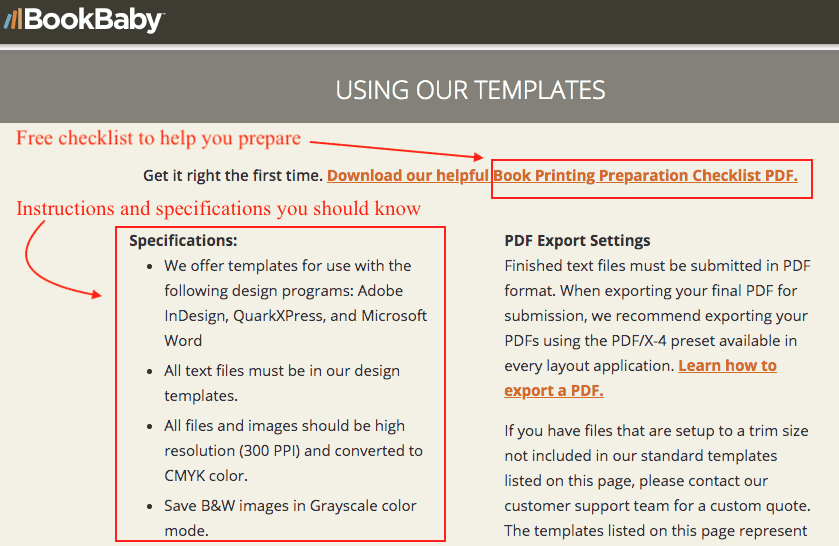
If you need additional instructions, BookBaby offers some helpful information in the “Using Our Templates” section. You can check out their specifications, and even download their Book Printing Preparation Checklist PDF.
DiggyPOD Free Book Template for Word
A book printing company, DiggyPOD offers free book layout templates for your book interior and exterior. While the sizes offered aren’t as extensive as some, you can find the most common sizes for book printing available.
Download them here.
If you’re just getting started with writing your book, download the interior template.
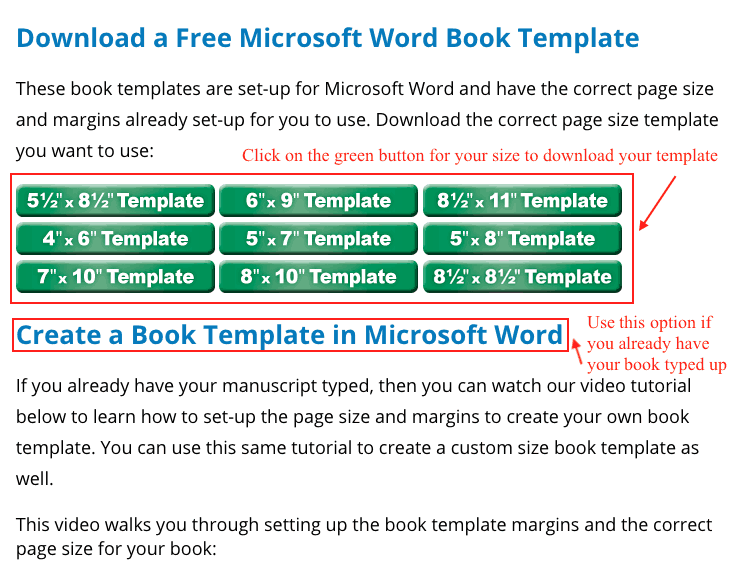
If you’ve already written your book, you can use the resources on the page to create your own book template for your typed manuscript.
DIYBookFormats Free Templates
This site offers 5 free minimal book layout templates that you can use with a variety of programs, Word included.
Download them here.
These templates offer different designs, not just your standard text and format options. While you can access five templates for free, any additional access to other styles will have to be purchased.
You’ll also have to do some extra clicking and typing to access these manuscript templates (unlike some of the other sites listed in this article).
The free book templates are a gated offer, which means you will have to provide your email address, and then the templates are sent directly to your inbox.
Once you download the .zip file, you’ll want to unzip it. Then, you can open the folder for each styled template, and select the file you need. If you are using Word, you’ll want to click on the .doc or .docx file, depending on which Word version you are using.
The site also provides some helpful tutorial videos on how to format your book in Microsoft Word, if you want to skip the template and do it all yourself.
48HrBooks Word Templates
This site offers four of the most common standard book sizing options available – no email required. Perfect for use if you haven’t started typing your story yet, these Microsoft Word book manuscript templates are straight and to the point.
Download them here.
To begin your download, look under the “Free Book Templates” heading, and scroll down to the “Inside Pages” option. You can then click on the book icon for the corresponding size you need, and the file will begin downloading automatically.
If you need further instructions, there is also a handy PDF that you can download with more info.
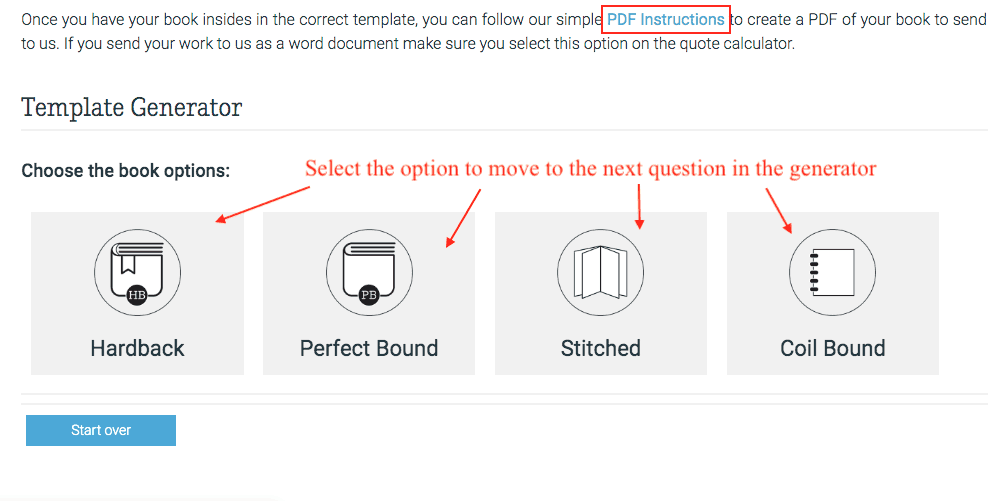
BookPrintingUK Template Generator
Featuring an easy-to-use design, this responsive template generator is great if you know the specifics of your book’s layout, such as binding and size.
Download them here.
You can start by selecting which program you are using to write your book, and Microsoft Word is the first option you can select.
You’ll need to know the document type needed, the book option, template size, color (if applicable), and orientation to generate your template.
One thing to note is that this site is for UK book printing, so it will be UK sizing. However, you can always look up the US equivalent with a quick Google search, if needed.
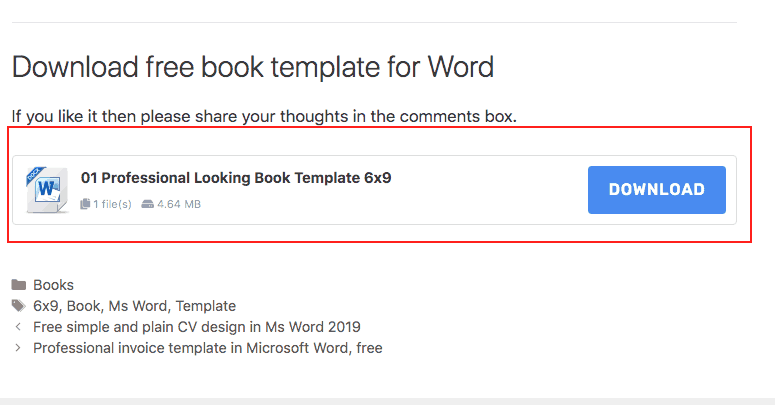
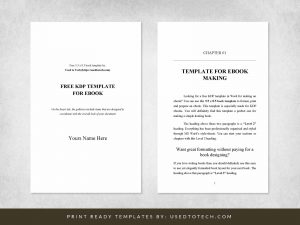
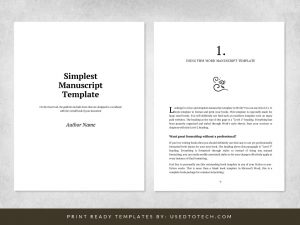
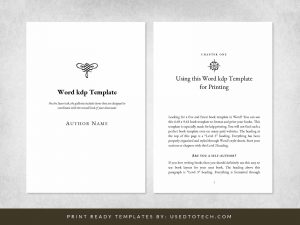
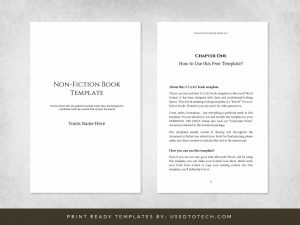
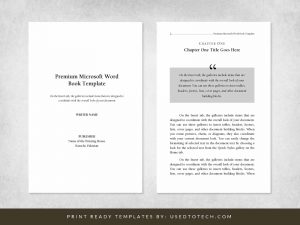
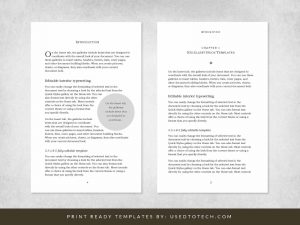
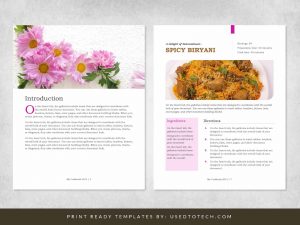
UsedtoTech Free Word Book Template
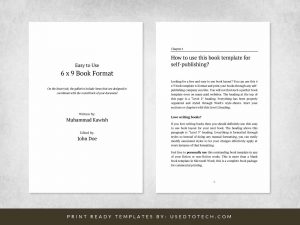
A simple, clean design, this free Word book template is specifically for the standard 6” x 9” book, which is the most common book size for printed paperbacks.
Download them here.
To download, you’ll need to scroll down to the bottom of the page and click on the “Download” button. This will prompt the download of the .zip file to start automatically.
Unzip the file, then select the file that ends in “.docx” or, if you need to, you can download the .pdf file.
This book template for Word features a minimal design, and is free – no email required!
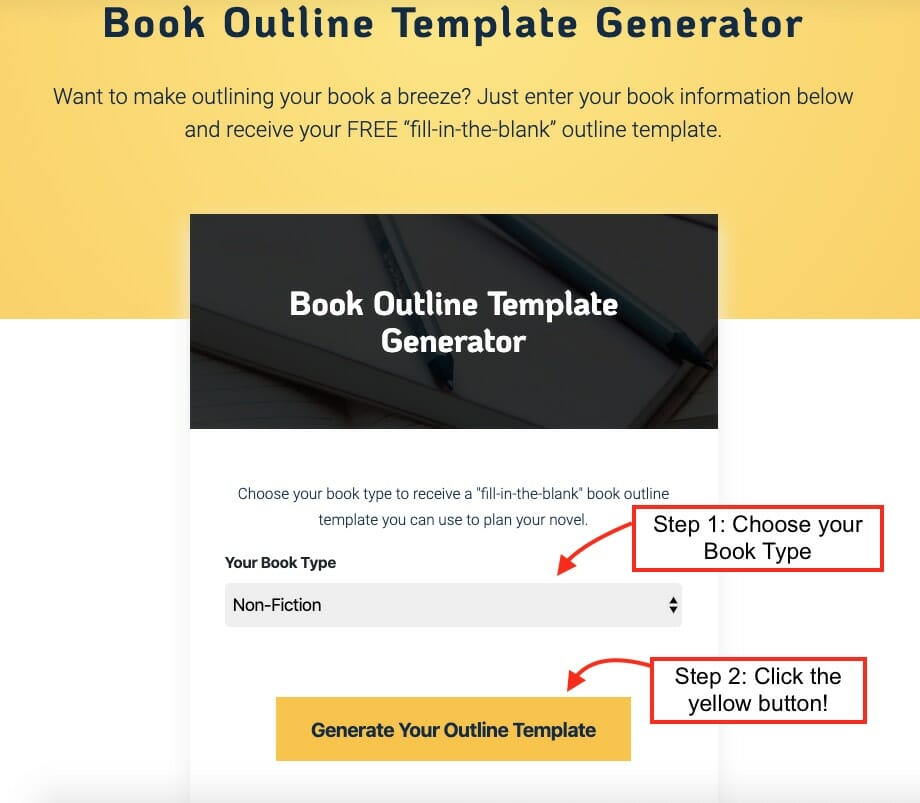
Book Template Outline Generator
If you need a done-for-you book outline to fill in your book’s contents into, consider using a pre-made outline for your nonfiction or fiction book.
This is not a print-ready format for your book, but an actual outline to organize your manuscript.
Use this Book Outline Generator to select your genre and immediately get access to complete outline – all you need to do is add your content!
Once you choose your book type and generate an outline, you’ll get access to a done-for-you book template in Google Docs. You then follow the steps in the document to get started.
Can I write a book in Microsoft Word?
Yes, you can write a book in Microsoft Word, and it may even help you write your book faster and increase your writing focus, since you can save time formatting and setting up your book layout. You can write a book in Word by downloading a free book template, by using the standard book template Word offers, or by setting up your own (which is more time-consuming).
Because Word is a flexible word processing system, you can simply use a book template within Word, and start typing your book directly onto the page.
Even if you don’t use a book template, you can still write a book using Microsoft Word – just be aware that you may have to spend more time formatting your book when it’s time to publish it.
How to write a book in Microsoft Word
To write a book in Microsoft Word, simply download a free book template, open the file, and start typing your manuscript into the template.
You’ll want to be sure that you download a book template that is formatted specifically for Word, and all of the sites listed in this article offer Word templates.
Once your template is downloaded, you can then open it on your computer, and make any modifications as needed.
Then, you can start typing your manuscript directly into your Word template. That’s it!
You don’t need a fancy template to start with; you can simply make do with the free templates that are available for download on these sites. However, if you want to purchase a template, there are some paid book templates that you can buy if you choose to.
Here are the steps to write a book in Microsoft Word:
#1 – Step 1: Download a Microsoft Word book template (more instructions on this below)
#2 – Step 2: Open Microsoft Word on your computer and click “File” then navigate to “Open.” Select your book template file.
#3 – Step 3: Your book template file will open and appear on the screen. You can now start typing your text directly into Word.
#4 – Step 4: Click “Save” often throughout your writing process, and before you exit the Word application.
Does Word have a book template?
Yes, Microsoft Word offers several templates within the application, including book templates to choose from. Different sizes and formats are offered, depending on the type of book you are writing.
All of the available book templates are customizable and editable, which means you can tailor the template to fit any specific requirements you need for your book.
To access the standard book template in Word, follow these steps:
- After opening Microsoft Word, click “File” then “New.”
- Double click “Books” folder icon in the “Available Templates” section.
- Double click “Other Books” folder icon.
- Browse through the available templates and select one that best fits your needs and book type.
- Customize your book template settings as needed.
- Start removing the placeholder text and typing your own book information directly in the document.
- Click “Save” any time you make changes and before closing the Word application.
How do I make a book template in Word?
If you prefer to make a book template in Word that is customized to fit your specific writing needs, then there’s an easy way to do this, too.
Microsoft Word is a versatile word processing tool that’s relatively easy to learn and super customizable. You can make a variety of projects, including a novel or book template with a little learning and direction.
The key is to start simple with one of the pre-made templates in Word, then format and customize the book layout to fit your needs.
Please keep in mind that depending on the Microsoft Word version your computer or laptop has, the step-by-step instructions may vary, since older or newer versions may have different menu items, names, or placements.
Here are the steps to make a book template in Word:
- Open the Microsoft Word program or application.
- Click “File,” then “New.”
- Go to Layout and click on “Page Setup”. Note: Depending on your Word version, you may have to click the launch icon to the left of Page Setup (it looks like a square with an arrow).
- Click “Margins.”
- Click “Custom Margins.”
- Click “Mirror Margins.”
- Enter the margin values you need. For standard book margin values, enter the following: Top & Bottom: .5, Inside: .8, Outside: .5, Gutter: 0.
- Click “Portrait” under Orientation.
- Click “Whole Document” under Apply To.
- Click on the Paper tab.
- Adjust the values to match the height and width of your book’s printed paper size. If you do not know these yet, you can adjust them later.
- Click “Save.”
How many Microsoft Word pages equal a book page?
As you start writing in your book template, you can easily track the word count. But, that doesn’t necessarily tell you how many actual “book pages” you have typed up.
Depending on how you like to track your progress, it might be helpful to know how many Microsoft Word pages equal a book page. While this will vary depending on your book’s genre and writing style (some authors are more wordy than others), there is a rough ballpark range you can use.
Determine what your book’s word count goal should be
First, we recommend determining how many words your book should be. You can use this Word & Page Count Calculator to plug calculate how many words you should aim for as you write your book. It calculates the word count depending on your book’s type, genre, audience.
Use the Word Count tool in Microsoft Word
As you write, it’s important to keep track of how many actual words you are writing. Word has an easy tool that makes it super simple to keep count, and it updates in real time.
Again, depending on your version of Word, there may be a different way to access the Word Count tool, but you can play around with it a bit – it almost always will be in the “Tool” menu.
Here’s how to track your book’s the Word Count in Word:
- In your Word document, click “Tools” from the top menu tool bar.
- Click “Word Count.”
- A small window will appear with the total number of words.
Determine how many Word pages equals one book page
Once you have determined your writing word count goal, and know how to easily track how many words you’ve written using the Word Count tool, the next step is to figure out how many Word pages equal one book page.
To do this, you will first need to understand that there will not be a direct correlation. In other words, there isn’t an easy, super accurate answer. The reason for this is because it will depend on your finished book’s page size.
A standard US paperback novel is typically printed as a 6 in. x 9 in. book, but it can be printed in a variety of other sizes depending on your book size.
Your book page in Word will be the standard paper size of 8.5 in. x 11 in. Therefore, the variance in size between the Word book template and your finalized printed book means there isn’t an exact equivalence.
Generally, a paperback novel in the standard print size can contain about 250-300 words per page. In Microsoft Word, one page in the standard size and 12-point font will be about 500-550 words per page.
So, a rough estimate is that 2 paperback printed pages will equal 1 Microsoft Word page, more or less. Please note that this is a very rough estimate, with several variables involved.
The only way to find an exact correlation is to set your Word document up to be the same size as your finalized printed book. So, you could set your word document up to be 6 in. x 9 in. However, there will still be some variance due to margins, printed text size and typeface, paragraphs, etc.
The best thing is to just go by your desired Word count and worry about the printed pages later. Focus on getting your story out, and the rest will follow suit once you get there!
Start typing your manuscript into the book template
Once you find your perfect Microsoft Word book manuscript template, you’ll be ready to start typing up your book!
Achieve your writing goals by committing to writing each and every day. Find a fellow author friend to make yourself accountable, or attend a writing conference to drive urgency for your writing career.
Once your manuscript is typed and self-edited, you can start the editing and production process to get your book published and into the hands of readers!
When you’re ready to write a new book, you can use the same book template, or make your own!
Which book templates did you find the most useful?
Need some help along the way as you self publish?
Get A Nonfiction Book Outline for Your Manuscript!
В этой статье мы вам покажем, как можно самому сверстать книгу. Если в книге нет сложных элементов, то сверстать ее можно и в Word.
Итак… Вот такой перед нами исходный документ.
.
1. Поля страницы книги
.
Для начала мы выставим нужные поля, чтобы все было ровно и красиво. Для этого нужно в меню выбрать Разметка страницы → Параметры страницы → Поля. Мы настроим поля по 2 см с каждой стороны, как показано на рисунке. Можно выставить поля и другого размера, главное, чтобы они были не меньше 1 см. Здесь же выбираем ориентацию страницы – книжную или альбомную.
.
2. Размер или формат книги
.
В этой же вкладке Параметры страницы выбираем формат (Размер бумаги). У нас это А5 (148х210 мм) и применяем ко всему документу (нажать кнопку ОК).
.
3. Размер и начертание шрифта
.
Теперь нужно выбрать шрифт во вкладке Главное.
.
У нас в книге используется Times New Roman, размер шрифта мы выбрали 11. Но здесь вы также можете повыбирать разные шрифты и размеры – это уже на ваш вкус.
.
4. Выравнивание, абзацы и межстрочный интервал
.
Далее нам надо выровнять текст по ширине, чтобы он смотрелся ровно и аккуратно, настроить абзацные отступы и межстрочный интервал. Все это можно сделать, нажав в меню Главное на вкладку Абзац.
.
Вы можете менять междустрочный интервал. Стандартно – это одинарный, но если вы предпочитаете больше воздуха и пространства между строками, то можете увеличить его.
На рисунке слева использован одинарный интервал, справа – полуторный.
Абзацные отступы также можно настраивать на ваше усмотрение. Главное, чтобы они были. Ведь при чтении текста без отступов глаза не отдыхают и сам текст тяжело читать. К тому же, без них нельзя узнать, где кончается первый абзац и начинается второй, если конечная строка первого абзаца имеет полную длину.
.
5. Форматирование текста
.
Теперь расскажем, как можно выделить текст с помощью полужирного, курсивного или подчеркнутого начертания. Это просто! В главном меню есть соответствующие буквы, нажимая на которые мы делаем текст либо полужирным, либо курсивом, либо подчеркнутым.
.
В этом же меню мы можем выставить текст по левому краю, по центру, по правому краю или по ширине.
.
Все это мы применили в заголовке и выделили эпиграф курсивом.
Вот так теперь выглядит наш документ.
.
6. Нумерация страниц
.
Следующий этап – это добавить нумерацию.
Делаем это, как показано на рисунке.
.
В меню Вставка ищем Номер страниц и выбираем, где расположить нумерацию – вверху, внизу и т.д.
В нумерации тоже нужно выбрать шрифт и размер цифр.
.
7. Форматирование заголовков
.
Мы уже писали выше, как можно выделить заголовки – применить полужирность или курсив и увеличить шрифт. Но заголовки можно сделать и автоматически.
В меню Главное выбираем Стили. Там выбираем нужный стиль. При желании можно поменять как размер шрифта, так и цвет.
.
8. Оглавление
.
Далее переходим к оглавлению. В меню Ссылки есть вкладка Оглавление. Там можно выбрать вид оглавления. После его применения можно редактировать шрифт, размер и цвет, как вам нужно.
.
Вот так примерно будет выглядеть оглавление.
Но нас не устраивает такой шрифт и цвет, и мы их поменяли. Теперь оглавление выглядит так
.
9. Титульный лист и оборот титула
.
Когда вся техническая работа по тексту сделана, можно перейти к титульной странице и обороту титула.
На титульной странице обычно пишут имя автора и название. Здесь можно «поиграть шрифтами», выбирать разные размеры, начертания и т.д. На второй странице, обороте титула, указывают библиографические данные: библиографические номера (ББК, авторский знак), библиографическая строчка (куда включены имя автора и название, кол-во страниц и издательство), аннотация (если она есть).
.
Вот основные принципы верстки в Word.
Помните, что стиль книги должен быть единым, не используйте больше трех разных шрифтов в книге, следите за тем, чтобы интервалы и отступы по всему тексту были одинаковые, тогда книга будет выглядеть аккуратно и гармонично.
.
.
.


