You may have an enclosed text box within the content in your MS Word document. By default, the text box moves with the content. If you do not want it to move with the content, you must lock the text box.
If you are sharing your document with others, you may not want them to change the content within the text box. Again, you can lock the text box.
Word allows you to lock the text box for the above cases. Thus, by locking the text box, you can:
- Prevent the text box from moving with the content.
- Protect the contents of the text box.
We will explain both methods stepwise. Let us start.
Method #1: Prevent the text box from moving with the content
Step #1: Open the Word document
Open the Word document that has at least one text box.
Note that if you add more lines/text to the top of the paragraph, the text box moves down with the text.
Step #2: Enable Drawing Tools
Click the bottom of the text box to select it.
Drawing Tools tab will be visible on the top menu bar.
Step #3: Lock the text box position
Click on the Format tab under Drawing Tools to change the ribbon.
In the section Arrange, click on the Wrap Text icon to open a drop-down menu.
In the drop-down menu, click on Move with Text to remove the tick mark next to it.
Note that now the tick mark appears against Fix Position on Page.
Now, the text box remains locked on the page and will not move with the text.
Method #2: Protect the contents of the text box.
Step #1: Open the Word document
Open the Word document that has at least one text box.
Step #2: Restrict editing
Click on the Review tab on the top menu bar to change the ribbon.
Under section Protect, click on the Restrict Editing icon to open the Restrict Editing drop-down menu.
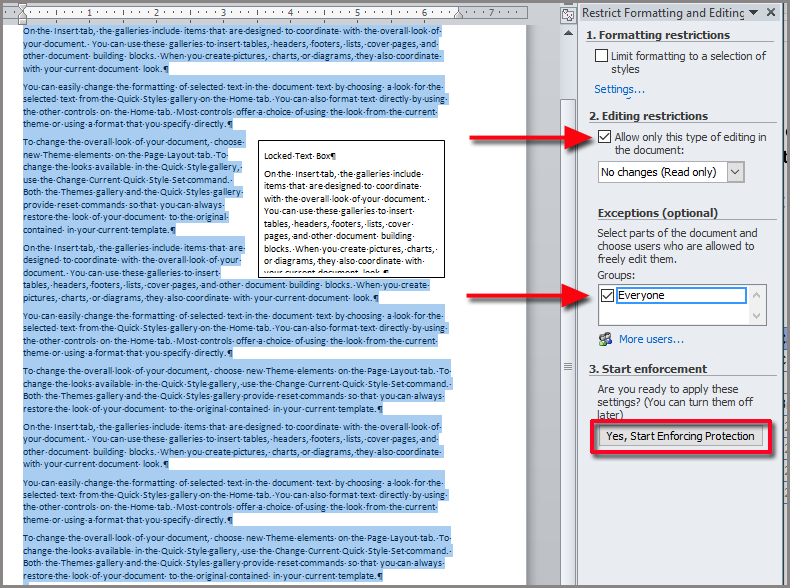
In the Restrict Editing drop-down menu, click the checkbox under Editing Restrictions so that a tick mark appears in the box.
In the box under the checkbox, select No Changes (Read only).
Step #3: Select the exceptions
Now select the entire document with Ctrl+A.
Holding the Ctrl key down, click on the text boxes to unselect them.
In the Restrict Editing drop-down menu, under Exceptions (optional), click on the box beside Everyone. Ensure a check mark appears in the box.
Under Start enforcement, click on Yes, Start Enforcing Protection to open a dialog box.
Step #4: Enforce the Protection
In the Start Enforcing Protection dialog box, click to enable Password.
Enter a password of your choice in Enter new password (optional).
Repeat the password entry in Reenter password to confirm.
Note: if you do not enter a password, no one, including you, will be able to edit the text box ever again. The same will happen if you forget the password you have entered.
Click on Ok to change the Restrict Editing dialog box.
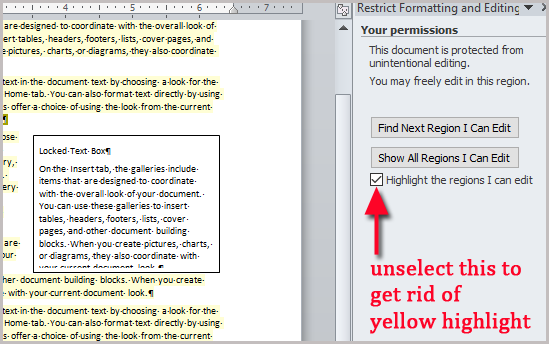
The editable text in the document will have a yellow highlight.
Step#5: Remove the highlight
In the Restrict Editing dialog, click on Highlight the regions I can edit to remove the tick mark in the box.
Exit the Restrict Editing dialog by clicking on the X button on the top right-hand corner.
Word will remove the yellow highlight in the document.
Now, anyone can edit the document. But to edit the text box contents, they will require a password.
Conclusion
Follow our instructions to lock a text box. You can prevent the text box from moving with the text. You can also disallow editing the text box contents.
Locking text boxes is a great way to protect specific content in your document from changing, either accidentally or intentionally. Here’s how to lock your text boxes in Word.
Locking Text Boxes in Word
Let’s say you’re working on a document that other people on the same network have access to and you want to lock your text boxes, so they don’t get edited by mistake.
RELATED: How to Protect Parts of a Word Document from Editing
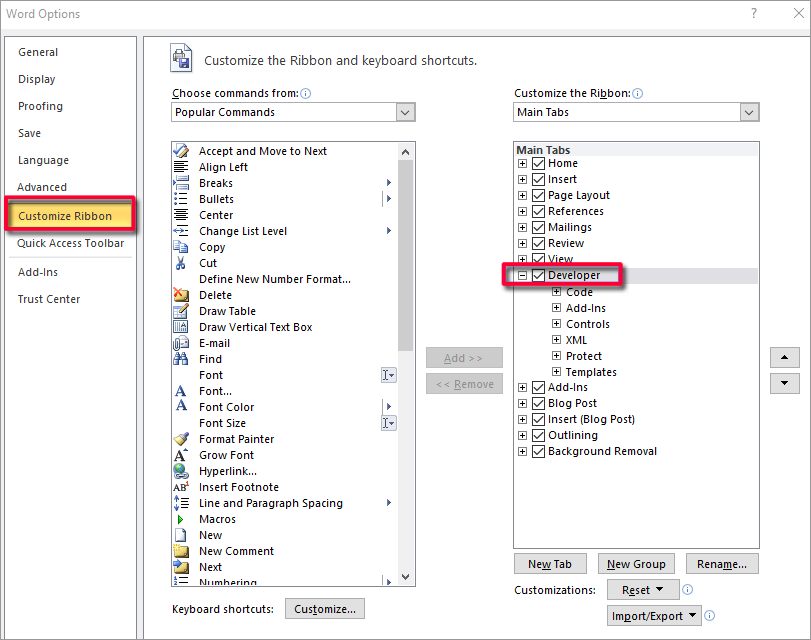
To make this work, we’re going to need to use the tools provided in the Developer tab. The developer tab is hidden by default, so go ahead and enable the tab to appear on the Ribbon if you haven’t already.
Once you have the Developer tab enabled, go ahead and open up your document that has the text boxes you want to lock and switch to the “Developer” tab. Here, select “Restrict Editing” in the “Protect” section.
Note: The Restrict Editing option is also available on the Review tab, but only appears if you have enabled Developer tab.
A Restrict Editing pane appears on the right where you can restrict editing permissions for all, or certain parts, of the document. Here, check the box next to “Allow only this type of editing in the document” in the “Editing restrictions” section, then keep “No changes (Read only)” selected in the drop-down menu in the same section.
Next, you need to select all of the content in your document except for the text boxes you want to lock. The easiest way to do this is to hit Ctrl+A to select everything in the document and then hold the Ctrl key while clicking each checkbox, in turn, to remove them from the selection.
Once you’ve selected the content, check the box next to “Everyone” under “Exceptions.” This makes it so that everyone is still able to edit the selected content.
Finally, select “Yes, Start Enforcing Protection” at the bottom of the “Restrict Editing” pane.
Once selected, you’ll be prompted to enter a password for additional protection. Type a password and then click “OK.”
You’ll notice all the content except for the text boxes is now highlighted, meaning your text boxes can no longer be edited while the highlighted content can.
To remove the protection restrictions on the document, click “Stop Protection” at the bottom of the “Restrict Editing” pane.
READ NEXT
- › How to Link Text Boxes in Microsoft Word
- › BLUETTI Slashed Hundreds off Its Best Power Stations for Easter Sale
- › Expand Your Tech Career Skills With Courses From Udemy
- › How to Adjust and Change Discord Fonts
- › The New NVIDIA GeForce RTX 4070 Is Like an RTX 3080 for $599
- › Google Chrome Is Getting Faster
- › This New Google TV Streaming Device Costs Just $20
How-To Geek is where you turn when you want experts to explain technology. Since we launched in 2006, our articles have been read billions of times. Want to know more?
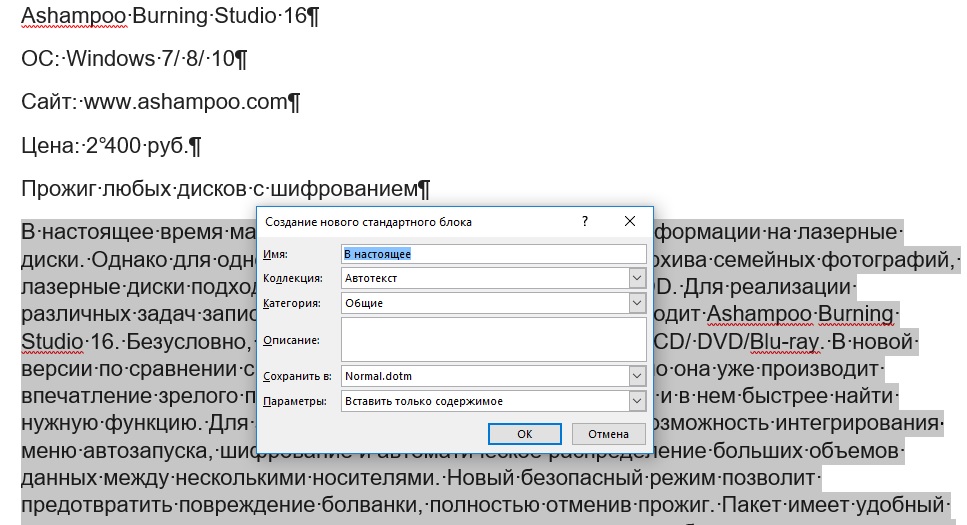
Для того чтобы создать блок, выделите соответствующий фрагмент. Комбинацией клавиш [Alt] + [F3] откройте окно «Создание нового стандартного блока». В нем задайте имя для блока и сохраните нажатием «ОК».
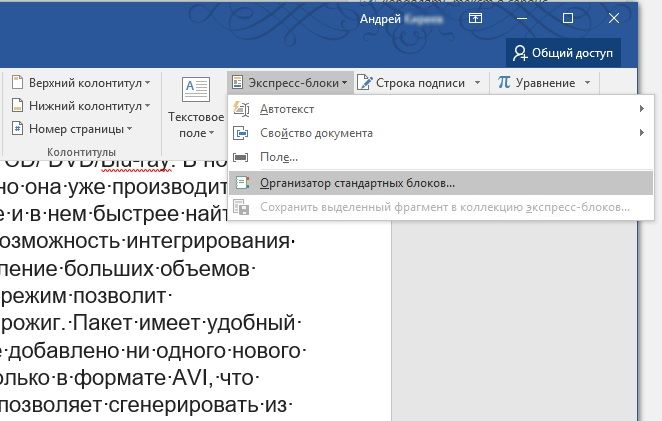
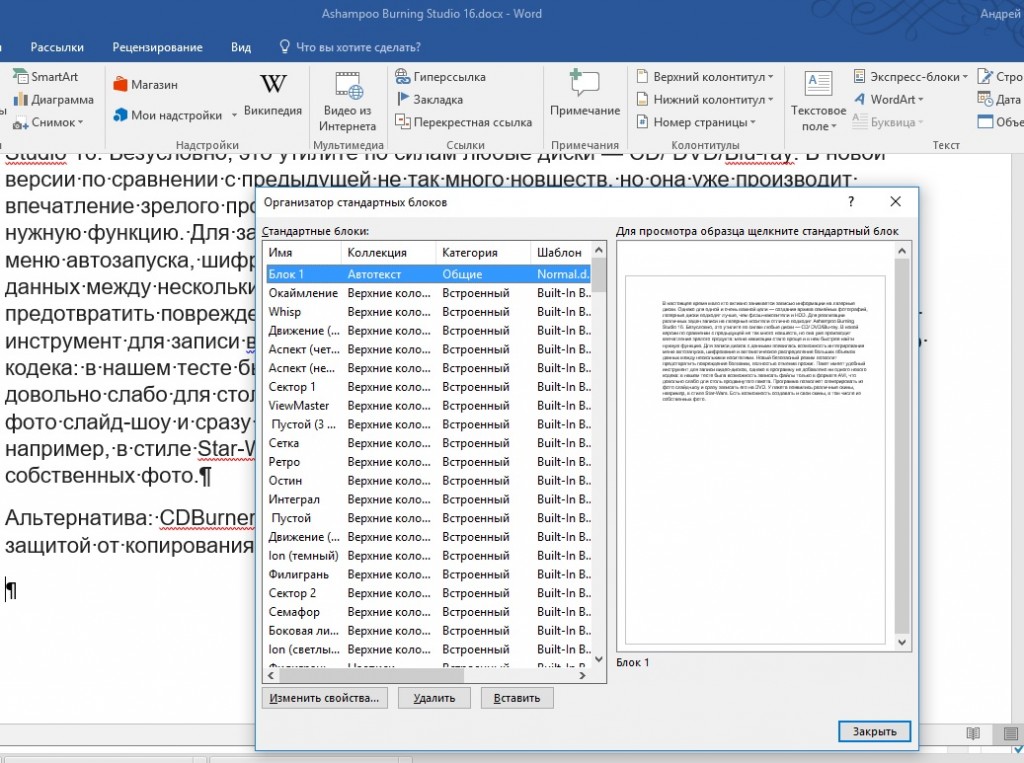
Для того чтобы в дальнейшем вызывать этот блок с помощью буквенного сокращения, во вкладке «Вставка» нажмите на кнопку «Экспресс-блоки» и вызовите «Организатор стандартных блоков…».
После нажатия на «Изменить свойства…» в окне «Изменение стандартного бока» в поле «Имя» введите сокращение для соответствующего блока. Для вставки блока вы просто вводите сокращение в документе Word и нажимаете кнопку [F3].
Фото: компания-производитель
A text box is a graphical container that holds text and works like a minidocument you can place anywhere within a regular document. Although it holds text, a text box itself is actually a graphic; the text it contains is independent from the document’s body text. You can format a text box’s text in most of the same ways you can format a document’s normal text. But because the box is a shape, you can drag it to a different position, resize it, and format it like other shapes.
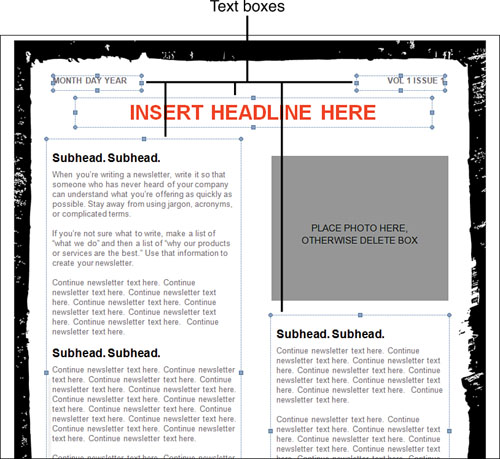
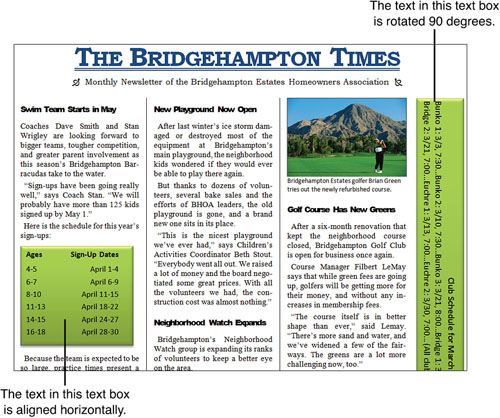
The text box is one of the secret weapons of great document layouts. In fact, lots of multicolumn documents, such as the newsletter template shown in Figure 1, don’t use columns at all. Instead, they are laid out with text boxes. In the figure, the newsletter is just a series of text boxes, sized and formatted in different ways, but neatly arranged to imitate a two-column design.
Figure 1. A newsletter template laid out with text boxes rather than columns. Each text box is indicated by its handles and borders.
The following sections show you how to insert a text box into a document, resize and move it, format the box itself and the text inside it, and other cool tricks.
Inserting a Text Box
You can create a text box in two ways. The first (and quicker) way is to insert a building block that is already formatted. The second (and slower) way is to draw a text box with your pointer and do all the formatting yourself. Either way, when a text box is selected, the Drawing Tools Format tab appears on the Ribbon and the text box is surrounded by a thin border and selection/sizing handles.
Creating a Text Box from a Building Block
If you create a text box from a building block, most of the work is done for you. The building blocks used for text boxes are preformatted with a border (and sometimes a fill) that coordinates with the document’s theme colors. The text is already formatted, too. All you need to do is add your own text. Here’s how to create a text block from a building block:
|
1. |
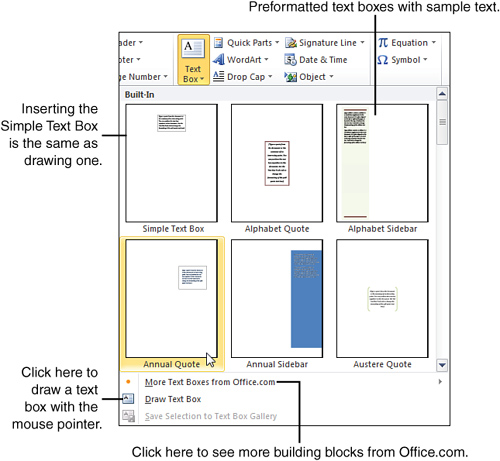
On the Insert tab, click Text Box. A menu drops down, showing thumbnail versions of Word’s built-in building blocks for text boxes, as shown in Figure 2. Figure 2. Selecting a building block from the Text Box menu. |
|
2. |
In the Built-In section of the menu, click one of the thumbnails. The new text box contains sample text, so you can see how it is formatted. The sample text is selected so you can delete it or type over it. If you select the Simple Text Box building block, Word inserts a box in the middle of the page, in front of the document’s text. If you select any other building block, it is inserted as shown in the Text Box menu; the document’s text wraps around the block according to that block’s default text wrapping setting. |
|
3. |
Press Del to delete the sample text from the box. A blinking insertion point appears in its place. |
|
4. |
Type your text into the text box. |
|
5. |
Click outside the text box to deselect it. |
If you want to see more building blocks, click More Text Boxes From Office.com on the Text Box menu. A submenu pops out, showing a selection of text boxes available from the Office.com website. Click any building block to add it to the document.
Drawing a Text Box
You can draw a text box with your pointer, but you’ll have to do all the formatting when you’re done. Here’s how to draw a text box:
|
1. |
On the Insert tab, click Text Box. |
|
2. |
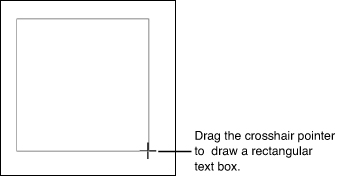
Click Draw Text Box. The pointer changes to a crosshair. |
|
3. |
Drag the pointer to draw a box, as shown in Figure 3. When you release the mouse button, the insertion point appears inside the finished text box. Figure 3. Drawing a text box. |
|
4. |
Type your text into the text box. |
|
5. |
Click outside the text box to deselect it. |
When you draw a text box, Word inserts the box wherever you draw it and places the box in front of the document’s text.
Resizing a Text Box
The way you can resize a text box depends on how you created it:
- If you drew the box (or inserted the Simple Text Box building block), resize it by doing any of the following:
- Drag any of its handles.
- On the Format tab, click the Size button; then use the Height and Width spin controls to set specific dimensions for the box.
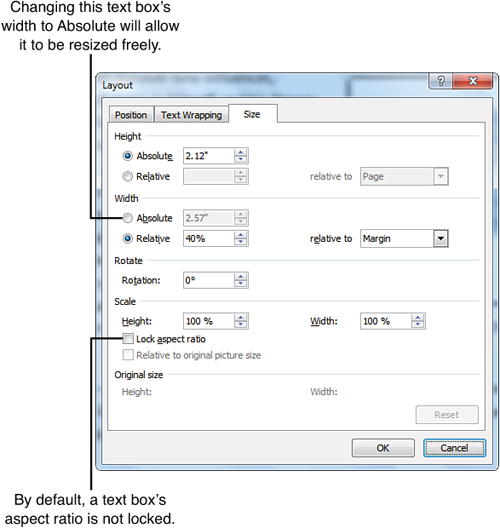
- Click the Size group’s dialog box launcher to open the Layout dialog box. On the Size tab, set specific dimensions in the Height and Width sections, or use the Scale section to set the text box’s size as a percentage of its current size. Click OK when you finish.
- If you created the text box from a building block, its sizing options may be restricted, as shown in Figure 4. If you can’t resize the box by dragging its handles or by using the Size tools on the Format tab, open the Layout dialog box. On the Size tab, click Absolute in both the Height and Width sections; then click OK. Now you can resize the box as if it were drawn.
Figure 4. By default, a building block’s height or width may be set to Relative, restricting your ability to resize it.
For some building blocks, the height and/or width may be set to Relative in the Layout dialog box. The Relative option ensures that the box’s height or width always stays in proportion to some aspect of the page. For easy resizing, change the text box’s Height and Width options to Absolute.
By default, a text box’s aspect ratio is not locked; if you leave it that way, you can resize the text box freely by dragging.
Moving a Text Box
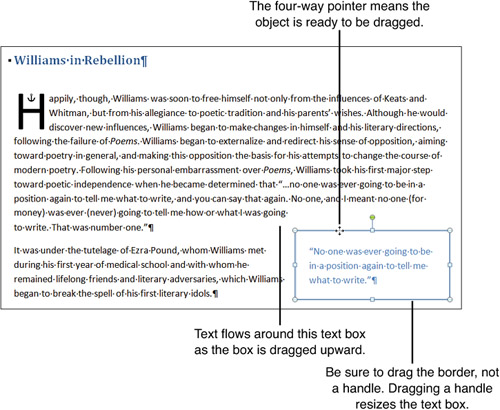
To move a text box, click its border and drag it to a new location, as shown in Figure 5. If the text box was created from a building block (other than the Simple Text Box building block), the document’s text wraps around the box as determined by the building block’s text wrapping setting.
Figure 5. Moving a text box by dragging its border.
If you created the box by drawing it or by using the Simple Text Box building block, the box appears in front of the document’s text. You can change this by applying a different text wrapping option to the text box. Then you can move the text box by dragging.
Formatting a Text Box
A text box is basically the same thing as an AutoShape (a rectangle), but this shape is special because it’s already set up to hold text. You can format a text box by using the shape-formatting tools on the Format tab.
By default, Word formats a text box with an outline and a fill. The outline and fill can be the same or different colors, or you can apply a special effect to either one. However, in some cases, it’s a good idea to remove both the outline and the fill. For example, if your document has a colored background, you can make the background show through the text box by removing its shape formats. If you ever use text boxes for laying out a page (as shown back in Figure 1), the document will look cleaner if you omit the fills and outlines from the text boxes.
Formatting Text in a Text Box
Text in a text box is basically the same as text in a document; it just fits in a smaller space. A text box can hold multiple paragraphs, including numbered and bulleted lists. You can format a text box’s text in just about all the same ways you format a document’s body text. Select the text in the box; then apply formats from the Font and Paragraph groups of the Home tab. Text in a text box can be formatted with styles, too.
You can also do a couple of neat tricks with a text box’s text:
- Change text direction: By default, text is aligned horizontally in a text box. You can set text to run vertically, reading either from top to bottom (rotated 90 degrees) or from bottom to top (rotated 270 degrees). Figure 6 shows an example of how rotated text can be used to create a cool effect and make use of limited page space. To change text direction, click the text box to activate the Format tab, click Text Direction, and then choose an option from the drop-down menu.
Figure 6. In the text box along the right-hand edge of this newsletter, the text is rotated 90 degrees.
- Change text alignment: You can vertically align text at the top, center, or bottom of a text box. To set the alignment, go to the Format tab, click Align Text, and then choose an option from the drop-down menu.
Linking Text Boxes
You can use multiple text boxes to create fancy or complicated-looking layouts. For example, if you’re designing a multicolumn document but don’t want to mess with columns, you can use text boxes instead. Or if you want to create a boxed “sidebar” that spans two pages of a document, you can use two text boxes (one on each page) to hold the sidebar’s content.
The key to tricks like this is linking. When you link two or more text boxes, Word treats them as though they are a single box. When you fill the first box with text, just keep typing; the text jumps to the next box and continues there.
Creating Linked Text Boxes
To make the linking process easy, start by creating all the text boxes you’re going to need. Here’s a simple example:
|
1. |
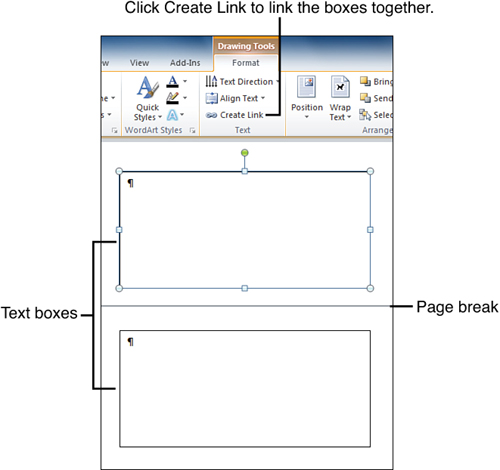
Create two text boxes. Figure 7 shows two empty text boxes; the first is at the bottom of one page, and the second is at the top of the following page. Figure 7. Two text boxes, ready for linking. |
|
2. |
Click the first text box. The Format tab appears on the ribbon. |
|
3. |
Click Create Link. The mouse pointer changes to the shape of a pitcher. |
|
4. |
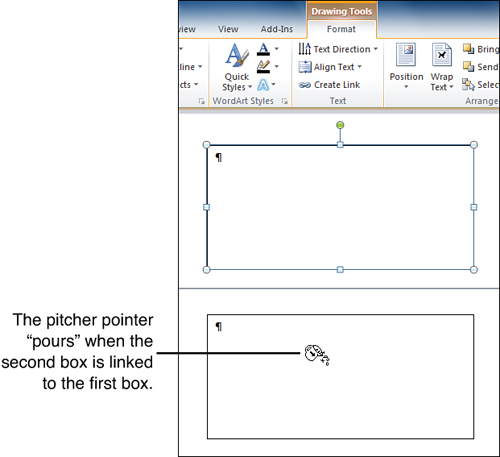
Point to the second text box, and notice that the pitcher is tilted to look like its contents are pouring into the second text box, as shown in Figure 8. Figure 8. Linking the second text box to the first one. |
|
5. |
Click the second text box. It is now linked to the first text box. |
The linking process goes a little differently if you need to link three or more boxes. Suppose you have four boxes; in this case, you would start by linking box 3 to box 4, then link box 2 to box 3, and finally link box 1 to box 2. Sounds crazy, but it works
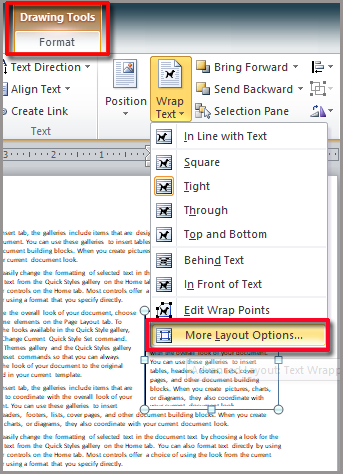
If by “lock” you mean to lock the position so that your text box moves with the text, you do that with the Text Wrapping dialog box.
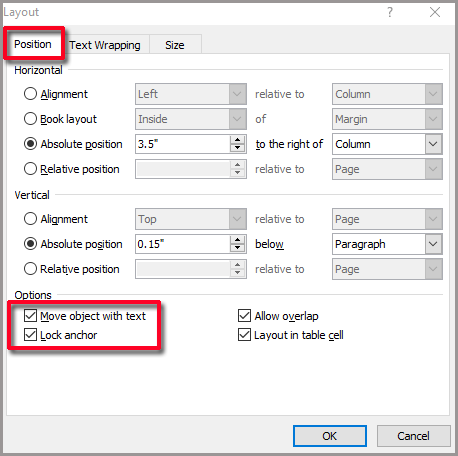
On the Position tab there are two settings at the bottom: Move object with text and Lock anchor.
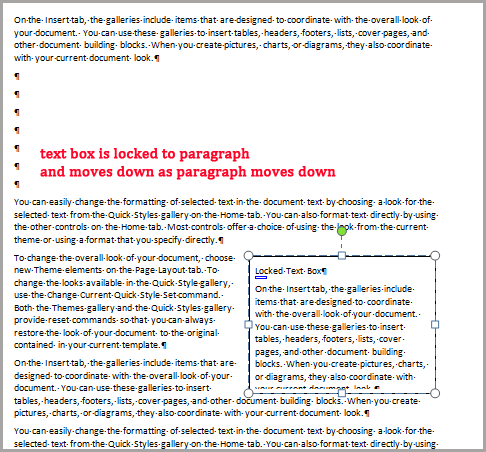
With these two options selected, this is what happens with my text box when I add more text to the preceding paragraphs.
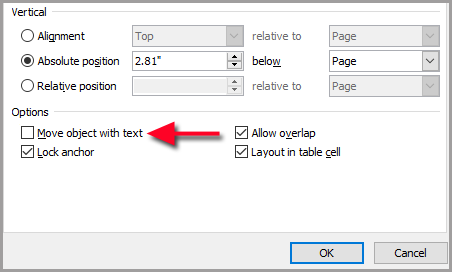
In this example, I unselect Move object with text, but leave Lock anchor selected.
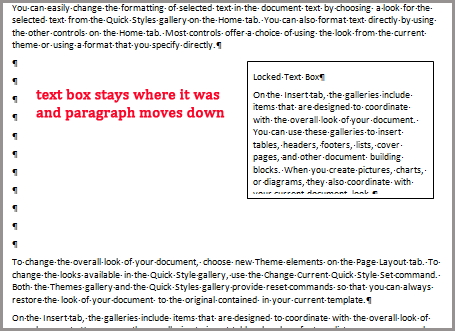
See the difference when the paragraph is moved down. The text box remains locked where it was on the page.
If, on the other hand, you want to lock the box and the text inside of it you can use the Restrict Editing feature. On the Review tab click on Restrict Editing.
If the Restrict Editing option does not appear, you may have to enable the display of the Developer tab.
Once you click on Restrict Editing, the Restrict Editing pane will appear.
First, press Ctrl+A to select the entire document, even if there isn’t much text yet. Now while leaving the document selected, Ctrl+click on the text box to unselect it.
Then, check the number 2 box – Editing restrictions and make sure that no changes are enabled.
In the Exceptions section click on Everyone. This will allow everyone to make changes to the area you just selected within the body of the document.
Now click on Yes, Start Enforcing Protection.
You will be prompted for a password, which is optional. (If you assign one, make sure you remember it or you will never to able to edit this textbox again!) Once you click on OK for the password, the Restrict Formatting and Editing pane will show the following options. You can unselect Highlight the regions I can edit so that the yellow markings disappear.
Now users will be able to edit the document but not touch the textbox.
Hope one of these answered your question.


