Create a new workbook
A workbook is a file that contains one or more worksheets to help you organize data. You can create a new workbook from a blank workbook or a template.
Create a workbook
-
Open Excel.
-
Select Blank workbook or press Ctrl+N.
-
Start typing.
Create a workbook from a template
-
Select File > New.
-
Double-click a template.
-
Click and start typing.
Open a new, blank workbook
-
Click the File tab.
-
Click New.
-
Under Available Templates, double-click Blank Workbook.
Keyboard shortcut To quickly create a new, blank workbook, you can also press CTRL+N.
Tips:
-
By default, a new workbook contains three worksheets, but you can change the number of worksheets that you want a new workbook to contain.
For more information, see Change the number of worksheets in a new workbook.
-
You can also add and remove worksheets as needed.
For more information about how to add or remove worksheets, see Insert or delete a worksheet.
Base a new workbook on an existing workbook
-
Click the File tab.
-
Click New.
-
Under Templates, click New from existing.
-
In the New from Existing Workbook dialog box, browse to the drive, folder, or Internet location that contains the workbook that you want to open.
-
Click the workbook, and then click Create New.
Base a new workbook on a template
-
Click the File tab.
-
Click New.
-
Do one of the following:
-
To use one of the sample templates that come with Excel, under Available Templates, click Sample Templates and then double-click the template that you want.
-
To use a recently used template, click Recent Templates, and then double-click the template that you want.
-
To use your own template, on the My Templates, and then on the Personal Templates tab in the New dialog box, double-click the template that you want.
Note: The Personal Templates tab lists the templates that you have created. If you do not see the template that you want to use, make sure that it is located in the correct folder. Custom templates are typically stored in the Templates folder, which is usually C:Usersuser_nameAppDataLocalMicrosoftTemplates in Windows Vista, and C:Documents and Settingsuser_nameApplication DataMicrosoftTemplates in Microsoft Windows XP.
-
Tip: To obtain more workbook templates, you can download them from Microsoft Office.com. In Available Templates, under Office.com Templates, click a specific template category, and then double-click the template that you want to download.
Need more help?
You can always ask an expert in the Excel Tech Community or get support in the Answers community.
See Also
Insert or delete a worksheet
Need more help?
Want more options?
Explore subscription benefits, browse training courses, learn how to secure your device, and more.
Communities help you ask and answer questions, give feedback, and hear from experts with rich knowledge.
Summary: Read this blog to understand what causes the Excel 2016 opens blank workbook when opening file issue. Also, it mentions the solutions to fix this issue. Also, you’ll find an Excel file repair tool that can quickly restore your Excel workbook with complete data.

When opening a Microsoft Excel 2016 workbook by double-clicking on it, you may find that Excel displays a blank workbook. More precisely, just a blank grey screen appears instead of the file you expect to see. Such an issue can be caused by something as simple as a messed up Excel ‘Preferences’ settings or something more complicated like underlying corruption in the workbook. Regardless of what causes the issue, you can fix it using some simple solutions mentioned below.

Figure 1 – Excel 2016 Blank Workbook
Solutions to Fix the ‘Excel 2016 Opening Blank Workbook’ Issue
Following are some solutions you can try to fix the ‘Excel 2016 blank screen when opening file’ problem.
Note: Before trying these solutions, make sure that the sheet you’re trying to open is not hidden. To locate hidden sheets in Excel, go to ‘View’ tab and check if the Unhide option is greyed out. If not, unhide your workbook.
Solution 1: Copy the Data to a New Workbook
Instead of clicking on the file name to open Excel spreadsheet, try opening it from Excel. For this, start Excel and click File > Open > Computer > Browse to locate the file. If it opens, copy and paste the file data to a new workbook.
Note: The solution might help you regain access to the file data but the problem may persist.
Solution 2: Uncheck the ‘Ignore DDE’ Option
When a user double-click an Excel workbook in Windows, a dynamic data exchange (DDE) message is sent to the Excel application, instructing it to open that workbook. If the DDE message is set to be “ignored” in Excel, double-clicking a workbook will open a blank screen. So check the value of this setting and uncheck the “ignore DDE” option (if enabled). Follow these steps:
- In Microsoft Excel, click on File > Options. This will open the ‘Excel Options’ window.

Figure 2 – Excel File Options
- On the ‘Excel Options’ window, click Advanced and scroll down to the General section.

Figure 3 – Locate General Section from Excel Advanced Settings
- Uncheck the box next to “Ignore other applications that use Dynamic Data Exchange (DDE)”.

Figure 4 – Uncheck DDE Option
- Click on OK.
Solution 3: Disable Hardware Graphics Acceleration for MS Excel Workbooks
Excel workbooks often demonstrate unanticipated symptoms, especially if you are using graphics (like advanced charts) in your Excel sheets.
The ‘Excel open blank workbook’ error may occur if the graphics card of your computer won’t function properly due to problem with hardware acceleration. To fix this, turn off hardware acceleration for MS Excel by following these steps:
- In MS Excel, click on File > Options to open the ‘Excel Options’ window.

Figure 5 – Open Excel Options Window
- Click on the Advanced tab and then locate Display section.

Figure 6 – Locate Display Section from Excel Advanced Settings
- Check the box next to “Disable hardware graphics acceleration”.

Figure 7 – Disable Graphics Hardware Acceleration
- To apply the changes you’ve made, click OK.
Solution 4: Reset Excel Workbook File Associations
Verify if the file associations in the system are performing correctly and reset the ones pertaining to Excel to their default settings. To do this, follow these steps:
- For Windows 10
- Open Windows 10 settings.
- From the ‘Settings’ screen, click on Apps.

Figure 8 – Open Windows 10 Apps
- From the ‘App Settings’ window, click Default Apps and then click the Reset button under ‘Reset to the Microsoft recommended defaults’.

Figure 9 – Reset File Associations to MS Recommended Defaults
Executing these steps will reset all of the Excel file associations to the Microsoft recommended default apps in Windows 10.
- For Windows 8/ Windows Vista/ Windows 7
- Click on Control Panel, select Programs, and then click on Default Programs.

Figure 10 – Open Default Programs
- Click on ‘Set your default programs’ to open currently installed programs.
- Select Excel from the list of default programs and then click ‘Choose default for this program’.
- In the ‘Set Program Associations’ window, click on Select All and then hit the Save button.
Solution 5: Repair MS Office Installation
If the above solutions fail to resolve the issue, your MS Office installation might be damaged. Try repairing it using the following steps:
- Open Control Panel and select Programs and Features.
- Select ‘Microsoft Office’ in the programs list and then click the Repair option.
- If prompted, click on Continue.
Note: This process can take a little time to complete. Do not interrupt it before it is completed.
Also read: Excel AutoRecover not Working, What is Next?
Solution 6: Repair Blank Excel Workbook with Excel Repair Software
If the Excel 2016 opens blank screen problem persists, the Excel workbook you’re trying to open might be severely damaged. In this case, repair the Excel workbook by using Stellar Repair for Excel software. The software can fix all types of Excel errors and restore all tables, charts, cell comments, images, formulas, sorts, and filters to a new working Excel workbook. You can free download the tool’s demo version to scan and preview recoverable data from the file.

Read this: How to repair corrupt Excel file using Stellar Repair for Excel?
Conclusion
If you’re facing the Excel 2016 opens blank workbook when opening file issue, try resolving the issue by implementing the solutions discussed in this blog. However, if the manual solutions doesn’t fix the problem, you can rely on Stellar Repair for Excel software to repair and restore your .XLS/.XLSX workbook following a few simple steps. Also, it helps recover complete workbook data.
About The Author
Priyanka
Priyanka is a technology expert working for key technology domains that revolve around Data Recovery and related software’s. She got expertise on related subjects like SQL Database, Access Database, QuickBooks, and Microsoft Excel. Loves to write on different technology and data recovery subjects on regular basis. Technology freak who always found exploring neo-tech subjects, when not writing, research is something that keeps her going in life.
Best Selling Products

Stellar Repair for Excel
Stellar Repair for Excel software provid
Read More

Stellar Toolkit for File Repair
Microsoft office file repair toolkit to
Read More

Stellar Repair for QuickBooks ® Software
The most advanced tool to repair severel
Read More

Stellar Repair for Access
Powerful tool, widely trusted by users &
Read More
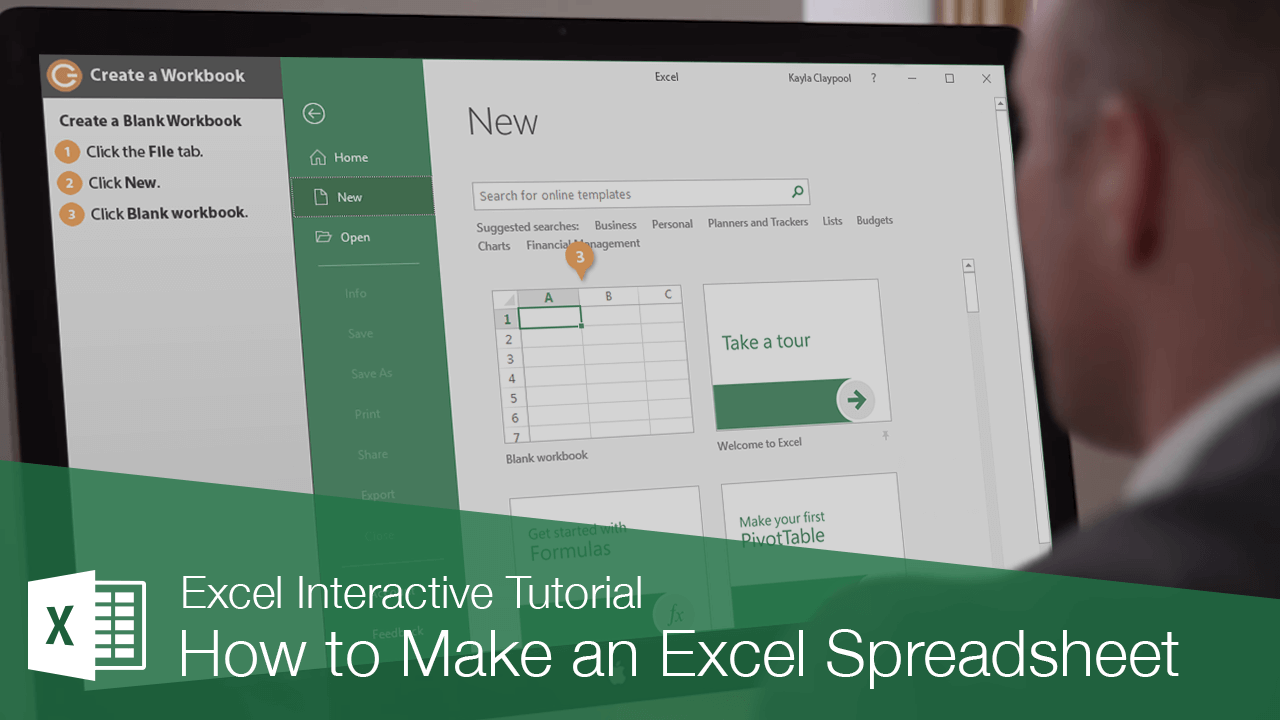
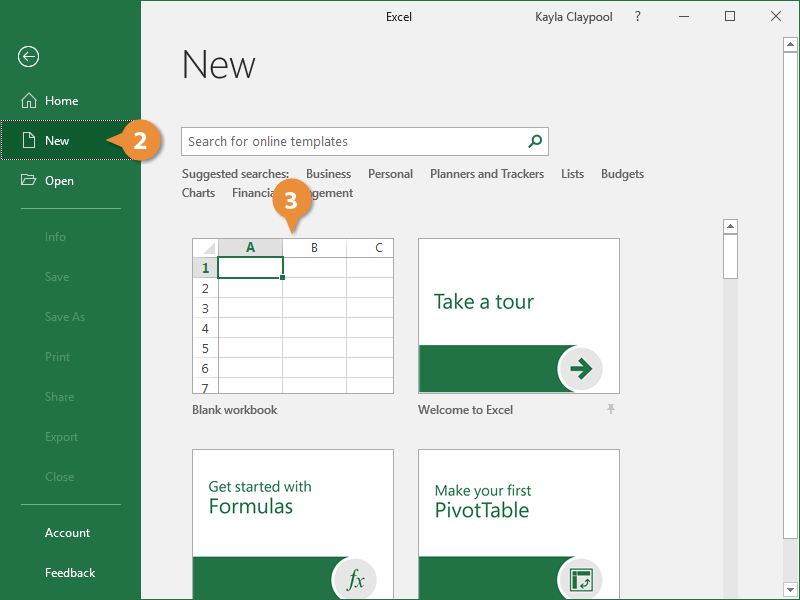
Creating a new workbook is one of the most basic commands you need to know in Excel. You can create a new, blank workbook or create a new workbook based on a variety of pre-designed templates.
Create a Blank Workbook
Most of the time you’ll want to create a blank workbook.
- Click the File tab.
- Click New.
- Select Blank workbook.
Press Ctrl + N to quickly create a new blank workbook.
A new, blank workbook is created, and you can start entering data.
Create a Workbook from a Template
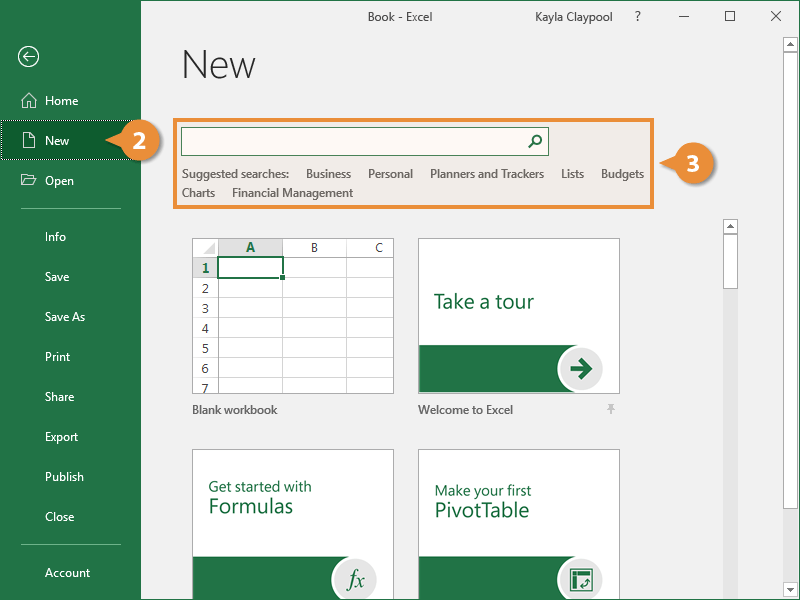
If you need help getting started with a common document, such as an invoice, expense report, or calendar, you can use one of Excel’s templates instead of starting from scratch.
- Click the File tab.
- Click New.
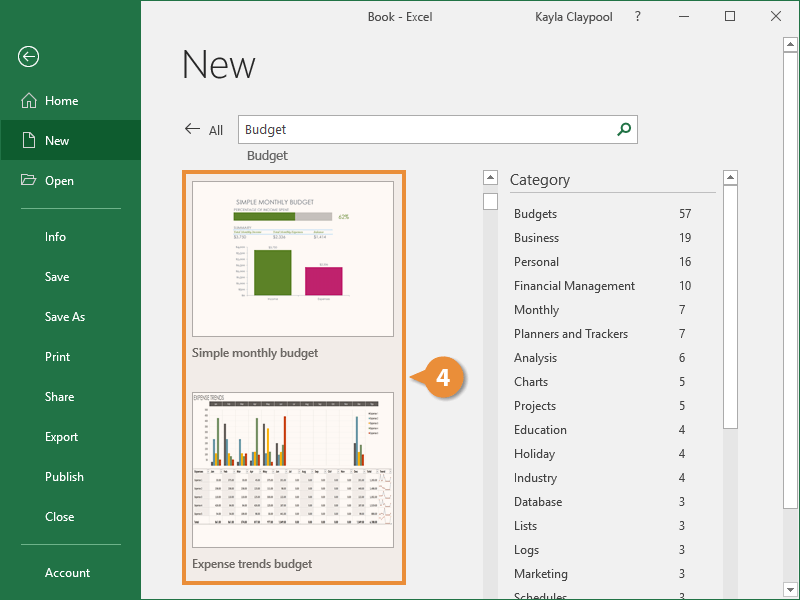
- Find the template you want by:
- Searching for the type of template you want, using keywords that describe it, such as “calendar” or “invoice”.
- Clicking a suggested search, located below the search field.
- Selecting the template you want, if it already appears on the page.
- Select a template style.
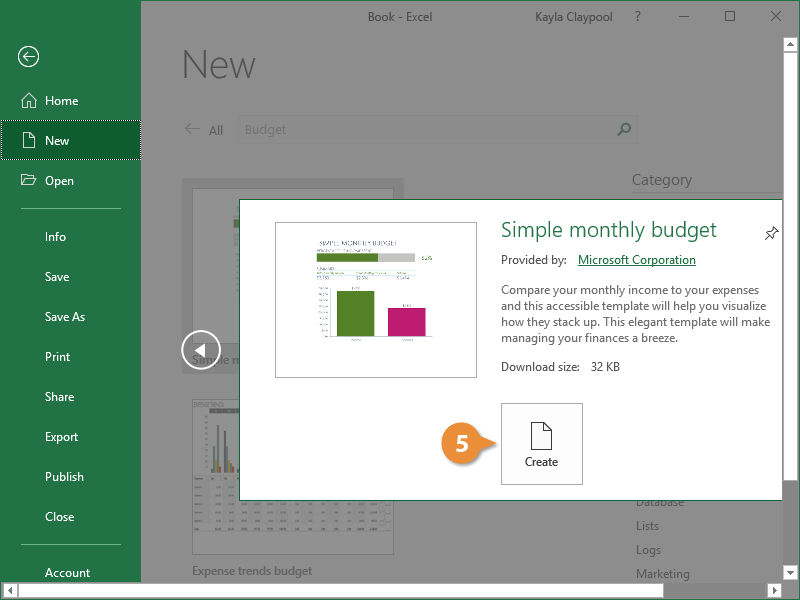
- Click Create.
Excel will create a new workbook, based on the template you select.
A new workbook is created from the template, and you can start populating it with your own data.
FREE Quick Reference
Click to Download
Free to distribute with our compliments; we hope you will consider our paid training.
Open an Existing Workbook | Close a Workbook | Create a New Workbook | Turn off the Start screen
A workbook is another word for your Excel file. When you start Excel, click Blank workbook to create an Excel workbook from scratch.
Open an Existing Workbook
To open a workbook you’ve created in the past, execute the following steps.
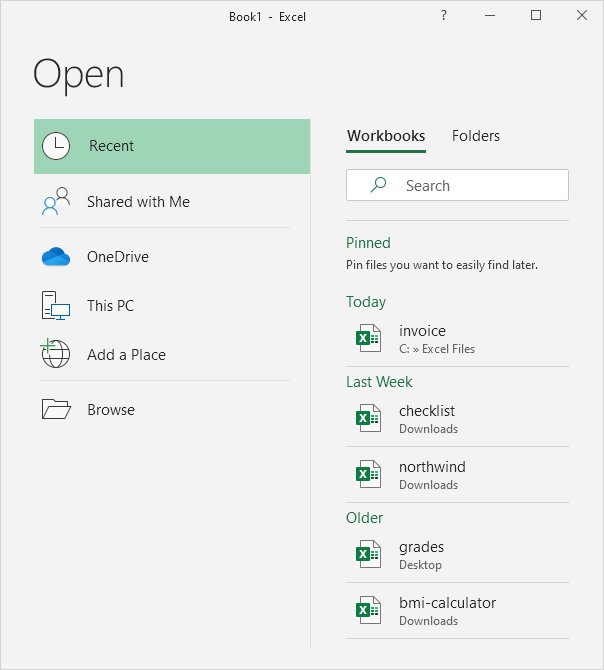
1. On the File tab, click Open.
2. Recent shows you a list of your recently used workbooks. You can quickly open a workbook from here.
3. Click Browse to open a workbook that is not on the list.
Close a Workbook
To close a workbook (and Excel), click the upper right X. If you have multiple workbooks open, clicking the upper right X closes the active workbook.
Create a New Workbook
Sometimes you want to start all over again. To create a new workbook, execute the following steps.
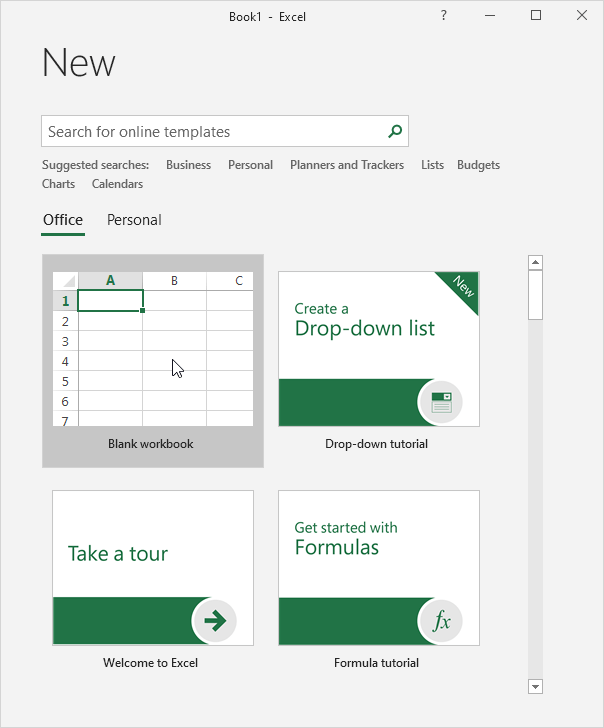
1. On the File tab, click New.
2. Click Blank workbook.
Turn off the Start screen
When you start Excel, it shows a start screen that lists recently used Excel files and templates. To skip the start screen and always start with a blank workbook, execute the following steps.
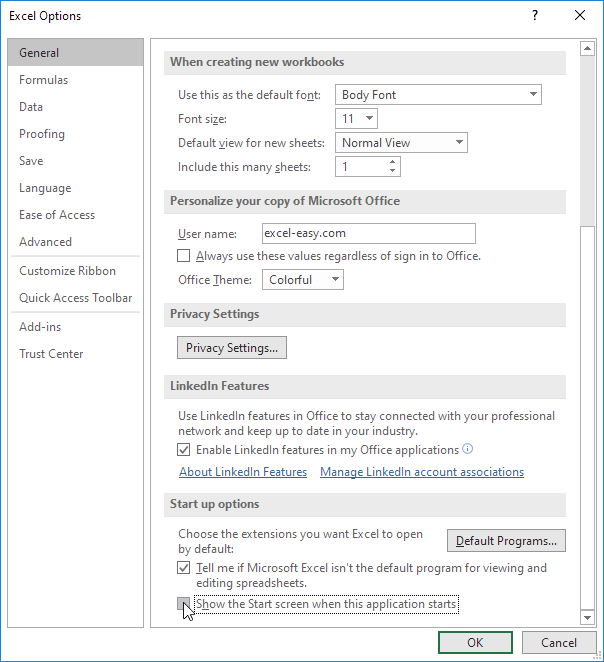
1. On the File tab, click Options.
2. Under Start up options, uncheck ‘Show the Start screen when this application starts’.
3. Click OK.
Updated: 03/06/2020 by
Sometimes, when a user opens a saved workbook or document, it is blank. This issue is often caused when Excel’s settings are changed (usually inadvertently) to ignore external programs. To learn how to fix this issue, try the following suggestions below.
Uncheck «Ignore DDE» option
- Open Microsoft Excel.
- In the Ribbon, click the File tab and click Options in the left navigation pane.
- Click Advanced, then locate the General section.
- Uncheck the box next to Ignore other applications that use Dynamic Data Exchange (DDE).
- Click OK.
Disable hardware graphics acceleration in Excel
Sometimes, Excel has issues opening an Excel file and displaying the data due to hardware acceleration for the graphics card in the computer. You can disable the hardware graphics acceleration in Excel by following the steps below.
- Open Microsoft Excel.
- In the Ribbon, click the File tab and click Options in the left navigation pane.
- Click Advanced, then locate the Display section.
- Check the box next to Disable hardware graphics acceleration.
- Click OK.
Reset Excel file associations
Windows 10 and 11
- Open the Start menu and select the Settings option.
- Click the System icon or option.
- In the «Find a setting» search field at the top, type default apps and click the Default apps option in the search results.
- Scroll down to find and click the Reset button.
Tip
The steps above reset the default file associations for Microsoft applications. If you want to select/change file associations manually, in step #3 above, select the Choose a default app by file type or similar option in the search results. You can then associate Microsoft Excel to the various Excel file types (e.g., .xlsx, .xlsm, etc.)
Windows 8
- On the Start screen, type Control Panel and open the Control Panel.
- Click the Default Programs option, then click the Set your default programs option.
- Select Excel and click the Choose defaults for this program option.
- In the Set Program Associations window, select the Select All option and click the Save button.
Windows Vista and 7
- Open the Start menu and click the Control Panel option.
- Click the Default Programs icon, then click the Set your default programs option.
- Select Excel in the Programs list on the left side, then click the Choose defaults for this program option at the bottom.
- In the Set Program Associations window, click the check box for Select All and click the Save button.
You can also select a file type association specifically for Excel worksheets only by following the steps below.
- Open the Start menu and click the Control Panel option.
- Click the Default Programs icon, then click the Associate a file type or protocol with a specific program option.
- In the Set Associations window, under the Description column, find and select the entry for Microsoft Excel Worksheet. Click the Change program button at the top-right.
- In the Open with window, under the Recommended Programs section, select the Excel option (might be named «Excel (desktop)» or similar) and click the OK button.
Tip
You may also want to perform the steps above for the Excel 97-2003 Worksheet file type.
Disable add-ins
Microsoft Excel may use add-ins to provide additional features and functionality. These add-ins sometimes cause problems with opening Excel spreadsheet files. Disabling these add-ins may fix the issue of an Excel file opening as a blank workbook.
- Open Microsoft Excel.
- In the Ribbon, click the File tab and click Options in the left navigation pane.
- Click Add-ins on the left side of the Options window.
- In the Manage drop-down list at the bottom, select COM Add-ins and click Go.
- Uncheck the box next to one of the add-ins that is currently enabled (box is checked) and click OK.
- Close Microsoft Excel, then open the Excel file again.
- If the problem is not fixed, repeat steps 2-6 again, unchecking the box for another COM add-in in step 5. Repeat until the issue is fixed or all COM add-ins are unchecked.
- If the problem continues after disabling all COM add-ins, repeat steps 2-6, but select Excel Add-ins in step 4. Uncheck the box for one enabled add-in, test, and repeat until the issue is fixed or all Excel add-ins are unchecked.
Repair Microsoft Office
The Microsoft Office application, and specifically the Excel application, may not be functioning properly, requiring you to repair it. To repair Microsoft Office, follow these steps.
- Open the Control Panel in Windows.
- Click the Programs and Features option.
- Select the Microsoft Office option in the programs list, then click the Repair option above the programs list.
Note
For Microsoft Office 365, you need to click the Change option above the programs list, select the Online Repair option on the next screen, then select the Repair option.
- If prompted, click the Continue option or button.
Allow at least several minutes for the repair process to complete. There should be a small window with a progress bar to show you the repair status.


