
Formatting is all about adding visual touches to a document to make it easier to read and look more appealing.
Want more?
Basic tasks in Word 2013
What’s new in Word 2013
Our document is okay for a rough draft, but we can’t really call it finished without some formatting.
Formatting is all about adding visual touches to a document to make it easier to read and look more appealing.
Let’s start by doing something to make the heading stand out.
Select the heading. Then, right-click the selection, or just point to it, and the mini-toolbar pops up.
This is the quickest way to add formatting because it is right where you are working.
To find out what a button does, just hold the mouse over it.
Let’s click Bold, and then, move up to this button, and Increase Font Size.
If you want more formatting choices, you’ll find them on the ribbon.
Here you can add a Strikethrough, format the text as a Subscript or Superscript, and over here you have Paragraph formatting.
There are many choices, but in general the best and easiest way to format text is to use a Style.
Hold the mouse over an option to see a preview.
Styles are easy because you can apply a number of formatting options with one click.
And they are the best way to format, because they help you apply formatting consistently throughout your document.
The Paragraph group has some useful options, like Bullets and Numbering.
If you want to check them out, just select some text and click the buttons.
You won’t hurt anything, because you can always click the button again — to turn the option off.
These commands adjust paragraph alignment.
Let’s see what they do. Go to the second paragraph and click it three times to select it.
Now the paragraph is aligned Left. Watch what happens when I align it to the Center — now to the Right.
This last button justifies the text on both sides.
Let’s try one more formatting option. Click here to adjust Line Spacing.
The default Line Spacing is 1.15.
But you can single-space it, double-space it, or even triple-space it.
What if you want to change the spacing of the whole document?
Well, the best way to do that is to go to the DESIGN tab, and click Paragraph Spacing.
This does more than simply adjust line spacing to improve the overall look of your document.
I have one last button to show you, and it’s up here in this row of buttons called the Quick Access Toolbar.
It’s called Undo. It’s actually my favorite button, because it lets me experiment and make mistakes.
And all I have to do to bring it back to the way it was before is, click Undo.
There’s also a Redo button.
Up next, we’ll insert some things in the document.
![]()
Download Article
Learn the basics of formatting a Microsoft Word document
![]()
Download Article
- Formatting the Layout
- Formatting Text
- Adding Pictures, Graphs, & Tables
- Using a Formatted Template
- Saving in Other Formats
- Q&A
|
|
|
|
|
Microsoft Word is the world’s most popular word processing app. Depending on what kind of legal, formal, or personal paper you’re writing, each has its own formatting guidelines. Fortunately, Microsoft Word makes it easy to format the layout, text, and other objects in your document. If you’re new to using Microsoft Word, don’t worry. You can be formatting your document like a pro in no time. This wikiHow guide will teach you simple ways to format a Word document on your PC or Mac computer.
Things You Should Know
- You can find most of the formatting tools you’ll need in the Ribbon menu at the top of your document.
- If you don’t want to do all the formatting from scratch, try using one of Word’s premade templates.
- Save your document in different file formats using the Save a Copy or Save As menu.
-

1
Explore the Word user interface. You can access most of Word’s formatting tools from the Menu Bar or the Ribbon at the top of the window. You can modify which tools are visible using the View menu.
- The Menu Bar is the area at the top of the screen where you will find File, Edit, View, and other important menu commands.
- The Ribbon is at the top of your workspace and contains icons, menus, and shortcuts to common tasks.
-
2
Align your document. Different types of documents call for different text alignments. You can choose whether to align your entire document to the left, right, or at the center on the Home tab by clicking the Alignment buttons in the «Paragraph» section.
- These are the buttons that look like a small version of a document, with small black lines arranged according to their button’s alignment function.
- You can also adjust alignment by selecting the text and objects you want to align, right-clicking the selection, and choosing Paragraph. Select your preferred alignment from the Alignment menu under the General header.
- You can either set the alignment for the whole document or just a selected piece of text.
Advertisement
-
3
Set the line spacing of your document. Need to change your document to single or double-space? You can adjust the spacing of your entire document, or for selected text.
- If you haven’t begun typing or adding content to your Word document, click the Home tab, click the «Line and Paragraph Spacing» icon (a row of lines with vertical arrows to the left of the lines pointing up and down, and select an option.
- If your document already has text or other content, press Ctrl + A (PC) or Cmd + A (Mac) to select everything in the document, right-click the selection, and choose Paragraph. You can then choose your desired spacing from the «Line Spacing» menu.
- For a single-spaced document, choose 1.0. For double-spacing, choose 2.0.
- Many professional documents, like college essays and cover letters, should be double-spaced.
-
4
Adjust the page orientation. If you need to write the document in a different orientation, click the Layout tab at the top of Word, select Orientation, and choose either Portrait or Landscape.
-
5
Change the size of the paper. If you need to print the document on a specific paper size, click the Layout tab, click Size, and then select your desired size from the drop-down list.
- This will change the virtual size of the document you’re writing as well as the actual size of the printout.
-
6
Adjust the headers and footers. A header contains details that will appear on every page of the paper, such as page numbers, your name, or the document title.
- To set the header of your document, double-click on the topmost part of the page, and the header field will appear. You can also click the Insert tab and select Header.
- Footers are just like headers. All text in the footer will appear at the bottom of each page of your document. To set the footer, double-click on the bottommost part of the page, and the footer field will appear. You can also use the Footer button on the Insert tab.
- You can also format your headers and footers by selecting the View tab and clicking Header and Footer on the list. This action will open the headers and footers on your page and allow you to edit them.
-
7
Insert page or section breaks with the Breaks menu. Go to the Layout tab in the and click Breaks if you want to start a new page or section in your document. You can choose from a variety of types of breaks, including Page, Column, and Section. This is a very useful tool if you need to format different sections of your document in different ways.[1]
- For example, you can use section or page breaks to help you format your page numbers so that the numbering restarts with each new section.
-
8
Adjust the margin size with the Margins tool. Click the Margins button in the Layout tab and select a margin from the pre-defined margin settings listed on the drop-down list.
- If you want to use your own margin measurements, click Custom Margins at the very bottom of the drop-down list to set your own.
-
9
Add columns to split your text vertically on the page. If you need to create a newspaper-like document, you can do so by adjusting the format of the document to columns. Click the Layout tab, select the Columns option, and choose the number and alignment of columns from the drop-down list.
- The Columns button looks like a rectangle with two vertical columns of blue lines on it.
- If you want to create one, two, or three columns, you can do so from the preset options. If you’d like to create more, you’ll need to choose More Columns from the bottom of the dropdown menu.
- Note that this column option is different from the columns you get when you insert items like tables on your document.
-
10
Add bullets and numbers to make lists. Highlight the text that you would like to be numbered or bulleted and click the Numbering or Bullets button on the Home tab of the Ribbon.
- These buttons can be found side by side on the Ribbon, near the alignment buttons. The Numbering button displays three small lines with numbers to the left of the lines and the Bullets button displays three small lines with bullet points to the left of the lines.
- There’s also a third button that allows you to create more elaborate multi-level list styles, which is useful for formatting outlines.
-
11
Experiment with document styles. All documents have standard built-in styles (for example, Normal, Title, Heading 1). The default style for text is Normal. The template that a document is based on (for example, Normal.dotx) determines which styles appear on the Ribbon and on the Styles tab. You can see the current style presets for your document in the Home tab of the Ribbon.
- Before you apply a style, you can see all of the available styles and preview how they will appear when applied.
- On the Home tab, click a style to apply it to selected text.
- Click the Styles Pane button (the arrow pointing down and to the right) to view and select from advanced Style options.
- By default, Word applies a paragraph style (for example, Heading 1) to the entire paragraph. To apply a paragraph style to part of a paragraph, select only the specific part that you wish to modify.
-
12
Reveal hidden formatting symbols if you’re having trouble. Word documents often contain hidden code that can cause frustrating problems when you’re trying to modify your formatting. For instance, an invisible extra paragraph mark or section break can create unwanted spaces between paragraphs or lines of text. To see formatting symbols that are normally hidden so you can delete or modify them, you can click the ¶ button in the Home tab, or try one of the following:[2]
- On Windows, open File, select Options, and click Display. Tick the box next to Show all formatting marks.
- In Word for Mac, open the Word menu, then Preferences, then View. Check the box next to All in the Show Non-Printing Characters section of the View menu.
-
13
Use the View menu to change your view of the document. The View menu can let you change how your document looks in Word without actually making changes to the format. For example, Print Layout will show approximately what your document will look like when it’s printed out, while Web Layout will display the whole document in one long chunk without any page breaks.
- The View menu also lets you zoom in and out on your document.
- You can also change your view with the buttons and zoom slider at the bottom right side of the document pane, or with the View tab in the Ribbon.


Advertisement
-
1
Change the font face. On the Home tab, you will a drop-down menu containing a list of fonts to choose from. Use your mouse to select the text you want to change, then choose a font from the list.
-
2
Change font size and color. Also on the Home tab, you can change the size, color, and highlighting for your font. Select the text you want to format, then choose your options.
- By default, they will be set to the size and font associated with your document’s current Style settings. For example, if you’re using Word’s default template, the Normal style will use Calibri as the default font and 12 pt. as the default text size.
- Always consider the formatting guidelines of the document you are writing when choosing the font style and size.
- The standard font for most college and professional papers is Times New Roman font, text size 12.
-
3
Make text bold, underlined, or italicized. Besides setting the font style and size, you can also adjust the emphasis of words and lines in your document. Near the font and text size menus, you will see the Bold, Italics, and Underline buttons.
- Just click the buttons to make your text bold, underlined, or italicized.
- In this section, you can also find special text formatting options such as Strikethrough, Subscript, and Superscript.
-
4
Highlight text on the page. If you would like to change the background color behind selected text, similar to using a highlighter on a printed page, click the Text Highlight icon, which is a pen above a colored line.
- You can also add special text effects with the Text Effects button, which looks like a capital A with a glowing blue border.


Advertisement
-
1
Drag an image into your document. This is a quick way to add a picture to your Word document. Simply select an image on your desktop and drag and drop it into the document window. Make sure your image is placed exactly where you want it before you drop it.
- You can also insert an image by going to the Insert tab, then clicking Pictures. Select one of the options to browse for images on your computer, the web, or Word’s gallery of stock photos.
- You can also insert graphics or other media (such as video or audio clips) using the Shapes, Icons, or 3D Models, and Media buttons.
-
2
Enable text wrapping. Text wrapping changes the layout of your document, allowing the text to flow around the image no matter where it is placed. To turn on text wrapping:
- Right-click (or ctrl-click, on a Mac) on the image and hover over Wrap Text. Select the alignment that best suits your document. You will see a preview as you hover over each option.
- To change the location of the image in the document, select the image and then hold the Ctrl key. While holding the key, use the arrow keys to move the picture around the document.
- When you right-click or ctrl-click your image, you’ll also see an option in the context menu to add a caption under your image.
-
3
Edit your image in the Picture Format tab. Once you insert your image, you can select it to open a new Picture Format tab in the ribbon. From there, you can choose from a variety of tools, such as:
- Making corrections or adding artistic filters to the image
- Adding style effects, such as a drop shadow or frame, to the picture
- Entering alt text
- Tweaking the position of your image or changing the text-wrap settings
-
4
Add a graph or chart in the Insert tab. Click the Insert tab on the Ribbon, and then click the Chart option. Choose your preferred type of graph, such as a pie or bar chart, from the dropdown menu.
- Depending on the type of chart or graph you choose, Word may automatically launch Excel and create a new spreadsheet, where you can enter data for your chart.
-
5
Modify your graph. When you choose a graph type, a new tab will appear in the Ribbon menu called Chart Design. Navigate to that tab with the chart selected to make changes to the look of your graph or chart, or choose the Edit in Excel button to make changes to the data in your chart.
-
6
Use the Table tool to insert a table. If you want to add a table to your document, head over to the Insert tab and click the Table button. A menu will pop open where you can either scroll over a grid of squares to select your number of rows and columns, or select an option like Insert Table or Draw Table.
- Insert Table opens a pop-up menu where you can specify parameters like the number of rows and columns and whether or not the contents of the table autofit your document window.
- The Draw Table tool allows you to draw the table with your mouse directly in the document.
- Once you start creating a table, you’ll see several new table editing tools in the Layout tab.


Advertisement
-
1
Choose a template from the New Documents pane. Templates are a great way to create a nice-looking document without having to do all the formatting from scratch. To use one, open Word and select New from the side menu to create a new document, or select New from Template from the File menu. Click one of the templates on the screen to select it.[3]
- If you don’t see a template you like, use the Search bar at the top of the window to find one that fits your needs. For instance, use keywords like “flyer,” “resume,” or “research paper” to find different styles of templates.
-
2
Click Create to open the template. The template will open as a new document.
-
3
Select text within the template to modify it. Word templates are simply preformatted documents with text, graphics, and other elements already in place. To add your own text, select text anywhere on the document and type in your own. The new text will have the same format as whatever text you selected and replaced. You can also click on a blank area of the document and start typing to add new text.
- To select a single word, double-click it. You can select longer pieces of text by clicking and dragging your mouse, or positioning your cursor at the start of the selection and holding down Shift while pressing the Right Arrow key.
- You can also select and move, delete, or replace other elements in the template, such as images, graphs, or tables.
-
4
Modify your template with the Styles pane. Templates use styles to create their distinctive looks. If you want to change the look of the template, click the Styles button in the Home tab of the ribbon toolbar. Click the down arrow next to any of the style elements and select Modify Style… to make changes.
- You can also make any other types of changes you like using the rest of the tools in the ribbon menu or Format menu.
-
5
Save your modified template as a document. When you’ve made the changes you want to the template, save it the same way you would any other Microsoft Word document.


Advertisement
-
1
Click the file menu and select Save a Copy…. If you want to save a document as a file type other than .DOCX, you can do so with the Save a Copy function.
- If it’s a brand-new document that you haven’t already saved, select Save As… instead.
-
2
Open the File Format dropdown menu. You’ll see this menu at the bottom of the Save a Copy or Save As window.
-
3
Select the format you want from the menu. In addition to common formats like .DOC, .DOCX, .TXT and .RTF, you can also save your document as a PDF, an XML file, or a macro-enabled Word file.
- Check out the list of file formats that are supported in word here.


Advertisement
Add New Question
-
Question
What is Microsoft publishing?

UK_Gamer05
Community Answer
Publisher is a tool for making posters, leaflets, booklet,s etc. It’s for when you need to create something that isn’t a standard document.
-
Question
How do I move from page one to page two of a Word document?
UK_Gamer05
Community Answer
In Word 2016, on the insert tab, either select insert new page or page break.
Ask a Question
200 characters left
Include your email address to get a message when this question is answered.
Submit
Advertisement
Thanks for submitting a tip for review!
Tip
- Unless free-handedly writing your paper, consult the guidelines of your document first before adjusting its format.
- Besides the header, footer, and page layout formats (which affect the entire document), all the other formatting tools can be applied only on specific parts of the document.
About This Article
Thanks to all authors for creating a page that has been read 309,741 times.
Is this article up to date?
Once you have written your basic document you can spruce it up with a just few clicks.
The process for formatting text is:
1. Select the text you want to format.
2. Apply the formatting.
Most of the tools that you need to make your document look professional are on the Home ribbon. They are collected together into the Font group.
Here’s a quick breakdown and each of these will be covered in this post.

2. Changing the font
The font is the name given to the text style — what the text looks like. Many newspapers and magazines use a font like Times New Roman for a formal look but there are other simpler fonts available like Calibri.
To change the font:
1. Select the text you want to apply the font to.
2. Single-left-click the Home tab.
3. Single-left-click the Font drop-down list then single-left-click the font you want to use.

A sample of some popular fonts are provided below.
![]()
![]()
![]()
![]()
3. Changing the font size
To change the size of your selected text:
1. Single-left-click the Home tab
2. Click the Font Size drop-down list on the Font group.
3. Choose a font size.

You can also click one of the two ‘A‘ icons, situated next to the font size drop down list.
![]()
The first A increases the text size by one standard size.
The second A decreases the text size by one standard size.
4. Adding bold, italic or underline for emphasis
To apply emphasis to a word or phrase, bold and italic are the quickest techniques to use. Here is a comparison:
- Regular text
- Bold text
- Italic text
- Underlined text
- Bold italic underlined text
There are 3 standard icons that you will find in every Microsoft Office program.
![]()
- To bold a selection of text, click the B icon, or press Ctrl B on the keyboard..
- To italicise a selection of text, click the I icon, or press Ctrl I on the keyboard..
- To underline a selection of text, click the U icon, or press Ctrl U on the keyboard..
To change the underline style:
1. Click the drop-down arrow next to the U icon.
2. Select the underline type that you want – single, double, thick, dotted, dashed etc.

To change the underline colour:
3. Click Underline Color (at the bottom of the menu).
4. Choose a colour from the palette.
5. Changing the font colour
To change the colour of your text
1. First, select the text that you want to change the colour for.
2. Single-left-click the Home tab.
3. Single-left-click the Font drop-down list in the Font group.
4. Single-left-click a colour from the palette.

Paragraph formatting tools in Microsoft Word
6. Striking through the text
Strikethrough puts a line through your text like this.
This is an example of text that has been struck through.
You can use this when you need to keep the text for historical reasons but clearly mark it as out of date, obsolete, no longer stocked of one of many other reasons.
To apply strikethrough to your text:
1. Select the text.
2. Single-left-click the Home tab.
3. Single-left-click the Strikethrough icon in the Font group.
![]()
7. Superscripting or subscripting text
Superscripted text is little text that sits above the baseline, e.g. 360o, 42 or 16th.
Subscripted text is little text that sits below the baseline, e.g. H2O, CO2, H2SO4.
![]()
To apply superscript:
1. Select the text.
2. Single-left-click the Home tab.
3. Single-left-click the Superscript icon in the Font group.
4. The keyboard short cut is Ctrl Shift +.
To apply subscript:
1. Select the text.
2. Single-left-click the Home tab.
3. Single-left-click the Subscript icon in the Font group.
4. The keyboard short cut is Ctrl Shift =.
8. Changing the case
UPPER CASE WORDS stand out on a page. Some people describe it as SHOUTING. To change the case of your text:
1. Single-left-click the Home tab.
2. Click the Aa icon in the Font group.
3. Choose from Sentence case, lower case, UPPER CASE, Capitalise Each Word and tOGGLE cASE

Pressing Shift F3 cycles through the UPPERCASE, lowercase and Capitalise Each Word options. The other two options are not included in the cycle.
Here are what the different case options mean:
Sentence Case
Capitalise the first letter of the first word in the sentence.
lowercase
Make all the selected text lower case (i.e. un-capitalise everything).
UPPERCASE
CAPITALISE all selected text.
Capitalise Each Word
Capitalise the first letter of EVERY word.
tOGGLE cASE
Convert UPPER CASE letters to lower case and convert lower case letters to UPPER CASE.
The Toggle Case feature seems like an odd one and under normal circumstances you would never use it.
However, back in the day (gee, I sound old) guys like me who look at their keyboard as they type and only look up once every 30 minutes used to curse loudly when we found our CAPS LOCK had been on the whole time!
You may still stumble across an old legacy document where the case is all screwed up. If you do, you canquickly fix it with Toggle Case.
Fast forward to today.
Microsoft Word detects when the CAPS LOCK is on. After typing something in reverse case, as soon as you press space or ENTER, Word corrects the incorrect case and turns the CAPS LOCK off. Whatever you type next is in correct case.
10. Highlighting text
Just as you would take a highlighter pen to highlight certain portions of text in a book or report, you can add highlight to any section of text in Microsoft Word. Highlighting attracts attention.
Perhaps you have prepared a document for somebody and need to point out the important sections.
Perhaps you are reviewing somebody else’s work (or even your own) and want to mark sections to revisit later.
There are 2 ways to use the highlighter tool.
Method 1 (for a one-off highlight):
1. Select the text you want to highlight.
2. Single-left-click the Home tab.
3. Click the ab Highlight icon in the Font group (to use default yellow).
4. If you want to choose your own highlight colour, click the drop-down arrow on the icon, then choose one of the highlight colours in the palette. Stick with the lighter colours.

Method 2 (for multiple highlights)
1. Single-left-click the Home tab.
2. Double-left-click the ab Highlight icon in the Font group.
3. The regular mouse pointer will change to a highlighter icon.
4. Select the first portion of text that you wish to highlight. The highlight is added but the highlighter tool is still active.
5. Select as many other portions of text as you want.
6. When you are done, press Escape or single-left-click the the ab Highlight icon again

Reset highlighted text
1. Select the highlighted text.
2. Single-left-click the Home tab.
3. Click the drop-down arrow on the ab Highlight icon in the Font group and choose No Color.
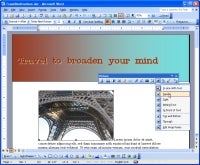
11. Creating a pretty title or heading
WordArt is a feature that has been around for many years. The conventional way to create WordArt is to choose the tools from the Insert ribbon, choose a style, type some text and then play with the settings.
In Word, there is a second tool that lets you select some existing text and apply WordArt Styling to it.
Here’s the process:
- Select your text (normally a title or heading).
- Click the blue A icon (called Text Effects and Typography).
- Select one of the thumbnail images from the gallery to apply the effect to your text.
- You can switch the style at any time.
 tool in Word")
- Using the options underneath, you can also change the outline (colour, thickness and style), shadows, reflection and glow settings. You don’t have to stick with the default settings in the main gallery.
 settings in Word")
Here are some samples of text effects and typography:
 in Word")
12. Key Takeaways
- The most commonly used text formatting tools in Word are found on the Home ribbon in the Font group.
- To access even more text formatting tools in Word, click the launcher icon in the bottom-right corner of the Font group (on the Home ribbon). This displays the Font dialog which not only displays the tools found on the ribbon but also additional tools.
- Common text formatting includes the font, font size, font colour, empasis tools like bold, italic and underline, strikethrough, superscript, subscript, WordArt and the highlighter tool.
13. what next?
I hope you found plenty of value in this post. I’d love to hear your biggest takeaway in the comments below together with any questions you may have.
Have a fantastic day.


About the author
Jason Morrell
Jason loves to simplify the hard stuff, cut the fluff and share what actually works. Things that make a difference. Things that slash hours from your daily work tasks. He runs a software training business in Queensland, Australia, lives on the Gold Coast with his wife and 4 kids and often talks about himself in the third person!
SHARE
There is no avoiding the fact; Microsoft Word is a very powerful program that has way more features than you’re probably ever going to need. When you are just getting started with Word the entire program can look just a little bit overwhelming. Even simple tasks like getting a picture into the right place can be difficult. In this article I’ll introduce you to the basics of formatting a Word document and show you where to find all the tools you will need to get started.
Set Up Your Page
To see the entire Word document, choose View > Print Layout. This is the easiest way to view your document the way it will look when you print. Word presets the margins around the page where you can’t type, but you can adjust them. You can access and change the margin settings by choosing File > Page Setup > Margins tab. By default, Word sets the top and bottom margins at one inch and the left and right margins at 1¼ inch.
You can alter these values to make the margins wider or narrower. However if you decrease them too much you may get an error message ‑ saying the margins are outside the printable area ‑ when you click OK. Most printers can’t print to the edges of the paper so you can’t make the margins too small – the width of this non-printing area is different for every printer. If you get that error message, click Fix to have Word adjust the margins for you
If you need a page that’s wider than it is tall – called landscape orientation – this is the place to change the orientation setting. When you do, the page on the screen will change rotation, but you still put the paper into the printer as usual. Word takes care of printing it correctly for you.
Line Spacing
If you’re writing an essay or a document that needs to have larger-than-normal spacing between lines, use the line spacing options. Locate the Line Spacing button on the Formatting toolbar. From the dropdown list of options you can choose from single spacing (1.0) through 1.5, 2.0, 2.5 and 3.0, which is triple line spacing. As with any tool in Word, if you want to apply this to text you have already typed you should first select the text and then set the desired line spacing.
Formatting Text
You’ll find many of the options for formatting text in Word in the toolbar. You can, for example, select a piece of text and choose a font from the Font dropdown list and a size from the Font Size dropdown list. Font sizes are measured in points and 72 points equals one inch. People typically use an 11- or 12-point font size for text in documents like letters and reports
From the toolbar you can also select Bold, Italics and Underline font styles. For additional formatting options, choose Format > Font > Font tab. Here you can, for example, create a shadow or small capitals font effect. From the Character Spacing tab you can adjust the spacing of the characters to stretch them wider apart or to make them closer together.
For example, to make letters spaced father apart, from the Spacing dropdown list choose Expanded and set the amount of extra space between characters. Check the Preview box to see what the result will look like. You must, of course, select any text that you want to apply the additional spacing to before you adjust its spacing.
Use the Picture toolbar options to change the text-wrapping and behavior of an inserted image.
(Click for larger image).
Inserting Symbols
If you need special symbols ‑ a trademark symbol, a checkbox or another character for which there is no key on the keyboard ‑ choose Insert > Symbol. Select a font to use – this can be the font you are using for your document or you can choose, for example, the Wingdings font that contains a range of handy graphical characters. Click the symbol you want to use, click Insert and then click Close.
Inserting Images
By default Word treats images the same as the characters you type so you can’t move images around the way you might expect. If you choose Insert > Picture > Clipart or From File and insert a picture into your document it will be stuck in its current position and difficult to move.
To change this behavior so you can move the picture, click on the picture to display the Picture toolbar. If it doesn’t appear, choose View > Toolbars > Picture to display it. Click the Text Wrapping dropdown list and choose something other than In line with text. For example, Square is a good choice.
When you do this, the sizing handles around the image change shape to hollow circles and you can now easily drag the image around the page. You can also rotate the image by dragging the green rotate handle.
Click and Type
Microsoft Word has a handy feature that lets you position the typing point anywhere on the page. To do this, point to where you want to start typing, double click and type. If you click on the right edge of the page, your text will be aligned neatly along the right page margin, if you click in the middle it will be centered, and if you click on the left it will be left aligned (the text will be ragged down the right edge of the page).
You can also control the alignment of text for any text using the Align Left, Center, Align Right and Justify buttons on the Formatting toolbar. Simply click in a line or paragraph of text and select the alignment option. Alignment is something that affects an entire paragraph and cannot be controlled line by line.
Word is Not a Typewriter
If you have used a typewriter in the past, Word will help to unlearn some typing habits. You should not press the Enter key at the end of a line; you should only do this when you reach the end of a paragraph.
And, instead of pressing the Space bar multiple times to line up columns of numbers, for example, use the Tab key on the keyboard. By default, Word sets tabs every half-inch, and it’s easier to line up text using the Tab key than spaces.
Helen Bradley is a respected international journalist writing regularly for small business and computer publications in the USA, Canada, South Africa, UK and Australia. You can learn more about her at her Web site, HelenBradley.com
Do you have a comment or question about this article or other small business topics in general? Speak out in the SmallBusinessComputing.com Forums. Join the discussion today!

No word processor would be complete without a way to format text, and Microsoft Word has a full set of tools that let you stylize text in your document files. Instead of having only standard fonts, you can change text to represent styles such as sub-titles, titles, section headers and other non-standard content.
Text Editing Functions
All basic text editing functions are found in the «Home» ribbon tab.
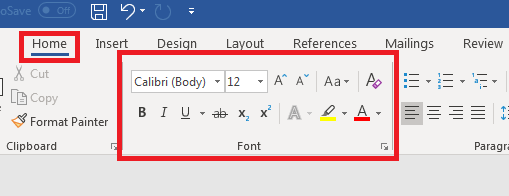
(Word text editing controls)
Notice that Word offers several stylizing features in the «Font» category in the «Home» tab. As you type content into a document, you’ll use these features and controls heavily.
The top row of font styles is the font type and the size of the characters. By default, Word opens a blank document using Calibri as the font for the body of a document. The default size is 11, but you can change this style with a simple click of the dropdown control. Alternatively, you can highlight text in your document, and then hover your mouse over the text and a list of standard font style choices will display.
When it comes to fonts in a Word document, only the fonts installed on your computer will show in the dropdown control. This is different from having fonts display in a web browser where developers pull fonts from a cloud location, so if content is meant for a website, you’ll need a way to implement the font using code or the browser will be unable to display the same font that you’ve used in your Word document.
You aren’t limited to one font size and style. If you have no content highlighted in the document, then the font changes will only take effect on new content typed into Word. If you have any content highlighted when you make these changes, Word will change the font and size of the highlighted content.

(Font style changes)
In the image above, the first line of text is the default font and size. The second line of text is a much larger size with a different style. This shows you that you can have several different font styles in a document without any restrictions. The dropdown control in the «Home» ribbon tab will show you all fonts available on your computer. Some third-party programs have their own fonts installed when you add the software to your computer. These fonts will then show in the Word font dropdown control.
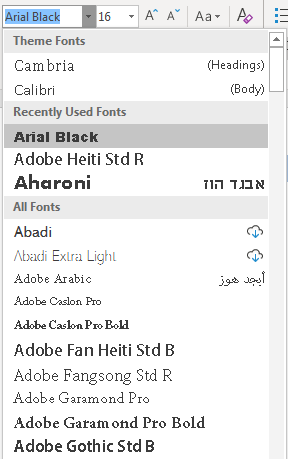
(Word dropdown font control with selection options)
Adobe Reader was installed on the computer in the image above, so several Adobe fonts are available in the Word dropdown. Not every application prefaces font names with the brand, so after you install some programs, you might just notice new fonts available. You can also download fonts from the Internet or purchase them from designers to add more fonts to your computer and Word availability.
Basic Font Styles
There are three basic font styles common with every text editing program: bold, underline and italics. Word offers other styles, but these three are the most common with standard content. All three buttons are under the font dropdown control.

(Bold, Italics and Underline controls)
The first «B» button sets any text to a bold style. The second «I» button sets text to italics, and then the «U» button sets an underline style. You can highlight any text and click one of these buttons to change to the style that you want. You can also click multiple buttons and have all three styles applied to text.
When you click one of these buttons and start typing, the style takes effect until you want to go back to the original style. Click the button again to stop the style from being applied to future text. Should you change your mind and want to remove a style, highlight the text and click the button to remove the style.
Alternatively, you can use the Ctrl+B keyboard shortcut for bold. Ctrl+I will apply italics style to selected text, and Ctrl+U will underline selected content.
Subscript and Superscript
Word supports subscript and superscript styles. These styles are used mainly for either math equations or referencing content within your documentation. The two controls are to the right of the font styles explained in the previous section (bold, italics and underline).

(Subscript and superscript controls)
The two font styles can be applied the same way as the others. Highlight the text that you want to stylize and click the button. You can remove the style by clicking the button again with the text highlighted.
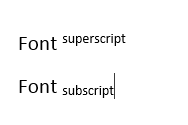
(Example subscript and superscript styles)
In the image above, notice that the superscript text is slightly above the «Font» text, and then the subscript text is slightly below. These two styles help you create math equations in a document or reference text similar to an academic paper references sources.
Adding a Hyperlink
When you create web pages, it’s not uncommon to add a link to another page on a website. You can do the same with Microsoft Word, except clicking a link will open the user’s browser and bring them to the linked web page.
To add a hyperlink, you can right click the text that should have a hyperlink applied and a context menu will display.
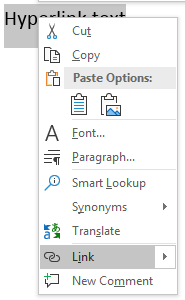
(Font style context menu)
In the image above, notice that the «Link» selection is highlighted. Click this link option and a window opens asking for the link location.
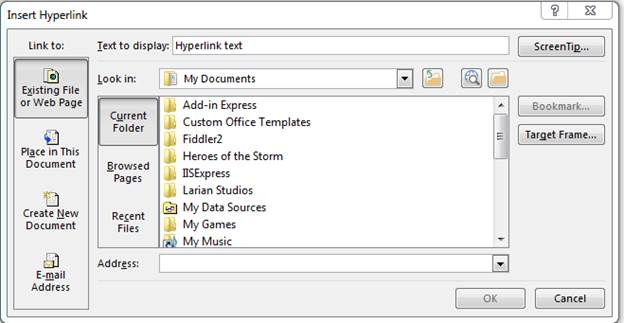
(Hyperlink configuration window)
The «Address» input text box is where you type the URL. You can also copy and paste a URL from your browser. Notice that the window also displays local directories from your computer. You aren’t limited to just URLs on the Internet. You can also link to files on your local computer or on a network drive. If this document is sent to another user, remember that any links to external documents on your computer won’t be accessible to a third party.
Highlighting and Font Color
Microsoft Word has a highlighter function that imitates when you run a physical highlighter over text on a sheet of paper. You have your choice of several different colors and using a highlighter will make specific sentences and words stand out.

(Highlighter and font color controls)
The first button is the highlighter control. Click the arrow icon next to this button and a list of color options appear. After you choose a color, click the highlighter button. Your cursor changes its icon and displays a highlighter icon indicating that any actions that you take will highlight text rather than prompt you to start typing.
Text highlighted with the tool will display a different background than the one in the document.
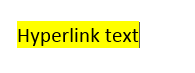
(Highlighted text)
The image above shows what text looks like when the highlighter tool has been used.
The default font color is black. Whenever you create a blank Word document, font color is black until you change it. Just like any other text in your document, you can change parts of it to be a different color. Any text selected can have its color changed using the font color tool.
Just like the highlighter tool, click the arrow to the right of the button and several color options are displayed. These color choices aren’t the only ones available. Click the «More Colors» option and another window opens where you can choose a custom color based on a more granular color palette.
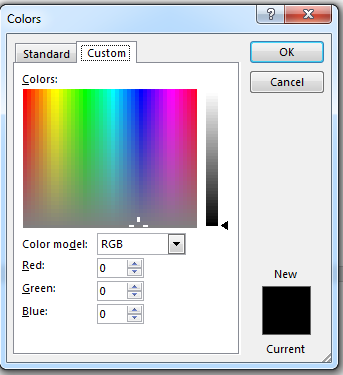
(Custom color choices)
The above image shows the color palette range. Just click somewhere on the palette and the color code will be automatically filled. Click «OK» when you choose your color, and any text highlighted will have its color changed. If you change the color with no text selected, the new color will take effect as you type your text.
These text changes are common when you create long documents. Even with small documents and notes, you’ll use these text edits to customize the way it displays on your screen or when you print it to hardcopy. Text editing tools are one of the most common features available in Word.
Selecting Text
Now that we’ve gone over the more exciting features of what word 2019 can do to enhance your text, let’s buckle down and get to the actual basics of how to enter and edit text.
The first step in editing text that appears on the screen in Word is to learn how to select it for editing. You can always click within a document to move the cursor to change text, or use Backspace and Delete to remove text. However, this can be time consuming. What if you want to remove a whole chunk of text? Or what if you want to move one paragraph to another location? Well, by selecting text, you can delete or move entire paragraphs or pages. You can also format your document. You can change the font size, color, style, or any number of other things. Being able to select text in Word is mandatory, even for the absolute beginner.
Whenever you select text in Word, the text appears highlighted, as shown below.

Selecting text is easy and done in three easy steps.
- Move the cursor to the beginning of the text that you want to select.
- Click and hold in the left button on your mouse.
- Drag it over the text you want to select. It will highlight the selected text, as shown above. Simply release the mouse button when you are finished selecting text.
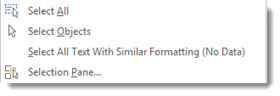
If you want to select the entire document, simply click on the Home tab and click Select on the far right in the Editing group.

Click the downward arrow beside Select and choose Select All.
This will highlight all your text for formatting. Also note that you can select objects or text with similar formatting as your selected text when clicking on ‘Select.’
Cutting Text
Once you’ve selected text, there are several things that you can do with it. Naturally, you can select text to format it. Perhaps you want to change the font type or size. We’ll cover how to do that later.
However, you can also cut selected text from a document as a way to either delete it from one location, then paste it elsewhere in the same or different document.
If you’d like to remove text from one location in the document to paste into another location, use the Cut command.
For example, below is an excerpt of the biography of F. Scott Fitzgerald.
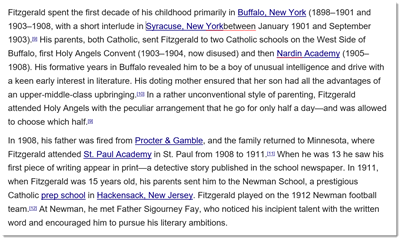
Let’s say we want to reverse the two paragraphs. In other words, we want the second paragraph to be the first paragraph.
We will use the Cut feature in Word to accomplish this.
1. Select the text or object to be cut and copied. We’ve selected the second paragraph.
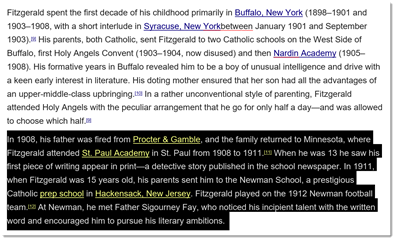
2. Click the Cut icon  in the Clipboard group under the Home tab. As you can see below, the paragraph is now cut from the document.

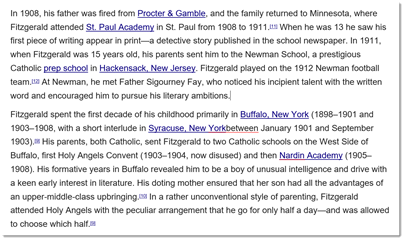
3. Now, click on the area in the document where you want to «paste» the text that you just cut. Using our example, it’s before the first paragraph. Once you see the cursor, go to the Ribbon. Under the Home tab, click Paste in the Clipboard group.
Delete and Cut should not be used interchangeably. When you cut an object, it is copied to the Clipboard. When you delete an object, it is simply removed from the document and the only way to restore it is by clicking the Undo Typing button. To delete text, select the text, then click Delete on your keyboard.
Copying Text
Once you select text, you can also copy it. Copying text means you copy the text you’ve selected, then you can paste it somewhere else in the document – or in another document. When you copy text, the text you’ve copied remains in the document.
There are three ways to copy text and objects to the clipboard.
1. Select the text or object to be copied and click the copy icon  in the Clipboard group under the Home tab.
2. Select the text or object to be copied, position the mouse pointer over it and right click. Then select Copy from the menu.
3. Select text or object to be copied and hit CTRL + C.
The Clipboard
Whenever you copy anything in Word, it is automatically sent to the Clipboard. The Clipboard does just as its name implies. It holds the text that you copy and paste for you to use. The Clipboard and its associated tools can be found on the Home tab at the far left end of the ribbon. The Clipboard group looks like this:
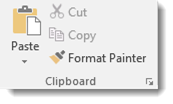
Click the arrow at the bottom of the Clipboard group to see its contents.
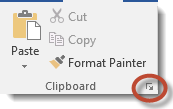
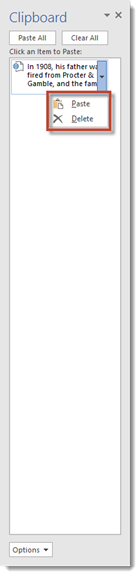
The clipboard will open as a long window to the left of your document. It can only hold 24 objects. When a 25th object is added, the first copied item is removed. To empty the Clipboard, click the Clear All button at the top of the Clipboard menu.

You can remove individual items from the clipboard by moving the mouse pointer over the item, then clicking the arrow button that appears to the right of the object. In the dropdown menu, select Delete.
Paste
The Paste command allows you to copy an object from one location in the document to another, or from another Office Program into Word. You can use the Cut or Copy feature to move an item to the clipboard, then use Paste to place it elsewhere into a document. We’ve already covered Paste briefly earlier in this course.
There are three ways to Paste text or an object into a document:
1. Move the cursor to the point in your document where you want to place the item and click the Paste icon. It looks like this:

2. Move the mouse pointer to the place you wish to insert the item and click the right mouse button. Select one of the paste options from the dropdown menu. We’ll discuss the options in just a minute.
3. Move the cursor to the point in your document where you wish to place the item and press CTRL + V.
Ordinarily, Word pastes the most recently copied item. To paste an object that was copied earlier, position the cursor at the point in your document you wish to paste the item, then open the clipboard and click the item you wish to paste. You can also move the mouse pointer over the item to be pasted, and click the arrow that appears to the right of that item. Then select a paste option.
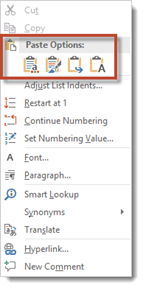
Paste Options is what you see when you right click your mouse to paste into a document. See below.
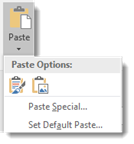
You also see Paste Options when you click the downward arrow below Paste on the Ribbon.

Paste Options allows you to specify the method of pasting that you want to use. This will be important if you want to keep or remove formatting for the selected text.
Let’s explain what we mean. This course is typed using Calibri font. Let’s say for example, that we want to paste a paragraph of this lesson into another lesson with a different font size, or into another document with a different font. Word gives us the option of preserving formatting, making the formatting match the area of the document where we paste our text, or pasting text only and not any images that we cut or copied.
Again, Paste Options only appears when you right click your mouse to paste – unless you select your Paste option from the Ribbon. Once you’ve copied or cut selected text, then right click, you’ll see this:
These are your paste options:
 Paste using original formatting of pasted text.
 Merge formatting. Paste using the formatting of the majority of the text in the document.
 Allows you paste text only. Any graphics or images will not be pasted, only text.
 Paste using the formatting of the destination text, or the text where you paste into.
 Paste a Picture.
Inserting Text
You can insert text anywhere in a document simply by moving the cursor to the desired location and typing.
Word automatically moves all text to the right of the cursor over as you type. However, if you’d rather replace the text as you type, Word gives you two options:
- Select the text you’d like to replace and start typing. This deletes the highlighted text and positions the cursor in its place.
- Use Overtype Mode. To turn on overtype mode, click on the File tab, then select Options.
You will then see this dialogue box.
Click on Advanced in the left column.
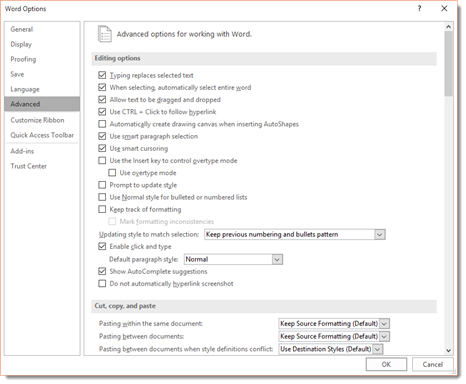
Put a Checkmark beside «Use the Insert key to control overtype mode» or the «Use overtype mode» box.

If you select the «Use the Insert key to control overtype mode» box, you can toggle overtype mode on or off by pressing the Insert key.
If you select only «Use overtype mode» you must manually turn it off by deselecting it.
AutoCorrect
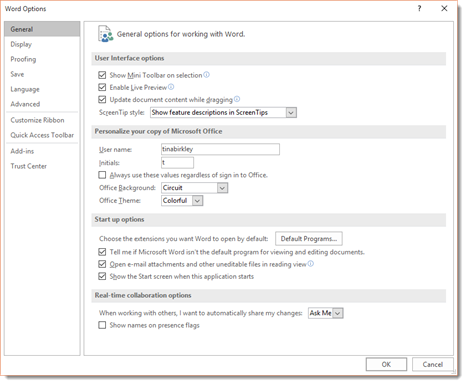
AutoCorrect automatically corrects some errors you make. For example, by default, Microsoft Word will start the first letter of every new paragraph with a capital letter. It also may recognize certain words and make corrections for you without ever having to use Spell. However, you can customize AutoCorrect to find and correct certain errors — or to leave certain «errors» alone.
To customize AutoCorrect, click on the File tab, then click Options on the left.
Click Proofing in the column on the left.
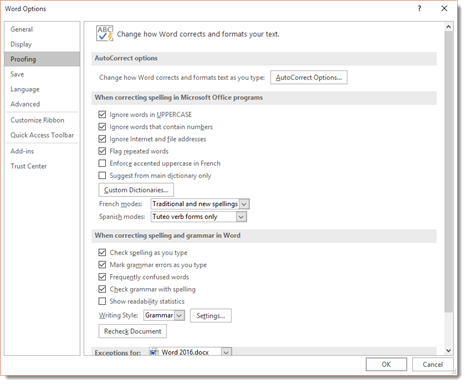
Next, click the AutoCorrect Options button. The screen you will see will look like the one below.
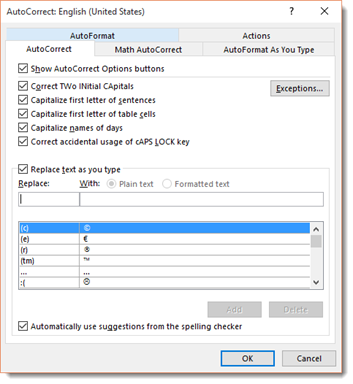
Click on the AutoCorrect options button, and you can specify words or even math that you want Word to correct as you type.
As you can see, by default, Word will automatically turn: (into a smiley face emoticon: J. It will also create a trademark symbol ™. These are default corrections that Word makes for you. You can add your own too.
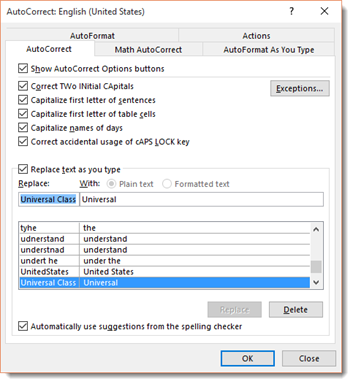
To add your own, type in what word or symbols you will enter in that you want Word to automatically correct. We’re going to type «Universal Class» and have it replaced by «Universal.» We’re doing this to have uniformity in our documents. Click the Add button when you’re finished.
Now, let’s click the Math AutoCorrect tab in the dialogue box.
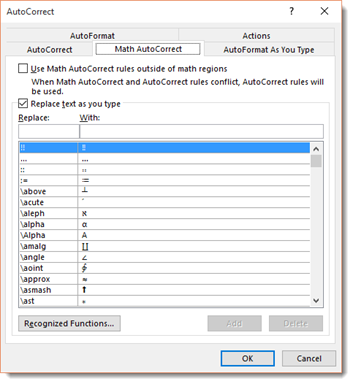
We’ll talk about mathematics later in this course. However, you can set AutoCorrect for mathematics just as you would with text.
Undo and Redo
But let’s say you accidently delete something or deleted it and then decided that you want it back. You grit your teeth and start to grumble, trying to remember the exact wording. It’s a lost cause, right? Wrong. The makers of Word anticipated this problem and supplied an easy solution. The Undo button!
The Undo button is on the Quick Access Toolbar. It looks like this:  . You can click the downward arrow beside the Undo button to determine how many steps backward you want to take with your undo.
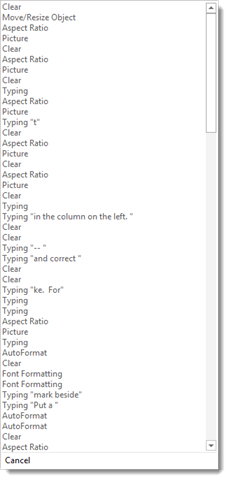
If you scroll down the list above to the bottom to AutoFormat, everything above AutoFormat will be undone too. You can undo up to 100 actions.
The Redo button is to the right of the Undo button. It looks like this:  . The redo button allows you redo an action that you just undid or to repeat the last action. If Word cannot redo the last action, the button will be faded.
Hyphenation
Word can hyphenate words at the end of lines for you, or you can choose to do it yourself. By default, hyphenation is turned off, which means Word won’t hyphenate words that are at the end of a line. Instead, it will just move the word to the next line.
To use the hyphenation feature in Word, click on the Layout tab, then go to the Page Setup group on the ribbon. You’ll see Hyphenation, as shown below.
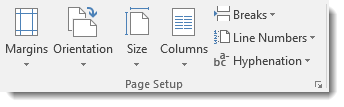
If you click the downward arrow beside Hyphenation, you’ll see that None is selected. This means no hyphenation (default.)
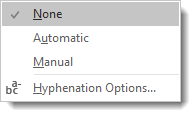
If you want Word to hyphenate words for you, select Automatic. This means that Word will hyphenate words that appear at the end of a line rather than moving it down to the next line to keep your text within the margins. Word will use its settings to decide how to hyphenate words. Just keep in mind, it does NOT mean Word will hyphenate words such as ‘how-to.’ It won’t.
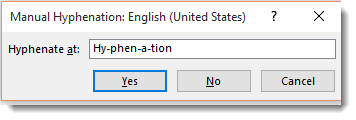
You can also select Manual. This box will pop up and ask you to specify how you want words hyphenated. Word will search your text for words that can be hyphenated and ask you how you wanted hyphenated. See the snapshot below:
You can also set options to tell Word the maximum amount of space to allow between the word and the right margin. This is called the Hyphenation Zone. To set the amount of space yourself, go to Hyphenation, click the downward arrow, then click on Hyphenation Options.
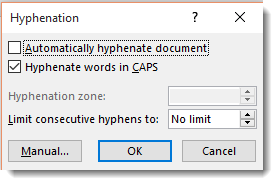
In this window, you can also select to automatically hyphenate the entire document, hyphenate words that are in CAPS, and manually set hyphens as we just learned to do.