Word 2016 is designed to help you create professional-quality documents. Word can also help you organize and write documents more efficiently.
When you create a document in Word, you can choose to start from a blank document or let a template do much of the work for you. From then on, the basic steps in creating and sharing documents are the same. And Word’s powerful editing and reviewing tools can help you work with others to make your document great.
Start a document
It’s often easier to create a new document using a template instead of starting with a blank page. Word templates come ready-to-use with pre-set themes and styles. All you need to do is add your content.
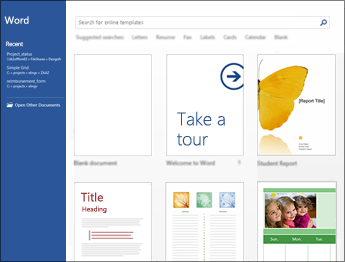
Each time you start Word, you can choose a template from the gallery, click a category to see more templates, or search for more templates online.
For a closer look at any template, click it to open a large preview.
If you’d rather not use a template, click Blank document.
Open a document
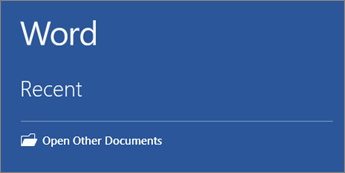
Every time you start Word, you’ll see a list of your most recently used documents in the left column. If the document you’re looking for isn’t there, click Open Other Documents.
If you’re already in Word, click File > Open and then browse to the file’s location.
When you open a document that was created in earlier versions of Word, you see Compatibility Mode in the title bar of the document window. You can work in compatibility more or you can upgrade the document to use Word 2016.
Save a document
To save a document for the first time, do the following:
-
On the File tab, click Save As.
-
Browse to the location where you’d like to save your document.
Note: To save the document on your computer, choose a folder under This PC or click Browse. To save your document online, choose an online location under Save As or click Add a Place. When your files are online, you can share, give feedback and work together on them in real time.
-
Click Save.
Note: Word automatically saves files in the .docx file format. To save your document in a format other than .docx, click the Save as type list, and then select the file format that you want.
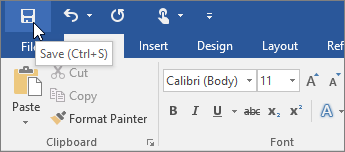
To save your document as you continue to work on it, click Save in the Quick Access Toolbar.
Read documents
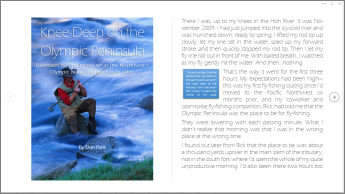
Open your document in Read Mode to hide most of the buttons and tools so you can get absorbed in your reading without distractions.
-
Open the document you want to read.
Note: Some documents open in Read Mode automatically, such as protected documents or attachments.
-
Click View > Read Mode.
-
To move from page to page in a document, do one of the following:
-
Click the arrows on the left and right sides of the pages.
-
Press page down and page up or the spacebar and backspace on the keyboard. You can also use the arrow keys or the scroll wheel on your mouse.
-
If you’re on a touch device, swipe left or right with your finger.
Tip: Click View > Edit Document to edit the document again.
-
Track changes
When you’re working on a document with other people or editing a document yourself, turn on Track Changes to see every change. Word marks all additions, deletions, moves, and formatting changes.
-
Open the document to be reviewed.
-
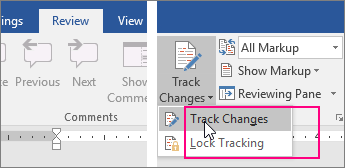
Click Review and then on the Track Changes button, select Track Changes.
Read Track changes to learn more.
Print your document
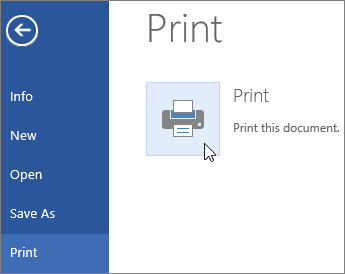
All in one place, you can see how your document will look when printed, set your print options, and print the file.
-
On the File tab, click Print.
-
Do the following:
-
Under Print, in the Copies box, enter the number of copies you want.
-
Under Printer, make sure the printer you want is selected.
-
Under Settings, the default print settings for your printer are selected for you. If you want to change a setting, just click the setting you want to change and then select a new setting.
-
-
When you’re satisfied with the settings, click Print.
For details, see Print a document.
Beyond the basics
For more on the fundamentals of using Word, see What’s new in Word 2016.
Top of Page
With Word for the web, you use your web browser to create, view, and edit the personal documents that you store on OneDrive. If your organization or college has a Microsoft 365 plan or SharePoint site, start using Word for the web by creating or storing documents in libraries on your site.Save changes
Word saves your changes automatically. Look on the status bar at the bottom left corner of Word for the web. It will either show Saved or Saving.

Share documents online
Because your document is online, you can share it by sending a link instead of an email attachment. People can read it in their web browser or mobile device.
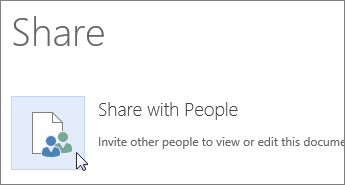
Click File > Share > Share with People.
Comment in the browser
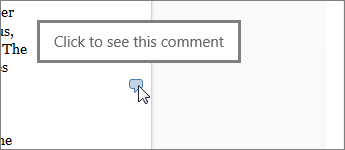
A comment balloon shows where comments have been made in the doc.
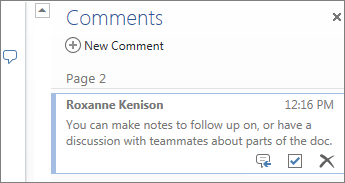
Reply to comments, and check off items you’ve addressed.
Edit in the browser
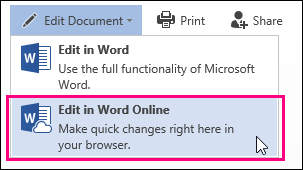
If you try to type in the document and nothing happens, you’re probably in Reading view. Switch to Editing view: click Edit Document > Edit in Word for the web.
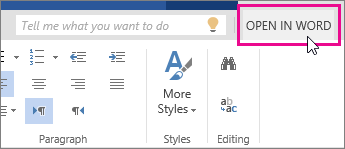
Type and format text, add pictures, adjust the layout of the page, and more. For more advanced editing, click Open in Word.
Work together on the same doc
To work together in Word for the web, you edit a document as you normally would. If others are also editing it, Word for the web alerts you to their presence. You can see everyone who is currently working in the document by clicking in the ribbon.
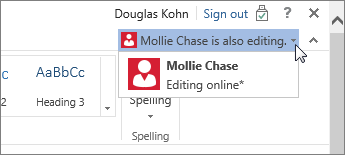
Clicking on an author’s name jumps you to where they’re working in the doc. And you’ll see the changes they make as they’re happening. They can be working in Word for the web, Word 2010 or later, or Word for Mac 2011.
Add a header or footer
Go to Insert > Header & Footer to add headers and footers to your document.
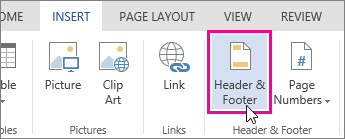
Click Options to choose how you’d like them to appear.

Add page numbers
Click Insert > Page Numbers and then choose from the gallery where you’d like the page numbers to appear.
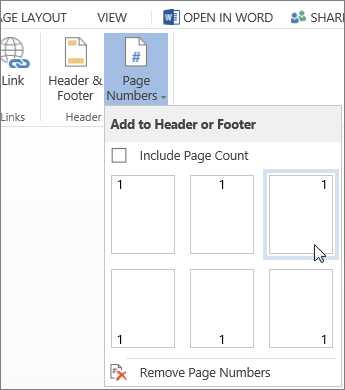
Select Include Page Count to show the current page number along with the total number of pages (page X of Y).
Find and replace text
Quickly search for every occurrence of a specific word or phrase in your document by clicking Home > Find (or type Ctrl+F). Results appear next to your document so you can see the term in context. Clicking on a search result jumps you to that occurrence.
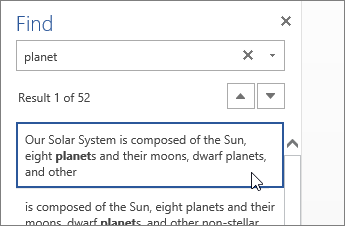
Click Replace (or type Ctrl+H) to find and replace text.
Print in Word for the web
Go to File > Print. Word for the web creates a PDF preview of your document that keeps all the layout and formatting of your document. Send the PDF to your printer and it will print the way you expect.
Microsoft Word 2013 is a word-processing program designed to help you create professional-quality documents. Word helps you organize and write your documents more efficiently.
Your first step in creating a document in Word 2013 is to choose whether to start from a blank document or to let a template do much of the work for you. From then on, the basic steps in creating and sharing documents are the same. Powerful editing and reviewing tools help you work with others to make your document perfect.
Choose a template
It’s often easier to create a new document using a template instead of starting with a blank page. Word templates are ready to use with themes and styles. All you need to do is add your content.
Each time you start Word 2013, you can choose a template from the gallery, click a category to see the templates it contains, or search for more templates online. (If you’d rather not use a template, just click the Blank document.)

For a closer look at any template, just click it to open a large preview.
Top of Page
Open a document
Every time you start Word, you’ll see a list of your most recently used documents in the left column. If the document you’re looking for isn’t there, click Open Other Documents.
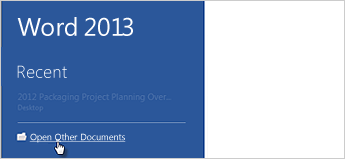
If you’re already in Word, click File > Open and then browse to the file’s location.
When you open a document that was created in earlier versions of Word, you see Compatibility Mode in the title bar of the document window. You can work in compatibility more or you can upgrade the document to use features that are new or enhanced in Word 2013.
Top of Page
Save a document
To save a document for the first time, do the following:
-
Click the File tab.
-
Click Save As.
-
Browse to the location where you’d like to save your document.
Note: To save the document on your computer, choose a folder under Computer or click Browse. To save your document online, choose a location under Places or Add a Location. When your files are online, you can share, give feedback and work together on them in real time.
-
Click Save.
Note: Word automatically saves files in the .docx file format. To save your document in a format other than .docx, click the Save as type list, and then select the file format that you want.
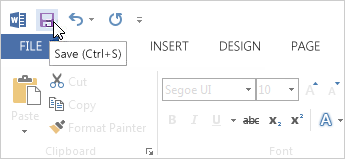
To save your document as you continue to work on it, click Save in the Quick Access Toolbar.
Top of Page
Read documents
Open your document in Read Mode to hide most of the buttons and tools so you can get absorbed in your reading without distractions.

-
Open the document you want to read.
Note: Some documents open in Read Mode automatically, such as protected documents or attachments.
-
Click View > Read Mode.
-
To move from page to page in a document, do one of the following:
-
Click the arrows on the left and right sides of the pages.
-
Press page down and page up or the spacebar and backspace on the keyboard. You can also use the arrow keys or the scroll wheel on your mouse.
-
If you’re on a touch device, swipe left or right with your finger.
Tip: Click View > Edit Document to edit the document again.
-
Top of Page
Track changes
When you’re working on a document with other people or editing a document yourself, turn on Track Changes to see every change. Word marks all additions, deletions, moves, and formatting changes.
-
Open the document to be reviewed.
-
Click Review and then on the Track Changes button, select Track Changes.

Read Track changes to learn more.
Top of Page
Print your document
All in one place, you can see how your document will look when printed, set your print options, and print the file.
-
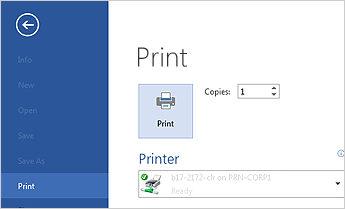
Click the File tab and then click Print.
-
Do the following:
-
Under Print, in the Copies box, enter the number of copies you want.
-
Under Printer, make sure the printer you want is selected.
-
Under Settings, the default print settings for your printer are selected for you. If you want to change a setting, just click the setting you want to change and then select a new setting.
-
-
When you’re satisfied with the settings, click Print.
For details, see Print and preview documents.
Beyond the basics
Go beyond the basics with your documents by creating a table of contents or saving a document as a template.
Top of Page
Important:
Office 2010 is no longer supported. Upgrade to Microsoft 365 to work anywhere from any device and continue to receive support.
Upgrade now
In this article
-
What is Word?
-
Find and apply a template
-
Create a new document
-
Open a document
-
Save a document
-
Read documents
-
Track changes and insert comments
-
Print your document
What is Word?
Microsoft Word 2010 is a word-processing program, designed to help you create professional-quality documents. With the finest document-formatting tools, Word helps you organize and write your documents more efficiently. Word also includes powerful editing and revising tools so that you can collaborate with others easily.
Top of Page
Find and apply a template
Word 2010 allows you to apply built-in templates, to apply your own custom templates, and to search from a variety of templates available on the web.
To find and apply a template in Word, do the following:
-
On the File tab, click New.
-
Under Available Templates, do one of the following:
-
To use one of the built-in templates, click Sample Templates, click the template that you want, and then click Create.
-
To reuse a template that you’ve recently used, click Recent Templates, click the template that you want, and then click Create.
-
To use your own template that you previously created, click My Templates, click the template that you want, and then click OK.
-
To find a template on Office.com, under Office.com Templates, click the template category that you want, click the template that you want, and click Download to download the template from Office.com to your computer.
-
Note: You can also search for templates on Office.com from within Word. In the Search Office.com for templates box, type one or more search terms, and then click the arrow button to search.
Top of Page
Create a new document
-
Click the File tab and then click New.
-
Under Available Templates, click Blank Document.
-
Click Create.
For more information about how to create a new document, see Create a document.
Top of Page
Open a document
-
Click the File tab, and then click Open.
-
In the left pane of the Open dialog box, click the drive or folder that contains the document.
-
In the right pane of the Open dialog box, open the folder that contains the drawing that you want.
-
Click the document and then click Open.
Top of Page
Save a document
To save a document in the format used by Word 2010 and Word 2007, do the following:
-
Click the File tab.
-
Click Save As.
-
In the File name box, enter a name for your document.
-
Click Save.
To save a document so that it is compatible with Word 2003 or earlier, do the following:
-
Open the document that you want to be used in Word 2003 or earlier.
-
Click the File tab.
-
Click Save As.
-
In the Save as type list, click Word 97-2003 Document. This changes the file format to .doc.
-
In the File name box, type a name for the document.
-
Click Save.
For more information about how to create a document that is compatible with Word 2003 or earlier versions, see Create a document to be used by previous versions of Word.
Top of Page
Read documents
-
Open the document that you want to read.
-
On the View tab, in the Document Views group, click Full Screen Reading
-
To move from page to page in a document, do one of the following:
-
Click the arrows in the lower corners of the pages.
-
Press PAGE DOWN and PAGE UP or SPACEBAR and BACKSPACE on the keyboard.
-
Click the navigation arrows at the top center of the screen.
Tip: Click View Options, and then click Show Two Pages
to view two pages, or screens, at a time.
-
For more information about how to view documents, see Read documents in Word.
Top of Page
Track changes and insert comments
-
To turn on change tracking, on the Review tab, in the Tracking group, click Track Changes.
-
To insert a comment, on the Review tab, in the Comments group, click New Comment.
For more information about how to track changes made while revising, see Track changes and insert comments.
Top of Page
Print your document
-
Click the File tab and then click Print.
-
Do the following:
-
Under Print, in the Copies box, enter the number of copies that you want to print.
-
Under Printer, make sure that the printer that you want is selected.
-
Under Settings, the default print settings for your printer are selected for you. If you want to change a setting, click the setting you want to change and then select the setting that you want.
-
-
When you are satisfied with the settings, click Print.
For more information about how to print a file, see Preview and print a file.
Top of Page
Word 2016 is designed to help you create professional-quality documents. Word can also help you organize and write documents more efficiently.
When you create a document in Word, you can choose to start from a blank document or let a template do much of the work for you. From then on, the basic steps in creating and sharing documents are the same. And Word’s powerful editing and reviewing tools can help you work with others to make your document great.
Start a document
It’s often easier to create a new document using a template instead of starting with a blank page. Word templates come ready-to-use with pre-set themes and styles. All you need to do is add your content.
Each time you start Word, you can choose a template from the gallery, click a category to see more templates, or search for more templates online.
For a closer look at any template, click it to open a large preview.
If you’d rather not use a template, click Blank document.

Open a document
Every time you start Word, you’ll see a list of your most recently used documents in the left column. If the document you’re looking for isn’t there, click Open Other Documents.

If you’re already in Word, click File > Open and then browse to the file’s location.
When you open a document that was created in earlier versions of Word, you see Compatibility Mode in the title bar of the document window. You can work in compatibility more or you can upgrade the document to use Word 2016.
Save a document
To save a document for the first time, do the following:
-
On the File tab, click Save As.
-
Browse to the location where you’d like to save your document.
Note: To save the document on your computer, choose a folder under This PC or click Browse. To save your document online, choose an online location under Save As or click Add a Place. When your files are online, you can share, give feedback and work together on them in real time.
-
Click Save.
Note: Word automatically saves files in the .docx file format. To save your document in a format other than .docx, click the Save as type list, and then select the file format that you want.
To save your document as you continue to work on it, click Save in the Quick Access Toolbar.

Read documents
Open your document in Read Mode to hide most of the buttons and tools so you can get absorbed in your reading without distractions.

-
Open the document you want to read.
Note: Some documents open in Read Mode automatically, such as protected documents or attachments.
-
Click View > Read Mode.
-
To move from page to page in a document, do one of the following:
-
Click the arrows on the left and right sides of the pages.
-
Press page down and page up or the spacebar and backspace on the keyboard. You can also use the arrow keys or the scroll wheel on your mouse.
-
If you’re on a touch device, swipe left or right with your finger.
Tip: Click View > Edit Document to edit the document again.
-
Track changes
When you’re working on a document with other people or editing a document yourself, turn on Track Changes to see every change. Word marks all additions, deletions, moves, and formatting changes.
-
Open the document to be reviewed.
-
Click Review and then on the Track Changes button, select Track Changes.
Read Track changes to learn more.
Print your document
All in one place, you can see how your document will look when printed, set your print options, and print the file.
-
On the File tab, click Print.
-
Do the following:
-
Under Print, in the Copies box, enter the number of copies you want.
-
Under Printer, make sure the printer you want is selected.
-
Under Settings, the default print settings for your printer are selected for you. If you want to change a setting, just click the setting you want to change and then select a new setting.
-
-
When you’re satisfied with the settings, click Print.
For details, see Print a document.
Beyond the basics
For more on the fundamentals of using Word, see What’s new in Word 2016.
Top of Page
With Word for the web, you use your web browser to create, view, and edit the personal documents that you store on OneDrive. If your organization or college has a Microsoft 365 plan or SharePoint site, start using Word for the web by creating or storing documents in libraries on your site.Save changes
Word saves your changes automatically. Look on the status bar at the bottom left corner of Word for the web. It will either show Saved or Saving.

Share documents online
Because your document is online, you can share it by sending a link instead of an email attachment. People can read it in their web browser or mobile device.
Click File > Share > Share with People.

Comment in the browser
A comment balloon shows where comments have been made in the doc.

Reply to comments, and check off items you’ve addressed.

Edit in the browser
If you try to type in the document and nothing happens, you’re probably in Reading view. Switch to Editing view: click Edit Document > Edit in Word for the web.

Type and format text, add pictures, adjust the layout of the page, and more. For more advanced editing, click Open in Word.

Work together on the same doc
To work together in Word for the web, you edit a document as you normally would. If others are also editing it, Word for the web alerts you to their presence. You can see everyone who is currently working in the document by clicking in the ribbon.

Clicking on an author’s name jumps you to where they’re working in the doc. And you’ll see the changes they make as they’re happening. They can be working in Word for the web, Word 2010 or later, or Word for Mac 2011.
Add a header or footer
Go to Insert > Header & Footer to add headers and footers to your document.

Click Options to choose how you’d like them to appear.

Add page numbers
Click Insert > Page Numbers and then choose from the gallery where you’d like the page numbers to appear.

Select Include Page Count to show the current page number along with the total number of pages (page X of Y).
Find and replace text
Quickly search for every occurrence of a specific word or phrase in your document by clicking Home > Find (or type Ctrl+F). Results appear next to your document so you can see the term in context. Clicking on a search result jumps you to that occurrence.

Click Replace (or type Ctrl+H) to find and replace text.
Print in Word for the web
Go to File > Print. Word for the web creates a PDF preview of your document that keeps all the layout and formatting of your document. Send the PDF to your printer and it will print the way you expect.

Microsoft Word 2013 is a word-processing program designed to help you create professional-quality documents. Word helps you organize and write your documents more efficiently.
Your first step in creating a document in Word 2013 is to choose whether to start from a blank document or to let a template do much of the work for you. From then on, the basic steps in creating and sharing documents are the same. Powerful editing and reviewing tools help you work with others to make your document perfect.
Choose a template
It’s often easier to create a new document using a template instead of starting with a blank page. Word templates are ready to use with themes and styles. All you need to do is add your content.
Each time you start Word 2013, you can choose a template from the gallery, click a category to see the templates it contains, or search for more templates online. (If you’d rather not use a template, just click the Blank document.)

For a closer look at any template, just click it to open a large preview.
Top of Page
Open a document
Every time you start Word, you’ll see a list of your most recently used documents in the left column. If the document you’re looking for isn’t there, click Open Other Documents.

If you’re already in Word, click File > Open and then browse to the file’s location.
When you open a document that was created in earlier versions of Word, you see Compatibility Mode in the title bar of the document window. You can work in compatibility more or you can upgrade the document to use features that are new or enhanced in Word 2013.
Top of Page
Save a document
To save a document for the first time, do the following:
-
Click the File tab.
-
Click Save As.
-
Browse to the location where you’d like to save your document.
Note: To save the document on your computer, choose a folder under Computer or click Browse. To save your document online, choose a location under Places or Add a Location. When your files are online, you can share, give feedback and work together on them in real time.
-
Click Save.
Note: Word automatically saves files in the .docx file format. To save your document in a format other than .docx, click the Save as type list, and then select the file format that you want.
To save your document as you continue to work on it, click Save in the Quick Access Toolbar.

Top of Page
Read documents
Open your document in Read Mode to hide most of the buttons and tools so you can get absorbed in your reading without distractions.

-
Open the document you want to read.
Note: Some documents open in Read Mode automatically, such as protected documents or attachments.
-
Click View > Read Mode.
-
To move from page to page in a document, do one of the following:
-
Click the arrows on the left and right sides of the pages.
-
Press page down and page up or the spacebar and backspace on the keyboard. You can also use the arrow keys or the scroll wheel on your mouse.
-
If you’re on a touch device, swipe left or right with your finger.
Tip: Click View > Edit Document to edit the document again.
-
Top of Page
Track changes
When you’re working on a document with other people or editing a document yourself, turn on Track Changes to see every change. Word marks all additions, deletions, moves, and formatting changes.
-
Open the document to be reviewed.
-
Click Review and then on the Track Changes button, select Track Changes.

Read Track changes to learn more.
Top of Page
Print your document
All in one place, you can see how your document will look when printed, set your print options, and print the file.

-
Click the File tab and then click Print.
-
Do the following:
-
Under Print, in the Copies box, enter the number of copies you want.
-
Under Printer, make sure the printer you want is selected.
-
Under Settings, the default print settings for your printer are selected for you. If you want to change a setting, just click the setting you want to change and then select a new setting.
-
-
When you’re satisfied with the settings, click Print.
For details, see Print and preview documents.
Beyond the basics
Go beyond the basics with your documents by creating a table of contents or saving a document as a template.
Top of Page
Important:
Office 2010 is no longer supported. Upgrade to Microsoft 365 to work anywhere from any device and continue to receive support.
Upgrade now
In this article
-
What is Word?
-
Find and apply a template
-
Create a new document
-
Open a document
-
Save a document
-
Read documents
-
Track changes and insert comments
-
Print your document
What is Word?
Microsoft Word 2010 is a word-processing program, designed to help you create professional-quality documents. With the finest document-formatting tools, Word helps you organize and write your documents more efficiently. Word also includes powerful editing and revising tools so that you can collaborate with others easily.
Top of Page
Find and apply a template
Word 2010 allows you to apply built-in templates, to apply your own custom templates, and to search from a variety of templates available on the web.
To find and apply a template in Word, do the following:
-
On the File tab, click New.
-
Under Available Templates, do one of the following:
-
To use one of the built-in templates, click Sample Templates, click the template that you want, and then click Create.
-
To reuse a template that you’ve recently used, click Recent Templates, click the template that you want, and then click Create.
-
To use your own template that you previously created, click My Templates, click the template that you want, and then click OK.
-
To find a template on Office.com, under Office.com Templates, click the template category that you want, click the template that you want, and click Download to download the template from Office.com to your computer.
-
Note: You can also search for templates on Office.com from within Word. In the Search Office.com for templates box, type one or more search terms, and then click the arrow button to search.
Top of Page
Create a new document
-
Click the File tab and then click New.
-
Under Available Templates, click Blank Document.
-
Click Create.
For more information about how to create a new document, see Create a document.
Top of Page
Open a document
-
Click the File tab, and then click Open.
-
In the left pane of the Open dialog box, click the drive or folder that contains the document.
-
In the right pane of the Open dialog box, open the folder that contains the drawing that you want.
-
Click the document and then click Open.
Top of Page
Save a document
To save a document in the format used by Word 2010 and Word 2007, do the following:
-
Click the File tab.
-
Click Save As.
-
In the File name box, enter a name for your document.
-
Click Save.
To save a document so that it is compatible with Word 2003 or earlier, do the following:
-
Open the document that you want to be used in Word 2003 or earlier.
-
Click the File tab.
-
Click Save As.
-
In the Save as type list, click Word 97-2003 Document. This changes the file format to .doc.
-
In the File name box, type a name for the document.
-
Click Save.
For more information about how to create a document that is compatible with Word 2003 or earlier versions, see Create a document to be used by previous versions of Word.
Top of Page
Read documents
-
Open the document that you want to read.
-
On the View tab, in the Document Views group, click Full Screen Reading
-
To move from page to page in a document, do one of the following:
-
Click the arrows in the lower corners of the pages.
-
Press PAGE DOWN and PAGE UP or SPACEBAR and BACKSPACE on the keyboard.
-
Click the navigation arrows at the top center of the screen.
Tip: Click View Options, and then click Show Two Pages
to view two pages, or screens, at a time.
-
For more information about how to view documents, see Read documents in Word.
Top of Page
Track changes and insert comments
-
To turn on change tracking, on the Review tab, in the Tracking group, click Track Changes.
-
To insert a comment, on the Review tab, in the Comments group, click New Comment.
For more information about how to track changes made while revising, see Track changes and insert comments.
Top of Page
Print your document
-
Click the File tab and then click Print.
-
Do the following:
-
Under Print, in the Copies box, enter the number of copies that you want to print.
-
Under Printer, make sure that the printer that you want is selected.
-
Under Settings, the default print settings for your printer are selected for you. If you want to change a setting, click the setting you want to change and then select the setting that you want.
-
-
When you are satisfied with the settings, click Print.
For more information about how to print a file, see Preview and print a file.
Top of Page
No word processor would be complete without a way to format text, and Microsoft Word has a full set of tools that let you stylize text in your document files. Instead of having only standard fonts, you can change text to represent styles such as sub-titles, titles, section headers and other non-standard content.
Text Editing Functions
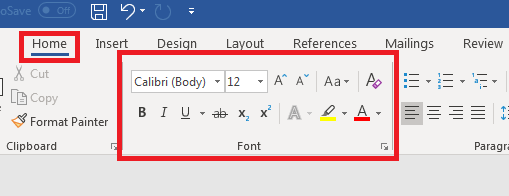
All basic text editing functions are found in the «Home» ribbon tab.
(Word text editing controls)
Notice that Word offers several stylizing features in the «Font» category in the «Home» tab. As you type content into a document, you’ll use these features and controls heavily.
The top row of font styles is the font type and the size of the characters. By default, Word opens a blank document using Calibri as the font for the body of a document. The default size is 11, but you can change this style with a simple click of the dropdown control. Alternatively, you can highlight text in your document, and then hover your mouse over the text and a list of standard font style choices will display.
When it comes to fonts in a Word document, only the fonts installed on your computer will show in the dropdown control. This is different from having fonts display in a web browser where developers pull fonts from a cloud location, so if content is meant for a website, you’ll need a way to implement the font using code or the browser will be unable to display the same font that you’ve used in your Word document.
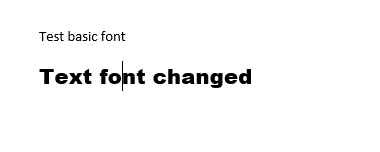
You aren’t limited to one font size and style. If you have no content highlighted in the document, then the font changes will only take effect on new content typed into Word. If you have any content highlighted when you make these changes, Word will change the font and size of the highlighted content.
(Font style changes)
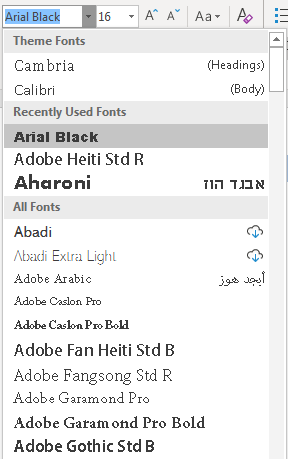
In the image above, the first line of text is the default font and size. The second line of text is a much larger size with a different style. This shows you that you can have several different font styles in a document without any restrictions. The dropdown control in the «Home» ribbon tab will show you all fonts available on your computer. Some third-party programs have their own fonts installed when you add the software to your computer. These fonts will then show in the Word font dropdown control.
(Word dropdown font control with selection options)
Adobe Reader was installed on the computer in the image above, so several Adobe fonts are available in the Word dropdown. Not every application prefaces font names with the brand, so after you install some programs, you might just notice new fonts available. You can also download fonts from the Internet or purchase them from designers to add more fonts to your computer and Word availability.
Basic Font Styles
There are three basic font styles common with every text editing program: bold, underline and italics. Word offers other styles, but these three are the most common with standard content. All three buttons are under the font dropdown control.
(Bold, Italics and Underline controls)
The first «B» button sets any text to a bold style. The second «I» button sets text to italics, and then the «U» button sets an underline style. You can highlight any text and click one of these buttons to change to the style that you want. You can also click multiple buttons and have all three styles applied to text.
When you click one of these buttons and start typing, the style takes effect until you want to go back to the original style. Click the button again to stop the style from being applied to future text. Should you change your mind and want to remove a style, highlight the text and click the button to remove the style.
Alternatively, you can use the Ctrl+B keyboard shortcut for bold. Ctrl+I will apply italics style to selected text, and Ctrl+U will underline selected content.
Subscript and Superscript
Word supports subscript and superscript styles. These styles are used mainly for either math equations or referencing content within your documentation. The two controls are to the right of the font styles explained in the previous section (bold, italics and underline).
(Subscript and superscript controls)
The two font styles can be applied the same way as the others. Highlight the text that you want to stylize and click the button. You can remove the style by clicking the button again with the text highlighted.
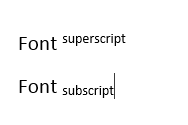
(Example subscript and superscript styles)
In the image above, notice that the superscript text is slightly above the «Font» text, and then the subscript text is slightly below. These two styles help you create math equations in a document or reference text similar to an academic paper references sources.
Adding a Hyperlink
When you create web pages, it’s not uncommon to add a link to another page on a website. You can do the same with Microsoft Word, except clicking a link will open the user’s browser and bring them to the linked web page.
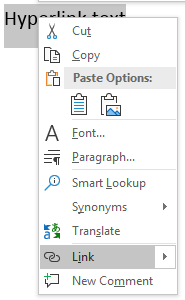
To add a hyperlink, you can right click the text that should have a hyperlink applied and a context menu will display.
(Font style context menu)
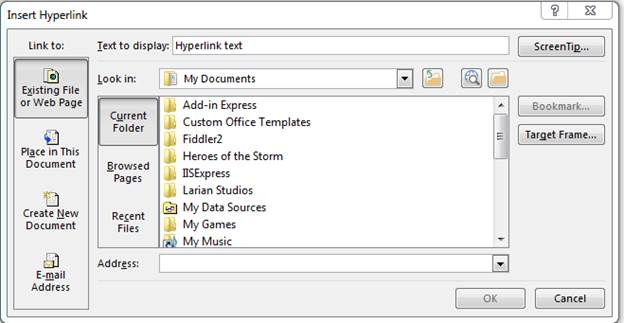
In the image above, notice that the «Link» selection is highlighted. Click this link option and a window opens asking for the link location.
(Hyperlink configuration window)
The «Address» input text box is where you type the URL. You can also copy and paste a URL from your browser. Notice that the window also displays local directories from your computer. You aren’t limited to just URLs on the Internet. You can also link to files on your local computer or on a network drive. If this document is sent to another user, remember that any links to external documents on your computer won’t be accessible to a third party.
Highlighting and Font Color
Microsoft Word has a highlighter function that imitates when you run a physical highlighter over text on a sheet of paper. You have your choice of several different colors and using a highlighter will make specific sentences and words stand out.
(Highlighter and font color controls)
The first button is the highlighter control. Click the arrow icon next to this button and a list of color options appear. After you choose a color, click the highlighter button. Your cursor changes its icon and displays a highlighter icon indicating that any actions that you take will highlight text rather than prompt you to start typing.
Text highlighted with the tool will display a different background than the one in the document.
(Highlighted text)
The image above shows what text looks like when the highlighter tool has been used.
The default font color is black. Whenever you create a blank Word document, font color is black until you change it. Just like any other text in your document, you can change parts of it to be a different color. Any text selected can have its color changed using the font color tool.
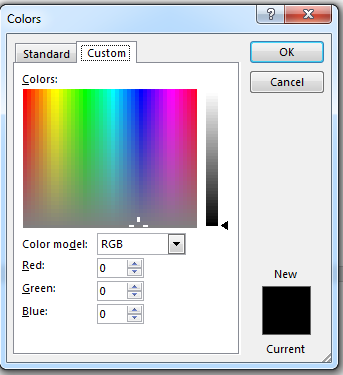
Just like the highlighter tool, click the arrow to the right of the button and several color options are displayed. These color choices aren’t the only ones available. Click the «More Colors» option and another window opens where you can choose a custom color based on a more granular color palette.
(Custom color choices)
The above image shows the color palette range. Just click somewhere on the palette and the color code will be automatically filled. Click «OK» when you choose your color, and any text highlighted will have its color changed. If you change the color with no text selected, the new color will take effect as you type your text.
These text changes are common when you create long documents. Even with small documents and notes, you’ll use these text edits to customize the way it displays on your screen or when you print it to hardcopy. Text editing tools are one of the most common features available in Word.
Selecting Text
Now that we’ve gone over the more exciting features of what word 2019 can do to enhance your text, let’s buckle down and get to the actual basics of how to enter and edit text.
The first step in editing text that appears on the screen in Word is to learn how to select it for editing. You can always click within a document to move the cursor to change text, or use Backspace and Delete to remove text. However, this can be time consuming. What if you want to remove a whole chunk of text? Or what if you want to move one paragraph to another location? Well, by selecting text, you can delete or move entire paragraphs or pages. You can also format your document. You can change the font size, color, style, or any number of other things. Being able to select text in Word is mandatory, even for the absolute beginner.
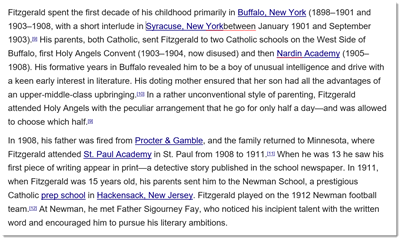
Whenever you select text in Word, the text appears highlighted, as shown below.
Selecting text is easy and done in three easy steps.
- Move the cursor to the beginning of the text that you want to select.
- Click and hold in the left button on your mouse.
- Drag it over the text you want to select. It will highlight the selected text, as shown above. Simply release the mouse button when you are finished selecting text.
If you want to select the entire document, simply click on the Home tab and click Select on the far right in the Editing group.
Click the downward arrow beside Select and choose Select All.
This will highlight all your text for formatting. Also note that you can select objects or text with similar formatting as your selected text when clicking on ‘Select.’
Cutting Text
Once you’ve selected text, there are several things that you can do with it. Naturally, you can select text to format it. Perhaps you want to change the font type or size. We’ll cover how to do that later.
However, you can also cut selected text from a document as a way to either delete it from one location, then paste it elsewhere in the same or different document.
If you’d like to remove text from one location in the document to paste into another location, use the Cut command.
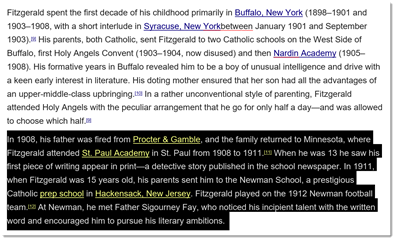
For example, below is an excerpt of the biography of F. Scott Fitzgerald.
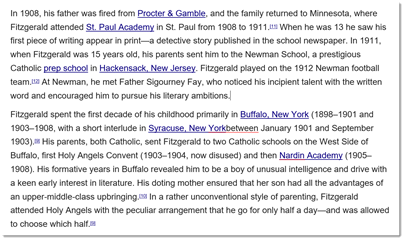
Let’s say we want to reverse the two paragraphs. In other words, we want the second paragraph to be the first paragraph.
We will use the Cut feature in Word to accomplish this.
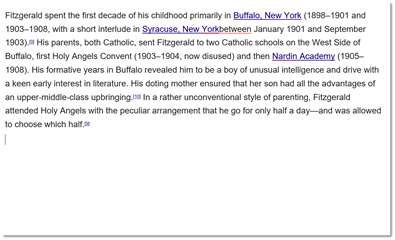
1. Select the text or object to be cut and copied. We’ve selected the second paragraph.
2. Click the Cut icon 
3. Now, click on the area in the document where you want to «paste» the text that you just cut. Using our example, it’s before the first paragraph. Once you see the cursor, go to the Ribbon. Under the Home tab, click Paste in the Clipboard group.
Delete and Cut should not be used interchangeably. When you cut an object, it is copied to the Clipboard. When you delete an object, it is simply removed from the document and the only way to restore it is by clicking the Undo Typing button. To delete text, select the text, then click Delete on your keyboard.
Copying Text
Once you select text, you can also copy it. Copying text means you copy the text you’ve selected, then you can paste it somewhere else in the document – or in another document. When you copy text, the text you’ve copied remains in the document.
There are three ways to copy text and objects to the clipboard.
1. Select the text or object to be copied and click the copy icon 
2. Select the text or object to be copied, position the mouse pointer over it and right click. Then select Copy from the menu.
3. Select text or object to be copied and hit CTRL + C.
The Clipboard
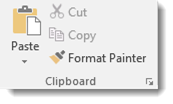
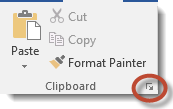
Whenever you copy anything in Word, it is automatically sent to the Clipboard. The Clipboard does just as its name implies. It holds the text that you copy and paste for you to use. The Clipboard and its associated tools can be found on the Home tab at the far left end of the ribbon. The Clipboard group looks like this:
Click the arrow at the bottom of the Clipboard group to see its contents.
The clipboard will open as a long window to the left of your document. It can only hold 24 objects. When a 25th object is added, the first copied item is removed. To empty the Clipboard, click the Clear All button at the top of the Clipboard menu.
You can remove individual items from the clipboard by moving the mouse pointer over the item, then clicking the arrow button that appears to the right of the object. In the dropdown menu, select Delete.
Paste
The Paste command allows you to copy an object from one location in the document to another, or from another Office Program into Word. You can use the Cut or Copy feature to move an item to the clipboard, then use Paste to place it elsewhere into a document. We’ve already covered Paste briefly earlier in this course.
There are three ways to Paste text or an object into a document:
1. Move the cursor to the point in your document where you want to place the item and click the Paste icon. It looks like this:
2. Move the mouse pointer to the place you wish to insert the item and click the right mouse button. Select one of the paste options from the dropdown menu. We’ll discuss the options in just a minute.
3. Move the cursor to the point in your document where you wish to place the item and press CTRL + V.
Ordinarily, Word pastes the most recently copied item. To paste an object that was copied earlier, position the cursor at the point in your document you wish to paste the item, then open the clipboard and click the item you wish to paste. You can also move the mouse pointer over the item to be pasted, and click the arrow that appears to the right of that item. Then select a paste option.
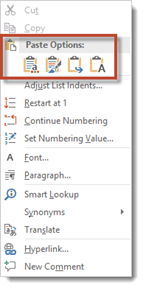
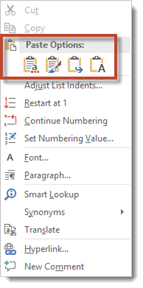
Paste Options is what you see when you right click your mouse to paste into a document. See below.
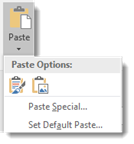
You also see Paste Options when you click the downward arrow below Paste on the Ribbon.
Paste Options allows you to specify the method of pasting that you want to use. This will be important if you want to keep or remove formatting for the selected text.
Let’s explain what we mean. This course is typed using Calibri font. Let’s say for example, that we want to paste a paragraph of this lesson into another lesson with a different font size, or into another document with a different font. Word gives us the option of preserving formatting, making the formatting match the area of the document where we paste our text, or pasting text only and not any images that we cut or copied.
Again, Paste Options only appears when you right click your mouse to paste – unless you select your Paste option from the Ribbon. Once you’ve copied or cut selected text, then right click, you’ll see this:
These are your paste options:


Inserting Text
You can insert text anywhere in a document simply by moving the cursor to the desired location and typing.
Word automatically moves all text to the right of the cursor over as you type. However, if you’d rather replace the text as you type, Word gives you two options:
- Select the text you’d like to replace and start typing. This deletes the highlighted text and positions the cursor in its place.
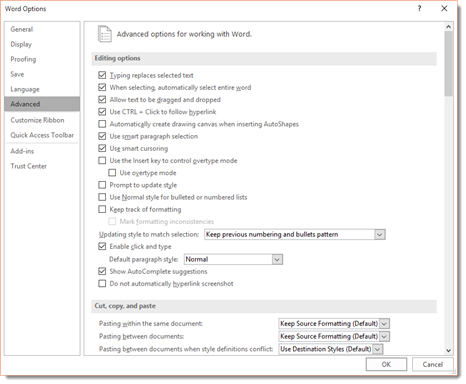
- Use Overtype Mode. To turn on overtype mode, click on the File tab, then select Options.
You will then see this dialogue box.
Click on Advanced in the left column.
Put a Checkmark beside «Use the Insert key to control overtype mode» or the «Use overtype mode» box.
If you select the «Use the Insert key to control overtype mode» box, you can toggle overtype mode on or off by pressing the Insert key.
If you select only «Use overtype mode» you must manually turn it off by deselecting it.
AutoCorrect
AutoCorrect automatically corrects some errors you make. For example, by default, Microsoft Word will start the first letter of every new paragraph with a capital letter. It also may recognize certain words and make corrections for you without ever having to use Spell. However, you can customize AutoCorrect to find and correct certain errors — or to leave certain «errors» alone.
To customize AutoCorrect, click on the File tab, then click Options on the left.
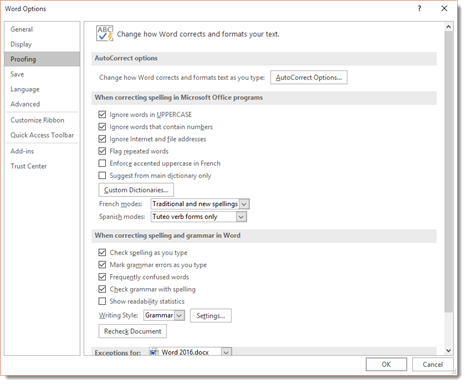
Click Proofing in the column on the left.
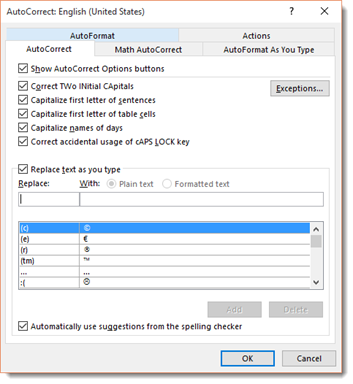
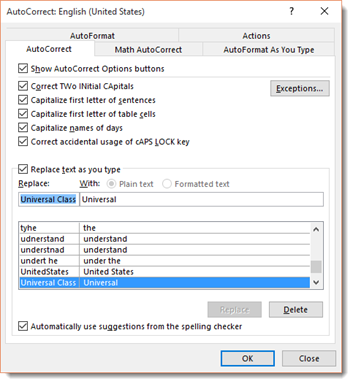
Next, click the AutoCorrect Options button. The screen you will see will look like the one below.
Click on the AutoCorrect options button, and you can specify words or even math that you want Word to correct as you type.
As you can see, by default, Word will automatically turn: (into a smiley face emoticon: J. It will also create a trademark symbol ™. These are default corrections that Word makes for you. You can add your own too.
To add your own, type in what word or symbols you will enter in that you want Word to automatically correct. We’re going to type «Universal Class» and have it replaced by «Universal.» We’re doing this to have uniformity in our documents. Click the Add button when you’re finished.
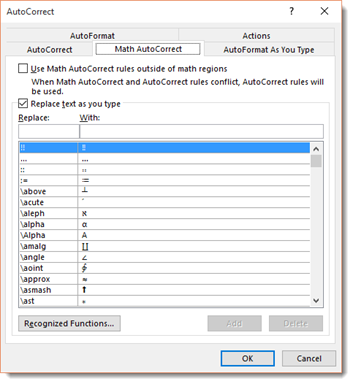
Now, let’s click the Math AutoCorrect tab in the dialogue box.
We’ll talk about mathematics later in this course. However, you can set AutoCorrect for mathematics just as you would with text.
Undo and Redo
But let’s say you accidently delete something or deleted it and then decided that you want it back. You grit your teeth and start to grumble, trying to remember the exact wording. It’s a lost cause, right? Wrong. The makers of Word anticipated this problem and supplied an easy solution. The Undo button!
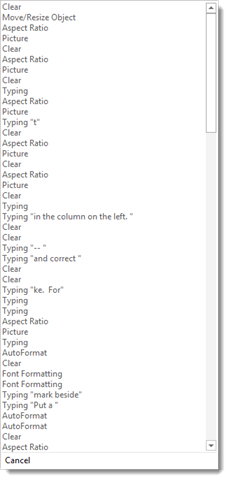
The Undo button is on the Quick Access Toolbar. It looks like this: 
If you scroll down the list above to the bottom to AutoFormat, everything above AutoFormat will be undone too. You can undo up to 100 actions.
The Redo button is to the right of the Undo button. It looks like this: 
Hyphenation
Word can hyphenate words at the end of lines for you, or you can choose to do it yourself. By default, hyphenation is turned off, which means Word won’t hyphenate words that are at the end of a line. Instead, it will just move the word to the next line.
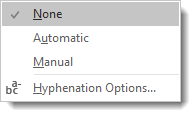
To use the hyphenation feature in Word, click on the Layout tab, then go to the Page Setup group on the ribbon. You’ll see Hyphenation, as shown below.
If you click the downward arrow beside Hyphenation, you’ll see that None is selected. This means no hyphenation (default.)
If you want Word to hyphenate words for you, select Automatic. This means that Word will hyphenate words that appear at the end of a line rather than moving it down to the next line to keep your text within the margins. Word will use its settings to decide how to hyphenate words. Just keep in mind, it does NOT mean Word will hyphenate words such as ‘how-to.’ It won’t.
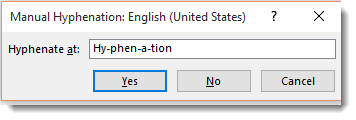
You can also select Manual. This box will pop up and ask you to specify how you want words hyphenated. Word will search your text for words that can be hyphenated and ask you how you wanted hyphenated. See the snapshot below:
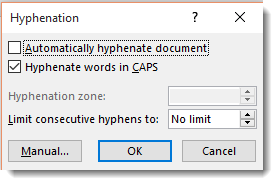
You can also set options to tell Word the maximum amount of space to allow between the word and the right margin. This is called the Hyphenation Zone. To set the amount of space yourself, go to Hyphenation, click the downward arrow, then click on Hyphenation Options.
In this window, you can also select to automatically hyphenate the entire document, hyphenate words that are in CAPS, and manually set hyphens as we just learned to do.
A Beginner’s Guide to Microsoft Office
Microsoft Word is a word processing program that was first made public by Microsoft in the early 1980s. It allows users to type and manipulate text in a graphic environment that resembles a page of paper. Extra features, such as tables, images and advanced formatting give users more options to customize their documents. Over the past three decades, there have been a number of updates and additions to Microsoft Word. Today it is one of the most widely used word processors available for Macs and PCs. It is often taught to students in schools and required as part of the basic computer requirements for many office jobs. In this guide, new users will learn the basic functions of Microsoft Word and how to use them.
Alignment – The alignment options dictate whether the left and right edges of the text in a document adhere to the right side, left, center or justified. Alignment can be set from the formatting toolbar at the top of the window or under by choosing “Paragraph” under the Format menu.
Bullets/Numbering – When creating a list of text items, users can choose from several bullet or numbering system to add a small graphic icon or series of numbers before each item. To add bullets or numbering to a series of text, click on the corresponding buttons in the formatting toolbar or choose “Bullets and Numbering” from the Format menu.
Clipboard – The clipboard acts as a type of storage area when a piece of text is temporarily removed and stored for later use within the same session. Using the Cut or Copy commands will place the text in the clipboard. Click on “Clipboard” under the Edit menu to view any text that may be temporarily stored in it.
Copy – Copying text simply means making a replica of any text that is currently selecting and saving it to the clipboard. Pressing the Control and C keys in Windows or Command and C on a Mac will copy the text. Alternatively, users can also select the text and then click the “Copy” option under the Edit menu or in the main toolbar.
Cut – Cutting text removes the text entirely from the viewable document and stores it in the clipboard. Control-X or Command-X are the keyboard shortcuts for the Cut function on Windows and Mac respectively. The Cut function can also be found under the Edit menu or the toolbar.
Document – Each document in Microsoft Word is essentially a new file. Each document can be several pages long. A new document can be created by hitting Control-N or Command-N, or by choosing the “New Blank Document” option from the File menu or the standard toolbar.
Edit – The edit menu or toolbar in Microsoft Word allows users to perform basic editing functions in their document such as copying, cutting and pasting. It also contains options for the Undo and Find/Replace functions.
Font – A font is a type of design for text and typically incorporates this design into each letter, number and symbol found on a keyboard. Fonts can range from formal to whimsical. Microsoft Word comes with a series of provided fonts and additional ones can also be downloaded if needed. To change the font used in a document, select the text and either click on the main Font menu, the Font drop-down menu in the formatting toolbar or hit Control-D or Command D.
Footer – The footer is the text that consistently appears on every page of a document, at the bottom of each page. Footers normally include details such as the page number, or a company’s name and contact details in formal documents. Add or edit a footer by choosing “Header and Footer” under the View menu.
Format – The Format menu (or toolbar) goes one step further than the Edit menu. Users can make stylistic changes by changing the look of the text itself, paragraphs, lists and more.
Header – The header is similar to a footer except that it sits at the very top of every page in a document. Headers often contain page numbers, the document name or sub-titles within a document. The header can be edited by clicking on “Header and Footer” within the View menu.
Justify, left justified, right justified – Justification is a type of alignment for text in a word processor. Justify ensures that both the left and right sides of the text in every paragraph run in a straight line. Left justify makes only the left side of the text aligned, while the right side remains ragged. Right justified does the complete opposite, with only the right side of the text aligned. Users can apply justification to their text by clicking on the corresponding buttons in the formatting toolbar or by selecting the text and clicking on “Paragraph” under the Format menu.
Open – The Open command opens an existing document in Microsoft Word. Command or Control plus O, or choosing “Open…” from the File menu will provide a pop-up window for users to select the document they wish to open.
Paste – The paste command takes any previously copied or cut text and lays it down within the document where the cursor is pointing. Control or Command plus V, or “Paste” from the Edit menu or standard toolbar will run the paste function.
Print – The print command first opens a window where users can specify parameters of the paper, printer and ink they wish to print with and it provides a preview of what the physical print will look like. Control or Command plus P, or clicking on “Print” in the File menu or standard toolbar lets users access the print window.
Quick access tool bar – The quick access toolbar is a small and moveable toolbar at the top of the document window. It usually contains buttons to save, undo, redo and print. This toolbar can also be customized to include or remove other commands.
Ribbon – The Ribbon is a type of toolbar found in versions of Microsoft Office 2007. It contains graphic buttons for commands and similar commands are shown in groups for easy access.
Save – The save command is one of the most important ones. It saves all of the work done to date within a document. The save command enables users to return to the same document later and continue writing, editing or printing. Control or Command plus S, or clicking “Save” under the File menu or standard toolbar will save the document. The “Save As” option is slightly different; it allows users to save the document as a different version by adding a different file name.
Text – Text is any of the words and paragraphs that a user types within a document.
Standard tool bar – The standard tool bar is the row of icons at the top of the document. Each of these buttons are used for basic functions such as saving, opening or printing documents, among other commands.
Undo – The undo feature keeps track of each command that a user issues while working on their document. Issuing the undo command allows the user to go back one step and restore the document as it was before their latest editing command. Related to the Undo command is Redo, which lets the user redo the same formatting command again. Control or Command plus Z, or “Undo” under the Edit menu is used to undo a command, while Control or Command plus Y or “Redo” under Edit is to redo a command.
Additional Resources
1. The Microsoft Word Toolbar Quiz
2. Test Your Knowledge of Microsoft Word Basic Functions
3. Print Microsoft Word Vocabulary Flash Cards
4. How Well do You Know Microsoft Word? (PDF)
5. Try This Online Microsoft Word Test
Things You Should Know
- To create a basic document, choose a template from the list provided or start with a blank document.
- Use the File tab to open, save, and start documents, and the Insert tab to add any images, symbols, or other media to your document.
- Highlight your text and play around with formatting options in the «Home» tab. You can change the font, italicize/bold/underline your words, and play around with font size.
-
1
Open the Microsoft Word application. Do this by double-clicking the Microsoft Word icon.
-
2
Review the available templates. On the right side of the screen, you’ll see several templates of interest:
- Blank document — A blank document with default formatting.
- Creative Resume/Cover Letter — A clean, pre-formatted resume (and accompanying cover letter) document.
- Student Report with Cover Photo — A document format geared toward an academic demographic.
- Fax Cover Sheet — A document to preface fax reports.
- You can also search for specific templates online from within Word by using the search bar at the top of this screen.
Advertisement
-
3
Choose a template. Doing so will open the template in Word with whatever pre-determined formatting applies to it. Now that your document is open, you’re ready to review your Toolbar options.
- When in doubt, open a blank document.
Advertisement
-
1
Click the File tab. It’s in the top left side of the screen (or in the menu bar for Mac users). From here, you have several useful options on the far left side of your screen:
- Info (PC only) — Click this to review the documents statistics, such as when it was last modified, as well as any potential issues with the document.
- New — Click this to bring up the «New Document» page that lists all of the pre-formatted templates. Opening a new document will prompt you to save your old one.
- Open — Click this to review a list of recently-opened documents. You can also select a directory (e.g., «This PC») in which to search.
- Save — Click this to save your document. If this is your first time saving this particular document, you’ll be prompted to enter a name, save location, and preferred file format as well.
- Save As — Click this to save your document «as» something (e.g., a different name or file format).
- Print — Click this to bring up your printer settings.
- Share — Click this to view sharing options for this document, including email and cloud options.
- Export — Click this to quickly create a PDF or change the file type.
-
2
Click ← in the top left corner of your screen. If you’re using a Mac, you won’t have this option—simply click your document to exit the «File» menu.
-
3
Review the Home tab to see your formatting options. At the top of your screen—from left to right—are five sub-sections of this tab:
- Clipboard — Whenever you copy text, it is saved on your clipboard. You can view copied text by clicking the Clipboard option here.
- Font — From this section, you can change your font style, size, color, formatting (e.g., bold or italic), and highlighting.
- Paragraph — You can change aspects of your paragraph formatting—such as line spacing, indentation, and bullet formatting—from this section.
- Styles — This section covers different types of text for various situations (e.g., headings, titles, and subtitles). You’ll also see the popular «No Spacing» option here, which removes excess spaces between lines of text.
- Editing — A couple of commonly-used tools—such as «Find and Replace», which allows you to quickly replace all appearances of one word with another—live here.
-
4
Click the Insert tab to review the types of media you can place in your document. Insert is to the right of the Home tab. The Insert tab allows you to add things like graphics and page numbers to your document. From left to right, a couple of notable options include the following:
- Table — Clicking this option will allow you to create an Excel-style table right in your document.
- Pictures — Use this feature to insert a picture into your document.
- Header, Footer, and Page Number — These options are all essential for writing in MLA- or APA-style formatting. The Header places a space at the top of the document for comment, while the Footer goes at the bottom—page numbers are customizable.
- Equation/Symbol — These options use special formatting to accurately display simple equations. You can select these equations or symbols from the pertinent drop-down menu.
-
5
Click the Design tab to create your own template. It’s to the right of the Insert tab.
- The Design tab contains pre-designed themes and formats listed across the top of the page.
-
6
Click the Layout tab to customize your page’s formatting. This tab contains options for changing the following aspects of your document:
- Margins
- Page orientation (vertical or horizontal)
- Page size
- Number of columns (defaults to one)
- Location of page breaks
- Indentation
-
7
Click the References to manage your citations. If you have a bibliography page, you can also manage it from here.
- For quick bibliography formatting, click the Bibliography drop-down menu and select a template.
- In the «Citations & Bibliography» group of options, you can change your bibliography formatting from APA to MLA (or other citation styles).
- The «Captions» group has an option to insert a table of figures. This is useful for scientific review papers or similar documents in which statistical data is prioritized over quotations.
-
8
Click the Mailings tab to review your document sharing options. You can review your email settings and share your documents from within this section.
- You can also print an envelope or label template by clicking the pertinent option in the top left corner of your screen.
- The Select Recipients drop-down menu allows you to choose Outlook contacts as well as an existing contact list within Word.
-
9
Click the Review tab. The Review section is geared towards editing, so it includes options for marking up documents and proofreading. A couple of important options include:
- Spelling & Grammar — Click this option (far left corner) to underline any spelling or grammatical errors.
- The «Changes» section — This is to the far right of the toolbar. From here, you can enable the «Track Changes» feature which automatically formats any additions or deletions you make in a document to appear in red print.
-
10
Decide on the set of options that best apply to your work. If you’re a student, for example, you’ll likely use the Insert and References tab often. Now that you’re familiar with the toolbar options, you can format your first Word document.
Advertisement
-
1
Open a new Blank Document in Word. If you have an existing document, you can open that instead.
-
2
Enter text. Do this by clicking on the blank section of the document and typing away.
- If you opened an existing document, be sure to save your work before re-formatting.
-
3
Highlight a section of text. To do this, click and drag your cursor across your writing, then let go when you’ve highlighted the section you wish to edit.
-
4
Consider what you want to do to the writing. Some potential options include:
- Quickly format your writing. Do this by right-clicking (or two-finger clicking) your highlighted text and then selecting an option from the right-click menu.
- Change the font of your selection. You can do this by clicking the drop-down bar at the top of the «Font» section (Home tab) and then selecting a new font.
- Bold, italicize, or underline your highlighted section. To do this, click the B, I, or U in the «Font» section of the Home tab.
- Change your document’s spacing. This is easiest to accomplish by right-clicking your selected text, clicking Paragraph, and modifying the «Line Spacing» value in the bottom right corner of this window.
-
5
Continue working with Word. Your preferred options for your documents will differ based on the intention behind creating them, so the more you work within your own particular format, the more proficient you’ll become.
Advertisement
Add New Question
-
Question
How do I copy and paste?
To copy a certain piece of text, highlight it and press Ctrl + C. Then click the spot you want to place the copied text and press Ctrl + V to paste.
-
Question
How do I place a logo in MS Word?
Press the Insert tab and then press the Pictures button. You will then be allowed to select the image.
-
Question
How can I save a document to a specific location?
Click File —> Save As… and you’ll be allowed to select the destination location (and filename and format) of the file.
Ask a Question
200 characters left
Include your email address to get a message when this question is answered.
Submit
Advertisement
-
A red line under a word means the word is misspelled, a green underline suggests a grammatical error, and a blue underline pertains to formatting.
-
If you right-click (or two-finger click) an underlined word, you’ll see a replacement suggestion at the top of the right-click menu.
-
You can quick-save your document by holding down Control (or Command on Mac) and tapping S.
Thanks for submitting a tip for review!
Advertisement
-
Don’t forget to save your work before closing Word.
Advertisement
About This Article
Article SummaryX
1. Create blank documents or from templates.
2. Format text colors, fonts, and sizes.
3. Insert media like photos and animations.
4. Insert data like tables, page numbers, headers, and equations.
5. Customize the on-screen and print layouts.
6. Add references and citations.
Did this summary help you?
Thanks to all authors for creating a page that has been read 213,309 times.


 to view two pages, or screens, at a time.

