
Word for Microsoft 365 Word 2021 Word 2019 Word 2016 Word 2013 Word 2010 Word Starter 2010 More…Less
You can make a chart in Word. If you have lots of data to chart, create your chart in Excel, and then copy from Excel to another Office program. This is also the best way if your data changes regularly and you want your chart to always reflect the latest numbers. In that case, when you copy the chart, keep it linked to the original Excel file.
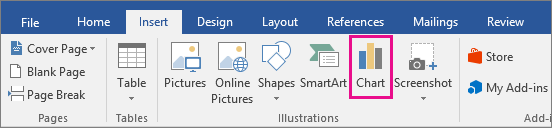
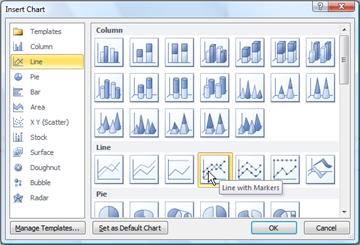
To create a simple chart from scratch in Word, click Insert > Chart, and pick the chart you want.
-
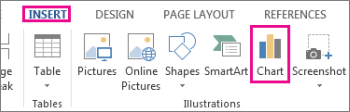
Click Insert > Chart.

-
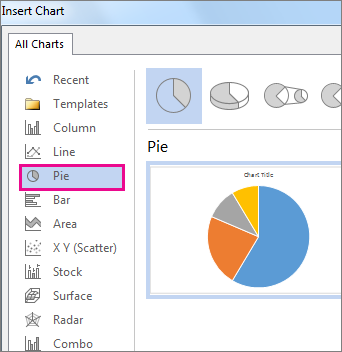
Click the chart type and then double-click the chart you want.
-
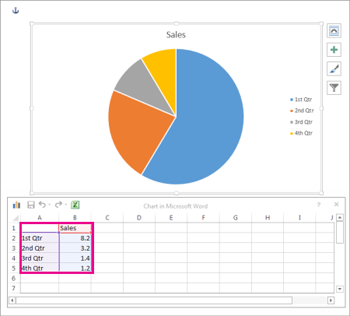
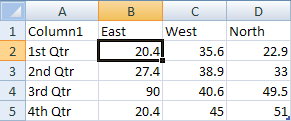
In the spreadsheet that appears, replace the default data with your own information.
-
When you’ve finished, close the spreadsheet.
-
If you want, use the Layout Options button
to arrange the chart and text in your document.
 to arrange the chart and text in your document.
You can make a chart in Word or Excel. If you have lots of data to chart, create your chart in Excel, and then copy from Excel to another Office program. This is also the best way if your data changes regularly and you want your chart to always reflect the latest numbers. In that case, when you copy the chart, keep it linked to the original Excel file.
To create a simple chart from scratch in Word, click Insert > Chart and pick the chart you want.
-
Click Insert > Chart.
-
Click the chart type and then double-click the chart you want.
-
In the spreadsheet that appears, replace the default data with your own information.
-
When you’ve finished, close the spreadsheet.
-
If you want, use the Layout Options button
to arrange the chart and text in your document.
Important:
Office 2010 is no longer supported. Upgrade to Microsoft 365 to work anywhere from any device and continue to receive support.
Upgrade now
In Microsoft Word 2010, you can insert many kinds of data charts and graphs, such as column charts, line graphs, pie charts, bar charts, area graphs, scatter graphs, stock charts, surface charts, doughnut charts, bubble graphs, and radar graphs.
Notes:
-
Don’t see the chart that you want in this article? For more information about the variety of graphs and charts you can use, see Available chart types.
-
Want to create an organization chart? For more information about how to create organization charts, see Create an organization chart.
-
If Microsoft Excel 2010 isn’t installed on your computer, you will not be able to take advantage of the advanced data charting capabilities in the Microsoft Office 2010. Instead, when you create a new data chart in Word 2010, Microsoft Graph opens.
How?
|
|
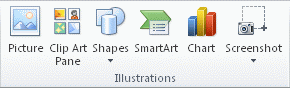
On the Insert tab, in the Illustrations group, click Chart.
|

|
|
In the Insert Chart dialog box, click the arrows to scroll through the chart types. Select the type of chart that you want and then click OK.
When you rest the mouse pointer over any chart type, a ScreenTip displays its name. |

|
|
Edit the data in Excel 2010. When you are finished editing your data, you can close Excel.
Sample data in an Excel worksheet |

Tips
-
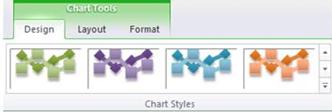
To get a good idea of what you can add to or change in your chart, under Chart Tools, click the Design, Layout, and Format tabs, and then explore the groups and options that are provided on each tab.
Note: If you don’t see the Chart Tools, make sure that you click anywhere inside the chart to activate it.
-
You can also access design, layout, and formatting features that are available for specific chart elements (such as chart axes or the legend) by right-clicking those chart elements.
More information
-
To learn about the available chart types, see Available chart types.
-
To edit data in your chart, see Change the data in an existing chart.
Top of Page
See also
Present data in a chart
Need more help?
Want more options?
Explore subscription benefits, browse training courses, learn how to secure your device, and more.
Communities help you ask and answer questions, give feedback, and hear from experts with rich knowledge.
![]()
Download Article
![]()
Download Article
Creating a bar chart or graph is a great way to compare data that’s separated into categories. Microsoft Word makes it easy to create many types of graphs, including simple but attractive bar charts, using their Chart tool. We’ll show you how to insert a Chart into your Microsoft Word document and use it to illustrate your own data.
-
1
Click the Insert tab in Microsoft Word. It’s at the top of Word.[1]
-
2
Click Chart on the toolbar. It’s the vertical bar graph icon in the toolbar at the top of Word. Depending on your version, it may be on a panel called «Illustrations.»
Advertisement
-
3
Select the Bar option. You’ll see it in the left panel.
-
4
Double-click the bar chart format you want. You can select any of the bar charts in the right panel to choose that type of chart. This places the chart in a spreadsheet window that looks like Excel.
- The Clustered and 3-D Clustered bar charts are helpful for comparing values across categories.[2]
- Stacked bar and 3-D Stacked bar charts are best for showing the relationship of individual items to a whole.
- The 100% Stacked and 3-D 100% Stacked bar charts compare the percentage each value contributes across multiple categories.
- The Clustered and 3-D Clustered bar charts are helpful for comparing values across categories.[2]
-
5
Replace the sample data with your own data. Now that you have the basic chart format, you can just swap out the example information with your own data to display your chart.
- You can close the spreadsheet window when you’re finished. If you need to edit the data again, click the chart to select it, click the Chart Design tab at the top, and then click Edit Data on the toolbar.
-
6
Edit your chart details. While the chart is selected, you’ll see four icons at its top-right corner. You can use these icons to make your data look exactly as you want.
- Click the first icon, which looks like a curved line over a set of horizontal lines, to display and select from a variety of layout and text-wrapping options.
- Click the + to show or hide chart elements, including axes, category and series names, grid lines, legends, and more.
- Click the paintbrush icon at the top-right corner of the chart to choose a different chart style.[3]
-
7
Select different chart elements to view options in the Format panel. As you click different chart elements, such as the bars or gridlines, the Format panel on the right side of Word will change to show you editing options for the selected element.
- For example, if you click text on your chart, you can change the text color and outline in the right panel.
- You can change the colors of the chart by clicking Change Colors on the Chart Design tab.
- For more formatting options, click the Chart Design tab at the top of Word—it’s only visible when the chart is selected. This is also where you’ll find options for changing the chart type, editing the data, and choosing a different color scheme.


Advertisement
Add New Question
-
Question
How should I name the x- and y-axis on the graph?

The x-axis is the horizontal part of the graph and is the independent variable meaning it will not be affected by the other variable, which is on the y-axis. You can name them according to the data that is being represented on your graph.
Ask a Question
200 characters left
Include your email address to get a message when this question is answered.
Submit
Advertisement
-
Your bar charts’ sections will be labeled «Category X» by default (wherein «X» is a number pertaining to the section). You can change these sections’ names to something more descriptive by clicking a section’s cell and typing in a new name.
-
Some bar chart layouts may work better than others with certain types of data. Feel free to experiment with different layouts.
Thanks for submitting a tip for review!
Advertisement
About This Article
Article SummaryX
1. Click Insert.
2. Click Chart.
3. Click Bar.
4. Double-click a bar chart format.
5. Replace the sample data with your own data.
Did this summary help you?
Thanks to all authors for creating a page that has been read 296,842 times.
Is this article up to date?
Skip to content
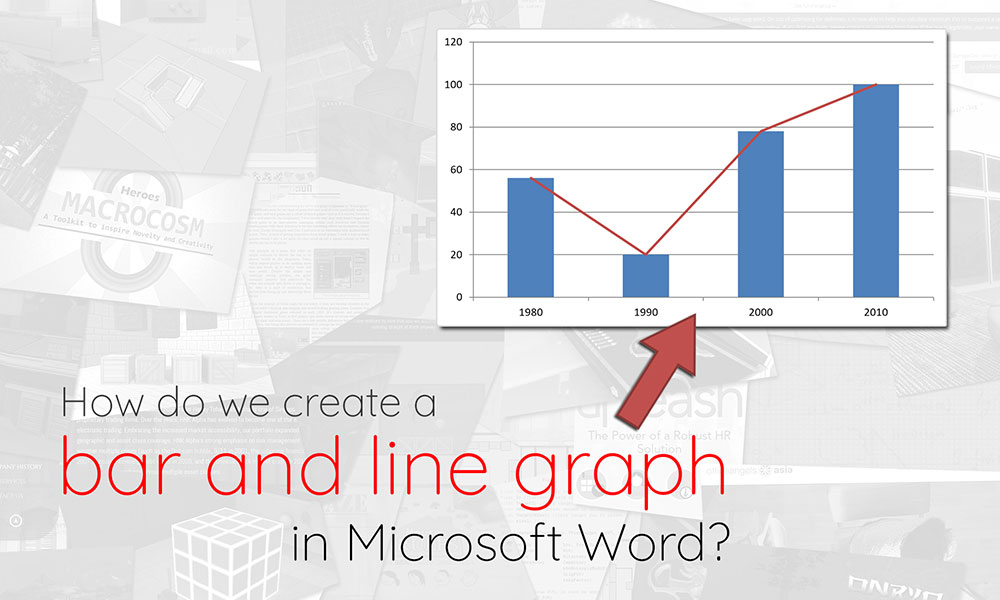
Are you tearing your hair out trying to figure out how to create a bar-line chart (i.e. a combination of a bar chart and a line chart) in Microsoft Word? Look no further, we’ve got step-by-step instructions for you in this post, as well as an accompanying video guide.
Note: This guide was created using Microsoft Word 2010. If you are looking for a guide that uses a more modern version of Word, check out this article instead.
How do we create a bar and line chart?
- To begin, create a bar chart in your Word document by going to the Insert panel, then clicking on the Chart icon. This will open a pop-up window where you can select the chart you want to insert.
- Bar charts are categorised under the Column tab in this pop-up. Select the first chart in the Column tab, then click OK to create the chart.
- A bar chart should appear on your Word document, alongside a Microsoft Excel window containing the data for the chart. Each horizontal category of your chart should be partitioned into 3 “series”. We will be removing Series 3, and formatting Series 2 so that it displays as a line (instead of a bar). Remember to also resize your data range to exclude Series 3, so you don’t have a empty space in your chart.
- Go to the Word document. Right-click on one of the Series 2 bars, and on the context menu that appears, select Change Series Chart Type. This should bring up a pop-up similar to the one seen when first creating the bar graph.
- On the ensuing pop-up, select one of the line graphs, then click OK.
- You should now have a bar graph from Series 1, and a line graph from Series 2, which come together to form a bar and line graph.
Video guide
Having trouble with the instructions above? Here’s a video guide to help you along.
Article continues after the advertisement:
![]()
Get a virtual business domain email
If you are running a small business and currently using a @gmail.com address, check out our new Virtual Email Hosting service. It maps a custom email address onto your existing Gmail mailbox, so you get to send and receive emails using the new address whilst keeping the same Gmail mailbox — no migrations needed.
Find out more →
No one will ever forget what the year 2020 has been. It brought fear and panic to humanity as the confirmed cases of COVID-19, an infectious disease, continually rises. But how do media companies and private agencies convey the information to the general public for them easily get a grasp on the subject? Through graphs. Different types of visual representations or infographics help organizations and individuals convey complex data and numerical figures in a way that doesn’t make the audience lose their focus. In this guide, let us discover more about a specific type of chart, the bar graph.
50+ SAMPLE Bar Graphs
What Is a Bar Graph?
You have probably seen bar graphs in your math classes or even made one for academic purposes. A bar graph is one of the several types of diagram individuals and organizations use. Its purpose is to present data in categories and show comparison through rectangular bars, which are either vertical or horizontal. In this visual representation, each bar represents respective values that are proportionate to their height or length. Other names of this type of diagram include bar chart and column chart.
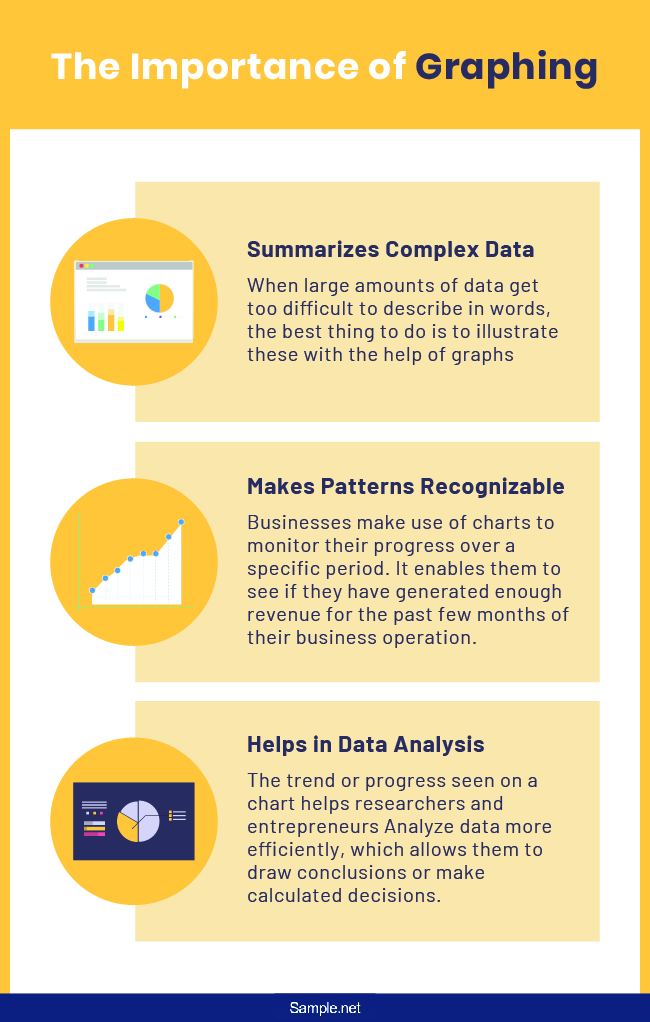
The Importance of Graphing
When an individual wants to know the details about a particular topic, he or she will find the easiest way to do so. Gathering information and learning from them would be better if we don’t have to spend much of our time on it. Now, imagine yourself facing two papers filled with the same information. However, there is a difference in their presentation. The first one consists of lengthy sentences, while the other makes use of visual representation of the data. Looking at the two, which one would you prefer spending time on? The one that uses graphical representation, right? In this section, get to learn more about the importance of graphing.
Summarizes Complex Data
Dealing with the complexity of various sets of numerical figures can be a challenge for most individuals. Also, presenting these data through text can be complicated and sometimes insufficient for people to understand. When large amounts of data get too difficult to describe in words, the best thing to do is to illustrate these with the help of graphs. Charts, regardless of its type, enables statisticians and other professionals to summarize complex data. With a summary, everything is comprehensible in just one look.
Makes Patterns Recognizable
Now that you have a summary of data presented through a graph, you can easily see changes over time and spot patterns. This is one of the advantages of some types of charts, specifically, bar and line graphs. For that reason, businesses make use of charts to monitor their progress over a specific period. It enables them to see if they have generated enough revenue for the past few months of their business operation.
Helps in Data Analysis
The trend or progress seen on a chart helps researchers and entrepreneurs analyze data more efficiently, which allows them to draw conclusions or make calculated decisions. For example, business owners see a downward trend in their sales. With the information they have at hand, they can strategize and rebuild their marketing plans to generate more sales for the next accounting cycle.
Building a Bar Graph: The Basics
As featured in an article from Smithsonian, there are over a million scientific articles published each year. Moreover, as cited from another source, there are scientists who put much dedication into publishing papers that they get to finish an average of 70 scientific papers per year. There are two main types of scientific methods these researchers can use to carry out their study—quantitative and qualitative. Over the years, the quantitative research methodology has become popular, especially in the academy. And in dealing with quantitative data, researchers will illustrate the responses they collated with the help of graphs. Here are the key elements of bar graphs, which are commonly used in visualizing the results of a study.
X-Axis: Just like a line graph, there are also two axes on a bar graph. The first one is the x-axis. It is part of the chart that runs horizontally. Typically, the x-axis represents the days or months where the changes occur (if any). Other than that, it could also specify the things being compared.Y-Axis: The next element is the y-axis, which runs vertically on a bar graph. It is usually where the numbers are placed. It means that the y-axis represents the quantity (percentage. amount, rates) of each category on the x-axis. Both axes should be on a bar graph for the visualization tool to serve its purpose.Data: It is the most crucial element of a bar graph. What would the diagram be without the set of numerical figures and information it should present? Your data are the information you gathered during the survey. When you input this, leave no room for errors.Legend: Instead of labeling each data reflected on a bar graph, the rectangles are filled with colors to represent different categories. For this reason, your bar graph should have a legend that indicates what each bar depicts. This enables the viewers to understand the information conveyed by the chart.Title: Aside from the data, one of the most vital elements of the bar graph is its title. It should be on the upper portion of the graph so that readers can easily determine what the numerical figures are about. Bear in mind that the title should give the readers a brief explanation of the content of your graph.Source: This element does not apply to all. If you extract the data from other sources, then make sure to indicate it in the document. Doing so will enable the viewers to check out the source; thus, it will guarantee them that the information you presented is reliable. Also, it is just right to give credit to the group of people who collected the data reflected on the graph.
How to Design a Bar Graph
Some sources credited William Playfair for the invention of bar charts during the 1780s. However, some accounts attributed the first use of bar charts to Nicole Oresme for his publication entitled The Latitude of Forms. Regardless of who invented it, one thing is certain—the bar graphs paved the way for a more efficient method to make various numerical figures comprehensible even to this date. If you are to design a bar graph, follow the steps provided below.
Step 1: Gather Data
If you are in the process of completing a study, you first need to gather the data you need so that you will have something to make a visual representation of. On the other hand, if you collect the information from the government agencies’ websites, make sure that they are the most recent one for it to be relevant to the ones who will see the graph.
Step 2: Use a Software
After gathering the essential information, you can now proceed to create the bar graph. In doing so, skip the hassle of designing it manually and launch the software that allows you to plot the data you have at hand. You can use applications such as Numbers, Excel, or Google Sheets. However, if you want to make the process hassle-free, you can also utilize the bar graph templates and sample documents provided in this article.
Step 3: Enter Details
Now that you have selected a program or application for you to use, all you have to do is to enter the details on the sheet. For this step, make sure that you have encoded the information for both the x and y-axis. You should arrange the information accordingly and not in random order. Also, see to it that there are no errors, especially when you are dealing with numbers. Sometimes, our eyes and minds can play tricks on us, so it would be best to double-check everything.
Step 4: Keep It Simple
While you may have the freedom to personalize the appearance of your bar graph, you should still bear in mind that other people are going to take a look at it. Therefore, you have to consider the organization and neatness of your diagram. Here’s a tip, don’t use numerous colors on your design so as not to confuse the viewers. Furthermore, if it is necessary to stack, then do so. Grouping data would be better than having several separate charts. And just remember not to overdo it. Keep it simple yet informative.
FAQs
What is a trend?
We have probably mentioned the word trend in this article. But what does it mean? In a graph, a trend is a line that indicates the direction or the pattern based on the data at hand. It could be an upward trend or a downward trend.
What is a linear relationship?
Also called the linear association, a linear relationship is an equation that results in a straight line when you plot it in a graph. In statistics, this indicates that there is a straight-line relationship between two data: the variable and the constant. If an equation does not give you a straight line when you graph it, that means that it is a non-linear relationship.
What is a pictograph?
Aside from lines and bars, there are also other ways to illustrate data or information, one example of which is a pictograph. A pictograph is a diagram that uses images to convey various ideas. When used in Mathematics, each photo will represent a specific number of things.
The ups and downs of life are truly unpredictable. We’d never know what would happen the next day, even when we make plans ahead of time. And this situation is specifically true in businesses. For this reason, business owners monitor the changes in their sales and other important aspects of their business. While explaining the numerical figures in sentences would do its job in conveying to a company’s executives what is going on in their business, transforming them into graphs would still be more effective.
You may also like these articles
-
72+ SAMPLE Partnership Agreements in PDF | MS Word | Excel | Google Docs | Apple Pages
Are you considering starting your own business but don’t have enough resources—or you have the resources but don’t have the skill to start your own business? The answer to…
continue reading
share this :
Rating :
-
3+ SAMPLE Truck Maintenance Checklist in PDF
Trucks are needed in all kinds of industries. Manufacturing companies use them when delivering products. A forklift or heavy equipment is also used by some companies. For this reason,…
continue reading
share this :
Rating :

