
Word for Microsoft 365 Word 2021 Word 2019 Word 2016 Word 2013 Word 2010 Word Starter 2010 More…Less
You can make a chart in Word. If you have lots of data to chart, create your chart in Excel, and then copy from Excel to another Office program. This is also the best way if your data changes regularly and you want your chart to always reflect the latest numbers. In that case, when you copy the chart, keep it linked to the original Excel file.
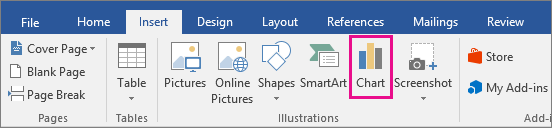
To create a simple chart from scratch in Word, click Insert > Chart, and pick the chart you want.
-
Click Insert > Chart.

-
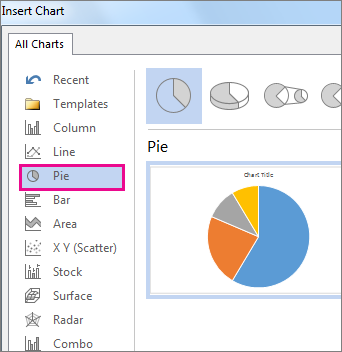
Click the chart type and then double-click the chart you want.
-
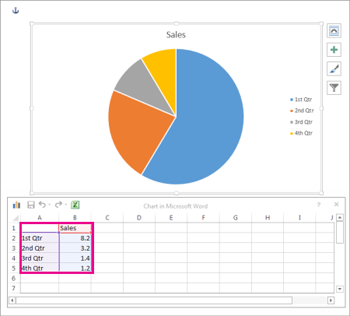
In the spreadsheet that appears, replace the default data with your own information.
-
When you’ve finished, close the spreadsheet.
-
If you want, use the Layout Options button
to arrange the chart and text in your document.
 to arrange the chart and text in your document.
You can make a chart in Word or Excel. If you have lots of data to chart, create your chart in Excel, and then copy from Excel to another Office program. This is also the best way if your data changes regularly and you want your chart to always reflect the latest numbers. In that case, when you copy the chart, keep it linked to the original Excel file.
To create a simple chart from scratch in Word, click Insert > Chart and pick the chart you want.
-
Click Insert > Chart.
-
Click the chart type and then double-click the chart you want.
-
In the spreadsheet that appears, replace the default data with your own information.
-
When you’ve finished, close the spreadsheet.
-
If you want, use the Layout Options button
to arrange the chart and text in your document.
Important:
Office 2010 is no longer supported. Upgrade to Microsoft 365 to work anywhere from any device and continue to receive support.
Upgrade now
In Microsoft Word 2010, you can insert many kinds of data charts and graphs, such as column charts, line graphs, pie charts, bar charts, area graphs, scatter graphs, stock charts, surface charts, doughnut charts, bubble graphs, and radar graphs.
Notes:
-
Don’t see the chart that you want in this article? For more information about the variety of graphs and charts you can use, see Available chart types.
-
Want to create an organization chart? For more information about how to create organization charts, see Create an organization chart.
-
If Microsoft Excel 2010 isn’t installed on your computer, you will not be able to take advantage of the advanced data charting capabilities in the Microsoft Office 2010. Instead, when you create a new data chart in Word 2010, Microsoft Graph opens.
How?
|
|
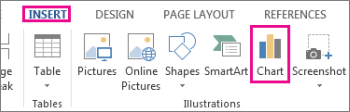
On the Insert tab, in the Illustrations group, click Chart.
|

|
|
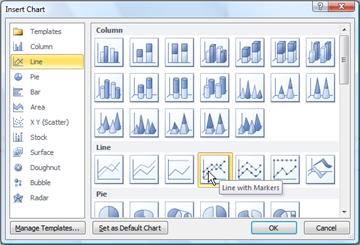
In the Insert Chart dialog box, click the arrows to scroll through the chart types. Select the type of chart that you want and then click OK.
When you rest the mouse pointer over any chart type, a ScreenTip displays its name. |

|
|
Edit the data in Excel 2010. When you are finished editing your data, you can close Excel.
Sample data in an Excel worksheet |

Tips
-
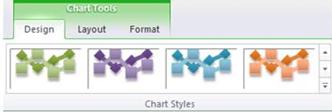
To get a good idea of what you can add to or change in your chart, under Chart Tools, click the Design, Layout, and Format tabs, and then explore the groups and options that are provided on each tab.
Note: If you don’t see the Chart Tools, make sure that you click anywhere inside the chart to activate it.
-
You can also access design, layout, and formatting features that are available for specific chart elements (such as chart axes or the legend) by right-clicking those chart elements.
More information
-
To learn about the available chart types, see Available chart types.
-
To edit data in your chart, see Change the data in an existing chart.
Top of Page
See also
Present data in a chart
Need more help?
![]()
Download Article
![]()
Download Article
Creating a bar chart or graph is a great way to compare data that’s separated into categories. Microsoft Word makes it easy to create many types of graphs, including simple but attractive bar charts, using their Chart tool. We’ll show you how to insert a Chart into your Microsoft Word document and use it to illustrate your own data.
-
1
Click the Insert tab in Microsoft Word. It’s at the top of Word.[1]
-
2
Click Chart on the toolbar. It’s the vertical bar graph icon in the toolbar at the top of Word. Depending on your version, it may be on a panel called «Illustrations.»
Advertisement
-
3
Select the Bar option. You’ll see it in the left panel.
-
4
Double-click the bar chart format you want. You can select any of the bar charts in the right panel to choose that type of chart. This places the chart in a spreadsheet window that looks like Excel.
- The Clustered and 3-D Clustered bar charts are helpful for comparing values across categories.[2]
- Stacked bar and 3-D Stacked bar charts are best for showing the relationship of individual items to a whole.
- The 100% Stacked and 3-D 100% Stacked bar charts compare the percentage each value contributes across multiple categories.
- The Clustered and 3-D Clustered bar charts are helpful for comparing values across categories.[2]
-
5
Replace the sample data with your own data. Now that you have the basic chart format, you can just swap out the example information with your own data to display your chart.
- You can close the spreadsheet window when you’re finished. If you need to edit the data again, click the chart to select it, click the Chart Design tab at the top, and then click Edit Data on the toolbar.
-
6
Edit your chart details. While the chart is selected, you’ll see four icons at its top-right corner. You can use these icons to make your data look exactly as you want.
- Click the first icon, which looks like a curved line over a set of horizontal lines, to display and select from a variety of layout and text-wrapping options.
- Click the + to show or hide chart elements, including axes, category and series names, grid lines, legends, and more.
- Click the paintbrush icon at the top-right corner of the chart to choose a different chart style.[3]
-
7
Select different chart elements to view options in the Format panel. As you click different chart elements, such as the bars or gridlines, the Format panel on the right side of Word will change to show you editing options for the selected element.
- For example, if you click text on your chart, you can change the text color and outline in the right panel.
- You can change the colors of the chart by clicking Change Colors on the Chart Design tab.
- For more formatting options, click the Chart Design tab at the top of Word—it’s only visible when the chart is selected. This is also where you’ll find options for changing the chart type, editing the data, and choosing a different color scheme.


Advertisement
Add New Question
-
Question
How should I name the x- and y-axis on the graph?

The x-axis is the horizontal part of the graph and is the independent variable meaning it will not be affected by the other variable, which is on the y-axis. You can name them according to the data that is being represented on your graph.
Ask a Question
200 characters left
Include your email address to get a message when this question is answered.
Submit
Advertisement
-
Your bar charts’ sections will be labeled «Category X» by default (wherein «X» is a number pertaining to the section). You can change these sections’ names to something more descriptive by clicking a section’s cell and typing in a new name.
-
Some bar chart layouts may work better than others with certain types of data. Feel free to experiment with different layouts.
Thanks for submitting a tip for review!
Advertisement
About This Article
Article SummaryX
1. Click Insert.
2. Click Chart.
3. Click Bar.
4. Double-click a bar chart format.
5. Replace the sample data with your own data.
Did this summary help you?
Thanks to all authors for creating a page that has been read 296,842 times.
Is this article up to date?
Skip to content

Are you tearing your hair out trying to figure out how to create a bar-line chart (i.e. a combination of a bar chart and a line chart) in Microsoft Word? Look no further, we’ve got step-by-step instructions for you in this post, as well as an accompanying video guide.
Note: This guide was created using Microsoft Word 2010. If you are looking for a guide that uses a more modern version of Word, check out this article instead.
How do we create a bar and line chart?
- To begin, create a bar chart in your Word document by going to the Insert panel, then clicking on the Chart icon. This will open a pop-up window where you can select the chart you want to insert.
- Bar charts are categorised under the Column tab in this pop-up. Select the first chart in the Column tab, then click OK to create the chart.
- A bar chart should appear on your Word document, alongside a Microsoft Excel window containing the data for the chart. Each horizontal category of your chart should be partitioned into 3 “series”. We will be removing Series 3, and formatting Series 2 so that it displays as a line (instead of a bar). Remember to also resize your data range to exclude Series 3, so you don’t have a empty space in your chart.
- Go to the Word document. Right-click on one of the Series 2 bars, and on the context menu that appears, select Change Series Chart Type. This should bring up a pop-up similar to the one seen when first creating the bar graph.
- On the ensuing pop-up, select one of the line graphs, then click OK.
- You should now have a bar graph from Series 1, and a line graph from Series 2, which come together to form a bar and line graph.
Video guide
Having trouble with the instructions above? Here’s a video guide to help you along.
Article continues after the advertisement: