
You can save a file to a folder on your hard disk drive, a network location, the cloud, a DVD, the desktop, or a flash drive. While you must identify the destination, if it is different than the default folder, the saving process is the same regardless of what destination you choose. By default, Microsoft 365 programs save files in the default working folder.
Additionally you can save a file in a different file format, such as RTF, CSV, or PDF.
Saving a file to OneDrive or SharePoint allows you to access it on any device and enables features such as AutoSave and Version History, which can help prevent data loss if your file closes unexpectedly.
To save your file:
-
Press CTRL+S or select File > Save.
Tip: You can also select Save
 on the Quick Access Toolbar.
 -
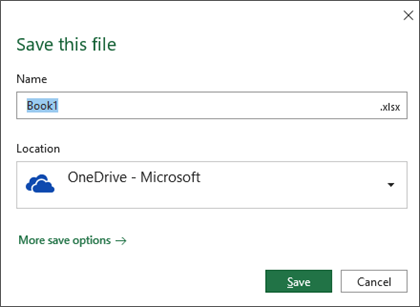
You must enter a name for the file if you are saving it for the first time.
 on the Quick Access Toolbar.
Tip: Save your file to a cloud location, such as OneDrive or SharePoint, to be able to access it anywhere, collaborate with others in real-time, and access Version History.
By default, if you’re signed in, files are saved to your OneDrive. If you want to save the current file somewhere else, click the Location drop-down to see additional recently-used locations. If the location you want isn’t there, you can open the full Save As window by selecting More save options.
Tip: If you save your file to OneDrive or SharePoint, AutoSave will be enabled by default, so you don’t have to remember to save as you go.
If you’d like to change the default location for these saves to one of your other recently-used folders, select the Location drop-down, right-click the folder location you want to set as the default and select Set as Default Location.
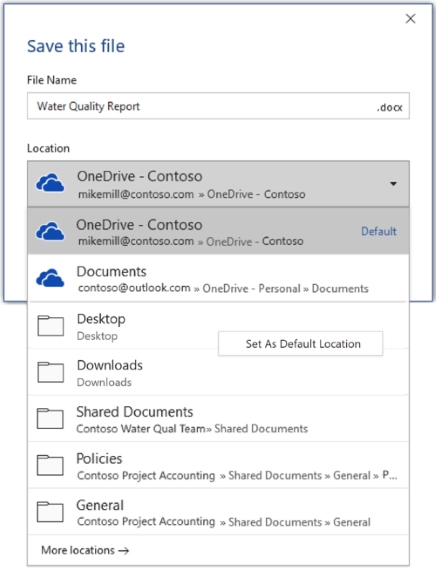
If you want to save to a location other than your recently-used folders, select More locations. If you haven’t received this update yet, your Office applications will continue to use the File menu for saving.
Tips:
-
You can also press F12 or select File > Save As to open the File menu.
-
If you’re used to using keyboard shortcuts when closing your document, such as ALT+F4, you can quickly choose to «Don’t Save» the file by using the keyboard accelerator key for that button (ALT+N).
Save a copy as a new file (Save As)
Tip: If you’re going to create a new file based on an existing file, but only want your changes saved in the new file, it’s a good idea to Save a Copy before you’ve made any changes. That way your original file will remain unchanged and all your edits will be in the new copy. You can also right-click the original file and select Open a copy.
-
Press F12 or click File > Save a Copy
-
By default Office will save the copy in the same location as the original. If you’re happy with the existing location go on to step 3. If you want to save the new copy in a different location choose it at this point.
Location
Description
Sites –
[Your Company Name]
SharePoint or Office 365 Groups document libraries
OneDrive –
[Your Company Name]
OneDrive for Business
OneDrive – Personal
OneDrive for consumers via your Microsoft account
This PC
Your local device, including any connected hard drives or flash drives
Browse
Opens the File Explorer so you can navigate to any location on your computer.
-
Give your new copy a name and click Save.
Your original file will be closed and you’ll now be working in the new copy you just created.
Tip: If you find yourself creating new files based on existing files often, you may want to use templates to make the process easier and safer. See Create a template for more information.
Save as a different format
You might want to save your file in another format so that you, or somebody else, can open the file in a different program or older version. For example, you might want to save your Word document as a Rich Text File (RTF) or your Excel workbook as a Comma-Separated Values (CSV) file.
Important: If you save an Office file in a format other than the Open XML format (such as .DOCX, .XLSX, or .PPTX) some connected experiences and modern features like AutoSave or Accessibility Checker won’t work on that file.
-
Click the File tab.
-
Click Save As.
-
Choose a file location, such as OneDrive or This PC to store your file.
-
In the File name box, enter a new name for the file.
-
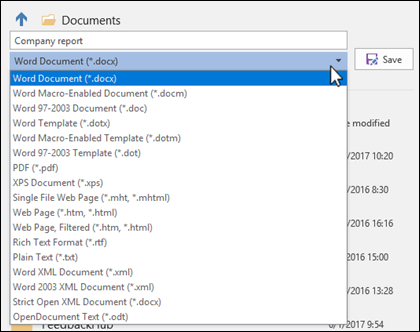
In the Save as type list, click the file format that you want to save the file in. For example, click Rich Text Format (.rtf), Word 97-2003 (.doc), Web Page (.htm or .html), or Comma Delimited (.csv).
For more information about how to save files in PDF (.pdf) or XPS (.xps) formats, see Save or convert to PDF or XPS.
-
Click Save.
Back up and recover your files
How you back up and recover your files depends on where and when you saved it. To learn more about a feature, including which versions of Office support it, select the name of the feature in the table below.
Saved to OneDrive
Saved to your device
If AutoRecover is turned on and your file closes unexpectedly, Document Recovery opens the next time you open the Office app. You can also recover an earlier version of an Office file.
Important: Even if AutoRecover is turned on, you should save the file frequently while you’re working on it to avoid losing data because of an unexpected power failure or other problem.
You can save a copy as a new file, or in a different format, or to a different location in Office 2016.
Save a copy as a new file (Save As)
Tip: If you’re going to create a new file, based on an existing file, but only want your changes saved in the new file it’s a good idea to do the Save a Copy process first thing; before you’ve made any changes. That way your original file will remain unchanged and all your edits will be in the new copy.
-
Press F12 or click File > Save a Copy
-
By default Office will save the copy in the same location as the original. If you want to save the new copy in a different location choose it at this point. If you’re happy with the existing location go on to step 3.
-
Give your new copy a name and click Save.
Your original file will be closed and you’ll now be working in the new copy you just created.
Tip: If you find yourself creating new files based on existing files often, you may want to use templates to make the process easier and safer. See Create a template for more information.
Choose a different location to save your file
During the Save, or Save a Copy, process described above you can choose a different location to save your file.
-
Select the cloud, web site, or device location where you want to save the file.
Location
Description
Sites –
[Your Company Name]
SharePoint or Office 365 Groups document libraries
OneDrive –
[Your Company Name]
OneDrive for Business
OneDrive – Personal
OneDrive for consumers via your Microsoft account
This PC
Your local device, including any connected hard drives or flash drives
Browse
Opens the File Explorer so you can navigate to any location on your computer.
-
Select a folder from the Recent Folders list, or click Browse if you don’t see the location you want listed there.
-
Confirm the filename you want to use and click Save.
Save as a different, or older, format
You might want to save your file in another format so that you, or somebody else, can open the file in a different program or older version. For example, you might want to save your Word 2016 document as a Rich Text File (RTF) or your Excel workbook as a Comma-Separated Values (CSV) file.
-
Click the File tab.
-
Click Save As.
-
Choose a file location, such as OneDrive or This PC to store your file.
-
In the File name box, enter a new name for the file.
-
In the Save as type list, click the file format that you want to save the file in. For example, click Rich Text Format (.rtf), Word 97-2003 (.doc), Web Page (.htm or .html), or Comma Delimited (.csv).
Note: For more information about how to save files in PDF (.pdf) or XPS (.xps) formats, see Save or convert to PDF or XPS.
-
Click Save.
Save as a copy, or to a different location in Office 2013.
-
Select the cloud, web site, or device location where you want to save the file.
Location
Description
Sites –
[Your Company Name]
SharePoint Server 2013 or earlier document libraries
OneDrive –
[Your Company Name]
OneDrive for work or school
OneDrive – Personal
OneDrive for consumers via your Microsoft account
Other web locations
Any other websites you have file storage access to.
Computer
Your local device
-
Select a folder from the Recent Folders list, or click Browse if you don’t see the location you want listed there.
-
Confirm the filename you want to use and click Save.
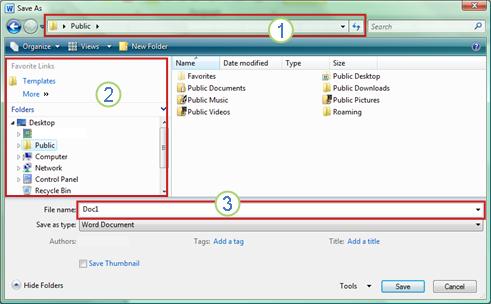
When you use the Save As dialog box, you can also save the file to a new location by using the Navigation pane.
-
To choose a folder or type the path to a folder, use the Address Bar.
-
To quickly see locations you use often, use the Navigation pane.
-
To see more file types, click the arrow.
You can also use the Save As dialog box to rename a file or change the location of where you save the file by clicking a different folder.
You might want to save your file in another format so that you, or somebody else, can open the file in a different program or older version. For example, you might want to save your Word document as a Rich Text File (RTF) or your Excel workbook as a Comma-Separated Values (CSV) file.
-
Click the File tab.
-
Click Save As.
-
Choose a file location, such as OneDrive or This PC to store your file.
-
In the File name box, enter a new name for the file.
-
In the Save as type list, click the file format that you want to save the file in. For example, click Rich Text Format (.rtf), Web Page (.htm or .html), or Comma Delimited (.csv).
Note: For more information about how to save files in PDF (.pdf) or XPS (.xps) formats, see Save or convert to PDF or XPS.
-
Click Save.
If you are using Office 2010, you can save files in an earlier version of Microsoft 365 by selecting the version in the Save as type list in the Save As dialog box. For example, you can save your Word 2010 document (.docx) as a 97-2003 document (.doc).
Notes:
-
Office 2010 continues the use of the XML-based file formats, such as .docx, .xlsx, and .pptx, introduced in the 2007 Office release. Therefore, files created in Microsoft Word 2010, Microsoft Excel 2010, and Microsoft PowerPoint 2010 can be opened in the 2007 Office release programs without special add-ins or loss of functionality. For more information, see Open XML Formats and file name extensions.
-
For more information about compatibility between files from different releases, see Use the Compatibility Checker.
For information about saving Microsoft Access 2010 .ACCDB files into the older .MDB format see Convert an .accdb database to an earlier file format.
-
Click the File tab.
-
Click Save As.
-
In the File name box, enter a new name for the file.
-
Click Save.
When you use the Save As dialog box, you can also save the file to a new location by using the Navigation pane.
-
To choose a folder or type the path to a folder, use the Address Bar.
-
To quickly see locations you use often, use the Navigation pane.
-
To see more file types, click the arrow.
You can also use the Save As dialog box to rename a file or change the location of where you save the file by clicking a different folder.
You might want to save your file in another format so that you, or somebody else, can open the file in a different program or older version. For example, you might want to save your Word document as a Rich Text File (RTF) or your Excel workbook as a Comma-Separated Values (CSV) file.
-
Click the File tab.
-
Click Save As.
-
Choose a file location, such as OneDrive or This PC to store your file.
-
In the File name box, enter a new name for the file.
-
In the Save as type list, click the file format that you want to save the file in. For example, click Rich Text Format (.rtf), Web Page (.htm or .html), or Comma Delimited (.csv).
Note: For more information about how to save files in PDF (.pdf) or XPS (.xps) formats, see Save or convert to PDF or XPS.
-
Click Save.
If you are using Office 2010, you can save files in an earlier version of Microsoft 365 by selecting the version in the Save as type list in the Save As dialog box. For example, you can save your Word 2010 document (.docx) as a 97-2003 document (.doc).
Notes:
-
Office 2010 continues the use of the XML-based file formats, such as .docx, .xlsx, and .pptx, introduced in the 2007 Office release. Therefore, files created in Microsoft Word 2010, Microsoft Excel 2010, and Microsoft PowerPoint 2010 can be opened in the 2007 Office release programs without special add-ins or loss of functionality. For more information, see Open XML Formats and file name extensions.
-
For more information about compatibility between files from different releases, see Use the Compatibility Checker.
For information about saving Microsoft Access 2010 .ACCDB files into the older .MDB format see Convert an .accdb database to an earlier file format.
We’re listening
This article was updated January 29, 2020 as a result of your comments. If you found it helpful, and especially if you didn’t, please use the feedback controls below to let us know how we can make it better.
See Also
-
What is AutoSave?
-
Rename a file
-
Save or convert to PDF
-
Store, share, and sync your files
-
What happens when you sign out of Office
На чтение 3 мин Опубликовано 19.10.2015
По умолчанию в Word отключено автоматическое создание резервных копий документов, но эту функцию не сложно включить. Правда есть одна маленькая неприятность, файлы резервных копий имеют расширение .wbk. Как же открыть такой файл, если нужно получить доступ к его содержимому?
Файл резервной копии Word открывается предельно просто. Когда Вы запускаете Word, не открывая документ, в левой части окна отображается список недавно открытых документов, а в правой части – шаблоны, которые Вы можете использовать для создания документов.

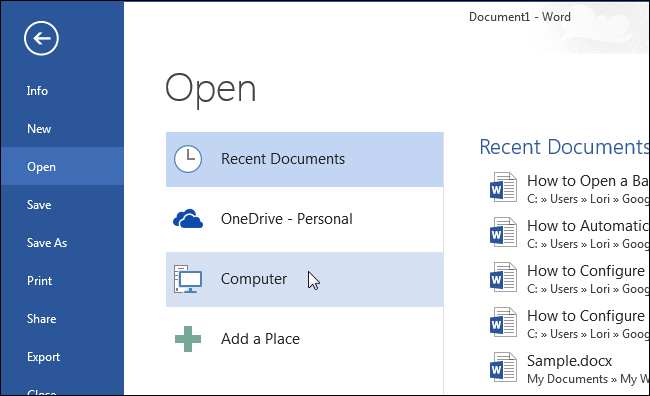
Под списком Последние (Recent) нажмите Открыть другие документы (Open Other Documents).
Замечание: Если в данный момент у Вас открыт пустой или созданный ранее документ, нажмите Ctrl+O или кликните Файл > Открыть (File > Open).

В окне Открыть (Open) выберите место, где хранится нужный файл резервной копии, например, Компьютер (Computer).
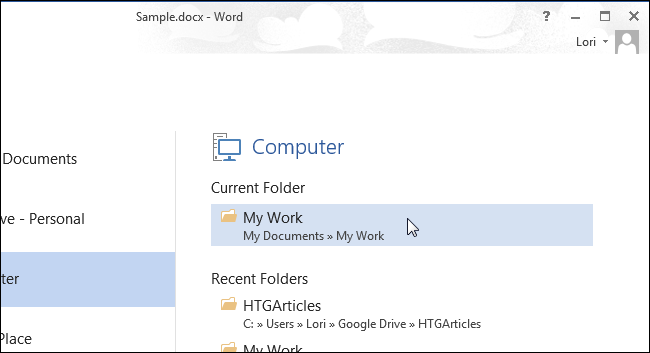
Если папка, содержащая файл резервной копии, есть в списке Последние папки (Recent Folders), то кликните по ней. Если нет – нажмите кнопку Обзор (Browse).
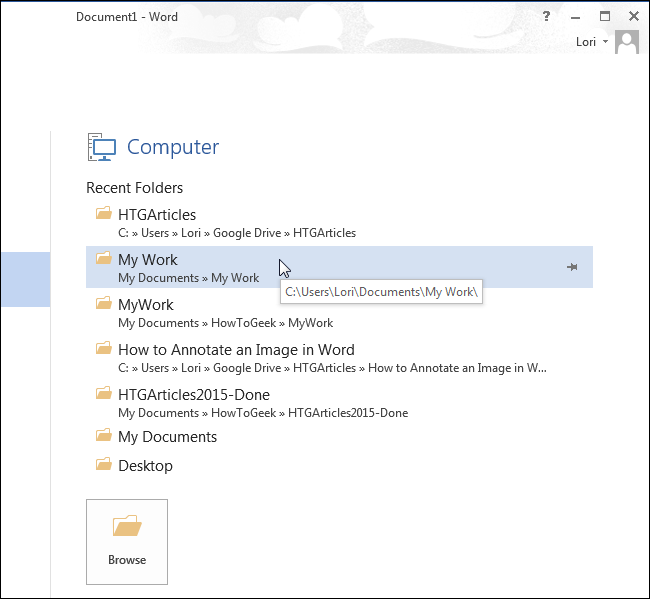
Замечание: Если в данный момент у Вас открыт какой-либо документ, то над списком Последние папки (Recent Folders) будет указана текущая папка. Кликните по ней, если файл резервной копии сохранён в той же папке, что и открытый в данный момент документ.
Откроется диалоговое окно Открытие документа (Open). Перейдите к папке, в которой хранится файл резервной копии. Обратите внимание, что Вы видите только файл оригинала, но не файл резервной копии. Дело в том, что по умолчанию Word показывает только документы Word, а файл резервной копии имеет расширение .wbk.
Примечание: По всей видимости, расширение .wbk произошло от словосочетания Word Backup.
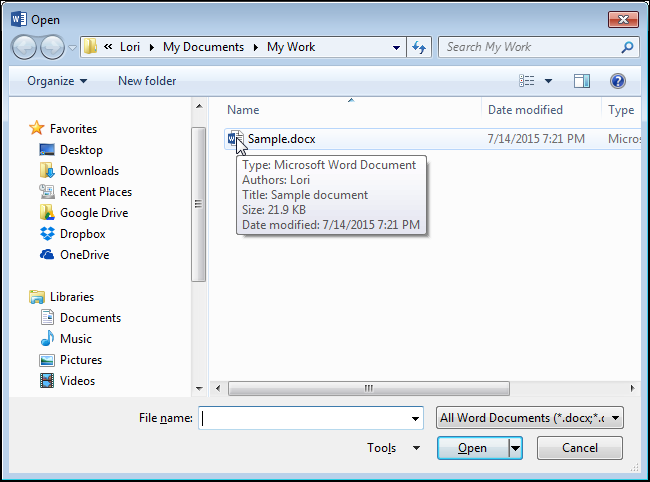
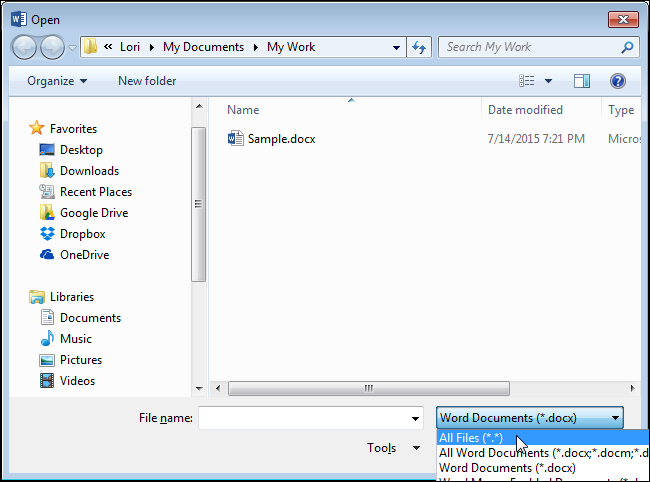
Чтобы сделать видимыми все файлы в папке, в выпадающем списке справа от поля Имя файла (File name) выберите Все файлы (All Files).
Теперь файл резервной копии (.wbk) должен стать видимым. Выберите нужный файл и нажмите Открыть (Open).
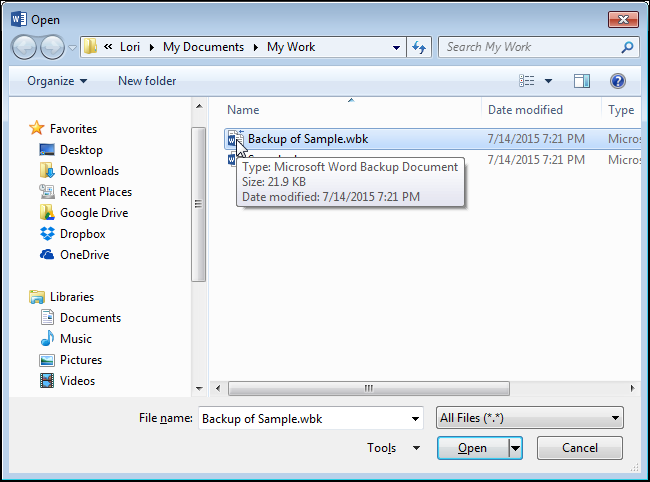
Файл .wbk откроется в Microsoft Word, и Вы сможете делать в нём любые изменения так же, как в обычных документах Word. Откройте вкладку Файл (File) и нажмите Сохранить как (Save as), чтобы сохранить документ в формате .docx. Тип файла .docx будет автоматически выбран для сохранения документа и расширение .docx заменит расширение .wbk в имени файла. При желании, Вы можете изменить имя файла, прежде чем сохранить его. Кроме этого, Вы можете сохранить документ в более старом формате Word.
Оцените качество статьи. Нам важно ваше мнение:

В текстовом процессоре MS Word довольно-таки хорошо реализована функция автосохранения документов. По ходу написания текста или добавления любых других данных в файл программа автоматически сохраняет его резервную копию с заданным временным интервалом.
О том, как работает эта функция, мы уже писали, в этой же статье речь пойдет о смежной теме, а именно, будет рассмотрим то, где хранятся временные файлы Ворд. Это и есть те самые резервные копии, своевременно не сохраненные документы, которые располагаются в директории по умолчанию, а не в указанном пользователем месте.
Урок: Функция автосохранения в Word
Зачем кому-то может понадобиться обращение ко временным файлам? Да хотя бы затем, чтобы найти документ, путь для сохранения которого пользователь не указывал. В этом же месте будет храниться последняя сохраненная версия файла, созданная в случае внезапного прекращения работы Ворд. Последнее может произойти из-за перебоев с электричеством или по причине сбоев, ошибок в работе операционной системы.
Урок: Как сохранить документ, если завис Word
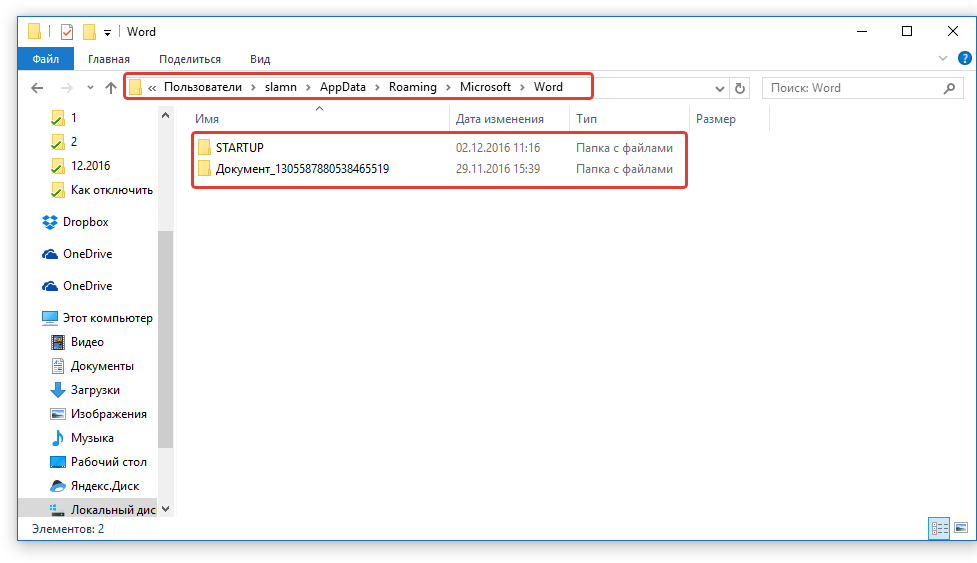
Как найти папку с временными файлами
Для того, чтобы найти директорию, в которую сохраняются резервные копии документов Ворд, создаваемые непосредственно во время работы в программе, нам потребуется обратиться к функции автосохранения. Если говорить точнее, к ее настройкам.
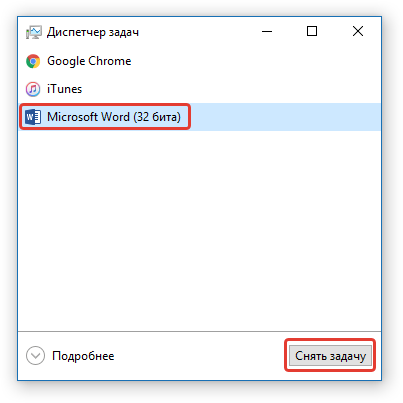
Примечание: Прежде, чем приступить к поиску временных файлов, обязательно закройте все запущенные окна Microsoft Office. При необходимости, можно снять задачу через «Диспетчер» (вызывается комбинацией клавиш «CTRL+SHIFT+ESC»).
1. Откройте Word и перейдите в меню «Файл».
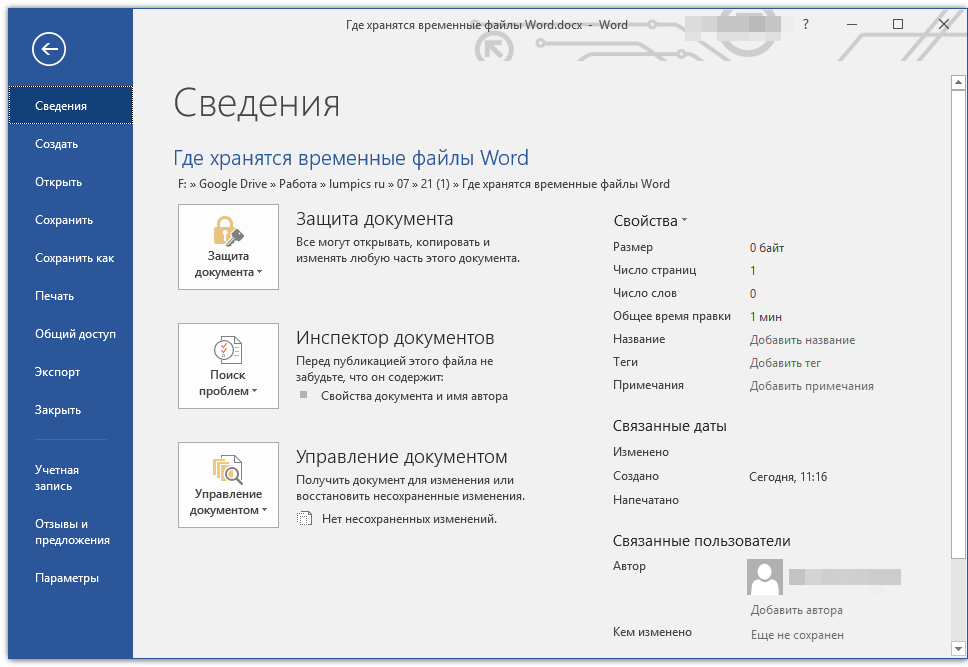
2. Выберите раздел «Параметры».
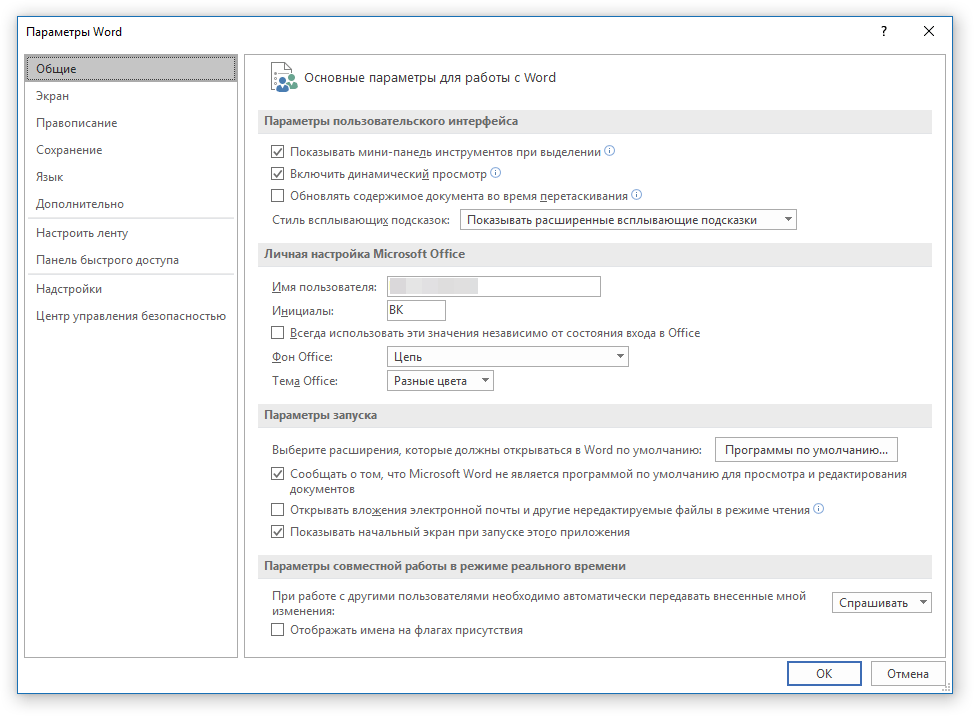
3. В окне, которое перед вами откроется, выберите пункт «Сохранение».


4. Как раз в этом окне и будут отображаться все стандартные пути для сохранения.
Примечание: Если пользователь вносил изменения в параметры по умолчанию, в этом окне они будут отображены вместо стандартных значений.
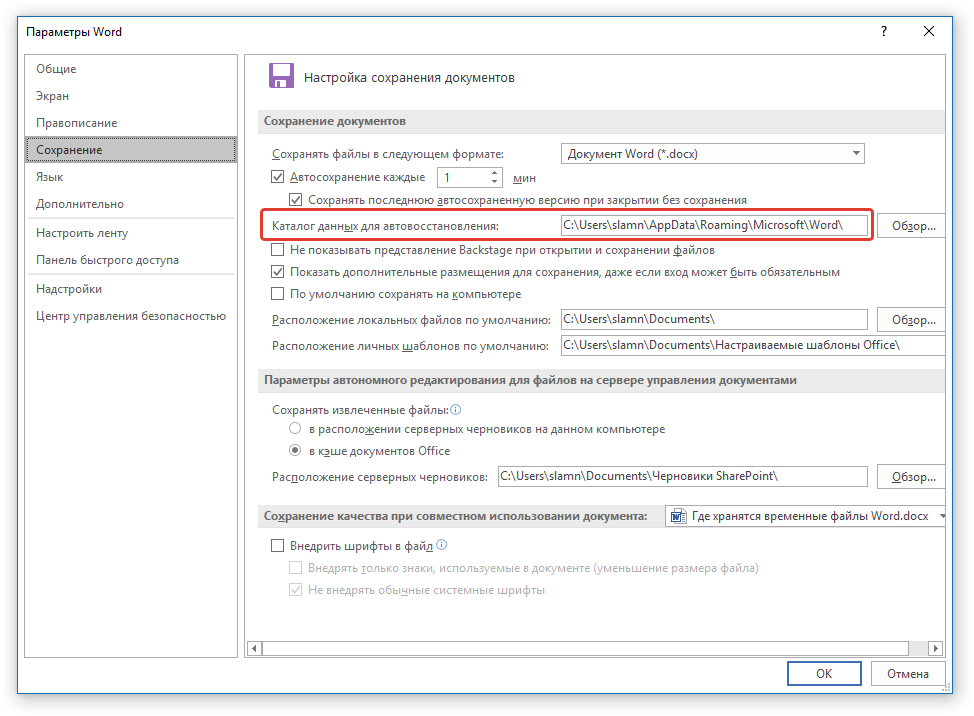
5. Обратите внимание на раздел «Сохранение документов», а именно, на пункт «Каталог данных для автовосстановления». Путь, который указан напротив него, приведет вас к месту, где хранятся последние версии автоматически сохраненных документов.
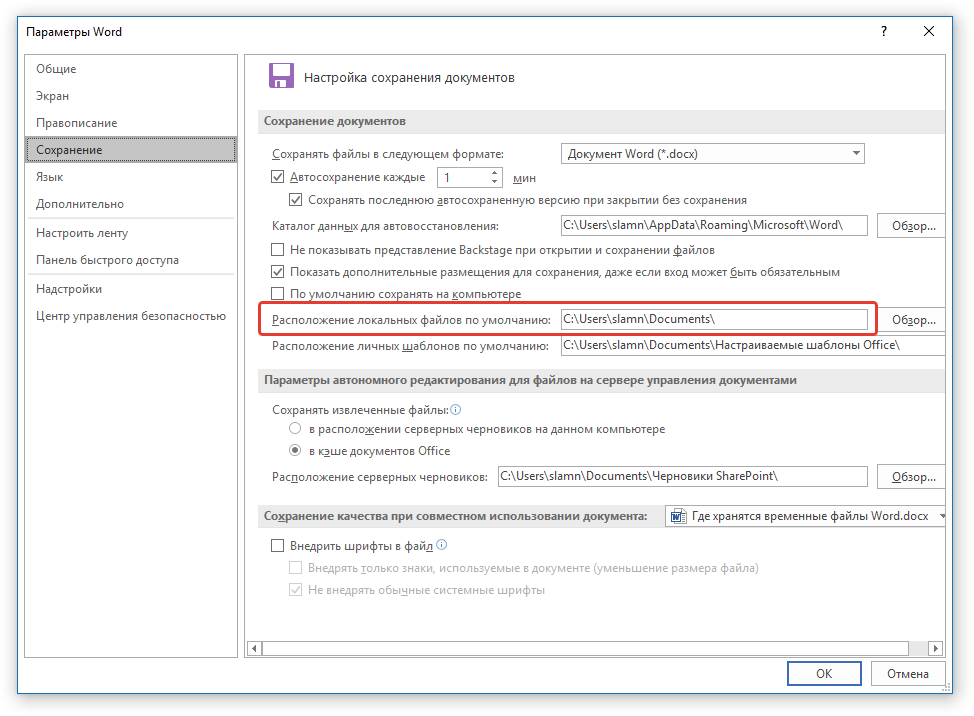
Благодаря этому же окну можно найти и последний сохраненный документ. Если вы не знаете его местонахождение, обратите внимание на путь, указанный напротив пункта «Расположение локальных файлов по умолчанию».
6. Запомните путь, по которому вам нужно перейти, или же просто скопируйте его и вставьте в поисковую строку системного проводника. Нажмите «ENTER» для перехода в указанную папку.
7. Ориентируясь на имя документа или на дату и время его последнего изменения, найдите тот, который вам нужен.
Примечание: Временные файлы довольно часто хранятся в папках, названных точно так же, как и документы, которые в них содержатся. Правда, вместо пробелов между словами у них установлены символы по типу «%20», без кавычек.
8. Откройте этот файл через контекстное меню: правый клик по документу — «Открыть с помощью» — Microsoft Word. Внесите необходимые изменения, не забыв сохранить файл в удобном для вас месте.
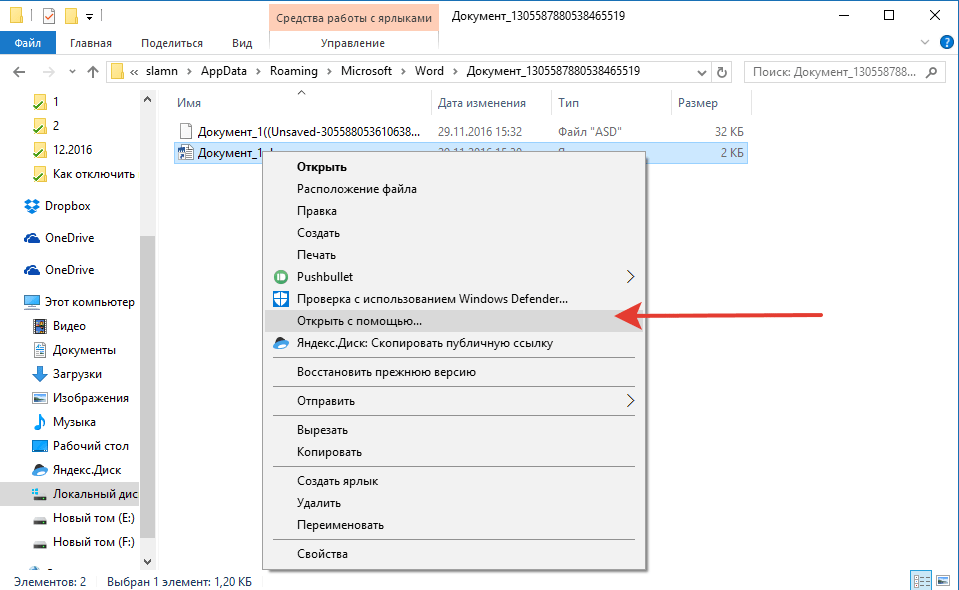
Примечание: В большинстве случаев аварийного закрытия текстового редактора (перебои в сети или ошибки в системе), при повторном открытии Word предлагает открыть последнюю сохраненную версию документа, с которым вы работали. Это же происходит и при открытии временного файла непосредственно из папки, в которой он хранится.
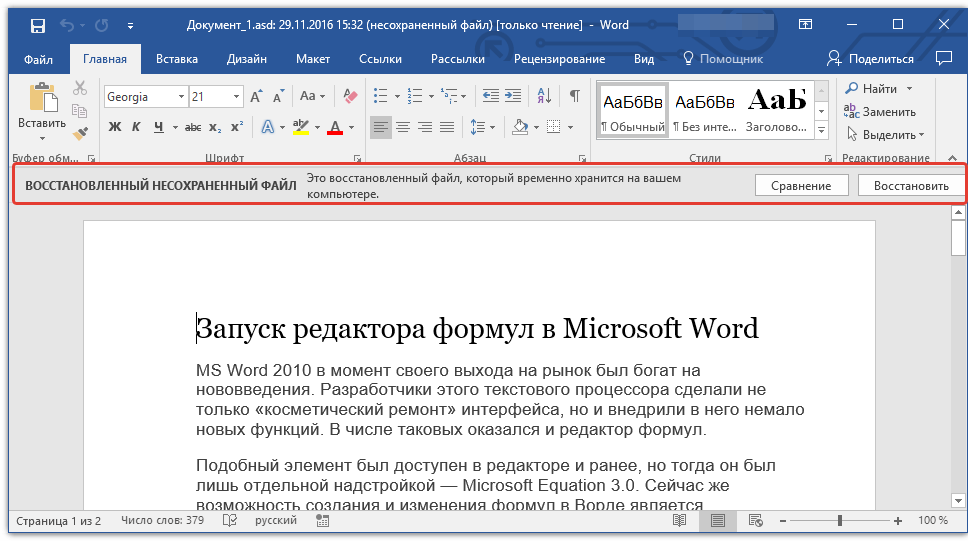
Урок: Как восстановить несохраненный документ Ворд
Теперь вы знаете, где хранятся временные файлы программы Microsoft Word. Искренне желаем вам не только продуктивной, но и стабильной работы (без ошибок и сбоев) в этом текстовом редакторе.
There are few experiences as universally familiar as losing a Word document. Everyone from high schoolers with Catcher in the Rye book reports to business executives with quarterly earnings knows the panic of their work disappearing when it’s just a few crossed-t’s away from being completed.
Fortunately, there are dependable ways to recover Word documents quickly and reliably. Whether your work was accidentally deleted, lost in a Microsoft Word crash, or simply disappeared, here’s a simple guide on how to recover unsaved Word documents.
And remember, if all else fails, installing a data recovery program like Acronis Revive or falling back on a recent file or system backup may help get your documents back (at least in a workably recent state).
Can I retrieve a Word document that wasn’t saved?
Whether you rely on Word for personal or business tasks, losing an unsaved document sucks.
If you don’t save your Word documents manually, your files can fall victim to an unexpected crash. If you’ve already experienced such loss, chances are you have a habit of pressing the «Save» button once (or twice) every so minutes. However, not many users have that habit.
Nonetheless, even if your system crashes with an unsaved document open, you can still recover it through several options.
You can recover unsaved files through Temporary Files, AutoRecover Files, Document Recovery, Recycle Bin, and Data Recovery solutions. We’ll explore all of those options more deeply a bit later in the article.
Does Word keep backup files?
Like most programs in its class, Microsoft Word has an in-built «auto-save» feature to automatically back up your progress every few minutes. The default auto-save folder to support this function is the AppData folder.
Examples of the file path to harvest copies of your work are:
C:UsersYour_UsernameAppDataLocalMicrosoftWord
Or
C:UsersYour_UsernameAppDataLocalTemp
Or
C:UsersYour_UsernameAppDataLocalMicrosoftOfficeUnsavedFiles
Word backup files carry the «.wbk» extension. If you haven’t disabled the backup option in Word, the program will make copies of your documents regularly.
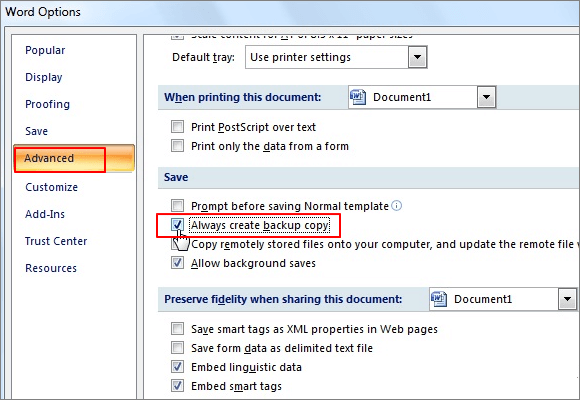
To check if the backup option is active, go to «File» -> «Options» -> «Advanced»; then scroll down to the «Save» section -> select «Always create backup copy».
Can Word save to the Cloud?
Yes, it can. If you rely on the native Windows option, your documents will be uploaded to OneDrive.
Having your documents on the cloud enables easier sharing and improves collaboration. It also allows easier mobile access (from a PC, laptop, smartphone, or tablet) and enhances data protection.
To save files to the cloud, do the following:
1. Select the «File» menu and go for the «Save As» option;
2. Choose «OneDrive»;
3. Choose a descriptive file name and go for «Save».
You can save personal and payment information to OneDrive – Personal, with work-related files going to a company OneDrive. You can also pick an alternative location in the list or «Add a Place» of your preference.
If you’re using a third-party backup solution like Acronis Cyber Protect Home Office, you can upload backup files to the Acronis cloud. Storing your files with a dedicated cloud backup service provides improved cybersecurity via backup encryption, automated backups, and concrete data recovery processes.
How do I restore a permanently deleted file?
Multitasking on a device may lead to losing critical data. (files, documents, images, audio, video, etc.)
Sometimes, you can get distracted and accidentally delete files and folders. The most common reasons for an accidental deletion are:
· Accidentally emptying your Recycle Bin;
· Erasing documents via «Shift+Delete» keys;
· Deleting files via the command line;
· Deleting files with the «Do not move deleted files to Recycle Bin» option enabled
File deletion or corruption can also result from malware or virus infection on your device.
Fortunately, you can recover perma-deleted data and documents in several feasible ways. Not all of them are guaranteed to recover permanently deleted documents, but you may try all of them in order when needed.
You can still recover seemingly perma-deleted files due to how your hard drive operates. Every file on your device resides on a specific portion of the hard drive. When you delete a file from your hard drive, the drive removes the deleted data and marks the space it used to occupy as «free» for writing new data.
However, the file can be restored to its original location unless you write new data on the newly available space. Remember, you need to act quickly – even if you don’t save new data to the hard drive manually, your computer can initiate updates or save system data on the newly available space.
In such a scenario, recovering permanently deleted files becomes close to impossible.
How to recover deleted Word documents via Backup?
Windows 10 and 11 pack a new feature called Backup and Restore.
The option enables users to create backups of their data to restore them later if needed. To recover permanently deleted files via Backup and Restore, you’d need to have enabled the option on your Windows device.
Here’s how to do it:
· Connect the external media carrier holding the backup to your primary device
· Go to «Control Panel» -> select «System and Security» -> click «Backup and Restore (Windows 7)» option
· Once in the Backup and Restore menu, go for the «Restore my files» option -> a Restore wizard will pop up to start file recovery
· If you can’t find the «Restore my files» option, go for the «Select another backup to restore files» option. Again, a wizard will pop up to assist you with your recovery
Recovering via Backup and Restore will replace all data on your Windows device with backed-up data. So, to avoid further data loss, make sure the backup contains all your crucial data.
How to recover deleted Word documents via Previous Windows 10/11 version?
Windows 10 and 11 offer another convenient feature to restore permanently deleted files – the «File History» option. If you had enabled the option before deleting a document, you could use it to recover permanently deleted files without additional software.
To do so:
· Type «File History» in the Start menu or the Windows search bar
· Select «File History Settings»
· From the left panel on the pop-up window, choose «Restore personal files»
· Navigate the feature to the backup you wish to restore. You can do that via the left and right navigation buttons at the bottom of the window. While you switch between backups, you can preview backup dates and the folders within them
· Once you’ve located the specific backup storing the deleted documents, press the «Restore» button to recover the files to their original location
· If Windows suggests it already carries a file with the same name in the destination folder, go for the «Replace the file in the destination» option
Lastly, close the window and check if the recovery is successful.
How to recover deleted Word documents via Command Prompt?
Sometimes, files and folders can be hidden due to the «Hidden files and folders» feature in Windows. You can use the Command Prompt to try and recover them.
To do so:
· Type in «cmd» in the Search Bar on the Start menu
· Choose the «Run as administrator» option
· Type chkdsk *: /f in the Command Prompt. The * represents the letter of your hard drive, so replace it properly. Once you do, hit «Enter»
· Type ATTRIB -H -R -S /S /D D:*.* in the Command Prompt window. Here, replace the «D» with the letter corresponding to your hard drive. Once you do, hit «Enter» again
A recovery process should start immediately if you’ve followed the above steps successfully. Let it finish and check if your files have been restored.
How to recover deleted Word documents via System Restore?
If you’re running Windows 10 or 11, you can opt for a System Restore to recover permanently deleted files. As System Restore takes regular (automated) snapshots of your whole OS, you can revert any unwanted changes to your system by reverting it to a previous point in time.
However, you’d need to have activated the System Restore option beforehand.
To recover perma-deleted files via System Restore, you need to:
· Type in «create a restore point» in the Start menu or Windows search bar, and click «Enter»
· Select «System Restore»
· Go through potential system restore points in time and select the most appropriate to recover the deleted document; then, click «Next»
· Confirm the specific restore point and choose «Finish»
· Your PC or laptop will then restart to allow Windows to apply the changes
Although this option is convenient, you must remember that System Restore may affect recently installed drives, programs, and browser updates. As its primary goal is to repair your Windows environment, it will revert your device to an older version of itself. And that older version may not have some programs or apps installed or updated correctly.
Nonetheless, before the System Restore process starts, the feature will show you a window containing all programs that will be affected by it. This way, you can back up all potentially affected programs and files before you revert your system.
How to recover deleted Word documents via System Image Recovery?
System Image backup enables users to back up the entirety of a Windows 10 or 11 OS. However, the feature doesn’t allow single file and folder backup, so you wouldn’t be able to restore individual documents if needed.
Here, it’s either recover everything or don’t recover anything.
To recover documents via System Image Recovery, you need to:
· Type «settings» in the Start menu or Windows search bar, and click «Enter»
· Browse and select «Update & Security»
· From the options list on the left, go for «Recovery»
· Save the progress on any open documents or programs
· Then, go for the «Restart now» button (you can find it under «Advanced Startup»)
· Afterward, select “Troubleshoot” -> “Advanced Options” -> “See more recovery options” -> “System Image Recovery”
· Browse through the list of System Image backup files and select the one containing the deleted document, then click «Next»
· Choose additional restore options, then click «Next»
· Review all System Image properties and click on «Finish» to start the restoration process
Once the restoration is complete, the deleted document should be restored to its original location. (or an alternative location, if you’ve chosen so in the Restore settings)
How to recover deleted Word documents via a third-party Backup solution?
If you’re using a dedicated backup solution, you can initiate data recovery and restore permanently deleted files from your device.
For example, Acronis Backup and Recovery enables users to initiate efficient backups with over 20 supported platforms. Via the cloud, your data is securely stored in physical, cloud, virtual, and mobile environments.
If you need to recover files from Acronis backup, you can do it via the user-friendly interface.
To do so:
· Start Acronis Cyber Protect Home Office -> select «Backup» on the sidebar
· Select the backup containing the deleted documents from the backup list
· On the panel to the right, select «Recovery»
· The interface will present you with possible recovery models for the selected backup; depending on the backup’s type, you’d be able to choose from «Entire PC», «Disks», «Partitions», and «Files» options. To recover one or more documents, select «Files»
· Cyber Protect Home Office will display the backup’s properties and the data inside it. Then, select a specific version of the backup based on the date and time. The default option here is the latest backup
· The panel on the left lets you navigate the files you wish to restore in the panel on the right; after you select all needed documents, press «Next»
· Choose a recovery destination on your device to place the selected documents after restoration. Here, you have two options – recover the data to its original location or choose a new location via the «Browse» button
· You can customize the recovery settings for the current session via the «Recovery options» menu.
· Once you’re done with the settings, go for the «Recovery now» button.
You can terminate recovery via the «Cancel» button at any time. However, aborted recoveries can still cause changes in the selected destination folder, so only go for the option if absolutely necessary.
Tips on preventing your Word Files from being deleted or unsaved
How to recover Unsaved Word Document?
We rely heavily on autosaves, yet huge chunks of progress and entire versions of documents can be lost when we don’t manually save our work. The good news is, this problem is so common that Microsoft has made it easy to recover unsaved Word documents:
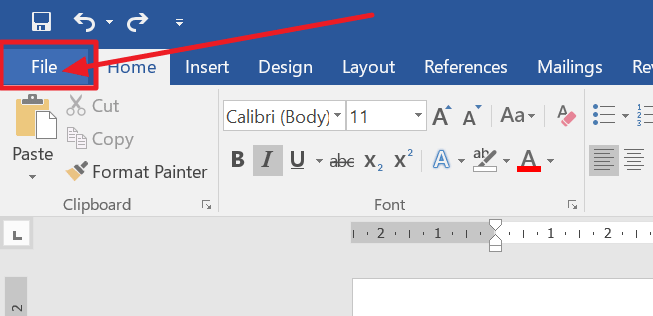
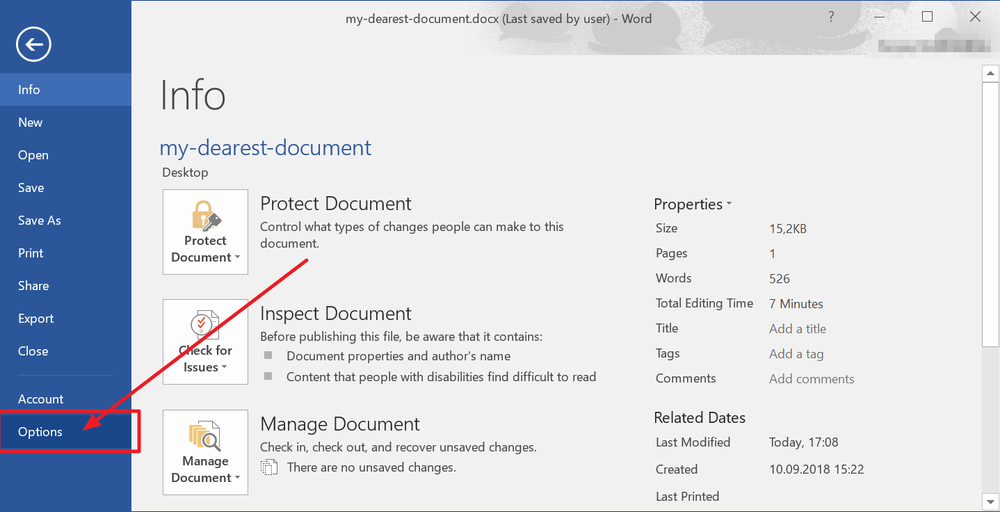
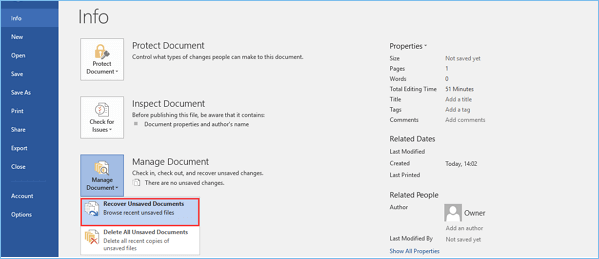
1. In MS Word, click the File Tab in the upper left.
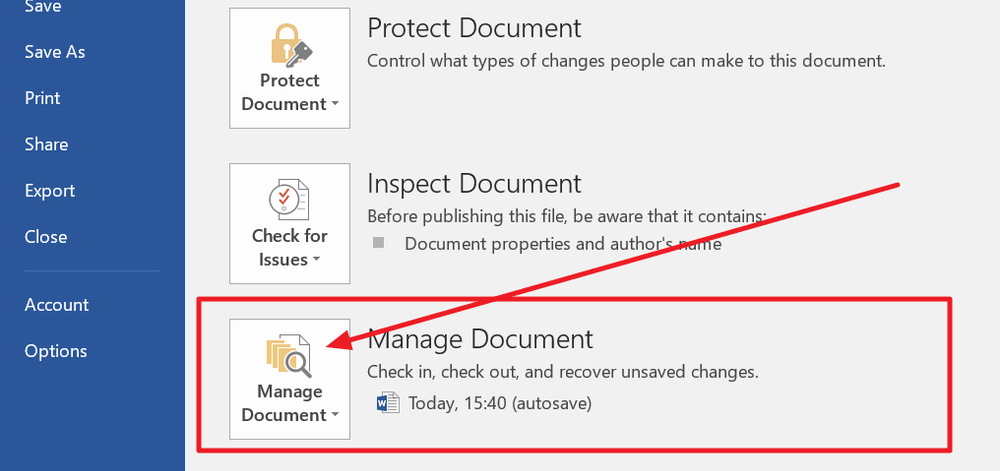
2. Click Manage Document and select Recover Unsaved Documents from the drop-down list.
3. Check for your missing file in the dialog box. If it was a recent loss it should appear.
4. Open the recovered Word document and click the Save As button in the top banner.
Did You Know?
You can update the frequency with which Microsoft Word autosaves your documents. Click File > Options > Save and change the number of minutes to ensure you have a recoverable version of all your docs available in case you need to recover Word documents in the future.
Knowing how to recover deleted Word documents will make you seem like a wizard to many of the people in your office, but it’s not complicated at all. Whether you’re trying to recover MS Word documents that were accidentally deleted or compromised by malware, there are a few easy steps that could help you get it back.
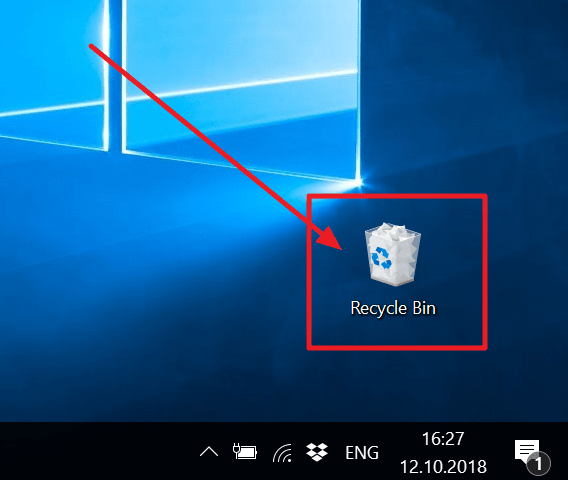
1. On your desktop, open the Recycle Bin
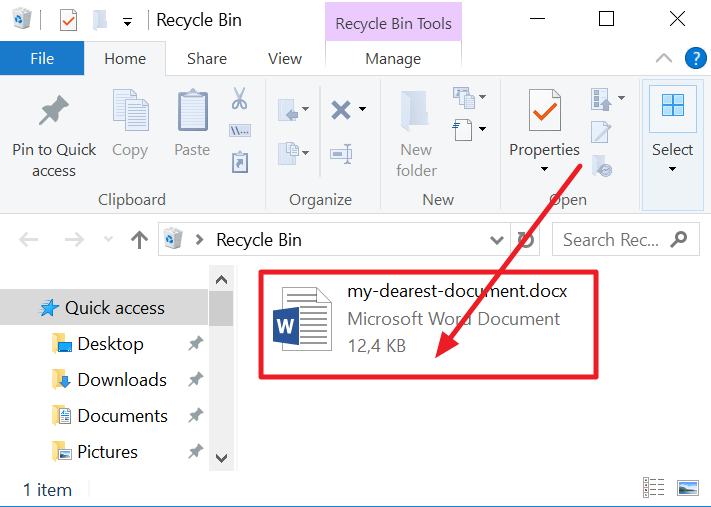
2. Search for your file by document name, file type, or date deleted. If you find your missing file, note the Original Location. When you recover deleted Word documents, they automatically are restored to that location.
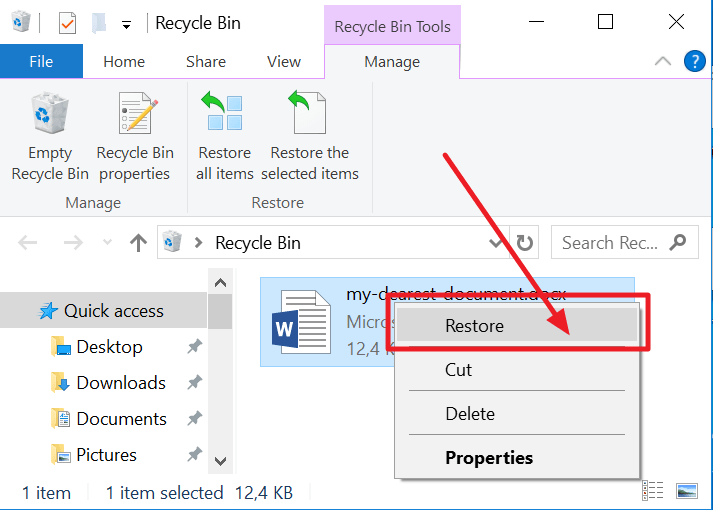
3. Restore the deleted document and either find it in its original location or click Quick Access to find it in the Recent Files list.
Did You Know?
When a file is deleted you’re actually just removing a marker that points to where the file was stored on the disc. The file actually exists on the disc until its space is overwritten by new information. Until that happens, you have a chance to recover Word documents.
How to recover Word Documents after a Crash?
Recovering Word documents that didn’t save doesn’t always stem from user errors. Whether your system unexpectedly went down or Microsoft Word crashed, Word documents can be recovered if you quickly search for the lost files before other files can take their disk space.
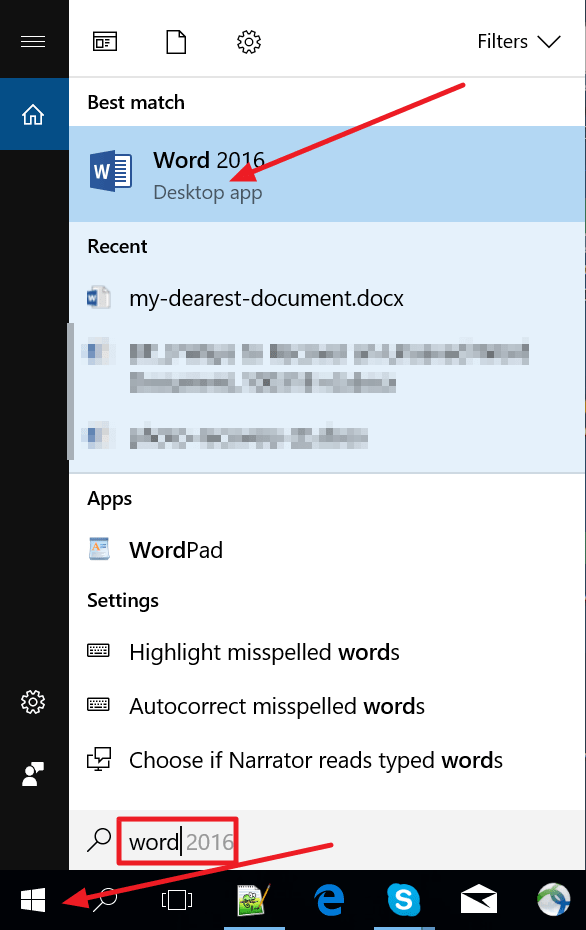
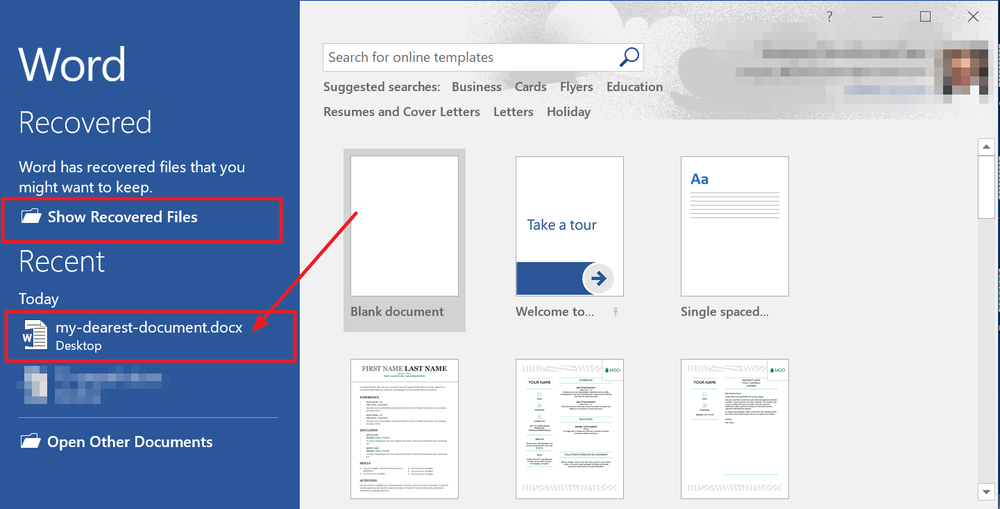
1. When your system comes back online, reopen Microsoft Word. The program automatically recovers unsaved Word documents in most cases.
2. If your document doesn’t appear in the AutoRecover list, click on File, then Options, then Save.
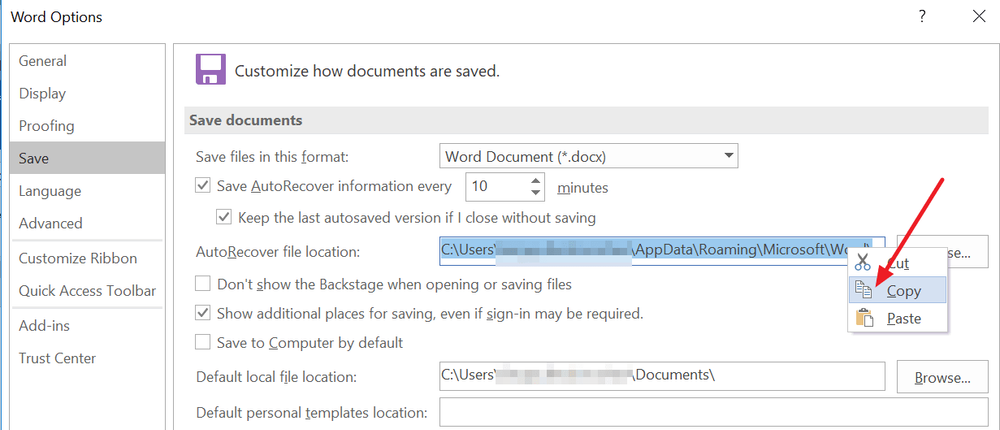
3. Copy the AutoRecover file location filepath and paste it into File Explorer.
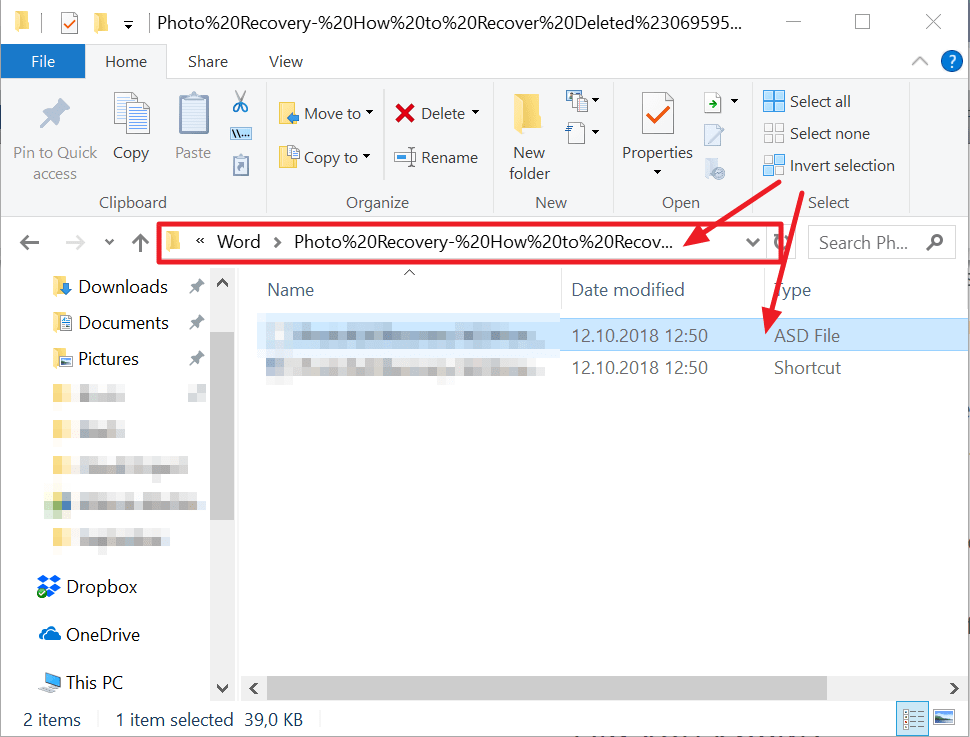
4. Open the folder with your document’s name and copy the .asd file with the most recent modification date and time.
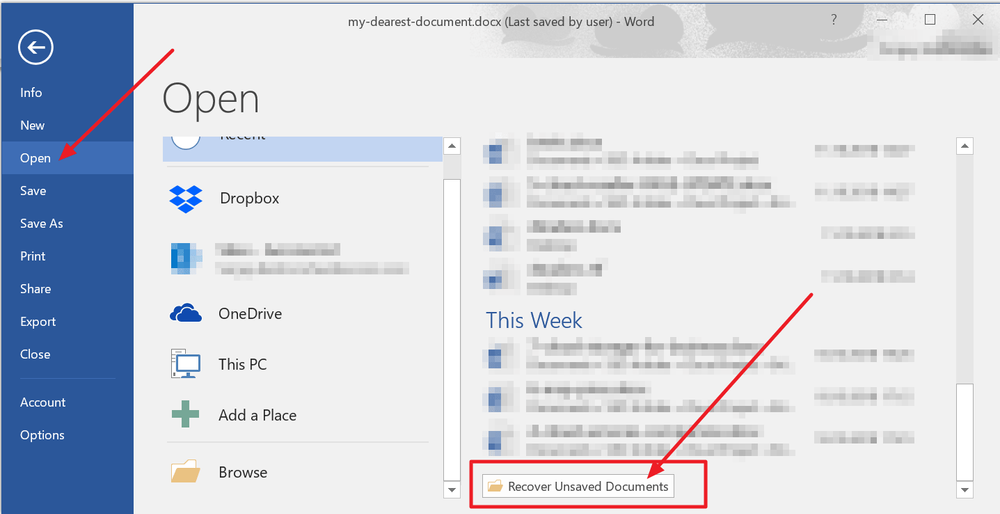
5. Return to MS Word, click File, then Open, then scroll to the bottom of the recent documents list and click Recover Unsaved Documents.

6. Paste the copied file into the folder that pops up and open the file to recover it.
Did You Know?
One of the most common reasons for Microsoft Word crashing is corrupt add-on or template. If your program consistently crashes, try running Word without any of these features loaded to see if that helps to improve reliability.
Can I recover a permanently deleted word doc without a backup?
Recovering a permanently deleted file via backup is the easiest and most reliable option. However, sometimes, users don’t have the chance to add a specific document to the backup. If they then accidentally delete the document, recovery gets a hell of a lot more complicated.
In such a scenario, you have two primary options.
The first one is to use data recovery software. Nowadays, many recovery tools claim to have an exceptionally high rate of recovering permanently deleted files. Usually, such solutions can recover over 1000 file types and formats and claim to restore data even from corrupted partitions or bad sectors on your hard drive.
They typically operate by collecting the lost data bit-by-bit until they can fully restore its original state. Such an approach can prove handy occasionally, but that depends heavily on the state of your computer’s hard drive.
If you lose a document due to a bad sector on your hard drive, the software may not be able to recover all of the document’s pieces successfully. This may lead to an altered version of the document or may not be able to restore it at all. In such a case, the document would be lost unless you have it stored in some form of backup.
This leads us to the second option.
Suppose a user perma-deletes a document by accident. In that case, most often, their reaction is to panic, especially if they don’t have the document stored in a backup outside their primary device.
However, we live in a technologically webbed world – anyone can send documents to multiple recipients via email, social media platforms, or free cloud services.
You can go through old emails, check DropBox or OneDrive shared storage, or go through your correspondence on Facebook and Instagram to find the deleted file. Nonetheless, if you’re 100% sure you haven’t sent the document to anyone, you can opt for the data recovery software option.
As we’ve mentioned, AutoSave is an in-built feature available in Word, Excel, and PowerPoint. (given you have a Microsoft 365 subscription)
AutoSave saves the progress on your Word files every few seconds unless you tell it otherwise. If you store your Word files on OneDrive, SharePoint, or OneDrive for Business, AutoSave is enabled by default.
To save a copy of your work before implementing any changes, it’s better to use the command «File -> Save a Copy» rather than «File -> Save As». That way, AutoSave will not overwrite the original document with the changes you make afterward.
If you skip that step and end up with an overwritten document, you can still restore the original via Version History. To do so:
· Open the Word file you wish to restore to a previous version
· At the top of the windows, click on the filename and go for «Version History»
· Review the dates and times of all versions to find the one you wish to restore -> click «Open Version»
· An additional window will pop up and show you the specific version of the document
· Once you’ve made sure this is the version you want to restore, click «Restore»
Whenever you open a Word document and make first changes, AutoSave will save those changes by adding a new file version to Version History. Afterward, AutoSave will regularly save changes to the document but only add new versions to Version History about every 10 minutes until you terminate the session. (ending the session means closing the Word document)
How do I get Microsoft Word to save AutoRecover versions every minute?
If you’re handling critical information via Word documents, saving a version of the file every 10 minutes may seem risky. However, Microsoft has thought of that – you can change the AutoRecover frequency to any number that suits you.
Here’s how to do it:
· Open Word and go to File -> Options -> Save
· You’ll see a settings section labeled «Save documents»
· Under the «Save documents» line, type your chosen number (of minutes) in the «Save AutoRecover information every (…)» box
· Once done, press «OK»
If you want to change the location for AutoRecover documents, go to:
· File -> Options -> Save
· Under the «Save documents» line, browse or type in the save path for saved documents in the «AutoRecover file location» field
· Once done, press «OK»
The AutoRecover settings window allows you to also:
· Disable AutoSave for OneDrive and SharePoint online files by default
· Change the cache location for AutoRecover files. The default should be «C:UsersYour_UsernameAppDataRoamingMicrosoft[OFFICEAPPFOLDER]
· Enable AutoSave on the computer by default
According to Microsoft, however, there is no option to use AutoSave locally in Office 2019 or 2021. Nonetheless, the AutoRecovery feature is still active to periodically save copies of your Word files to negate accidental data loss due to a crash.
Can I turn on AutoRecover in Word for Mac?
As with Windows, AutoRecover is available for Mac to protect the progress on your Word documents. Its default function here is the same – it makes a copy of your document every 10 minutes.
To enable AutoRecover and set the timeframe for making copies, you need to:
· With Word open on your Mac, go to the «Word» submenu on the top
· Choose «Preferences»
· Choose the «Save» option
· Choose «Save Auto-Recovery Information» and type in the duration you wish to set for AutoRecover copy creation
Microsoft advises users not to rely on AutoRecover as a substitute for manually saving their documents. (by clicking on the «Save» icon)
The most optimal way to preserve changes to your document is by manually saving it after every significant change. Nonetheless, it doesn’t hurt to set the AutoRecover timer to 5 minutes instead of 10 to guarantee you won’t lose progress due to a crash.
Keep in mind, when you manually save a document, its previous AutoRecover versions are removed.
On the other hand, AutoSave is a feature that saves your documents as you work on them. It works as if you’ve manually saved your progress. For Mac, AutoSave is available in Word, Excel, and PowerPoint for Mac and Microsoft 365 subscribers.
If you have AutoSave enabled, it’s less likely you’d need to rely on AutoRecover files.
Where is Autosave in Word located on Mac?
The AutoSave and AutoRecover features are linked in the Word menu. The path to enable AutoSave follows the same steps as with AutoRecover. However, you’ll have a few extra steps to complete before AutoSave is active for Word on your Mac.
Here’s how to do it:
· Open Word
· From the top menu, choose «Word» -> «Preferences»
· Click on the «Save» icon
· Tick the checkbox labeled «Turn on AutoSave by default»
· From the Word document, enable the AutoSave toggle to save your progress to the cloud (OneDrive or SharePoint)
· Explore more options from the AutoSave tab and select the «Automatically Save» option
· The AutoSave toggle will appear on the top side of the Word toolbar
· Name the document you’re working on and choose OneDrive or SharePoint as the storage location of the Word file
· Click «Save» to enable AutoSave to store changes in your desired location in real-time
· Your document will then be uploaded to the chosen location
·Once that’s done, AutoSave is on, and all changes you make to the document will be saved to OneDrive or SharePoint
Where can I find AutoSave Word documents on my computer?
If a power failure or a crash occurs, AutoRecover will typically recover the last version of your Word document automatically when you launch the app. Once AutoRecover opens the existing recovery file, it’s best to save it before editing or closing it immediately.
However, you may need to find AutoRecover files on your computer for other reasons. To do so:
· Switch to Finder
· Click «Go»
· Click «Go to Folder» (you can also use the SHIFT + COMMAND + G combo)
· Enter the specific folder path corresponding to Word, Excel, or PowerPoint
For Word:
/Users/Your_Username/Library/Containers/com.Microsoft/Data/Library/Preferences/AutoRecovery
For Excel:
/Users/Your_Username/Library/Containers/com.microsoft.Excel/Data/Library/Application Support/Microsoft
For PowerPoint: /Users/Your_Username/Library/Containers/com.Microsoft.Powerpoint/Data/Library/Preferences/AutoRecovery
Just a reminder: Replace «Your_Username» with your actual username.
As the AutoRecovery folder is hidden, typically, you won’t be able to find it by navigating in Finder. That’s why you need to use the «Go to Folder» feature and type in the full path to reach the folder.
Additionally, if you close a Word document and click «Don’t Save», the AutoRecover option won’t be active. The feature will delete the AutoRecover file because it assumes everything is okay and you wouldn’t need the AutoRecover file.
Can Microsoft Word recover previous versions of my document?
If you have turned the AutoRecover option on, it will automatically save versions of your documents regularly. (usually, at 10-minute intervals)
Once you have the AutoRecover files for your document, you can recover them depending on when you saved them.
There are two options: recover a saved file or an unsaved one.
If you have saved the document, you have to:
· Open the document you were working on
· Select “File” -> “Info”
· Find «Manage Documents» and choose the file labeled (when I closed without saving)
· A bar on the top of the file will appear; choose «Restore» to overwrite any previously saved versions
You can also compare AutoRecover versions by choosing «Compare» instead of «Restore».
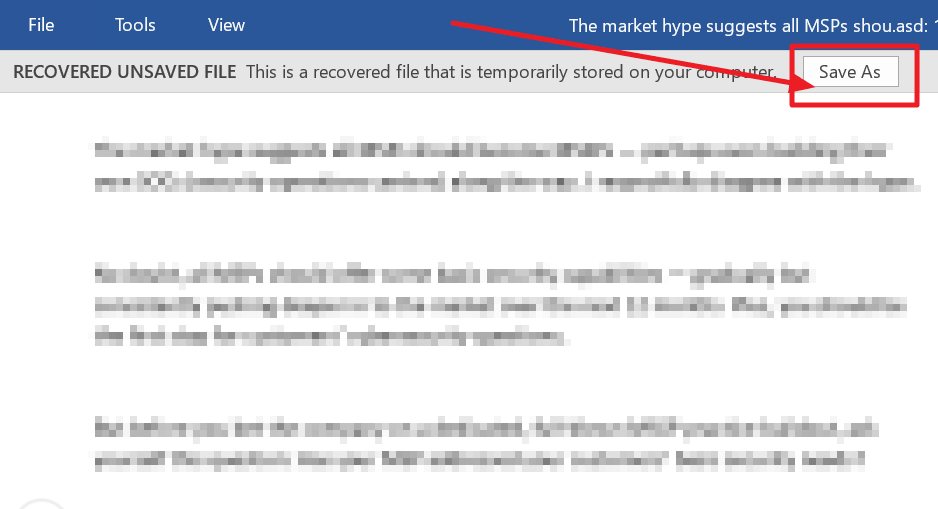
If you haven’t saved the document, you have to:
· Open Word and go for “File” -> “Info” -> “Manage Document” -> “Recover Unsaved Documents”
· Select the specific file and click «Open»
· In the top file bar, choose «Save As» to save the document
If you have stored AutoRecover files in OneDrive or SharePoint in Microsoft 365, you can view all historical versions of a document.
To do so in Office 365:
· Open the file you want to inspect
· Select “File” -> “Info” -> “Version History”
· Browse through versions and select them to open them in a separate window
· If you want to restore the document to one of the previous versions, choose «Restore»
Keep in mind, if you operate via a Microsoft account, you’d be able to retrieve the last 25 versions of a document. If you sign in with a school or work account, the retrievable version volume will depend on your library configuration.
To view AutoRecover versions in Office 2019-2016:
· Open the document you want to inspect
· Click “File” -> “History”
· Choose a version to open in a separate window
If you can’t locate the «History» tab on the Word navigation pane, you may have a subscription version of Microsoft Office. If that’s the case, click the «Info» button and try accessing Version History from there.
To view AutoRecover versions on Mac:
· Open the document you want to view
· If you are using Microsoft 365 for Mac, choose the name of the document from the app’s title bar -> click «Browse Version History»
If you’re running Office 2016 or 2019 for Mac, go for «File» -> «Browse Version History»
· Browse AutoRecover versions and choose which ones to open in a separate window.
To view AutoRecover versions on the web:
· Open the document you want to view
· Go for “File” -> “Info” -> “Version History”
· Browse through AutoRecover versions and open the ones you want in a separate window
· When you find the version you’re looking for, choose «Restore»
If you use SharePoint in Microsoft 365 to handle documents, you can track AutoRecover versions, share them with others, and check recycle bin storage if you accidentally delete a file.
How to search for Word doc which I know I saved?
If you’re sure you have saved a Word document but haven’t been able to locate it, worry not. There are several ways to unfold saved documents, even when you’re computer is swamped with Word files.
You can search a file via the taskbar, the Documents tab, or File Explorer.
To find a Word document via the taskbar, type in the document’s name (if you remember it correctly) into the search box on the Windows taskbar. If you don’t know the full name of the document, you can use a keyword from it.
You can get results even if you remember a keyword from the text body of the document. (and not its name)
Once you type the name or keyword, Windows will show all matches on your device and OneDrive.
You can select the Documents tab if you wish to narrow your search. Once you do, your search results will only show documents.
Moreover, you can open File Explorer from a taskbar shortcut or right-click the Windows Start menu and choose File Explorer. Afterward, you can select a location on your hard drive from the left window pane.
You can then search or browse to find the document you need. You can search your entire device by selecting «This PC», or go for «Documents» and only look for files stored there.
How to search for Word backup files?
Although Word backup is seamless once set up for users, finding specific Word backups may be difficult without preparation. Luckily, you can learn how to pinpoint different Word backups below.
Check Word settings
If you remember how to open the AutoSave settings in Word, you can skip the next set of instructions. If not, you need to:
· Start Word -> click on «File»
· Choose «Options» and then click on «Save» on the left
· Ensure that the «Save AutoRecover information» option is enabled
Once you reach the settings window, go to the AutoRecover File Location field. Here, you can check the current AutoSave directory location.
By default, it would be «C:UsersYour_UsernameAppDataRoamingMicrosoftWord»
Once you locate the AutoSave directory location, you need to:
· Launch Word
· Navigate to the AutoSave directory
· Look for the version of the automatically saved backup and double-click it; the file will open in Word
As we’ve mentioned, the AutoSave directory may be a hidden folder on your computer, primarily if it resides in the AppData folder. However, you can bypass that by pasting the directory location in File Explorer’s address bar.
Nevertheless, you can navigate to the folder manually if you follow the path. Just make sure to reveal hidden items to be able to see the AppData folder. Once that’s done, you should easily find your way to the AutoSave directory.
Check the AppData folder
As we’ve said, the AppData folder is the default location for AutoSave backups. The pathing to the AutoSave directory can vary; the most common places to look are:
C:UsersYour_usernameAppDataLocalMicrosoftWord
and
C:UsersYour_usernameAppDataLocalTemp
Sometimes, the most recent AutoSave versions may use a different location. Most often, you’d be able to find them in
C:UsersYour_usernameAppDataLocalMicrosoftOfficeUnsavedFiles
As with previously shown paths, replace «Your_Username» with the username corresponding to your user account.
Regardless of which folder holds your Word backups, the AutoSave files have weird-looking names, especially for a casual user. They typically have a tilde before their name and the «.tmp» extension alongside a 4-digit number assigned to them.
Below are some examples of what Word backup files look like in different scenarios:
· ~wrdxxxx.tmp – such a name relates to a Word document within an AutoSave folder;
· ~wrfxxxx.tmp – such a name relates to a temporary document file;
· ~wraxxxx.tmp – such a name relates to an AutoRecovery file;
Complete AutoRecovery files won’t carry the «.tmp» extension but rather the «.wbk» extension. Once you locate them, you can double-click them to open the document in Word. An important note is always to save the file after you open it.
How to use the Recover unsaved documents option?
Sometimes, you’re sure you’ve saved a Word document, but your PC crashes, and you can’t locate the file afterward.
In such cases, you can still recover the document from the AutoSave location. To do so:
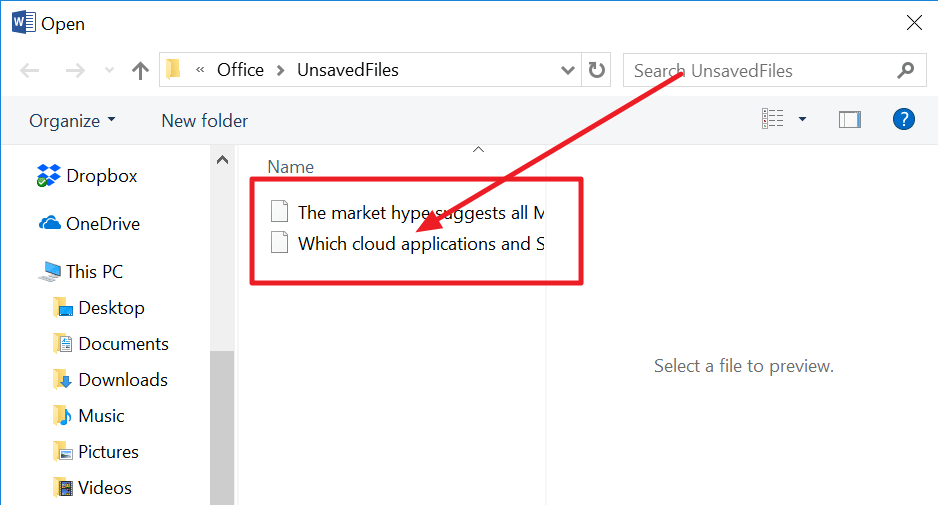
· Open Word and go to «File»
· Click «Recent», then select «Recover Unsaved Documents»
· You will be redirected to the AutoSave location folder; you can browse the documents here and find the one you’re looking for
Another path to reach the AutoSave folder is as follows:
“File” -> “Info” -> “Manage Versions” -> “Recover Unsaved Documents”
After you open the file, make sure to save it.
Check the Documents directory
To check the Documents directory, you should:
· Start Word
· Select «File», then choose «Open»
· Go for «Browse» and navigate to the directory you suspect holds the document
· Ensure to change the File Type of the folder from «All Word documents» to «All Files»
· If you’ve opened the correct folder, you should be able to see all corresponding backup files; you should easily spot the specific file as it is typically titled «Backup of (…)»
· Once you find the backup, you can open and save it
How to search your Windows temporary files manually?
In some instances, finding a backup file via traditional methods is more challenging, especially if you can’t find the AutoSave folder.
However, you can manually search for temporary files by tracking their extensions. Autosaved Word files usually carry the .asd or .wbk file extension.
To search for those, you should:
· Press the Windows Key + E on your keyboard; this will launch the File Explorer
· Once it’s up, click on the search bar on the top right
· Type in «.asd» or «.wbk» (without the quotes)
· Press «Enter»
· Windows will now search for all .asd and .wbk extensions
· Once the search is complete, you can browse through the matches and find the file you’re looking for
· Upon finding the specific file, right-click it and choose «Open File Location»; this will open the AutoSave directory location so that you can see all automatically saved backup files
If searching for .asd and .wbk extensions doesn’t bear any fruits, you can search for .tmp extensions. However, .tmp files aren’t necessarily all Word files. Many of them can support files from other applications, so you’d have to do some sorting.
How to recover Word Documents through Data Recovery Programs?
If none of these methods help you recover unsaved Word documents, your best bet is either backup software or data recovery software.
As always, the most secure and reliable way to recover data is with regular full image backups. Whether you use a Windows PC, a Mac, or a mobile device, having up-to-date backups ensure that you don’t lose your files – no matter what.
That said, if you didn’t have a backup plan in-place and active when you lost your Word document, you won’t have a backup to restore the file from.
In this case, personal cyber protection solutions like Acronis Cyber Protect Home Office are the best way to help you recover Word documents. Acronis Cyber Protect Home Office is an easy-to-use software solution that allows you to backup up the entire contents of your system so in the event of a disaster, you can locate a lost file and restore the MS Word document with just a few clicks.
Final Thought
Whether your Word doc was deleted, encrypted by malware or corrupted when it was saved on a faulty partition, you can recover it with Acronis Cyber Protect Home Office. When armed with regular backups, your docs can be recovered quickly and easily so you never have to worry about losing a Word doc or any other file ever again.
Do you often worry about losing your work? If so, you’re not alone. It’s easy to lose a Word document for uncertain causes, such as computer or program crashes, hardware failure, accidental deletion, human misoperation, etc.
Therefore, it’s crucial to have a backup plan in place for your most important files. This article will discuss how to automatically back up Word documents in multiple ways. For example, you can use the built-in Save or AutoRecover functions in Word or an automatic file backup tool to back up Word documents. No matter which method you choose, make sure you have a backup plan for your most important files!
Back Up Word Documents Automatically with File Backup Software
Backing up your work is always essential, but it can be easy to forget. If you’ve been creating many important Word projects, you can set up Word automatic backup schedule with EaseUS Todo Backup Home.
Here is what EaseUS data backup software can do:
- Back up all the file types, including photos, videos, documents, emails, archives, etc.
- Automatically back up files to external hard drive, USB flash drive, pen drive, etc.
- Back up to cloud, OneDrive, and NAS drives
- Provide complete and quick backup and restore solutions in a few clicks
Here’s how to use this data backup program to make Word automatic backup schedules:
Step 1. Click «Select backup contents» to initiate a backup.

Step 2. There are four data backup categories, File, Disk, OS, and Mail, click File.

Step 3. Local and network files will be displayed on the left side. You may extend the directory to choose which files to back up.

Step 4. Select the location where you want to store the backup by following the on-screen instructions.

Click «Options» to encrypt the backup with a password in «Backup Options,» and to setup a backup schedule and choose to initiate a backup at a certain event in «Backup Scheme.» There are a variety of other customization options available for the backup process.

Step 5. You may save the backup to a local disk, EaseUS’ online service, or a NAS.

Step 6. EaseUS Todo Backup enables customers to back up data to a third-party cloud drive and its own cloud drive.
If you want to back up data to a third-party cloud drive, choose Local Drive, scroll down to add Cloud Device, add your account, and then log in.

You can also save backups to EaseUS’s cloud storage service. Sign up for an EaseUS Account and log in after clicking EaseUS Cloud.

Step 7. To begin backup, click «Backup Now» Once the backup process has been finished, it will be shown as a card on the panel’s left side. To further manage a backup job, right-click it.

More Word backup operations are explained clearly in the following video. We’ve listed the key moments as below:
- 00:36 Click File > Word Option.
- 00:45 Click Save > choose AutoRecover
- 01:00 Click Adavanced > Always create backup copy
How to Create Backups of Documents in Word
Word has an embedded document backup function to help users always create a backup copy when saving files. The Word backup file is saved as a «wbk» file in the same folder as the original document, which you can open in Word and edit in.Doc or Docx file.
Here are the how-to steps:
Step 1. Open your Word, click the «File» tab and select «Options».
Step 2. Select «Word Option» and click «Advanced».
Step 3. On the right pane, Find Save and tick «Always create backup copy» beneath it.
Step 3. Then, click «OK» to save the changes.
Backup Unsaved Word documents with AutoRecover
Microsoft Word has a built-in utility that can automatically back up your Word documents while you are working. Here’s how it works:
While the AutoRecover feature is excellent, it only saves the unsaved Word documents to save your work automatically. You cannot use this function to back up saved documents. You should apply the other two ways if you want to back up the saved Word document automatically.
Step 1. Open Microsoft Word appliation and click on the «File» tab > «Options».
Step 2. In the pop-up window, click on «Save», located on the left side under Save Documents.
Step 3. Under the heading of Save documents, look for «AutoRecover file location» and enter the directory path where you want your backup files saved e.g., C:UsersYourNameDocumentsWordBackups.
Step 4. Make sure the checkbox for Save AutoRecover information every X minutes is checked and set to the frequency at which you want your documents backed up. The default is usually ten minutes.
Step 5. Click «OK» to save your changes.
From now on, your Word document will be automatically saved at the set interval to the directory that you specified! If you ever need to access these backup files, go to the directory path you entered as the AutoRecover file location and open the most recent file with a .asd extension.
These files are automatically generated by Word and contain all your unsaved work from your current session. If for some reason, Microsoft Word crashes, you can open this file and retrieve your unsaved work.
![]()
Word Documents Automatic Backup FAQs
Get more additional information on Microsoft Word documents automatic backup through the following questions and answers.
1. Does Word have an auto backup?
Many programs, including Microsoft Excel and Word, have the AutoRecover feature that can automatically back up documents to avoid data loss. You can set the auto-save interval and location as you need.
2. How do I automatically back up in Word?
The most efficient way to back up Word documents automatically is using the file backup tool:
Step 1. Launch EaseUS Todo Backup and choose file backup.
Step 2. Choose the Word documents to back up.
Step 3. Set up the backup options like cofiguring automatic backup.
3. How do I set Word to always make a backup copy?
To make a Word backup copy, here are the steps:
Step 1. Open the Word Options box. Choose Advanced.
Step 2. Scroll down to find the Save options.
Step 3. Tick on the Always Create Backup Copy box.
4. How do you turn off auto backup in Word?
How to turn off autosave in Word? We have dedicated tutorials on disabling AutoSave on Windows and macOS. Go to get the detailed guides.
Conclusion
This post has covered a couple of ways for you to automatically back up Word documents. You can use the built-in Save or AutoRecover functions in Word or an EaseUS automatic file backup tool.
EaseUS Todo Backup is well-known for comprehensive file backup features. We have a solution if you want to back up files, disks, or systems. You can back up your computer to different destinations like network shared location, USB flash drive, external hard drive, or different Clouds.
We may want to secure some important Word data by saving it to a backup document. In this article, we will then look at how to enable Word to create a backup copy automatically.
Data loss is unavoidable for all Word users. Both external and internal factors can result in file corruption. Therefore, for some important documents, we may want to create a backup copy. But don’t bother to do it manually for each document. Because you can enable Word to create a backup copy of our files automatically. So, every time you save a Word File, Word program automatically create a backup copy of your document. In the following section, we will talk about how to achieve this functionality in detail.
Enable the Backup Option
- Switch to “File” menu, and click “Options”.

- In the subsequent pop up window, we select “Advanced” tab.

- Scroll down through the list to find “Save” page. And tick the “Always create backup copy” checkbox. Then click “OK” to save it.

- By doing so, we have successfully created a backup of our word document. Automatically, Word saves your last created version in the backup copy, as we can see below in the Windows Explorer. word stores the backup file in the same file path as the original file. Of course, to double ensure the safety of your backup copy, you can also move the file into other locations on your disks. That way, you can rely on the backup copy of your document to restore the lost data.


Repair Corrupted Original File via Recovery Tool
Certainly, we can rely upon a backup version to salvage our data. However, if something goes wrong with our original files, we can also acquire an external recovery tool DataNumen Word Repair to repair the corrupt document. This tool is capable of fixing severely damaged Word files effectively. In addition, its recovery rate is also well ahead of its peers.
What If Your Backup Copy is Also Damaged
Typically, we tend to keep the backup version in the same computer as our original file. Therefore, in times of data disaster, all of the files in our computer might be damaged. Therefore, backing up Word file is not necessarily the surest way to keep our data safe. Because the backup copy are also very likely to be corrupted or damaged. But don’t need to panic, there is remedy to it.
- Change the .wbk file extension to .docx.
- Repair the backup file with an effective Word repair tool. Select the file path in the following box and Click “Start Repair”.


This tool is able to recover your damaged word file in short time. And more importantly, it will restore it in the same structure as in corrupted file.
Author Introduction
Kelly Zhao is a data recovery expert in DataNumen, Inc., which is the world leader in data recovery technologies, including excel recovery and pdf repair software products. For more information visit www.datanumen.com

Backing up your documents is always a good thing to do, but not always something we remember to do. Word can automatically create a backup copy of your Word document every time you save it and we’ll show you how to do this.
To have Word automatically save backup copies of your documents, click the “File” tab.

On the backstage screen, click “Options” in the list of items on the left.
On the “Word Options” dialog box, click “Advanced” in the list of items on the left.
When your document is small, saving to disk is a fairly quick process. However, as your document grows, or if you start saving your document to an external storage device that’s not as speedy as the internal hard drive, saving the document can take quite a bit more time. To overcome this delay, Word allows you to save your document in the background so you can continue to work on the document while it’s being saved. To turn on this feature, select the “Allow background saves” check box so there is a check mark in the box.
NOTE: An animated disk displays on the status bar in Word while a document is being saved. When the disk disappears, the save is complete.
Click “OK” to close the “Word Options” dialog box.
NOTE: Before a backup copy is created, you must save your document more than once. The backup copy is saved in the same folder as the original document. You can open it in Word and edit it as you would any “.doc” or “.docx” file.
The backup of your Word document is nothing more than a copy of the file with “Backup of” prepended to the beginning of the file and the file extension changed to “.wbk”. Only one backup copy of a document is maintained. When you save the document again, the existing “.wbk” file is deleted, the current document is renamed as the updated “.wbk” file, and the document is saved again as a standard Word document.
Having Word create automatic backups of your documents should NOT be used as a substitute for backing up your files to external media or cloud storage (or both) on a regular basis.
READ NEXT
- › BLUETTI Slashed Hundreds off Its Best Power Stations for Easter Sale
- › Expand Your Tech Career Skills With Courses From Udemy
- › This New Google TV Streaming Device Costs Just $20
- › Google Chrome Is Getting Faster
- › The New NVIDIA GeForce RTX 4070 Is Like an RTX 3080 for $599
- › How to Adjust and Change Discord Fonts
How-To Geek is where you turn when you want experts to explain technology. Since we launched in 2006, our articles have been read billions of times. Want to know more?
 Please Note:
This article is written for users of the following Microsoft Word versions: 2007, 2010, 2013, 2016, 2019, Word in Microsoft 365, and 2021. If you are using an earlier version (Word 2003 or earlier), this tip may not work for you. For a version of this tip written specifically for earlier versions of Word, click here: Making Backup Copies.
![]()
Written by Allen Wyatt (last updated July 23, 2022)
This tip applies to Word 2007, 2010, 2013, 2016, 2019, Word in Microsoft 365, and 2021
By default, Word does not make backup copies of your files. Instead, the old file is deleted after the new file is written to disk. Other word processors typically provide backup files by default. If you want Word to provide backup files, follow these steps:
- Display the Word Options dialog box. (In Word 2007 click the Office button and then click Word Options. In Word 2010 and later versions, click the File tab of the ribbon and then click Options.)
- At the left of the dialog box click Advanced.
- Scroll down until you see the Save options. (Don’t confuse this with clicking Save at the left side of the dialog box; they are not the same.) (See Figure 1.)
- Click on Always Create Backup Copy, so there is a check mark in the check box.
- Click on OK.
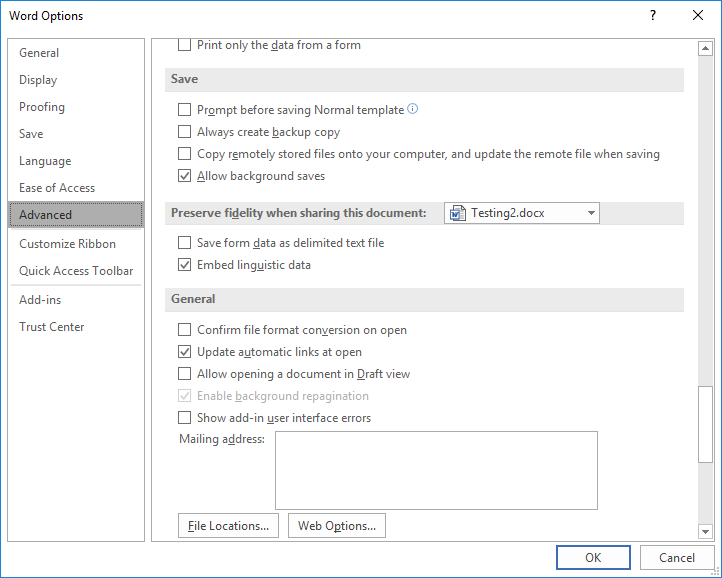
Figure 1. The Advanced options of the Word Options dialog box.
WordTips is your source for cost-effective Microsoft Word training.
(Microsoft Word is the most popular word processing software in the world.)
This tip (9768) applies to Microsoft Word 2007, 2010, 2013, 2016, 2019, Word in Microsoft 365, and 2021. You can find a version of this tip for the older menu interface of Word here: Making Backup Copies.
Author Bio
With more than 50 non-fiction books and numerous magazine articles to his credit, Allen Wyatt is an internationally recognized author. He is president of Sharon Parq Associates, a computer and publishing services company. Learn more about Allen…
MORE FROM ALLEN
Automatic Initial Capitals in Tables
Have you ever started typing words in a table, only to find that Word automatically capitalizes the first word in each …
Discover More
Independent Radio Buttons
Radio buttons are great for some data collection purposes. They may not be that great for some purposes, however, for the …
Discover More
Backing Up Your Custom Dictionaries
When you work with the spelling checker quite a bit, you eventually end up with a sizeable custom dictionary. You might …
Discover More
Learning Made Easy! Quickly teach yourself how to format, publish, and share your content using Word 2013. With Step by Step, you set the pace, building and practicing the skills you need, just when you need them! Check out Microsoft Word 2013 Step by Step today!
More WordTips (ribbon)
Changing the Default Location for Saving a Document
When you use Save As, it can be frustrating to be offered all sorts of locations in which to save your file. Fortunately, …
Discover More
Losing Information in a Network Document
Saving documents on a network drive can be convenient. It can also be frustrating if it seems like your changes aren’t …
Discover More
Grabbing the MRU List
The MRU (most recently used) list informs you which documents were the last to be opened and edited in Word. You can …
Discover More
Subscribe
FREE SERVICE: Get tips like this every week in WordTips, a free productivity newsletter. Enter your address and click «Subscribe.»
View most recent newsletter.