
Время на прочтение
4 мин
Количество просмотров 11K
Рассмотрим пример простой программы на Python с помощью библотекы docx для автоматизации рабочего процесса, а именно автоматической вставки файлов (в данном случае изображений) и их подпись в документах Word (docx).
Данная статья будет интересна для начинающих изучающих Python, а также полезна для тех кто работает с большими объемами изображений, графиков, осциллограмм и тому подобное. В ней мы рассмотрим простой и удобный способ вставки изображений в Word и их подписью с помощью Python.
Я опишу свой максимально дубовый и непрофессиональный но простой код который Вы сможете повторить в своих проектах. (Полный код в низу статьи).
Цель
В жизни каждого инженера или аналитика или другого специалиста, наступает момент, когда нужно оформлять отчет. Часто это осциллограммы, графики, ВАХ или другие графические изображения. Отчет нужно оформить в вордовском файле, с приведением изображений и их подписью. Делать вручную это очень увлекательно и интересно долго, неэффективно, скучно и другие синонимы к етим словам.
Рассмотрим простой способ вставки изображений и их подписью в файл docx с помощью Python.
Начало написания программы
Сначала нам нужно добавить библиотеку docx для работы с файлами Word.
import docxДавайте создадим блок в коде в котором укажем название docx файла и путь к нему, а также путь к папке с изображениями. Чтобы в дальнейшем для удобства было достаточно внести изменения путь к файлам только в верху кода.
folder_doc = r'D:PITONProject'       # Папка в которой docx файл
name_doc = 'Report.docx'              # Название doc файла
folder_png = 'D:PITONProjectPng'    # Папка в которой находятся графики
Далее добавим объект doc из библиотеки и укажем путь к файлу с названием документа.
doc = docx.Document(folder_doc + name_doc)
# Указываем параметры которые задавали в коде раньше (путь и имя)
Формируем последовательность вставки файлов
Исходя из названия файлов (изображений) нам нужно определить в какой последовательности мы будем вставлять изображения в Word.
В моем случае ето: Test_number1_Outside_humidity_10_Outside_temperature_25. Отличие в названии файлов есть в числах возле названия параметра (их мы и будем менять в коде для автоматического заполнения файла).
Создаем массивы с значениями этих чисел:
test_number = [1, 2, 3, 4, 5]                           # Указываем номер теста
outside_humidity = [10, 20, 30, 40, 50, 60, 70, 80, 90] # Указываем влажность
outside_temperature = [25, 50, 75, 100]                 # Указываем температуру
Основная часть программы
После того как мы разобрались с тем, как мы будем идентифицировать изображение для последующей вставки, нам необходимо определиться в порядке в котором будут идти изображения. У меня все картинки будут идти в таком порядке: test_number, outside_humidity, outside_temperature. Вы же можете сделать произвольный порядок.
Для этой реализации используем цикл for, который будет перебирать все значение из массива по очереди.
for r in range(len(test_number)):
    for d in range(len(outside_humidity)):
        for i in range(len(outside_temperature)):
Далее стандартными средствами библиотеки добавляем картинки в файл и создаем подписи.doc.add_picture — добавляет изображения в файл Wordfolder_png — это путь к папке которую мы указывали вверху кода
После этого мы указываем точное название файлов в папке, но вместо значений которые меняются вставляем в фигурные скобки.
В функции .format указываем те значения переменных которые меняются в каждом файле и которые мы внесли в цикле for. Эти значения будут применяться к каждому файлу, где мы указывали фигурные скобки (в той же последовательности).
Для подписи файла используем такой же алгоритм.doc.add_paragraph — используем для записи параграфуdoc.add_paragraph(" ") — делаем отступ
doc.add_picture(folder_png + '/Test_number{}_Outside_humidity_{}_Outside_temperature_{}.png'
		.format(test_number[r],outside_humidity[d], outside_temperature[i]))

doc.add_paragraph("Figure {}, Test number {}, Outside humidity = {} %, Outside temperature = {} C;"
		.format(i + 1, test_number[r], outside_humidity[d], outside_temperature[i]))

doc.add_paragraph(" ")
Сохраняем файл
doc.save(folder_doc + name_doc)Меняем параметры изображения
Изображение будем вставлять размером 13.33 х 10 см, для этого воспользуемся дополнительными возможностями библиотеки docx.
Сначала напишем функцию которая будет конвертировать размер с inch в см.
def inch_to_cm(value):
    return value / 2.54
Теперь добавим данные параметры к основному коду:
doc.add_picture(folder_png + '/Test_number{}_Outside_humidity_{}_Outside_temperature_{}.png'
	.format(test_number[r],outside_humidity[d], outside_temperature[i]),
			width=docx.shared.Inches(inch_to_cm(13.330)),
				height=docx.shared.Inches(inch_to_cm(9)))
Результат
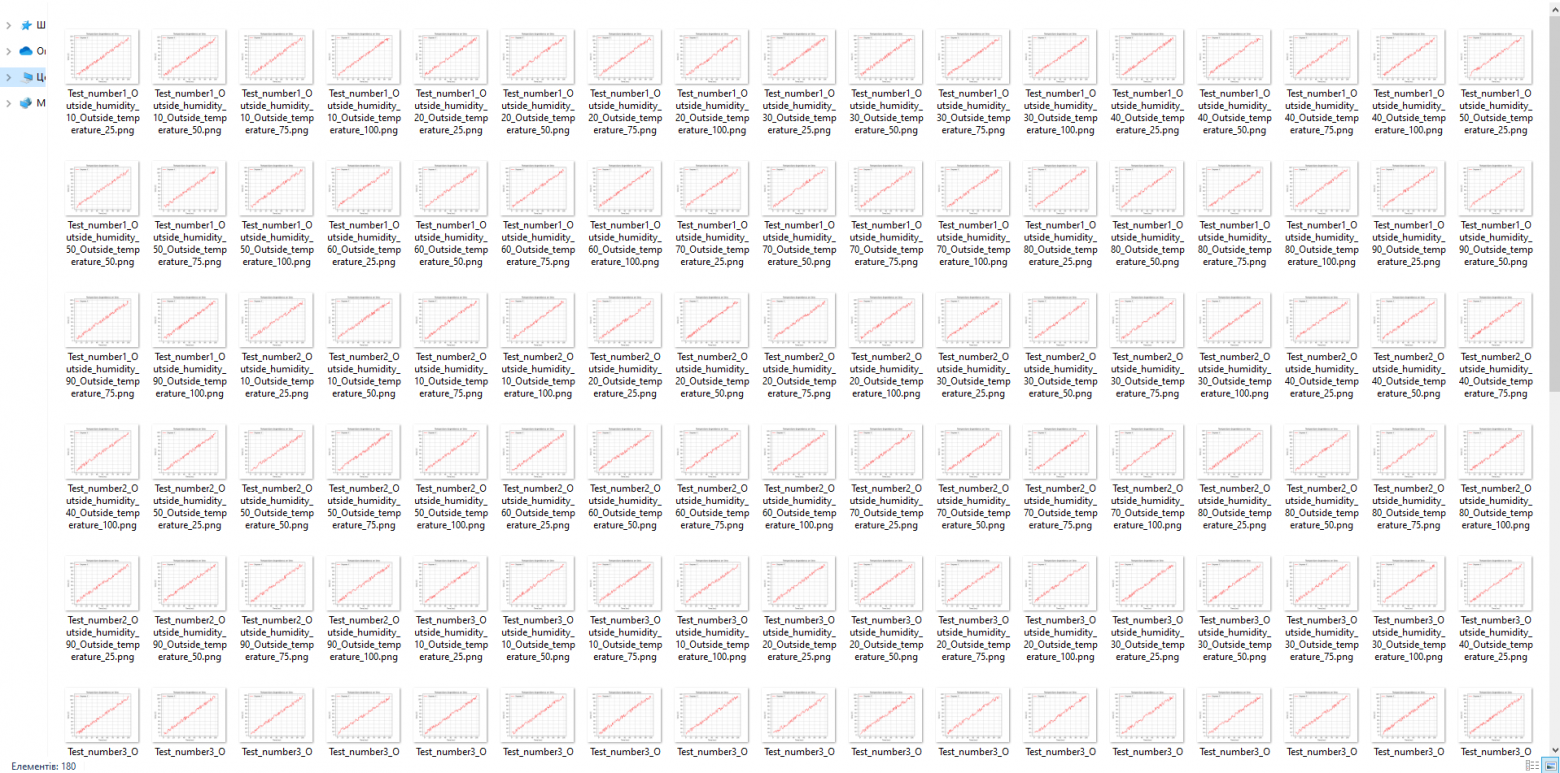
В данной папке находится 180 изображений:
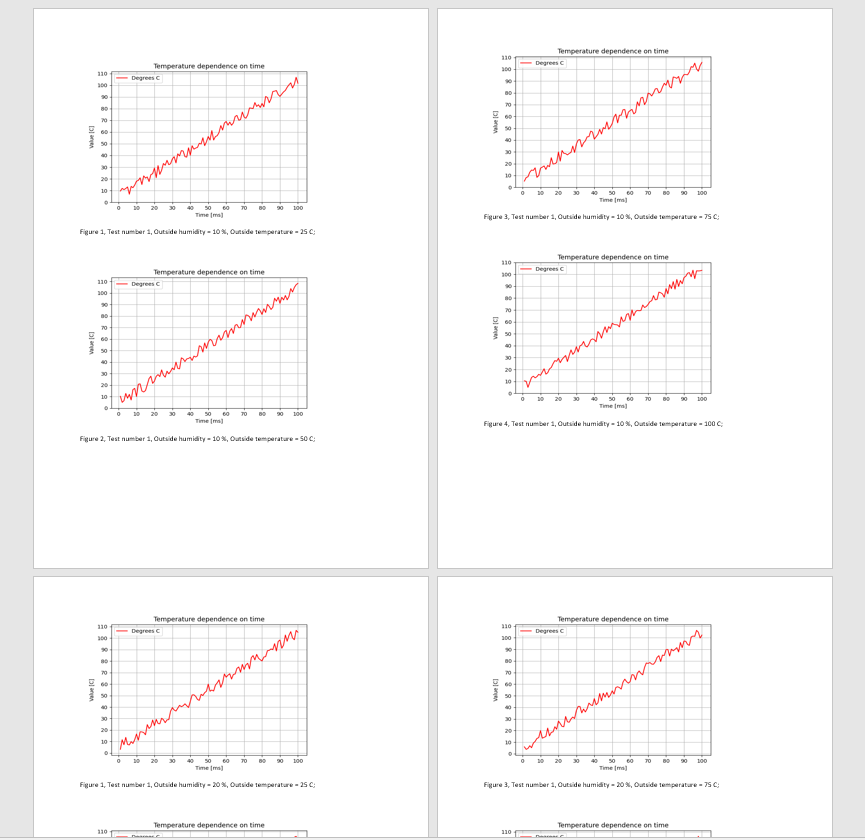
После запуска кода с помощью Python, в течение 5 секунд мы получаем следующий результат:
Вывод
Имея структурированные данные на базе данного кода с помощью Python и библиотеки docx можно в течение 10 минут написать свой код, который в течение нескольких секунд сделает всю грязную работу за Вас.
Разве не для этого придумывали компьютер?
Полный код программы
import docx

folder_doc = r'D:PITONProject'       # Папка в которой docx файл
name_doc = 'Report.docx'              # Название doc файла
folder_png = 'D:PITONProjectPng'    # Папка в которой находятся графики

doc = docx.Document(folder_doc + name_doc) # Указываем параметры которые задавали в коде раньше (путь и имя файла)

test_number = [1, 2, 3, 4, 5]                           # Указываем номер теста
outside_humidity = [10, 20, 30, 40, 50, 60, 70, 80, 90] # Указываем влажность
outside_temperature = [25, 50, 75, 100]                 # Указываем температуру

def inch_to_cm(value):
    return value / 2.54 # Конвертируем в см

for r in range(len(test_number)):
    for d in range(len(outside_humidity)):
        for i in range(len(outside_temperature)):

            # Test_number1_Outside_humidity_10_Outside_temperature_25
            doc.add_picture(folder_png + '/Test_number{}_Outside_humidity_{}_Outside_temperature_{}.png'.format(test_number[r],outside_humidity[d], outside_temperature[i]), width=docx.shared.Inches(inch_to_cm(13.330)), height=docx.shared.Inches(inch_to_cm(9)))
            doc.add_paragraph("Figure {}, Test number {}, Outside humidity = {} %, Outside temperature = {} C;" .format(i + 1, test_number[r], outside_humidity[d], outside_temperature[i]))
            doc.add_paragraph(" ")

doc.save(folder_doc + name_doc)Как часто вы заполняете документы по шаблону? Я не особо, но если вам приходиться заполнять одни и те же данные в шаблонный документ, то в этом рутинном деле может помочь Python. И в значительной мере, буквально несколькими строчками кода облегчить работу, которая выполниться в считанные секунды, вместо потраченного дня. Давайте сделаем небольшой скрипт, который поможет автоматизировать рутинный процесс.

В принципе, я могу представить, кому и когда требуется выполнять работу по заполнению шаблонных документов. Например, юристам. Различные уведомления, постановления и прочие документы, с которыми они работают. Или кадровикам. Если нужно, к примеру, сделать большое количество однотипных уведомлений, где меняется только Ф.И.О., должность и подразделение. Да мало ли где. Давайте приступим к написанию кода.
Что понадобиться?
В этот раз понадобиться не особо много, а точнее, нужно будет установить всего лишь одну библиотеку docxtpl, с помощью которой и будет заполняться документ. Пишем в терминале:
pip install docxtpl
Понадобиться шаблон документа, в котором будут указаны места, куда нужно вставлять переменные. Места для вставки указываются с помощью двойных парных скобок: {{date}}, где дата, это та переменная, что будет заменена на нужное значение. Я скачал какое-то уведомление об изменении условий трудового договора, и расставил в него переменные:

И еще вам понадобится база данных работников или файл Excel с заполненными данными. С ним тоже можно работать. Я для примера использовал json-файл, в который внес некоторые данные. Этот файл, может быть выгружен из реальной программы по учету персонала. Не суть, какой формат файла вы выберете. Главное, чтобы вы смогли прочитать из него данные.

Заполнение данных
Импортируем в скрипт все библиотеки, что нам необходимы:
Python:
import json
import locale
import os

from datetime import datetime as dt
from docxtpl import DocxTemplate
Я создал небольшую функцию filling_doc(). Здесь в нее ничего не передается и не возвращается. Просто обрабатываются и сохраняются файлы. Но, если у вас есть база и несколько шаблонов с похожими данными, то можно запрашивать у пользователя путь к шаблону и базе. И передавать их в функцию. Здесь же, для демонстрации работы это не требуется.
Для того, чтобы заполнение даты в документе не выглядело совсем уж печально, я решил, что надо переводить дату в формат вида: 12 января 1970. Но, у питона с русской локалью оказалась беда. И системную локаль он просто так не подхватывает. Потому вызываем функцию setlocale(locale.LC_ALL, ») модуля locale.
locale.setlocale(locale.LC_ALL, '')
Следующим шагом будет загрузить файл шаблона, загрузить файл БД или json, с которым вы работаете, а также создать папку для сохранения результатов заполнения. Ведь мы их все будем сохранять под разными именами.
Python:
doc = DocxTemplate("template.docx")
user = json.load(open(os.path.join(os.getcwd(), 'user_info.json'), encoding='utf-8'))
if not os.path.isdir(os.path.join(os.getcwd(), 'personal')):
    os.mkdir(os.path.join(os.getcwd(), 'personal'))
Затем запускаем цикл по файлу json. Выводим принт, чтобы не было скучно. Он тут больше для декорации.
Python:
    for usr in user:
        print(f'r[+] Заполняю: {usr["last_name"]}', end='')
        data = {'manager': 'И. С. Иванов', 'reason': 'реструктуризацией и оптимизацией закваски',
                'date': dt.strftime(dt.now(), '%d %B %Y'), 'fio': f'{usr["last_name"]} {usr["first_name"]} '
                                                                  f'{usr["middle_name"]}', 'post': usr['post'],
                'first_middle': f'{usr["first_name"]} {usr["middle_name"]}',
                'contract_date': dt.strftime(dt.strptime(usr['contract_date'], "%d.%m.%Y"), '%d %B %Y'),
                'contract_num': usr['contract_num'], 'day_x': '01.07.2021'}
        doc.render(data)
        doc.save(os.path.join(os.getcwd(), 'personal',
                              f'{usr["last_name"]} {usr["first_name"]} {usr["middle_name"]}.docx'))
Заполняем словарь необходимыми значениями для подстановки. Значения должны иметь такие же названия, как и в шаблоне. С помощью render заполняем данные и сохраняем файл с Ф.И.О. человека, на которого заполнялся шаблон.
Python:
# pip install docxtpl
import json
import locale
import os

from datetime import datetime as dt
from docxtpl import DocxTemplate


def filling_doc():
    locale.setlocale(locale.LC_ALL, '')
    doc = DocxTemplate("template.docx")
    user = json.load(open(os.path.join(os.getcwd(), 'user_info.json'), encoding='utf-8'))
    if not os.path.isdir(os.path.join(os.getcwd(), 'personal')):
        os.mkdir(os.path.join(os.getcwd(), 'personal'))
    for usr in user:
        print(f'r[+] Заполняю: {usr["last_name"]}', end='')
        data = {'manager': 'И. С. Иванов', 'reason': 'реструктуризацией и оптимизацией закваски',
                'date': dt.strftime(dt.now(), '%d %B %Y'), 'fio': f'{usr["last_name"]} {usr["first_name"]} '
                                                                  f'{usr["middle_name"]}', 'post': usr['post'],
                'first_middle': f'{usr["first_name"]} {usr["middle_name"]}',
                'contract_date': dt.strftime(dt.strptime(usr['contract_date'], "%d.%m.%Y"), '%d %B %Y'),
                'contract_num': usr['contract_num'], 'day_x': '01.07.2021'}
        doc.render(data)
        doc.save(os.path.join(os.getcwd(), 'personal',
                              f'{usr["last_name"]} {usr["first_name"]} {usr["middle_name"]}.docx'))


def main():
    filling_doc()
    print('n[+] Все записи обработаны')


if __name__ == "__main__":
    main()
Вот так вот, достаточно просто и быстро можно избавить себя от кучи рутинной работы. Единственное, на что здесь, именно в этом коде нужно обратить внимание, это на склонения названий месяцев. То есть, нужно или найти библиотеку, которая переводит данное название в нужное склонение, или написать функцию, которая это будет делать в коде. Я этого здесь делать не стал. Но, для использования на реальных датах, думаю, что может понадобиться.
В прикрепленных файлах, если понадобиться, шаблон документа и json с данными. Чтобы можно было попробовать сразу, как работает скрипт.
А на это, пожалуй, все.
Спасибо за внимание. Надеюсь, что данная информация будет полезна
Last Updated on January 15, 2022 by
This tutorial will walk through how to automate Word documents using python-docx and sending emails with win32com libraries. Imagine that we have a list of customer information stored inside an Excel file (or a database). The process looks like the following:
- Automatically generate an invoice in MS Word for each client
- Convert the Word document to PDF format
- Send (using MS Outlook App) the PDF invoice to customers with a customized greeting message
Required Libraries
We’ll need three libraries for this project. We use pandas to read data from an Excel file, but the pandas library is not a must-have if your data is elsewhere or if you prefer to extract customer data another way.
python-docx for automating .docx (e.g. MS Word, Google docs, etc) file
pywin32 for interacting with Windows APIs
pip install pandas python-docx pywin32The library you’ll hear is docx; however, for installation purposes, it’s python-docx.
So, note the following difference:
pip install python-docx

import docx
Since the docx library creates .docx files, you don’t have to use MS Word. Both Google Docs and LibreOffice are free alternatives that support .docx files, and they are as good as the MS Office suite.
To create a .docx file, we need to create a Document object first. Then inside the document object, we can add various elements such as headings, paragraphs, pictures, etc. In the code below, the Inches object is used to define the size of an element, e.g. a picture.
from docx import Document
from docx.shared import Inches

document = Document()
document.add_picture('brand_logo.png', width = Inches(1))
document.add_heading('Invoice', 0)
The Run Object
The Run object represents any text – it can be a letter, a word, a sentence, or a full paragraph. Visually, each red box in the below picture represents a separate Run. We use .add_paragraph() to start a new sentence/paragraph “This is a “. Then we can keep adding new Runs to the existing Paragraph object.

Once we add a Run, we can also modify its properties such as font, size, color, etc.
The following code will create the above sentence with shown styles.
from docx import Document
from docx.shared import Pt, RGBColor

document = Document()
p1 = document.add_paragraph('This is a ')
p1.add_run('MS WORD ').bold = True
p1.add_run('document ')
eg = p1.add_run('example')
eg.font.size = Pt(20)
eg.font.color.rgb = RGBColor(0,128,0)
Create Invoices
Our sample data inside Excel looks like the following:

Of course, we don’t want to send to these guys’ actual email addresses, so I’m using my own test email address.
Essentially, this is our company’s sales data, for example, the first record means: We sold 10 units of Falcon 9 rockets to Elon Musk at a unit price of $1m. Let’s create an invoice for each customer 🙂
Since this is part of a streamlined process, we’ll write a function that only does one thing at a time. The first step is creating invoices in .docx format. This function will take the following arguments: customer name, email, the product sold to them, number of units, and the unit price.
In the code below:
- line 6 inserts a customer name
- line 10 inserts the number of units
- line 12 inserts the product name
- line 15 uses a list comprehension to add two blank lines
- lines 17 – 30 creates a table to summarize the invoice
- line 38 saves the document with the client’s name

Let’s test the function, looks good!
make_client_invoice('Elon Musk', 'amznbotnotification@gmail.com','Falcon 9',10, 1000000)
Convert MS Word Document To PDF Format
Now we have our invoice in Word, let’s convert it to PDF since that’s the standard format for business documents.
We’ll use the pywin32/win32com library, this one also got a weird naming between installation name and library name. Note the difference below:
pip install pywin32

import win32com.client
The win32com is a great library that allows us to control lots of things in the Windows operating system. It can control the Office Suite of apps for example.
To convert Word (.docx) to PDF format, we essentially open the document using win32com, then Save As PDF format. Easy peasy!
The code below takes an input file path src, then converts and saves a pdf to file path dst.
win32com.client.Dispath("Word.Application") will create a MS Word instance/object inside Python. Replace the Word with Excel, then you’ll have an Excel instance!
The wdFormatPDF = 17 is likely a convention used by VBA, check this list on other file type options we can save to.

Automate Sending Email Using Outlook App
Next, we’ll send out the invoice to our customers! win32com is again our helper to interact with the Outlook App. Note – not the web-based Outlook, but the actual app that’s installed on our computer. This step requires you have Office (especially Outlook) installed on your computer, and logged into an Outlook account. User name and password are not required as long as your Outlook App stays logged in.

In the code above, line 3 CreateItem(0) means to create a Mail object. See the below table on other possible objects we can create inside Outlook.

To add an attachment, simply pass in the file location similar to line 8.
It appears that we don’t even need to have Outlook App open to send an email using Python. As long as we have previously logged into our Outlook App, it’s good to go. The best part – no credentials or passwords are required, the win32com will just interact with Outlook with your existing settings.
Putting It Together
Now I offer the three functions for the three steps of the invoicing system. It’s your turn to try putting it together. You can use a loop to send invoices one by one or build them with other processes. Enjoy!
from docx import Document
from docx.shared import Inches
import pandas as pd
import win32com.client


def make_client_invoice(name, email, product, unit, price):
    document = Document()
    document.add_picture('brand_logo.png', width=Inches(1))
    document.add_heading('Invoice', 0)
    p1 = document.add_paragraph('Dear ')
    p1.add_run(name).bold=True
    p1.add_run(',')

    p2 = document.add_paragraph('Please find attached invoice for your recent purchase of ')
    p2.add_run(str(unit)).bold = True
    p2.add_run(' units of ')
    p2.add_run(product).bold=True
    p2.add_run('.')

    [document.add_paragraph('') for _ in range(2)]

    table = document.add_table(rows=1, cols=4)
    hdr_cells = table.rows[0].cells
    hdr_cells[0].text = 'Product Name'
    hdr_cells[1].text = 'Units'
    hdr_cells[2].text = 'Unit Price'
    hdr_cells[3].text = 'Total Price'
    for i in range(4):
        hdr_cells[i].paragraphs[0].runs[0].font.bold = True

    row_cells = table.add_row().cells
    row_cells[0].text = product
    row_cells[1].text = f'{unit:,.2f}'
    row_cells[2].text = f'{price:,.2f}'
    row_cells[3].text = f'{unit * price:,.2f}'

    [document.add_paragraph('') for _ in range(10)]

    document.add_paragraph('We appreciate your business and and please come again!')
    document.add_paragraph('Sincerely')
    document.add_paragraph('Jay')

    document.save(f'{name}.docx')

def docx_to_pdf(src, dst):
    word = win32com.client.Dispatch("Word.Application")
    wdFormatPDF = 17
    doc = word.Documents.Open(src)
    doc.SaveAs(dst, FileFormat=wdFormatPDF)
    doc.Close()
    word.Quit()

def send_email(name, to_addr, attachment):
    outlook = win32com.client.Dispatch("Outlook.Application")
    mail = outlook.CreateItem(0)
    mail.To = to_addr #'amznbotnotification@gmail.com'
    mail.Subject = 'Invoice from PythonInOffice'
    mail.Body = f'Dear {name}, Please find attached invoice'
    mail.Attachments.Add(attachment)
mail.Send()Introduction on word automation using python-docx
Nowadays, python automation is everywhere. From simple, every day’s hacks to professional workflows. One of the important areas where automation is used in the corporate and professional world is in Excel and Word automation. Python is used to automate financial reports, combine multiple excel sheets, insert the results of calculations and the graphical results in a Word formatted report that can be then converted into a pdf file…etc. Python can automate it all.
In this article, we will have a look at one of the common python packages that is used for creating, inserting data and modifying a word document. In other words, automating one or multiple tasks and workflows related to a .docx document.
The package that we will explore is python-docx.
Overview
In this first article, we will create a new empty word document. Then we will have a look on how to create and add various text elements like paragraphs and headings. After that we will understand how we can style them by adding different colors transformation the font type. Then, We will pass To adding images. Finally, we will explore how we can add and style tables which is something that can’t be added directly.
Note that this is a beginners friendly post, that’s why we will explain simple manipulations to understand the basics of the python-docx library. After this post I’ll add another post where we explore more stuff and build a real project.
One important thing to put in mind is that python automation can be easy if one understand the basics well, that’s why I made this first easy-to-digest article on word automation.
Installation and Setup
Understanding the basics of word automation using python-docx
Python-docx allows us to both, create an empty document and modify an existing one. When creating a new file, everything is added using pure python code. however, when working with an existing document, we usually insert variables into the document, close it, then change those variables using the package.
One important thing to note for beginners is that we must have the file closed in order to apply the modifications using the library. Meaning if you are opening the document in a word processor like MS Word, and execute the python script, you will get an error.
Creating the an empty document – first step towards word automation
To create an empty file we use to following code:
from docx import Document

document = Document()

document.save('demo.docx')
Note that I named the outputted word document demo.docx, you can name it whatever you want as long as it ends with .docx .
Also note that everything we insert in this document must be between the second and third line as follows, and that these three lines of code must always be present.
from docx import Document

document = Document()
############################

# eveything we insert must be in this area

############################
document.save('demo.docx')
Adding Elements – word automation principles
Creating and adding headings using python-docx
We add headings in our document using the add_heading() method. There are 10 levels of heading starting from 0. 0 is the biggest and 9 is the smallest.
the add_heading() method accepts two arguments, the first is the text and the second is the level.
here’s an example:
from docx import Document

document = Document()

document.add_heading('Heading, level 0', level=0)
document.add_heading('Heading, level 1', level=1)
document.add_heading('Heading, level 2', level=2)
document.add_heading('Heading, level 3', level=3)
document.add_heading('Heading, level 4', level=4)
document.add_heading('Heading, level 5', level=5)
document.add_heading('Heading, level 6', level=6)
document.add_heading('Heading, level 7', level=7)
document.add_heading('Heading, level 8', level=8)
document.add_heading('Heading, level 9', level=9)


document.save('demo.docx')
The output is word document with the following headings:

As we can see, we have 10 headings added to our document. We can notice that heading level 0 is the biggest and level 9 is the smallest. We can also see, that by default, the python-docx add the color blue to the headings created.
working with paragraphs using python-docx
Creating paragraphs
We add a paragraph using the add_paragraph() method, where we input the text inside the methode like we did with headings.
from docx import Document

document = Document()

document.add_paragraph('This is a simple plain paragraph.')

document.save('demo.docx')
Resulted document:

Styling Text Elements like headings and paragraphs
In order to style text in python-doc, we use what’s known as Runs.
We ofter procceed as follows:
- Create an element and save it in a variable.
- we add a run to that variable using .add_run().
- finally we add the style to that run.
There are many styles you can add to text elements, in this example we will explore how to change color, transform regular text into Bold or italic, and finally combine these styles.
Note that we add styles to all sorts of text this was, whether it’s a paragraph, a heading, a list element, …etc.
# import
from docx import Document
from docx.shared import Inches, RGBColor

# Create and open the document
document = Document()

####
#### Styling Paragraphs
####

# bold paragraph
p2 = document.add_paragraph('')
p2.add_run('This is a bold paragraph.').bold = True

# italic paragraph
p2 = document.add_paragraph('')
p2.add_run('This is an italic paragraph.').italic = True

# paragraph with an orange color
p2 = document.add_paragraph('')
p2.add_run('This is an orange paragraph.').font.color.rgb = RGBColor(255, 165, 0)

# paragraph with mixed style
p2 = document.add_paragraph('This paragraph has a mixture of styles, like ')
p2.add_run('bold ').bold = True
p2.add_run('and ')
p2.add_run('italic ').italic = True
p2.add_run('and ')
p2.add_run('green color.').font.color.rgb = RGBColor(0, 255, 0)

# paragraph with a sentence mixed with two styles, color and italic
p3 = document.add_paragraph('This paragraph has an ')
p3_word = p3.add_run('italic aqua colored ')
p3_word.italic = True
p3_word.font.color.rgb = RGBColor(0,255,250)
p3.add_run('sentence.')

####
#### Styling Headings
####

# heading with red color
h =  document.add_heading('', level=1)
h.add_run('This is a red heading').font.color.rgb = RGBColor(255, 0, 0)

# an italic heading
h2 = document.add_heading('', level=1)
h2.add_run('This is an italic heading').italic = True

# heading with three colors
h4 = document.add_heading('', level=1)
h4.add_run('This is black ').font.color.rgb = RGBColor(0, 0, 0)
h4.add_run('This is yellow ').font.color.rgb = RGBColor(255, 255, 0)
h4.add_run('This is green').font.color.rgb = RGBColor(0,255,0)

# saving and closing the document
document.save('demo.docx')

Working with lists using python-docx
Creating an ordered list
In order to create an ordered list in python-docx, you need to create myltiple paragraphs (lsame as we did in the section above) and then give them the List Number style as follows:
from docx import Document
document = Document()

document.add_paragraph('first item in ordered list', style='List Number')
document.add_paragraph('second item in ordered list', style='List Number')
document.add_paragraph('third item in ordered list', style='List Number')

document.save('demo.docx')
Here is the output of the script above:

As you can see, the List Number style gives us the possibility of creating un ordered list.
Creating an unordered List
To create an unorder list (bullets list), we do the same as we did in the ordered list example, we one change the List Number style by the List Bullet style as follows:
from docx import Document
document = Document()

document.add_paragraph('first item in unordered list', style='List Bullet')
document.add_paragraph('second item in unordered list', style='List Bullet')
document.add_paragraph('third item in unordered list', style='List Bullet')

document.save('demo.docx')
Output of the code:

As you can see, the code worked.
Styling Lists
To style list elements, we apply the same style principals and attributes as we did with the paragraphs/ heading since list elements are just text! (check out the examples above).
Adding image using python-docx
To add an image to a word document using the python-docx package, we use the add_picture() method, and we give it the name of the file.
One thing to not is that add_picture() imports the file with its original size, which is something that we don’t always want. We can modify the size of the method by importing a measurement unit like Inches, cm and mm from the docx.shared class.
In the example bellow we we added twice the same image which is name python-log.png and exists in the same folder /directory as our python file. The first time we import it with its original size, and the second time with modify the size.
# import
from docx import Document
from docx.shared import Inches

# create and open the document
document = Document()

# adding images with original size
document.add_picture('python-logo.png')

# adding image with a size of 1.25 inches
document.add_picture('python-logo.png', width=Inches(1.25))

# save and close the document
document.save('demo.docx')
Here’s the output of the code:
![]()
As we can see, when we open the created demo.docx file, we find two images. The first images is large which means it kemp its original size, and the second one is the same image with the dimensions of 1.25 inches.
Working with tables using python-docx
Creating a Table
Working with tables is a bit different from what we seen before. The approach is as follows
- First, get the data.
- Then, create a table with one row and as many columns as you need.
- After that, populate the header row.
- Finaly, using a loop, populate each row with the data that we have.
# import
from docx import Document

# create and open document
document = Document()

# get table data
records = (
    (1, 'product 1', '99'),
    (2, 'product 2', '13'),
    (3, 'product 3', '43'),
    (4, 'product 4', '104')
)

# add the table
table = document.add_table(rows=1, cols=3)

# add grid
table.style = 'Table Grid'

# populate the header row
hdr_cells = table.rows[0].cells
hdr_cells[0].text = 'Id'
hdr_cells[1].text = 'Product'
hdr_cells[2].text = 'Price'

# add a data row for each item
for id, product, price in records:
    row_cells = table.add_row().cells
    row_cells[0].text = str(id)
    row_cells[1].text = product
    row_cells[2].text = price

# save and close the document
document.save('demo.docx')
The output is a word document with the following table:

egezrgerger
Styling tables
To style a table we use the style method, the same one we used in the example above the add a grid table.style = ‘built-in value’.
Note that there a lot of built-in styles to choose from, you can find them in the official documentation here (click link and scroll down to find table related properties).
Let’s check three examples here:
# import
from docx import Document

# create and open document
document = Document()

# get table data
records = (
    (1, 'product 1', '99'),
    (2, 'product 2', '13'),
    (3, 'product 3', '43'),
    (4, 'product 4', '104')
)

# add the table
table = document.add_table(rows=1, cols=3)

# add grid
table.style = 'Table Grid'

# populate the header row
hdr_cells = table.rows[0].cells
hdr_cells[0].text = 'Id'
hdr_cells[1].text = 'Product'
hdr_cells[2].text = 'Price'

# add a data row for each item
for id, product, price in records:
    row_cells = table.add_row().cells
    row_cells[0].text = str(id)
    row_cells[1].text = product
    row_cells[2].text = price


####
#### table 2
####

# add the table
table2 = document.add_table(rows=1, cols=3)

# add grid
table2.style = 'Medium List 1 Accent 1'

# populate the header row
hdr_cells = table2.rows[0].cells
hdr_cells[0].text = 'Id'
hdr_cells[1].text = 'Product'
hdr_cells[2].text = 'Price'

# add a data row for each item
for id, product, price in records:
    row_cells = table2.add_row().cells
    row_cells[0].text = str(id)
    row_cells[1].text = product
    row_cells[2].text = price


####
#### table 3
####

# add the table
table3 = document.add_table(rows=1, cols=3)

# add grid
table3.style = 'Medium Shading 2'

# populate the header row
hdr_cells = table3.rows[0].cells
hdr_cells[0].text = 'Id'
hdr_cells[1].text = 'Product'
hdr_cells[2].text = 'Price'

# add a data row for each item
for id, product, price in records:
    row_cells = table3.add_row().cells
    row_cells[0].text = str(id)
    row_cells[1].text = product
    row_cells[2].text = price

# save and close the document
document.save('demo.docx')
The output of the script:

As we can see, we have three different styles, in the first one we just added the grid using ‘Table Grid’, in the second one we set style equals to ‘Medium List 1 Accent 1’, and in the final one we set style equals to ‘Medium Shading 2’.
As mentioned before, check out the official documentation to explore all the available styles.
Conclusion
In this article we leaned the basics of the word automation using the python-docx package. We explored how to create, add and style text based elements lie headings and lists, as well as other elements. Note that these are just simple examples to ease the way for you to start using the library and get more comfortable with it. In the next post I’ll dive deeper in python-docx and manipulate an existing file with a template which is what most people do.
Thank you for reading my post!
Статья не имеет цели доказать важность и необходимость существования документа «Текст программы» и, тем более, необходимость его разработки в виде документа, которым кто-то когда-либо воспользуется. Цель статьи показать основы автоматизации обработки документов формата *.doc (*.docx) с использованием скриптов, написанных на языке Python.
Документ «Текст программы» (далее – Документ) входит в состав комплекта программных документов, перечень которых определен ГОСТ 19.101-77. ГОСТ, бесспорно, достаточно старый, однако его требования до сих пор востребованы при разработке программной продукции, соответственно требуется и разработка рассматриваемого Документа.
Содержание Документа определено ГОСТ 19.401-78 и должно включать в себя либо символическую запись на исходном языке, либо символическую запись на промежуточных языках, либо символическое представление машинных кодов (и т.п.).
Учитывая объемы современных веб приложений, разрабатываемых с использованием нескольких фреймворков, подготовить данный документ без использования автоматизации достаточно сложно.
Возможно два варианта создания документа:
-
разработчики собирают содержание всех файлов проекта в один текстовый файл и передают техническому писателю на обработку;
-
разработчики передают техническому писателю архив с файлами проекта, которые технический писатель должен обработать сам.
Первый вариант зависим от загруженности разработчиков. Чтобы сформировать текстовый файл с кодом программы, кто-то из команды разработчиков должен отвлечься, выгрузить код проекта из репозитория, написать программу, которая обработает выгруженный код и выдаст текстовый файл. Файл может быть размером как в пару мегабайт, так и в пару сотен мегабайт, его нужно вставить в Документ и как-то оформить. Вставка такого объема информации в файл Microsoft Word может занять как 30 минут, так и несколько часов. При этом, когда вставка будет завершена, Документ будет не структурирован и не читаем.
Второй вариант зависим от технических навыков исполнителя, но предпочтителен с точки зрения отсутствия необходимости привлечения людей, не имеющих отношения к разработке документации, вследствие чего будем автоматизировать именно этот вариант.
Автоматизация рассматриваемого Документа заключается в том, чтобы перенести текст кода программы в документ с заданным форматированием и структурой, чтобы в дальнейшем им можно было воспользоваться (маловероятный, но имеющий право на жизнь вариант использования).
Файл формата Microsoft Word (*.doc, *.docx) представляет собой набор данных в разметке xml. Файл имеет такие атрибуты, как параграф, рисунок, таблица, стиль. Для доступа к файлу и его атрибутам Microsoft в свое время была разработана технология OLE (Object Linking and Embedding). OLE позволяет передавать часть работы от одной программы редактирования к другой и возвращать результаты назад.
Библиотеки, осуществляющие взаимодействие с файлами офисного пакета Microsoft Office с использованием технологии OLE, есть практически для всех языков программирования. Для Python это библиотека python-docx. Описание библиотеки доступно по ссылке. Установить библиотеку можно командой:
!pip install python-docxОбщий алгоритм разработки Документа представляет собой последовательность шагов:
-
Подготовка шаблона документа;
-
Подготовка скрипта сборки на Python;
-
Обновление содержания и числа страниц;
-
Сохранение в PDF.
Шаг 1
Конечный Документ проще сформировать на основе заранее подготовленного шаблона (например файл с именем template.docx). Форматирование и атрибуты (наименование программы, разработчик, децимальный номер, аннотация, текст основной части) шаблона Документа должны соответствовать ГОСТ 19.104-78.
Кроме требований ГОСТ шаблон Документа должен удовлетворять следующим требованиям (последовательность шагов описана для Microsoft Word 2019):
-
иметь поле автоматического подсчета числа страниц в строке «Листов …»:

-
иметь предопределенные стили для заголовков уровня 1, 2, 3, а также для кода:

-
иметь поле автоматической сборки содержания:

-
заголовки уровня 1, 2, 3 должны переноситься в содержание (Ссылки→Оглавление→Настраиваемое оглавление→Параметры→Выбрать созданные стили и присвоить им уровень);
-
шаблон документа должен содержать фразу, на место которой будет вставлен код программы, выполненную в необходимом стиле, например «<КОД ПРОГРАММЫ>».
Шаг 2
Папка с проектом содержит значительное число файлов, часть которых не являются кодом. К ним относятся графические файлы интерфейса программы, файлы фреймворков, а также файлы программ, используемых в процессе разработки и оставляющих после себя следы (GIT, SVN, Docker). Все эти файлы необходимо отфильтровать.
Функция, которая будет отфильтровывать только файлы, удовлетворяющие условию, выглядит следующим образом:
def check(string):
  result = False
  if string[-3:] == '.js':
    result = True
  if string[-4:] == '.vue':
    result = True
  if string[-5:] == '.json':
    result = True
  if string[-4:] == '.css':
    result = True
  return result
Чтобы получить список файлов, удовлетворяющих условиям фильтра, сначала необходимо получить список всех каталогов в директории проекта:
folder = []
for i in os.walk(folder_name):
    folder.append(i)
Из полученного списка каталогов читаем имена всех файлов во всех директориях проекта, и те, которые удовлетворяют условиям фильтра, складываем в отдельный список:
paths = []
for address, dirs, files in folder:
    for file in files:
        if check(file):
            paths.append(address+'\'+file)
Перед обработкой полученного списка файлов необходимо подготовить функцию, которая будет считывать содержимое файла в одну строку с сохранением разметки переносов строк. Это необходимо для дальнейшего ускорения вставки кода в Word.
def read_file(filename):
    f = codecs.open(filename, "r", "utf_8_sig" )
    file = []
    for line in f:
        file.append(line)
    file = ''.join(file)
    f.close()
    return file
Используя функцию read_file, считываем содержимое отфильтрованных файлов, попутно вставляя строки-разделители каталогов и файлов. Это понадобится для автоматического формирования содержания.
total_code_file = []for i, path in enumerate(paths):
if i == 0:
catalog = path[folder_name_len:].split('')[1]
total_code_file.append('Каталог '+catalog+'n')
if path[folder_name_len:].split('')[1] != catalog:
catalog = path[folder_name_len:].split('')[1]
total_code_file.append('Каталог '+catalog+'n')
total_code_file.append('Файл '+path[folder_name_len:]+'n')
total_code_file.append(read_file(path))
total_code_file += 'n'Для переноса полученного кода программы подключаемся к документу, ищем контрольную фразу, заменяем ее на пустую строку и начинаем вставлять полученный код. Если код содержит слово «Каталог», форматируем его в стиле заголовка 2 уровня, если содержит слово «Файл» – в стиле заголовка 3 уровня, остальной текст форматируем в стиле кода программы:
doc = Document(sample_file)
for p in doc.paragraphs:
    if '<КОД ПРОГРАММЫ>' in p.text:
        p.text = ''
        for line in total_code_file:
            if line.rstrip() > '' and line.split()[0] == 'Каталог':
                p.insert_paragraph_before(line.rstrip(), 'ЗАГ_2')
            elif line.rstrip() > '' and line.split()[0] == 'Файл':
                p.insert_paragraph_before(line.rstrip(), 'ЗАГ_3')
            else:
                p.insert_paragraph_before(line.rstrip(), 'КОД')
По завершении сохраняем документ. Программная обработка документа завершена.
doc.save(filename+'.docx')Шаг 3
После вставки текста программы в Документ необходимо открыть его в Microsoft Word, выделить все (Ctrl+A) и обновить автозаполняемые поля (F9). Данную операцию необходимо выполнить дважды, так как поля обновляются последовательно, и после формирования содержания итоговое число страниц изменится.
Данная операция занимает время, так как Word выполняет расчет страниц, последовательно обрабатывая документ до конца.
Шаг 4
После завершения обновления автозаполняемых полей необходимо сохранить Документ в формате *.pdf средствами Word. Это необходимо, чтобы зафиксировать форматирование и исключить дальнейшую работу с файлом в Word, так как Word будет выполнять пересчет числа страниц при каждом открытии файла или его изменении. С *.pdf такой проблемы не будет.
*.pdf имеет больший размер, но легко открывается любой подходящей программой. Ссылки в содержании после сохранения работают.
Полный код проекта доступен по ссылке.
Описанный вариант автоматизации не обрабатывает ошибки, связанные с разными кодировками файлов, и имеет варианты развития:
-
обработка ошибок, связанных с кодировкой файлов;
-
автоматическая выгрузка архива проекта;
-
программный запуск пересчета полей автозаполнения.