
Word for Microsoft 365 Word for Microsoft 365 for Mac Word for the web Word 2021 Word 2021 for Mac Word 2019 Word 2019 for Mac Word 2016 Word 2016 for Mac Word 2013 Word 2010 Word for Mac 2011 More…Less
-
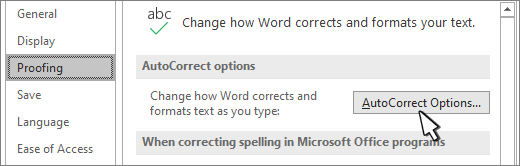
Go to File > Options > Proofing and select AutoCorrect Options.

-
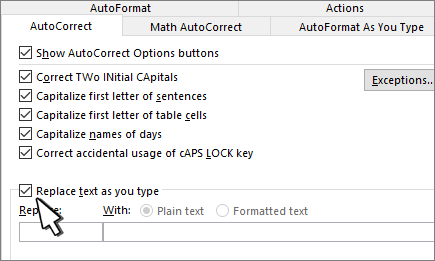
On the AutoCorrect tab, select or clear Replace text as you type.
-
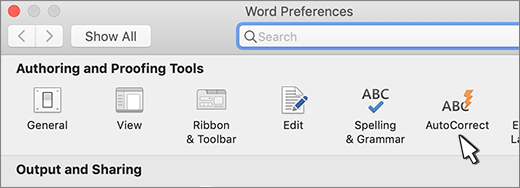
On the Word menu, select Preferences, and then AutoCorrect.
-
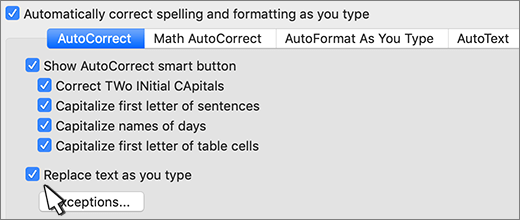
Select or clear Replace text as you type.
-
Go to the Review and select the arrow next to Spelling & Grammar.
-
Select AutoCorrect Options… and then select or clear Replace text as you type
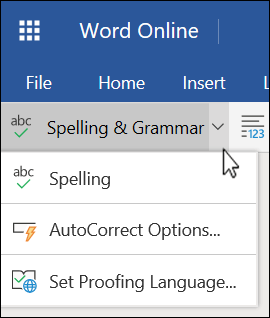
Word for the web currently has a slightly more limited set of AutoCorrect Options than Word on the desktop does.
Need more help?
Turn AutoCorrect on or off in Word
- Go to File > Options > Proofing and select AutoCorrect Options.
- On the AutoCorrect tab, select or clear Replace text as you type.
Contents
- 1 What is AutoCorrect and how do you use it?
- 2 How do I turn on AutoCorrect when typing?
- 3 How do you customize AutoCorrect in word?
- 4 How do you use AutoCorrect in a sentence?
- 5 Is AutoCorrect one word or two?
- 6 How do I use AutoCorrect on Windows?
- 7 How do I add words to AutoCorrect in Windows 10?
- 8 How do you change AutoCorrect on Windows?
- 9 How do I AutoCorrect all mistakes in word?
- 10 What are the common steps to Customise AutoCorrect?
- 11 How do I turn on AutoCorrect in word 2007?
- 12 What is Auto Complete in word?
- 13 Where do I find AutoCorrect in word 2010?
- 14 What is AutoCorrect tool?
- 15 How do I put predictive text on my laptop?
- 16 Why is AutoCorrect not working in Word?
- 17 How do I put predictive text on Windows 10?
- 18 Why is my AutoCorrect not working in Windows 10?
- 19 How do I edit AutoCorrect?
- 20 How do I manually change AutoCorrect?
What is AutoCorrect and how do you use it?
Auto-correct is a type of software program that identifies misspelled words, uses algorithms to identify the words most likely to have been intended, and edits the text accordingly. Auto-correct is commonly a feature included in word processors and messaging platforms of various types.
How do I turn on AutoCorrect when typing?
How to enable autocorrect and predictive text in Windows 10
- Press the Windows key, type “Typing settings” and hit enter to open the Settings app to the right page.
- Click the “Show text suggestions as I type” and “Autocorrect misspelt words I type” sliders to the “on” position.
How do you customize AutoCorrect in word?
In Word’s options, switch to the “Proofing” tab and click “AutoCorrect Options”. Alternatively, if you have a typo with a suggested replacement, you can get to the AutoCorrect options by right-clicking the typo. You then have to click on the arrow next to a suggestion and click “AutoCorrect Options”.
How do you use AutoCorrect in a sentence?
Examples of ‘autocorrect’ in a sentence autocorrect
- Or, as one of the organisers tweeted thanks to an autocorrect error, ‘ hangman style’.
- The autocorrect functioned as an awkward moment and a great opportunity.
- The autocorrect on our mobile phones is not only mischievous, it also has a potty mouth.
Is AutoCorrect one word or two?
or au·to·cor·rect, Au·to·cor·rect. noun Computers.
How do I use AutoCorrect on Windows?
To enable it, open Settings by using Win + I, then browse to Devices > Typing. In the list, scroll down to the Hardware keyboard section. Here, enable the Autocorrect misspelled words as I type slider. After you do this, Windows will fix common typos as you enter text anywhere on the system.
How do I add words to AutoCorrect in Windows 10?
Add an entry to the AutoCorrect list
- Go to the AutoCorrect tab.
- Select the + sign at the bottom left of the dialog and type a word or phrase that you often misspell in the Replace column.
- In the With column, type the correct spelling of the word.
- Press Enter.
How do you change AutoCorrect on Windows?
Edit auto-correct dictionary?
- Use the Windows + I keyboard shortcut to open the Settings app.
- Navigate to Devices and go to Typing.
- Under Spelling, switch the Autocorrect misspelled words and Highlight misspelled words to the Off position.
How do I AutoCorrect all mistakes in word?
1. Press the F7 function key to run the spell checker. 2. When the spell checker comes to a commonly misspelled or mistyped word click on the AutoCorrect button.
What are the common steps to Customise AutoCorrect?
How to customise Word’s spell check and AutoCorrect
- Click File then Options in the left menu.
- Click Proofing in the Word options window and then click the AutoCorrect Options button.
- Click the Exceptions button.
- Click the tab of the type of auto-correction you wish to create an exception for.
How do I turn on AutoCorrect in word 2007?
To enable the option, follow these steps:
- Click the Microsoft Office Button, and then click Word Options.
- Click Proofing.
- Click AutoCorrect Options.
- On the AutoCorrect tab, click to select the Replace text as you type check box.
- Click OK to close the AutoCorrect Options dialog box.
What is Auto Complete in word?
a feature of a word processor, email program, web browser, etc., that automatically predicts the remaining characters in a word or phrase based on what has been typed or input before: If you supply the information, your browser will be able to use autocomplete to fill out online forms.
Where do I find AutoCorrect in word 2010?
Setting AutoCorrect
- Step 1 − Click the File tab, click Options, and then click the Proofing option available in the left most column, it will display the Word Options dialog box.
- Step 2 − Click the AutoCorrect Options button which will display the AutoCorrect dialog box and then click the AutoCorrect tab.
What is AutoCorrect tool?
Tools > AutoCorrect Options. AutoCorrect automatically corrects common typing errors as you type with the keyboard. Because the words are automatically corrected as you work, fast process of the document is possible without having to edit each word, or running a spelling check. Click Tools > AutoCorrect Options.
How do I put predictive text on my laptop?
To launch it, press Windows+I or open the Start menu and click the gear-shaped Settings icon. Click the “Devices” icon in the Settings window. Click “Typing” in the sidebar. Scroll down to the “Hardware keyboard” section and enable the “Show text suggestions as I type” option.
Why is AutoCorrect not working in Word?
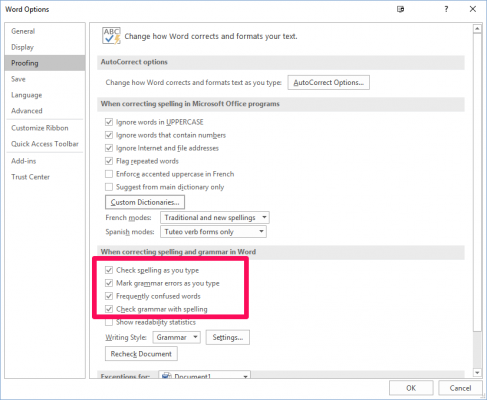
Select the File tab, and then select Options. In the Word Options dialog box, select Proofing. Make sure that the Check spelling as you type check box is selected in the When correcting spelling and grammar in Word section. Make sure that all check boxes are cleared in the Exception for section.
How do I put predictive text on Windows 10?
To enable predictive text in Windows 10, you can follow these steps:
- Press Start.
- Go to Settings > Devices > Typing.
- Scroll the mouse to the Hardware keyboard.
- Turn on both Show text suggestion as I type and Autocorrect misspelled words I type.
Why is my AutoCorrect not working in Windows 10?
Step 1: Launch the Windows Settings menu and select Devices. Step 2: On the left-hand menu, click Typing. Step 3: In the spelling section, toggle off both ‘Autocorrect misspelled words’ and ‘Highlight misspelled words.Return to typing within the affected app(s) and check if autocorrect now works.
How do I edit AutoCorrect?
How to adjust autocorrect manually:
- Open Settings on your iPhone.
- Tap General.
- Tap Keyboard.
- Choose “Text Replacement”
- Tap the + button in the top-right corner.
How do I manually change AutoCorrect?
There are two main methods to enter the Google Keyboard settings, you may long press on the ‘,’ button, to the left of the space bar and select the gear that pops up, or head into Settings -> Language & input -> Google Keyboard. From here, simply tap on Text correction.
You’ll find them under the Tools menu
Updated on February 10, 2023
Microsoft introduced the AutoCorrect feature to correct typos, misspelled words, and grammatical errors. You can also use the AutoCorrect tool to insert symbols, auto-text, and several other forms of text. AutoCorrect is set up by default with a list of typical misspellings and symbols, but you can modify the list that AutoCorrect uses and customize it to boost your productivity.
Today we’ll teach you how to edit the AutoCorrect list and settings to make your word processing experience more fluid. Instructions apply to Word 2003 and later.
What the Tool Can Do
Before we move on to the actual customization and editing of the AutoCorrect tool, you will need to understand how the AutoCorrect list works. There are three main things you can use the AutoCorrect tool to do.
- Corrections
Firstly the tool will automatically detect and correct typos and spelling errors. If, for example, you type «taht,» the AutoCorrect tool will automatically fix it and replace it with «that.» If will also fix typos like «I like tha tcar.» the AutoCorrect tool will also replace it with «I like that car.»
- Symbol Insertion
Symbols are a great feature included in Microsoft products. The easiest example of how the AutoCorrect tool can be used to easily insert symbols is the Copyright symbol. Simply type «(c)» and press the space-bar. You will notice that it is automatically changed to «©.» If the AutoCorrect list doesn’t contain the symbols you want to insert, just add it using the tips outlined below.
- Insert Predefined Text
You can also use the AutoCorrect feature to quickly insert any text based on your predefined AutoCorrect settings. If you use certain phrases often it is useful to add custom entries to the AutoCorrect list. For example, you can create an entry that will automatically replace «eposs» with «electronic point of sale system.»
Understanding the AutoCorrect Tool
When you open the AutoCorrect tool, you will see two lists of words. The pane on the left indicates all the words that will be replaced while the pane on the left is where all the corrections are listed. Note that this list will carry through to all other Microsoft programs that support this feature.
You can add as many entries as you want to boost productivity. You can add things like symbols, words, addresses, sentences, and even complete paragraphs and documents.
Word 2003
The AutoCorrect tool in Word 2003 is great for error correction and with the right customization you can boost your word processing efficiency. In order to access and edit the AutoCorrect list, follow these steps.
- Click on Tools
- Select AutoCorrect Options to open the AutoCorrect Options dialog box
- From this dialog box, you can edit the following options by ticking the check-boxes.
- Show AutoCorrect Options buttons
- Correct two initial capitals
- Capitalize the first letter of the sentence
- Capitalize the first letter of table cells
- Capitalize names of days
- Correct accidental usage of Caps Lock key
- You can also edit the AutoCorrect list by entering your desired corrections in the Replace and With text fields under the list shown above. Replace indicates the text to be replaced and With indicates the text that it will be replaced with. When you are done, just click on Add to add it to the list.
- Click on OK when you are done to implement the changes.
Word 2007
The AutoCorrect tool in Word 2007 is great for error correction and with the right customization you can boost your word processing efficiency. In order to access and edit the AutoCorrect list, follow these steps.
- Click the Office button on the top left of the window
- Click on Word Options on the bottom of the left pane
- Click on Proofing then on AutoCorrect Options to open the dialog box
- Click on the AutoCorrect tab
- From this dialog box, you can edit the following options by ticking the check-boxes.
- Show AutoCorrect Options buttons
- Correct two initial capitals
- Capitalize the first letter of the sentence
- Capitalize the first letter of table cells
- Capitalize names of days
- Correct accidental usage of Caps Lock key
- You can also edit the AutoCorrect list by entering your desired corrections in the Replace and With text fields under the list shown above. Replace indicates the text to be replaced and With indicates the text that it will be replaced with. When you are done, just click on Add to add it to the list.
- Click on OK when you are done to implement the changes.
Word 2013
The AutoCorrect tool in Word 2013 is great for error correction and with the right customization you can boost your word processing efficiency. In order to access and edit the AutoCorrect list, follow these steps.
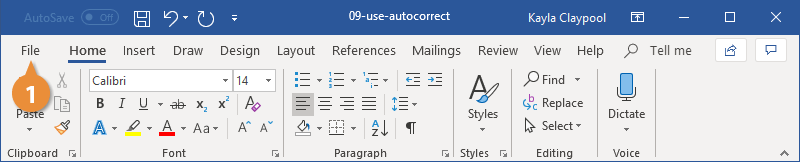
- Click the File tab on the top left of the window
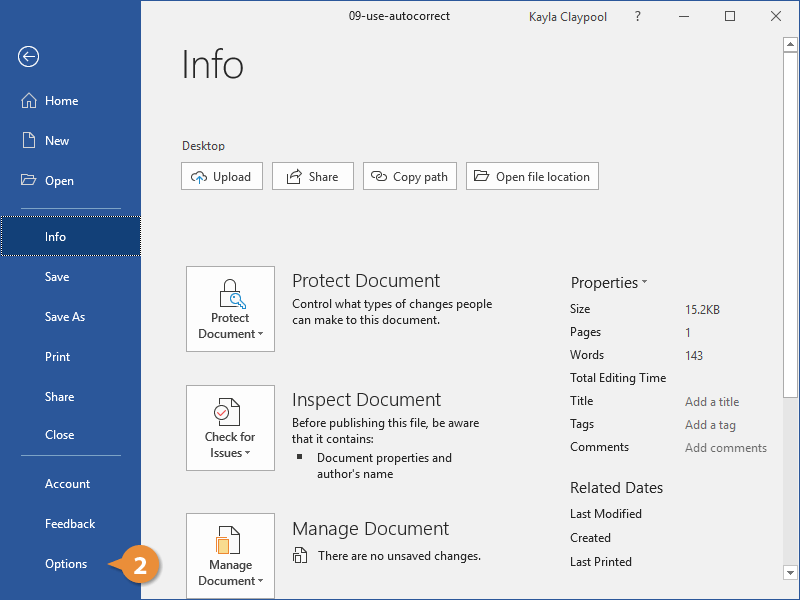
- Click on Options on the bottom of the left pane
- Click on Proofing then on AutoCorrect Options to open the dialog box
- Click on the AutoCorrect tab
- From this dialog box, you can edit the following options by ticking the check-boxes.
- Show AutoCorrect Options buttons
- Correct two initial capitals
- Capitalize the first letter of the sentence
- Capitalize the first letter of table cells
- Capitalize names of days
- Correct accidental usage of Caps Lock key
- You can also edit the AutoCorrect list by entering your desired corrections in the Replace and With text fields under the list shown above. Replace indicates the text to be replaced and With indicates the text that it will be replaced with. When you are done, just click on Add to add it to the list.
- Click on OK when you are done to implement the changes.
Thanks for letting us know!
Get the Latest Tech News Delivered Every Day
Subscribe
Microsoft Word can helpfully correct or point out spelling errors and other errors as you type. But when you’ve purposely typed a word a certain way, those squiggly red lines and autocorrections are just annoying. Adjust Word’s autocorrection settings and spellcheck dictionary to avoid this frustration for your most commonly typed words.
With the steps below, you’ll add exceptions to Word’s autocorrection rules so it won’t automatically change specific words you type based on rules like always capitalizing the first word of a sentence. You’ll also add words to the custom dictionary so Word will stop flagging them as misspelled.
How to Add Exceptions to Word’s Auto-Correction Rules
1. Click File then Options in the left menu.
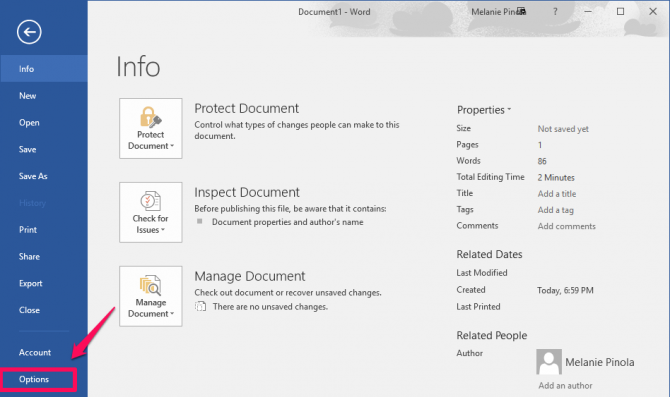
2. Click Proofing in the Word options window.

3. Click the AutoCorrect Options button.
4. Click the Exceptions button. You can also uncheck any of the auto-correction defaults here, such as always capitalizing the first letter of a word in a table cell.
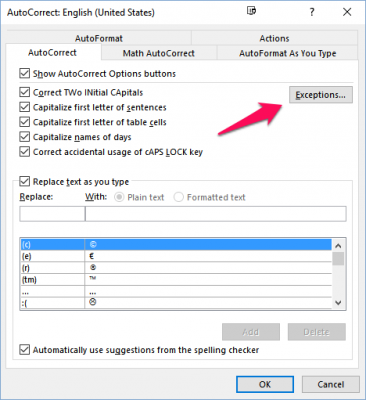
5. Click the tab of the type of auto-correction you want to add an exception to. For example, if you work for a company that always writes its name in lowercase, click the First Letter tab so Word won’t capitalize it when you write the company name at the start of a sentence. The Initial Caps tab will stop Word from correcting words with two capital letters at the beginning. Use the «Other Corrections» tab for all other words.
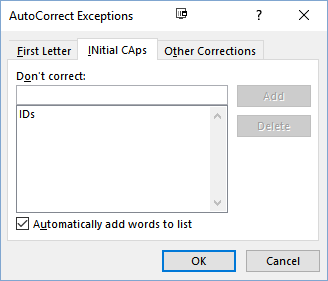
6. Add the word you don’t want corrected and click OK.
How to Add Words to the Custom Dictionary
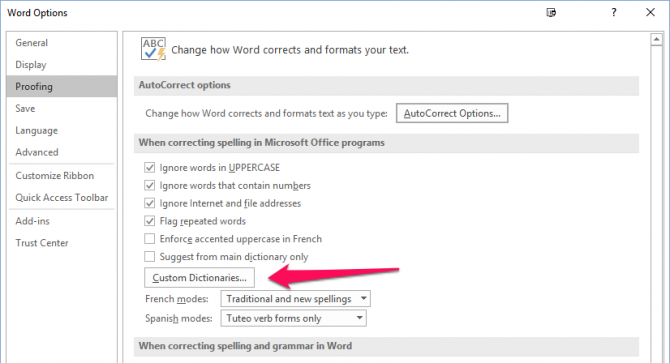
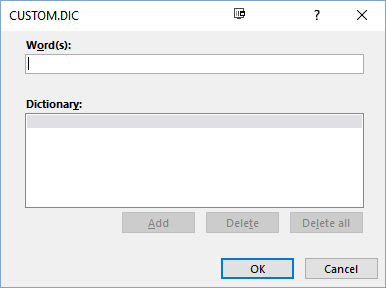
1. Click on the Custom Dictionary button in the Word options window.
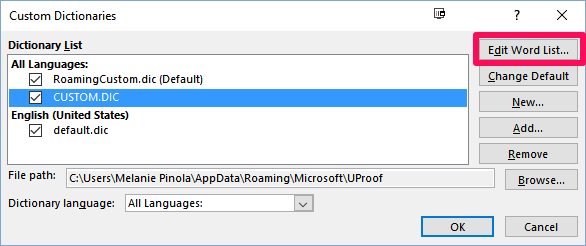
2. Select CUSTOM.DIC then click the Edit Word List button.
3. Add each word you don’t want marked as misspelled and click OK.
4. Click OK to close the Word options window.
You can also turn off spellcheck and grammar check altogether in the Word options menu, but proceed at your own risk!
Microsoft Word Tips
- Previous Tip
- Next Tip
- Show Formatting Marks in Microsoft Word
- See All of Microsoft Word’s Keyboard Shortcuts
- Select All Text with Similar Formatting in Microsoft Word
- Create Table Templates in Microsoft Word
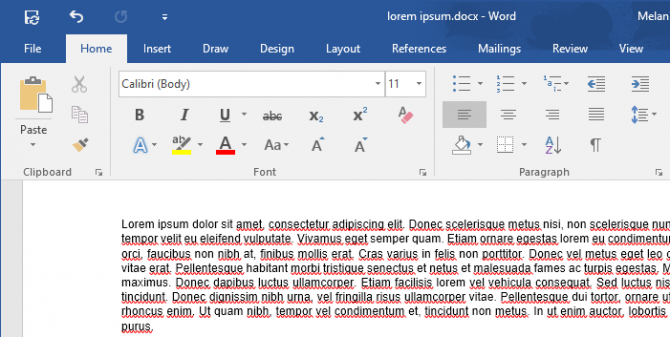
- Use Microsoft Office’s Lorem Ipsum (Random Text) Generator
- Add a Table of Contents in Word
- Co-Edit a Document in Word
- Add or Remove Page Breaks in Word
- Put Microsoft Office into Touch-Friendly Mode
- Compare Docs Side-by-Side
- Remove Double Spaces After a Period
- Compare and Combine Two Docs
- Copy and Paste Text from Multiple Locations
Get instant access to breaking news, the hottest reviews, great deals and helpful tips.

How to Use AutoCorrect in Word

AutoCorrect is a feature that automatically corrects commonly misspelled words and replaces certain symbols and abbreviations with specific text. As you type, instead of being highlighted as misspelled, words in the AutoCorrect list will automatically be replaced with the correct spelling.
Add New AutoCorrect Entries
You can customize AutoCorrect by adding new words to the list of replacements.
- Click the File tab.

- Select Options.

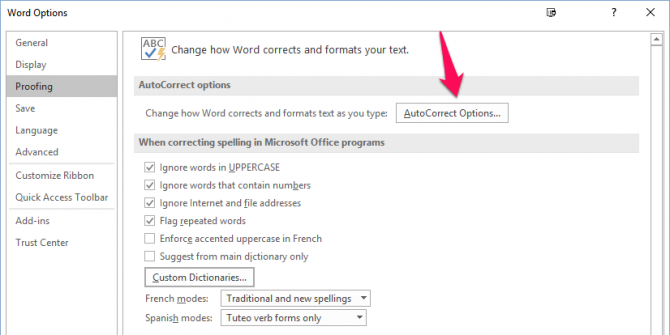
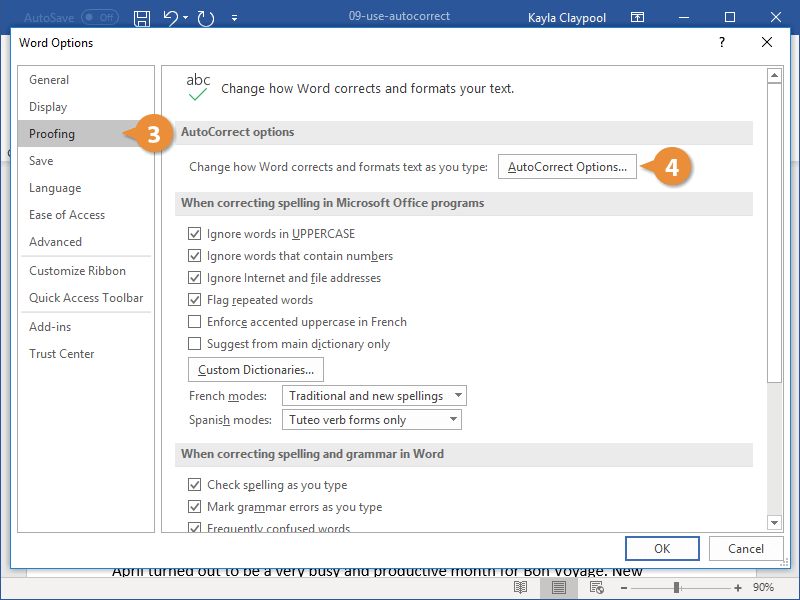
- Click the Proofing tab.
- Click the AutoCorrect Options button.
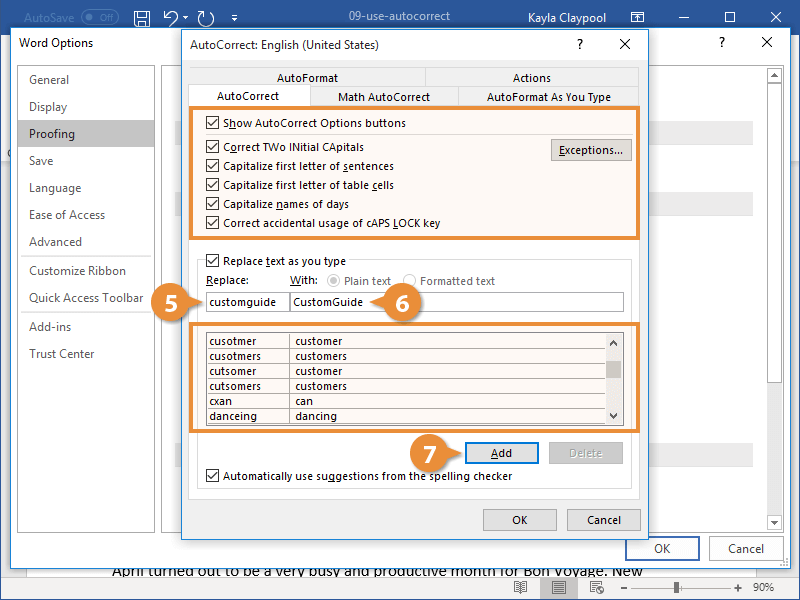
- Enter text in the Replace field.
- Enter text in the With field.
- Click Add.
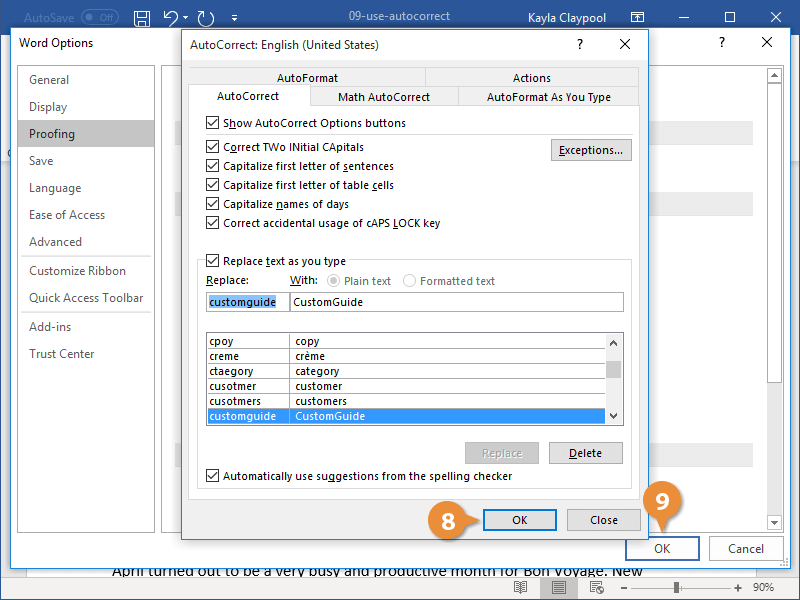
- Click OK to close the AutoCorrect dialog box.
- Click OK to close the Word Options dialog box.
The AutoCorrect options window opens.
At the top, there are a few options for fixing capitalization errors that can be turned on or off.
At the bottom is the AutoCorrect word list. When text from the left column is typed, it will be automatically replaced with the text from the right column.
When you type this text, AutoCorrect will trigger and this word will be replaced.
This text is what will replace the previous field when AutoCorrect is triggered.
The AutoCorrect entry is created.
You could also delete entries here by selecting an entry and clicking Delete. You can disable AutoCorrect entirely by clearing the Replace text as you type check box.
The AutoCorrect entry is created, and will be automatically inserted from now on.

FREE Quick Reference
Click to Download
Free to distribute with our compliments; we hope you will consider our paid training.