Word for Microsoft 365 Word 2021 Word 2019 Word 2016 Word 2013 Word 2010 Word 2007 More…Less
Inserting a document
You can insert the content of previously-created Word documents into a new or different Word document.
-
Click or tap where you want to insert the content of the existing document.
-
Go to Insert and select the arrow next to Object
 .
. -
Select Text from File.
-
Locate the file that you want and then double-click it.
-
To add in the contents of additional Word documents, repeat the above steps as needed.
 .
. 
Important: If you want to insert the header and footer also, be sure to insert the text from the file in a new section so that the header and footer are applied to only those pages. For more info on sections, see Insert a section break.
Need more help?
Want more options?
Explore subscription benefits, browse training courses, learn how to secure your device, and more.
Communities help you ask and answer questions, give feedback, and hear from experts with rich knowledge.
![]()
Download Article
![]()
Download Article
This wikiHow teaches you how to insert the contents of and/or a link to another document into a Microsoft Word document on Windows or Mac.[1]
Steps
-
1
Open a Microsoft Word document. To do so, double-click the blue app that contains or is shaped like a W. Then click File at the top of the screen and Open….
- To create a new document, click New in the file menu.
-
2
Click the place in the document where you want to insert the file.
Advertisement
-
3
Click the Insert tab. It’s at the top of the window.
-
4
Click the
next to Object. It’s in the Text group on the right side of the tool bar at the top of the window.
- On Mac, click Text to expand the group.
-
5
Choose the type of file to insert.
- Click Object… to insert a PDF, image, or another type of non-text file into your Word document. Then click From File… on the left side of the dialog box that opens.
- If you prefer to insert a link to and/or icon of the file, rather than the entire document, click Options on the left side of the dialog box and check Link to File and/or Display as Icon.
- Click Text from File… to insert the text of another Word or text document into the current Word document.
- Click Object… to insert a PDF, image, or another type of non-text file into your Word document. Then click From File… on the left side of the dialog box that opens.
-
6
Select the file to insert.
-
7
Click OK. The file contents, a linked icon, or the text of the file will be inserted into your Word document.


Advertisement
Add New Question
-
Question
I like that I can copy the file and paste to a blank page within another Word file. Is there a way to paste a document that’s more than one page?

Open Microsoft Word. On the top left menu choose Insert. Choose File. Browse through your file system to the file you want. Click on the file name. Choose Insert. For an existing document, place the cursor at the point you want to insert the document, then follow the above instructions. You can also choose a range of pages substituting the final Insert with Range.
-
Question
How do I insert a file into a Word document?
Read and follow the instructions listed in the article above.
-
Question
I need to email a document that is not already in a file. What do I do?
Okay, where is the document? All documents are files. If you don’t like the current format, save it to another format, or copy the material into another file in a standard format. If desperate, take a screenshot by pressing the PrintScreen key and pasting it into a Word document. Save it and you’ll have a file. If you mean the document is a physical piece of paper and not on your computer, you can either scan it or just take a picture of it with your phone.
See more answers
Ask a Question
200 characters left
Include your email address to get a message when this question is answered.
Submit
Advertisement
Video
Thanks for submitting a tip for review!
About This Article
Article SummaryX
1. Open a Word document.
2. Click a place in the document.
3. Click Insert.
4. Click the Object drop-down.
5. Choose the type of file to insert.
6. Select a file to insert.
7. Click OK.
Did this summary help you?
Thanks to all authors for creating a page that has been read 455,641 times.
Is this article up to date?
![]()
We are going to introduce you to the 4 easy ways for how to attach a file in ms word. You may know how to attach a file in ms word but here we will show you all the possible ways of attaching or linking files including pdf files, word files, text files and more in ms word.
Insert an Object:
With this method you can create a link to any existing file which includes inserting the name of the file or Icon of the file, upon clicking on the icon or name of the file inserted in word will open the linked or attached file.
This method also gives you the option of inserting the whole content of the selected file in your word document.
1. Link a file as attachment in word:
1. Click on the Insert tab at the top menu and then click on Object icon.

2. Select Create from File tab from the pop up window and click on browse and select the file which you want to link.
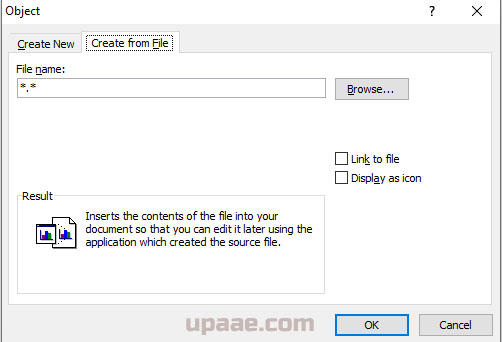
3. Click OK button, that’s it your file is linked to the word document. Now double click on the icon of the linked file and it will open that file.
2. Link content or text of a file in word document:
If you want to display text or content of a file in word this option is for you, if the content of the linked file is updated, it will also be reflected in the word document.
1. Click on the Insert Tab and then click on the small arrow next to Object and select “Text from File”.

2. Locate your file and click on Insert Button.
This will add the content of the selected file to the word document. Any updates made to the linked document will get reflected in the word document.
3. Paste Link Option:
1. Select and copy some text from the source document.
2. Select Home tab and then click the small arrow under Paste, select Paste Special.
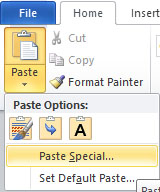
From the pop-up window select the radio button next to Paste Link and select unformatted text or any other option you like. Now Press OK Button and it is done.
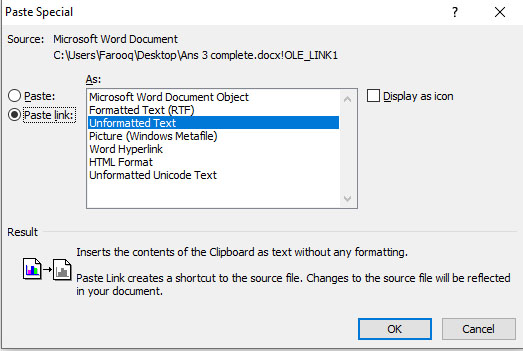
Note: You will notice no difference between simple paste and paste special so far, the main difference is when the source document updates the text pasted with the above method will also update.
All you have to do is right click on the pasted text or content and select Update Link from the right click menu. Any changes made to the source document will reflect here.

If you check the check box next to Display as icon, it will display the icon of the source file from which the text is selected. Clicking on this document will open the source document.
4. Link a document through Bookmark in Word:
1. Select some text and create a bookmark in the source document or the document which you want to link.
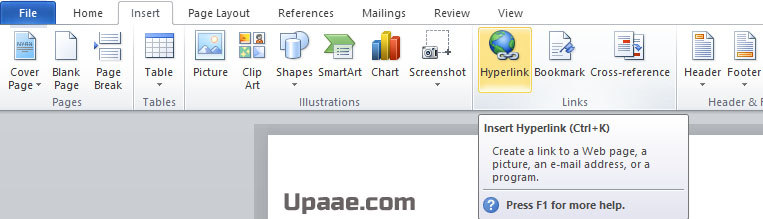
2. In the main document Click on the insert tab and then select Hyperlink.
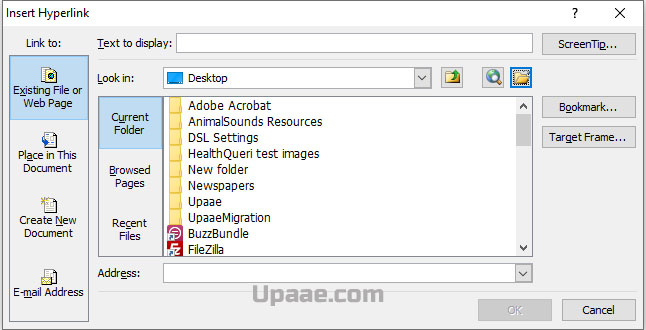
3. Click on the browse button and select your file in which bookmark is created.
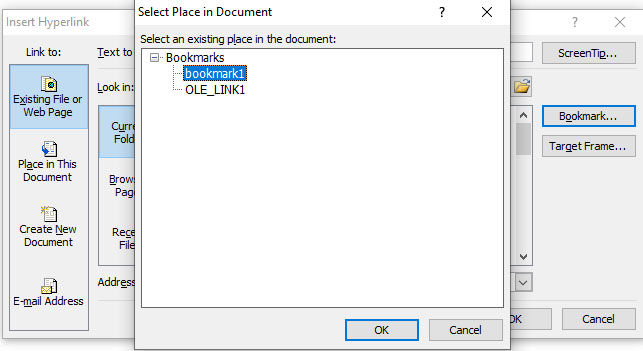
4. Now click on the Bookmark button and select your bookmark which you created and then click on OK button.
That’s it, hope that we helped you in making more out of Microsoft Word. If you liked it don’t forget to share this on social media with your friends.
When writing a document, you have to pay close attention to what information you put in it. Some information might be relevant but adding it all to the same document might not be a good idea. There is such a thing as too much information. It might be a good idea to add the information to a separate document and attach it to the original one. You can do this easily in Word in Office 365. The app allows you to attach any type of file to a document. Once attached, the file can be opened from within the document on any system. Here’s how you can attach a file to a document in Word Office 365.
Open the Word document that you want to attach a file to. Make sure you have the file you want to attach present on your system. Once the document is open, go to the Insert tab on the ribbon and on the Text toolbox, select the Object button. From the menu that opens, select ‘Object’. A new window will open. Go to the ‘Create from File’ tab. Click the ‘Browse’ button and select the file you’d like to attach. That’s all you need to do. You can, optionally, select the ‘Display as icon’ option if you want.

The file will be inserted as an object and like any other object, you can move it to any part of the document. The object can be resized but you cannot change its name. There are a few formatting options available for this object from its right-click context menu.

Opening the file
The file can be opened by double-clicking the object that represents it. The only requirement is that you have an app on your system that can open the file type. If it’s a common file e.g., an image or a text file, you will be able to open it but for formats like PSD, you will need an app that can open or view the file type. Once the file is open, you can save it as a copy to your desktop.
Attaching files to a document will make it much bigger. The size of the file that is attached will be added to the document so the bigger the attached file is, the larger your final document will be. If you’re attaching a file to a document, it may be a good idea to include a caption that instructs the reader on how to open it.
Кнопка «Наверх»
Updated: 03/05/2023 by

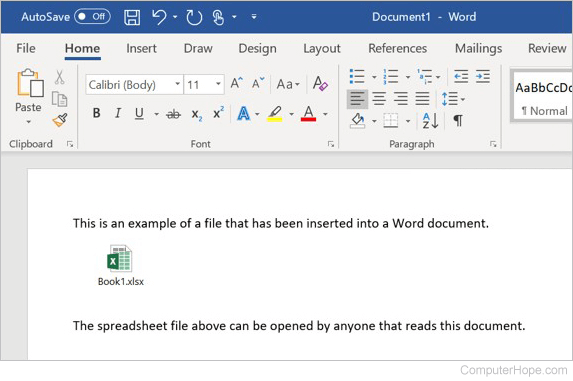
When creating or modifying a Microsoft Word document, it can be beneficial to insert or embed another file into it. By inserting a file into a Word document, that file becomes a part of the Word document. A reader can open and view the embedded file without requiring special permission or access.
Nearly any file can be inserted into a Word document, including another document, spreadsheet, presentation, text file, or a media file containing music or video. However, be aware that inserting a file into a Word document can increase its size significantly.
Insert a file into a Word document
To insert or embed a file into a Microsoft Word document, follow the steps below.
Note
It is not possible to insert a file in a Microsoft Word Online document. You can only insert a file in a document opened and edited in the Microsoft Word desktop application.
- Open a Microsoft Word document.
- Locate the file on your computer that you want to insert into the Word document.
- Click the file and, while holding down the left mouse button, drag the file from your computer into the Word document. Release the left mouse button once the file is where you want it to be inserted.