
- Download demo project — 313 Kb
Introduction
This article is being written in response of the need of building Microsoft Word document in an ASP.NET project. This article demonstrates how to create and modify document using Microsoft Word with ASP.NET.
Background
Automation is a process that allows applications that are written in languages such as Visual Basic .NET or C# to programmatically control other applications. Automation to Word allows you to perform actions such as creating new documents, adding text to documents, mail merge, and formatting documents. With Word and other Microsoft Office applications, virtually all of the actions that you can perform manually through the user interface can also be performed programmatically by using automation. Word exposes this programmatic functionality through an object model. The object model is a collection of classes and methods that serve as counterparts to the logical components of Word. For example, there is an Application object, a Document object, and a Paragraph object, each of which contain the functionality of those components in Word.
The project
The first step in manipulating Word in .NET is that you’ll need to add a COM reference to your project by right clicking in the solution explorer on References->Add Reference. Click on the COM tab and look for the Microsoft Word 10.0 Object Library. Click Select and OK.

This will automatically place an assembly in your application directory that wraps COM access to Word.
Now you can instantiate an instance of a Word application:
Word.ApplicationClass oWordApp = new Word.ApplicationClass();
You can call the interesting methods and properties that Microsoft Word provides to you to manipulate documents in Word. The best way to learn how to navigate the object models of Word, Excel, and PowerPoint is to use the Macro Recorder in these Office applications:
- Choose Record New Macro from the Macro option on the Tools menu and execute the task you’re interested in.
- Choose Stop Recording from the Macro option on the Tools menu.
- Once you are done recording, choose Macros from the Macro option on the Tools menu, select the macro you recorded, then click Edit.
This takes you to the generated VBA code that accomplishes the task you recorded. Keep in mind that the recorded macro will not be the best possible code in most cases, but it provides a quick and usable example.
For example to open an existing file and append some text:
object fileName = "c:\database\test.doc";
object readOnly = false;
object isVisible = true;
object missing = System.Reflection.Missing.Value;
Word.ApplicationClass oWordApp = new Word.ApplicationClass();

Word.Document oWordDoc = oWordApp.Documents.Open(ref fileName,
                            ref missing,ref readOnly,
                            ref missing, ref missing, ref missing,
                            ref missing, ref missing, ref missing,
                            ref missing, ref missing, ref isVisible,
                            ref missing,ref missing,ref missing);

oWordDoc.Activate();

oWordApp.Selection.TypeText("This is the text");
oWordApp.Selection.TypeParagraph();
oWordDoc.Save();

oWordApp.Application.Quit(ref missing, ref missing, ref missing);
Or to open a new document and save it:
Word.ApplicationClass oWordApp = new Word.ApplicationClass();

Word.Document oWordDoc = oWordApp.Documents.Add(ref missing,
                           ref missing,ref missing, ref missing);

oWordDoc.Activate();

oWordApp.Selection.TypeText("This is the text");
oWordApp.Selection.TypeParagraph();
oWordDoc.SaveAs("c:\myfile.doc");

oWordApp.Application.Quit(ref missing, ref missing, ref missing);
In C#, the Word Document class’s Open method signature is defined as Open(ref object, ref object, ref object, ref object, ref object, ref object, ref object, ref object, ref object, ref object, ref object, ref object, ref object, ref object, ref object). What this means is that in C# the Open method takes 15 required arguments, and each argument must be preceded with the ref keyword and each argument must be of type object. Since the first argument is a file name, normally a String value in Visual Basic. NET, we must declare a variable of type object that holds the C# string value, hence the code:
object fileName = "c:\database\test.doc";
Although we only need to use the first argument in the Open method, remember that C# does not allow optional arguments, so we provide the final 14 arguments as variables of type object that hold values of System.Reflection.Missing.Value
Use a template
If you are using automation to build documents that are all in a common format, you can benefit from starting the process with a new document that is based on a preformatted template. Using a template with your Word automation client has two significant advantages over building a document from nothing:
- You can have greater control over the formatting and placement of objects throughout your documents.
- You can build your documents with less code.
By using a template, you can fine-tune the placement of tables, paragraphs, and other objects within the document, as well as include formatting on those objects. By using automation, you can create a new document based on your template with code such as the following:
Word.ApplicationClass oWordApp = new Word.ApplicationClass();
object oTemplate = "c:\MyTemplate.dot";
oWordDoc = oWordApp.Documents.Add(ref oTemplate,
              ref Missing,ref Missing, ref Missing);
In your template, you can define bookmarks so that your automation client can fill in variable text at a specific location in the document, as follows:
object oBookMark = "MyBookmark";
oWordDoc.Bookmarks.Item(ref oBookMark).Range.Text = "Some Text Here";
Another advantage to using a template is that you can create and store formatting styles that you wish to apply at run time, as follows:
object oStyleName = "MyStyle";
oWordDoc.Bookmarks.Item(ref oBookMark).Range.set_Style(ref oStyleName);
Using the class CCWordApp
The project contains a file: CCWordApp.cs. I didn’t want to write every time all the code necessary to insert text, open a file, etc…So I decided to write a class CCWordApp that wraps the most important function. This is a brief description of the class and its functions.
public class CCWordApp
{

    private Word.ApplicationClass oWordApplic;

    private Word.Document oWordDoc;


    public CCWordApp();


    public void Open( string strFileName);


    public void Open( );


    public void Quit( );


    public void Save( );


    public void SaveAs(string strFileName );


    public void SaveAsHtml(string strFileName );


    public void InsertText( string strText);


    public void InsertLineBreak( );


    public void InsertLineBreak( int nline);


    public void SetAlignment(string strType );


    public void SetFont( string strType );


    public void SetFont( );


    public void SetFontName( string strType );


    public void SetFontSize( int nSize );


    public void InsertPagebreak();


    public void GotoBookMark( string strBookMarkName);


    public void GoToTheEnd( );


    public void GoToTheBeginning( );
So the code to open an existing file will be:
CCWordApp test ;
test = new CCWordApp();
test.Open ("c:\database\test.doc");
test.InsertText("This is the text");
test.InsertLineBreak;
test.Save ();
test.Quit();
Details
The demo project contains:
- CCWordApp.cs — the class
- CreateDocModel.aspx: an example of building a new document based on a template and the use of bookmarks
- CreateNewDoc.aspx: an example of building a new document and inserting some text
- ModifyDocument.aspx: an example of opening an existing document and appending some text at the end
- templatetemplate1.dot: an example of a template (used in CreateDocModel.aspx)
Keep in mind that the directory ,in which you save the files, must be writeable. Please check the Web.config to change the path.
References
- Microsoft Word Objects
- Converting Microsoft Office VBA Macros to Visual Basic .NET and C#
- HOWTO: Automate Microsoft Word to Perform a Mail Merge from Visual Basic .NET
- A Primer to the Office XP Primary Interop Assemblies
- HOWTO: Find and Use Office Object Model Documentation
- Creating and Opening Microsoft Word Documents from .NET using C#
This member has not yet provided a Biography. Assume it’s interesting and varied, and probably something to do with programming.
In this article I will explain with an example, how to display Word document (DOC and DOCX) files on web page in ASP.Net using C# and VB.Net.
The Word document will be first uploaded, then it will be converted to HTML using Microsoft Office Interop Library and finally the converted HTML it will be displayed in web page in ASP.Net using C# and VB.Net.
Adding reference of Microsoft Office Interop Library
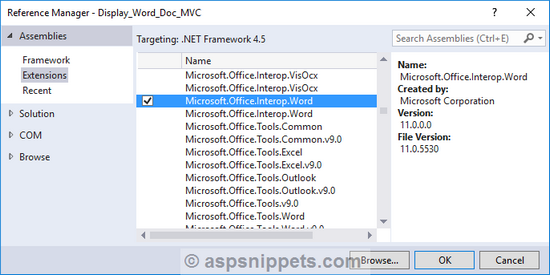
In order to add reference of the Microsoft Office Interop Library, right click on the Project in Solution Explorer and click Add Reference.
Then from the following Window, please select Microsoft Office Interop.Word assembly.
HTML Markup
The following HTML Markup consists of an ASP.Net FileUpload control, a Button and an HTML DIV.
<asp:FileUpload ID=»FileUpload1″ runat=»server» />
<asp:Button ID=»btnUpload» runat=»server» Text=»submit» OnClick=»Upload» />
<hr />
<div id=»dvWord» runat=»server»></div>
Namespaces
You will need to import the following namespaces.
C#
using System.IO;
using Microsoft.Office.Interop.Word;
using System.Text.RegularExpressions;
VB.Net
Imports System.IO
Imports Microsoft.Office.Interop.Word
Imports System.Text.RegularExpressions
Display Word document on web page in ASP.Net
The following event handler gets called when the Submit button is clicked.
The uploaded Word Document file is first saved into a Folder named Temp within the Project Folder and then the Word Document file is converted into HTML string using Microsoft Office Interop Library.
Finally the HTML string will be assigned to the InnerHtml property of the HTML DIV.
C#
protected void Upload(object sender, EventArgs e)
{
object documentFormat = 8;
string randomName = DateTime.Now.Ticks.ToString();
object htmlFilePath = Server.MapPath(«~/Temp/») + randomName + «.htm»;
string directoryPath = Server.MapPath(«~/Temp/») + randomName + «_files»;
object fileSavePath = Server.MapPath(«~/Temp/») + Path.GetFileName(FileUpload1.PostedFile.FileName);
//If Directory not present, create it.
if (!Directory.Exists(Server.MapPath(«~/Temp/»)))
{
Directory.CreateDirectory(Server.MapPath(«~/Temp/»));
}
//Upload the word document and save to Temp folder.
FileUpload1.PostedFile.SaveAs(fileSavePath.ToString());
//Open the word document in background.
_Application applicationclass = new Application();
applicationclass.Documents.Open(ref fileSavePath);
applicationclass.Visible = false;
Document document = applicationclass.ActiveDocument;
//Save the word document as HTML file.
document.SaveAs(ref htmlFilePath, ref documentFormat);
//Close the word document.
document.Close();
//Read the saved Html File.
string wordHTML = System.IO.File.ReadAllText(htmlFilePath.ToString());
//Loop and replace the Image Path.
foreach (Match match in Regex.Matches(wordHTML, «<v:imagedata.+?src=[«‘](.+?)[«‘].*?>», RegexOptions.IgnoreCase))
{
wordHTML = Regex.Replace(wordHTML, match.Groups[1].Value, «Temp/» + match.Groups[1].Value);
}
//Delete the Uploaded Word File.
System.IO.File.Delete(fileSavePath.ToString());
dvWord.InnerHtml = wordHTML;
}
VB.Net
Protected Sub Upload(ByVal sender As Object, ByVal e As EventArgs)
Dim documentFormat As Object = 8
Dim randomName As String = DateTime.Now.Ticks.ToString
Dim htmlFilePath As Object = Server.MapPath(«~/Temp/») & randomName + «.htm»
Dim directoryPath As String = Server.MapPath(«~/Temp/») & randomName + «_files»
Dim fileSavePath As Object = Server.MapPath(«~/Temp/») & Path.GetFileName(FileUpload1.PostedFile.FileName)
‘If Directory not present, create it.
If Not Directory.Exists(Server.MapPath(«~/Temp/»)) Then
Directory.CreateDirectory(Server.MapPath(«~/Temp/»))
End If
‘Upload the word document and save to Temp folder.
FileUpload1.PostedFile.SaveAs(fileSavePath.ToString)
‘Open the word document in background.
Dim applicationclass As _Application = New Application
applicationclass.Documents.Open(fileSavePath)
applicationclass.Visible = False
Dim document As Document = applicationclass.ActiveDocument
‘Save the word document as HTML file.
document.SaveAs(htmlFilePath, documentFormat)
‘Close the word document.
document.Close()
‘Read the saved Html File.
Dim wordHTML As String = System.IO.File.ReadAllText(htmlFilePath.ToString)
‘Loop and replace the Image Path.
For Each match As Match In Regex.Matches(wordHTML, «<v:imagedata.+?src=[«»‘](.+?)[«»‘].*?>», RegexOptions.IgnoreCase)
wordHTML = Regex.Replace(wordHTML, match.Groups(1).Value, («Temp/» + match.Groups(1).Value))
Next
‘Delete the Uploaded Word File.
System.IO.File.Delete(fileSavePath.ToString)
dvWord.InnerHtml = wordHTML
End Sub
Screenshot
Downloads
GemBox.Document is a standalone .NET component that’s ideal for web applications because of its fast performance and thread safety when working with multiple DocumentModel objects.
With GemBox.Document you can build web applications that target ASP.NET Core 2.0 and above. The following live demos show how you can create web apps that generate Word and PDF files and download them to your browser.
To use GemBox.Document, simply install the GemBox.Document package with NuGet or add the following package reference in the project file.
<Project Sdk="Microsoft.NET.Sdk.Web">

    <PropertyGroup>
        <TargetFramework>net7.0</TargetFramework>
    </PropertyGroup>

    <ItemGroup>
        <PackageReference Include="GemBox.Document" Version="*" />
    </ItemGroup>

</Project>
Create Word or PDF files in ASP.NET Core MVC
The following example shows how you can create an ASP.NET Core MVC application that:
- Imports data from a web form into a Word document using the Mail Merge process.
- Creates a file of a specified format like DOCX or PDF.
- Downloads the generated file with a
FileStreamResult.

@model InvoiceModel
<!DOCTYPE html>
<html lang="en">
<head>
<meta charset="utf-8" />
<meta name="viewport" content="width=device-width, initial-scale=1.0" />
<title>GemBox.Document in ASP.NET Core MVC application</title>
<link rel="icon" href="~/favicon.ico" />
<link rel="stylesheet" href="~/lib/bootstrap/dist/css/bootstrap.min.css" />
<link rel="stylesheet" href="~/css/site.css" />
</head>
<body>
<header>
<nav class="navbar border-bottom box-shadow mb-3">
<div class="container">
<a class="navbar-brand" asp-controller="Home" asp-action="Index">Home</a>
</div>
</nav>
</header>
<div class="container">
<main class="pb-3 row">
<h1 class="display-4 p-3">Invoice generator [Razor View]</h1>
<div class="col-lg-6">
<form asp-action="Download">
<div class="form-group">Number: <input asp-for="Number" class="form-control" /></div>
<div class="form-group">Date: <input asp-for="Date" class="form-control" /></div>
<div class="form-group">Company: <input asp-for="Company" class="form-control" /></div>
<div class="form-group">Address: <input asp-for="Address" class="form-control" /></div>
<div class="form-group">Name: <input asp-for="Name" class="form-control" /></div>
<div class="form-group">
Format:
<div class="row">
@foreach (string format in Model.FormatMappingDictionary.Select(item => item.Key))
{
<div class="col-3">
<div class="form-check form-check-inline">
<input asp-for="Format" class="form-check-input" type="radio" id="@format" value="@format">
<label for="@format" class="form-check-label">@format</label>
</div>
</div>
}
</div>
</div>
<div class="form-group"><input type="submit" value="Create" class="btn btn-primary" /></div>
</form>
</div>
</main>
</div>
<footer class="footer border-top text-muted">
<div class="container">© GemBox Ltd. — All rights reserved.</div>
</footer>
</body>
</html>using System;
using System.Collections.Generic;
using System.Diagnostics;
using System.IO;
using Microsoft.AspNetCore.Hosting;
using Microsoft.AspNetCore.Mvc;
using DocumentCoreMvc.Models;
using GemBox.Document;
namespace DocumentCoreMvc.Controllers
{
public class HomeController : Controller
{
private readonly IWebHostEnvironment environment;
public HomeController(IWebHostEnvironment environment)
{
this.environment = environment;
// If using the Professional version, put your serial key below.
ComponentInfo.SetLicense("FREE-LIMITED-KEY");
}
public IActionResult Index()
{
return View(new InvoiceModel());
}
public FileStreamResult Download(InvoiceModel model)
{
// Load template document.
var path = Path.Combine(this.environment.ContentRootPath, "%#InvoiceWithFields.docx%");
var document = DocumentModel.Load(path);
// Execute mail merge process.
document.MailMerge.Execute(model);
// Save document in specified file format.
var stream = new MemoryStream();
document.Save(stream, model.Options);
// Download file.
return File(stream, model.Options.ContentType, $"OutputFromView.{model.Format.ToLower()}");
}
[ResponseCache(Duration = 0, Location = ResponseCacheLocation.None, NoStore = true)]
public IActionResult Error()
{
return View(new ErrorViewModel() { RequestId = Activity.Current?.Id ?? HttpContext.TraceIdentifier });
}
}
}
namespace DocumentCoreMvc.Models
{
public class InvoiceModel
{
public int Number { get; set; } = 1;
public DateTime Date { get; set; } = DateTime.Today;
public string Company { get; set; } = "ACME Corp.";
public string Address { get; set; } = "240 Old Country Road, Springfield, United States";
public string Name { get; set; } = "Joe Smith";
public string Format { get; set; } = "DOCX";
public SaveOptions Options => this.FormatMappingDictionary[this.Format];
public IDictionary<string, SaveOptions> FormatMappingDictionary => new Dictionary<string, SaveOptions>()
{
["PDF"] = new PdfSaveOptions(),
["DOCX"] = new DocxSaveOptions(),
["ODT"] = new OdtSaveOptions(),
["HTML"] = new HtmlSaveOptions() { EmbedImages = true },
["MHTML"] = new HtmlSaveOptions() { HtmlType = HtmlType.Mhtml },
["RTF"] = new RtfSaveOptions(),
["XML"] = new XmlSaveOptions(),
["TXT"] = new TxtSaveOptions(),
["XPS"] = new XpsSaveOptions(),
["PNG"] = new ImageSaveOptions(ImageSaveFormat.Png),
["JPG"] = new ImageSaveOptions(ImageSaveFormat.Jpeg),
["BMP"] = new ImageSaveOptions(ImageSaveFormat.Bmp),
["GIF"] = new ImageSaveOptions(ImageSaveFormat.Gif),
["TIF"] = new ImageSaveOptions(ImageSaveFormat.Tiff)
};
}
}Create Word or PDF files in ASP.NET Core Razor Pages
The following example shows how you can create an ASP.NET Core Razor Pages application that:
- Imports data from a web form into a Word document using Find and Replace operations.
- Creates a file of a specified format like DOCX or PDF.
- Downloads the generated file with a
FileContentResult.

@page
@model IndexModel
<!DOCTYPE html>
<html lang="en">
<head>
<meta charset="utf-8" />
<meta name="viewport" content="width=device-width, initial-scale=1.0" />
<title>GemBox.Document in ASP.NET Core Razor Pages application</title>
<link rel="icon" href="~/favicon.ico" />
<link rel="stylesheet" href="~/lib/bootstrap/dist/css/bootstrap.min.css" />
<link rel="stylesheet" href="~/css/site.css" />
</head>
<body>
<header>
<nav class="navbar border-bottom box-shadow mb-3">
<div class="container">
<a class="navbar-brand" asp-page="/Index">Home</a>
</div>
</nav>
</header>
<div class="container">
<main class="pb-3 row">
<h1 class="display-4 p-3">Invoice generator [Razor Page]</h1>
<div class="col-lg-6">
<form method="post">
<div class="form-group">Number: <input asp-for="Invoice.Number" class="form-control" /></div>
<div class="form-group">Date: <input asp-for="Invoice.Date" class="form-control" /></div>
<div class="form-group">Company: <input asp-for="Invoice.Company" class="form-control" /></div>
<div class="form-group">Address: <input asp-for="Invoice.Address" class="form-control" /></div>
<div class="form-group">Name: <input asp-for="Invoice.Name" class="form-control" /></div>
<div class="form-group">
Format:
<div class="row">
@foreach (string format in Model.Invoice.FormatMappingDictionary.Select(item => item.Key))
{
<div class="col-3">
<div class="form-check form-check-inline">
<input asp-for="Invoice.Format" class="form-check-input" type="radio" id="@format" value="@format">
<label for="@format" class="form-check-label">@format</label>
</div>
</div>
}
</div>
</div>
<div class="form-group"><input type="submit" value="Create" class="btn btn-primary" /></div>
</form>
</div>
</main>
</div>
<footer class="footer border-top text-muted">
<div class="container">© GemBox Ltd. — All rights reserved.</div>
</footer>
</body>
</html>using System;
using System.Collections.Generic;
using System.IO;
using Microsoft.AspNetCore.Hosting;
using Microsoft.AspNetCore.Mvc;
using Microsoft.AspNetCore.Mvc.RazorPages;
using DocumentCorePages.Models;
using GemBox.Document;
namespace DocumentCorePages.Pages
{
public class IndexModel : PageModel
{
private readonly IWebHostEnvironment environment;
[BindProperty]
public InvoiceModel Invoice { get; set; }
public IndexModel(IWebHostEnvironment environment)
{
this.environment = environment;
this.Invoice = new InvoiceModel();
// If using the Professional version, put your serial key below.
ComponentInfo.SetLicense("FREE-LIMITED-KEY");
}
public void OnGet() { }
public FileContentResult OnPost()
{
// Load template document.
var path = Path.Combine(this.environment.ContentRootPath, "%#InvoiceWithPlaceholders.docx%");
var document = DocumentModel.Load(path);
// Execute find and replace operations.
document.Content.Replace("{{Number}}", this.Invoice.Number.ToString("0000"));
document.Content.Replace("{{Date}}", this.Invoice.Date.ToString("d MMM yyyy HH:mm"));
document.Content.Replace("{{Company}}", this.Invoice.Company);
document.Content.Replace("{{Address}}", this.Invoice.Address);
document.Content.Replace("{{Name}}", this.Invoice.Name);
// Save document in specified file format.
using var stream = new MemoryStream();
document.Save(stream, this.Invoice.Options);
// Download file.
return File(stream.ToArray(), this.Invoice.Options.ContentType, $"OutputFromPage.{this.Invoice.Format.ToLower()}");
}
}
}
namespace DocumentCorePages.Models
{
public class InvoiceModel
{
public int Number { get; set; } = 1;
public DateTime Date { get; set; } = DateTime.Today;
public string Company { get; set; } = "ACME Corp.";
public string Address { get; set; } = "240 Old Country Road, Springfield, United States";
public string Name { get; set; } = "Joe Smith";
public string Format { get; set; } = "PDF";
public SaveOptions Options => this.FormatMappingDictionary[this.Format];
public IDictionary<string, SaveOptions> FormatMappingDictionary => new Dictionary<string, SaveOptions>()
{
["PDF"] = new PdfSaveOptions(),
["DOCX"] = new DocxSaveOptions(),
["ODT"] = new OdtSaveOptions(),
["HTML"] = new HtmlSaveOptions() { EmbedImages = true },
["MHTML"] = new HtmlSaveOptions() { HtmlType = HtmlType.Mhtml },
["RTF"] = new RtfSaveOptions(),
["XML"] = new XmlSaveOptions(),
["TXT"] = new TxtSaveOptions(),
["XPS"] = new XpsSaveOptions(),
["PNG"] = new ImageSaveOptions(ImageSaveFormat.Png),
["JPG"] = new ImageSaveOptions(ImageSaveFormat.Jpeg),
["BMP"] = new ImageSaveOptions(ImageSaveFormat.Bmp),
["GIF"] = new ImageSaveOptions(ImageSaveFormat.Gif),
["TIF"] = new ImageSaveOptions(ImageSaveFormat.Tiff)
};
}
}Host and deploy ASP.NET Core
GemBox.Document is licensed per individual developer, and the licenses include a royalty-free deployment. You can feel free to build an unlimited number of applications and deploy or distribute them to an unlimited number of services, servers, or end-user machines with no extra cost.
GemBox.Document licenses are compatible with SaaS or PaaS solutions, as long as they don’t offer similar or competing functionality to our component, or expose our features through an API for use by an unlicensed third party. For more information, please check the EULA.
Create PNG, JPG, or XPS files on Windows
GemBox.Document supports saving to XPS and image formats (like PNG and JPG) on applications that target .NET 6.0 or above.
However, these features currently work only on Windows. In other words, besides .NET Core Runtime, you also need a .NET Windows Desktop Runtime installed on the server.
To export an XPS or image file in an ASP.NET Core application, you need to use a Windows-specific TFM in the project file.
<Project Sdk="Microsoft.NET.Sdk.Web">

    <PropertyGroup>
        <TargetFramework>net7.0-windows</TargetFramework>
    </PropertyGroup>

    <ItemGroup>
        <PackageReference Include="GemBox.Document" Version="*" />
    </ItemGroup>

</Project>
Also, enable the following compatibility switch with the AppContext class.
- C#
public class Startup
{
    public Startup(IConfiguration configuration)
    {
        Configuration = configuration;

        // Add compatibility switch.
        AppContext.SetSwitch("Switch.System.Windows.Media.ShouldRenderEvenWhenNoDisplayDevicesAreAvailable", true);
    }

    public IConfiguration Configuration { get; }

    // This method gets called by the runtime. Use this method to add services to the container.
    public void ConfigureServices(IServiceCollection services)
    {
        // ...
    }

    // This method gets called by the runtime. Use this method to configure the HTTP request pipeline.
    public void Configure(IApplicationBuilder app, IWebHostEnvironment env)
    {
        // ...
    }
}
Or you can enable that compatibility switch by adding the following runtimeconfig.template.json file to your project.
- JSON
{
  "configProperties": {
    "Switch.System.Windows.Media.ShouldRenderEvenWhenNoDisplayDevicesAreAvailable": true
  }
}
Limitations on Linux or macOS
You can use the full functionality of GemBox.Document on Unix systems, but with the following exceptions:
- Printing files.
- Saving files to XPS or image formats.
- Saving charts and group shapes to PDF, XPS, and image formats.
- Calling
ConvertToImageSourceandConvertToXpsDocumentmethods.
These features currently have WPF dependencies which means they require a .NET Windows Desktop Runtime. However, we do have plans for providing cross-platform support for them in future releases.
GemBox.Document is a .NET component that enables you to read, write, edit, convert, and print document files from your .NET applications using one simple API. How about testing it today?
Download Buy
In one of the ASP.NET Core projects we did in the last year, we created an OutputFormatter to provide Word documents as printable reports via ASP.NET Core Web API. Well, this formatter wasn’t made by me but by my colleague Jakob Wolf at the yooapps.com. I told him to write about it, but he hadn’t enough time to do it yet, so I’m going to do it for him. Maybe you know about him on Twitter. Maybe not, but he is one of the best ASP.NET and Angular developers I ever met.
About OutputFormatters
In ASP.NET you are able to have many different formatters. The best known built-in formatter is the JsonOutputFormatter which is used as the default OutputFormatter in ASP.NET Web API.
By using the AddMvcOptions() you are able to add new Formatters or to manage the existing formatters:
services.AddMvc()
    .AddMvcOptions(options =>
    {
        options.OutputFormatters.Add(new WordOutputFormatter());
        options.FormatterMappings.SetMediaTypeMappingForFormat(
          "docx", MediaTypeHeaderValue.Parse("application/ms-word"));
    })
As you can see in the snippet above, we add the Word document formatter (called WordOutputFormatter to provide the Word documents if the requested type is «application/ms-word».
You are able to add whatever formatter you need, provided on whatever media type you want to support.
Let’s have a look how a output formatter looks like:
public class MyFormatter : IOutputFormatter
{
  public bool CanWriteResult(OutputFormatterCanWriteContext context)
  {
	  // check whether to write or not
    throw new NotImplementedException();
  }

  public async Task WriteAsync(OutputFormatterWriteContext context)
  {
	// write the formatted contents to the response stream.
    throw new NotImplementedException();
  }
}
You have one method to check whether the data can be written to the expected format or not. The other async method does the job to format and output the data to the response stream, which comes with the context.
This way needs to do some things manually. A more comfortable way to implement an OutputFormatter is to inherit from the OutputFormatter base class directly:
public class WordOutputFormatter : OutputFormatter
{
  public string ContentType { get; }

  public WordOutputFormatter()
  {
    ContentType = "application/ms-word";
    SupportedMediaTypes.Add(MediaTypeHeaderValue.Parse(ContentType));
  }

	// optional, but makes sense to restrict to a specific condition
  protected override bool CanWriteType(Type type)
  {
    if (type == null)
    {
      throw new ArgumentNullException(nameof(type));
    }

	// only one ViewModel type is allowed
    return type == typeof(DocumentContentsViewModel);
  }

	// this needs to be overwritten
  public override Task WriteResponseBodyAsync(OutputFormatterWriteContext context)
  {
	 // Format and write the document outputs here
    throw new NotImplementedException();
  }
}
The base class does some things for you. For example to write the correct HTTP headers.
Creating Word documents
To create Word documents you need to add a reference to the Open XML SDK. We used the OpenXMLSDK-MOT with the version 2.6.0, which cannot used with .NET Core. This is why we run that specific ASP.NET Core project on .NET 4.6.
Version 2.7.0 is available as a .NET Standard 1.3 library and can be used in .NET Core. Unfortunately, this version isn’t yet available in the default NuGet Feed. To install the latest Version, follow the instructions on GitHub. Currently, there is a mess with the NuGet package IDs and versions on NuGet and MyGet. Use the MyGet feed, mentioned on the GitHub page to install the latest version. The package ID here is DocumentFormat.OpenXml and the latest stable Version is 2.7.1
In this post, I don’t want to go through all the word processing processes, because it is too specific for our implementation. I just want to show you how it works in general. The Open XML SDK is pretty well documented, so you can use this as an entry point to create your own specific WordOutputFormatter:
public override async Task WriteResponseBodyAsync(OutputFormatterWriteContext context)
{
  var response = context.HttpContext.Response;
  var filePath = Path.GetTempFileName();

  var viewModel = context.Object as DocumentContentsViewModel;
  if (viewModel == null)
  {
    throw new ArgumentNullException(nameof(viewModel));
  }

  using (var wordprocessingDocument = WordprocessingDocument
         .Create(filePath, WordprocessingDocumentType.Document))
  {
	// start creating the documents and the main parts of it
    wordprocessingDocument.AddMainDocumentPart();

    var styleDefinitionPart = wordprocessingDocument.MainDocumentPart
      .AddNewPart<StyleDefinitionsPart>();
    var styles = new Styles();
    styles.Save(styleDefinitionPart);

    wordprocessingDocument.MainDocumentPart.Document = new Document
    {
      Body = new Body()
    };
    var body = wordprocessingDocument.MainDocumentPart.Document.Body;

	 // call a helper method to set default styles
    AddStyles(styleDefinitionPart);
	  // call a helper method set the document to landscape mode
    SetLandscape(body);

    foreach (var institution in viewModel.Items)
    {

	/ iterate threw some data of the viewmodel
      // and create the elements you need

      // ... more word processing stuff here


    }

    await response.SendFileAsync(filePath);
  }
}
The VewModel with the data to format is in the Object property of the OutputFormatterWriteContext. We do a save cast and check for null before we continue. The Open XML SDK works based on files. This is why we need to create a temp file name and let the SDK use this file path. Because of that fact — at the end — we send the file out to the response stream using the response.SendFileAsync() method. I personally prefer to work on the OutputStream directly, to have fewer file operations and so I can work a little bit faster. The other thing is, we need to clean up the temp files.
After the file is created, we work on this file and create the document, custom styles and layouts and the document body, which will contain the formatted data. Inside the loop, we are only working on that Body object. We created helper methods to add formatted values, tables and so on.
Conclusion
OutputFormatters are pretty useful to create almost any kind of content out of any kind of data. Instead of hacking around in the specific Web API actions, you should always use the OutputFormatters to have reusable components.
The OutputFormatter we build is not really reusable or generic because it was created for a specific kind of a report. But with this starting point, we are able to make it generic. We could pass a template document to the formatter, which knows the properties of the ViewModel, this way it is possible to create almost all kind of Word documents.
Building feature rich applications can often leave users asking to take visual elements off the screen to be used elsewhere. Being able to export from an application to Word or PDF opens up new possibilities, such as sharing, reporting or even satisfying Sarbanes–Oxley (SOX) audit requirements.
Getting data out of your application and into standard formats like Microsoft Word and Adobe PDF can be a daunting task. Especially when performance optimizations for large datasets, document customization & appearance, and supported platforms are taken into consideration.
However, with the right tools, adding this feature to your .NET application can be as simple as a few lines of code. Let’s take a look at 5 ways we can include rich document functionality in our .NET apps with very little code and time investment.
For most of the examples we’ll be using the Telerik Document Processing Library (DPL), which is distributed at no additional cost with the Progress Telerik UI libraries for ASP.NET Web Forms and MVC. For the desktop developers out there, the DPL is also included with WPF, Silverlight and WinForms. In addition, no MS Office licenses or dependencies are required to use the DPL. As a bonus for web developers, we’ll see that the Telerik UI libraries have powerful client-side APIs for exporting content directly from the screen.
If you’re using Telerik UI, you already have these capabilities in your toolbox and we’ll learn how to leverage them. If you’re not using Telerik UI yet, but would like to increase your developer productivity, learn more about it here.
1. Create New Word Document in .NET
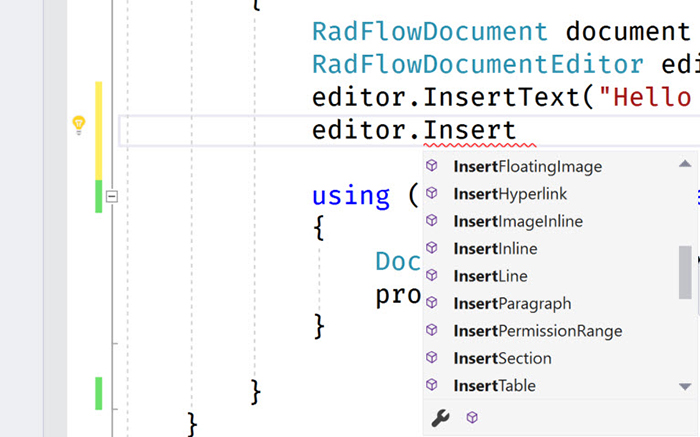
Having the ability to create a new Word document from code provides a great deal of flexibility. With a just few dependencies we have access to Word document creation APIs that include text, image, and link generation. For this example we’ll use RadFlowDocument and RadFlowDocumentEditor to create a new Word document from a .NET console application.
We’ll start with a few dependencies like System.IO to handle a file stream, and the necessary Telerik DPL assemblies.
using System.IO;
using Telerik.Windows.Documents.Flow.FormatProviders.Docx;
using Telerik.Windows.Documents.Flow.Model;
using Telerik.Windows.Documents.Flow.Model.Editing;
Next, we create a new RadFlowDocument and RadFlowDocumentEditor. The RadFlowDocumentEditor will allow us to insert new text, image and other elements to the document.
static void Main(string[] args)
{
    RadFlowDocument document = new RadFlowDocument();
    RadFlowDocumentEditor editor = new RadFlowDocumentEditor(document);
Using the editor we’ll write some text to the document using the InsertText method. We also have additional methods available such as:
- InsertFloatingImage
- InsertParagraph
- InsertTable
- InsertHyperlink
- and more
static void Main(string[] args)
{
    RadFlowDocument document = new RadFlowDocument();
    RadFlowDocumentEditor editor = new RadFlowDocumentEditor(document);
    editor.InsertText("Hello Word!");
Once the document is complete, we just need to write it to the a FileStream. For the RadFlowDocument we’ll use the DocxFormatProvider to export to the DOCX format. Similarly we could use a PdfFormatProvider to create a PDF document.
using System.IO;
using Telerik.Windows.Documents.Flow.FormatProviders.Docx;
using Telerik.Windows.Documents.Flow.Model;
using Telerik.Windows.Documents.Flow.Model.Editing;
namespace DocProcessing
{
class Program
{
static void Main(string[] args)
{
RadFlowDocument document = new RadFlowDocument();
RadFlowDocumentEditor editor = new RadFlowDocumentEditor(document);
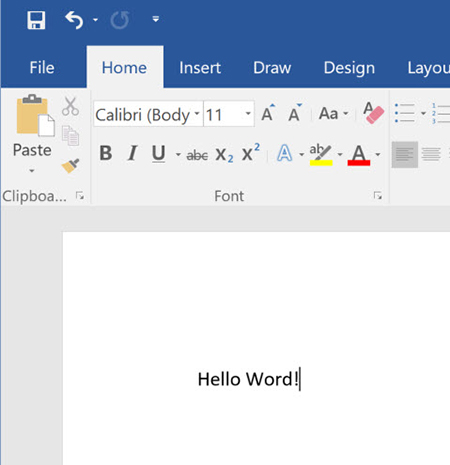
editor.InsertText("Hello Word!");
using (Stream output = new FileStream("output.docx", FileMode.OpenOrCreate))
{
DocxFormatProvider provider = new DocxFormatProvider();
provider.Export(document, output);
}
}
}
}
In this example, files created using the Telerik DPL are saved directly to disk. However, any file created using the DPL can also be downloaded via the browser from UI for ASP.NET AJAX and UI for ASP.NET MVC applications.
2. Mail Merge from .NET
Creating a mail merge is an effective way of building a template and populating it with data for processing documents in batches. With the mail merge process, you can create a series of personalized documents based on your data source.
The Mail Merge process is one that is often manually performed inside of Microsoft Word. With the Telerik DPL this process can be completely automated and customized based on the needs of your application. The mail merge APIs can be used virtually anywhere in .NET. To see it in action we’ll use an example of how a mail merge is executed in an ASP.NET Web Forms application.
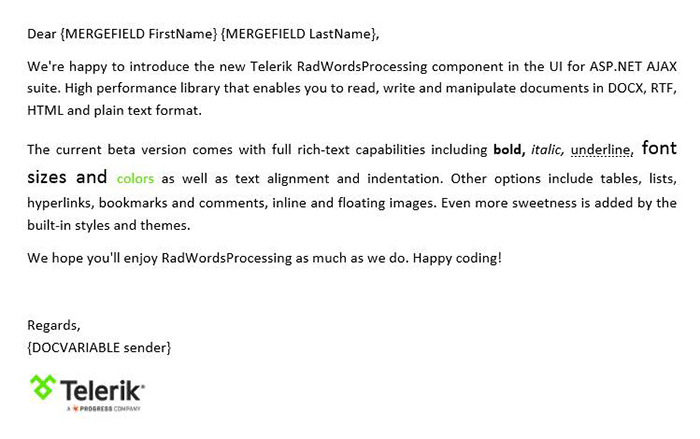
We’ll create a new document containing our template message. To create a template field in the document we’ll use the InsertField method and set the field code to MERGEFIELD with the variable name we wish to use, in this case FirstName. The variable name simply matches the property on an object that we’ll supply to the MailMerge method.
private RadFlowDocument CreateDocument()
{
    RadFlowDocument document = new RadFlowDocument();
    RadFlowDocumentEditor editor = new RadFlowDocumentEditor(document);

    editor.InsertText("Dear ");
    editor.InsertField("MERGEFIELD FirstName", "");
    editor.InsertText(" ");
    editor.InsertField("MERGEFIELD LastName", "");
    editor.InsertLine(",");
    editor.InsertLine("This is a sample Mail Merge");
    return document;
}
With the document created, the next step will be to perform the mail merge. For simplicity, we’ll do our work on the page load event of the webform. The MailMerge method takes any IEnumerable as a parameter, in this case we’ll use a predefined list of Person via GetRecipents. In this case Person has a FirstName and LastName property matching the MERGEFIELD variables.
protected void Page_Load(object sender, EventArgs e)
{
    RadFlowDocument document = this.CreateDocument();
    RadFlowDocument mailMergeDocument = document.MailMerge(GetRecipients());
    //save the document
}
The document can be saved to the server or sent directly to the client. Serving the document to the client requires setting up a MemoryStream and calling Export from a DocxFromatProvider. Once the memory stream is ready, we’ll write it to the response with the corresponding ContentType for a .DOCX file.
protected void Page_Load(object sender, EventArgs e)
{
    RadFlowDocument document = this.CreateDocument();
    RadFlowDocument mailMergeDocument = document.MailMerge(GetRecipients());
    byte[] renderedBytes = null;

    using (MemoryStream ms = new MemoryStream())
    {
        var formatProvider = new DocxFormatProvider();
        formatProvider.Export(document, ms);
        renderedBytes = ms.ToArray();
    }

    Response.Clear();
    Response.AppendHeader("Content-Disposition", "attachment; filename=MailMergeFile.docx");
    Response.ContentType = "application/vnd.openxmlformats-officedocument.wordprocessingml.document";
    Response.BinaryWrite(renderedBytes);
    Response.End();
}
The result is a multi-page .DOCX file for each recipent provided to the mail merge. This type of document can easily be printed and sent to clients as physical mail. See demos.telerik.com for a more comprehensive demo that includes additional file types and document features.
3. Convert Word to PDF in .NET
One of the Telerik DPL strengths is its ability to import and export various file types like: DOCX, PDF (export only), HTML and RTF. Because of this ability, it can also be used to do file conversions between these types as well. Using the IFormatProvider we can utilize the various format providers within the Telerik DPL interchangeably. Let’s take a look at a basic example of a console app that can import a DOCX file and export it to PDF.
We’ll begin by creating a default provider using an IFormatProvider and setting it to an instance of DocxFormatProvider. A RadFlowDocument is used as our document in the conversion from DOCX to PDF.
IFormatProvider<RadFlowDocument> fileFormatProvider = new DocxFormatProvider();
RadFlowDocument documentToConvert = new RadFlowDocument();
The DOCX document is opened from disk using the DocxFormatProvider and streamed into memory.
    using (FileStream input = new FileStream("input.docx", FileMode.Open))
    {
        documentToConvert = fileFormatProvider.Import(input);
    }
With the document in memory as a RadFlowDocument we can change our provider from a DocxFormatProvider to a PdfFormatProvider. Now the document can be written back to disk as a PDF.
    fileFormatProvider = new PdfFormatProvider();

    using (Stream output = new FileStream("output.pdf", FileMode.OpenOrCreate))
    {
        fileFormatProvider.Export(documentToConvert, output);
    }
As you can see in the complete example, in just a few short lines of code we’re able to convert from DOCX to PDF.
static void Main(string[] args)
{
    IFormatProvider<RadFlowDocument> fileFormatProvider = new DocxFormatProvider();
    RadFlowDocument documentToConvert = new RadFlowDocument();

    // Read DOCX
    using (FileStream input = new FileStream("input.docx", FileMode.Open))
    {
        documentToConvert = fileFormatProvider.Import(input);
    }

    // Write PDF
    fileFormatProvider = new PdfFormatProvider(); // change format provider to PDF

    using (Stream output = new FileStream("output.pdf", FileMode.OpenOrCreate))
    {
        fileFormatProvider.Export(documentToConvert, output);
    }
}
This method of importing and exporting documents can be used to convert between file formats. One caveat however is that there is no import functionality for PDF documents due to file format limitations. To deal with this limitation the IFormatProvider is equipped with a CanImport property that can be checked before the Import operation is performed.
See the ASP.NET Webforms or ASP.NET MVC WordsProcessing pages for more comprehensive demos that includes additional file types and web scenarios.
4. Edit Microsoft Word Docs in ASP.NET
Customers can sometimes ask for time-consuming project requirements, like the ability to edit Word Documents in the browser. On the surface this sounds like a feature that will take quite a bit of effort to accomplish; however, it’s as simple as adjusting the right properties on any Telerik UI editor widget for ASP.NET Webforms or ASP.NET MVC.

Using UI for ASP.NET MVC the ability to import and export right from the Editor widget can be accomplished right from the Razor view.
@(Html.Kendo().Editor()
    .Name("editor")
    .HtmlAttributes(new { style = "height:440px" })
    .Tools(tools => tools
        .Clear()
        .ExportAs()
        .Import()
    )
    .ExportAs(exportAs => exportAs
        .FileName("editor_content")
        .Proxy("Export", "EditorExport")
    )
    .Import(import => import
        .Proxy("Import", "EditorImport")
        .AllowedExtensions(new[] { "docx", "rtf", "html", "txt" })
        .MaxFileSize(104857600)
        .Select("onSelect")
        .Error("onError")
    )
)
To export the content include the corresponding command to the editor’s toolbar .Tools(tools => tools.ExportAs()) and configure the export settings through the ExportAs attribute. For instance you should specify the Proxy option, which sets the Action to which the content will be submitted, or you can specify FileName attribute to set the name of the downloaded file.
See the ASP.NET Webforms or ASP.NET MVC pages for more comprehensive demos that include additional editor features.
5. Client-side Export From HTML page to PDF
Applications that include charts, maps and schedules can empower users by giving them the ability to visualize data. And, having a visually rich app can often leave users asking to take visual elements off the screen to be used elsewhere. When trying to capture exactly what the users sees on the web we cannot rely on server-side technologies like the DPL. Fortunately, the Telerik UI libraries for ASP.NET (AJAX, MVC, Core) are all powered by the HTML5 & JavaScript library Kendo UI and can export HTML to PDF directly on the client.
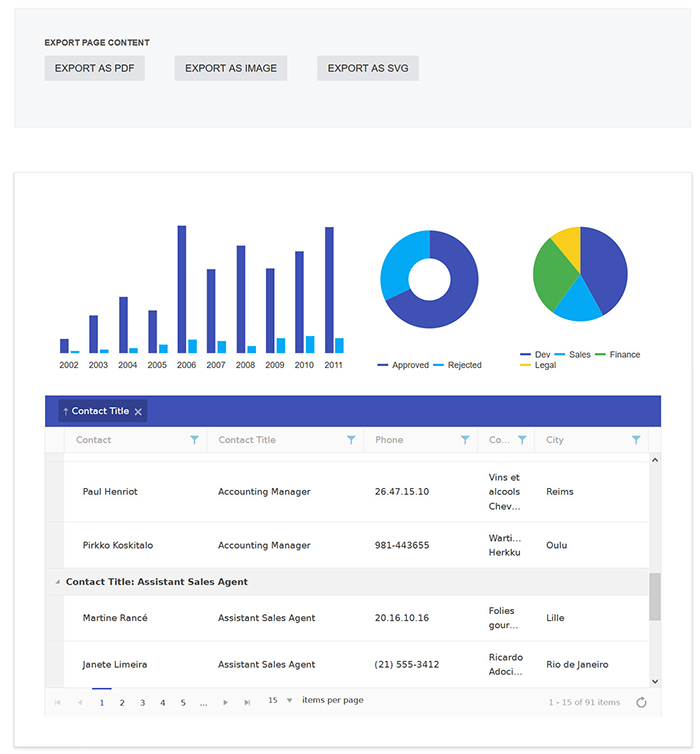
We’ll start with an ASP.NET Core application using Telerik UI for ASP.NET Core. Because UI for ASP.NET Core is powered by Kendo UI, we’ll have full access to its drawing APIs. In the following example, we have a Human Resources dashboard with complex UI controls like charts, graphs and grids. Let’s wire up the Export AS PDF button with a few lines of jQuery to export on the client side.
Let’s locate the Export AS PDF button export-pdf and attach to the click event.
$(".export-pdf").click(function() { }Next, we’ll use the Kendo UI drawing API to capture the elements in the DOM. When we call drawDOM we can target specific elements on the page allowing us to capture the entire page, groups, or single elements. Using the results from drawDOM, the exportPDF function is called creating the PDF file.
$(".export-pdf").click(function() {
    // Convert the DOM element to a drawing using kendo.drawing.drawDOM
    kendo.drawing.drawDOM($(".content-wrapper"))
    .then(function(group) {
        // Render the result as a PDF file
        return kendo.drawing.exportPDF(group, {
            paperSize: "auto",
            margin: { left: "1cm", top: "1cm", right: "1cm", bottom: "1cm" }
        });
    }); }
To prompt the client for a file save the kendo.saveAs function is used with the properties describing the file.
$(".export-pdf").click(function() {
// Convert the DOM element to a drawing using kendo.drawing.drawDOM
kendo.drawing.drawDOM($(".content-wrapper"))
.then(function(group) {
// Render the result as a PDF file
return kendo.drawing.exportPDF(group, {
paperSize: "auto",
margin: { left: "1cm", top: "1cm", right: "1cm", bottom: "1cm" }
});
})
.done(function(data) {
// Save the PDF file
kendo.saveAs({
dataURI: data,
fileName: "HR-Dashboard.pdf",
proxyURL: "https://demos.telerik.com/kendo-ui/service/export"
});
});
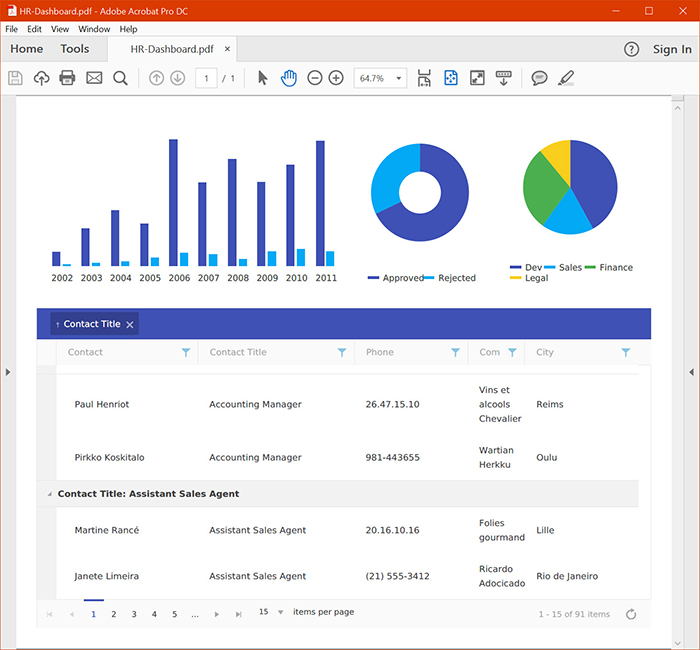
});With a single button click the user is now able to export the dashboard directly to PDF. Now the view they created in the dashboard can be shared with team members via email or printed for an important meeting.
In this example we used ASP.NET Core, but Kendo UI can be utilized across a wide range of platforms to enable users to export
web content.
Conclusion
Whether you need to create documents from scratch, edit in the browser or capture directly from the screen, the Telerik UI libraries make short work of any document export task for .NET developers. With the Telerik Document Processing Library new files can be created from scratch as DOCX, PDF, RTF, or TXT. Advanced features such as mail merge can reduce manual tasks with app driven automation. With the addition of Telerik UI libraries powered by Kendo UI, documents can be edited on screen and custom export features empower users to export content with the click of a button.
Get access to the vast benefits of Telerik Document Processing and client-side exporting by downloading either the full[Telerik (formerly DevCraft)] bundle or any technology-specific library you need: (http://www.telerik.com/devcraft) UI for ASP.NET AJAX, UI for ASP.NET MVC or UI for ASP.NET Core client-side only.
Related resources
- The Command Line Reinvented for Modern Developers (whitepaper)
- ASP.NET Core MVC Changes Every Developer Should Know (whitepaper)
- Exporting HTML From Web App to Image (article)
- Exporting Content from JavaScript Apps (webinar)
