
When?
During and after reading
Why?
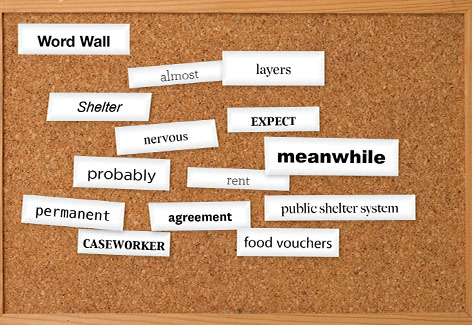
Word walls support a language-rich learning environment. They foster word-consciousness and provide access to essential vocabulary, concepts and skills. Word walls reinforce sight-word acquisition with younger readers and build content literacy across grades and disciplines. Word walls help students see relationships between words and ideas.
How?
Organize your word wall vocabulary based on learning objectives and on the relationships among the words. For example, group words that begin with the letter “B,” words that are relevant to women’s suffrage or words that are synonyms for tolerance.
Word walls should reflect the character and culture of the classroom. Use index cards, sentence strips or construction paper on a wall, window or door. Lettering should be large, neat and visible from every seat in the classroom. Students can also contribute to the word wall; enlist students with artistic or spatial skills.
Before adding a word to the word wall, confirm that students understand its meaning within the context of the text. You can do this in any of the following ways:
- Ask students to use context clues, affixes, roots, word relationships or reference materials.
- Provide definitions for words that cannot be determined from context prior to reading.
- Explain unknown concrete and abstract words when encountered in the text. Reinforce abstract words after reading as students may take more time to understand them.
Reinforce new vocabulary by using flash cards, organizers and iterative activities that explore shades of meaning and morphology. Continued practice will enhance students’ abilities to acquire and use a range of Tier Two and Tier Three words.
Adapt and expand your word wall so that students can reference it throughout the year. Alternately, rotate word walls with each new lesson or unit. Applications, such as Worldle, WordItOut and WordSift can help create digital word walls. Bright colors and pictures engage students and illustrate a wall’s overall theme.
English language learners
Word walls are a dedicated space English language learners can reference for learning support. To better support English language learners, modify your word wall to include words in students’ native languages, use pictures to represent words, or create personal word walls for students. Use personal word walls in other Word Work strategies such as concept sorts. Consider having two word walls for English language learners: one for Tier One and Tier Two words and another reserved for content-specific Tier Three words.
Connection to anti-bias education
Your word wall tells students which vocabulary you consider worth learning. Including vocabulary related to diversity makes your classroom a safe place for students to talk about personal or controversial topics. Making words accessible allows all students to engage in dialogue using the new vocabulary.
The purpose of the personal word wall is to provide students with multiple exposures to new words. Students can exclude vocabulary words they have already mastered or include words from the text that are not part of the classroom word wall.
В статье рассматриваются методические аспекты использования сервиса Wordwall в учебном процессе. выделены особенности и формы работы с сервисом. проанализированы наиболее эффективные шаблоны для использования на уроках.
Ключевые слова:
сервис Wordwall, интерактивные занятия, уроки разного типа.
Сейчас оснащение школ более современными средствами коммуникации, включая web-технологии, позволяют использовать огромное количество разнообразных сервисов для создания интерактивных заданий. Каждый учитель при подготовке к уроку, старается найти разные средства, которые позволяют разнообразить урок.
Wordwall — универсальный учебный ресурс, решающий одну из наиболее важных задач образовательного процесса — повышение мотивации учащихся!
С помощью данного ресурса можно организовать дифференциальное и индивидуальное обучение, создавая разные типы упражнений, например, печатные или интерактивные, с учетом возможностей каждого отдельного ребёнка.
Структура сервиса
На первом этапе работы с сервисом необходимо зарегистрироваться. Для того, чтобы данный этап прошел быстрее можно войти с помощью Google-аккаунта. Так же на главной странице представлена основная информации о сервисе и шаблоны, которые можно использовать при создании своего задания.
Во вкладке «Функции» можно познакомиться с основным инструментарием данного сервиса.
Wordwall можно использовать для создания материалов двух типов: печатных и интерактивных.
– Интерактивные задания воспроизводятся с помощью любого устройства с веб-интерфейсом, например, на планшете, компьютере, телефоне, а также на интерактивной доске. Задание может открыть как учитель на уроке для всего класса, так и сами учащиеся на своих устройствах.
– Печатные задания можно загрузить в виде PDF или распечатать. Они могут быть использованы как вспомогательный материал к интерактивным или в качестве самостоятельных учебных заданий.
Для создания наиболее оптимального ресурса нужно пройти три этапа: выбрать подходящий шаблон, заполнить контентом и спроецировать на экран или распечатать. В Шаблоны входят всем знакомые игры, а также «Погоня в лабиринте» и «Самолет». Имеются инструменты управления классом, например, План рассадки.
После создания упражнения можно переключить его на другой шаблон. Данная функция сохраняет ваше время и подходит для усиления и специализации. Например, созданное учебное задание «Сопоставить», основанное на названиях фигур, можно переделать в «Кроссворд» с точно такими же названиями фигур. Подобным образом можно превратить любой другой ресурс.
Сервис предлагает не только создание своего контента, так и возможность использовать задание, которые предложены в библиотеке сервиса. Если задание не совсем то, что нужно, его можно настроить в соответствии с уроком и стилем преподавания.
Каждое созданное занятие можно сделать общедоступным. Это позволяет поделиться ссылкой на страницу занятия в социальных сетях, по электронной почте или с помощью любых других средств. Это также позволит другим учителям найти занятие в библиотеке, играть в него и, если необходимо, улучшать его. Но можно хранить задание и в частной форме, что означает, что только создатель можете получать доступ к нему.
Во вкладке «Сообщество» представлены задания, которые включены в библиотеку сервиса. Здесь можно найти упражнения как по названию шаблона, так и по предметной области и теме.
Во вкладке «Мои занятия» представлены упражнения, которые создал пользователь. Все упражнения можно структурировать, создавая папки по определенной тематике.
Во вкладке «Мои результаты» можно отследить выполнение заданий, которые были отправлены учащимся. Здесь можно увидеть статистику по учащимся, которые выполнили задание: число студентов, средний балл, наивысший балл, а также представлены две диаграммы: по вопросам и по баллам среди учащихся. Ниже можно увидеть статистику по каждому вопросу и составить рейтинг учащихся.
Тарифный план.
Данный сервис имеет платную подписку, которая отличается своей функциональностью. «Базовый» тарифный план является бесплатным, включает в себя 18 шаблонов и 5 ресурсов, которые можно создать. «Стандартный» тарифный план обходится в 180 рублей в месяц и включает в себя 18 шаблонов, 16 печатных заданий и неограниченное количество ресурсов, которые можно создать. «Профессиональный» тарифный план обходится в 270 рублей в месяц и включает в себя 33 шаблона, 16 печатных заданий и неограниченное количество ресурсов, которые можно создать. Основной функционал данного сервиса доступен в каждом плане.
Также данный сервис предполагает «Школьный план», цена которого зависит от количества учителей.
Этапы создания задания
Первый этап. Выбор шаблона.
Все шаблоны можно разделить на следующие группы:
Таблица 1
|
|
Групповая сортировка; Правда или ложь; Сопоставить; Найди пару; Совпадающие пары |
|
|
Викторина с изображением; Викторина; Викторина «Игровое шоу»; Откройте поле |
|
|
Случайные карты; Случайное колесо; Перевернуть плитки |
|
|
Пропущенное слово; Привести в порядок; Анаграмма |
|
|
Поиск слов; Погоня в лабиринте; Диаграмма с метками |
Второй этап. Наполнение контентом и
настройка задания.
Взависимости от выбранного шаблона заполняются требуемые поля информацией. При создании можно указать инструкцию по выполнению задания, указать будут ли учащимся предлагаться подсказки.
При настройке задания можно выбрать внешний вид задания, установить таймер, тем самым ограничить время на выполнение задания, задать срок выполнения, указать будет ли учащийся выполнять задание анонимно или нет и настроить параметры окончания игры. Также имеются параметры настройки, которые являются персональными для каждого шаблона.
Третий этап. Представление учащимся.
Для того чтобы поделиться с учащимися заданием можно:
– Если данная игра рассчитана на весь класс, то его можно открыть на интерактивной доске или с использованием проектора.
– Если задание предполагает открытие на устройствах учащихся, то можно:
– Создать ссылку на задание и поделиться в социальных сетях, электронной почте и Google-класс;
– Создать QR-код на задание;
– Встроить на свой сайт.
Рассмотрим подробнее выполнение каждого этапа на нескольких шаблонах.
Шаблон 1. Найти пару.
После выбора шаблона переходим к этапу заполнения полей, предлагаемых в данном шаблоне. В Заголовке занятия указать название упражнения. В инструкции можно дать указания к работе, но это необязательно.
Ниже ввести ключевые слова и их определения. Для вставки/удаления изображения используется соответствующая иконка (рис. 1).
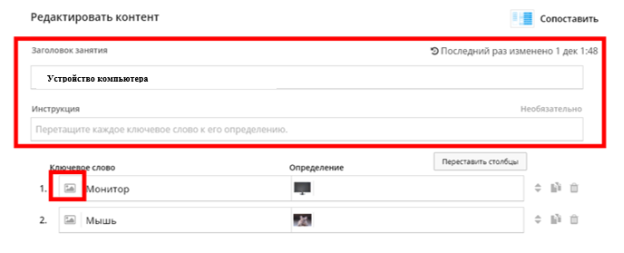
Рис. 1. Пример заполнения полей «Заголовок занятия» и «Ключевое слово»
Ключевое слово или определение может быть представлено в двух видах: текст или изображение. Для вставки изображения в появившемся окне необходимо либо в поисковую строку ввести запрос, либо с помощью кнопки «Отправить» добавить свое изображение (рис. 2.).
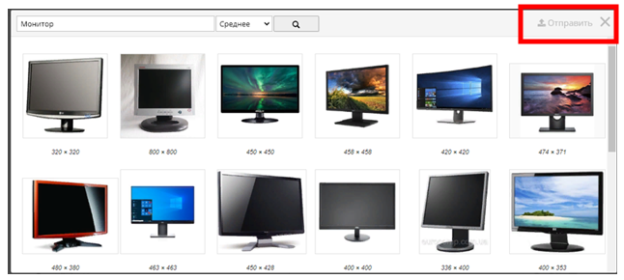
Рис. 2. Добавление изображения
Справа, напротив каждой строки находятся кнопки для перемещения элементов (стрелки), копирования (два листа) и удаления (корзина). Для вставки новых элементов используется кнопка снизу «Добавить элемент» (рис. 3).

Рис. 3. Добавление нового элемента
После редактирования задания нажать кнопку «Выполнено». Ниже выбрать тему для упражнения и начальные настройки (рис. 4).
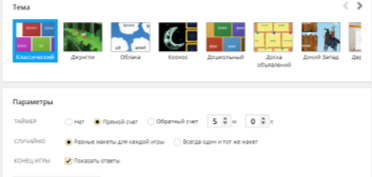
Рис. 4. Настройка занятия
Шаблон 2. Пропущенное слово.
Как и в предыдущем шаблоне, заполняются поля: «Заголовок занятия» и «Инструкция». Затем заполняются поля контентом, для этого вводим свой текст. Поставить курсор мыши на слове, которое будет пропущено, и ниже нажать «+Добавить это слово» (рис. 5.).
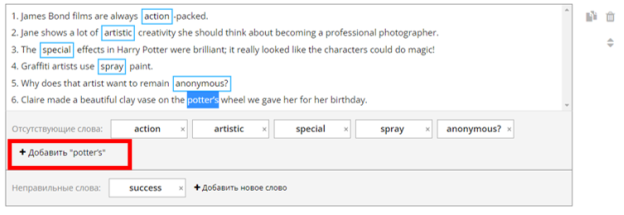
Рис. 5. Выбор пропущенного слова
Для выбора пропущенного слова можно указывать не только правильные слова, но и неправильные. Для вставки неправильных слов ниже в графе «Неправильные слова» нажать кнопку «+Добавить новое слово». В появившемся окне ввести слово (рис. 6.).
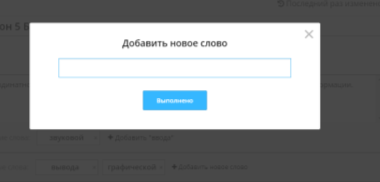
Рис. 6. Добавление неправильного слова
Для добавления второго текста нажать «Добавить страницу» и повторить действия.
Затем кнопку «Выполнено». Ниже выбрать тему для упражнения и начальные настройки.
Таким образом, интерактивные задания, созданные с помощью сервиса Wordwall, помогают сделать уроки интересными, делают всех учащихся активными участниками процесса обучения, повышают мотивацию учебной деятельности и создают условия для повышения качества обучения.
Литература:
- Васильева, А. С. Основные задачи современного школьного образования в контексте формирования и развития культуры информационного общества [Электронный ресурс]/ Васильева, А. С. //Молодой ученый. Международный научный журнал. — 2016. — № 5. — С. 667–671. Режим доступа. https://moluch.ru/archive/109/26328/ (18.05.2022)
- Клоктунова, Н. А. Эргономические требования к представлению образовательной информации на экране [Электронный ресурс] / Н.А Клоктунова, С. Б. Вениг, В. А. Соловьева //Высшее образование в России. — 2017. — № 4 — С.153–156. Режим доступа. https://cyberleninka.ru/article/n/ergonomicheskie-trebovaniya-k-predstavleniyu-obrazovatelnoy-informatsii-na-ekrane/viewer (18.05.2022)
Основные термины (генерируются автоматически): задание, шаблон, пропущенное слово, сервис, слово, учащийся, PDF, библиотека сервиса, интерактивная доска, электронная почта.
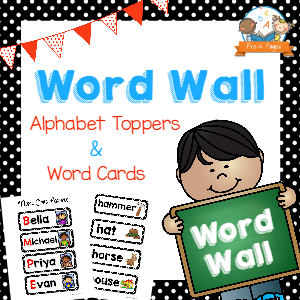
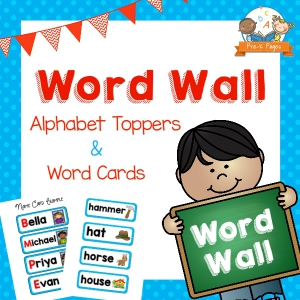
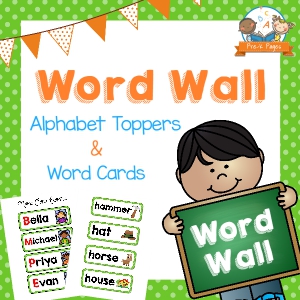
A word wall is an important part of any emergent literacy program.
Word walls can be used to display an organized collection of names, theme words, or sight words in a highly visible place in the classroom.
But don’t worry, word walls in the early childhood classroom are used differently than they are in classrooms of older children.
Why are Word Walls Important?
A word wall is used as a tool to support emergent literacy instruction. It can help students learn the alphabet, letter sounds, the first letter in their name, names of classmates, the sequence of the alphabet, and even sight words. Word walls are a required component in many early childhood programs.
When used as a tool to support instruction, word walls can be very fun and effective learning tools in the Pre-K or Kindergarten classroom. Some people prefer to call it a “name wall” at the pre-k level or an “alphabet wall”, both of which are also acceptable.
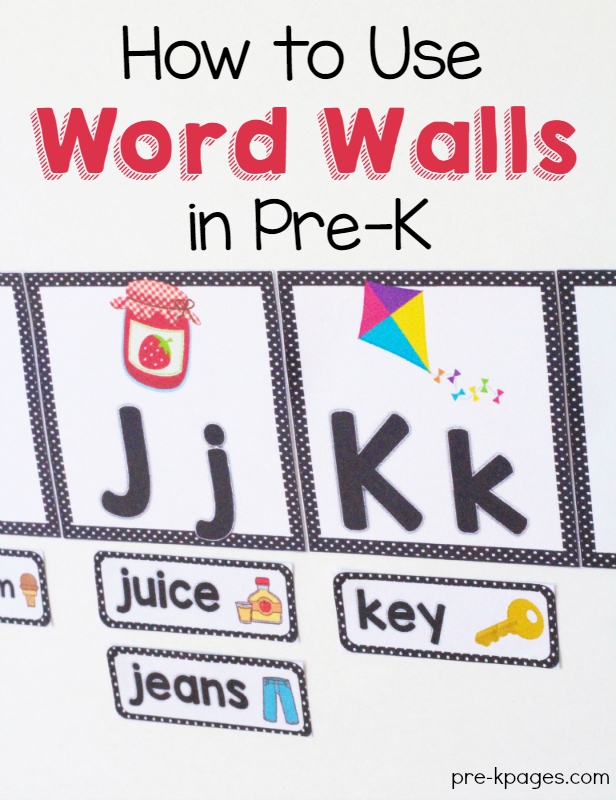
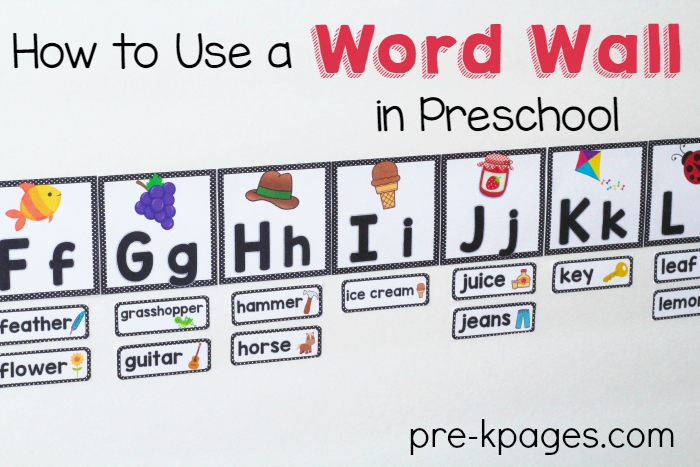
What does a Word Wall Look Like?
- The alphabet is displayed horizontally across the wall at student eye level.
- Each letter of the alphabet has a corresponding picture that is easily identified by the students.
- The font of the names and words on the word wall are large enough to be easily read from across the room.
- A word wall changes throughout the year as the students learn and grow.
How to Use a Word Wall in Preschool
It is important to interact with the word wall on a daily basis. Incorporate visual, auditory and kinesthetic means of practicing the words. Add print to your word wall during specific literacy or word wall lessons with the students present and actively participating in the placement of the words.
What does a word wall look like at the beginning of the school year?
In the beginning of the year, a word wall can have student’s pictures and names under each letter on the wall. You might also include other members of the staff the students have daily interaction with such as your teaching assistant, principal, or custodian.
Names and pictures of the students are added to the word wall during specific literacy or word wall lessons with the students present and actively participating in the placement of their own names. When you have your student’s pictures and names displayed on the word wall it creates a sense of belonging and a feeling ownership of their classroom.
The first letter of each child’s name is written in red ink to indicate that it is the first letter of their name and therefore the reason why it is placed under that letter on the word wall.

Words to Put on the Word Wall
Words used on the word wall are most helpful when they’re meaningful to the children. In preschool, this means the children’s names and certain words they like to write often, such as mom, dad, or love, etc. You can also include words and pictures used during specific lessons, such as a picture of a lemon to introduce the letter L or the sound it makes.
In kindergarten, both names and sight words are used on the word wall.
Where to Put Your Word Wall
The biggest challenge of using a word wall is finding adequate wall space. The alphabet is placed on the wall horizontally so the students can see the progression of the alphabet from A-Z, so it’s often hard finding a place to put it.
Want to change the size of your word wall toppers? Make them larger, make them smaller? It CAN be done! Here’s a step-by-step tutorial that shows you exactly how easy it is!
It also helps to have your word wall in the same area that you conduct your large group activities; location, location, location! My word wall is located next to my large group area to minimize transitions.

- To start making your word wall, first, find a picture alphabet that will fit in the space you have. Don’t forget, you can change the size of your word wall toppers using this trick!
- Next select your background for your word wall, some suggestions are butcher paper, fabric, or felt. Always check your fire code before putting up a background for your word wall, some cities do not allow two layers of paper or fabric on the wall. When choosing a background make sure it is a solid color so it doesn’t detract from the words on the wall. Once your background is up you can and add the alphabet.
- Take a picture of each student using a smartphone, you can use a regular camera but digital photos are easier to crop and resize. Crop each child’s picture to show just the head, print, then cut out.
- Print each child’s name on your computer in large point type; I recommend the Comic Sans font. Make sure you type the first letter of each student’s name in red. Mount the names and student pictures on construction paper. If you have both an AM and a PM class you may want to mount each class on a different color to differentiate between the two. After you have laminated the names and pictures, you can cut them out leaving a border around the edges. See word wall pictures at the top of the page for example.
- Gather the students in your large group area and introduce the word wall and the name cards to the whole class. Explain how the first letter of each child’s name will determine where the names are placed. Select a few students and help each one identify the first letter of their names on the name cards.
- Help each student staple their picture/name card below the appropriate letter on the word wall.
Word Wall Activities
There are several fun activities you can do using your word wall throughout the year.
- Greeting: In the beginning of the year when we gather during circle time I will say good morning to each child individually. As we say good morning to a child he may go to the word wall and point to his name for the whole class using a fancy pointer. We may also discuss other students who also start with the same letter and point out their pictures as well. As the student points to his name I try to verbalize it as well; “Michael’s name is after Karen’s name but before Samantha’s on the word wall.” In addition to teaching the sequence of the alphabet this activity also introduces the children to the concept of the word wall and helps them to become comfortable using it.
- Theme Pictures: As you introduce new themes it helps to print out pictures using Microsoft clip art or similar to go along with your theme. For example, when learning All About Me you might print off some pictures of body parts like hand, nose, or mouth, then cut and laminate the pictures. During circle time on the first day of your new theme introduce your picture cards to the children. Hold up the picture of the hand and ask the students what it is. After hearing the correct response repeat the name of the picture several times emphasizing the first sound. Call on a volunteer to place the card under the correct letter on the word wall.
- Read and Write Around the Room: I introduce this activity in January after our winter vacation. Several clipboards, copy paper, cool pens, and pointers are placed in a dish tub for the students to use during center time. I explain the purpose of the activity, to find as many words or letters of one type as possible and I give several examples. I model for the entire class how to use the items in the tub daily during the first week. Pointing out print sources all around the classroom, I write on my clipboard and refer to the word wall often. When the students are done with a sheet of paper they may place it in a special Read and Write Around the Room “in-box”.
- Writing Workshop: Using the word wall is a big part of writing workshop time. I encourage the children to refer to the word wall often when they are writing in their notebooks. For instance; if a child asks me how to spell the word “blue” I might say, “Oh, that’s a word wall word, where should you go to look for that word? Listen to the first sound if you need help.” I try to encourage using the word wall during writing workshop time as often as possible.
- Environmental Print: I use lots of environmental print on my word wall. To get ideas and learn more about the benefits of environmental print visit the Environmental Print page
Teaching Trailblazers
Using a name or word wall is important, but it’s only one small piece of the literacy puzzle. If you really want to be the best teacher you can be, the best place to learn about current best teaching practices and get the support you need is in the Teaching Trailblazers. We have many printable lessons and on-demand video trainings to help you become the best teacher you can be! If you want to get on the waiting list for the Teaching Trailblazers, do it soon so you don’t miss the next open enrollment period!