
-
Select the list you want to sort.
-
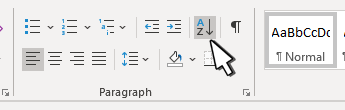
Go to Home > Sort.

-
Set Sort by to Paragraphs and Text.
-
Choose Ascending (A to Z) or Descending (Z to A).
-
Select OK.
-
Select the list you want to sort.
-
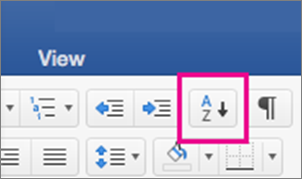
On the Home tab, click Sort.
-
In the Sort Text dialog box:
-
Under Sort by, select Paragraphs.
-
Next to Type, select Text.
-
Choose Ascending or Descending.
-
-
Click OK.
With Word for the web you can create numbered and bulleted lists, but you can’t sort lists alphabetically. You can sort lists alphabetically in the desktop version of Word.
If you have Word, select Open in Word.
Then follow the instructions in the Windows tab.
3 Ways to Keep Text Together in Microsoft Word Documents
by Avantix Learning Team | Updated April 5, 2021
Applies to: Microsoft® Word® 2010, 2013, 2016, 2019, 2021 and 365 (Windows)
You can keep text together in several ways in Word. If you want to keep words or characters together, you can use nonbreaking spaces or nonbreaking hyphens or dashes and insert them using a dialog box or a keyboard shortcut. If you want to keep lines or paragraphs together on the same page, you can apply settings in the Paragraph dialog box (which can be built into styles if you use styles).
You may want to keep the lines in a paragraph together so that the paragraph doesn’t break across pages or you may want to keep a paragraph with the next paragraph and avoid inserting manual page breaks. This can be accomplished easily using the Paragraph dialog box (and can be built into styles if you use styles).
It’s important to understand some key paragraph concepts:
- A paragraph in Word is anything with a hard return after it (you have pressed Enter or Return).
- It’s best to eliminate any blank paragraphs in a long document.
- You can view paragraph marks or symbols by clicking Show/Hide ¶ on the Home tab in the Ribbon in the Paragraph group.
Recommended article: 14 Timesaving Microsoft Word Selection Shortcuts to Quickly Select Text
Do you want to learn more about Microsoft Word? Check out our virtual classroom or live classroom Word courses >
Keeping lines together in a paragraph
To keep the lines in a paragraph together on the same page in Word using the Ribbon:
- Select the paragraph in the Word document with the text you want to keep together. You can simply click in the paragraph to select it.
- Click the Home tab in the Ribbon and click the dialog box launcher on the bottom right of the Paragraph group. The Paragraph dialog box appears.
- Select the Line and Page breaks tab. Word displays options to keep the lines of the paragraph together or to keep the paragraph with the next paragraph.
- Check Keep lines together.
- Click OK. The paragraph will no longer break across pages.
Below is the Paragraph dialog box in Word with Keep lines together selected:

You can also use a context menu to access the Paragraph dialog box (right-click in a paragraph and choose Paragraph from the drop-down menu).
Keeping a paragraph with the next paragraph
To keep a paragraph on the same page with the next paragraph using the Ribbon:
- Click in the paragraph you want to keep with the next paragraph (the next paragraph should not be a blank paragraph).
- Click the Home tab in the Ribbon.
- Click the dialog box launcher on the bottom right of the Paragraph group. The Paragraph dialog box appears.
- Select the Line and Page breaks tab.
- Check Keep with next.
- Click OK.
You can also use a context menu to access the Paragraph dialog box (right-click in a paragraph and choose Paragraph from the drop-down menu).
Keeping text together with nonbreaking spaces
If you want specific words or characters to stay together on the same line (such as De Marco), you can use nonbreaking spaces instead of regular spaces.
To insert a nonbreaking space between two words or characters using a keyboard shortcut:
- Position the cursor between the two words or characters you want to keep together (there should be no space between these characters).
- Press Ctrl + Shift + Spacebar. Word inserts a nonbreaking space.
To insert a nonbreaking space between two words or letters using the Ribbon:
- Position the cursor between the two words or characters you want to keep together (there should be no space between these characters).
- Click the Insert tab in the Ribbon.
- Click Insert Symbol and then More Symbols in the drop-down menu. A dialog box appears.
- Select the Special Characters tab.
- Select Nonbreaking space and click Insert.
- Click Close. Word inserts a nonbreaking space.
Below is the Insert Symbol dialog box to insert a non-breaking space:

Keeping text together with nonbreaking hyphens or dashes
You can also use nonbreaking hyphens or dashes to keep words or characters together (such as co-ordinator or 416‑222‑9999).
To insert a nonbreaking hyphen between two words or characters using a keyboard shortcut:
- Position the cursor between the two words or characters you want to keep together (there should be no space between these characters).
- Press Ctrl + Shift + Underscore (_). Word inserts a nonbreaking hyphen.
To insert a nonbreaking hyphen between two words or characters using the Ribbon:
- Position the cursor between the two words or characters you want to keep together (there should be no space between these characters).
- Click the Insert tab in the Ribbon.
- Click Insert Symbol and then More Symbols in the drop-down menu. A dialog box appears.
- Select the Special Characters tab.
- Select Nonbreaking hyphen and click Insert.
- Click Close. Word inserts a nonbreaking hyphen.
To view nonbreaking spaces, nonbreaking hyphens and paragraph marks:
- Click the Home tab in the Ribbon.
- Click the Show/Hide ¶ in the Paragraph group.
You can turn off the symbols by clicking on the same button.
You can also quickly find and remove nonbreaking spaces or hyphens using the Replace dialog box.
To find and remove nonreaking spaces or hyphens:
- Press Ctrl + H. The Replace dialog box appears. You can also click the Home tab in the Ribbon and click Replace in the Editing group.
- Click More to expand the dialog box if necessary.
- Click in the Find What box.
- Click Special. A drop-down menu appears.
- Select nonbreaking space or nonbreaking hyphen.
- Ensure the Replace with box is empty.
- Click Find Next. Word should find the first nonbreaking space or nonbreaking hyphen.
- Click Replace or Replace All.
- Click Close.
Below is the Replace dialog box:

Although all of these techniques will keep text together, keeping paragraphs together is the most important. If you start using paragraph formatting to keep specific paragraphs together, you can avoid using manual page breaks for pagination.
This article was originally published on July 14, 2017 and has been updated for clarity and content.
Subscribe to get more articles like this one
Did you find this article helpful? If you would like to receive new articles, JOIN our email list.
More resources
How to Center Text Vertically on a Page in Word
How to Insert an Em Dash in Word (4 Ways with Shortcuts)
How to Quickly Remove Hard Returns in Word Documents
How to Insert, Format and Update Cross-References in Word
How to Convert a PDF to Word in Microsoft Word (for Free – No Third Party Programs Needed)
Related courses
Microsoft Word: Intermediate / Advanced
Microsoft Excel: Intermediate / Advanced
Microsoft PowerPoint: Intermediate / Advanced
Microsoft Word: Long Documents Master Class
Microsoft Word: Styles, Templates and Tables of Contents
Microsoft Word: Designing Dynamic Word Documents Using Fields
VIEW MORE COURSES >
To request this page in an alternate format, contact us.
Our instructor-led courses are delivered in virtual classroom format or at our downtown Toronto location at 18 King Street East, Suite 1400, Toronto, Ontario, Canada (some in-person classroom courses may also be delivered at an alternate downtown Toronto location). Contact us at info@avantixlearning.ca if you’d like to arrange custom instructor-led virtual classroom or onsite training on a date that’s convenient for you.
Copyright 2023 Avantix® Learning
Microsoft, the Microsoft logo, Microsoft Office and related Microsoft applications and logos are registered trademarks of Microsoft Corporation in Canada, US and other countries. All other trademarks are the property of the registered owners.
Avantix Learning |18 King Street East, Suite 1400, Toronto, Ontario, Canada M5C 1C4 | Contact us at info@avantixlearning.ca
In my previous blog we went over the basics of applying image Styles to your photos. I showed you how to add different effects to your images, such as a drop shadow, glow, reflection, and more. In this blog we will cover the Arrange section of the Picture Format tool bar.
We will cover the following:
- Position
- Wrap Text – See Blog: How Do I Add and Format Text Around an Image
- Bring Forward & Send Backward
- Selection Pane
- Align
- Group
- Rotate

Position
The Position menu allows you to choose where the selected object will appear on the page. Text will automatically wrap around the image so that it’s still easy to read.
You can also use the More Layout Options to place your image in an exact location using measurements.

Bring Forward or Send Backward
When you have two images and you want one on top of the other, you will select either Bring Forward or Send Backward to position those images how you see fit.
Note: Right-click on the image to bring up the shortcut menu to perform the same functions.

Selection Pane
The Selection Pane allows you to see all your objects on the page. This will make it easier to select objects (even text boxes), change their order, or change their visibility. Click the eye icon to reveal or hide the image.
Align
The Align feature allows you to change the placement of your selected image or object on the page. Use this to align images or objects to the margin, center, top, middle, or the edge of the page. You can also align them relative to one another.
Click View Gridlines to better align your images. The gridlines make it easier for you to align images with other objects/images or locations on the page.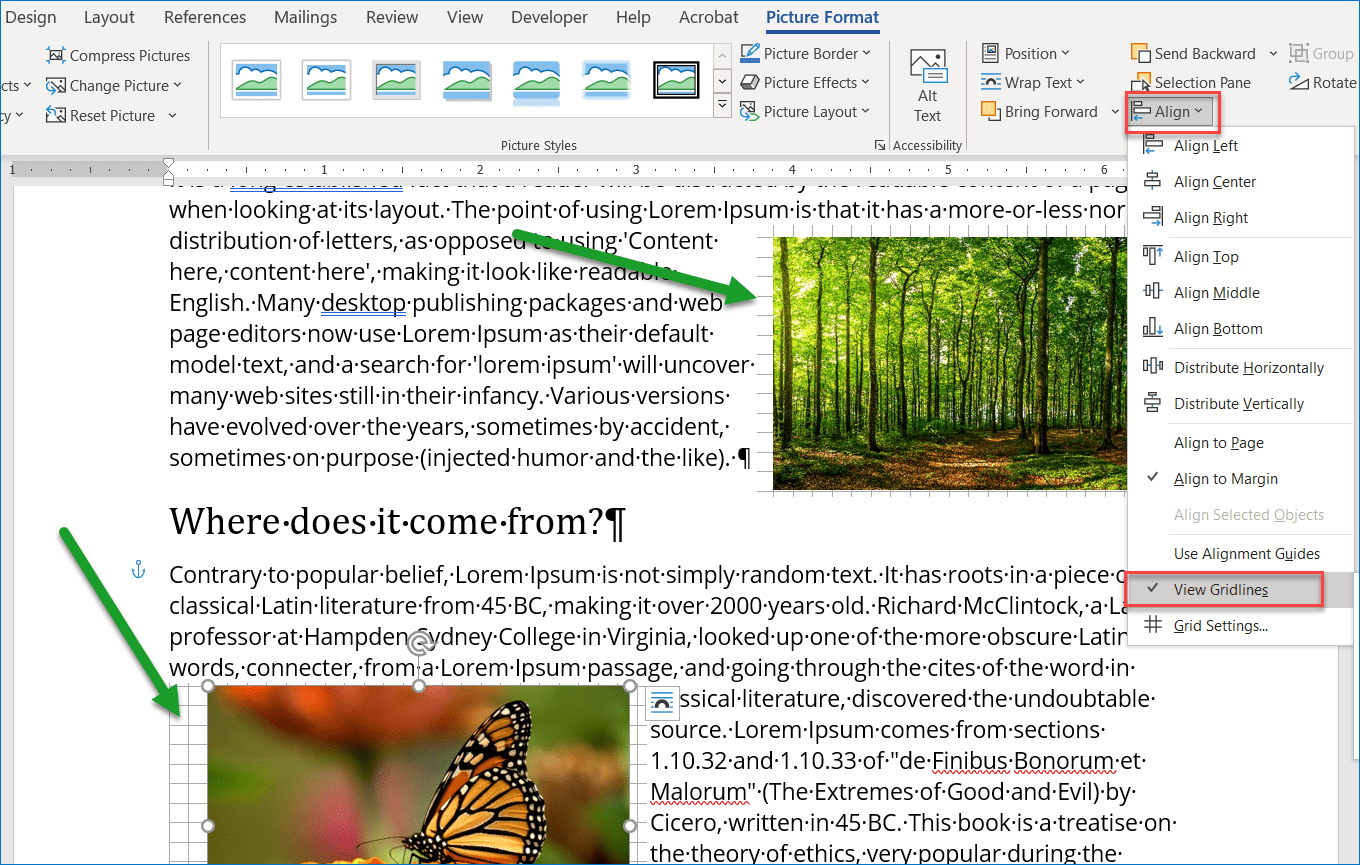
Click on the Grid Settings to manually set the position of your images or objects on the page.

Group
Group multiple objects together by selecting one object, then holding down the Shift key on the keyboard to select the next item, then click Group in the menu ribbon. This feature allows you to Group items together to move and format as one single object.

You can then select the single object and resize or reposition the image. 
To Ungroup the object, click on the grouped object, then go to the ribbon menu (or right click) and click Ungroup to break the connection to move them individually.
Note: You must have an image, text box or object selected to perform the function, otherwise the feature will be greyed out. You can also group multiple text boxes and images together.
Rotate
Easily rotate or flip an image on the screen. Select from: Rotate Right 90°, Rotate Left 90°, Flip Vertical, Flip Horizontal, and or edit rotation in the More Rotation Options.
That concludes the Arrange section of the Picture Format tool bar in Microsoft Word. In our next blog we will cover the different cropping options you can do with your images. For more tips and tricks for Microsoft Office 365 visit and subscribe to our blog.
Microsoft Word allows you to insert images into a text document in order to better illustrate it. There are several ways to wrap text around images using the program’s settings. This article explains how to use the options offered by Word to align text based on images and how to add a caption.
Steps
Part 1 of 3: Adding an Image

Step 1. Click on the place in the document where you want to insert an image
After performing this step, the text cursor (characterized by a flashing vertical line) will be visible at the indicated point.
The mouse is very useful for working with images within a Word document, as it gives you more control to better size and position objects

Step 2. Click on the Insert tab
It is located at the top of the page. A special toolbar will appear.

Step 3. Select the Images item
This way you will have the ability to insert any image JPG, PDF and many other formats, stored on your computer or USB memory drive into the document.

Step 4. Select the Photo Browser option
In this way you will have the possibility to choose the images from the computer program with which you manage them.
- Alternatively, choose the option Image from file whether the photo you want to use is stored on the desktop or in another folder.

Step 5. Select the image you want to use
After opening the dialog box for inserting the image, access the folder in which it is stored and click on the corresponding icon to select it.

Step 6. Click the Insert button
It is located at the bottom of the window. At this point the image will be inserted in the exact point where the text cursor is placed.

Step 7. View the image
Remember that Word’s default for aligning images and text is «Inline». This means that it will be handled as if it were a single large character or line of text.
Aligning the text allows you to arrange it correctly around, on top of, or next to the image
Part 2 of 3: Arranging Text Around an Image

Step 1. Click on the image
The menu will be displayed Image format at the top of the Word window.
Clicking on a point outside the image will display the menu for formatting the text and the one relating to image formatting will disappear

Step 2. Select the Wrap Text item
It should appear within the group Arrange of the card Layout, Drawing tools or SmartArt tools, depending on the version of Word you are using.

Step 3. Click on the «Wrap Text» button
It is located in the upper right corner of the image. A drop-down menu will appear where you will find options to arrange the text according to the image.

Step 4. Select one of the alignment options
Word offers several options for positioning text according to an image that you can choose according to your needs:
- You choose Framed if the image has a square shape and you want the text to be arranged along the edges.
- Select the item Over and under if you want the image to remain on the line where you inserted it and the text to be placed between the previous and following lines.
- Choose the option Close to wrap text around a circular or irregularly shaped image.
- Select the item Inside of to be able to customize the areas in which to arrange the text. This is the best option if you need text to be embedded in the image or to somehow not follow the contours of the photo. This is an advanced setting, as you will need to move the image anchor points from their original positions.
- Choose the option Behind the text to use the image as if it were a watermark and to make it appear in the background to the text.
- Select the item In front of the text to display the image on top of the text. In this case you may need to change the colors because otherwise the text may be unreadable.

Step 5. Reposition the image
After choosing the best option for arranging the text, you can drag the photo to the place on the page you want. Word will allow you to place it wherever you like by aligning the key automatically based on the settings you have chosen.

Step 6. Try using different alignment options
Each image and each document will require the use of different text alignment options. Review the list of options available each time you insert an image to make sure the text is formatted correctly.
Part 3 of 3: Delete the Text from the Image

Step 1. Click on the text box formatted according to the type of alignment you have chosen
The anchor points of the pane will appear allowing you to change its size and position as well as allowing you to edit the text itself.

Step 2. Select all text in the box other than the first character
It is very important not to select the first character of the text as you will have to press the «Backspace» key on your keyboard as it may cause the image you have inserted in the document to be deleted.

Step 3. Press the ← Backspace key on your keyboard
The selected text will be deleted from the document. At this point, make sure you also delete the character you didn’t highlight earlier, as it is this step that will override the text alignment settings depending on the image.
Introduction
In order to attract your readers and to provide them with a great reading experience, it’s important that you as a writer think about the layout and the design of your article – as well as the contents. There are a number of tools in Word 2013 that can help you create an attractive article.
Introduction to the document
Here I have a text that I have written for an article on “Running effective meetings”. I’m going to show you how I can use the formatting tools within Word to make the article look like this instead, a much more attractive article.
How to change margins in Word?
First I want to make better use of the paper by reducing the margins. To change the margins of a document, go to the “PAGE LAYOUT” tab and click “Margins”. Here you can select from a number of pre-defined margin settings. You can also define exactly how wide you want the margins to be by clicking “Custom” and entering the exact measurements. I’ll click Cancel here and go back to the Margin settings. If you have set up custom margins before, the last used custom settings are available on the menu. In this case, I’ll select “Narrow” margins and as you can see the text now fills out more of the page.
How to arrange text in columns in Word?
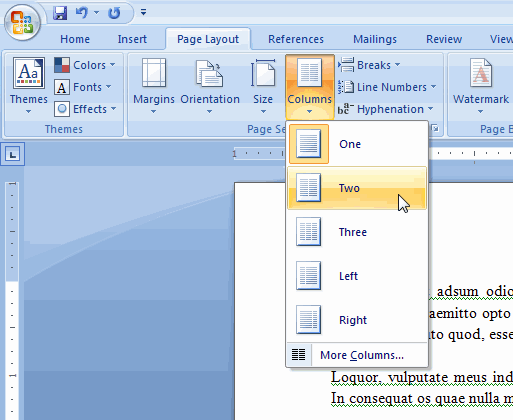
Now I want to change the layout of the text into two columns. I want the title or the headline and the sub-headline to remain in one column, I only want the body text of the article to be arranged into two columns. To arrange text into columns, mark the text you want to re-arrange. To mark large chunks of text place the marker at the beginning of the text and then scroll down to the end, hold down Shift on the keyboard and then mark the end of the text. On the “PAGE LAYOUT” tab click “Columns.” Select the number of columns you want, here I’ll select “Two” columns.
The text is now arranged into two columns. If you want to change the spacing between the columns open up the ruler by clicking the “VIEW” tab and then mark the “Ruler” option. To change the width between the columns, move your mouse until it becomes a double-sided arrow, now hold down the left mouse button and then move the marker with your mouse.
How to work with images in Word?
Now I want to add some pictures to make the article easier to digest. To insert a picture into your document, place the cursor where you want to position the picture and click the “INSERT” tab. I want to insert a picture from the Internet so I’ll click “Online Pictures”. In this case, I want to use a royalty-free image from Microsoft’s ClipArt library on Office.com. I’ll write “meeting” in the search text box and select this one by marking it and clicking “Insert”.
The image is a bit too big, so I’ll click “Crop” and then I’ll crop the picture to an appropriate size. Now I want to change the image a bit by adding an artistic effect to it. To apply an artistic effect to your picture, mark the image and click “Artistic Effects” in the “PICTURE TOOLS” menu. You get a live preview of what different effects look like. The “Blur” effect is great if you want to censor something, like a face or a credit card number. The “Film Grain” effect is good if you want to make something look older. Here I’ll select the “Crisscross Etching” effect which is quite subtle.
How to position images in Word?
I’ll insert one more image, this time I want to insert a picture that I have on my computer so I’ll click “INSERT”, “Pictures” and select my image.
When you insert an image in Word 2013 a layout button appears. Click on the “LAYOUT OPTIONS” buttons to see how you can position your image.
Here you can select if you want your image to be placed in line with text, or if you want it with text wrapping. The default layout is “In Line with Text”. I’ll select to position the image with text wrapping using the “Square” option. If you often use this layout you can set it as the default by right-clicking and select “Set as Default”.
You can also select if you want the image to be positioned relative to the text or relative to the page. I want this image to be located at the bottom right corner of the page, so I’ll select, “Fix position on page” and then I’ll close down the “LAYOUT OPTIONS”. Now I can position the picture where I want it on the page. I get a live preview of what the positioning of the image will look like. The new alignment guides help me position the images more precisely. The little anchor shows me what text the image belongs.
Even though I’ve said I want the image to have a fixed position on the page, the image always belongs to a defined text that needs to be on the same page. In this case, the image belongs to the paragraph starting with “Taking good meeting notes”. So to anchor the image with that text, I’ll just grab the anchor and move it to that paragraph. If I insert a page break and move the paragraphs after the anchored text, the image will remain in the position since the anchoring text is still on the same page. If however, I change the page break so that the anchored text moves to the next page, the image will also move, having the same fixed position, but on the next page.
Again I want to apply the same artistic effect to this picture so I’ll mark the image, Click “Artistic Effects” and select the “Crisscross Etching” effect.
How to insert a caption for an image in Word?
I want to add a caption to this image. Along with the title, the lead, and section headings, captions are the most commonly read words in an article, so they should be concise and informative. To insert a caption go to the “REFERENCES” tab and click “Insert Caption”.
I don’t want the caption to have a label, but even if I select the option “Exclude label from caption” the caption number will be shown, so I’ll just leave this option and delete the label from the text box instead. I’ll write the caption and then click “OK”. Now I’ll remove the caption label from the text box by marking it and pressing Delete. I’ll mark the image, right-click and select “Group”. This way the caption stays with the image no matter where I move it.
How to add a Callout in Word 2013?
To capture my reader’s attention further I’ll insert two callout bubble shapes highlighting some of the text in the article. To insert a callout shape, click “INSERT”, “Shapes” and then select the one you want to insert.
I’ll select this bubble callout and write my text in the bubble. I’ll click the “LAYOUT OPTIONS” button and select to position the shape wrapped with text with the square option. Now I can position the bubble exactly where I want it. I’ll click the “Shape Styles” to apply a nice design. I’m not thrilled about the color, but I’ll change that later.
To insert one more similar shape, I’ll just copy this by pressing CTRL C on my keyboard and then CTRL V to paste it in again. I’ll position the second one and change the text. There!
How to apply a theme in Word?
Now I want to change the look and feel of my article. I’ll click the “DESIGN” tab and then browse through one of the many themes in Word 2013. A theme is a collection of styles and color combinations. I will select this one called “Parallax”.
I’ll click the “Colors” drop down to select another color combination. I’ll select this green color theme. But I’d like to change the shading a bit. I’ll click “Colors” again and select “Customize Colors”.
I’d like to choose a dark green that goes well with the image of the article so I’ll change the first accent color to a dark green. I’ll save the custom color combination and name it, “Dark Green”.
Now I want to make some changes to the title. I’ll mark the title and change the font to “Adobe Hebrew”, I’ll increase the font size so that the title covers the full page width. Finally, I’ll change the color by selecting the “Dark Green” in the applied color theme. I’ll update the title style by right-clicking and select “Update Title to Match Selection”.
How to insert a Drop Cap in Word?
Now I want to highlight the beginning of the text by enlarging the first letter, by inserting a so-called Drop Cap. To insert a Drop Cap, place your cursor by the word where you want the Drop Cap inserted, click “INSERT” and then “Drop Cap”. Here you get a live preview so that you can select which layout option you prefer. I’ll select the one where the letter is dropped into the text.
To make it stand out even more I’ll mark the Drop Cap and change the font to “Adobe Hebrew”. I’ll also change the color and select a dark green in the color theme. There, now the beginning of the article stands out more.
How to distribute columns evenly in Word?
The final touch is to even out the text on the second page to balance the article. I’ll move the callout shape and position it at the top of the page. The marker is placed where I want to break the text to even it out. I will click the “PAGE LAYOUT” tab, “Breaks” and then select to insert a “Column” break.
The text is now split, evening out the article.
Closing
What I’ve shown you here are just a few examples of how the built-in tools in Word 2013 can help you create a really attractive article.
4 Comments
Word’s Position and Wrap Text features help arrange images and text on the page. Position features automatically place the object at the location of your choice on the page (see how to position figures in Word for more details). Text Wrap features determine how text wraps around an image or other objects on the page, depending on the chosen option.
Wrap Text features work for figures in a Word document (see text wrapping for tables). Figures in Word mean any visual objects except tables and equations. So, using the same Wrap Text features can be used for images, ClipArt objects, charts, text boxes, diagrams, and SmartArt objects.
Change text wrapping
By default, Word inserts (see examples below):
- Pictures (images and photos), charts in line with the text.
- Text boxes, shapes in front of the text.
- WordArt objects behind the text.
To change the way how text should wrap the object, select it, then do one of the following:
- On the Picture Format (Shape Format, Graphics Format) tab, in the Arrange group, click the Wrap Text button:

- Right-click on the object, then choose Wrap Text in the popup menu:

or

- Click the Layout Options button that appears next to the selected figure:


From the Wrap Text list, choose the option you prefer:
- In Line with Text places an object in a paragraph on the same line as the surrounding text. The text does not wrap around it.

- Square wraps the text around the picture or shape on all sides at right angles (a square pattern) as if it is rectangular. The text fills the remaining rectangular region.
This option is the most common form of text wrapping.

- Tight wraps the text around the edges of the figure. The text follows the shape.
This option is most useful for larger images covering most of the page width.

- Through wraps the text around the picture or shape edges, including any white gaps. If there is no white space in the image or shape, text wrapping works the same as Tight.
This option is an advanced setting because you pull or drag image and shape points in and out of their original borders:
See how to edit hyphenation points.
- Top and Bottom wraps the text above and below the figure to keep the image on its line. There is no text on either side of it.
- Behind Text places the figure behind, or underneath, any existing text. The text does not wrap around it.
The picture looks like a watermark or background image.
Note: Use the Selection pane when working with objects behind the text.
- In Front of Text places the object on top of the text. The text is not wrapped, so some of it may be blocked depending on the figure’s transparency.


Note: Figures that use the Square, Tight, Through, Top and Bottom, Behind Text, or In Front of Text wrapping style are all considered floating.
Position a figure to a paragraph or page
Also, Word offers two options for all wrapping styles except In line with Text (for floating figures):

or

- Move with Text moves the figure along with the surrounding text.
If a figure is positioned inside the paragraph, and you delete or add any content before the paragraph, the figure moves with the paragraph. See more about Positioning a picture, text box, or shape on the page.
- Fix Position on Page keeps the figure at the same place on the page when text is added or removed.
If the paragraph where the figure is located (that paragraph contains anchor) moves to the next page, the figure moves and keeps its position relative to the page.
Note: The same options you can find in the Layout dialog box, on the Position tab, in the Options section:

Checking the Move object with text check box is equivalent to the Move with Text option from the Wrap Text dropdown list. Unchecking the Move object with text check box is equivalent to the Fix Position on Page option.
Wrap text on both sides, or one side only
To change additional options, choose More Layout Options… from the Wrap Text dropdown list or the See more… link in the Layout Options menu.
In the Layout dialog box, on the Text Wrapping tab:

- In the Wrapping style group, choose any style exact In line with text (see above).
- In the Wrap text group (available for the Square, Tight, and Thought wrapping styles), choose any of the additional options:
- Both sides wraps text around either side of the image or shape:
- Left only wraps text around only the left side of the image or shape:
- Right only wraps text around only the right side of the image or shape:
- Largest only wraps text on the side of the image or shape with the larger distance from the margin.
- Both sides wraps text around either side of the image or shape:


Change the distance between text and object
To change the distance between text and the visual object, open the Layout dialog box by one of the following methods:
- On the Picture Format (Shape Format, Graphics Format) tab, in the Arrange group, click the Wrap Text button, then select More Layout Options…
- Right-click on the object, click the Wrap Text list, then select More Layout Options… in the popup menu.
- Click the See more… link in the Layout Options menu.
In the Layout dialog box, on the Text Wrapping tab, in the Distance from text section, enter custom values for the distance between the text and the picture independently for:
- Top and Bottom (available for the Square, Tight, Thought, and Top and Bottom wrapping styles),
- Left and Right (available for the Square, Tight, and Thought wrapping styles).
For example, with the 0.3-inch distance on all sides:

Edit hyphenation points
To use the Tight or Through options effectively, you may need to adjust the wrapping points for the image or shape. To edit wrap points, select the object, then activate the Edit Wrap Points view by one of the following methods:
- Picture Format (Shape Format, Graphics Format) tab, in the Arrange group, click the Wrap Text button. Then choose Edit Wrap Points from the Wrap Text dropdown list:

- Right-click on the object and select Wrap Text -> Edit Wrap Points in the popup menu:


In the Edit Wrap Points view, drag the red lines to adjust where the text wraps:

Note: There is no way to add points. You can move existing wrap points however you want.
Be careful! After changing a text wrapping option or copy-pasting the picture, Word lost the changes of Wrap Points.
Arranging Text in Multiple Columns
To arrange text in columns:
- Select the text you want to arrange in columns, or position your cursor where you want to begin the columns.
- On the Ribbon, select the Page Layout tab.
- In the Page Setup group, click the Columns button and select the number of columns you want to use.
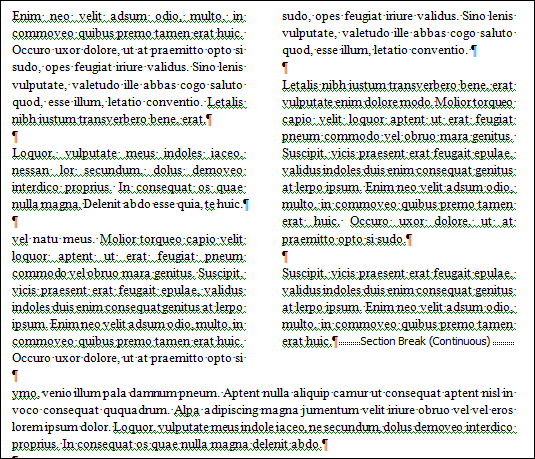
Word arranges the selected text in columns and automatically inserts a continuous section break separating the columns from the surrounding text. To format the text in the columns, be sure you click inside that section break. To see the break, click the Show/Hide ![]() Â button in the Paragraph group on the Ribbon’s Home tab to display hidden formatting symbols.
 button in the Paragraph group on the Ribbon’s Home tab to display hidden formatting symbols.
To keep your columns even, you may need to force the last line of the first column to the top of the second column. To insert a column break, place your cursor where you want the break and then press Ctrl + Shift + Enter.
For formatting options, select More Columns at the bottom of the Columns button menu. This opens the Columns dialog, which you can use to set column width and spacing, add a line between columns, or change the number of columns:

Tip:
You can use this dialog to format existing columns or to arrange single-column text into multiple columns, bypassing the quick choices in the Columns button menu.
Adding Page and Section Breaks
Use a page break to start a new page in your document without adding extraneous hard returns; hard returns, or paragraph breaks, are notorious for causing pagination issues when text is inserted or deleted. A column break, like a page break, forces text to the next column, effectively ending the current one.
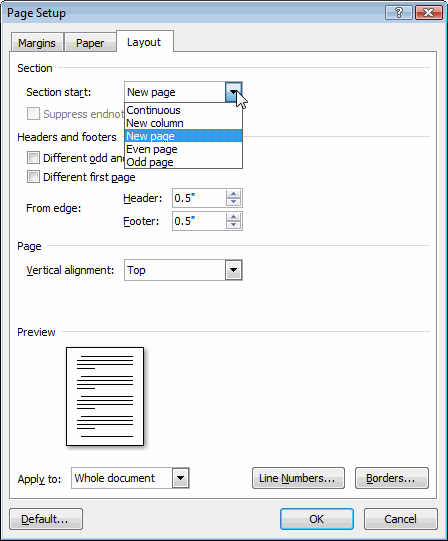
Section breaks are similar to page breaks, but they divide the formatting of your document into sections. Each section can use a different page layout, size, and orientation, as well as different headers and footers, to name just a few examples. And you don’t have to begin a section break on a new page.
- Next page starts a new section on the next page.
- Continuous starts a new section on the same page, where you insert the break.
- Even Page and Odd Page start a new section on the next even- or odd-numbered page. If the preceding section ends on a page of the same number type (even or odd), then Word inserts a blank page. The blank page is not displayed on-screen, but it is included when the document is printed. This is handy, for example, when creating books or booklets and you want the first page of each chapter to begin on an odd page.
To insert a break, just position your cursor where you want to insert it and then select the break type from the menu.
Tip:
When working with section breaks, it’s useful to show formatting symbols, so you can see the break itself. Without seeing it, it’s possible to inadvertently delete it and all the formatting along with it. To show formatting symbols, click the Show/Hide button ![]() Â in the Paragraph group of the Ribbon’s Home tab. Section breaks appear in the document as double dotted lines:
 in the Paragraph group of the Ribbon’s Home tab. Section breaks appear in the document as double dotted lines:

Although you can certainly use this menu to insert page and column breaks, it’s much quicker to use Word’s hotkeys, and you won’t interrupt your flow of typing:
- To insert a page break, press Ctrl + Enter.
- To insert a column break, press Ctrl + Shift + Enter.
Tip:
If you need to, you can change the type of an existing section break. For instance, if you have a long document with breaks between major sections, you may want each section to begin on an odd page. You can do this without inserting blank pages by changing the section breaks to odd page breaks:
- Position the insertion point inside the section whose type you want to change.
- On the Ribbon’s Page Layout tab, click the small button in the lower right-hand corner of the Page Setup group. This opens the Page Setup dialog to the Layout tab.
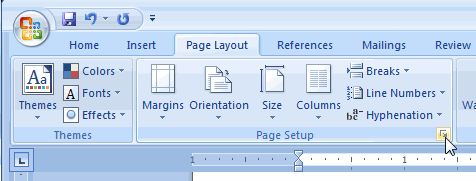
- From the Section start menu, select the section break type you want to use.
- Click OK.
Pages: 1 2 3 4 5 6 7 8 9 10 11 12 13 14 15 16 17
 Please Note:
This article is written for users of the following Microsoft Word versions: 97, 2000, 2002, and 2003. If you are using a later version (Word 2007 or later), this tip may not work for you. For a version of this tip written specifically for later versions of Word, click here: Arranging Paragraphs.
![]()
Written by Allen Wyatt (last updated March 3, 2018)
This tip applies to Word 97, 2000, 2002, and 2003
Sometimes you want to move a paragraph or two around in your document. For instance, you might want to move a paragraph from its current location to before the preceding paragraph. You can quickly move paragraphs by following these steps:
- Position the insertion point in the paragraph you want to move.
- While holding down the Shift and Alt keys, press the Up Arrow or Down Arrow to move the paragraph.
WordTips is your source for cost-effective Microsoft Word training.
(Microsoft Word is the most popular word processing software in the world.)
This tip (1219) applies to Microsoft Word 97, 2000, 2002, and 2003. You can find a version of this tip for the ribbon interface of Word (Word 2007 and later) here: Arranging Paragraphs.
Author Bio
With more than 50 non-fiction books and numerous magazine articles to his credit, Allen Wyatt is an internationally recognized author. He is president of Sharon Parq Associates, a computer and publishing services company. Learn more about Allen…
MORE FROM ALLEN
Quickly Removing Table Borders
Insert a table in your document and Word assumes that you want borders around the table and its cells. Here’s a shortcut …
Discover More
Excellent XML Resource Available
Where to get more information on XML.
Discover More
Getting Audible Feedback
You can add a bit of sound to your editing tasks by turning on Word’s sound capabilities. This tip shows where this …
Discover More

Do More in Less Time! Are you ready to harness the full power of Word 2013 to create professional documents? In this comprehensive guide you’ll learn the skills and techniques for efficiently building the documents you need for your professional and your personal life. Check out Word 2013 In Depth today!
More WordTips (menu)
Turning Off Word’s Second Guessing with Quote Marks
When you type quote marks in a document, Word normally changes them to Smart Quotes. They look better on a printout, but …
Discover More
Putting Character Codes to Work
If you know the character codes for some characters of interest, you can use those codes to do lots of tasks. This tip …
Discover More
Adding Parentheses
Need to add parentheses around some word or phrase? Here’s a quick macro that makes this simple edit in one step.
Discover More
Subscribe
FREE SERVICE: Get tips like this every week in WordTips, a free productivity newsletter. Enter your address and click «Subscribe.»
View most recent newsletter.