
Return to VBA Code Examples
In this Article
- Disable ScreenUpdating
- Enable ScreenUpdating
- VBA ScreenUpdating Example
- ScreenUpdating Refresh
- VBA Settings – Speed Up Code
- VBA Coding Made Easy
As cool as it looks watching your VBA macro manipulate the screen, you can help your Macro run faster if you turn off (disable) ScreenUpdating.
Disable ScreenUpdating
1. To disable ScreenUpdating, At the beginning of your code put this line:
Application.ScreenUpdating = FalseEnable ScreenUpdating
2. To re-enable ScreenUpdating, At the end of your code put this line:
Application.ScreenUpdating = TrueVBA ScreenUpdating Example
Your procedure will then look like this:
Sub ScreenUpdating_Example()
    Application.ScreenUpdating = False

    'Do Something
    Range("a1").Copy Range("b1")
    Range("a2").Copy Range("b2")
    Range("a3").Copy Range("b3")


    Application.ScreenUpdating = True
End Sub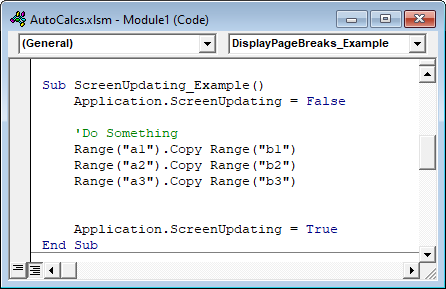
ScreenUpdating Refresh
Disabling ScreenUpdating will make your VBA code run MUCH faster, but it will also make your work appear more professional. End-users typically don’t want to see the behind the scenes actions of your procedures (especially when the procedure runs slow). Also, you may not want end-users to see the behind the scenes functionality (ex. Hidden Worksheets). I recommend disabling (and re-enabling) ScreenUpdating in virtually all of your procedures.
However, there are some times when you want the screen to refresh. To refresh the screen, you will need to temporarily turn back on ScreenUpdating (there is no screen “refresh” command):
    Application.ScreenUpdating = True
    'Do Something
    Application.ScreenUpdating = False
VBA Settings – Speed Up Code
There are several other settings to play with to improve your code speed.
Disabling Automatic Calculations can make a HUGE difference in speed:
Application.Calculation = xlManualDisabling the Status Bar will also make a small difference:
Application.DisplayStatusBar = FalseIf your workbook contains events you should usually disable events at the beginning of your procedure:
Application.EnableEvents = FalseLast, your VBA code can be slowed down when Excel tries to re-calculate page breaks (Note: not all procedures will be impacted). To disable displaying page breaks use this line of code:
ActiveSheet.DisplayPageBreaks = FalseVBA Coding Made Easy
Stop searching for VBA code online. Learn more about AutoMacro – A VBA Code Builder that allows beginners to code procedures from scratch with minimal coding knowledge and with many time-saving features for all users!
VBA Coding Made Easy
Stop searching for VBA code online. Learn more about AutoMacro — A VBA Code Builder that allows beginners to code procedures from scratch with minimal coding knowledge and with many time-saving features for all users!

Learn More!
Excel VBA ScreenUpdating
When we run any VBA macro with a huge set of code, the code completes but in the background we get processing data in the form of running or waiting for the pointer. And once it is done, we can only see the output. The regular way is not the proper way to see how the values are updating by running code. For example, let’s say we have written the code to generate some numbers in 100 cells. Now that code could simply generate the output without showing how the numbers are getting printed. To resolve this, we have VBA ScreenUpdating. ScreenUpdating in VBA helps us the see how the code is generating the output. This could be numbers, text, alphabets or combination. Once we run the code loop, by VBA ScreenUpdating we could able to see the numbers getting generated.
How to Use ScreenUpdating Application in Excel VBA?
We will learn how to use the ScreenUpdating application in Excel by using the VBA Code.
You can download this VBA ScreenUpdating Excel Template here – VBA ScreenUpdating Excel Template
VBA ScreenUpdating can be noticed while we run the code or macro. While the code is running, we will be able to see how our screen is getting updated by the values generated by written code in VBA. Instead of seeing the older waiting sign, by the help of VBA ScreenUpdating we can see how the screen is updating the values of output by VBA ScreenUpdating. Now by that, we can also see the name of the article itself defines it work, VBA ScreenUpdating.
VBA ScreenUpdating – Example #1
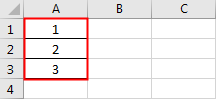
In this example, we will see a simple code for updating the screen. For this, we need some cells with numbers, as shown below. For this, follow the below steps:
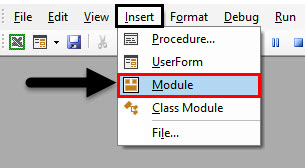
Step 1: Open a Module from the Insert menu tab as shown below.
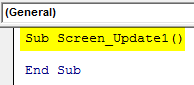
Step 2: Now write the subprocedure in the name of VBA ScreenUpdating as shown below.
Code:
Sub Screen_Update1()

End Sub
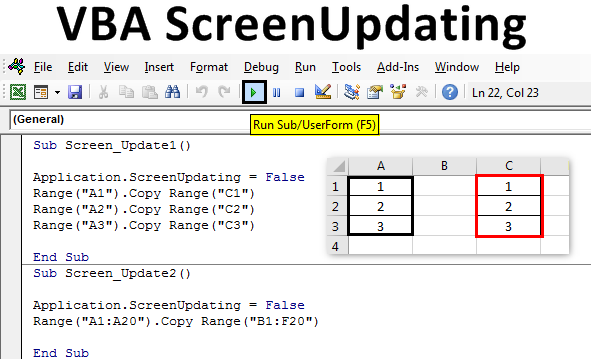
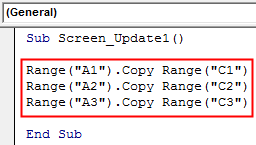
Step 3: We will now copy the numbers from cell A1: A3 to any other cells. Let’s say that cell be C1: C3 with the help of the below code.
Code:
Sub Screen_Update1()

Range("A1").Copy Range("C1")
Range("A2").Copy Range("C2")
Range("A3").Copy Range("C3")

End Sub
Step 4: Now if we run this code, we could only get the output which is copied values from column A to C. Now we will use ScreenUpdating application as shown below.
Code:
Sub Screen_Update1()

Application.ScreenUpdating
Range("A1").Copy Range("C1")
Range("A2").Copy Range("C2")
Range("A3").Copy Range("C3")

End Sub
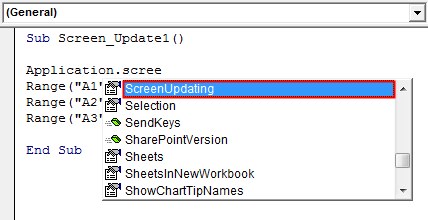
Step 5: We put an equal sign to select the Boolean values which are TRUE or FALSE. We will select FALSE to stop the screenupdating.
Code:
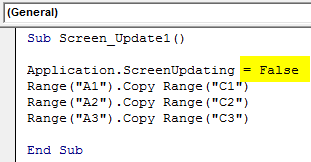
Sub Screen_Update1()

Application.ScreenUpdating = False
Range("A1").Copy Range("C1")
Range("A2").Copy Range("C2")
Range("A3").Copy Range("C3")

End Sub
Step 6: Run the code by pressing the F5 key or by clicking on the Play Button located below the menu ribbon. We will see the values are copied from column A to C.

This could be seen more clearly if we have a huge set of numbers.
VBA ScreenUpdating – Example #2
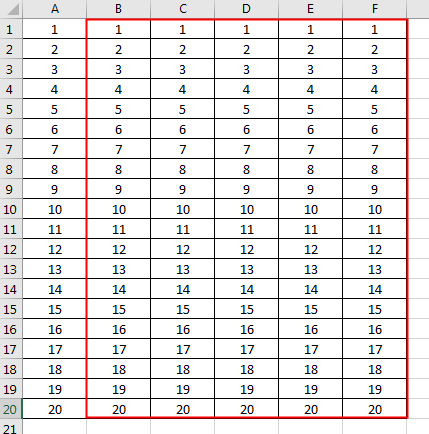
Let’s see another example for ScreenUpdating. This time let’s consider the number from 1 to 20 from cell A1 to A20 as shown below.

For using screenupdating application, follow the below steps:
Step 1: Write the subprocedure of VBA Screenupdating as shown below.
Code:
Sub Screen_Update2()

End Sub
Step 2: Now write the code to select the range cell from A1 to A20 and copy them at B1 to F20 as shown below. In a similar fashion as we saw in example-1.
Code:
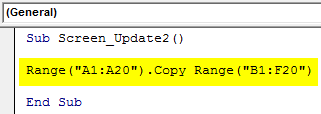
Sub Screen_Update2()

Range("A1:A20").Copy Range("B1:F20")

End Sub
Step 3: To apply the screenupdating application, we will again use a similar line of code which we have seen in example-1.
Code:
Sub Screen_Update2()

Application.ScreenUpdating = False
Range("A1:A20").Copy Range("B1:F20")

End Sub
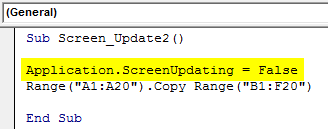
The above-used application ScreenUpdating as FALSE will allow us to see how the VBA code updates the screen. As we have more numbers so there are chances we can see screenupdating.
Step 4: Run the code by pressing the F5 key or by clicking on the Play Button. We could see the value getting updated.
VBA ScreenUpdating – Example #3
There is another way to see the screen getting updated. This could be done with the help of the For-Next Loop. In this example, we will print the numbers in a Row and Column combo matrix. For this, follow the below steps:
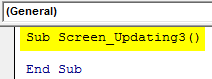
Step 1: Write the subprocedure of VBA ScreenUpdating.
Code:
Sub Screen_Updating3()

End Sub
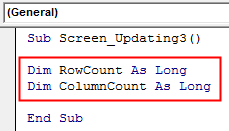
Step 2: Now declare the 2 variables for Row and Columns separately as data type Long.
Code:
Sub Screen_Updating3()

Dim RowCount As Long
Dim ColumnCount As Long

End Sub
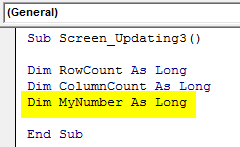
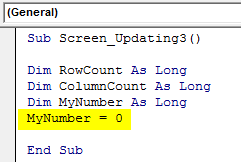
Step 3: Now declare another variable which we will use as a reference to start the numbers.
Code:
Sub Screen_Updating3()

Dim RowCount As Long
Dim ColumnCount As Long
Dim MyNumber As Long

End Sub
Step 4: Now give the reference number from which position we want to start the counting. Here we are giving it as 0.
Code:
Sub Screen_Updating3()

Dim RowCount As Long
Dim ColumnCount As Long
Dim MyNumber As Long
MyNumber = 0

End Sub
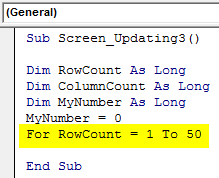
Step 5: Now open a For loop and give the count of the Columns and Rows which want to see updating. Let say from 1 to 50.
Code:
Sub Screen_Updating3()

Dim RowCount As Long
Dim ColumnCount As Long
Dim MyNumber As Long
MyNumber = 0
For RowCount = 1 To 50

End Sub
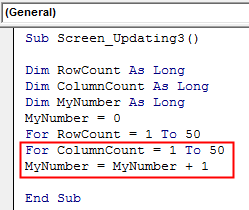
Step 6: To continue the loop give MyNumber variable +1.
Code:
Sub Screen_Updating3()

Dim RowCount As Long
Dim ColumnCount As Long
Dim MyNumber As Long
MyNumber = 0
For RowCount = 1 To 50
For ColumnCount = 1 To 50
MyNumber = MyNumber + 1

End Sub
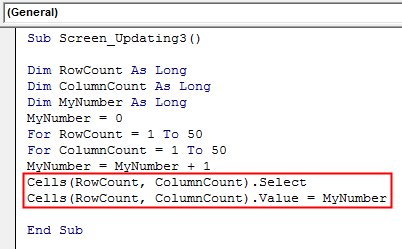
Step 7: Now select the Row and Column variables in Cell function. And then select the values stored in them and assign them to MyNumber variable.
Code:
Sub Screen_Updating3()

Dim RowCount As Long
Dim ColumnCount As Long
Dim MyNumber As Long
MyNumber = 0
For RowCount = 1 To 50
For ColumnCount = 1 To 50
MyNumber = MyNumber + 1
Cells(RowCount, ColumnCount).Select
Cells(RowCount, ColumnCount).Value = MyNumber

End Sub
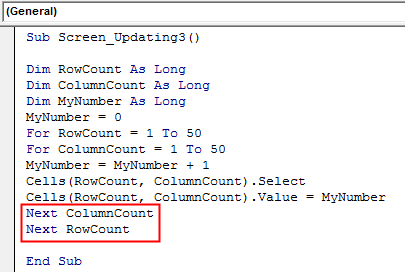
Step 8: Now close the Loop by Next. Include Row and Column variables which we defined and used in the For-Next loop.
Code:
Sub Screen_Updating3()

Dim RowCount As Long
Dim ColumnCount As Long
Dim MyNumber As Long
MyNumber = 0
For RowCount = 1 To 50
For ColumnCount = 1 To 50
MyNumber = MyNumber + 1
Cells(RowCount, ColumnCount).Select
Cells(RowCount, ColumnCount).Value = MyNumber
Next ColumnCount
Next RowCount

End Sub
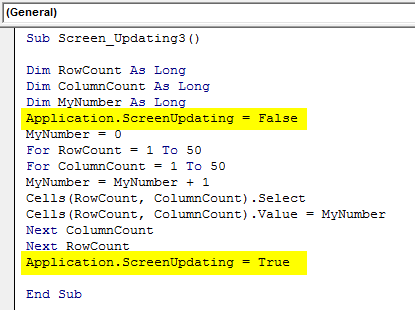
Step 9: Now we haven’t inserted the Screenupdating application yet. Now insert the Screenupdating application as FALSE before the start of the loop and as TRUE at the end of the loop as shown below.
Code:
Sub Screen_Updating3()

Dim RowCount As Long
Dim ColumnCount As Long
Dim MyNumber As Long
Application.ScreenUpdating = False
MyNumber = 0
For RowCount = 1 To 50
For ColumnCount = 1 To 50
MyNumber = MyNumber + 1
Cells(RowCount, ColumnCount).Select
Cells(RowCount, ColumnCount).Value = MyNumber
Next ColumnCount
Next RowCount
Application.ScreenUpdating = True

End Sub
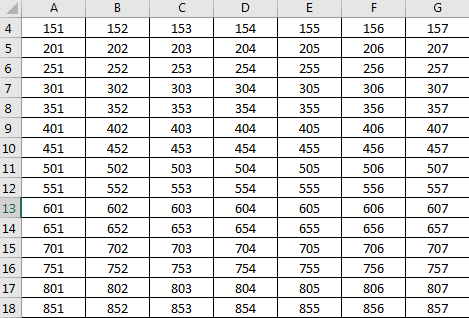
Now compile the complete code step by step by pressing the F8 function key and then run it if no error is found. We will see, how each cell of selected rows and columns is getting updated with the values stored in it.
Pros of Excel VBA ScreenUpdating
- It is quite helpful in seeing how the screen is getting updated with the value stored in the loop.
- We can use Screenupdating if we want to switch between worksheets and workbooks.
- We can use any range of numbers.
Things to Remember
- We use the insert For-Next loop as the frame or first, we can satisfy the condition of For loop and then close it by Next.
- VBA ScreenUpdating is quite useful and visible if we are using a huge set of numbers.
- Once done, do save the excel file as Macro enables excel format.
- VBA ScreenUpdating can also be used for creating a macro through which we can send emails.
Recommended Articles
This is a guide to VBA ScreenUpdating. Here we discuss how to use ScreenUpdating application in Excel VBA along with practical examples and downloadable excel template. You can also go through our other suggested articles –
- VBA IF Statements
- VBA Sort
- VBA While Loop
- VBA Environ
Home / VBA / VBA ScreenUpdating | How to Turn it ON and OFF
What is VBA Screen Updating?
ScreenUpdating is a property in VBA that you can use to turn “ON” and “OFF” the screen updating while running the code. You can turn it off before running a code that makes your code run faster and then turn it on once the execution of the code completes. You can read and write this property.

By default, screen updating is “ON” in Excel. When you normally run a code it takes a lot of flickering if that code takes time, but if you turn OFF the screen updating it will take less time than normal to run.
Turn OFF Screen Updating in VBA
- First, type the keyword “Application”.
- After that, press a dot “.” to open the properties and methods list.
- Now, select “ScreenUpdating”.
- In the end, specify “False” to it.

Once you turn off screen updating, VBA will not turn it ON once the code is executed. So it’s always better to turn it off from your end. The code would be like something below.

Points to Consider
- Make sure to have the screen updating “ON” when you are using a user form.
- If you are debugging code, it is better to have a screen updating “ON” so that you can see all the activities as they are.
There’s More
VBA With Statement | VBA Wait and Sleep Commands | VBA Status Bar | VBA Random Number | Line Break in a VBA Code | VBA Immediate Window (Debug.Print) | VBA Concatenate | VBA Module | VBA Random Number
If you ever worked with VBA, you could probably be in a situation where your code is not as fast as you would want it to be. There are a couple of things that you can do to speed it up a little bit.
In the example below, we will show how to speed up the code by turning the screen updating off in VBA.
Screen updating can be turned on or off through the VBA module. In simple terms, it has to be done at the application level. We are going to use the following sentence:
|
Application.ScreenUpdating = False (turning it off) Application.ScreenUpdating = True (turning it on) |
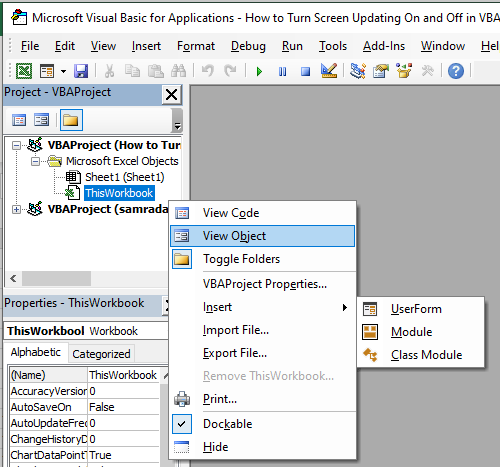
We will show its importance in one example. To do this, we need to open the Excel file, click on ALT + F11, and then right-click on the left window that appears, go to Insert >> Module:
When a new window appears in which we should write our code, we can start with it.
This is what our code will look like:
|
Sub AddingSheets() Application.ScreenUpdating = FALSE Dim sTime As Single, ElapsedTime As Single, sec As Single sTime = Timer ‘find out starting time Worksheets.Add after:=Sheets(Sheets.Count) ElapsedTime = Timer — sTime ‘Save the elapsed time to ElapsedTime variable ‘Extract seconds sec = ElapsedTime Debug.Print «Time passed: « & sec & » sec» End Sub |
This is what our code looks like in the module itself:
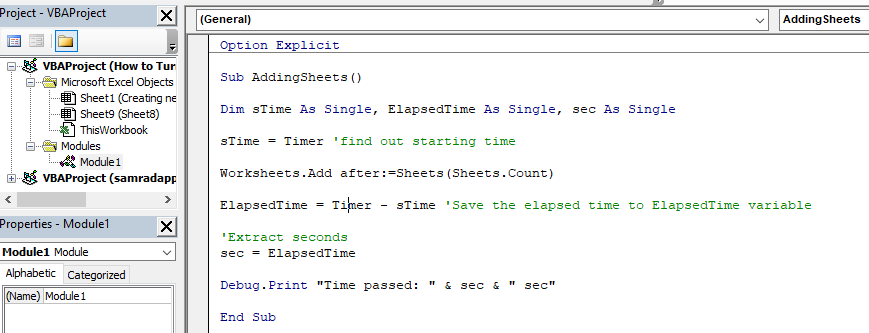
This code first declares variables that we going to use, and then it sets variable sTime to be equal to the Timer:
|
Dim sTime As Single, ElapsedTime As Single, sec As Single sTime = Timer |
Then we need concrete action. In our case, our action is to add a worksheet at the end of our workbooks, i.e. after the end of our sheets list.
After that, we calculate ElapsedTime as the difference between the Timer and start time, and we store that number in the ElapsedTime variable.
|
Worksheets.Add after:=Sheets(Sheets.Count) ElapsedTime = Timer — sTime |
For the next part, we want to extract seconds from our variable, so we do just that by setting the sec variable to be equal to ElapsedTime.
Now, for the final part, we will use the Debug.Print option to show us the time that it took for our sheet to be created:
|
Debug.Print «Time passed: « & sec & » sec» |
Now, Debug.Print option is great for us because it will give us the information that we need (the time spent creating a sheet) without having to store this information in a variable or without showing it in a message box.
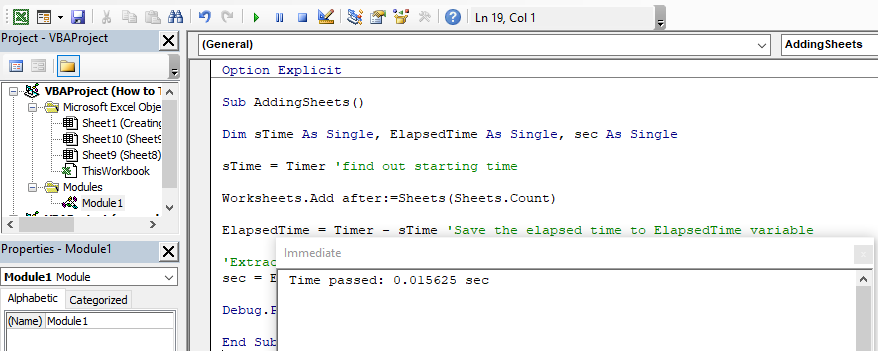
To use Debug.Print option, we need to turn on the Immediate window. We will do it by going to the View tab in our Module and choosing the Immediate window, or simply clicking CTRL + G:

With this window visible, we will execute our code (by going into the code and clicking F5) and we will see the message in our Immediate window:
Time passed: 0.015625 seconds
Or in our Module:
We will also have a new sheet created, as defined in our code.
To speed up the execution of our code, we will simply add an Application.ScreenUpdating = False above our code and beneath the part where we defined subroutine (Sub….):
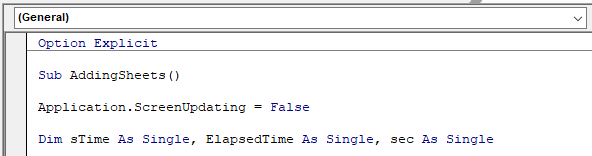
Now, when we execute our code again, these are the results that we will get:
Time passed: 0.0078125 seconds
Or in the module:

To turn on the screen updating again, we just need to insert:
|
Application.ScreenUpdating = True |
You will notice that our code is executed so much faster without screen updating. Although it is a matter of seconds in our case that is only because we defined such a small portion of code (sheet to be added) to be executed. Just imagine how much time can you spare when it comes to more complex code.
Post Views: 111
VBA Screen Updating is a property used to avoid or prevent distraction flashes while running the code and make it fast by turning off screen updating. We can turn off the screen updating by setting this property as “False.”
We often feel the Excel screen going crazy while the Macro is running. We almost get frustrated by that. But, how do we deal with these situations and make the code run faster than the usual slow thing?
Screen Updating is something we can notice while the excel macroA macro in excel is a series of instructions in the form of code that helps automate manual tasks, thereby saving time. Excel executes those instructions in a step-by-step manner on the given data. For example, it can be used to automate repetitive tasks such as summation, cell formatting, information copying, etc. thereby rapidly replacing repetitious operations with a few clicks.
read more is running. When the task is executing, we notice our screen updating the values until the Macro finishes its assigned task. As our screen flickers or refreshes, it leads to the slowdown of the Excel program and takes a longer time than usual to complete the task.
In VBA, we have a property called “ScreenUpdating,” we set this property to FALSE to eliminate the screen updating process while the code runs.
This article will say goodbye to watching on-screen action drama while the code is running. Instead, today you will make your code run faster and quicker than your usual time.
Table of contents
- Excel VBA Screen Updating
- When to use Screen Updating Feature?
- How to use Screen Updating Feature in VBA Code?
- Example #1 – Turn Off Screen Updating
- Example #2 –
- Recommended Articles

When to use Screen Updating Feature?
Suppose you have any doubt about when to use this technique. Then, look into the below points.
- Looping through a large number of cells.
- Sending emails from Excel VBAWe can use VBA to automate our mailing feature in Excel to send emails to multiple users at once. To use Outlook features, we must first enable outlook scripting in VBA, and then use the application method.read more.
- Switching between Excel workbooks.
- Opening new workbooks.
How to use the Screen Updating Feature in VBA Code?
You can download this VBA ScreenUpdating Excel Template here – VBA ScreenUpdating Excel Template
Example #1 – Turn Off Screen Updating
Look at the below code.
Code:
Sub Screen_Updating()

 Dim RowCount As Long
 Dim ColumnCount As Long
 Dim MyNumber As Long

 MyNumber = 0

 For RowCount = 1 To 50

 For ColumnCount = 1 To 50
   MyNumber = MyNumber + 1
   Cells(RowCount, ColumnCount).Select
   Cells(RowCount, ColumnCount).Value = MyNumber
 Next ColumnCount

 Next RowCount

End Sub
The above has a nested VBA loopA VBA loop in excel is an instruction to run a code or repeat an action multiple times.read more to insert serial numbers from the first column to the 50th column and again to insert serial numbers starting from 51 from the second row to the 50th column.

Like this, it will insert until it reaches the 50th row.
While this code is running, you can notice your screen flickering. You cannot do anything apart from watching this crazy moment.
To avoid all of these, we can add Screen Updating to FALSE.
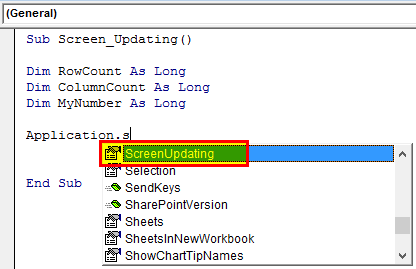
To access the Screen Updating feature, first, we need to access the Application object.
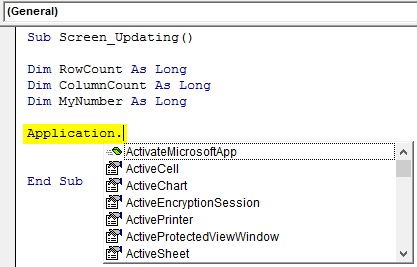
As we can see with the Application object, we have many properties and methods. So, select “Screen Updating” from the IntelliSense list.
Note: You must apply the Screen Updating feature immediately after declaring the variables.
After selecting the Screen Updating property, put an equal sign (=).
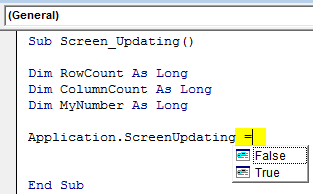
As we can see, there are two Boolean values: FALSE and TRUE.
To stop screen updating, set the status to FALSE.

As the Macro starts running first, it will update the screen, updating the status to FALSE, and proceed to the next line.
Since Macro executed Screen Updating to FALSE, it will not allow the screen to update while the code is executing its task.
Example #2 –
Always Set Screen Updating to TRUE at the End
We have seen many people set the Screen Updating to FALSE but forgot to set it back to TRUE at the end of the Macro.
Always set the Screen Updating back to TRUE at the end of the Macro.
Code:
Sub Screen_Updating()

 Dim RowCount As Long
 Dim ColumnCount As Long
 Dim MyNumber As Long

 Application.ScreenUpdating = False
 MyNumber = 0

 For RowCount = 1 To 50

 For ColumnCount = 1 To 50
   MyNumber = MyNumber + 1
   Cells(RowCount, ColumnCount).Select
   Cells(RowCount, ColumnCount).Value = MyNumber
 Next ColumnCount

 Next RowCount
 Application.ScreenUpdating = True

End Sub
Recommended Articles
This article has been a guide to VBA Screen Updating. Here, we discuss how to use the Application.ScreenUpdating feature to make code run faster and quicker than your usual time, along with examples and a downloadable Excel template. Below are some useful Excel articles related to VBA: –
- Solver Function in VBA
- Use VBA Debug Print
- Break For Loop in VBA
- ThisWorkbook Property in VBA
- VBA FreeFile