
In this tutorial I will show you how to create a word document using apache poi or write to a word document using apache poi API. Microsoft word document is a great tool to document your stuff. This example is tested on both 3.15 and 4.1.1 versions of Apache POI library. I am also going to show you how to use build tools maven and gradle for the application.
We will create here a Java application to create word document using apache poi library. Using apache poi library is very easy for any kind of activities in word document.
Prerequisites
Eclipse 4.12, JDK 1.8 or 12, Maven 3.6.1, Gradle 5.6, Apache POI 3.15 to 4.1.1
Create Project
You basically need to create a maven or gradle project in eclipse. The name of the project is word-apache-poi.
Once the project is created and eclipse finishes build then you need to modify the pom.xml file as shown below.
Here we will add apache poi API as a dependency for working with microsoft word document or even you can work with open source word document.
<project xmlns="http://maven.apache.org/POM/4.0.0" xmlns:xsi="http://www.w3.org/2001/XMLSchema-instance"
	xsi:schemaLocation="http://maven.apache.org/POM/4.0.0 http://maven.apache.org/xsd/maven-4.0.0.xsd">
	<modelVersion>4.0.0</modelVersion>
	<groupId>com.roytuts</groupId>
	<artifactId>word-apache-poi</artifactId>
	<version>0.0.1-SNAPSHOT</version>
	<packaging>jar</packaging>

	<properties>
		<project.build.sourceEncoding>UTF-8</project.build.sourceEncoding>
		<java.version>1.8</java.version>
		<poi.version>3.15</poi.version>
	</properties>

	<dependencies>
		<!-- apache poi for xlsx, docx etc reading/writing -->
		<dependency>
			<groupId>org.apache.poi</groupId>
			<artifactId>poi-ooxml</artifactId>
			<version>${poi.version}</version>
		</dependency>
	</dependencies>

	<build>
		<plugins>
			<plugin>
				<groupId>org.apache.maven.plugins</groupId>
				<artifactId>maven-compiler-plugin</artifactId>
				<configuration>
					<source>${java.version}</source>
					<target>${java.version}</target>
				</configuration>
			</plugin>
		</plugins>
	</build>
</project>
If you want to use gradle build script to create your project then use below build script to setup the project. Here also we have used the same apache poi version as you have seen in the above maven based pom.xml file.
plugins {
    id 'java-library'
}

sourceCompatibility = 12 or 1.8
targetCompatibility = 12 or 1.8

repositories {
    jcenter()
}

dependencies {
    implementation 'org.apache.poi:poi-ooxml:4.1.1 or 3.15'
}
Create Word File
Create below class to create WordDocx.docx file.
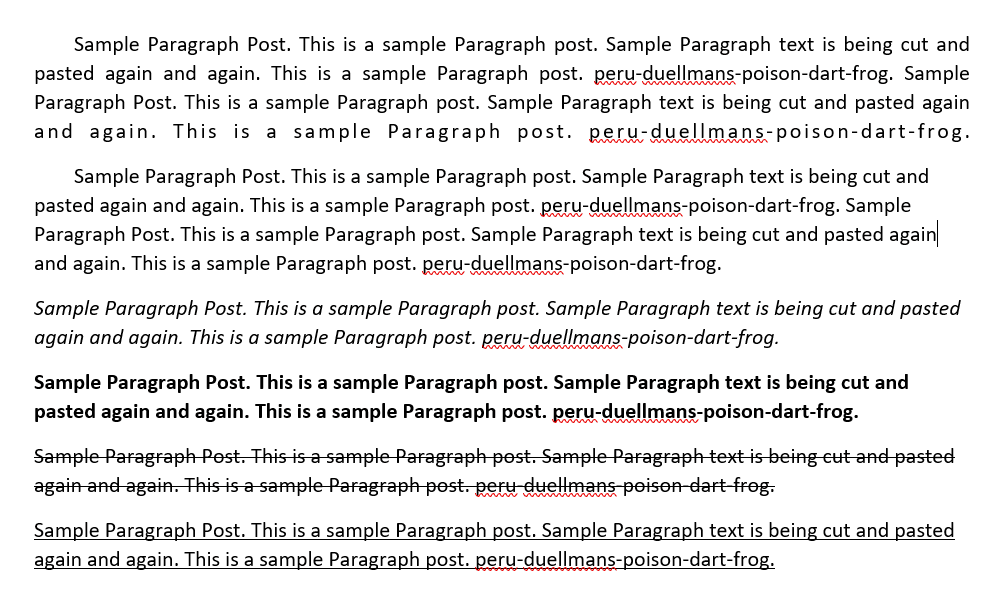
The below source code creates a word document and writes sample texts to different paragraphs in different formats.
The first paragraph writes texts with justify alignments. It also adds first line with indent.
The second paragraph writes test with left alignment. It also adds first line with indent.
The third paragraph texts are italic with left alignment. The fourth paragraph texts are bold with left alignment.
The fifth paragraph texts are strike-through with left alignment. The sixth paragraph texts are undelined with left alignment.
Finally we create the output WordDocx.docx file in the root directory of the project. You can also save the file anywhere you want. This will create a word document using apache poi.
package com.roytuts.word.apache.poi;

import java.io.FileOutputStream;
import java.io.IOException;

import org.apache.poi.xwpf.usermodel.ParagraphAlignment;
import org.apache.poi.xwpf.usermodel.UnderlinePatterns;
import org.apache.poi.xwpf.usermodel.XWPFDocument;
import org.apache.poi.xwpf.usermodel.XWPFParagraph;
import org.apache.poi.xwpf.usermodel.XWPFRun;

public class WordDocx {

	public static void main(String[] args) {
		createWordDocument("WordDocx.docx");
	}

	public static void createWordDocument(final String outputFileName) {
		// create a document
		XWPFDocument doc = new XWPFDocument();

		// create a paragraph with justify alignment
		XWPFParagraph p1 = doc.createParagraph();

		// first line indentation in the paragraph
		p1.setFirstLineIndent(400);

		// justify alignment
		p1.setAlignment(ParagraphAlignment.DISTRIBUTE);

		// wrap words
		p1.setWordWrapped(true);

		// insert page break after this paragraph
		// p1.setPageBreak(true);
		// XWPFRun object defines a region of text with a common set of
		// properties
		XWPFRun r1 = p1.createRun();
		String t1 = "Sample Paragraph Post. This is a sample Paragraph post. Sample Paragraph text is being cut and pasted again and again. This is a sample Paragraph post. peru-duellmans-poison-dart-frog."
				+ " Sample Paragraph Post. This is a sample Paragraph post. Sample Paragraph text is being cut and pasted again and again. This is a sample Paragraph post. peru-duellmans-poison-dart-frog.";
		r1.setText(t1);

		// create a paragraph with left alignment
		XWPFParagraph p2 = doc.createParagraph();

		// first line indentation in the paragraph
		p2.setFirstLineIndent(400);

		// left alignment
		p2.setAlignment(ParagraphAlignment.LEFT);

		// wrap words
		p2.setWordWrapped(true);

		// insert page break after this paragraph
		// p2.setPageBreak(true);
		// XWPFRun object defines a region of text with a common set of
		// properties
		XWPFRun r2 = p2.createRun();
		String t2 = "Sample Paragraph Post. This is a sample Paragraph post. Sample Paragraph text is being cut and pasted again and again. This is a sample Paragraph post. peru-duellmans-poison-dart-frog."
				+ " Sample Paragraph Post. This is a sample Paragraph post. Sample Paragraph text is being cut and pasted again and again. This is a sample Paragraph post. peru-duellmans-poison-dart-frog.";
		r2.setText(t2);

		// create a paragraph with ITALIC text
		XWPFParagraph p3 = doc.createParagraph();

		// left alignment
		p3.setAlignment(ParagraphAlignment.LEFT);

		// wrap words
		p3.setWordWrapped(true);

		// XWPFRun object defines a region of text with a common set of
		// properties
		XWPFRun r3 = p3.createRun();
		String t3 = "Sample Paragraph Post. This is a sample Paragraph post. Sample Paragraph text is being cut and pasted again and again. This is a sample Paragraph post. peru-duellmans-poison-dart-frog.";
		r3.setText(t3);

		// make text italic
		r3.setItalic(true);

		// create a paragraph with BOLD text
		XWPFParagraph p4 = doc.createParagraph();

		// left alignment
		p4.setAlignment(ParagraphAlignment.LEFT);

		// wrap words
		p4.setWordWrapped(true);

		// XWPFRun object defines a region of text with a common set of
		// properties
		XWPFRun r4 = p4.createRun();
		String t4 = "Sample Paragraph Post. This is a sample Paragraph post. Sample Paragraph text is being cut and pasted again and again. This is a sample Paragraph post. peru-duellmans-poison-dart-frog.";
		r4.setText(t4);

		// make text bold
		r4.setBold(true);

		// create a paragraph with Strike-Through text
		XWPFParagraph p5 = doc.createParagraph();

		// left alignment
		p5.setAlignment(ParagraphAlignment.LEFT);

		// wrap words
		p5.setWordWrapped(true);

		// XWPFRun object defines a region of text with a common set of
		// properties
		XWPFRun r5 = p5.createRun();
		String t5 = "Sample Paragraph Post. This is a sample Paragraph post. Sample Paragraph text is being cut and pasted again and again. This is a sample Paragraph post. peru-duellmans-poison-dart-frog.";
		r5.setText(t5);

		// make StrikeThrough
		r5.setStrikeThrough(true);

		// create a paragraph with Underlined text
		XWPFParagraph p6 = doc.createParagraph();

		// left alignment
		p6.setAlignment(ParagraphAlignment.LEFT);

		// wrap words
		p6.setWordWrapped(true);

		// XWPFRun object defines a region of text with a common set of
		// properties
		XWPFRun r6 = p6.createRun();
		String t6 = "Sample Paragraph Post. This is a sample Paragraph post. Sample Paragraph text is being cut and pasted again and again. This is a sample Paragraph post. peru-duellmans-poison-dart-frog.";
		r6.setText(t6);

		// make Underlined
		r6.setUnderline(UnderlinePatterns.SINGLE);

		// write to a docx file
		FileOutputStream fo = null;
		try {
			// create .docx file
			fo = new FileOutputStream(outputFileName);

			// write to the .docx file
			doc.write(fo);
		} catch (IOException e) {
		} finally {
			if (fo != null) {
				try {
					fo.close();
				} catch (IOException e) {
					e.printStackTrace();
				}
			}
			if (doc != null) {
				try {
					doc.close();
				} catch (IOException e) {
					e.printStackTrace();
				}
			}
		}
	}

}
Related Posts:
- add images to word document using apache poi
- create table in word document using apache poi
- create header and footer in word document using apache poi
Testing the Application
Run the above class to see the output in WordDocx.docx file. The file is created under root directory of the project.
Now open the created word document you should see the expected output similar to below image.
Hope you have got an idea how to create a word document using apache poi.
Source Code
Download
Thanks for reading.
Microsoft Word Processing in Java with Apache POI
-
Data
1. Overview
Apache POI is a Java library for working with
the various file formats based on the Office Open XML standards (OOXML)
and Microsoft’s OLE 2 Compound Document format (OLE2).
This tutorial focuses on the support of Apache
POI for Microsoft Word, the most commonly used Office file format. It
walks through steps needed to format and generate an MS Word file and
how to parse this file.
2. Maven Dependencies
The only dependency that is required for Apache POI to handle MS Word
files is:
<dependency>
    <groupId>org.apache.poi</groupId>
    <artifactId>poi-ooxml</artifactId>
    <version>3.15</version>
</dependency>
Please click
here
for the latest version of this artifact.
3. Preparation
Let’s now look at some of the elements used to facilitate the generation
of an MS Word file.
3.1. Resource Files
We’ll collect the contents of three text files and write them into an MS
Word file – named rest-with-spring.docx.
In addition, the logo-leaf.png file is used to insert an image into
that new file. All these files do exist on the classpath and are
represented by several static variables:
public static String logo = "logo-leaf.png";
public static String paragraph1 = "poi-word-para1.txt";
public static String paragraph2 = "poi-word-para2.txt";
public static String paragraph3 = "poi-word-para3.txt";
public static String output = "rest-with-spring.docx";
For those who are curious, contents of these resource files in the
repository, whose link is given in the last section of this tutorial,
are extracted from
this
course page here on the site.
3.2. Helper Method
The main method consisting of logic used to generate an MS Word file,
which is described in the following section, makes use of a helper
method:
public String convertTextFileToString(String fileName) {
    try (Stream<String> stream
      = Files.lines(Paths.get(ClassLoader.getSystemResource(fileName).toURI()))) {

        return stream.collect(Collectors.joining(" "));
    } catch (IOException | URISyntaxException e) {
        return null;
    }
}
This method extracts contents contained in a text file located on the
classpath, whose name is the passed-in String argument. Then, it
concatenates lines in this file and returns the joining String.
4. MS Word File Generation
This section gives instructions on how to format and generate a
Microsoft Word file. Prior to working on any part of the file, we need
to have an XWPFDocument instance:
XWPFDocument document = new XWPFDocument();4.1. Formatting Title and Subtitle
In order to create the title, we need to first instantiate the
XWPFParagraph class and set the alignment on the new object:
XWPFParagraph title = document.createParagraph();
title.setAlignment(ParagraphAlignment.CENTER);
The content of a paragraph needs to be wrapped in an XWPFRun object.
We may configure this object to set a text value and its associated
styles:
XWPFRun titleRun = title.createRun();
titleRun.setText("Build Your REST API with Spring");
titleRun.setColor("009933");
titleRun.setBold(true);
titleRun.setFontFamily("Courier");
titleRun.setFontSize(20);
One should be able to infer the purposes of the set-methods from their
names.
In a similar way we create an XWPFParagraph instance enclosing the
subtitle:
XWPFParagraph subTitle = document.createParagraph();
subTitle.setAlignment(ParagraphAlignment.CENTER);
Let’s format the subtitle as well:
XWPFRun subTitleRun = subTitle.createRun();
subTitleRun.setText("from HTTP fundamentals to API Mastery");
subTitleRun.setColor("00CC44");
subTitleRun.setFontFamily("Courier");
subTitleRun.setFontSize(16);
subTitleRun.setTextPosition(20);
subTitleRun.setUnderline(UnderlinePatterns.DOT_DOT_DASH);
The setTextPosition method sets the distance between the subtitle and
the subsequent image, while setUnderline determines the underlining
pattern.
Notice that we hard-code the contents of both the title and subtitle as
these statements are too short to justify the use of a helper method.
4.2. Inserting an Image
An image also needs to be wrapped in an XWPFParagraph instance. We
want the image to be horizontally centered and placed under the
subtitle, thus the following snippet must be put below the code given
above:
XWPFParagraph image = document.createParagraph();
image.setAlignment(ParagraphAlignment.CENTER);
Here is how to set the distance between this image and the text below
it:
XWPFRun imageRun = image.createRun();
imageRun.setTextPosition(20);
An image is taken from a file on the classpath and then inserted into
the MS Word file with the specified dimensions:
Path imagePath = Paths.get(ClassLoader.getSystemResource(logo).toURI());
imageRun.addPicture(Files.newInputStream(imagePath),
  XWPFDocument.PICTURE_TYPE_PNG, imagePath.getFileName().toString(),
  Units.toEMU(50), Units.toEMU(50));
4.3. Formatting Paragraphs
Here is how we create the first paragraph with contents taken from the
poi-word-para1.txt file:
XWPFParagraph para1 = document.createParagraph();
para1.setAlignment(ParagraphAlignment.BOTH);
String string1 = convertTextFileToString(paragraph1);
XWPFRun para1Run = para1.createRun();
para1Run.setText(string1);
It is apparent that the creation of a paragraph is similar to the
creation of the title or subtitle. The only difference here is the use
of the helper method instead of hard-coded strings.
In a similar way, we can create two other paragraphs using contents from
files poi-word-para2.txt and poi-word-para3.txt:
XWPFParagraph para2 = document.createParagraph();
para2.setAlignment(ParagraphAlignment.RIGHT);
String string2 = convertTextFileToString(paragraph2);
XWPFRun para2Run = para2.createRun();
para2Run.setText(string2);
para2Run.setItalic(true);

XWPFParagraph para3 = document.createParagraph();
para3.setAlignment(ParagraphAlignment.LEFT);
String string3 = convertTextFileToString(paragraph3);
XWPFRun para3Run = para3.createRun();
para3Run.setText(string3);
The creation of these three paragraphs is almost the same, except for
some styling such as alignment or italics.
4.4. Generating MS Word File
Now we are ready to write out a Microsoft Word file to memory from the
document variable:
FileOutputStream out = new FileOutputStream(output);
document.write(out);
out.close();
document.close();
All the code snippets in this section are wrapped in a method named
handleSimpleDoc.
5. Parsing and Testing
This section outlines the parsing of MS Word files and verification of
the result.
5.1. Preparation
We declare a static field in the test class:
static WordDocument wordDocument;This field is used to reference to an instance of the class that
encloses all the code fragments shown in sections 3 and 4.
Before parsing and testing, we need to initialize the static variable
declared right above and generate the rest-with-spring.docx file in
the current working directory by invoking the handleSimpleDoc method:
@BeforeClass
public static void generateMSWordFile() throws Exception {
    WordTest.wordDocument = new WordDocument();
    wordDocument.handleSimpleDoc();
}
Let’s move on to the final step: parsing the MS Word file and the
verification of the outcome.
5.2. Parsing MS Word File and Verification
First, we extract contents from the given MS Word file in the project
directory and the store the contents in a List of XWPFParagraph:
Path msWordPath = Paths.get(WordDocument.output);
XWPFDocument document = new XWPFDocument(Files.newInputStream(msWordPath));
List<XWPFParagraph> paragraphs = document.getParagraphs();
document.close();
Next, let’s make sure that the content and style of the title is the
same as what we have set before:
XWPFParagraph title = paragraphs.get(0);
XWPFRun titleRun = title.getRuns().get(0);

assertEquals("Build Your REST API with Spring", title.getText());
assertEquals("009933", titleRun.getColor());
assertTrue(titleRun.isBold());
assertEquals("Courier", titleRun.getFontFamily());
assertEquals(20, titleRun.getFontSize());
For the sake of simplicity, we just validate the contents of other parts
of the file, leaving out the styles. The verification of their styles is
similar to what we have done with the title:
assertEquals("from HTTP fundamentals to API Mastery",
  paragraphs.get(1).getText());
assertEquals("What makes a good API?", paragraphs.get(3).getText());
assertEquals(wordDocument.convertTextFileToString
  (WordDocument.paragraph1), paragraphs.get(4).getText());
assertEquals(wordDocument.convertTextFileToString
  (WordDocument.paragraph2), paragraphs.get(5).getText());
assertEquals(wordDocument.convertTextFileToString
  (WordDocument.paragraph3), paragraphs.get(6).getText());
Now we can be confident that the creation of the rest-with-spring.docx
file has been successful.
6. Conclusion
This tutorial introduced Apache POI support for the Microsoft Word
format. It went through steps needed to generate an MS Word file and to
verify its contents.
The implementation of all these examples and code snippets can be found
in a GitHub
project.
In this article we will be discussing about ways and techniques to read word documents in Java using Apache POI library. The word document may contain images, tables or plain text. Apart from this a standard word file has header and footers too. Here in the following examples we will be parsing a word document by reading its different paragraph, runs, images, tables along with headers and footers. We will also take a look into identifying different styles associated with the paragraphs such as font-size, font-family, font-color etc.

Maven Dependencies
Following is the poi maven depedency required to read word documents. For latest artifacts visit here
pom.xml
	<dependencies>
		<dependency>
                     <groupId>org.apache.poi</groupId>
                     <artifactId>poi-ooxml</artifactId>
		     <version>3.16</version>
                 </dependency>
	</dependencies>
Reading Complete Text from Word Document
The class XWPFDocument has many methods defined to read and extract .docx file contents. getText() can be used to read all the texts in a .docx word document. Following is an example.
TextReader.java
public class TextReader {

	public static void main(String[] args) {
	 try {
		   FileInputStream fis = new FileInputStream("test.docx");
		   XWPFDocument xdoc = new XWPFDocument(OPCPackage.open(fis));
		   XWPFWordExtractor extractor = new XWPFWordExtractor(xdoc);
		   System.out.println(extractor.getText());
		} catch(Exception ex) {
		    ex.printStackTrace();
		}
 }

}
Reading Headers and Foooters of Word Document
Apache POI provides inbuilt methods to read headers and footers of a word document. Following is an example that reads and prints header and footer of a word document. The example .docx file is available in the source which can be downloaded at the end of thos article.
HeaderFooter.java
public class HeaderFooterReader {

	public static void main(String[] args) {

		try {
			FileInputStream fis = new FileInputStream("test.docx");
			XWPFDocument xdoc = new XWPFDocument(OPCPackage.open(fis));
			XWPFHeaderFooterPolicy policy = new XWPFHeaderFooterPolicy(xdoc);

			XWPFHeader header = policy.getDefaultHeader();
			if (header != null) {
				System.out.println(header.getText());
			}

			XWPFFooter footer = policy.getDefaultFooter();
			if (footer != null) {
				System.out.println(footer.getText());
			}
		} catch (Exception ex) {
			ex.printStackTrace();
		}

	}

}
Output
This is Header
This is footer
 Other Interesting Posts
Java 8 Lambda Expression
Java 8 Stream Operations
Java 8 Datetime Conversions
Random Password Generator in Java
Read Each Paragraph of a Word Document
Among the many methods defined in XWPFDocument class, we can use getParagraphs() to read a .docx word document paragraph wise.This method returns a list of all the paragraphs(XWPFParagraph) of a word document. Again the XWPFParagraph has many utils method defined to extract information related to any paragraph such as text alignment, style associated with the paragrpahs.
To have more control over the text reading of a word document,each paragraph is again divided into multiple runs. Run defines a region of text with a common set of properties.Following is an example to read paragraphs from a .docx word document.
ParagraphReader.java
public class ParagraphReader {

	public static void main(String[] args) {
		try {
			FileInputStream fis = new FileInputStream("test.docx");
			XWPFDocument xdoc = new XWPFDocument(OPCPackage.open(fis));

			List paragraphList = xdoc.getParagraphs();

			for (XWPFParagraph paragraph : paragraphList) {

				System.out.println(paragraph.getText());
				System.out.println(paragraph.getAlignment());
				System.out.print(paragraph.getRuns().size());
				System.out.println(paragraph.getStyle());

				// Returns numbering format for this paragraph, eg bullet or lowerLetter.
				System.out.println(paragraph.getNumFmt());
				System.out.println(paragraph.getAlignment());

				System.out.println(paragraph.isWordWrapped());

				System.out.println("********************************************************************");
			}
		} catch (Exception ex) {
			ex.printStackTrace();
		}
	}
}
Reading Tables from Word Document
Following is an example to read tables present in a word document. It will print all the text rows wise.
TableReader.java
public class TableReader {

	public static void main(String[] args) {
		try {
			FileInputStream fis = new FileInputStream("test.docx");
			XWPFDocument xdoc = new XWPFDocument(OPCPackage.open(fis));
			Iterator bodyElementIterator = xdoc.getBodyElementsIterator();
			while (bodyElementIterator.hasNext()) {
				IBodyElement element = bodyElementIterator.next();

				if ("TABLE".equalsIgnoreCase(element.getElementType().name())) {
					List tableList = element.getBody().getTables();
					for (XWPFTable table : tableList) {
						System.out.println("Total Number of Rows of Table:" + table.getNumberOfRows());
						for (int i = 0; i < table.getRows().size(); i++) {

							for (int j = 0; j < table.getRow(i).getTableCells().size(); j++) {
								System.out.println(table.getRow(i).getCell(j).getText());
							}
						}
					}
				}
			}
		} catch (Exception ex) {
			ex.printStackTrace();
		}
	}
}
Reading Styles from Word Document
Styles are associated with runs of a paragraph. There are many methods available in the XWPFRun class to identify the styles associated with the text.There are methods to identify boldness, highlighted words, capitalized words etc.
StyleReader.java
public class StyleReader {

	public static void main(String[] args) {
		try {
			FileInputStream fis = new FileInputStream("test.docx");
			XWPFDocument xdoc = new XWPFDocument(OPCPackage.open(fis));

			List paragraphList = xdoc.getParagraphs();

			for (XWPFParagraph paragraph : paragraphList) {

				for (XWPFRun rn : paragraph.getRuns()) {

					System.out.println(rn.isBold());
					System.out.println(rn.isHighlighted());
					System.out.println(rn.isCapitalized());
					System.out.println(rn.getFontSize());
				}

				System.out.println("********************************************************************");
			}
		} catch (Exception ex) {
			ex.printStackTrace();
		}

	}

}
Reading Image from Word Document
Following is an example to read image files from a word document.
public class ImageReader {

	public static void main(String[] args) {

		try {
			FileInputStream fis = new FileInputStream("test.docx");
			XWPFDocument xdoc = new XWPFDocument(OPCPackage.open(fis));
			List pic = xdoc.getAllPictures();
			if (!pic.isEmpty()) {
				System.out.print(pic.get(0).getPictureType());
				System.out.print(pic.get(0).getData());
			}

		} catch (Exception ex) {
			ex.printStackTrace();
		}
	}

}
Conclusion
I hope this article served you that you were looking for. If you have anything that you want to add or share then please share it below in the comment section.
Download source
1. Обзор
Apache POI
— это библиотека Java для работы с различными форматами файлов на основе стандартов Office Open XML (OOXML) и формата Microsoft OLE 2 Compound Document (OLE2).
В этом руководстве рассматривается поддержка
Apache POI для Microsoft Word
, наиболее часто используемого формата файлов Office. В нем рассматриваются шаги, необходимые для форматирования и создания файла MS Word, и способы синтаксического анализа этого файла.
2. Зависимости Maven
Единственная зависимость, которая требуется для Apache POI для обработки файлов MS Word:
<dependency>
    <groupId>org.apache.poi</groupId>
    <artifactId>poi-ooxml</artifactId>
    <version>3.15</version>
</dependency>
Пожалуйста, нажмите
here
для последней версия этого артефакта.
3. Подготовка
Давайте теперь рассмотрим некоторые элементы, используемые для облегчения создания файла MS Word.
3.1. Файлы ресурсов
Мы соберем содержимое трех текстовых файлов и запишем их в файл MS Word с именем
rest-with-spring.docx
.
Кроме того, файл
logo-leaf.png
используется для вставки изображения в этот новый файл. Все эти файлы существуют в пути к классам и представлены несколькими статическими переменными:
public static String logo = "logo-leaf.png";
public static String paragraph1 = "poi-word-para1.txt";
public static String paragraph2 = "poi-word-para2.txt";
public static String paragraph3 = "poi-word-para3.txt";
public static String output = "rest-with-spring.docx";
Для тех, кому интересно, содержимое этих файлов ресурсов в репозитории, чья ссылка приведена в последнем разделе этого урока, извлечено из ссылки:/rest-with-spring-course? Utm__source = blog
3.2. Вспомогательный метод
Основной метод, состоящий из логики, используемой для создания файла MS Word, который описан в следующем разделе, использует вспомогательный метод:
public String convertTextFileToString(String fileName) {
    try (Stream<String> stream
      = Files.lines(Paths.get(ClassLoader.getSystemResource(fileName).toURI()))) {

        return stream.collect(Collectors.joining(" "));
    } catch (IOException | URISyntaxException e) {
        return null;
    }
}
Этот метод извлекает содержимое, содержащееся в текстовом файле, расположенном в пути к классам, имя которого является переданным аргументом
String
. Затем он объединяет строки в этом файле и возвращает присоединяющуюся
String
.
4. Создание файлов MS Word
В этом разделе приведены инструкции по форматированию и созданию файла Microsoft Word. Прежде чем работать с любой частью файла, нам нужно иметь экземпляр
XWPFDocument
XWPFDocument document = new XWPFDocument();
4.1. Форматирование заголовка и субтитров
Чтобы создать заголовок, нам нужно сначала создать экземпляр класса
XWPFParagraph
и установить выравнивание для нового объекта:
XWPFParagraph title = document.createParagraph();
title.setAlignment(ParagraphAlignment.CENTER);
Содержимое абзаца должно быть заключено в объект
XWPFRun
.
Мы можем настроить этот объект, чтобы установить текстовое значение и связанные с ним стили:
XWPFRun titleRun = title.createRun();
titleRun.setText("Build Your REST API with Spring");
titleRun.setColor("009933");
titleRun.setBold(true);
titleRun.setFontFamily("Courier");
titleRun.setFontSize(20);
Нужно уметь определять цели set-методов из их имен.
Аналогичным образом мы создаем экземпляр
XWPFParagraph
, содержащий субтитры:
XWPFParagraph subTitle = document.createParagraph();
subTitle.setAlignment(ParagraphAlignment.CENTER);
Давайте также отформатируем субтитры:
XWPFRun subTitleRun = subTitle.createRun();
subTitleRun.setText("from HTTP fundamentals to API Mastery");
subTitleRun.setColor("00CC44");
subTitleRun.setFontFamily("Courier");
subTitleRun.setFontSize(16);
subTitleRun.setTextPosition(20);
subTitleRun.setUnderline(UnderlinePatterns.DOT__DOT__DASH);
Метод
setTextPosition
устанавливает расстояние между субтитрами и последующим изображением, а
setUnderline
определяет шаблон подчеркивания.
Обратите внимание, что мы жестко закодировали содержимое заголовка и подзаголовка, так как эти операторы слишком короткие, чтобы оправдать использование вспомогательного метода.
4.2. Вставка изображения
Изображение также необходимо обернуть в экземпляр
XWPFParagraph
. Мы хотим, чтобы изображение располагалось по центру по горизонтали и помещалось под субтитрами, поэтому ниже приведенный выше код должен содержать следующий фрагмент:
XWPFParagraph image = document.createParagraph();
image.setAlignment(ParagraphAlignment.CENTER);
Вот как установить расстояние между этим изображением и текстом под ним:
XWPFRun imageRun = image.createRun();
imageRun.setTextPosition(20);
Изображение берется из файла на пути к классам, а затем вставляется в файл MS Word с указанными размерами:
Path imagePath = Paths.get(ClassLoader.getSystemResource(logo).toURI());
imageRun.addPicture(Files.newInputStream(imagePath),
  XWPFDocument.PICTURE__TYPE__PNG, imagePath.getFileName().toString(),
  Units.toEMU(50), Units.toEMU(50));
4.3. Форматирование абзацев
Вот как мы создаем первый абзац с содержимым, взятым из файла
poi-word-para1.txt
:
XWPFParagraph para1 = document.createParagraph();
para1.setAlignment(ParagraphAlignment.BOTH);
String string1 = convertTextFileToString(paragraph1);
XWPFRun para1Run = para1.createRun();
para1Run.setText(string1);
Очевидно, что создание абзаца похоже на создание заголовка или подзаголовка. Единственным отличием здесь является использование вспомогательного метода вместо жестко закодированных строк.
Аналогичным образом мы можем создать два других абзаца, используя содержимое файлов
poi-word-para2.txt
и
poi-word-para3.txt
:
XWPFParagraph para2 = document.createParagraph();
para2.setAlignment(ParagraphAlignment.RIGHT);
String string2 = convertTextFileToString(paragraph2);
XWPFRun para2Run = para2.createRun();
para2Run.setText(string2);
para2Run.setItalic(true);

XWPFParagraph para3 = document.createParagraph();
para3.setAlignment(ParagraphAlignment.LEFT);
String string3 = convertTextFileToString(paragraph3);
XWPFRun para3Run = para3.createRun();
para3Run.setText(string3);
Создание этих трех абзацев практически одинаково, за исключением некоторых стилей, таких как выравнивание или курсив.
4.4. Создание файла MS Word
Теперь мы готовы записать файл Microsoft Word в память из переменной
document
:
FileOutputStream out = new FileOutputStream(output);
document.write(out);
out.close();
document.close();
Все фрагменты кода в этом разделе обернуты в метод с именем
handleSimpleDoc
.
5. Разбор и тестирование
В этом разделе описывается разбор файлов MS Word и проверка результата.
5.1. Подготовка
Мы объявляем статическое поле в тестовом классе:
static WordDocument wordDocument;Это поле используется для ссылки на экземпляр класса, который включает в себя все фрагменты кода, показанные в разделах 3 и 4.
Перед анализом и тестированием нам нужно инициализировать статическую переменную, объявленную выше, и сгенерировать файл
rest-with-spring.docx
в текущем рабочем каталоге, вызвав метод
handleSimpleDoc
:
@BeforeClass
public static void generateMSWordFile() throws Exception {
    WordTest.wordDocument = new WordDocument();
    wordDocument.handleSimpleDoc();
}
Давайте перейдем к последнему шагу: анализ файла MS Word и проверка результата.
5.2. Разбор файла MS Word и проверка
Сначала мы извлекаем содержимое из указанного файла MS Word в каталоге проекта и сохраняем содержимое в
List
из
XWPFParagraph
:
Path msWordPath = Paths.get(WordDocument.output);
XWPFDocument document = new XWPFDocument(Files.newInputStream(msWordPath));
List<XWPFParagraph> paragraphs = document.getParagraphs();
document.close();
Далее, давайте удостоверимся, что содержание и стиль заголовка такой же, как мы установили ранее:
XWPFParagraph title = paragraphs.get(0);
XWPFRun titleRun = title.getRuns().get(0);

assertEquals("Build Your REST API with Spring", title.getText());
assertEquals("009933", titleRun.getColor());
assertTrue(titleRun.isBold());
assertEquals("Courier", titleRun.getFontFamily());
assertEquals(20, titleRun.getFontSize());
Для простоты мы просто проверяем содержимое других частей файла, не используя стили. Проверка их стилей аналогична тому, что мы сделали с заголовком:
assertEquals("from HTTP fundamentals to API Mastery",
  paragraphs.get(1).getText());
assertEquals("What makes a good API?", paragraphs.get(3).getText());
assertEquals(wordDocument.convertTextFileToString
  (WordDocument.paragraph1), paragraphs.get(4).getText());
assertEquals(wordDocument.convertTextFileToString
  (WordDocument.paragraph2), paragraphs.get(5).getText());
assertEquals(wordDocument.convertTextFileToString
  (WordDocument.paragraph3), paragraphs.get(6).getText());
Теперь мы можем быть уверены, что создание файла
rest-with-spring.docx
прошло успешно.
6. Заключение
В этом руководстве была представлена поддержка Apache POI для формата Microsoft Word. Он прошел шаги, необходимые для создания файла MS Word и проверки его содержимого.
Реализация всех этих примеров и фрагментов кода может быть найдена в
a проекте GitHub
.
package com.knf.dev.demo.helper;
import java.io.ByteArrayInputStream;
import java.io.ByteArrayOutputStream;
import java.io.FileInputStream;
import java.io.FileNotFoundException;
import java.io.IOException;
import org.apache.poi.openxml4j.exceptions.InvalidFormatException;
import org.apache.poi.util.Units;
import org.apache.poi.xwpf.usermodel.Document;
import org.apache.poi.xwpf.usermodel.ParagraphAlignment;
import org.apache.poi.xwpf.usermodel.XWPFDocument;
import org.apache.poi.xwpf.usermodel.XWPFParagraph;
import org.apache.poi.xwpf.usermodel.XWPFRun;
import org.apache.poi.xwpf.usermodel.XWPFTable;
import org.apache.poi.xwpf.usermodel.XWPFTableRow;
public class WordHelper {
static String imgFile = "/home/user/Downloads/KnowledgeFactory-master"
+ "/springboot-microsoft-word"
+ "/src/main/resources/spring.png";
public static ByteArrayInputStream generateWord()
throws FileNotFoundException, IOException,
InvalidFormatException {
try (XWPFDocument doc = new XWPFDocument()) {
XWPFParagraph p1 = doc.createParagraph();
p1.setAlignment(ParagraphAlignment.CENTER);
// Set Text to Bold and font size to 22 for first paragraph
XWPFRun r1 = p1.createRun();
r1.setBold(true);
r1.setItalic(true);
r1.setFontSize(22);
r1.setText("Spring Boot + Apache POI Example");
r1.setFontFamily("Courier");
r1.setColor("008000");
r1.addBreak();
XWPFParagraph p2 = doc.createParagraph();
// Set color for second paragraph
XWPFRun r2 = p2.createRun();
r2.setText("Spring Boot + Apache POI Example");
r2.setColor("FF5733");
r2.setEmbossed(true);
r2.setStrikeThrough(true);
r2.addBreak();
r2.addBreak();
XWPFParagraph p3 = doc.createParagraph();
p3.setAlignment(ParagraphAlignment.CENTER);
XWPFRun r3 = p3.createRun();
r3.setBold(true);
r3.setItalic(true);
r3.setFontSize(22);
r3.setText("Table");
r3.setFontFamily("Arial");
XWPFTable table = doc.createTable();
// Creating first Row
XWPFTableRow row1 = table.getRow(0);
row1.getCell(0).setText("Java, Scala");
row1.addNewTableCell().setText("PHP, Flask");
row1.addNewTableCell().setText("Ruby, Rails");
// Creating second Row
XWPFTableRow row2 = table.createRow();
row2.getCell(0).setText("C, C ++");
row2.getCell(1).setText("Python, Kotlin");
row2.getCell(2).setText("Android, React");
// add png image
XWPFRun r4 = doc.createParagraph().createRun();
r4.addBreak();
XWPFParagraph p = doc.createParagraph();
XWPFRun r = p.createRun();
try (FileInputStream is = new FileInputStream(imgFile)) {
r.addPicture(is, Document.PICTURE_TYPE_PNG, imgFile,
Units.toEMU(500), Units.toEMU(200));
}
ByteArrayOutputStream b = new ByteArrayOutputStream();
doc.write(b);
return new ByteArrayInputStream(b.toByteArray());
}
}
}