
You can create alternative text (Alt text) for shapes, pictures, charts, SmartArt graphics, or other objects in your Microsoft 365 documents. Alt text helps people with visual disabilities understand pictures and other graphical content. When someone using a screen reader comes across a picture in a document, they will hear the alt text describing the picture; without alt text, they will only know they’ve reached a picture without knowing what the picture shows.
Use the procedures in this article to learn how to add alt text to a shape, picture, chart, SmartArt graphic, or other graphical objects.
To learn how to write alt text, go to Everything you need to know to write effective alt text.
In this topic
-
Excel for Microsoft 365, Outlook for Microsoft 365, PowerPoint for Microsoft 365, and Word for Microsoft 365
-
Excel 2019, Outlook 2019, PowerPoint 2019, and Word 2019
-
Excel 2016/2013, Outlook 2016/2013, PowerPoint 2016/2013, and Word 2016/2013
-
Excel 2010, Outlook 2010, PowerPoint 2010, and Word 2010
Excel for Microsoft 365, Outlook for Microsoft 365, PowerPoint for Microsoft 365, and Word for Microsoft 365
Add alt text
-
Do one of the following:
-
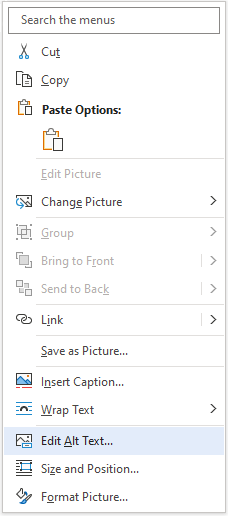
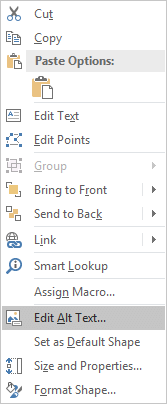
Right-click the object and select Edit Alt Text.

-
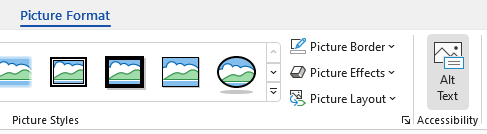
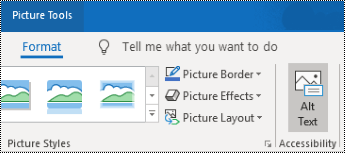
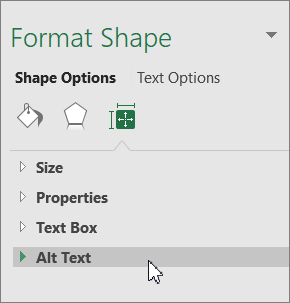
Select the object and then select the format menu for the object, for example, Picture Format. Select Alt Text.
Note: To add alt text to the entire SmartArt graphic or chart, click the border of the SmartArt graphic or chart, and not an individual shape or piece.
-
-
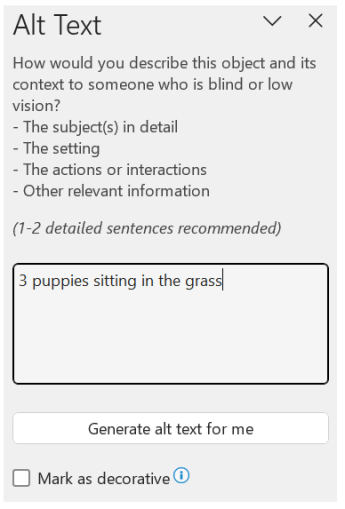
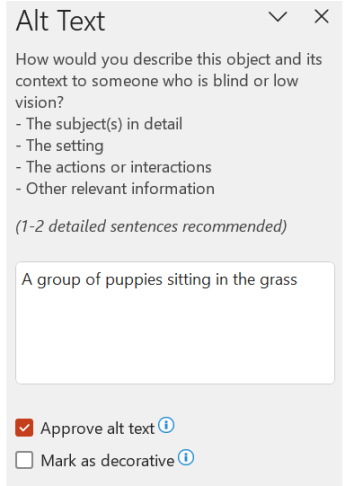
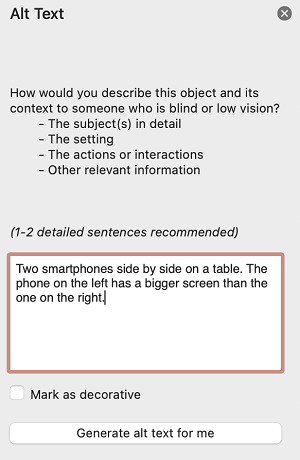
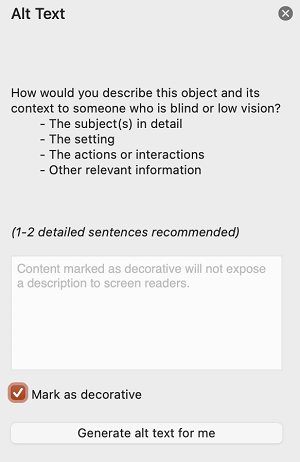
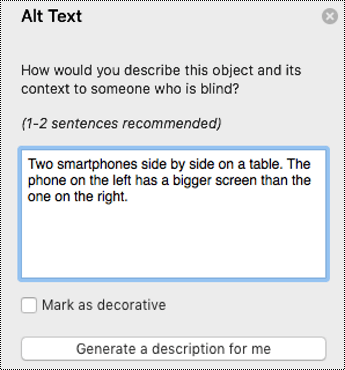
In the Alt Text pane, type 1-2 sentences in the text box to describe the object and its context to someone who cannot see it.
Mark visuals as decorative
If your visuals are purely decorative and add visual interest but aren’t informative, you can mark them as such without needing to write any alt text. Examples of objects that should be marked as decorative are stylistic borders. People who use screen readers will hear that these objects are decorative so they know they aren’t missing any important information. You can mark your visuals as decorative in Excel, PowerPoint, and Word.
-
To open the Alt Text pane, do one of the following:
-
Right-click an image, and then select Edit Alt Text.
-
Select an image, select Format > Alt Text.
-
-
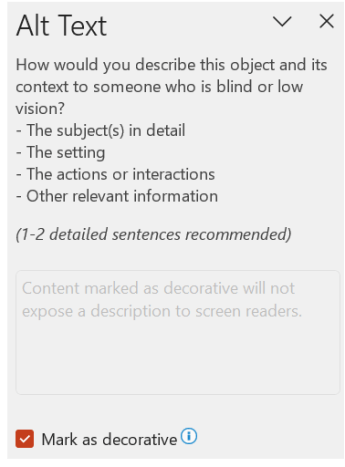
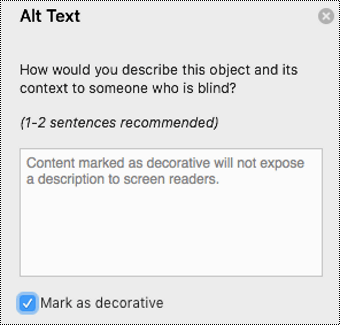
Select the Mark as decorative checkbox. The text entry field becomes grayed out.
Toggle Automatic Alt Text on and off
If you don’t want automatically generated alt text to be added to inserted pictures, you can turn off the automatic alt text option. If you change your mind later, you can just as easily turn it back on.
-
Select File > Options > Accessibility.
-
In the Automatic Alt Text section, select or unselect the Automatically generate alt text for me option, and then select OK.
Approve the automatic alt text
You can approve the auto-generated alt text in Microsoft 365.
-
If the alt text is satisfactory, select the Approve alt text checkbox.
Go to top
Excel 2019, Outlook 2019, PowerPoint 2019, and Word 2019
Add alt text
-
Do one of the following:
-
Right-click the object and select Edit Alt Text.
-
Select the object. Select Format > Alt Text.
Note: To add alt text to the entire SmartArt graphic or chart, click the border of the SmartArt graphic or chart, and not an individual shape or piece.
-
-
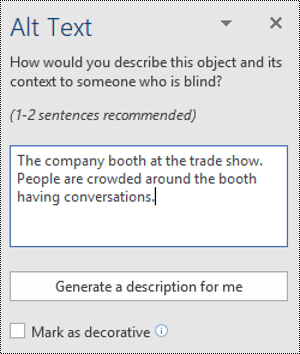
In the Alt Text pane, type 1-2 sentences in the text box to describe the object and its context to someone who cannot see it.
Tip: Save time and add an alt text generated by the system to the object. In the Alt Text pane, select Generate a description for me. In the Make Office work smarter for you dialog box, select Turn on. Then edit the automatic alt text to better suit the content.
Mark visuals as decorative
If your visuals are purely decorative and add visual interest but aren’t informative, you can mark them as such without needing to write any alt text. Examples of objects that should be marked as decorative are stylistic borders. People who use screen readers will hear that these objects are decorative so they know they aren’t missing any important information.
-
To open the Alt Text pane, do one of the following:
-
Right-click an image, and then select Edit Alt Text.
-
Select an image, select Format > Alt Text.
-
-
Select the Decorative checkbox. The text entry field becomes grayed out.

Go to top
Excel 2016/2013, Outlook 2016/2013, PowerPoint 2016/2013, and Word 2016/2013
-
Do one of the following:
-
For a shape, picture, chart, SmartArt graphic, or other object, right-click the object, click Format Object, Format Picture, Format Chart Area, or other, and then click Alt Text.
Note: The pane where you click Alt Text is dynamic and the title and lists change depending on the object you click.
To add alt text to the entire SmartArt graphic or chart, click the border of the SmartArt graphic or chart, and not an individual shape or piece.
-
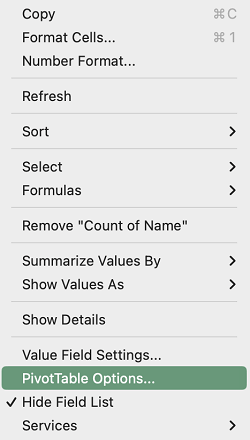
For an Excel PivotTable, right-click it, point to PivotTable Options, and then click Alt Text.
-
-
In the Description box, enter an explanation of the shape, picture, chart, PivotTable, SmartArt graphic, or other object. This box should always be filled in.
Tip: If you don’t want Alt text, either remove the words from the alt text Title and Description boxes, or don’t fill them in.
-
If you want, in the Title box, enter a brief summary. This box should only be filled in if you are entering a detailed or long explanation in the Description box.
Note: Unless you have a complex chart, you will usually want to enter text in just the Description box. When you have complex content to describe, then filling in the Title field is useful so reading the full description is not necessary unless desired.
Notes:
-
If you frequently add alternative text to shapes, pictures, charts, SmartArt graphics, or other objects, you can add the Alt Text command to the Quick Access Toolbar to create a shortcut to it.
-
To use the Alt Text command on the Quick Access Toolbar, select the shape, picture, chart, SmartArt graphic, or other object, click the toolbar button, and then add your alternative text.
-
In the upper-left corner above the ribbon, click Customize Quick Access Toolbar
. -
Click More Commands > Choose commands from > Commands Not in the Ribbon.
-
Click Alt Text > Add.
 .
.Go to top
Excel 2010, Outlook 2010, PowerPoint 2010, and Word 2010
-
Do one of the following:
-
For a shape, picture, chart, SmartArt graphic object, right-click it, click Format object, and then click the Alt Text pane.
To add alt text to the entire SmartArt graphic or chart, click the border of the SmartArt graphic or chart, and not an individual shape or piece.
-
For an Excel PivotTable, right-click it, point to PivotTable Options, and then click Alt Text.
-
-
In the Description box, enter an explanation of the shape, picture, chart, PivotTable, SmartArt graphic, or other object. This box should always be filled in.
-
If you want, in the Title box, enter a brief summary. This box should only be filled in if you are entering a detailed or long explanation in the Description box.
Note: Unless you have a complex chart, you will usually want to enter text in just the Description box. When you have complex content to describe, then filling in the Title field is useful so reading the full description is not necessary unless desired.
Notes:
-
If you frequently add alternative text to shapes, pictures, charts, SmartArt graphics, or other objects, you can add the Alt Text command to the Quick Access Toolbar to create a shortcut to it.
-
To use the Alt Text command on the Quick Access Toolbar, select the shape, picture, chart, SmartArt graphic, or other object, click the toolbar button, and then add your alternative text.
-
In the upper-left corner above the ribbon, click Customize Quick Access Toolbar
. -
Click More Commands > Choose commands from > Commands Not in the Ribbon.
-
Click Alt Text > Add.
Go to top
See also
Everything you need to know to write effective Alt Text
Microsoft Office Help & Training
In this topic
-
Excel for Microsoft 365, Outlook for Microsoft 365, PowerPoint for Microsoft 365, and Word for Microsoft 365 for Mac
-
Excel 2019, Outlook 2019, PowerPoint 2019, and Word 2019 for Mac
-
Excel 2016, Outlook 2016, PowerPoint 2016, and Word 2016 for Mac
Excel for Microsoft 365, Outlook for Microsoft 365, PowerPoint for Microsoft 365, and Word for Microsoft 365 for Mac
Add alt text in Excel for Microsoft 365, PowerPoint for Microsoft 365, and Word for Microsoft 365 for Mac
Tips:
-
For audio and video content, in addition to alt text, include closed captioning for people who are deaf or have limited hearing.
-
To enable right-click on your Mac, make sure that the Secondary click option is selected in System Settings.
-
To spell check and correct a word you typed, control-click or right-click the word, and then select an option from the suggested alternatives.
-
Do one of the following:
-
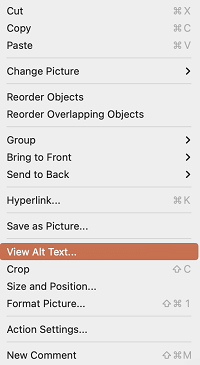
Control-click or right-click the object, and then select View Alt Text…. The Alt Text pane opens.
-
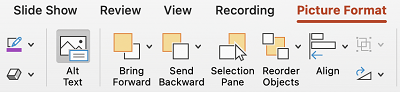
Select an object. In the ribbon, select the object’s Format tab, and then select Alt Text.
Note: To add alt text to the entire SmartArt graphic or chart, click the border of the SmartArt graphic or chart, and not an individual shape or piece.
-
-
In the Alt Text pane, type 1-2 sentences in the text box to describe the object and its context to someone who cannot see it.
Add alt text in Outlook for Microsoft 365 for Mac
-
Control-click or right-click the object and select Edit Alt Text…. The Alt Text pane opens.
Note: To add alt text to the entire SmartArt graphic or chart, click the border of the SmartArt graphic or chart, and not an individual shape or piece.
-
In the Alt Text pane, type 1-2 sentences in the text box to describe the object and its context to someone who cannot see it.

Add alt text to an Excel PivotTable
-
Control-click or right-click a PivotTable, and then select PivotTable Options….
-
In the PivotTable Options… dialog box, select Alt Text.
-
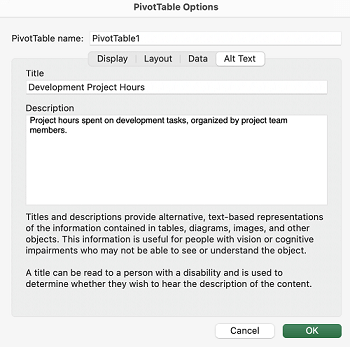
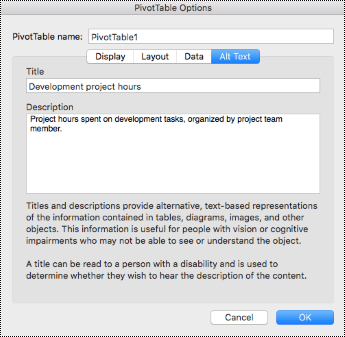
In the Alt Text tab, type a title for the PivotTable in the Title text box.
-
In the Description text box, type 1-2 sentences to describe the table and its context to someone who cannot see it. When you’re done, select OK.
Mark visuals as decorative
If your visuals are purely decorative and add visual interest but aren’t informative, you can mark them as such without needing to write any alt text. Examples of objects that should be marked as decorative are stylistic borders. People using screen readers will hear that these objects are decorative so they know they aren’t missing any important information. You can mark your visuals as decorative in Excel, PowerPoint, and Word.
-
To open the Alt Text pane, do one of the following:
-
Control-click or right-click an image, and then select View Alt Text.
-
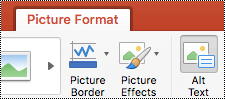
Select an image, and then select Picture Format > Alt Text.
-
-
Select the Mark as decorative checkbox. The text entry field becomes grayed out.
Toggle automatic alt text on and off
If you don’t want automatically generated alt text to be added to inserted pictures, you can turn off the automatic alt text option in PowerPoint and Word. If you change your mind later, you can as easily turn it back on.
-
Press Command+Comma (,). The app preferences dialog box opens.
-
Select Accessibility, and then select or unselect the Automatically generate alt text for me checkbox.
Go to top
Excel 2019, Outlook 2019, PowerPoint 2019, and Word 2019 for Mac
Add alt text
-
Do one of the following:
-
Control-click the object and select Edit Alt Text…. The Alt Text pane opens.
-
Select an object. In the ribbon, select the object’s Format tab, and then select Alt Text.
Note: To add alt text to the entire SmartArt graphic or chart, click the border of the SmartArt graphic or chart, and not an individual shape or piece.
-
-
In the Alt Text pane, type 1-2 sentences in the text box to describe the object and its context to someone who cannot see it.
Tip: Save time and add an alt text generated by the system to the object. In the Alt Text pane, select Generate a description for me. In the Use Intelligent Services? dialog box, select Turn on.

Add alt text to an Excel PivotTable
-
Control-click a PivotTable, and select PivotTable Options….
-
In the PivotTable Options… dialog box, select Alt Text.
-
In the Alt Text tab, type a title for the PivotTable in the Title text box.
-
In the Description text box, type 1-2 sentences to describe the table and its context to someone who cannot see it. When you’re done, select OK.
Mark visuals as decorative
If your visuals are purely decorative and add visual interest but aren’t informative, you can mark them as such without needing to write any alt text. Examples of objects that should be marked as decorative are stylistic borders. People using screen readers will hear that these objects are decorative so they know they aren’t missing any important information. You can mark your visuals as decorative in Excel, PowerPoint, and Word.
-
To open the Alt Text pane, do one of the following:
-
Right-click an image, and then select Edit Alt Text.
-
Select an image, select Format > Alt Text.
-
-
Select the Decorative checkbox. The text entry field becomes grayed out.
Go to top
Excel 2016, Outlook 2016, PowerPoint 2016, and Word 2016 for Mac
-
Do one of the following:
-
For a shape, picture, chart, SmartArt graphic, or other object, right-click the object, click Format Object, Format Picture, Format Chart Area, or other, and then click Alt Text.
Note: The pane where you click Alt Text is dynamic and the title and lists change depending on the object you click.
To add alt text to the entire SmartArt graphic or chart, click the border of theSmartArt graphic or chart, and not an individual shape or piece.
-
For an Excel PivotTable, right-click it, point to PivotTable Options, and then click Alt Text.
-
-
In the Description box, enter an explanation of the shape, picture, chart, PivotTable, SmartArt graphic, or other object. This box should always be filled in.
Tip: If you don’t want Alt text, either remove the words from the alt text Title and Description boxes, or don’t fill them in.
-
If you want, in the Title box, enter a brief summary. This box should only be filled in if you are entering a detailed or long explanation in the Description box.
Note: Unless you have a complex chart, you will usually want to enter text in just the Description box. When you have complex content to describe, then filling in the Title field is useful so reading the full description is not necessary unless desired.
Go to top
See also
Everything you need to know to write effective alt text
Microsoft 365 help & learning
Альтернативный текст (альтернативный текст) позволяет программам чтения с экрана захватывать описание объекта и читать его вслух, предоставляя помощь людям с нарушениями зрения. Вот как можно добавить альтернативный текст к объекту в Word.
В Word вы можете добавить альтернативный текст для некоторых объектов, но не для других. Вы можете добавить альтернативный текст к изображениям, фигурам, скриншотам, иконкам, 3D-моделям и даже текстовым полям. Вы не можете добавить альт-текст в SmartArt или диаграммы.
Добавление альтернативного текста к объектам в Word
Хотя программы чтения с экрана — невероятная технология, они не достаточно сложны, чтобы понять, что такое объект без помощи альтернативного текста.
СВЯЗАННЫЕ: Как добавить альтернативный текст в объект в PowerPoint
Чтобы добавить альтернативный текст в Word, откройте документ и выберите объект, к которому вы хотите добавить альтернативный текст.

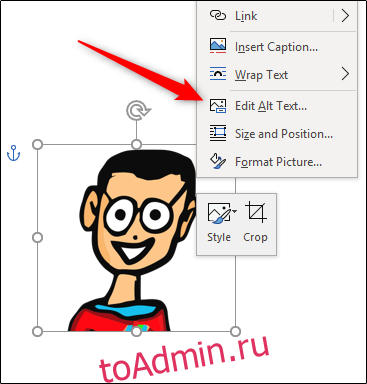
Щелкните правой кнопкой мыши объект. В появившемся меню выберите «Изменить альтернативный текст».

Кроме того, вы можете выбрать опцию «Alt Text» в группе «Доступность» на вкладке «Формат» объекта.

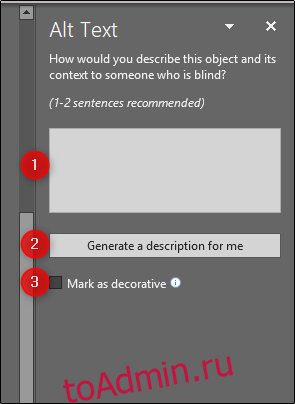
Независимо от того, какой метод вы выберете, вы увидите панель «Alt Text», появившуюся в правой части окна. Есть несколько вещей, которые вы можете сделать здесь. Вы можете вручную ввести альтернативный текст в поле содержимого (1), сделать так, чтобы Word сгенерировал описание для вас (2), или пометить объект как декоративный (3).

Если вы помечаете что-то как декоративное, то это то, что должно быть — объект, который эстетически приятен, но не добавляет никакой ценности фактическому содержанию. Office использует стилистическую границу в качестве примера того, что вы можете отметить как декоративный.
Чтобы пометить что-то как декоративное, установите флажок «Пометить как декоративный». Как только вы это сделаете, вы заметите, что поле, в которое вы вручную вводите альтернативный текст, стало серым и отображает сообщение, сообщающее, что экран читатели не подберут описание.

У вас также есть возможность позволить Word сгенерировать описание выбранного объекта для вас. Выберите опцию «Создать описание для меня».

Word предлагает «Крупный план логотипа» в качестве альтернативного текста для нашего объекта. Хотя это и не правильно, но не очень наглядно, что важно для тех, кто использует программу чтения с экрана.
Если вы предпочитаете вводить альтернативный текст самостоятельно, выберите текстовое поле и введите свое описание. Общее правило для альтернативного текста — держать его кратким и описательным. Вам также не нужно добавлять слова «изображение» или «фотография» перед описанием, поскольку программы чтения с экрана объявляют объект как изображение для вас.

Это все, что нужно для добавления альтернативного текста к вашим изображениям. Если вы хотите запретить Word автоматически генерировать альтернативный текст для вас при вставке нового изображения, вы можете отключить эту функцию. Для этого выберите вкладку «Файл», а затем выберите «Параметры» в нижней части левой панели.

Откроется окно «Параметры слова». На левой панели выберите «Простота доступа».

Затем найдите раздел «Автоматический альтернативный текст» и снимите флажок рядом с «Автоматически генерировать альтернативный текст для меня», который включен по умолчанию. После отмены нажмите «ОК».

Word больше не будет автоматически генерировать альтернативный текст для вновь вставленных изображений.

Alternative text (alt text) allows screen readers to capture the description of an object and read it aloud, providing aid for those with visual impairments. Here’s how to add alt text to an object in Word.
In Word, you can add alt text to some objects, but not others. You can add alt text to images, shapes, screenshots, icons, 3D models, and even text boxes. You cannot add alt-text to SmartArt or charts.
Adding Alt Text to Objects in Word
Though screen readers are incredible technology, they aren’t quite sophisticated enough to understand what an object is without the help of alt text.
RELATED: How to Add Alternative Text to an Object in PowerPoint
To add alt text in Word, open your document and select the object to which you want to add the alternative text.

Right-click the object. From the menu that appears, select “Edit Alt Text.”
Alternatively, you may select the “Alt Text” option found in the “Accessibility” group of the object’s “Format” tab.
Regardless of which method you choose, you will see the “Alt Text” pane appear on the right-hand side of the window. There are a few things you can do here. You can manually type the alt text into the content box (1), have Word generate a description for you (2), or mark the object as decorative (3).
If you mark something as decorative, then that’s what it should be—an object that is aesthetically pleasing but adds no value to the actual content. Office uses a stylistic border as an example of something you might want to mark as decorative.
To mark something as decorative, check the box next to “Mark as decorative.” Once you do, you’ll notice the box in which you would manually enter the alternative text has become grayed out and displays a message letting you know that the screen readers will not pick up the description.
You also have the option of letting Word generate a description of the selected object for you. Select the “Generate a description for me” option to do so.
Word offers “A close up of a logo” as the alt text for our object. While that’s not incorrect, it’s not very descriptive, which is important for someone using a screen reader.
If you’d rather input the alt text yourself, select the text box and type your description. The general rule for alt text is to keep it brief and descriptive. You also don’t need to add the words “image of” or “photo of” before your description, since screen readers announce an object as an image for you.
That’s all there is to adding alt text to your images. If you’d like to prevent Word from automatically generating alt text for you when you insert a new image, you can disable that feature. To do this, select the “File” tab and then select “Options” from the bottom of the left-hand pane.
The “Word Options” window will appear. In the left-hand pane, select “Ease of Access.”
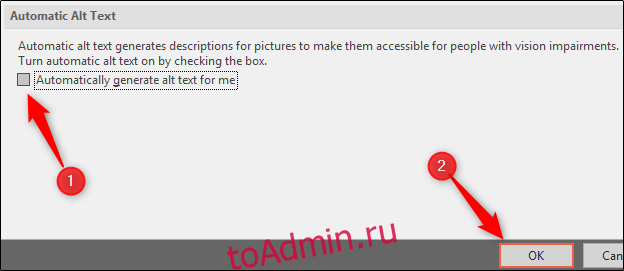
Next, find the “Automatic Alt Text” section and uncheck the box next to “Automatically generate alt text for me,” which is enabled by default. Once unchecked, click “OK.”
Word will now no longer automatically generate alt text for newly inserted images.
READ NEXT
- › How to Create and Update a Table of Figures in Microsoft Word
- › How to Add Alt Text to Images on Facebook
- › What Is Alt Text? Why You Should Use It, and How to Write It
- › How to Insert an Animated GIF into a Word Document
- › How to Make Your Word Document More Accessible to Everyone
- › How to Add Alternative Text to an Object in Google Sheets
- › How to Add Alternative Text to an Object in Microsoft Excel
- › The New NVIDIA GeForce RTX 4070 Is Like an RTX 3080 for $599
How-To Geek is where you turn when you want experts to explain technology. Since we launched in 2006, our articles have been read billions of times. Want to know more?
Альтернативный текст (замещающий текст) позволяет программам чтения с экрана записывать описание объекта и читать его вслух, оказывая помощь людям с нарушениями зрения. Вот как добавить замещающий текст к объекту в Word.
В Word вы можете добавлять замещающий текст к одним объектам, но не к другим. Вы можете добавлять замещающий текст к изображениям, фигурам, снимкам экрана, значкам, 3D-моделям и даже текстовым полям. Вы не можете добавлять замещающий текст в SmartArt или диаграммы.
Хотя программы чтения с экрана — невероятная технология, они недостаточно сложны, чтобы понять, что такое объект, без помощи замещающего текста.
Чтобы добавить замещающий текст в Word, откройте документ и выберите объект, к которому вы хотите добавить замещающий текст.
Щелкните объект правой кнопкой мыши. В появившемся меню выберите «Изменить замещающий текст».
Как вариант, вы можете выбрать опцию «Замещающий текст» в группе «Доступность» на вкладке «Формат» объекта.
Независимо от того, какой метод вы выберете, вы увидите панель «Замещающий текст» в правой части окна. Здесь вы можете сделать несколько вещей. Вы можете вручную ввести замещающий текст в поле содержимого (1), попросить Word сгенерировать для вас описание (2) или пометить объект как декоративный (3).
Если вы помечаете что-то как декоративное, то это должно быть то, что должно быть эстетически приятным, но не добавляющим ценности фактическому содержанию. В Office стилистическая рамка используется как пример того, что вы можете отметить как декоративное.
Чтобы отметить что-то как декоративное, установите флажок «Отметить как декоративное». Как только вы это сделаете, вы заметите, что поле, в которое вы должны вручную ввести альтернативный текст, стало серым и отображает сообщение, информирующее вас о том, что программы чтения с экрана не получат описание.
У вас также есть возможность разрешить Word генерировать описание выбранного объекта за вас. Для этого выберите параметр «Создать описание для меня».
Word предлагает «Крупный план логотипа» в качестве альтернативного текста для нашего объекта. Хотя это не неправильно, это не очень наглядно, что важно для тех, кто использует программу чтения с экрана.
Если вы предпочитаете вводить замещающий текст самостоятельно, выделите текстовое поле и введите свое описание. Общее правило для альтернативного текста — сделать его кратким и описательным. Вам также не нужно добавлять слова «изображение» или «фотография» перед описанием, поскольку программы чтения с экрана объявляют объект как изображение для вас.
Это все, что нужно для добавления замещающего текста к вашим изображениям. Если вы хотите, чтобы Word автоматически генерировал замещающий текст при вставке нового изображения, вы можете отключить эту функцию. Для этого выберите вкладку «Файл», а затем выберите «Параметры» в нижней части левой панели.
Появится окно «Параметры Word». На левой панели выберите «Удобство доступа».
Затем найдите раздел «Автоматический замещающий текст» и снимите флажок рядом с «Автоматически создавать замещающий текст для меня», который включен по умолчанию. После снятия флажка нажмите «ОК».
Word больше не будет автоматически генерировать замещающий текст для вновь вставленных изображений.
Images can add context, clarity, and meaning to a document; in other words, images can enhance the accessibility of your document. However, it is essential that you add strong alt text to each image, chart, graph, or other non-text element in your document — otherwise, screen reader users will hear the word «image» but not know what the image is.
Creating alt text in Microsoft Word
- Choose one of the following:
- Select any image and press the Alt Text button in the Format ribbon tab.
- Right-click an image and select Edit Alt Text.The Alt Text pane opens on the right side of the document body
- Describe the image content and context.
- Be accurate and equivalent
Think: what is the meaning that a sighted user gets from this image, in this context? Or, what meaning would be lost if this image disappeared from this page? Use those ideas to write your alt text. - Be succinct, not redundant.
Typically no more than a few words are necessary. Do not provide information that is already in the text surrounding the image. - Omit the phrases «image of …» or «graphic of …» to describe the image.
If the fact that an image is a photograph or illustration, etc. is important, it may be useful to include this in alternative text. Otherwise, screen readers already announce that the item is an image.
- Be accurate and equivalent
Marking an image as «decorative»
Decorative objects add visual interest but aren’t informative (for example, stylistic borders). People using screen readers will hear that these are decorative, so they will know they aren’t missing any important information.
We recommend that you explain the content and context of an image, even if you initially think it is decorative. If it truly carries no meaning, consider removing it entirely.
- Right-click any visual element.
- Select Edit Alt Text. The Alt Text pane opens on the right side of the document body.
- Select the Mark as decorative check box. The text entry field will be grayed out.
Alt text resources
- An Alt Text Decision Tree
A list of questions to help you decide how to craft your alt text - Video (Links to an external site.)Writing Great Alt Text
A lecture by UMN developer Kim Doberstein (July 2019) - WebAIM: Alternative Text
An authoritative article about alternative text

How to Add Alternative Text to an Object in Microsoft Word.
Alternative text (alternative text) allows screen readers to capture an object’s description and read it aloud, providing help to the visually impaired. Here’s how to add alt text to an object in Word.
In Word, you can add alt text to some objects but not to others. You can add alt text to images, shapes, screenshots, icons, 3D models, and even text boxes. You can’t add alt text to SmartArt or graphics.
Add alt text to objects in Word
While screen readers are amazing technology, they aren’t sophisticated enough to understand what an object is without the help of alt text.

To add alt text in Word, open your document and select the object to which you want to add alt text.
Right click on the object. In the menu that appears, select “Edit Alt Text”.

Alternatively, you can select the “Alt Text” option found in the “Accessibility” group of the “Format” tab of the object.
Regardless of which method you choose, you will see the “Alt Text” panel appear on the right side of the window. There are a few things you can do here. You can manually type alternative text in the content box (1), have Word generate a description for you (2), or mark the object as decorative (3).

If you mark something as decorative, then that’s what it should be: an object that is aesthetically pleasing but adds no value to the actual content. Office uses a stylistic border as an example of something you might want to mark as decorative.
To mark something as decorative, check the box next to “Mark as decorative.” Once you do, you’ll notice that the box where you would manually enter alt text has been grayed out and displays a message letting you know that screen readers won’t pick up the description.
You also have the option of allowing Word to generate a description of the selected object for you. Select the “Generate a description for me” option to do so.
Word offers “A close up of a logo” as alt text for our object. While that’s not wrong, it’s not very descriptive, which is important for someone using a screen reader.
If you prefer to enter the alt text yourself, select the text box and type your description. The general rule of thumb for alt text is to keep it short and descriptive. You also don’t need to add the words “image of” or “photo of” before your description, since screen readers announce an object as an image to you.
That’s all there is to adding alt text to your images. If you want to prevent Word from automatically generating alt text when you insert a new picture, you can disable that feature. To do this, select the “File” tab and then select “Options” at the bottom of the left-hand panel.

The “Word Options” window will appear. In the left panel, select “Ease of Access”.
Next, find the “Automatic alt text” section and uncheck the box next to “Automatically generate alt text for me”, which is enabled by default. Once unchecked, click “OK”.
Word will no longer automatically generate alt text for newly inserted images.
Alt text is text applied to graphics for audible screen readers to read aloud. Good alt text gives accurate, detailed descriptions of images and charts so that people with visual impairments can understand what’s on the page. This wikiHow will teach you how to add and edit alt text in Word. [1]
-
1
Open your project in Word. You can either open the application from your Start Menu or Applications folder and then click File > Open, or you can right-click the Word file in your file manager and select Open with > Word.
- This method works for Word for Microsoft 365 on Mac and Windows as well as Word 2019 for both Mac and Windows.
-
2
Right click the object. A menu will open at your cursor.
- If you’re using a Mac, you’ll press Control at the same time you click the mouse to perform a right-click.
-
3
Click Edit Alt Text. It’s near the bottom of the menu.
-
4
Add the alt text. In the text field, you can write 1-2 sentences to describe the image and context to someone who can’t see it.
- Close the window and save your document. The added alt text will be saved with the rest of your Word project.[2]
- Close the window and save your document. The added alt text will be saved with the rest of your Word project.[2]


-
1
Open your project in Word. You can either open the application from your Start Menu or Applications folder and then click File > Open, or you can right-click the Word file in your file manager and select Open with > Word.
- This method works for Word 2013 and 2016 for Windows and Mac.
-
2
Right click the object. A menu will open at your cursor.
- If you’re using a Mac, you’ll press Control at the same time you click the mouse to perform a right-click.
-
3
Click Format Object and Alt text. The «Format Object» may change to reflect the object you’re formatting. For example, if you clicked on a shape, this menu option will display «Format Shape» instead.
- Since this menu is so dynamic, the options listed and the display order will most likely change depending on the object you selected.
-
4
Add the alt text. In the Description box, add the explanation of the shape, object, image, or chart.
- Add information in the Title box if you want.
- Close the window and save your document. The added alt text will be saved with the rest of your Word project.[3]


-
1
Open your project in Word. You can either open the application from your Start Menu or Applications folder and then click File > Open, or you can right-click the Word file in your file manager and select Open with > Word.
-
2
Right-click the object with alt text you want to edit. Just like adding alt text, you’ll need to right-click the object to see the menu.
-
3
Click Edit Alt Text. If you’re using an older version than 2019, you’ll click Format Object > Alt text instead.
-
4
Edit the text. You can edit the text that’s in the text field as needed.
- Close the window and save your document. The added alt text will be saved with the rest of your Word project.[4]
- Close the window and save your document. The added alt text will be saved with the rest of your Word project.[4]


Ask a Question
200 characters left
Include your email address to get a message when this question is answered.
Submit
Video
References
About this article
Article SummaryX
1. Open your project in Word.
2. Right click the object.
3. Click Edit Alt Text.
4. Add the alt text.
Did this summary help you?
Thanks to all authors for creating a page that has been read 1,894 times.
Is this article up to date?
In this article, we want to demonstrate you 4 ways to add alternative text to a picture in your Word document.
Now and then, there can be myriad of pictures in a Word document. And to make them more understandable, adding alternative text is a good choice. Therefore, in this post, we will introduce you 4 methods to achieve this task.
Method 1: Format Picture
- Firstly, right click on the target picture and choose “Format Picture” on the contextual menu.

- Next, in “Format Picture” dialog box, click “Alt Text” tab.
- Then add texts in “Title” or “Description” text box.
- Lastly, click “Close”.


By the way, you can’t view the text directly. Instead, you will have to use the above step to go to the “Format Picture” box and click “Alt Text”.
Method 2: Insert Hyperlink
- To begin with, right click on a picture and choose “Hyperlink” this time.

- Then in “Insert Hyperlink” dialog box, click “ScreenTip” to open “Set Hyperlink ScreenTip” box.
- Next add texts and click “OK”.
- Now go back to “Insert Hyperlink” box and enter anything in that text box.
- Finally, click “OK”.


To see the description, you just need to hover cursor over the picture. Here is what it may look like:
Method 3: Use a Content Control
In order to apply this method, you must enable the “Developer” tab first.
- At first, click “File”.
- Then click “Options” to open “Word Options” dialog box.
- Next click “Customize Ribbon” and check the box before “Developer” on the right-most column.
- Lastly, click “OK” to save the change.


Next, let’s take a look at steps to work on a content control.
- First off, click to select the target picture.
- Then click “Developer” tab.
- Next click “Building Block Gallery Content Control” in “Controls” group.

- Now click “Properties” also in “Controls” group.
- In “Content Control Properties” box, input the alternative text in the “Title” text box.
- And click “OK”.


Once you click on the picture, there is the text on its upper-left corner.
Method 4: Insert Picture Caption
- Similarly, right click on a picture.
- Secondly, choose “Insert Caption”.
- And in “Caption” dialog box, input text in “Caption” text box.
- Besides, you are able to choose the position for the caption words.
- Click “OK”.


Below or above the picture, there shall be the caption words.
Comparison of 4 Methods
| Methods | Advantages | Disadvantages |
| Method 1: Format Picture | There is no character limitation for text. | You have to go to the “Format Picture” dialog box to view the text. |
| Method 2: Insert Hyperlink | 1. There is no character limitation for text.
2. You can see alternative texts directly when hovering over a picture. |
There can be other irrelevant texts in the screen tip box. |
| Method 3: Use a Content Control | You can see the text directly while clicking on a picture. | The text character is limited to 64. |
| Method 4: Insert Picture Caption | 1. There is no character limitation for the text.
2. The text is visible on the document sheet, which saves you from clicking. |
Since the alternative text is always visible on the document, it can occupy some space. |
Workarounds to Bypass File Loss
Unfortunately, Word is not immune to errors. And the very truth is it can shut down all of a sudden. We can’t image what an amount of files might get corrupt after it. Thus, we highly recommend all of you who deal with digital data on a regular basis should take time to back up. Otherwise, you will need the assistance of a Word recovery tool.
Author Introduction:
Vera Chen is a data recovery expert in DataNumen, Inc., which is the world leader in data recovery technologies, including tool to fix Excel and pdf repair software products. For more information visit www.datanumen.com
Overview
Individuals who cannot see images in Microsoft Word documents rely on the author to provide alternative text to describe the content of an image. The alternative text used should describe important aspects of the image, but be brief enough to not overburden the user. When a screen reader encounters an image in a Word document, the alternative text will be read out to the user, helping them understand what’s going on in the image.
Note:
If you’re using images in a decorative context and they don’t offer any informative content (for example, a colored separator bar image used between paragraphs of content), alternative text is not required.
Add alternative text to an image
To add alternative text to an image in Word:
- Insert the picture you want to use into the document.
- Right-click the picture, and then, in the menu that pops up, click .
- In the «Format Picture» pane, click .
- Click the arrow next to to expand the alternative text options.
-
In the «Description» field, enter a description of the image.
If you have a detailed image that requires a long description, you may want to enter a brief summary of the description in the «Title» field. This allows users to decide if they need the full description of the image or not. Otherwise, you can leave the «Title» field blank.
- When finished, close the «Format Picture» pane.
 .
.Note:
In the Microsoft 365 version of Word, you can also add alternative text for images by right-clicking the image and clicking . Keep in mind that this option doesn’t provide a title field; for detailed images that may need a title, follow the steps above to add alternative text and a title.
For more about creating alternative text for images, see General guidelines for creating accessible documents.
This is document aqjs in the Knowledge Base.
Last modified on 2022-11-14 14:44:31.