
Word for Microsoft 365 Outlook for Microsoft 365 Word 2021 Outlook 2021 Word 2019 Outlook 2019 Word 2016 Outlook 2016 Word 2013 Outlook 2013 Word 2010 Outlook 2010 Word 2007 Outlook 2007 More…Less
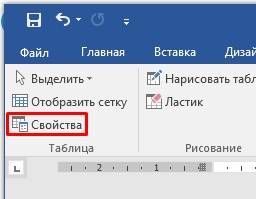
To set or change table options in Word or Outlook, right-click a table and choose Table Properties.
Note: If you want to set properties for a particular row, column, or cell, click in that row, column, or cell before making changes in the Table Properties dialog box.
In this article
-
Table properties
-
Row properties
-
Column properties
-
Cell properties
-
Alt text
Table properties

Click the Table tab to apply settings to your entire table:
-
Under Size, set the table’s overall width by selecting Preferred width and choosing a size. In the Measure in box, choose whether you want to measure the width in inches or a percentage of the page.
-
Under Alignment, choose whether you want to align your table to the left, center, or right of page. If you select Left, you can select an indentation distance in the Indent from Left box.
-
Under Text wrapping, select Around if you want nearby text on your page to wrap around your table; you can make text wrapping more precise by clicking Positioning, and then choosing options in the Table Positioning dialog box. If you don’t want text wrapping, select None.
-
Click Borders and Shading to change the border style, line color, and line width of your table.
-
Click Options to set more table properties, including top and bottom cell margins, cell spacing, and automatic resizing of cell contents.
Top of Page
Row properties
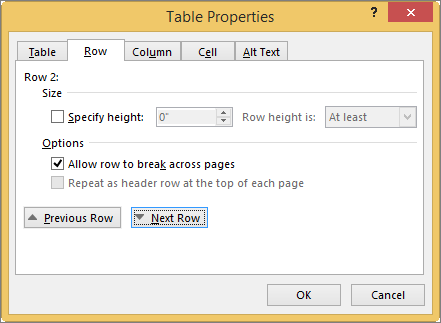
First, click in the row or select the rows you want to change, right-click, choose Table Properties, and then click the Row tab.
-
Under Size, set the row’s height by selecting Preferred height and choosing a size; you can further refine the height by selecting an option in the Row height is box.
-
Under Options, select options for breaking rows across pages or creating header rows.
-
To display the currently selected row at the top of the tab and navigate between rows without leaving the Table Properties dialog box, click Previous Row or Next Row.
Top of Page
Column properties
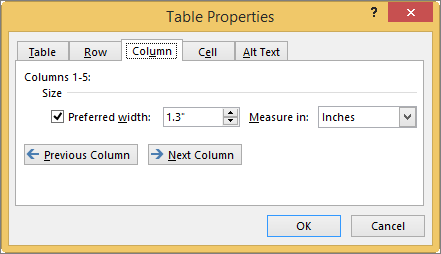
First, click in the column or select the columns you want to change, right-click, choose Table Properties, and then click the Column tab.
-
Under Size, set the column’s width by selecting Preferred width and choosing a size. In the Measure in box, choose whether you want to measure the width in inches or a percentage.
-
To display the currently selected column or columns at the top of the tab and navigate between columns without leaving the Table Properties dialog box, click Previous Column or Next Column.
Top of Page
Cell properties
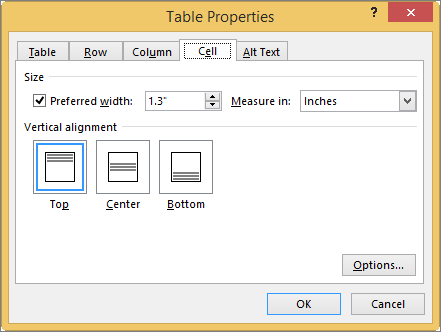
First, click in the cell that you want to change, right-click, choose Table Properties, and then click the Cell tab.
-
Under Size, set the cell’s width by selecting Preferred width and choosing a size. In the Measure in box, choose whether you want to measure the width in inches or a percentage.
-
Under Vertical alignment, choose an alignment option for the cell contents—Top (the default alignment), Center, or Bottom.
-
Click Options to set more cell properties, including top and bottom cell margins and text wrapping and fit options.
Top of Page
Alt text
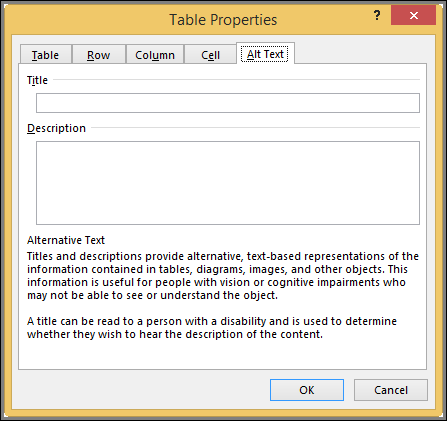
You can create alternative text (alt text) for your table to help people with screen readers understand the content of the table.
-
In the Description box, enter an explanation of the table.
-
In the Title box, enter a brief summary of the table.
Note: Unless you have a complex table, you will usually want to enter text in just the Description box. When you have complex content to describe, filling in the Title field is useful so that reading the full description is not necessary unless desired.
Top of Page
Need more help?
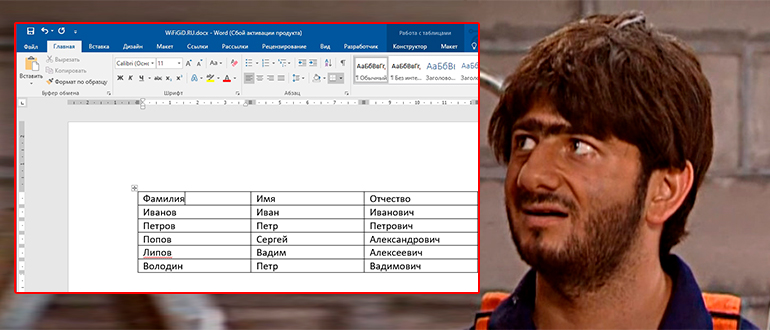
Всем привет на портале WiFiGiD.RU. Сегодня у нас будет интересный урок и мы посмотрим, как можно выровнять текст в таблице и ячейки по ширине в программе Ворд. Для урока я создал обычную таблицу, вы же можете использовать какой-то свой пример. Наша задача сделать нашу табличку красивой. Напомню, что вы можете использовать почти любую версию Microsoft Word.
Содержание
- Изменяем ширину столбцов
- Способ 1: Автоматическое выравнивание
- Способ 2: Панель инструментов
- Способ 3: Ручное выравнивание
- Способ 4: Свойства таблицы
- Выравнивание текста в таблице
- Задать вопрос автору статьи
Изменяем ширину столбцов
Способ 1: Автоматическое выравнивание
Выровнять столбцы в таблице в Ворде можно с помощью специальной встроенной функции – её можно увидеть в контекстном меню при выделении таблицы.
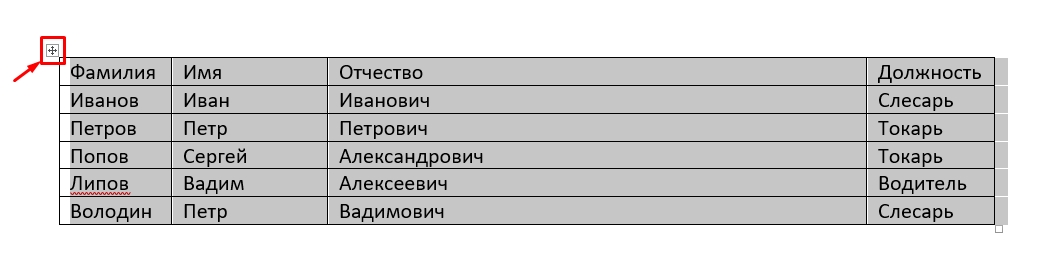
- Полностью выделите таблицу – для этого нажмите по крестику в левом верхнем углу.
- Теперь кликаем правой кнопкой мыши (ПКМ) по табличке и из выпадающего меню выбираем команду «Выровнять ширину столбцов».
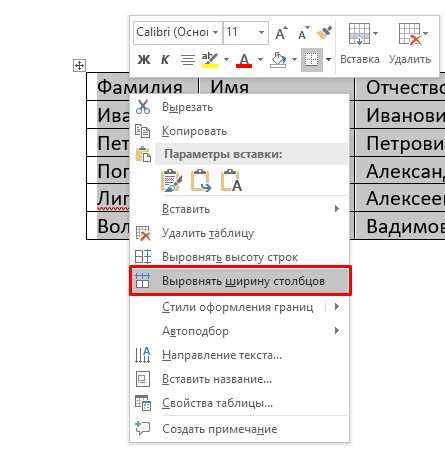
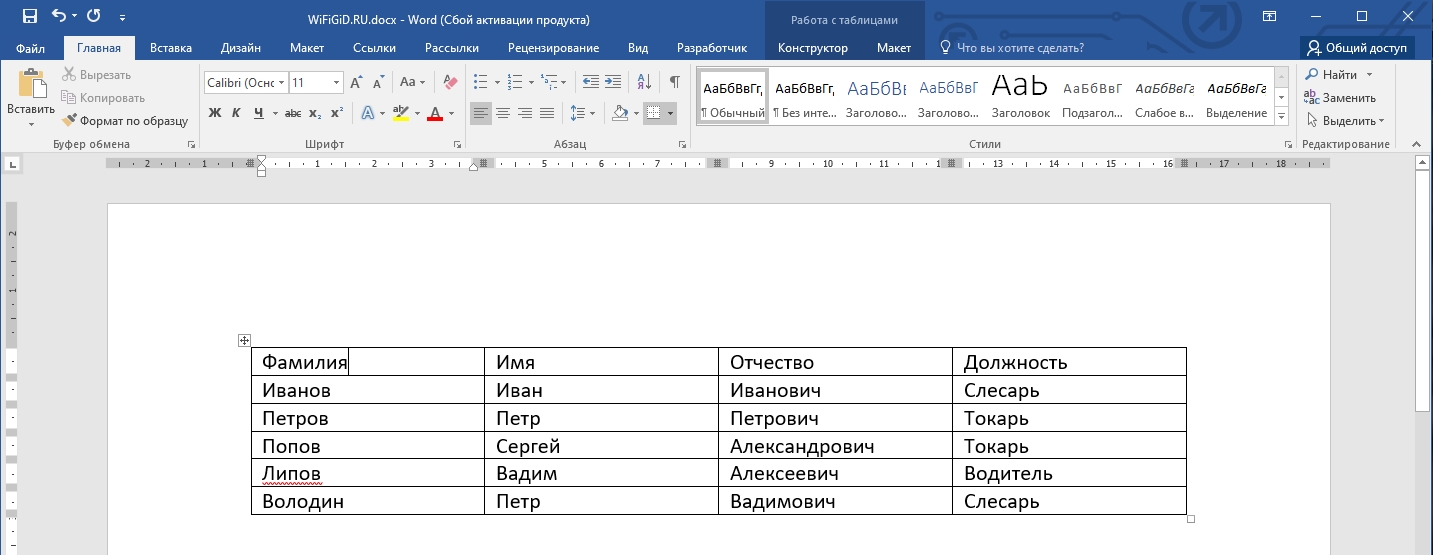
- После этого все столбцы станут равномерной ширины.
Способ 2: Панель инструментов
Кнопка «Выровнять ширину столбцов» также находится на панели инструментов во вкладке «Макет» в разделе «Размер ячеек». Напомню, что перед этим нужно аналогично полностью выделить таблицу.
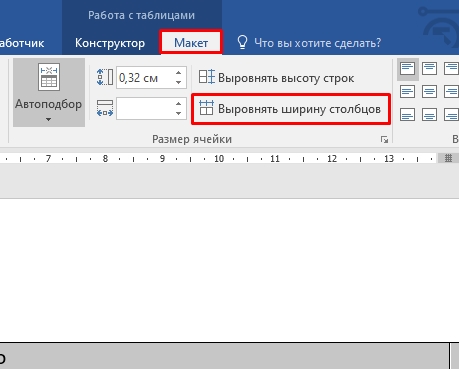
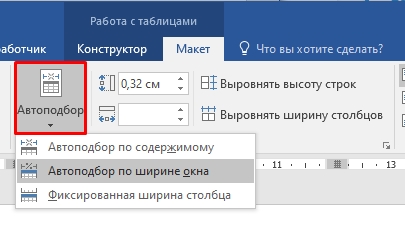
Дополнительно рядом есть пункт «Автоподбор», где можно выровнять ширину всей таблицы по размеру окна или содержимого. Окно в данном случае – это размер рабочей области листа. Размер листа можно посмотреть в белой области на линейке. Можете ради интереса попробовать все представленные варианты.
Читаем – как включить линейку в Word.
Способ 3: Ручное выравнивание
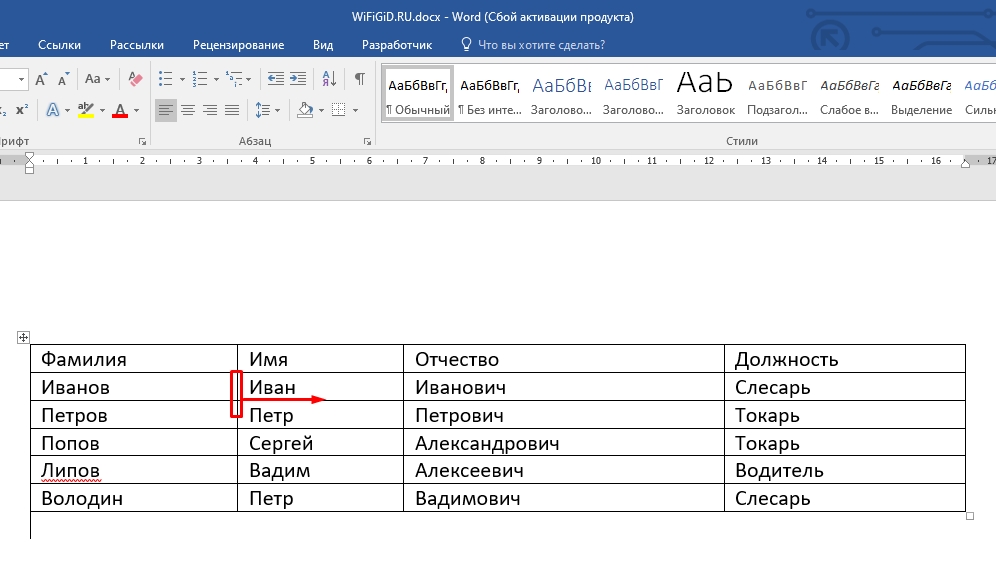
Вы можете вручную на глаз выровнять ячейки в Ворде – чаще всего этим вариантом многие и пользуются. Для того чтобы изменить ширину ячейки, наведите курсор мыши на ребро. Как только стрелка превратится в значок изменения размера, зажимаем левую кнопку мыши и тянем границу влево или вправо. Таким же образом изменяем размер и других граней.
Способ 4: Свойства таблицы
Выровнять ширину столбцов в Ворде можно с помощью свойств выделенной таблицы.
- Выделяем табличку и переходим на вкладку «Макет».
- В разделе «Таблица» переходим в свойства. Также вы можете попасть туда через контекстное меню, нажав ПКМ по самой таблице
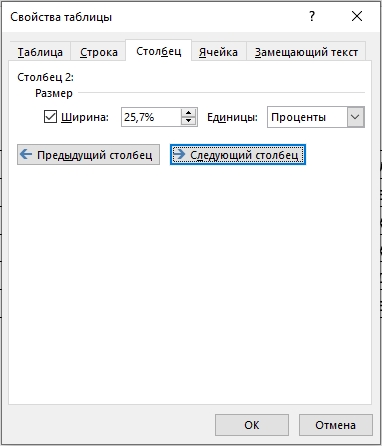
- Если таблица не заполнена, вы можете выставить одинаковый размер всех ячеек. Если же в ней уже есть какие-то данные, то вы можете выставить размер каждого столбца в процентах. Чтобы переключаться между столбцами, используем кнопки ниже. Если вам неудобно использовать «Проценты», вы можете изменить единицы на «Сантиметры».
Выравнивание текста в таблице
В этом главе мы уже поговорим про то, а как выровнять текст в таблице. На самом деле он выравнивается примерно так же как мы это делаем с обычным текстом – то есть используются такие же функции. Процесс достаточно простой:
- Выделяем ячейку или ряд ячеек с текстом, который хотим изменить.
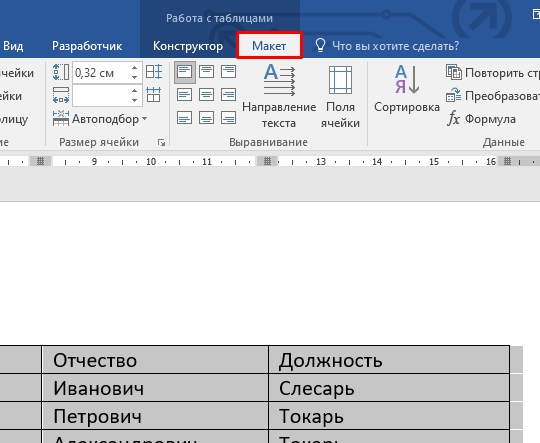
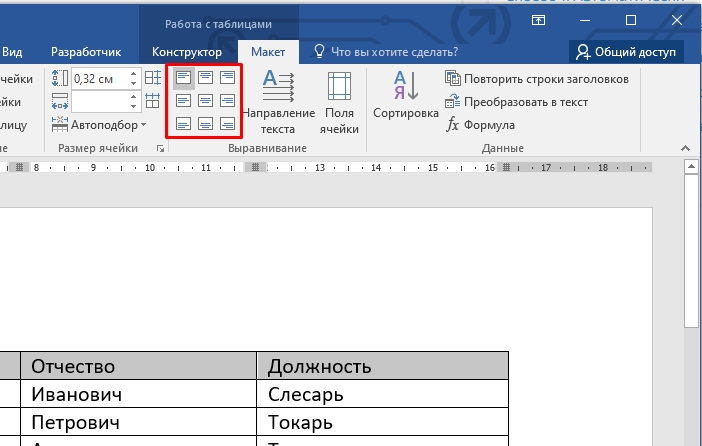
- Переходим на вкладку «Макет».
- Находим раздел «Выравнивание», а в нем используем кнопку, которая нам и нужна. Посмотрите на картинку ниже.
В качестве домашнего задания попробуйте самостоятельно изменить горизонтальное выравнивание текста в отдельных ячейках. Опробуйте каждый из вариантов на вкладке «Макета». Если что-то будет не получаться – можете обратиться в комментариях в самом низу этой статьи.

on
December 21, 2021, 7:41 AM PST
How to control a Word table’s horizontal alignment
When inserting a table in a Word document, you can stick with the default alignment or change it in any number of ways.
We may be compensated by vendors who appear on this page through methods such as affiliate links or sponsored partnerships. This may influence how and where their products appear on our site, but vendors cannot pay to influence the content of our reviews. For more info, visit our Terms of Use page.

Inserting a table in Microsoft Word is a simple task, but the default won’t always be exactly what you want. For instance, the default alignment is offset from the left margin. What if you want the table centered or even flush to the right margin? The good news is that realigning a table is easy. In this article, I’ll show you several ways to align a table the way you want.
I’m using Microsoft 365 on a Windows 10 64-bit system, but you can use earlier versions, and you can align tables in Word Online. You can work with your own file or download the demonstration .docx and .doc files.
SEE: Microsoft 365: A cheat sheet (free PDF) (TechRepublic)
The default table
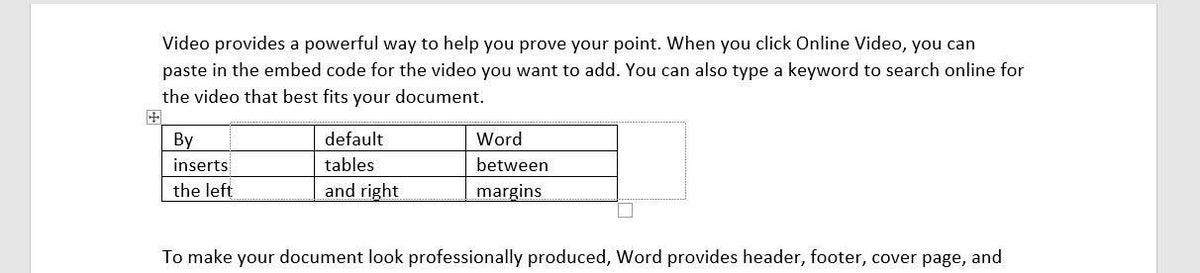
When you insert a table or convert text into a table, Word positions it between the left and right margins (Figure A) – you can easily change this. And, there are several ways you can align a table across the horizontal plane between the left and right margins.
Figure A

The first thing you might want to change is the width. There’s not enough text to fill the cells, and it looks odd. In addition, the readability is low. Your eyes try to take in the entire table at once instead of reading the content. Fortunately, changing the width is easy.
- Click the table to select it. Doing so will display two handles (Figure B): one in the top-left corner and one in the bottom-right corner.
- Hover the mouse over the one at the bottom-right corner and your mouse will turn into a double-arrow.
- Simply drag up and to the left to decrease the width of the table and the width of each cell. Figure C shows the results.
Figure B

Figure C
The resized table is a better fit, and you could easily stop here, if you don’t want it aligned differently.
SEE: Checklist: Securing Windows 10 systems (TechRepublic Premium)
Alignment options
When you have a table that doesn’t spread from the left to the right margin, you might want to align it. You can apply specific alignments or indent the table.
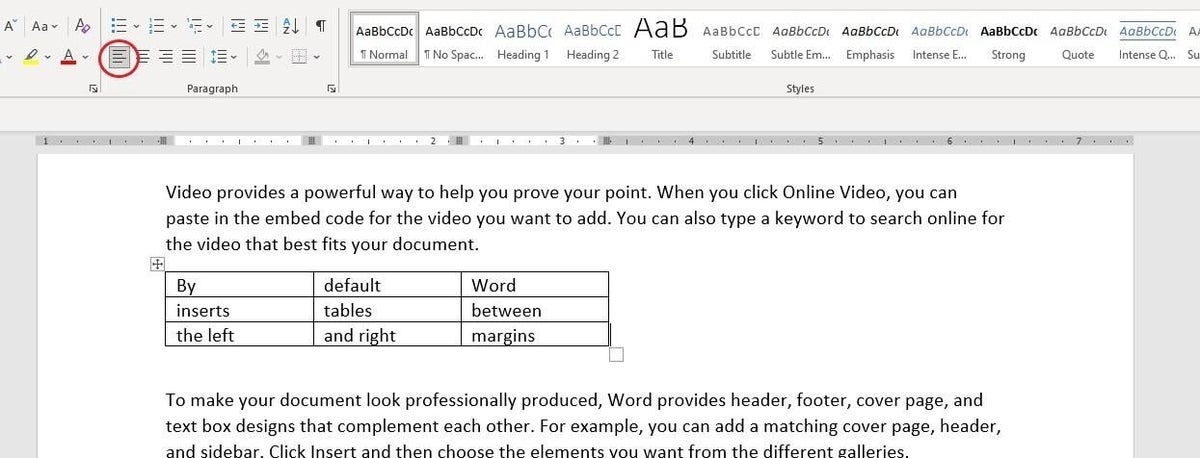
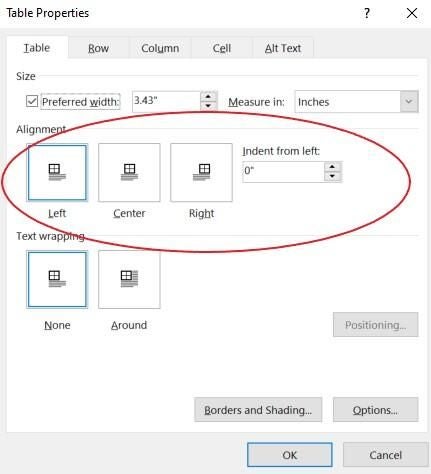
You have three alignments: left, center and right. The default table is aligned to the left margin. You can easily check that by selecting the entire table (not a cell) and viewing the alignment options in the Paragraph group on the Home tab. Figure C (above) shows the Align Left option selected. To align the table, select the table and click one of the other options: Center or Left Align. Using these three options you can quickly and easily align your table to the left, center, or right of the page.
You can also use the Table Properties option to align a table. To access these options, right-click anywhere in the table and choose Table Properties from the resulting submenu. On the Table tab, choose an option from the Alignment section, and click OK. As you can see in Figure D, there are lots of properties, but we’re concerned with only those in the Alignment section. You might want to return later and review all the other options.
Figure D
The final alignment option is Indent From Left. This allows you to easily indent the table from the left margin. It’s the option to use if you need to be precise in that placement. You can do the same thing by dragging the table and using the ruler to snap the table into position (Figure E). Or use the Increase Indent option in the Paragraph group to move the table a half inch at a time.
Figure E
Aligning the content within each cell is just as easy using the Table Properties. On the Table tab, click the Options button to open the Table Options shown in Figure F. The Default Cell Margins section lets you change the size of all four margins. By default, the Automatically Resize To Fit Contents option is selected. To center or right align content in the cell, use the alignment options in the Paragraph group. However, you must select the text rather than the entire table; otherwise, clicking an option will align the table and not the content within the cells. Figure G shows the result of selecting the content (not the table) and clicking Right Align.
Figure F
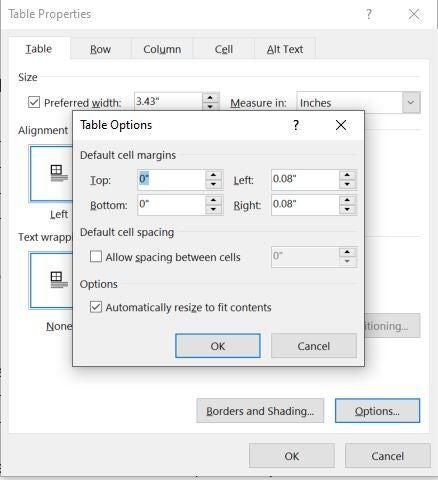
Figure G

SEE: Windows 10: Lists of vocal commands for speech recognition and dictation (free PDF) (TechRepublic)
Word Online
Aligning is a bit different in Word Online, but still simple. With the table selected, right-click it and choose Paragraph Options. Use the Alignment dropdown in the General section. Using the Align options on the menu will align the text within the cells, not the table. So far, everything we’ve done has been clear cut, but you might have noticed that the text is positioned as a paragraph. The text doesn’t flow around the table.
Wrapping text
If you want text to wrap around the table, you need to change another default option. Go back to the Table Properties dialog. Below the alignment options, you’ll see the text wrapping options. The default is no wrapping. Simply click the Around option (Figure H) and click OK. As you can see, this option pulls up the text below and wraps it around the table. I clicked Backspace twice to pull the text up to align it with the top of the table. Pulling the text up this way may cause the paragraph to adopt some of the table’s properties. Simply click Normal to fix that.
Figure H

Stay tuned
Aligning Word tables as a whole is a simple task, and there are a number of ways to get the alignment you want. If you repeat this task often, you might want to change the default alignment; in a future article, I’ll show you how to do so.
Also See
-
How to use the many text wrapping options in Microsoft Word
(TechRepublic) -
How to make fewer mistakes and work more efficiently using predictive text in Microsoft 365
(TechRepublic) -
Google Workspace vs. Microsoft 365: A side-by-side analysis
(TechRepublic Premium) -
Must-read coverage: Windows 10
(TechRepublic on Flipboard)
-
Microsoft
-
Software
By default, MS Word aligns tables and other objects to the left. This article will discuss various methods to centre align tables in word.

- Using the Center-align button
- Using the Context Menu
- Using a shortcut key
Method 1: Using the Center-align Button
Step 1: Open up an MS Word file.

Step 2: Select the table.
Once your document is ready, select the table by clicking the Move icon found at the upper left corner of the table.

Step 3: Click the Center-align button.
Go to the Home tab and select the Center-align icon found under the Paragraph group.

It will center-align the table.
Method 2: Using the Context Menu
Step 1: Open up an MS Word file.

Step 2: Access the Context menu.
Now that your document is ready, right-click on the table to display the Context menu.
On it, select the Table Properties option. This will launch a dialogue box.

On the Table tab, select the Center option under the Alignment group.
Then, click the OK button to proceed. Otherwise, click the Cancel button.

Method 3: Using Shortcut Keys
Step 1: Open up an MS Word file.

Step 2: Select the table.

Once the table is selected, press the CTRL + E keys on your keyboard.
Conclusion
We hope you’ve found this article helpful!
Как выровнять таблицу в Ворде
 Вставка таблицы в Ворд — привычная процедура для всех, кто работает с документами. В таблице можно удобно отобразить статистику, сравнить различные показатели и даже выполнить различные математические функции, например, рассчитать сумму. В этой статье мы рассмотрим способы выровнять таблицу в Ворде, чтобы она хорошо смотрелась в общем тексте.
Оглавление:
1. Как выровнять таблицу в Ворде
- Способ 1 - через главное меню
- Способ 2 - через свойства таблицы
2. Как выровнять текст в таблице Ворд
3. Как выровнять ширину столбцов в таблице Ворд
4. Как выровнять высоту строк в таблице Ворд
Как выровнять таблицу в Ворде
Обычно вставленная в Ворд таблица отображается по левому краю. Удобнее в тексте она будет смотреться, если выровнять ее по центру. Рассмотрим два способа как это сделать.
Способ 1 — через главное меню
Чтобы выровнять таблицу по центру, нажмите в углу таблицы на значок, тем самым выделив ее всю.

Когда таблица будет выделена, для ее выравнивания по центру используйте обычную опцию в разделе абзац на главной закладке меню.
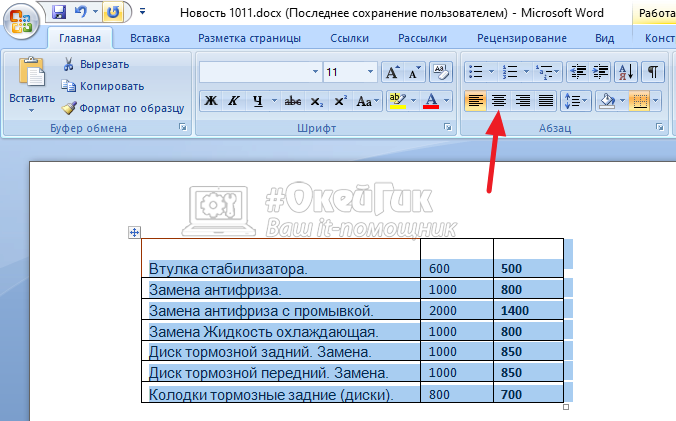
Сразу после этого таблица будет выровнена по центру.
Обратите внимание
Таким же образом, используя другие опции, можно выровнять таблицу по левому краю, по правому краю или по ширине.
Способ 2 — через свойства таблицы
Есть еще один способ выровнять таблицу. Нужно выделить ее, после чего нажать правой кнопкой мыши на таблицу. Появится меню, в нем выберите пункт “Свойства таблицы”.
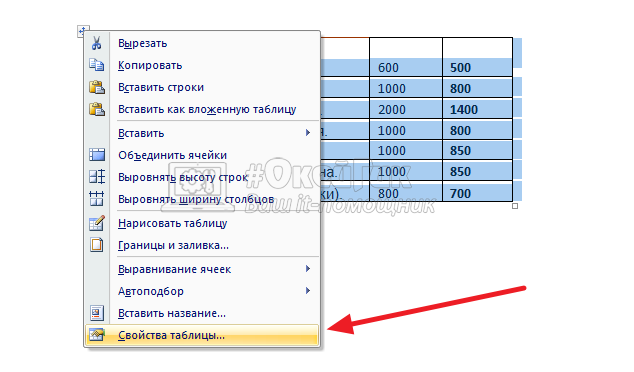
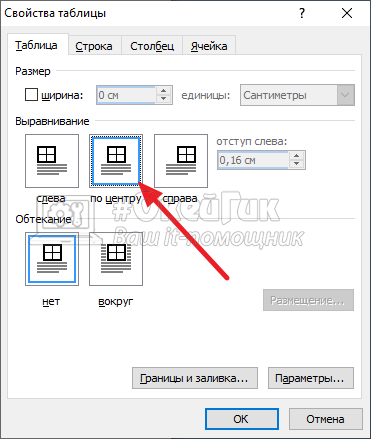
Появится меню свойств таблицы. Выберите “По центру” в разделе “Выравнивание”, после чего таблица будет выровнена по центру.
Обратите внимание
В свойствах таблицы можно не только выравнивать таблицу, но и настроить для нее обтекание текстом. Это бывает полезно, если нужно, чтобы таблица находилась слева или справа от текста.
Как выровнять текст в таблице Ворд
Теперь рассмотрим каким образом можно выровнять текст в таблице, который по умолчанию, при вставке таблицы из Excel или других источников, выровнен по левом краю.
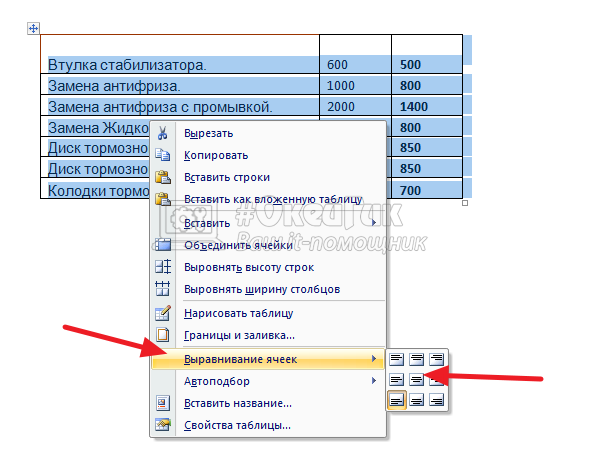
Чтобы выровнять текст по центру, нужно выделить все ячейки в таблице, после чего нажать правой кнопкой мыши на таблицу, и в открывшемся меню выбрать “Выравнивание ячеек”, а далее нужный вариант.
Обратите внимание
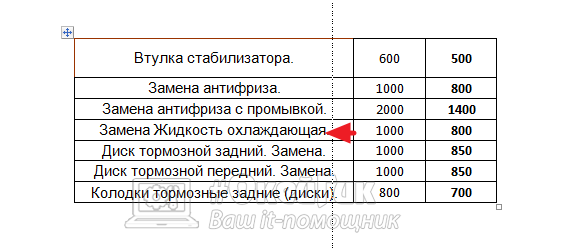
Выравнивание ячеек происходит не только по ширине, но и по высоте. Если строки имеют разную высоту, имеет смысл сделать выравнивание по центру по высоте.
Сразу после этого ячейки будут выровнены.
Если необходимо выровнять по центру, или по любому другому краю, только одну или несколько ячеек, выделите их, а далее проделайте описанное выше действие. Тогда опции будут применены не ко всем ячейкам, а только к выделенным.
Как выровнять ширину столбцов в таблице Ворд
Каждый столбец в Ворд можно двигать, чтобы задать ему нужную ширину. Для этого требуется навести мышку на линию столбца и передвинуть его в нужную сторону.
Но выравнивать таким образом столбцы, чтобы привезти их к общей ширине, неудобно. Для этого есть отдельная опция. Выделите таблицу, нажмите на нее правой кнопкой мыши и выберите пункт “Выровнять ширину столбцов”.
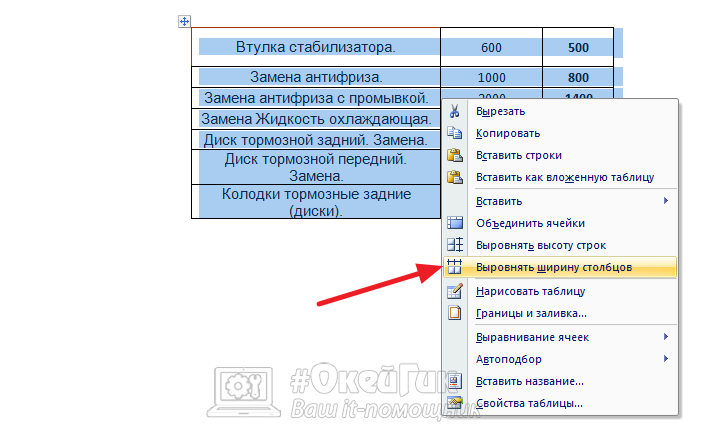
После этого все столбцы в таблице Ворд станут одной ширину.
Как выровнять высоту строк в таблице Ворд
Аналогичная ситуация со строками. Можно отдельно каждую строку передвигать, чтобы задать индивидуальную высоту строкам.
А можно просто выделить всю таблицу, нажать на нее правой кнопкой мыши и выбрать вариант “Выровнять высоту строк”.
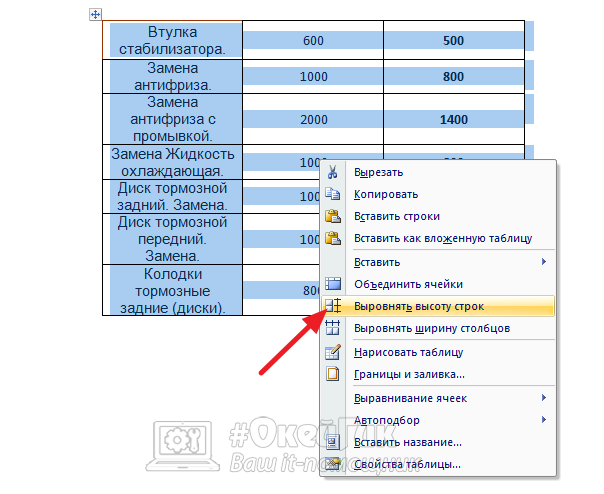
После этого все строки будут приведены к единой высоте.
![]()
![]()
![]()
![]()
![]() (12 голос., средний: 4,00 из 5)
(12 голос., средний: 4,00 из 5)
![]() Загрузка…
Загрузка…