
You may need to insert tables in your MS Word document to present data. Your table may contain text or numbers in different cells. But, for each cell, Word defaults to left alignment in the horizontal direction. The default vertical alignment is to the top of the cell.
If you do not like the default alignments, Word allows you to change them. For instance, you may have a lot of text in some cells and few in others. Center aligning all the text in the table makes it easier to read.
For horizontal alignment, you may consider one of the three choices that Word offers:
- Left (default)
- Center
- Right
For the vertical alignment, Word offers three more choices in relation to the cell:
- Top (default)
- Center
- Bottom
Additionally, you may apply the process in two ways:
- Center align only a select cell
- Center align the entire table in one go.
We will show you how you can accomplish the above in easy steps.
Let’s begin.
Method #1: Center align only a select cell
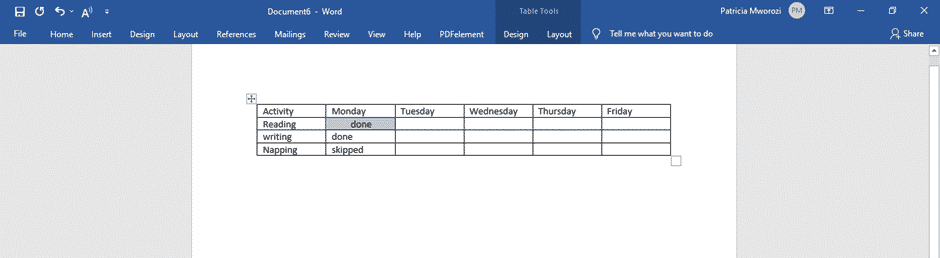
Step #1: Open the Word document. It must have at least one table in it.

Step #2: Change the ribbon to display the Home menu
Click on the Home tab in the top menu bar to change the ribbon.

Step #3: Center align the content of a cell
Click inside the cell you want to align.
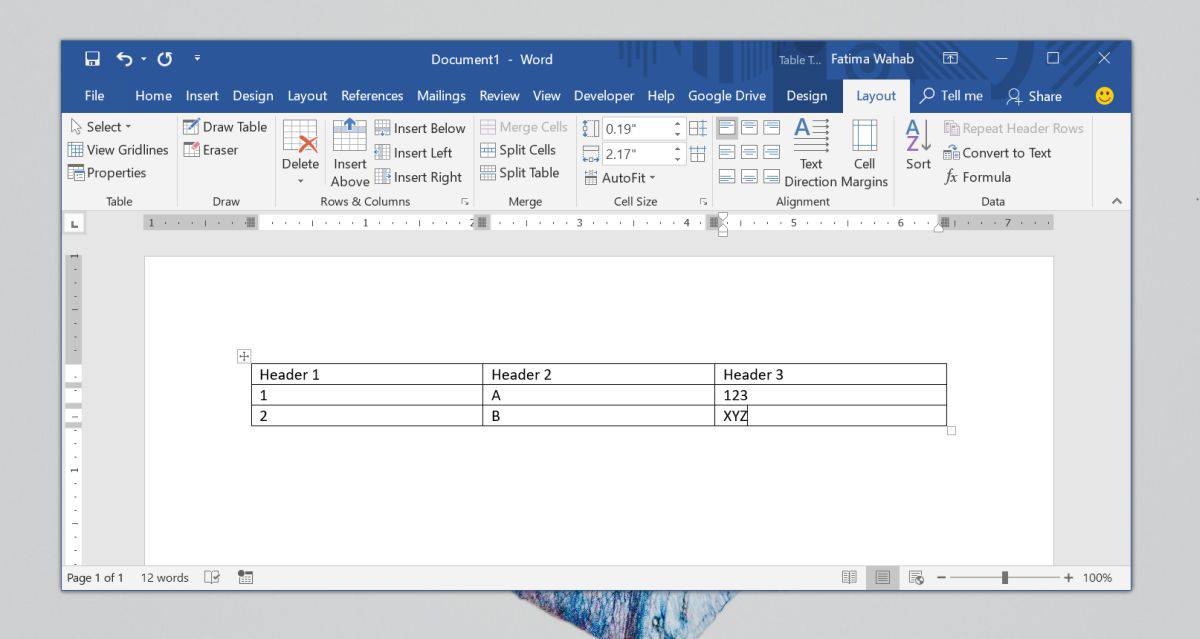
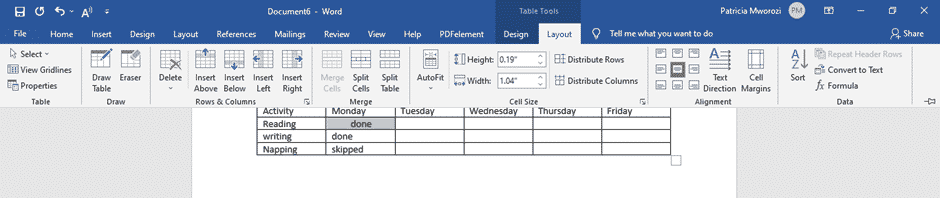
Click on the Layout tab under Table Tools.

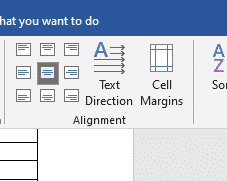
In the Alignment section, Word offers nine choices for alignment:
- Align Top Left, Align Top Center, Align Top Right
- Align Center Left, Align Center, Align Center Right
- Align Bottom Left, Align Bottom Center, Align Bottom Right
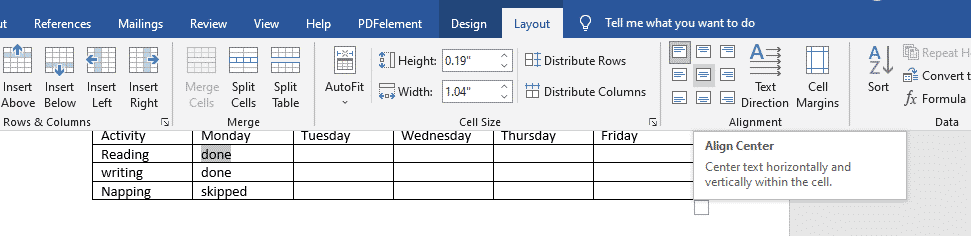
To center align the text in the cell, choose Align Center.

Word will center the text in the cell horizontally as well as vertically.

Method #2: Center align the entire table
Step #1: Open the Word document. It must have at least one table in it.

Step #2: Change the ribbon to display the Home menu
Click on the Home tab in the top menu bar to change the ribbon.

Step #3: Center align the contents of the table
Click on the cross icon in the top left corner of the table to select the table.

Click on the Layout tab under Table Tools.

In the Alignment section, Word offers nine choices for alignment:
- Align Top Left, Align Top Center, Align Top Right
- Align Center Left, Align Center, Align Center Right
- Align Bottom Left, Align Bottom Center, Align Bottom Right
To center align all the contents in the table, choose Align Center.

Word will center the contents of all the cells in the table horizontally as well as vertically.

Conclusion
Follow our above instructions step-by-step to center align your text within an MS Word table.
Aligning text in Microsoft Word is incredibly simple. The Home tab on the ribbon has dedicated buttons that allow you to left align, right align, center align, or justify text. It’s great for when you need to meet certain academic requirements, make a stylish document, or type in different languages. The text alignment can vary for each paragraph. Where text alignment is incredibly easy to mange, it isn’t as easy to align text inside tables. There are dedicated buttons for it as well but they’re somewhat confusing.
When you create a table, and enter text in its various cells, it is always aligned to the left. The exception being that you’re typing in a language that writes from right to left in which case the text will always be aligned to the right.
With table cells, there are two alignments to consider; the left/right/center alignment that is measured in terms of the left and right border of the cell, and the top/center/bottom alignment that is measured in terms of the top and bottom border of the cell. By default, the text is aligned left, and to the top of the cell.
To change it, click inside the cell that you want to change the text alignment for. This will activate the two tabs that allow you to customize the table. Go to the Layout tab and you will find there’s an Alignment toolbox there.
The Alignment toolbox has nine buttons for aligning text in a table in Microsoft Word. From left to right, and top to bottom, the buttons let you align text to the right, and top, center and top, and left and top. The second row lets you align text to the right but center it from the top, center the text from the right and the top, align text to the left and center it from the top. The third row lets you align text to the left, and to the bottom of the cell, center text from the right and to the bottom of the cell, and finally, align text to the left and to the bottom of the cell.

These settings may seem excessive however a cell is basically divided into nine sections and the alignment maps to those sections. If all the text is the same size, then your cells will look okay and you won’t be bothered too much about the look of the table. If, however, your text isn’t the same size i.e., some cells have loads of text while others have just a bit, the alignment will make the table easier to read.
Table alignment is different from cell alignment.

When you work with tables in Word, formatting the text inside is just as important as the rest of the text in your document. If you want a uniform look, we’ll show you how to center text in a table, either horizontally or vertically.
Center Table Text Horizontally in Word
There’s more than one way to center the text in your table horizontally. So you can use whichever is best for you.
RELATED: How to Align a Table Horizontally in Microsoft Word
Select the text in the table you want to center. If it’s all of the text, drag your cursor through each cell to capture it all. Otherwise, select the text inside the particular cell you want to center. Then, do one of the following.
Method One: Go to the Home tab and click the Center Text button in the Paragraph section of the ribbon.

Method Two: Go to the Layout tab and the Alignment section of the ribbon. Choose “Align Top Center” to keep the text centered at the top of the cell or “Align Bottom Center” to center the text at the bottom of the cell.
Center Table Text Vertically in Word
If the centering you want to apply is vertical, you have a couple of ways to do this as well.
RELATED: How to Center Text Vertically on the Page in Microsoft Word
Select the text you want to center whether all text in the table or that in a certain cell. Then, do one of the following.
Method One: Right-click and choose “Table Properties.” Go to the Cell tab and choose “Center” below Vertical Alignment. Click “OK.”
Method Two: Go to the Layout tab and the Alignment section of the ribbon. Choose “Align Center Left” to center the text vertically on the left side of the cell or “Align Center Right” to place it on the right side of the cell.
Center Table Text Horizontally and Vertically in Word
Maybe you want your text right in the center of the cell, both horizontally and vertically.
Select the text and go to the Layout tab and the Alignment section of the ribbon. Choose “Align Center.”
Your text will then be right in the middle of the cell.
Centering the text in your Word table is a simple task whether horizontally, vertically, or both. Remember these methods when you want to change the appearance of the table text in your document.
READ NEXT
- › How to Create a Basic Survey in Microsoft Word
- › How to Convert Text to a Table in Microsoft Word
- › Microsoft Is Testing Windows 11 Changes for the Steam Deck
- › Mozilla Wants Your Feature Suggestions for Thunderbird
- › Get to Your Windows 11 Desktop: 7 Fastest Methods
- › Expand Your Tech Career Skills With Courses From Udemy
- › BLUETTI Slashed Hundreds off Its Best Power Stations for Easter Sale
- › The New NVIDIA GeForce RTX 4070 Is Like an RTX 3080 for $599
How-To Geek is where you turn when you want experts to explain technology. Since we launched in 2006, our articles have been read billions of times. Want to know more?
You can align text in Microsoft Word either to the left, right, or center. If you want to have a neatly organized table, it is advisable to pay attention to the alignment of the text that you type into the cells.
There are several ways to center the text in the rows and columns, as you will see.
You can align the text in the rows and columns at once or individually.
Aligning all the rows and columns simultaneously
- Insert the table (This is if you have not already and do not know how to)
- To do this, go to the ‘insert’ tab at the top of your screen.

- A diagram of a table will appear. Click it.
- When you do this, several boxes/ squares will be displayed.

- You can choose the number of rows and columns from the squares. If you want four rows and six columns, you will pick the 4th square vertically and the 6th square horizontally.
- Start typing in the details of your table.
- Once you are done, you can put the cursor at any corner of the table and drag it till it selects the entire table.
- On your home tab on the ribbon, you can center align the text using the column directly below ‘review.’

Aligning each cell individually
- Place the cursor in the cell with the text that you want to center.
- Go to the ‘layout’ tab on the ribbon.
- It will display different ways you can align your cell: top right, bottom right, center right, top left, bottom left, center left, top center, bottom center, and middle center (which is our focus)
- Select ‘middle center,’ and your cell will be center aligned.
- The text in the selected cell will be center-aligned.
Did you receive a group assignment at work but cannot be there physically because you are isolating at home due to the pandemic?
There is no need to worry or find your way to your physical workplace.
Simul Docs is your answer.
The first step is downloading Simul Docs then you can get started.
After writing your first draft in Microsoft Word, upload it to Simul Docs. This will automatically make it the first version. Now, another colleague can open it and make their edits. This will create another version different from the first.
Whenever another person opens a version and makes edits, a new version is created with the latest changes.
Sometimes, you might be in a rush and forget to turn on tracked changes so your modifications can be updated. You have nothing to worry about. Simul Docs automatically records these edits regardless of your online or offline status.
Since it is a collaboration, a bonus feature is the ability to add comments to the document. If you want a colleague to review the changes by a specific time, or any other instructions, you can let them know in the comment section.
Later on, these comments can be removed after your groupmates have seen and executed the instructions.
You can also make changes to the document and your colleagues can either accept or reject them.
Additionally, you and your groupmates can work on the document at the same time. There’s no need to lazy around waiting for someone else to make edits. You might do your part in time, and the last person ends up costing the group credit because they work slowly. You can save time by working on a document at once, and Simul Docs keeps each version separately.
Suppose another co-worker is supposed to include their input, but they do not have Simul Docs. Maybe they are not tech-savvy. All you have to do is download the document or forward it by email. Alternatively, you can upload it to any storage software like one drive, and once their changes have been made, they can forward it to you once again, and you can open it in Simul Docs.
Once all the necessary edits have been made, you can save the final version containing all the modifications with one click.
You and your groupmates can work on the same document from the comfort of your homes or workplaces.
Simul is the most convenient collaborative tool yet. Centralising your written project avoids mishaps like losing your work or losing its original format.
Group projects do not have to be a nightmare anymore.
Visit simuldocs.com and prepare your group projects without the usual hassle and bustle.
If you create a table in Word and type some contents in it, you’ll find the text is automatically aligned left just like in Excel. It’s the default setting. If you don’t like it and want to center the text in each cell of Word tables, there are methods you can try.
First, select all the content in the table.

Then switch to Home tab and click Center in Paragraph section. The text will be centered immediately as below. But it’s still at the upper place of each cell.

If you want to center the text in Word tables both horizontally and vertically, you should select all the text at first as well. Then right-click the selected text and choose Table Properties…

Switch to Cell tab and choose Center in Vertical alignment. Hit OK to implement it.

Now check the table again. You’ve centered the text completely.

Copyright Statement: Regarding all of the posts by this website, any copy or use shall get the written permission or authorization from Myofficetricks.