
You may need to insert tables in your MS Word document to present data. Your table may contain text or numbers in different cells. But, for each cell, Word defaults to left alignment in the horizontal direction. The default vertical alignment is to the top of the cell.
If you do not like the default alignments, Word allows you to change them. For instance, you may have a lot of text in some cells and few in others. Center aligning all the text in the table makes it easier to read.
For horizontal alignment, you may consider one of the three choices that Word offers:
- Left (default)
- Center
- Right
For the vertical alignment, Word offers three more choices in relation to the cell:
- Top (default)
- Center
- Bottom
Additionally, you may apply the process in two ways:
- Center align only a select cell
- Center align the entire table in one go.
We will show you how you can accomplish the above in easy steps.
Let’s begin.
Method #1: Center align only a select cell
Step #1: Open the Word document. It must have at least one table in it.

Step #2: Change the ribbon to display the Home menu
Click on the Home tab in the top menu bar to change the ribbon.

Step #3: Center align the content of a cell
Click inside the cell you want to align.
Click on the Layout tab under Table Tools.

In the Alignment section, Word offers nine choices for alignment:
- Align Top Left, Align Top Center, Align Top Right
- Align Center Left, Align Center, Align Center Right
- Align Bottom Left, Align Bottom Center, Align Bottom Right
To center align the text in the cell, choose Align Center.

Word will center the text in the cell horizontally as well as vertically.

Method #2: Center align the entire table
Step #1: Open the Word document. It must have at least one table in it.

Step #2: Change the ribbon to display the Home menu
Click on the Home tab in the top menu bar to change the ribbon.

Step #3: Center align the contents of the table
Click on the cross icon in the top left corner of the table to select the table.

Click on the Layout tab under Table Tools.

In the Alignment section, Word offers nine choices for alignment:
- Align Top Left, Align Top Center, Align Top Right
- Align Center Left, Align Center, Align Center Right
- Align Bottom Left, Align Bottom Center, Align Bottom Right
To center align all the contents in the table, choose Align Center.

Word will center the contents of all the cells in the table horizontally as well as vertically.

Conclusion
Follow our above instructions step-by-step to center align your text within an MS Word table.
Как вы знаете, в текстовом редакторе MS Word можно создавать и изменять таблицы. Отдельно стоит сказать о большом наборе инструментов, предназначенных для работы с ними. Говоря непосредственно о данных, которые можно вносить в созданные таблицы, довольно часто возникает необходимость их выровнять относительно самой таблицы или всего документа.
Урок: Как в Ворде сделать таблицу
В этой небольшой статье мы расскажем о том, как можно выровнять текст в таблице MS Word, а также о том, как выровнять саму таблицу, ее ячейки, столбцы и строки.
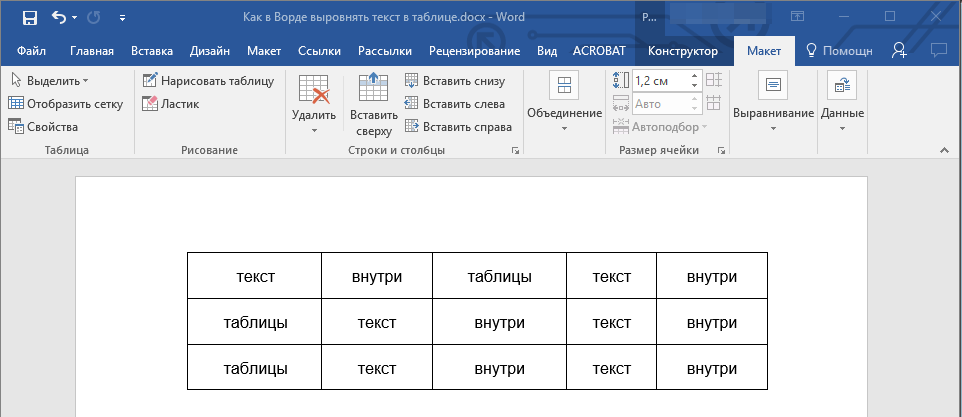
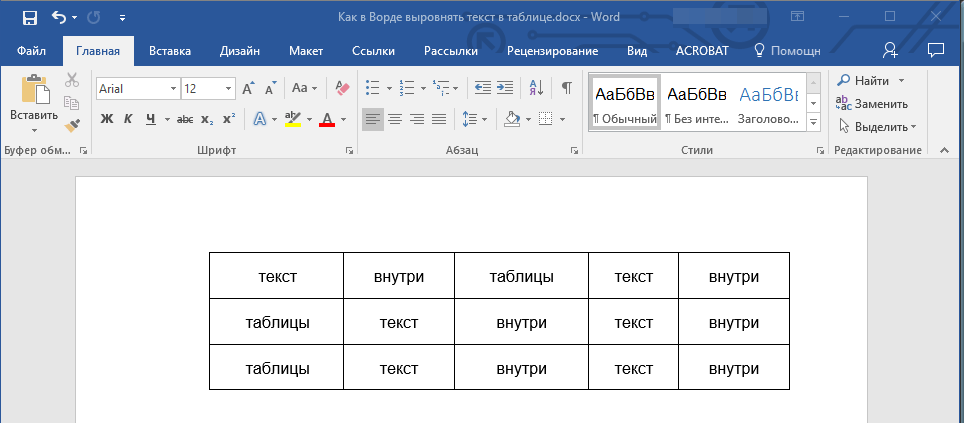
Выравниваем текст в таблице
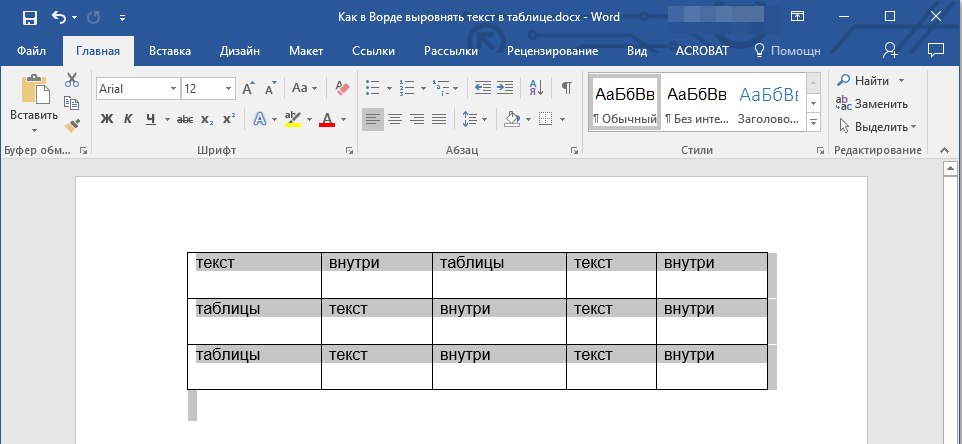
1. Выделите все данные в таблице или отдельные ячейки (столбцы или строки), содержимое которых нужно выровнять.
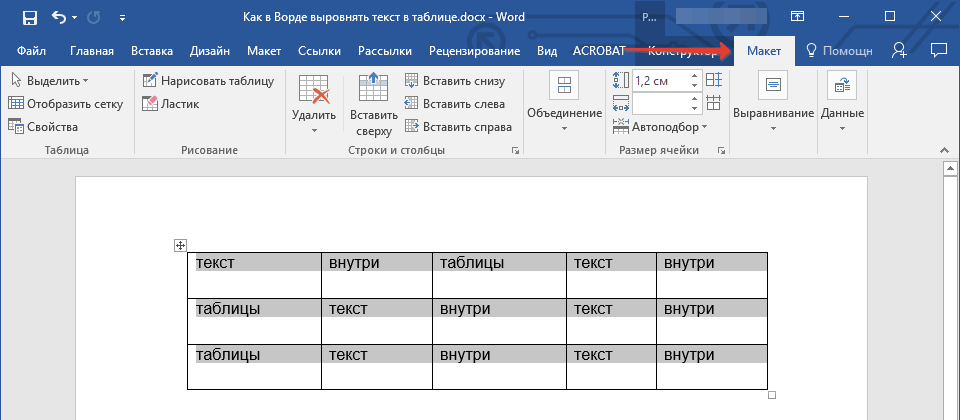
2. В основном разделе “Работа с таблицами” откройте вкладку “Макет”.
3. Нажмите кнопку “Выровнять”, расположенную в группе “Выравнивание”.
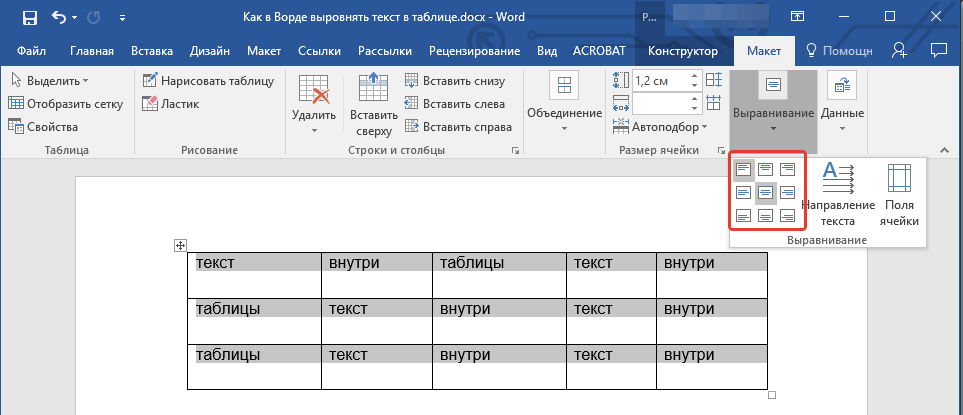
4. Выберите подходящий вариант для выравнивания содержимого таблицы.
Урок: Как в Ворде скопировать таблицу
Выравнивание всей таблицы
1. Кликните по таблице, чтобы активировать режим работы с ней.
2. Откройте вкладку “Макет” (основной раздел “Работа с таблицами”).

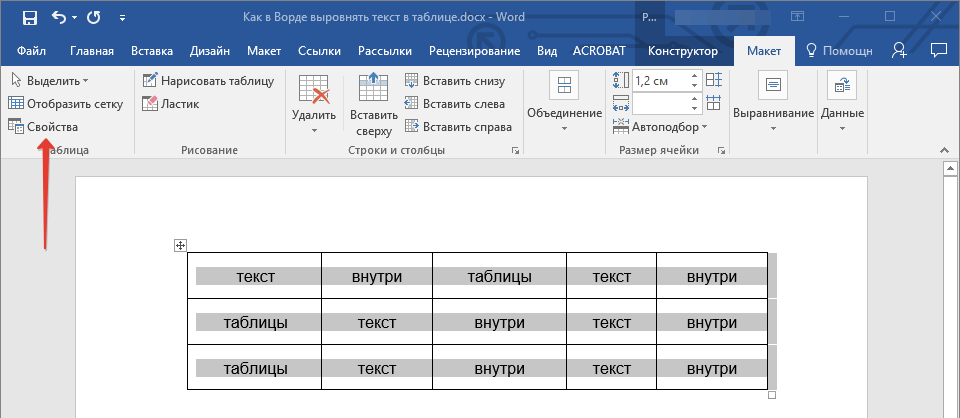
3. Нажмите кнопку “Свойства”, расположенную в группе “Таблица”.

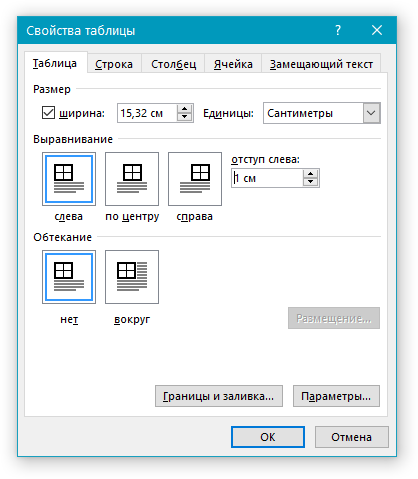
4. Во вкладке “Таблица” в открывшемся окне найдите раздел “Выравнивание” и выберите необходимый вариант выравнивания для таблицы в документе.
- Совет: Если вы хотите установить отступ для таблицы, которая выровненная по левому краю, задайте необходимое значение для отступа в разделе “Отступ слева”.
Урок: Как в Word сделать продолжение таблицы
На этом все, из этой небольшой статьи вы узнали, как выровнять текст в таблице в Ворде, а также о том, как выровнять саму таблицу. Теперь вы знаете немного больше, мы же хотим пожелать вам успехов в дальнейшем освоении этой многофункциональной программы для работы с документами.
Еще статьи по данной теме:
Помогла ли Вам статья?
If you create a table in Word and type some contents in it, you’ll find the text is automatically aligned left just like in Excel. It’s the default setting. If you don’t like it and want to center the text in each cell of Word tables, there are methods you can try.
First, select all the content in the table.

Then switch to Home tab and click Center in Paragraph section. The text will be centered immediately as below. But it’s still at the upper place of each cell.

If you want to center the text in Word tables both horizontally and vertically, you should select all the text at first as well. Then right-click the selected text and choose Table Properties…

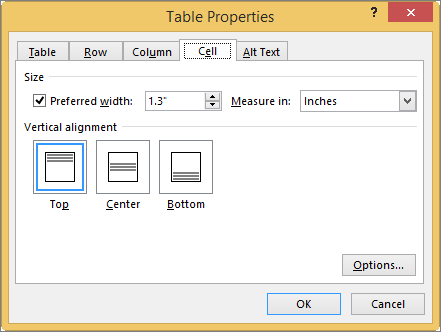
Switch to Cell tab and choose Center in Vertical alignment. Hit OK to implement it.

Now check the table again. You’ve centered the text completely.

Copyright Statement: Regarding all of the posts by this website, any copy or use shall get the written permission or authorization from Myofficetricks.
If the document contains tables, it must be formatted according to the requirements accepted by your college, university, company, established on the project, etc. Most requirements, including accessibility, tell that tables should contain titles, column headers, alternate text, etc. In addition, tables must be correctly positioned on the page, using the pre-defined alignment, padding, and text-wrapping guidelines.
Usually, the table contains the following basic components:
- The table number (e.g., Table 1) and the title appear above the table body (see how to create a caption for tables).
- The table includes column headings, including a stub heading (heading for the leftmost, or stub, column). Some tables also include column spanners, decked heads, and table spanners. See how to format tables in a Word document.
- The table body contains all the rows and columns of a table (including the headings row). A cell is the point of intersection between a row and a column. See how to select and format table elements.
- All types of notes (general, specific, and probability) appear below the table if there are notes. Notes describe contents of the table that cannot be understood from the table title or body alone (e.g., definitions of abbreviations, copyright attribution, etc.).

See also how to create cross-references to a table.
Align the table on the page
By default, Word aligns the table to the Left. If you want to change an alignment of the table on the page, select it and do one of the following:
- On the Home tab, in the Paragraph group, select the alignment you prefer:

- Open the Table Properties dialog box by doing one of the following:
- On the Table Layout tab, in the Table group, click the Properties button:

- Right-click the table and select Table Properties… in the popup menu:

In the Table Properties dialog box, on the Table tab, in the Alignment section, select the option you prefer:

- On the Table Layout tab, in the Table group, click the Properties button:
- Press the keyboard shortcuts:
- Ctrl+L to align a table to the Left (by default),
- Ctrl+E to Center the table,
- Ctrl+R to align a table to the Right.


Add indent from left
The Indent from left controls the distance of the table from the left margin. To add the Indent from left, do one of the following:
- On the Home tab, in the Paragraph group, click the Increase Indent button:
- Open the Properties dialog box. In the Table Properties dialog box, on the Table tab, in the Alignment section, type or choose the value you need in the Indent from left field:
Note: The Indent from left field is active only for the Left alignment.


For example, the table with a left indent 0.5 inches:

Text Wrapping for a table
Word offers to customize the text wrapping style for a table, as well as for figures. To customize a text wrapping style, do the following:
1. Select a table.
2. Open the Table Properties dialog box. In the Table Properties dialog box, on the Table tab, in the Text wrapping section:
- Select None to disable text wrapping for the table
- Select the Around option to have text wrapping around the table. Then click the Positioning… button for more customization:
In the Table Positioning dialog box:


Position a table
- In the Horizontal sections, specify:
- Position to the Left, Right, Center, Inside, or Outside,
- Relative to the Margin, Page, or Column.
For example, with Position to the Right relative to Margin:

- In the Vertical section, specify:
- Position to the Top, Bottom, Center, Inside, or Outside,
- Relative to the Margin, Page, or Column.
For example, with Position to the Top relative to Page:


Increase the space between text and table
- In the Distance from surrounding text section, enter custom values for the distance between the text and the table independently for:
- Top (0 by default),
- Bottom (0 by default),
- Left (1.13 inches by default),
- Right (1.13 inches by default).
For example, with the 0.3-inch distance on all sides:

Note: See also how to change a distance within a table.
Text wrapping options
- In the Options section:
- The Move with text option moves the table along with the text in which it is located.
Select the Move with Text option if the text is directly related to the table data. The table is vertically aligned to the related paragraph around it. If the table data applies to the whole document, keep the Move with Text option unselected.
- Allow overlap allows to layer table on top of each other.
- The Move with text option moves the table along with the text in which it is located.
Position a large table
Control where a table is split
When working with a long table, or when a table needs to be placed at the bottom of the page, splitting up a table into two separate tables is necessary. By default, if a page break occurs within a large row, Microsoft Word allows a page break to split the line between two pages (see How to prevent a table break between pages).
To insert a table break at a specific location, position the cursor on the cell on the row, or select the row that should appear on the next page, then do one of the following:
- Press Ctrl+Enter.
- On the Table Layout tab, in the Merge group, click the Split Table button:

Be careful! Word applies the chosen style to the new table. If you Undo the table splitting, the formatting may not be Undone correctly.
Add an Alternative text (Alt Text)
Most requirements recommend adding alternative text for visual objects, including tables (see how to turn off automatically creating the Alternative text).
To add an alternative text for a table, do the following:
1. Select a table.
2. Do one of the following:
- On the Table Layout tab, in the Table group, click the Properties button.
- Right-click the table and select Table Properties… in the popup menu.
3. In the Table Properties dialog box, on the Alt Text tab:

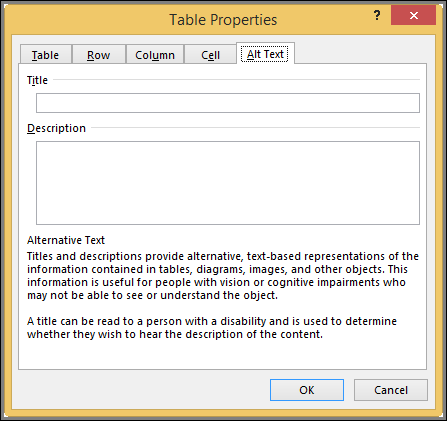
- In the Title field, type a title, if necessary.
- In the Description field, fill the description for the table.
- Click the OK button.
Word for Microsoft 365 Outlook for Microsoft 365 Word 2021 Outlook 2021 Word 2019 Outlook 2019 Word 2016 Outlook 2016 Word 2013 Outlook 2013 Word 2010 Outlook 2010 Word 2007 Outlook 2007 More…Less
To set or change table options in Word or Outlook, right-click a table and choose Table Properties.
Note: If you want to set properties for a particular row, column, or cell, click in that row, column, or cell before making changes in the Table Properties dialog box.
In this article
-
Table properties
-
Row properties
-
Column properties
-
Cell properties
-
Alt text
Table properties

Click the Table tab to apply settings to your entire table:
-
Under Size, set the table’s overall width by selecting Preferred width and choosing a size. In the Measure in box, choose whether you want to measure the width in inches or a percentage of the page.
-
Under Alignment, choose whether you want to align your table to the left, center, or right of page. If you select Left, you can select an indentation distance in the Indent from Left box.
-
Under Text wrapping, select Around if you want nearby text on your page to wrap around your table; you can make text wrapping more precise by clicking Positioning, and then choosing options in the Table Positioning dialog box. If you don’t want text wrapping, select None.
-
Click Borders and Shading to change the border style, line color, and line width of your table.
-
Click Options to set more table properties, including top and bottom cell margins, cell spacing, and automatic resizing of cell contents.
Top of Page
Row properties
First, click in the row or select the rows you want to change, right-click, choose Table Properties, and then click the Row tab.
-
Under Size, set the row’s height by selecting Preferred height and choosing a size; you can further refine the height by selecting an option in the Row height is box.
-
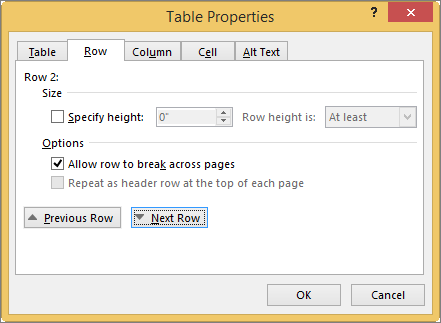
Under Options, select options for breaking rows across pages or creating header rows.
-
To display the currently selected row at the top of the tab and navigate between rows without leaving the Table Properties dialog box, click Previous Row or Next Row.
Top of Page
Column properties
First, click in the column or select the columns you want to change, right-click, choose Table Properties, and then click the Column tab.
-
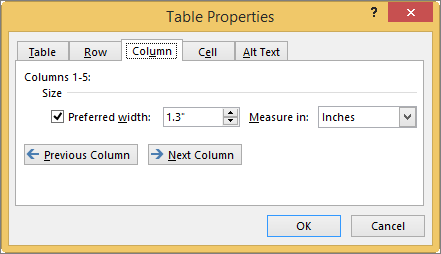
Under Size, set the column’s width by selecting Preferred width and choosing a size. In the Measure in box, choose whether you want to measure the width in inches or a percentage.
-
To display the currently selected column or columns at the top of the tab and navigate between columns without leaving the Table Properties dialog box, click Previous Column or Next Column.
Top of Page
Cell properties
First, click in the cell that you want to change, right-click, choose Table Properties, and then click the Cell tab.
-
Under Size, set the cell’s width by selecting Preferred width and choosing a size. In the Measure in box, choose whether you want to measure the width in inches or a percentage.
-
Under Vertical alignment, choose an alignment option for the cell contents—Top (the default alignment), Center, or Bottom.
-
Click Options to set more cell properties, including top and bottom cell margins and text wrapping and fit options.
Top of Page
Alt text
You can create alternative text (alt text) for your table to help people with screen readers understand the content of the table.
-
In the Description box, enter an explanation of the table.
-
In the Title box, enter a brief summary of the table.
Note: Unless you have a complex table, you will usually want to enter text in just the Description box. When you have complex content to describe, filling in the Title field is useful so that reading the full description is not necessary unless desired.
Top of Page
Need more help?
Want more options?
Explore subscription benefits, browse training courses, learn how to secure your device, and more.
Communities help you ask and answer questions, give feedback, and hear from experts with rich knowledge.