
Align text horizontally
-
In the text box, select the text that you want to change the horizontal alignment for.
-
On the Home tab, click the alignment option that you want
 .
.
 .
.Align text vertically
You can align all the text in a text box with the top, middle, or bottom of the text box.
-
Click the outer edge of the text box to select it.
-
On the Shape Format tab, click Format Pane.
-
Click the Shape Options tab if it isn’t already selected.
-
Click the text box icon
, and then click Text Box. -
Choose Top, Middle, or Bottom from the Vertical alignment drop-down list.
 , and then click Text Box.
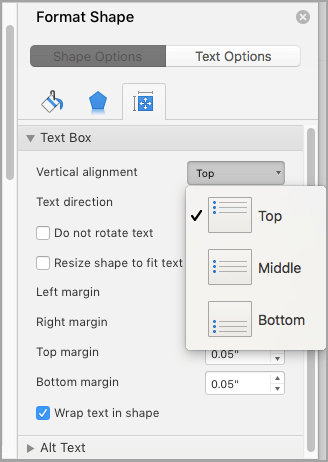
Adjust the text box margins
-
Click the outer edge of the text box to select it.
-
On the Shape Format tab, click Format Pane.
-
Click the Shape Options tab if it isn’t already selected.
-
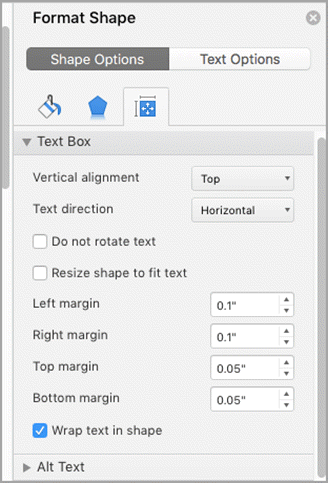
Click the text box icon
, and then click Text Box. -
You can adjust the left, right, top, and bottom margins.
Important:
Office for Mac 2011 is no longer supported. Upgrade to Microsoft 365 to work anywhere from any device and continue to receive support.
Upgrade now
Align text horizontally
-
In the text box, select the text that you want to change the horizontal alignment for.
-
On the Home tab, under Paragraph, click the alignment option that you want
.
Align text vertically
You can align all the text in a text box with the top, middle, or bottom of the text box.
-
Click the outer edge of the text box to select it.
-
Click the Format tab (the purple contextual tab that appears next to the Home tab), and then under Text Box, click Change text alignment within the text box
. -
Click the alignment option that you want.
 .
.Adjust the text box margins
-
Click the outer edge of the text box to select it.
-
On the Format menu, click Shape.
-
In the left pane of the Format Shape dialog box, click Text Box.
-
Under Internal Margin, adjust the measurements to increase or decrease the distance between the text and the outer border of the text box.
Select the text that you want to center. in the Page Setup group, and then click the Layout tab. In the Vertical alignment box, click Center. In the Apply to box, click Selected text, and then click OK.
Contents
- 1 How do you center a textbox?
- 2 How do you align all text boxes in Word?
- 3 How do I center a textbox in CSS?
- 4 How do I center align a textbox in CSS?
- 5 How do I center a text box in a div?
- 6 How do you center a text box in HTML?
- 7 How do I center text in a div?
- 8 How do I align all text boxes in HTML?
- 9 How do you center a form?
- 10 How do I vertically align text in the middle of a div?
- 11 How do I center text vertically in CSS?
- 12 How do you center a table in CSS?
- 13 How do I align all text boxes in CSS?
- 14 How do I align a text box to the right in HTML?
- 15 How do I center in the middle of the page?
- 16 How do you center a button?
- 17 How do you center a form of an element?
- 18 How do I center a horizontal list in CSS?
How do you center a textbox?
Right-click the text box for which you want to set vertical alignment. On the shortcut menu, click Format Text Box. In the Format Text Box dialog box, click the Text Box tab. In the Vertical alignment box, select Top, Middle, or Bottom.
How do you align all text boxes in Word?
Hold down Shift , click the objects that you want to align, and then click the Shape Format tab. Click Arrange > Align > Align Selected Objects.
How do I center a textbox in CSS?
Center Align Text
To just center the text inside an element, use text-align: center; This text is centered.
How do I center align a textbox in CSS?
To center text in CSS, use the text-align property and define it with the value “center.” Let’s start with an easy example. Say you have a text-only web page and want to center all the text. Then you could use the CSS universal selector (*) or the type selector body to target every element on the page.
How do I center a text box in a div?
Wrap a div around with text-align: center; . In modern browsers that support CSS 3 you can do an easy centering using these three lines of code: position: absolute; left: 50%; transform: translateX(-50%);
How do you center a text box in HTML?
To center text using HTML, you can use the <center> tag or use a CSS property. To proceed, select the option you prefer and follow the instructions. Using the <center></center> tags. Using a style sheet property.
How do I center text in a div?
Using CSS, you can center text in a div in multiple ways. The most common way is to use the text-align property to center text horizontally. Another way is to use the line-height and vertical-align properties. The last way exclusively applies to flex items and requires the justify-content and align-items properties.
How do I align all text boxes in HTML?
In order to align the labels, you only need to set the width width of the label to a certain value, such as 150px in this example, because the label label and the input label belong to the P label, they are displayed from left to right. Specify the length of the label label to align the text box of the form.
How do you center a form?
- Wrap your form in a div.
- Set the div’s display to block and text-align to center (this will center the contained form).
- Set the form’s display to inline-block (auto-sizes to content), left and right margins to auto (centers it horizontally), and text-align to left (or else its children will be center-aligned too).
How do I vertically align text in the middle of a div?
The CSS just sizes the div, vertically center aligns the span by setting the div’s line-height equal to its height, and makes the span an inline-block with vertical-align: middle. Then it sets the line-height back to normal for the span, so its contents will flow naturally inside the block.
How do I center text vertically in CSS?
How to Vertically Center Text with CSS
- Use the CSS vertical-align property.
- Use CSS Flexbox.
- Use the CSS display property.
- Use the CSS line-height property.
- Set equal top and bottom padding.
- Set absolute positioning and negative margin.
- Set absolute positioning and stretching.
- Set the CSS transform property.
How do you center a table in CSS?
Center a table with CSS
- Method 1. To center a table, you need to set the margins, like this: table.center { margin-left:auto; margin-right:auto; }
- Method 2. If you want your table to be a certain percentage width, you can do this: table#table1 { width:70%; margin-left:15%; margin-right:15%; }
- Method 3.
How do I align all text boxes in CSS?
4 Answers. You are making your inputs inline-block , but you are also floating them to the left. If you remove the float: left and add <br> after each input, you will get the correct behavior. To align the boxes, add a div wrapper around each label/input, make your label inline-block with a fixed width.
How do I align a text box to the right in HTML?
text-align:right; will only right align text elements. It appears that your are using bootstrap. You could try giving your form a class of pull-right , which is a bootstrap class for float right. Don’t use align:right; , there’s no such CSS rule, use float:right; instead.
How do I center in the middle of the page?
If you want to do a horizontal centering, just put the form inside a DIV tag and apply align=”center” attribute to it. So even if the form width is changed, your centering will remain the same.
How do you center a button?
How to center a button in CSS?
- text-align: center – By setting the value of text-align property of parent div tag to the center.
- margin: auto – By setting the value of margin property to auto.
- display: flex – By setting the value of display property to flex and the value of justify-content property to center.
How do you center a form of an element?
To centre block elements (such as divs and forms and paragraphs), give it a width and set margin-right and margin-left to auto. It’s important to understand the difference between block and inline elements.
How do I center a horizontal list in CSS?
There are two simple ways to center list item horizontally.
- display: inline-block & text-align: center. .list-container { text-align: center; .list-item { display: inline-block; } }
- width: fit-content & margin: 0 auto;
In this article, we would like to introduce you with 2 methods to center all pictures and text boxes in your Word document.
Pictures and shapes, such as text boxes, play vital important in making a wonderful document. With a growing number of images and shapes being inserted, the demand to integrate their formatting, say to center them starts to surface.
What you should know is that all pictures inserted into document is set in “In line with text” layout, while text boxes are flowing shapes. You may change the picture layout as required, but to center them you will have to consider the text wrapping. Because text formatting can be easily tampered, leaving you with a layout you don’t like.
Therefore, we will focus on 2 ways to center “In line with text” pictures and text boxes.
Method 1: Center One Picture or Text Box Manually
To center a “In line with text” picture, follow these steps:
- Firstly, click on the picture to select it.
- Secondly, click “Center” in “Paragraph” group under “Home” tab. Or you can use the shortcuts “Ctrl+ E” instead.


Then to center a text box, go through these instructions:
- Similarly, click on text box to have it in selection.
- Then click “Format” tab under “Drawing Tools”.
- Next click “Align” in “Arrange” group.
- And choose “Align Center” on its drop-down menu.


Method 2: Batch Center Multiple Pictures or Text Boxes Automatically
Most of us would favor an automatic process to save efforts. Here you go.
- First off, press “Alt+ F11” to open the VBA editor.
- Next click “Normal” project.
- Click “Insert” tab and choose “Module”.

- Then double click on the module to bring out the editing space on the right side.
- Next to center pictures, you paste the following codes there:

Sub CenterInLinePictures()
  Dim objInLineShape As InlineShape
  Dim objDoc As Document

  Set objDoc = ActiveDocument

  For Each objInLineShape In objDoc.InlineShapes
    objInLineShape.Select
    Selection.ParagraphFormat.Alignment = wdAlignParagraphCenter
  Next objInLineShape
End Sub
To center all text boxes, you need the bellowing macro:
Sub CenterTextBoxes()
  Dim objDoc As Document
  Dim objTextBox As Shape

  Set objDoc = ActiveDocument

  For Each objTextBox In objDoc.Shapes
    If objTextBox.Type = msoTextBox Then
      objTextBox.RelativeHorizontalPosition = wdRelativeHorizontalPositionPage
      objTextBox.Left = wdShapeCenter
    End If
  Next objTextBox
End Sub
To center both pictures and text boxes, you will have to use this one:
Sub CenterInLinePicturesAndTextBoxes()
  Dim objInLineShape As InlineShape
  Dim objShape As Shape
  Dim objDoc As Document

  Set objDoc = ActiveDocument

  For Each objInLineShape In objDoc.InlineShapes
    objInLineShape.Select
    Selection.ParagraphFormat.Alignment = wdAlignParagraphCenter
  Next objInLineShape

  For Each objShape In objDoc.Shapes
    If objShape.Type = msoTextBox Then
      objShape.RelativeHorizontalPosition = wdRelativeHorizontalPositionPage
      objShape.Left = wdShapeCenter
    End If
  Next objShape
End Sub
- Lastly, click “Run” button or hit “F5”.


Address Document Problems
No matter how reluctant we have to admit that Word is not foolproof. Its breaking down can lead to corruption of documents while inheriting a corrupted docx can be heart-broken for us. In order to ease such anxiety, it’s advisable to get hold of a document recovering tool in advance. Then you won’t have to worry about the data loss.
Author Introduction:
Vera Chen is a data recovery expert in DataNumen, Inc., which is the world leader in data recovery technologies, including xlsx corruption and pdf repair software products. For more information visit www.datanumen.com
Lesson 22: Aligning, Ordering, and Grouping Objects
/en/word2016/text-boxes/content/
Introduction
There may be times when your documents have multiple objects, such as pictures, shapes, and text boxes. You can arrange the objects any way you want by aligning, grouping, ordering, and rotating them in various ways.
Optional: Download our practice document.
Watch the video below to learn more about arranging objects in Word.
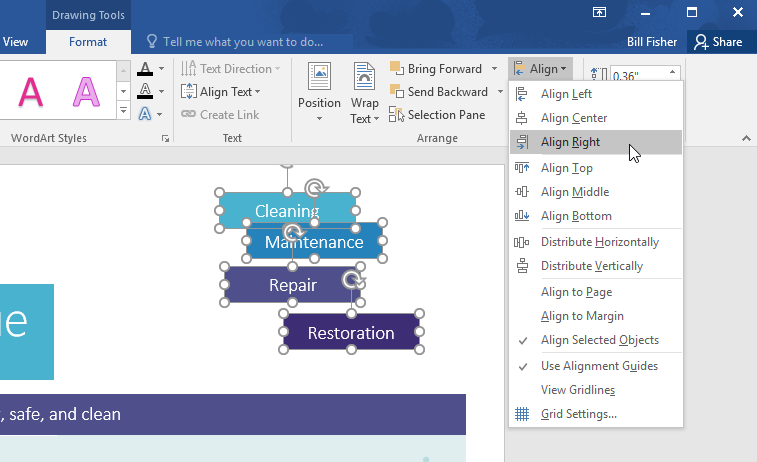
To align two or more objects:
- Hold the Shift (or Ctrl) key and click the objects you want to align. In our example, we’ll select the four shapes on the right.
- From the Format tab, click the Align command, then select one of the alignment options. In our example, we’ll choose Align Right.
- The objects will be aligned based on the selected option. In our example, the shapes are now aligned with each other.

Note that the Align Selected Objects option is selected by default, which allows you to align objects without moving them to a different part of the page. However, if you want to move the objects the top or bottom of the page, select Align to Page or Align to Margin before choosing an alignment option.
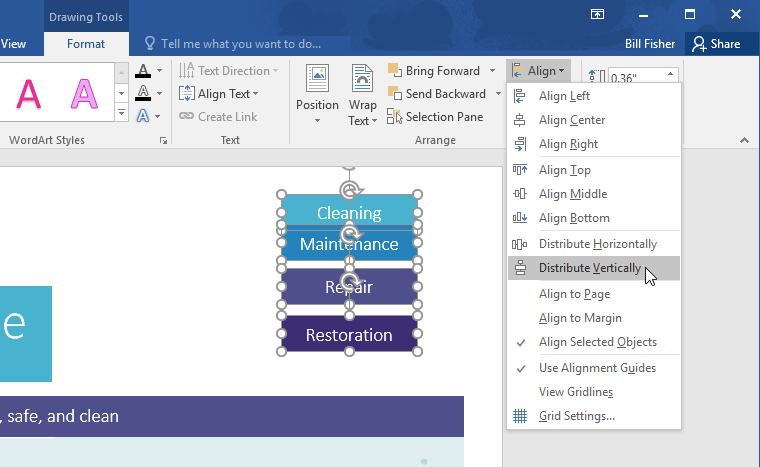
To distribute objects evenly:
If you have arranged your objects in a row or column, you may want them to be an equal distance from one another for a neater appearance. You can do this by distributing the objects horizontally or vertically.
- Hold the Shift (or Ctrl) key and click the objects you want to distribute.
- On the Format tab, click the Align command, then select Distribute Horizontally or Distribute Vertically.
- The objects will be evenly spaced from one another.
Grouping objects
At times, you may want to group multiple objects into one object so they will stay together. This is usually easier than selecting them individually, and it also allows you to resize and move all of the objects at the same time.
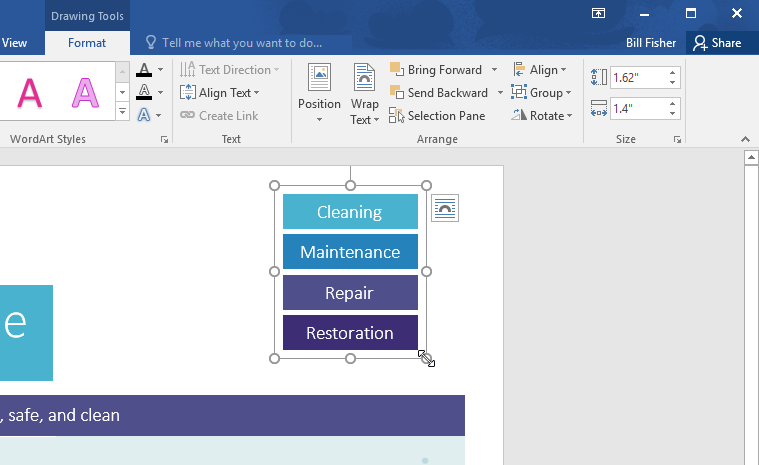
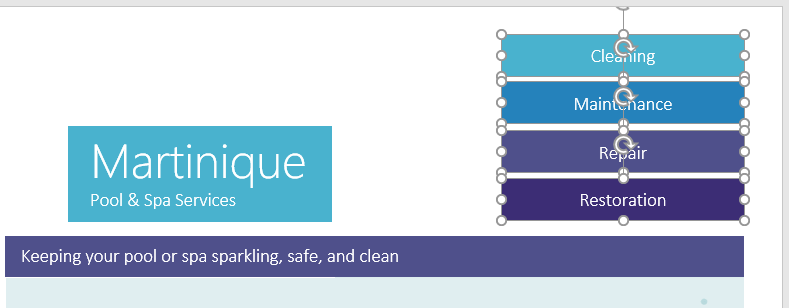
To group objects:
- Hold the Shift (or Ctrl) key and click the objects you want to group.
- Click the Group command on the Format tab, then select Group.
- The selected objects will now be grouped. There will be a single box with sizing handles around the entire group so you can move or resize all of the objects at the same time.

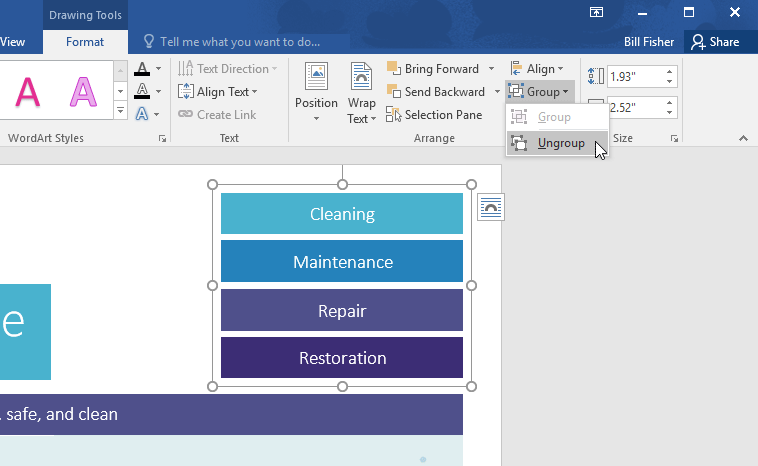
To ungroup objects:
- Select the grouped object. From the Format tab, click the Group command and select Ungroup.
- The objects will be ungrouped.
Ordering objects
In addition to aligning objects, Word gives you the ability to arrange objects in a specific order. The ordering is important when two or more objects overlap because it determines which objects are in the front or the back.
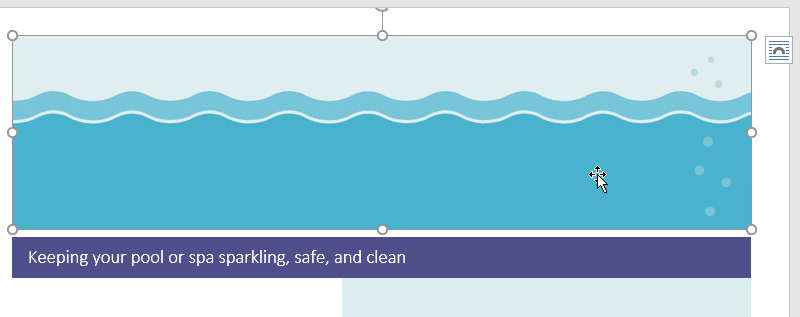
Understanding levels
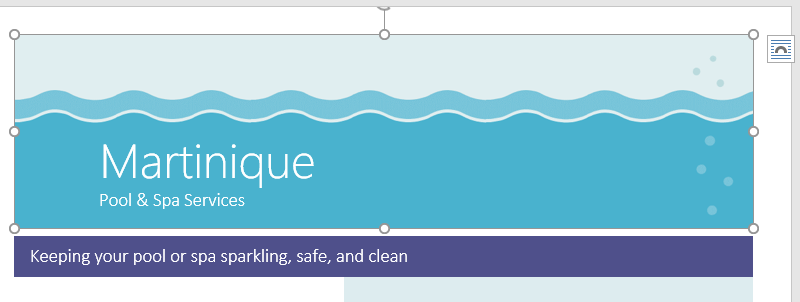
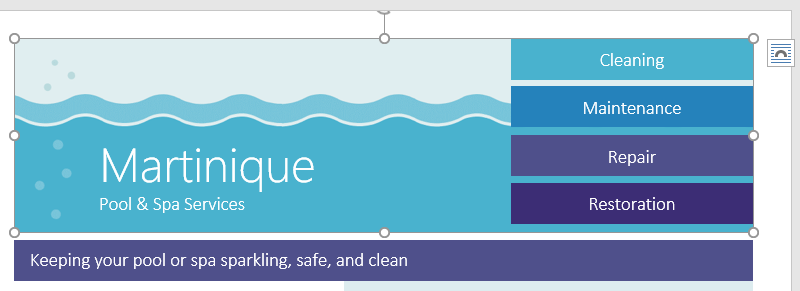
Objects are placed on different levels according to the order in which they were inserted into a document. In the example below, if we move the waves image to the beginning of the document, it covers up several of the text boxes. That’s because the image is currently on the highest—or top—level. However, we can change its level to put it behind the other objects.
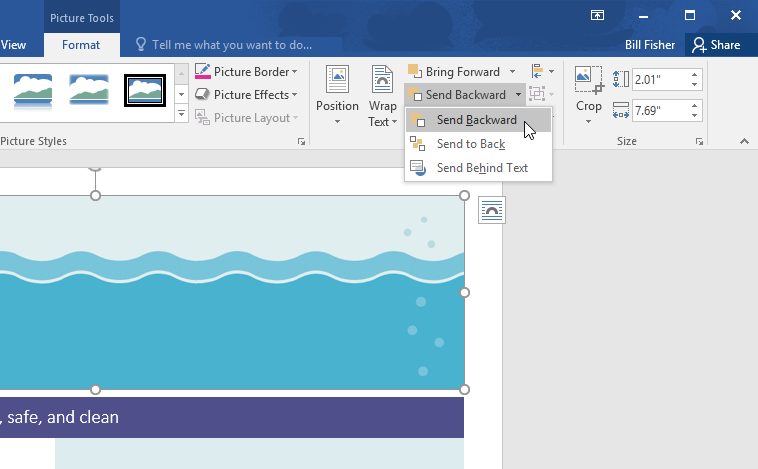
To change an object’s level:
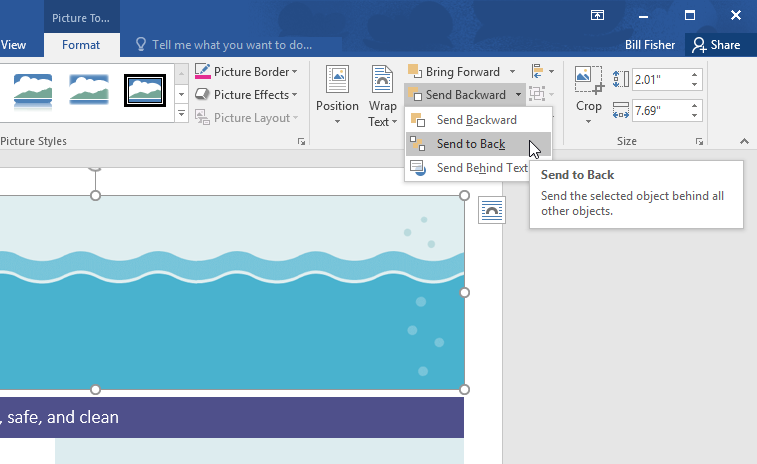
- Select the object you want to move. In our example, we’ll select the image of the waves.
- From the Format tab, click the Bring Forward or Send Backward command to change the object’s ordering by one level. In our example, we’ll select Send Backward.
- The objects will be reordered. In our example, the image is now behind the text on the left, but it’s still covering the shapes on the right.
- If you want to move an object behind or in front of several objects, it’s usually faster to use Bring Forward or Send Backward instead of clicking the other ordering command multiple times.
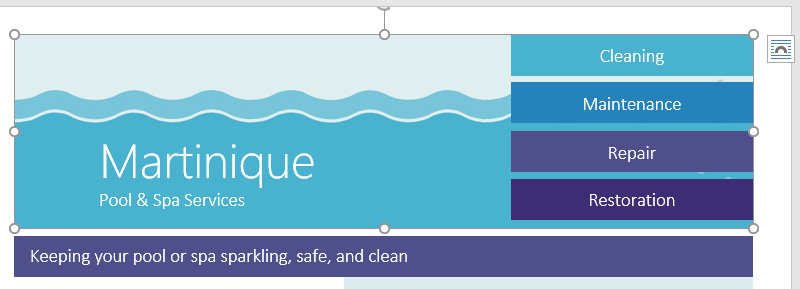
- In our example, the image has been moved behind everything else on the page, so all of the other text and shapes are visible.
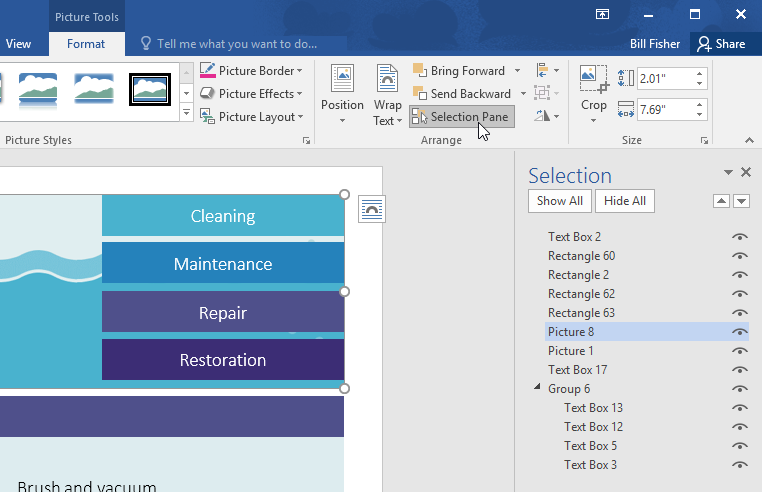
If you have several objects placed on top of each other, it may be difficult to select an individual object. The Selection Pane allows you to easily drag an object to a different level. To view the Selection Pane, click Selection Pane on the Format tab.
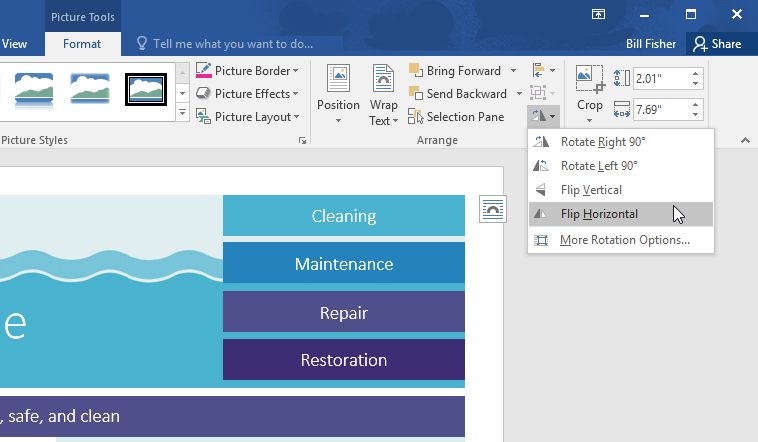
To rotate or flip an object:
If you need to turn an object so it faces a different direction, you can rotate it to the left or right, or you can flip it horizontally or vertically.
- With the desired object selected, click the Rotate command on the Format tab, then choose the desired rotation option. In our example, we’ll choose Flip Horizontal.
- The object will be rotated. In our example, we can now see the bubbles on the left that were previously hidden behind the text boxes.
Challenge!
- Open our practice document.
- Scroll to page 2 and select the picture of the waves at the top of the page.
- Use the Rotate command to flip the waves vertically.
- Use the Send to Back command to move the waves behind the Martinique text box.
- Move the Martinique text box so it is near the bottom of the waves image.
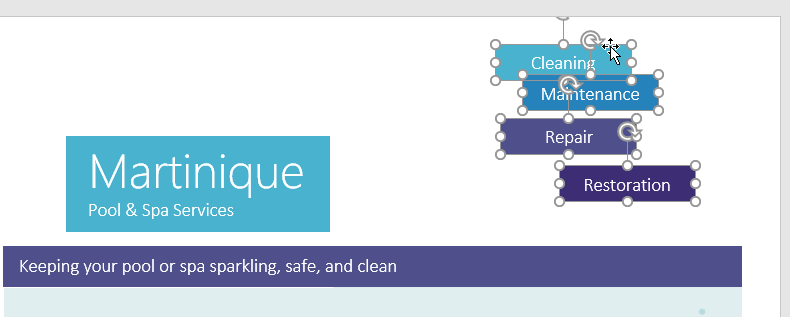
- Make sure the waves picture and Martinique text box are no longer selected. Hold down the Shift key, then select the text boxes containing Cleaning, Maintenance, Repair, and Restoration.
- Click the Align command, and make sure the Align Selected Objects option is selected. Select Align Right and Distribute Vertically.
- With the text boxes still selected, group them.
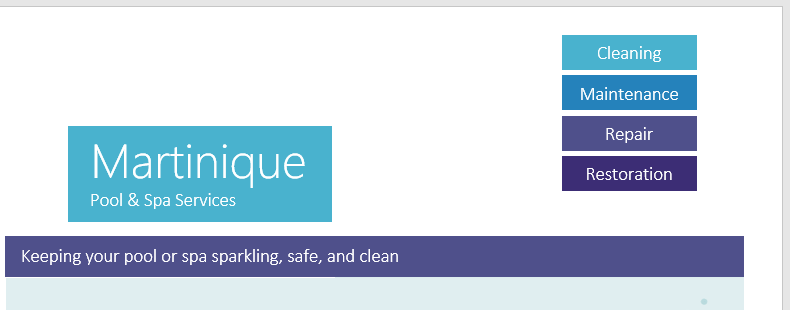
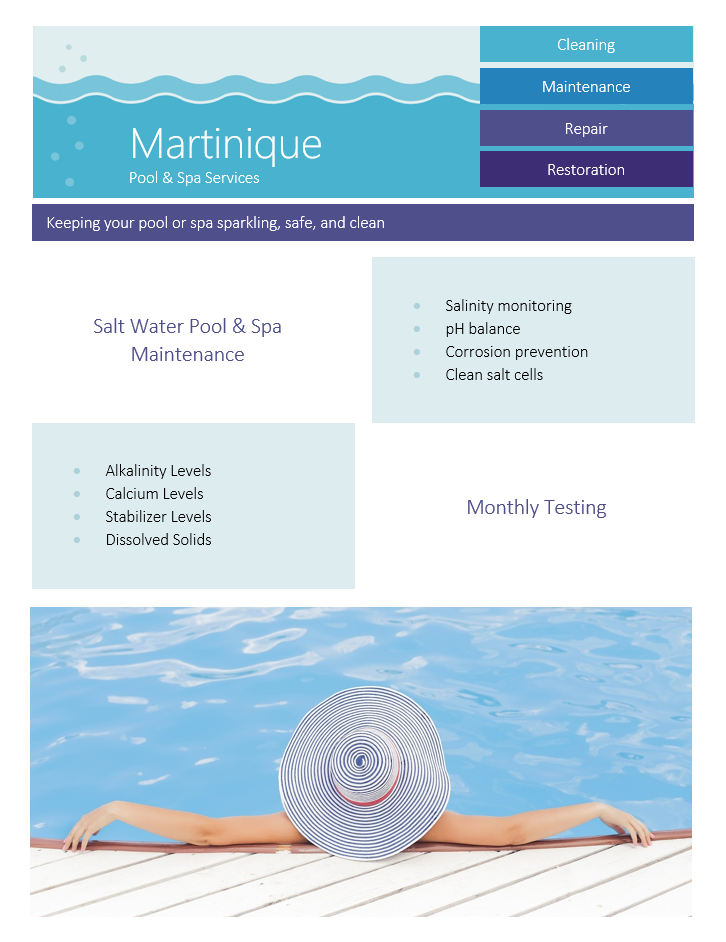
- When you’re finished, your page should look something like this:
/en/word2016/tables/content/
- Remove From My Forums
-
Вопрос
-
Hi,
Need to align center all textboxes in my document . I can select one textbox , then click align center. But when I select all textboxes and click align center, it doesn’t work.
Is there something wrong with my step? Or I have to align center all textboxes one by one? Any other quick ways to do that ?
Thanks in advance.
Ответы
-
You could run the following macro. If you create the macro in a module in your default template Normal.dotm, you can use it in any document where you need it.
Sub CenterTextBoxes()
    Dim shp As Shape
    Application.ScreenUpdating = False
    For Each shp In ActiveDocument.Shapes
        If shp.Type = msoTextBox Then
            shp.TextFrame.TextRange.ParagraphFormat _
                .Alignment = wdAlignParagraphCenter
        End If
    Next shp
    Application.ScreenUpdating = True
End Sub
Regards, Hans Vogelaar (http://www.eileenslounge.com)
-
Предложено в качестве ответа
1 мая 2017 г. 2:57
-
Помечено в качестве ответа
LydiaLD
3 мая 2017 г. 3:09
-
Предложено в качестве ответа
-
Hi,LydiaLD
You can use the macro to do that as above reply.
And as you may need to center all pictures too, you can try the macro as below.
Sub CenterInLinePicturesAndTextBoxes() Dim objInLineShape As InlineShape Dim objShape As Shape Dim objDoc As Document Set objDoc = ActiveDocument For Each objInLineShape In objDoc.InlineShapes objInLineShape.Select Selection.ParagraphFormat.Alignment = wdAlignParagraphCenter Next objInLineShape For Each objShape In objDoc.Shapes If objShape.Type = msoTextBox Then objShape.RelativeHorizontalPosition = wdRelativeHorizontalPositionPage objShape.Left = wdShapeCenter End If Next objShape End Sub-
Помечено в качестве ответа
LydiaLD
3 мая 2017 г. 3:09 -
Изменено
LotusAdaBanned
12 мая 2017 г. 1:20
-
Помечено в качестве ответа