
Word for Microsoft 365 Word 2021 Word 2019 Word 2016 Word 2013 Word 2010 Word 2007 Word Starter 2010 More…Less
Use advanced Word options to customize editing tasks, document display, printing preferences, and more.
To choose your advanced Word options, select File > Options, and on the left pane, select Advanced.
|
Editing options Set up the way you select, replace, and format words and paragraphs. |
|
|
Cut, copy, and paste Choose how you want to paste content and formatting within the same document or between different documents and apps. |
|
|
Image Size and Quality Apply image size and quality settings for an open document or for all new documents. |
|
|
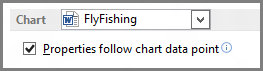
Chart Allow custom formatting and labels to stay with data points, even if the chart changes. |
|
|
Show document content Choose formatting, text, and image options. |
|
|
Display Choose a measurement format, show scrolling bars, and select the number of documents shown in the Recent Documents list. |
|
|
Optimize the appearance of the hard-copy version of the document or change your printer paper size. |
|
|
Save Save backup copies, automatically save changes to templates, or allow backup saves. |
|
|
Preserve fidelity when sharing this document Make sure the look of your document is preserved when you share the document with someone who uses a different version of Word. |
|
|
General Among the options in this section, you can change where Word saves your changes by selecting File Locations . Or choose to open documents in Draft view. |
|
|
Layout options for: Modify the layout, such as character spacing, for an open document or all new documents. |
|


To choose your advanced Word options, select File > Options, and on the left pane, select Advanced.
In this article
-
Editing options
-
Cut, copy, and paste
-
Image size and quality
-
Show document content
-
Display
-
Print
-
When printing this document
-
Save
-
Preserve fidelity when sharing this document
-
General
-
Compatibility
-
Compatibility options for
Editing options
Typing replaces selected text
Select this option to delete the selected text when you begin to type. If you clear this check box, Microsoft Office Word inserts new text in front of the selected text and does not delete the selected text.
When selecting, automatically select entire word
Select this option to select entire words when you select part of one word and then part of the next word. Turning this option on also causes Word to select a word and the space that follows it when you double-click a word.
Allow text to be dragged and dropped
Select this option to be able to move or copy selected text by dragging it. To move text, select the text, and then drag it to a new location. To copy text, select the text, and then hold down CTRL while you drag the selection to its new location.
Use CTRL + Click to follow hyperlink
Select this option to make it easier to edit the text of hyperlinks. When this option is turned on, you must press CTRL while you click the link in order to follow the link. When this option is turned off, clicking the link causes Word to go to the destination of the link, which makes it more difficult to edit the text of the link.
Automatically create drawing canvas when inserting AutoShapes
Select this option to place a drawing canvas around drawing objects or ink drawings and writing when you insert them into your document. A drawing canvas helps you to arrange drawing objects and pictures, and to move them as a unit.
Use smart paragraph selection
Select this option to select the paragraph mark when you select a whole paragraph. If you include the paragraph mark when you cut and paste a paragraph, you don’t leave a blank paragraph, and your formatting automatically stays with the paragraph.
Use smart cursoring
Select this option to specify that the cursor moves as you scroll up or down. When you press the LEFT ARROW, RIGHT ARROW, UP ARROW, or DOWN ARROW key after you scroll, the cursor responds at the page currently in view, not at its previous position.
Use the Insert key to control overtype mode
Select this option to turn Overtype mode on or off by pressing INSERT.
-
Use overtype mode
Select this option to replace existing text as you type, one character at a time. If Use the Insert key to control overtype mode is selected, you can turn this option on or off by pressing INSERT.
Add double quote for Hebrew alphabet numbering
Select this option to add double quotation marks («) to numbering.
This option is available only if Hebrew is enabled for editing text.
Prompt to update style
Select this option to be prompted when you directly modify text to which a style is applied and then you reapply the style to the modified text. When prompted, you can either update the style based on recent changes or reapply the formatting of the style.
Use Normal style for bulleted or numbered lists
Select this option to base list styles on the Normal paragraph style instead of the Paragraph List style.
Keep track of formatting
Select this option to keep track of your formatting as you type. This helps you to easily apply the same formatting elsewhere. This option must be turned on before you can use the Select Text with Similar Formatting command on the shortcut menu that appears if you right-click selected text. To display a list of the formatting that you used, click the Options command on the Style pane, and then select the Paragraph level formatting, Font formatting, and Bullet and numbering formatting check boxes.
-
Mark formatting inconsistencies
Select this option to mark formatting with a wavy blue underline when it is similar to, but not exactly the same as, other formatting in your documents. To use this option, you must also select the Keep track of formatting check box.
Updating style to match selection In the list, click Keep previous numbering and bullets pattern to make any paragraphs in that style that aren’t numbered stay unnumbered. Click Add numbering or bullets to all paragraphs with this style to number any paragraphs that have the style applied.
Enable click and type
Select this option to insert text, graphics, tables, or other items in a blank area of a document by double-clicking in the blank area. The Click and Type feature automatically inserts paragraphs and applies the alignment necessary to position the item where you double-clicked. This feature is available only in Print Layout view and Web Layout view.
-
Default paragraph style Select the style that is applied to text when you use click and type.
Show AutoComplete suggestions Select this option to see complete AutoText entries when you type the first four characters of the entry. You can press ENTER to add the full AutoText entry to your document, or you can continue to type the text you want. If you don’t want to see the AutoText suggestions, clear this check box.
Cursor movement
This option specifies the direction in which the cursor moves when you press the arrow keys on your keyboard.
This option is available only if a right-to-left language is enabled for editing text.
-
Logical Select this option to move the cursor according to the direction of the text encountered. For example, when you are using the arrow keys to move through Arabic and then English text in the same sentence, the cursor moves from right to left through the Arabic text and then starts at the leftmost character in the English word and progresses from left to right.
-
Visual Select this option to move the cursor to the next visually adjacent character. For example, when you are using the arrow keys to move from right to left through Arabic and then English text in the same sentence, the arrow key moves from right to left regardless of the direction of the text.
Cursor visual selection
This option specifies how text is selected as you extend the selection.
This option is available only if a right-to-left language is enabled for editing text.
-
Block Select this option to wrap text from line to line as you select downward, with all selected lines being the same width.
-
Continuous Select this option to wrap text from line to line as you select downward and vary the width of the final line of the block.
Use sequence checking
Select this option to validate whether a newly typed character occurs in the correct sequence to be used as a tone mark, diacritic, or vowel to be placed above, below, in front of, or behind the consonant it goes with.
This option is available only if a complex script language is enabled for editing text.
-
Type and replace Select this option to replace the previously typed character with the newly typed character if the two characters cannot coexist in the same text cluster.
Asian fonts also apply to Latin text
Select this option to change Latin characters to the selected Asian font when you apply the Asian font to selected text. Clear this check box if you want Latin characters to remain in the Latin font while you apply the Asian font to the rest of the document.
This option is available only if an East Asian language is enabled for editing text.
Automatically switch keyboard to match language of surrounding text
Select this option to change the keyboard language and font based on the language of the text where the cursor is placed. If you clear this option, only the font is changed.
Note: This option is available only if an East Asian language is enabled for editing text and an Input Method Editor for typing East Asian characters is installed.
IME Control Active
Select this option to start an Input Method Editor (IME). Clear this check box to stop an IME.
Note: This option is available only if an East Asian language is enabled for editing text and an Input Method Editor for typing East Asian characters is installed.
IME Settings
Click to open the Properties for IME Name dialog box. Use this dialog box to set or change the text, keyboard, character conversion, and other options for the active IME.
Note: This option is available only if an East Asian language is enabled for editing text and an Input Method Editor for typing East Asian characters is installed.
Top of Page
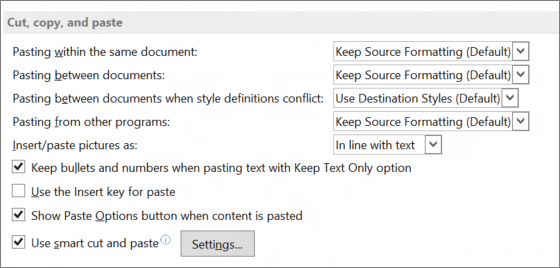
Cut, copy, and paste
Pasting within the same document
This option displays the default behavior that occurs when you paste content into the same document from which you copied the content. In the drop-down list, select one of the following:
-
Keep Source Formatting (Default)
This option retains character styles and direct formatting that were applied to the copied text. Direct formatting includes characteristics such as font size, italic, or other formatting that is not included in the paragraph style. -
Merge Formatting
This option discards most of the formatting that was applied directly to the copied text, but it retains formatting that is considered emphasis, such as bold and italic, when it is applied to only a portion of the selection. The text takes on the style characteristics of the paragraph where it is pasted. The text also takes on any direct formatting or character style properties of text that immediately precedes the cursor when the text is pasted. -
Keep Text Only
This option discards all formatting and nontext elements, such as pictures or tables. The text takes on the style characteristics of the paragraph where it is pasted and takes on any direct formatting or character style properties of text that immediately precedes the cursor when the text is pasted. Graphical elements are discarded, and tables are converted to a series of paragraphs.
Pasting between documents
This option displays the default behavior that occurs when you paste content that was copied from another document in Word. In the drop-down list, select one of the following:
-
Keep Source Formatting (Default)
This option retains formatting that was applied to the copied text. Any style definition that is associated with the copied text is copied to the destination document. -
Merge Formatting
This option discards most formatting that was applied directly to the copied text, but it retains formatting that is considered emphasis, such as bold and italic, when it is applied to only a portion of the selection. The text takes on the style characteristics of the paragraph where it is pasted. The text also takes on any direct formatting or character style properties of text that immediately precedes the cursor when the text is pasted. -
Keep Text Only
This option discards all formatting and nontext elements, such as pictures or tables. The text takes on the style characteristics of the paragraph where it is pasted and takes on any direct formatting or character style properties of text that immediately precedes the cursor when the text is pasted. Graphical elements are discarded, and tables are converted to a series of paragraphs.
Pasting between documents when style definitions conflict
This option displays the default behavior that occurs when you paste content that was copied from another document in Word, and the style that is assigned to the copied text is defined differently in the document where the text is being pasted. In the drop-down list, select one of the following:
-
Keep Source Formatting
This option retains the look of the copied text by assigning the Normal style to the pasted text and applying direct formatting. Direct formatting includes characteristics such as font size, italic, or other formatting to mimic the style definition of the copied text. -
Use Destination Styles (Default)
This option retains the style name that is associated with the copied text, but it uses the style definition of the document where the text is being pasted. For example, you copy Heading 1 text from one document to another. In one document, Heading 1 is defined as Arial bold, 14-point, and in the document where you are pasting the text, Heading 1 is defined as Cambria bold, 16-point. When you use the Use Destination Styles option, the pasted text uses Heading 1 style, Cambria bold, 16-point. -
Merge Formatting
This option discards the style definition and most formatting that was applied directly to the copied text, but it retains formatting that is considered emphasis, such as bold and italic, when it is applied to only a portion of the selection. The text takes on the style definition in the document where the text is being pasted. -
Keep Text Only
This option discards all formatting and nontext elements, such as pictures or tables. The text takes on the style characteristics of the paragraph where it is pasted and takes on any direct formatting or character style properties of text that immediately precedes the cursor when the text is pasted. Graphical elements are discarded, and tables are converted to a series of paragraphs.
Pasting from other programs
This option displays the default behavior that occurs when you paste content that was copied from another program. In the drop-down list, select one of the following:
-
Keep Source Formatting (Default)
This option retains the formatting of the copied text. -
Merge Formatting
This option discards most formatting that was applied directly to the copied text, but it retains formatting that is considered emphasis, such as bold and italic, when it is applied to only a portion of the selection. The text takes on the style characteristics of the paragraph where it is pasted. The text also takes on any direct formatting characteristics of text that immediately precedes the cursor when the text is pasted. -
Keep Text Only
This option discards all formatting and nontext elements, such as pictures or tables. The text takes on the style characteristics of the paragraph where it is pasted and takes on any direct formatting or character style properties of text that immediately precedes the cursor when the text is pasted. Graphical elements are discarded, and tables are converted to a series of paragraphs.
Insert/paste pictures as
This option displays how Word inserts pictures relative to the text in your document. You can insert images inline with text, allow images to move with text, or wrap text around, in front of, or behind an image. In the drop-down list, select one of the following:
-
In line with text
This option inserts the graphic in a paragraph as if it were text. This option is used by default. The graphic moves as you add or delete text. You can drag the graphic to reposition it the same way that you drag text. -
Square
This option wraps the text around all sides of a square around the graphic. The graphic does not move as you add or delete text, but you can drag the graphic to reposition it. -
Tight
This option wraps the text around the graphic in an irregular shape around the actual image. The graphic does not move as you add or delete text, but you can drag the graphic to reposition it. -
Behind text
This option inserts the graphic so that the graphic floats on its own layer behind the text. There is no border around the graphic. The graphic does not move as you add or delete text, but you can drag the graphic to reposition it. -
In front of text
This option inserts the graphic so that the graphic floats on its own layer in front of the text. There is no border around the graphic. The graphic does not move as you add or delete text, but you can drag the graphic to reposition it. -
Through
This option wraps the text around the graphic, including filling the space created by a concave shape, such as a crescent moon. The graphic does not move as you add or delete text, but you can drag the graphic to reposition it. -
Top and bottom
This option prevents text from wrapping on the sides of the graphic. The graphic does not move as you add or delete text, but you can drag the graphic to reposition it.
Keep bullets and numbers when pasting text with Keep Text Only option
Select this option to convert numbering and bullets into text symbols.
Add control characters in Cut and Copy Select this option to retain right-to-left cursor movement when you cut or copy text from a Word document and paste as plain text (for example, in Notepad).
Use the Insert key for paste
Select this option to use the INSERT key to insert the contents of the Office Clipboard into a document.
Show Paste Options buttons when content is pasted
Select this option to display the Paste Options button when you paste content. You can use the Paste Options button to override or modify the settings you make in this section of the Word Options dialog box.
Use smart cut and paste
Select this option to automatically adjust formatting as you paste text. After you select this check box, you can click Settings to set additional options for pasting.
-
Settings
Click this to open the Settings dialog box. Use this dialog box to specify default behavior when merging, cutting, and pasting text. You can override default behavior by using the Paste Options button that appears when you paste content from the Clipboard into your document. This button is available only when the Use smart cut and paste option is turned on.-
Use default options for
Click an item in the list to pre-select a configuration of options in the dialog box. To select your own configuration of options, click Custom in this list. -
Adjust sentence and word spacing automatically
Select this option to remove extra spaces when deleting text or add necessary spaces when pasting text from the clipboard. -
Adjust paragraph spacing on paste
Select this option to prevent creating empty paragraphs and to prevent inconsistent paragraph spacing. -
Adjust table formatting and alignment on paste
Select this option to control the formatting and alignment of tables. When this option is turned on, single cells are pasted as text, table portions are pasted as rows into an existing table (rather than as a nested table), and when you add a table to an existing table, the pasted table is adjusted to match the existing table. -
Smart style behavior
Selecting this option has no effect. To fine-tune the behavior of styles when pasting content, use the Pasting options in the Cut, copy, and paste section of the Advanced options. -
Merge formatting when pasting from Microsoft PowerPoint
Select this option to control the results when you paste content from a PowerPoint presentation. When this option is turned on, the formatting of the surrounding text or table is applied to the pasted text, the most recently used bullet, number, or list style is applied to the pasted list, and the look of items such as tables, hyperlinks, images, OLE objects, and shapes is preserved from the source in PowerPoint. -
Adjust formatting when pasting from Microsoft Excel
Select this option to control the results when pasting data from Excel. When this option is turned on, pasted data is placed in a table, and charts are pasted as pictures rather than as OLE objects. -
Merge pasted lists with surrounding lists
Select this option to format list items to conform to the surrounding list when you are pasting the items into a list.
-
Top of Page
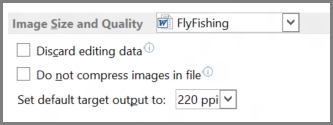
Image size and quality
Image Size and Quality Select the document that these settings apply to. In the list, click the name of a document that is already open, or click All New Documents to make the setting apply to all documents that you will create.
Discard editing data Select this option to save only the edited picture. Data from the original picture, before it was edited, will be unavailable.
Do not compress images in file Select this option to keep pictures at their full size. This option might make the document file size large.
Set default target output to This option determines the resolution of compressed images. Select a value for pixels per inch (ppi) from the list.
-
220 ppi Select this option if you’re planning to print your document.
-
150 ppi Select this option for documents that will be read on the screen.
-
96 ppi Select this option for documents you want to send in email.
Top of Page
Show document content
Show background colors and images in Print Layout view
Select this option to display background colors and images.
Show text wrapped within the document window
Select this option to wrap text to the document window, so that it is easier to read on the screen.
Show picture placeholders
Select this option to display an empty box in place of each picture in your documents. This option speeds the process of scrolling through a document that contains a large number of pictures.
Show drawings and text boxes on screen
Select this option to display objects that are created with the Word drawing tools in Print Layout view or Web Layout view. Clear this check box to hide drawings and possibly speed the display of documents that contain many drawings. Drawings will be printed even if you clear this check box.
Show text animation
Select this option to display text animations on your screen. Clear the check box to see how the text will look when printed.
Note: Use this option when viewing animated text in documents that were created in a version of Word earlier than Word 2007. The current version of Word no longer provides the ability to create animated text.
Show control characters
Select this option to display right-to-left control characters.
This option is available only if a right-to-left language is enabled for editing text.
Show bookmarks
Select this option to display bookmarks on the screen. If you assign a bookmark to an item, the bookmarked item appears in brackets ([…]). If you assign a bookmark to a location, the bookmark appears as an I-beam. The brackets and the I-beam do not appear in printed documents.
Show text boundaries
Select this option to display dotted lines around text margins, columns, and paragraphs. The boundaries are for layout purposes; they do not appear in printed documents.
Show crop marks
Select this option to display the corners of the margins.
Show field codes instead of their values
Select this option to display field codes instead of field results in your documents. For example, you may see { TIME @»MMMM, d, YYYY» } instead of February 4, 2008. Clear this check box to view field results.
Regardless of this setting, you can always switch between displaying field codes and field code results by pressing ALT+F9.
Field shading
This option displays whether and when fields are shaded. In the list, select Always or When Selected to shade your fields. Shading fields makes them easy to identify. The shading appears on the screen but not in the printed document.
Numeral
This option determines how numerals will appear in documents. Select an item from the list.
This option is available only if an Arabic language is enabled for editing text.
-
Arabic Select this option to display numerals in a format familiar to speakers of English and other European languages.
-
Hindi Select this option to display numerals in a format familiar to speakers of Arabic and Hindi.
-
Context Select this option to display numerals according to the language of the surrounding text.
-
System Select this option to display numerals according to the regional settings in Control Panel.
Month names
This option determines how Western (Gregorian) month names appear in Arabic text. Select an item from the list.
This option is available only if an Arabic language is enabled for editing text.
-
Arabic Select this option to use Arabic native month names.
-
English transliterated Select this option to spell out Western (Gregorian) month names in English pronunciation by using Arabic text.
-
French transliterated Select this option to spell out Western (Gregorian) month names in French pronunciation by using Arabic text.
Diacritics
This option displays diacritics in the document.
This option is available only if a language that uses diacritics is enabled for editing text.
-
Use this color for diacritics Select this option to specify a color for display of all diacritics, regardless of the color of the diacritics in the original document. In the list, select a color.
Use draft font in Draft and Outline views
On computers with extremely limited resources, select this option to speed the screen display of documents.
-
Name
Select the font to use for drafts of your documents. This option is available only when you select the Use draft font in Draft and Outline views check box. -
Size
Select the point size of the draft font. This option is available only when you select the Use draft font in Draft and Outline views check box.
Document view
This option specifies the text direction for new documents.
This option is available only if a right-to-left language is enabled for editing text.
-
Right-to-left Select this option to lay out documents right to left. For example, paragraphs start on the right side of a document with text flowing to the left.
-
Left-to-right Select this option to lay out documents left to right. For example, paragraphs start on the left side of a document with text flowing to the right.
Font Substitution
Click this to open the Font Substitution dialog box. Use this option to determine whether the active document uses any fonts that are not available on your computer. If the document uses fonts that are not on your computer, you can use the dialog box to specify a substitute font.
Top of Page
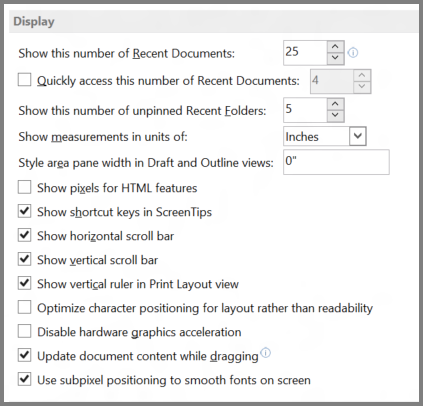
Display
Show this number of Recent Documents
Enter the number of items, between 1 and 50, to display in the Recent Documents list.
Note: Only the first nine files in the list are assigned an accelerator key. You can open these documents by pressing 1 through 9 after you press ALT+F.
Show measurements in units of
Select the measurement unit that you want to use for the horizontal ruler and for measurements that you type in dialog boxes.
Style area pane width in Draft and Outline views
Type a positive decimal, such as 0.5, in the box to open the style area, which displays the names of the styles applied to text. To close the style area, enter 0.
Show measurements in width of characters
Select this option to use character width as the basis for aligning text, such as in the vertical and horizontal rulers.
This option is available only if an East Asian language is enabled for editing text.
Show pixels for HTML features
Select this option to use pixels as the default unit of measurement in dialog boxes that are related to HTML features.
Show all windows in the Taskbar
Select this option to display an icon on the Microsoft Windows taskbar for each open window in a Microsoft Office program. Clearing this check box places a single icon for each open program on the taskbar.
Show shortcut keys in ScreenTips
Select this option to display keyboard shortcuts in ScreenTips.
Show horizontal scroll bar
Select this option to display the horizontal scrollbar at the bottom of the document window.
Show vertical scroll bar
Select this option to display the vertical scroll bar at the side of the document window.
-
Left scroll bar Select this option to place the vertical scroll bar on the left side of the document window. Use this option when working with documents that predominantly use right-to-left text.
This option is available only if a right-to-left language is enabled for editing text.
Show vertical ruler in Print Layout view
Select this option to display the vertical ruler at the side of the document window. Make sure that you also select the Ruler check box in the Show/Hide group on the View tab of the Ribbon, a component of the Microsoft Office Fluent user interface.
-
Show right ruler in Print Layout view Select this option to display the vertical ruler at the right side of the document window.
This option is available only if a right-to-left language is enabled for editing text.
Optimize character positioning for layout rather than readability
Select this option to display character positioning accurately, as it will appear in the printed document with respect to blocks of text. Spacing between characters may be distorted when this option is turned on. For best readability on the screen, turn this option off.
Disable hardware graphics acceleration Select this option to stop using the computer’s graphics card for rendering three-dimensional shapes, shape effects, and text effects.
Top of Page
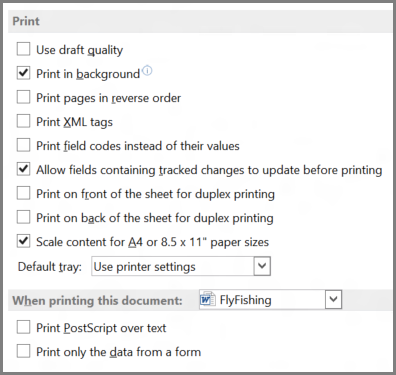
Use draft quality
Select this option to print the document with minimal formatting, which may speed the printing process. Many printers do not support this function.
Print in background
Select this option to print documents in the background, which allows you to continue to work while you print. This option requires more available memory to allow you to work and print at the same time. If working with your document while printing becomes unacceptably slow, turn this option off.
Print pages in reverse order
Select this option to print pages in reverse order, beginning with the last page in your document. Do not use this option when you print envelopes.
Print XML tags
Select this option to print the XML tags for the XML elements that are applied to an XML document. You must have a Schema attached to the document, and you must apply elements that are provided by the attached Schema. The tags appear in the printed document.
Print field codes instead of their values
Select this option to print field codes instead of field results — for example, { TIME @»MMMM, d, YYYY» } instead of February 4, 2008.
Allow fields containing tracked changes to update before printing Select this option to ensure that any field codes that were inserted while tracked changes were turned on will print showing the changed text.
Print on front of the sheet for duplex printing
Select this option to print the front of each sheet when printing on a printer that does not have duplex capability. Pages will print in reverse order so that when you flip the stack to print on the back, the pages will print in the proper order.
Print on back of the sheet for duplex printing
Select this option to print the back of each sheet when printing on a printer that does not have duplex capability. Pages will print in ascending order so that they correspond to a stack of pages that were printed on the front in reverse order.
Scale content for A4 or 8.5 x 11″ paper sizes
Select this option to automatically adjust documents that are designed for 8.5-by-11-inch paper to fit A4 paper and to adjust documents that are designed for A4 paper to fit 8.5-by-11-inch paper. This option takes affect only if the A4 or 8.5-by-11-inch paper in the printer does not match the paper size that is set on the Page Layout tab of Word. This option affects printouts only; it does not affect formatting.
Default tray
This option displays the printer tray that is used by default. To follow the settings in your printer, select Use printer settings. To choose a particular tray, select it in the list. The choices in the list depend on your printer’s configuration.
Top of Page
When printing this document
When printing this document
Select the document that these printing settings apply to. In the list, select the name of a document that is already open, or select All New Documents to make the setting apply to all documents that you will create.
Print PostScript over text
Select this option to print PostScript code when a document contains PRINT fields.
Print only the data from a form
Select this option to print the data that is entered into an online form without printing the form.
Top of Page
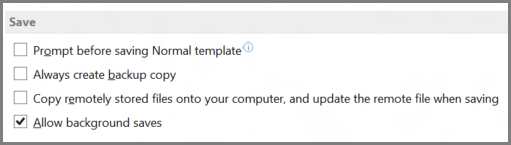
Save
Prompt before saving Normal template
Select this option to display, when you close Word, a message that asks if you want to save any changes that were made to the default template. Because changes to the default template will affect any new documents that you create, you may want to be alerted when the template has changed. Clearing this check box automatically saves changes without prompting you.
Always create backup copy
Select this option to create a backup copy of a document each time you save the document. Each backup copy replaces the previous backup copy. Word adds the phrase «Backup of» to the file name and applies the file extension .wbk to all backup copies. The backup copies are saved in the same folder as your original document.
Copy remotely stored files onto your computer, and update the remote file when saving
Select this option to temporarily store a local copy of a file that you store on a network or removable drive. When you save the local copy, Word saves your changes to the original copy. If the original file is not available, Word prompts you to save the file in another location to avoid data loss.
Allow background saves
Select this option to save your document while you work. A progress meter appears in the status bar when Word performs a background save.
Top of Page
Preserve fidelity when sharing this document
Preserve fidelity when sharing this document
Select the document that these settings apply to. In the list, select the name of a document that is already open, or select All New Documents to make the setting apply to all documents that you will create.
Save form data as delimited text file
Select this option to save the data that is entered into an online form as a single, tab-delimited text file in plain text format. You can then import the contents of that file into a database.
Embed linguistic data
Select this option to save linguistic data, such as speech and handwritten text.
Top of Page
General
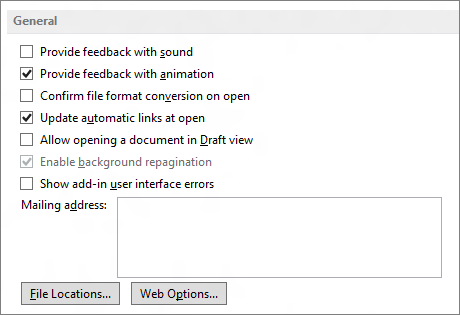
Provide feedback with sound
Select this option to add sounds to certain actions or events in Word and other programs in 2007 Microsoft Office system. For example, Word can play a sound when it completes a process. To change the sound that is associated with an event, open the folder for sounds and audio devices in Control Panel. Your computer must have a sound card to play most sounds.
Provide feedback with animation
Select this option to animate the movement of your pointer in Word and the other Office programs. This option also provides animated cursors for actions such as printing, saving, automatic formatting, and find-and-replace operations.
Confirm file format conversion on open
Select this option to choose the file converter that Word uses to open files that were created in another program. Clear this check box if you want Word to select a converter automatically.
Update automatic links at open
Select this option to automatically update any content that is linked to other files each time you open a document.
Allow opening a document in Draft view
Select this option to be able to open a document in Draft view.
Note: To make a document open in Draft view by default, you need to turn on this option and then on the View tab in the Document Views group, click Draft. Make some kind of change to the document, and then save the document.
Enable background repagination
Select this option to repaginate documents automatically as you work. This option is available in Draft and Outline views only. Clearing this check box prevents page numbers from updating (when displayed in the status bar) until you switch to Print Layout view.
Show add-in user interface errors
Select this option to display error messages from programs that customize the user interface. This option is especially useful for authors of software solutions, because it provides information for debugging customizations to the user interface.
Show customer submitted Office.com content Select this option to see templates and images created by customers in addition to the content provided by Microsoft Office.
Mailing address
Type the address that you want Word to use as the default return address for envelopes and letters.
File Locations
Click this to see the default storage location for documents, templates, and other items that you create and use in Word. In the File Locations dialog box, click the item you want to change, and then click Modify to set a new default location.
The default locations for templates and the Startup folder are treated as trusted locations. If you change the location, be sure that the new folder is a secure location.
Web Options
Click this to open the Web Options dialog box. Use this dialog box to set options for using Word to create Web pages.
Top of Page
Compatibility
English Word 6.0/95 documents
This option specifies your preferences for converting text. Earlier versions of Word were sometimes used in conjunction with third-party programs designed to support Chinese or Korean on English versions of Microsoft Windows. If the use of these add-ins results in incorrect text display in a document you are trying to open, you can use these options to convert the document so that text is displayed correctly. After successfully opening the file, be sure to reset this option to Open normally; otherwise, correctly stored files may be opened incorrectly.
This option is available only if an East Asian language is enabled for editing text.
-
Contain Asian text Select this option if you know the document contains East Asian text, so that the text will display correctly.
-
Open normally Select this option after the file has been opened to display the text correctly.
-
Automatically detect Asian text Select this option if you are not sure whether the document contains East Asian text. Word attempts to detect East Asian text and display it correctly.
Top of Page
Compatibility options for
Compatibility options for
Select the document that these settings apply to. In the list, select the name of a document that is already open, or select All New Documents to make the setting apply to all documents that you will create.
Lay out this document as if created in
Select the word-processing program that you expect to be used for opening the document. The settings in the list of Layout options change according to the word-processing program that you select. To specify your own configuration of settings, select Custom.
Layout options
Lists options for laying out the document. Select the check boxes for the options you want.
Top of Page
Important:
Office 2007 is no longer supported. Upgrade to Microsoft 365 to work anywhere from any device and continue to receive support.
Upgrade now
To choose your advanced Word options, click the Microsoft Office Button  > Word Options, and on the left pane, select Advanced.
In this article
-
Editing options
-
Cut, copy, and paste
-
Show document content
-
Display
-
Print
-
When printing this document
-
Save
-
Preserve fidelity when sharing this document
-
General
-
Compatibility
-
Compatibility options for
Editing options
Typing replaces selected text
Select this option to delete the selected text when you begin to type. If you clear this check box, Microsoft Office Word inserts new text in front of the selected text and does not delete the selected text.
When selecting, automatically select entire word
Select this option to select entire words when you select part of one word and then part of the next word. Turning this option on also causes Word to select a word and the space that follows it when you double-click a word.
Allow text to be dragged and dropped
Select this option to be able to move or copy selected text by dragging it. To move text, select the text, and then drag it to a new location. To copy text, select the text, and then hold down CTRL while you drag the selection to its new location.
Use CTRL + Click to follow hyperlink
Select this option to make it easier to edit the text of hyperlinks. When this option is turned on, you must press CTRL while you click the link in order to follow the link. When this option is turned off, clicking the link causes Word to go to the destination of the link, which makes it more difficult to edit the text of the link.
Automatically create drawing canvas when inserting AutoShapes
Select this option to place a drawing canvas around drawing objects or ink drawings and writing when you insert them into your document. A drawing canvas helps you to arrange drawing objects and pictures, and to move them as a unit.
Use smart paragraph selection
Select this option to select the paragraph mark when you select a whole paragraph. If you include the paragraph mark when you cut and paste a paragraph, you don’t leave a blank paragraph, and your formatting automatically stays with the paragraph.
Use smart cursoring
Select this option to specify that the cursor moves as you scroll up or down. When you press the LEFT ARROW, RIGHT ARROW, UP ARROW, or DOWN ARROW key after you scroll, the cursor responds at the page currently in view, not at its previous position.
Use the Insert key to control overtype mode
Select this option to turn Overtype mode on or off by pressing INSERT.
-
Use overtype mode
Select this option to replace existing text as you type, one character at a time. If Use the Insert key to control overtype mode is selected, you can turn this option on or off by pressing INSERT.
Add double quote for Hebrew alphabet numbering
Select this option to add double quotation marks («) to numbering.
This option is available only if Hebrew is enabled for editing text.
Prompt to update style
Select this option to be prompted when you directly modify text to which a style is applied and then you reapply the style to the modified text. When prompted, you can either update the style based on recent changes or reapply the formatting of the style.
Use Normal style for bulleted or numbered lists
Select this option to base list styles on the Normal paragraph style instead of the Paragraph List style.
Keep track of formatting
Select this option to keep track of your formatting as you type. This helps you to easily apply the same formatting elsewhere. This option must be turned on before you can use the Select Text with Similar Formatting command on the shortcut menu that appears if you right-click selected text. To display a list of the formatting that you used, click the Options command on the Style pane, and then select the Paragraph level formatting, Font formatting, and Bullet and numbering formatting check boxes.
-
Mark formatting inconsistencies
Select this option to mark formatting with a wavy blue underline when it is similar to, but not exactly the same as, other formatting in your documents. To use this option, you must also select the Keep track of formatting check box.
Enable click and type
Select this option to insert text, graphics, tables, or other items in a blank area of a document by double-clicking in the blank area. The Click and Type feature automatically inserts paragraphs and applies the alignment necessary to position the item where you double-clicked. This feature is available only in Print Layout view and Web Layout view.
-
Default paragraph style Select the style that is applied to text when you use click and type.
Cursor movement
This option specifies the direction in which the cursor moves when you press the arrow keys on your keyboard.
This option is available only if a right-to-left language is enabled for editing text.
-
Logical Select this option to move the cursor according to the direction of the text encountered. For example, when you are using the arrow keys to move through Arabic and then English text in the same sentence, the cursor moves from right to left through the Arabic text and then starts at the leftmost character in the English word and progresses from left to right.
-
Visual Select this option to move the cursor to the next visually adjacent character. For example, when you are using the arrow keys to move from right to left through Arabic and then English text in the same sentence, the arrow key moves from right to left regardless of the direction of the text.
Cursor visual selection
This option specifies how text is selected as you extend the selection.
This option is available only if a right-to-left language is enabled for editing text.
-
Block Select this option to wrap text from line to line as you select downward, with all selected lines being the same width.
-
Continuous Select this option to wrap text from line to line as you select downward and vary the width of the final line of the block.
Use sequence checking
Select this option to validate whether a newly typed character occurs in the correct sequence to be used as a tone mark, diacritic, or vowel to be placed above, below, in front of, or behind the consonant it goes with.
This option is available only if a complex script language is enabled for editing text.
-
Type and replace Select this option to replace the previously typed character with the newly typed character if the two characters cannot coexist in the same text cluster.
Asian fonts also apply to Latin text
Select this option to change Latin characters to the selected Asian font when you apply the Asian font to selected text. Clear this check box if you want Latin characters to remain in the Latin font while you apply the Asian font to the rest of the document.
This option is available only if an East Asian language is enabled for editing text.
Automatically switch keyboard to match language of surrounding text
Select this option to change the keyboard language and font based on the language of the text where the cursor is placed. If you clear this option, only the font is changed.
This option is available only if an East Asian language is enabled for editing text and an Input Method Editor for typing East Asian characters is installed.
Use legacy IME mode to enable Overtype mode
Select this option to allow the characters that you type to replace existing characters (overtype) while you are using an Input Method Editor (IME) on a computer that is running the Microsoft Windows XP operating system. If Word is installed on a computer that is running Windows Vista, this option does not appear because Overtype mode is supported automatically.
This option is available only if an East Asian language is enabled for editing text, and an Input Method Editor for typing East Asian characters is installed.
IME Control Active
Select this option to start an Input Method Editor (IME). Clear this check box to stop an IME.
This option is available only if an East Asian language is enabled for editing text and an Input Method Editor for typing East Asian characters is installed.
IME TrueInline
Select this option to use a natural language interface on IME-enabled computers.
This option is available only if an East Asian language is enabled for editing text and an Input Method Editor for typing East Asian characters is installed.
IME Settings
Click to open the Properties for IME Name dialog box. Use this dialog box to set or change the text, keyboard, character conversion, and other options for the active IME.
This option is available only if an East Asian language is enabled for editing text and an Input Method Editor for typing East Asian characters is installed.
Top of Page
Cut, copy, and paste
Pasting within the same document
This option displays the default behavior that occurs when you paste content into the same document from which you copied the content. In the drop-down list, select one of the following:
-
Keep Source Formatting (Default)
This option retains character styles and direct formatting that were applied to the copied text. Direct formatting includes characteristics such as font size, italic, or other formatting that is not included in the paragraph style. -
Match Destination Formatting
This option discards most of the formatting that was applied directly to the copied text, but it retains formatting that is considered emphasis, such as bold and italic, when it is applied to only a portion of the selection. The text takes on the style characteristics of the paragraph where it is pasted. The text also takes on any direct formatting or character style properties of text that immediately precedes the cursor when the text is pasted. -
Keep Text Only
This option discards all formatting and nontext elements, such as pictures or tables. The text takes on the style characteristics of the paragraph where it is pasted and takes on any direct formatting or character style properties of text that immediately precedes the cursor when the text is pasted. Graphical elements are discarded, and tables are converted to a series of paragraphs.
Pasting between documents
This option displays the default behavior that occurs when you paste content that was copied from another document in Word. In the drop-down list, select one of the following:
-
Keep Source Formatting (Default)
This option retains formatting that was applied to the copied text. Any style definition that is associated with the copied text is copied to the destination document. -
Match Destination Formatting
This option discards most formatting that was applied directly to the copied text, but it retains formatting that is considered emphasis, such as bold and italic, when it is applied to only a portion of the selection. The text takes on the style characteristics of the paragraph where it is pasted. The text also takes on any direct formatting or character style properties of text that immediately precedes the cursor when the text is pasted. -
Keep Text Only
This option discards all formatting and nontext elements, such as pictures or tables. The text takes on the style characteristics of the paragraph where it is pasted and takes on any direct formatting or character style properties of text that immediately precedes the cursor when the text is pasted. Graphical elements are discarded, and tables are converted to a series of paragraphs.
Pasting between documents when style definitions conflict
This option displays the default behavior that occurs when you paste content that was copied from another document in Word, and the style that is assigned to the copied text is defined differently in the document where the text is being pasted. In the drop-down list, select one of the following:
-
Keep Source Formatting
This option retains the look of the copied text by assigning the Normal style to the pasted text and applying direct formatting. Direct formatting includes characteristics such as font size, italic, or other formatting to mimic the style definition of the copied text. -
Use Destination Styles (Default)
This option retains the style name that is associated with the copied text, but it uses the style definition of the document where the text is being pasted. For example, you copy Heading 1 text from one document to another. In one document, Heading 1 is defined as Arial bold, 14-point, and in the document where you are pasting the text, Heading 1 is defined as Cambria bold, 16-point. When you use the Use Destination Styles option, the pasted text uses Heading 1 style, Cambria bold, 16-point. -
Match Destination Formatting
This option discards the style definition and most formatting that was applied directly to the copied text, but it retains formatting that is considered emphasis, such as bold and italic, when it is applied to only a portion of the selection. The text takes on the style definition in the document where the text is being pasted. -
Keep Text Only
This option discards all formatting and nontext elements, such as pictures or tables. The text takes on the style characteristics of the paragraph where it is pasted and takes on any direct formatting or character style properties of text that immediately precedes the cursor when the text is pasted. Graphical elements are discarded, and tables are converted to a series of paragraphs.
Pasting from other programs
This option displays the default behavior that occurs when you paste content that was copied from another program. In the drop-down list, select one of the following:
-
Keep Source Formatting (Default)
This option retains the formatting of the copied text. -
Match Destination Formatting
This option discards most formatting that was applied directly to the copied text, but it retains formatting that is considered emphasis, such as bold and italic, when it is applied to only a portion of the selection. The text takes on the style characteristics of the paragraph where it is pasted. The text also takes on any direct formatting characteristics of text that immediately precedes the cursor when the text is pasted. -
Keep Text Only
This option discards all formatting and nontext elements, such as pictures or tables. The text takes on the style characteristics of the paragraph where it is pasted and takes on any direct formatting or character style properties of text that immediately precedes the cursor when the text is pasted. Graphical elements are discarded, and tables are converted to a series of paragraphs.
Insert/paste pictures as
This option displays how Word inserts pictures relative to the text in your document. You can insert images inline with text, allow images to move with text, or wrap text around, in front of, or behind an image. In the drop-down list, select one of the following:
-
In line with text
This option inserts the graphic in a paragraph as if it were text. This option is used by default. The graphic moves as you add or delete text. You can drag the graphic to reposition it the same way that you drag text. -
Square
This option wraps the text around all sides of a square around the graphic. The graphic does not move as you add or delete text, but you can drag the graphic to reposition it. -
Tight
This option wraps the text around the graphic in an irregular shape around the actual image. The graphic does not move as you add or delete text, but you can drag the graphic to reposition it. -
Behind text
This option inserts the graphic so that the graphic floats on its own layer behind the text. There is no border around the graphic. The graphic does not move as you add or delete text, but you can drag the graphic to reposition it. -
In front of text
This option inserts the graphic so that the graphic floats on its own layer in front of the text. There is no border around the graphic. The graphic does not move as you add or delete text, but you can drag the graphic to reposition it. -
Through
This option wraps the text around the graphic, including filling the space created by a concave shape, such as a crescent moon. The graphic does not move as you add or delete text, but you can drag the graphic to reposition it. -
Top and bottom
This option prevents text from wrapping on the sides of the graphic. The graphic does not move as you add or delete text, but you can drag the graphic to reposition it.
Keep bullets and numbers when pasting text with Keep Text Only option
Select this option to convert numbering and bullets into text symbols.
Use the Insert key for paste
Select this option to use the INSERT key to insert the contents of the Office Clipboard into a document.
Show Paste Options buttons
Select this option to display the Paste Options button when you paste content. You can use the Paste Options button to override or modify the settings you make in this section of the Word Options dialog box.
Use smart cut and paste
Select this option to automatically adjust formatting as you paste text. After you select this check box, you can click Settings to set additional options for pasting.
-
Settings
Click this to open the Settings dialog box. Use this dialog box to specify default behavior when merging, cutting, and pasting text. You can override default behavior by using the Paste Options button that appears when you paste content from the Clipboard into your document. This button is available only when the Use smart cut and paste option is turned on.-
Use default options for
Click an item in the list to pre-select a configuration of options in the dialog box. To select your own configuration of options, click Custom in this list. -
Adjust sentence and word spacing automatically
Select this option to remove extra spaces when deleting text or add necessary spaces when pasting text from the clipboard. -
Adjust paragraph spacing on paste
Select this option to prevent creating empty paragraphs and to prevent inconsistent paragraph spacing. -
Adjust table formatting and alignment on paste
Select this option to control the formatting and alignment of tables. When this option is turned on, single cells are pasted as text, table portions are pasted as rows into an existing table (rather than as a nested table), and when you add a table to an existing table, the pasted table is adjusted to match the existing table. -
Smart style behavior
Selecting this option has no effect. To fine-tune the behavior of styles when pasting content, use the Pasting options in the Cut, copy, and paste section of the Advanced options. -
Merge formatting when pasting from Microsoft Office PowerPoint
Select this option to control the results when you paste content from a PowerPoint presentation. When this option is turned on, the formatting of the surrounding text or table is applied to the pasted text, the most recently used bullet, number, or list style is applied to the pasted list, and the look of items such as tables, hyperlinks, images, OLE objects, and shapes is preserved from the source in PowerPoint. -
Adjust formatting when pasting from Microsoft Office Excel
Select this option to control the results when pasting data from Excel. When this option is turned on, pasted data is placed in a table, and charts are pasted as pictures rather than as OLE objects. -
Merge pasted lists with surrounding lists
Select this option to format list items to conform to the surrounding list when you are pasting the items into a list.
-
Top of Page
Show document content
Show background colors and images in Print Layout view
Select this option to display background colors and images.
Show text wrapped within the document window
Select this option to wrap text to the document window, so that it is easier to read on the screen.
Show picture placeholders
Select this option to display an empty box in place of each picture in your documents. This option speeds the process of scrolling through a document that contains a large number of pictures.
Show drawings and text boxes on screen
Select this option to display objects that are created with the Word drawing tools in Print Layout view or Web Layout view. Clear this check box to hide drawings and possibly speed the display of documents that contain many drawings. Drawings will be printed even if you clear this check box.
Show text animation
Select this option to display text animations on your screen. Clear the check box to see how the text will look when printed.
Use this option when viewing animated text in documents that were created in a version of Word earlier than Word 2007. The current version of Word no longer provides the ability to create animated text.
Show control characters
Select this option to display right-to-left control characters.
This option is available only if a right-to-left language is enabled for editing text.
Show bookmarks
Select this option to display bookmarks on the screen. If you assign a bookmark to an item, the bookmarked item appears in brackets ([…]). If you assign a bookmark to a location, the bookmark appears as an I-beam. The brackets and the I-beam do not appear in printed documents.
Show smart tags
Select this option to display a purple dotted underline beneath text that is recognized as a smart tag.
Show text boundaries
Select this option to display dotted lines around text margins, columns, and paragraphs. The boundaries are for layout purposes; they do not appear in printed documents.
Show crop marks
Select this option to display the corners of the margins.
Show field codes instead of their values
Select this option to display field codes instead of field results in your documents. For example, you may see { TIME @»MMMM, d, YYYY» } instead of February 4, 2008. Clear this check box to view field results.
Regardless of this setting, you can always switch between displaying field codes and field code results by pressing ALT+F9.
Field shading
This option displays whether and when fields are shaded. In the list, select Always or When Selected to shade your fields. Shading fields makes them easy to identify. The shading appears on the screen but not in the printed document.
Numeral
This option determines how numerals will appear in documents. Select an item from the list.
This option is available only if an Arabic language is enabled for editing text.
-
Arabic Select this option to display numerals in a format familiar to speakers of English and other European languages.
-
Hindi Select this option to display numerals in a format familiar to speakers of Arabic and Hindi.
-
Context Select this option to display numerals according to the language of the surrounding text.
-
System Select this option to display numerals according to the regional settings in Control Panel.
Month names
This option determines how Western (Gregorian) month names appear in Arabic text. Select an item from the list.
This option is available only if an Arabic language is enabled for editing text.
-
Arabic Select this option to use Arabic native month names.
-
English transliterated Select this option to spell out Western (Gregorian) month names in English pronunciation by using Arabic text.
-
French transliterated Select this option to spell out Western (Gregorian) month names in French pronunciation by using Arabic text.
Diacritics
This option displays diacritics in the document.
This option is available only if a language that uses diacritics is enabled for editing text.
-
Use this color for diacritics Select this option to specify a color for display of all diacritics, regardless of the color of the diacritics in the original document. In the list, select a color.
Use draft font in Draft and Outline views
On computers with extremely limited resources, select this option to speed the screen display of documents.
-
Name
Select the font to use for drafts of your documents. This option is available only when you select the Use draft font in Draft and Outline views check box. -
Size
Select the point size of the draft font. This option is available only when you select the Use draft font in Draft and Outline views check box.
Document view
This option specifies the text direction for new documents.
This option is available only if a right-to-left language is enabled for editing text.
-
Right-to-left Select this option to lay out documents right to left. For example, paragraphs start on the right side of a document with text flowing to the left.
-
Left-to-right Select this option to lay out documents left to right. For example, paragraphs start on the left side of a document with text flowing to the right.
Font Substitution
Click this to open the Font Substitution dialog box. Use this option to determine whether the active document uses any fonts that are not available on your computer. If the document uses fonts that are not on your computer, you can use the dialog box to specify a substitute font.
Top of Page
Display
Show this number of Recent Documents
Enter the number of items, between 1 and 50, to display in the Recent Documents list.
Only the first nine files in the list are assigned an accelerator key. You can open these documents by pressing 1 through 9 after you press ALT+F.
Show measurements in units of
Select the measurement unit that you want to use for the horizontal ruler and for measurements that you type in dialog boxes.
Style area pane width in Draft and Outline views
Type a positive decimal, such as 0.5, in the box to open the style area, which displays the names of the styles applied to text. To close the style area, enter 0.
Show measurements in width of characters
Select this option to use character width as the basis for aligning text, such as in the vertical and horizontal rulers.
This option is available only if an East Asian language is enabled for editing text.
Show pixels for HTML features
Select this option to use pixels as the default unit of measurement in dialog boxes that are related to HTML features.
Show all windows in the Taskbar
Select this option to display an icon on the Microsoft Windows taskbar for each open window in a Microsoft Office program. Clearing this check box places a single icon for each open program on the taskbar.
Show shortcut keys in ScreenTips
Select this option to display keyboard shortcuts in ScreenTips.
Show horizontal scroll bar
Select this option to display the horizontal scrollbar at the bottom of the document window.
Show vertical scroll bar
Select this option to display the vertical scroll bar at the side of the document window.
-
Left scroll bar Select this option to place the vertical scroll bar on the left side of the document window. Use this option when working with documents that predominantly use right-to-left text.
This option is available only if a right-to-left language is enabled for editing text.
Show vertical ruler in Print Layout view
Select this option to display the vertical ruler at the side of the document window. Make sure that you also select the Ruler check box in the Show/Hide group on the View tab of the Ribbon, a component of the Microsoft Office Fluent user interface.
-
Show right ruler in Print Layout view Select this option to display the vertical ruler at the right side of the document window.
This option is available only if a right-to-left language is enabled for editing text.
Optimize character positioning for layout rather than readability
Select this option to display character positioning accurately, as it will appear in the printed document with respect to blocks of text. Spacing between characters may be distorted when this option is turned on. For best readability on the screen, turn this option off.
Top of Page
Use draft quality
Select this option to print the document with minimal formatting, which may speed the printing process. Many printers do not support this function.
Print in background
Select this option to print documents in the background, which allows you to continue to work while you print. This option requires more available memory to allow you to work and print at the same time. If working with your document while printing becomes unacceptably slow, turn this option off.
Print pages in reverse order
Select this option to print pages in reverse order, beginning with the last page in your document. Do not use this option when you print envelopes.
Print XML tags
Select this option to print the XML tags for the XML elements that are applied to an XML document. You must have a Schema attached to the document, and you must apply elements that are provided by the attached Schema. The tags appear in the printed document.
Print field codes instead of their values
Select this option to print field codes instead of field results — for example, { TIME @»MMMM, d, YYYY» } instead of February 4, 2008.
Print on front of the sheet for duplex printing
Select this option to print the front of each sheet when printing on a printer that does not have duplex capability. Pages will print in reverse order so that when you flip the stack to print on the back, the pages will print in the proper order.
Print on back of the sheet for duplex printing
Select this option to print the back of each sheet when printing on a printer that does not have duplex capability. Pages will print in ascending order so that they correspond to a stack of pages that were printed on the front in reverse order.
Scale content for A4 or 8.5 x 11″ paper sizes
Select this option to automatically adjust documents that are designed for 8.5-by-11-inch paper to fit A4 paper and to adjust documents that are designed for A4 paper to fit 8.5-by-11-inch paper. This option takes affect only if the A4 or 8.5-by-11-inch paper in the printer does not match the paper size that is set on the Page Layout tab of Word. This option affects printouts only; it does not affect formatting.
Default tray
This option displays the printer tray that is used by default. To follow the settings in your printer, select Use printer settings. To choose a particular tray, select it in the list. The choices in the list depend on your printer’s configuration.
Top of Page
When printing this document
When printing this document
Select the document that these printing settings apply to. In the list, select the name of a document that is already open, or select All New Documents to make the setting apply to all documents that you will create.
Print PostScript over text
Select this option to print PostScript code when a document contains PRINT fields.
Print only the data from a form
Select this option to print the data that is entered into an online form without printing the form.
Top of Page
Save
Prompt before saving Normal template
Select this option to display, when you close Word, a message that asks if you want to save any changes that were made to the default template. Because changes to the default template will affect any new documents that you create, you may want to be alerted when the template has changed. Clearing this check box automatically saves changes without prompting you.
Always create backup copy
Select this option to create a backup copy of a document each time you save the document. Each backup copy replaces the previous backup copy. Word adds the phrase «Backup of» to the file name and applies the file extension .wbk to all backup copies. The backup copies are saved in the same folder as your original document.
Copy remotely stored files onto your computer, and update the remote file when saving
Select this option to temporarily store a local copy of a file that you store on a network or removable drive. When you save the local copy, Word saves your changes to the original copy. If the original file is not available, Word prompts you to save the file in another location to avoid data loss.
Allow background saves
Select this option to save your document while you work. A progress meter appears in the status bar when Word performs a background save.
Top of Page
Preserve fidelity when sharing this document
Preserve fidelity when sharing this document
Select the document that these settings apply to. In the list, select the name of a document that is already open, or select All New Documents to make the setting apply to all documents that you will create.
Save smart tags as XML properties in Web pages
Select this option to save all of the smart tags in a document as Extensible Markup Language (XML) within a Hypertext Markup Language (HTML) file.
Save form data as delimited text file
Select this option to save the data that is entered into an online form as a single, tab-delimited text file in plain text format. You can then import the contents of that file into a database.
Embed linguistic data
Select this option to save linguistic data, such as speech and handwritten text.
Embed smart tags
Select this option to save smart tags as part of your document.
Top of Page
General
Provide feedback with sound
Select this option to add sounds to certain actions or events in Word and other programs in 2007 Microsoft Office system. For example, Word can play a sound when it completes a process. To change the sound that is associated with an event, open the folder for sounds and audio devices in Control Panel. Your computer must have a sound card to play most sounds.
Provide feedback with animation
Select this option to animate the movement of your pointer in Word and the other Office programs. This option also provides animated cursors for actions such as printing, saving, automatic formatting, and find-and-replace operations.
Confirm file format conversion on open
Select this option to choose the file converter that Word uses to open files that were created in another program. Clear this check box if you want Word to select a converter automatically.
Update automatic links at open
Select this option to automatically update any content that is linked to other files each time you open a document.
Allow opening a document in Draft view
Select this option to be able to open a document in Draft view.
To make a document open in Draft view by default, you need to turn on this option and then on the View tab in the Document Views group, click Draft. Make some kind of change to the document, and then save the document.
Allow background open of Web pages
Select this option to open Web page documents in the background while you work. A progress meter appears in the status bar when Word opens the page in the background.
Enable background repagination
Select this option to repaginate documents automatically as you work. This option is available in Draft and Outline views only. Clearing this check box prevents page numbers from updating (when displayed in the status bar) until you switch to Print Layout view.
Show add-in user interface errors
Select this option to display error messages from programs that customize the user interface. This option is especially useful for authors of software solutions, because it provides information for debugging customizations to the user interface.
Mailing address
Type the address that you want Word to use as the default return address for envelopes and letters.
File Locations
Click this to see the default storage location for documents, templates, and other items that you create and use in Word. In the File Locations dialog box, click the item you want to change, and then click Modify to set a new default location.
The default locations for templates and the Startup folder are treated as trusted locations. If you change the location, be sure that the new folder is a secure location.
Web Options
Click this to open the Web Options dialog box. Use this dialog box to set options for using Word to create Web pages.
Service Options
Click this to open the Service Options dialog box. Use this dialog box to set options for shared workspaces.
Top of Page
Compatibility
English Word 6.0/95 documents
This option specifies your preferences for converting text. Earlier versions of Word were sometimes used in conjunction with third-party programs designed to support Chinese or Korean on English versions of Microsoft Windows. If the use of these add-ins results in incorrect text display in a document you are trying to open, you can use these options to convert the document so that text is displayed correctly. After successfully opening the file, be sure to reset this option to Open normally; otherwise, correctly stored files may be opened incorrectly.
This option is available only if an East Asian language is enabled for editing text.
-
Contain Asian text Select this option if you know the document contains East Asian text, so that the text will display correctly.
-
Open normally Select this option after the file has been opened to display the text correctly.
-
Automatically detect Asian text Select this option if you are not sure whether the document contains East Asian text. Word attempts to detect East Asian text and display it correctly.
Top of Page
Compatibility options for
Compatibility options for
Select the document that these settings apply to. In the list, select the name of a document that is already open, or select All New Documents to make the setting apply to all documents that you will create.
Lay out this document as if created in
Select the word-processing program that you expect to be used for opening the document. The settings in the list of Layout options change according to the word-processing program that you select. To specify your own configuration of settings, select Custom.
Layout options
Lists options for laying out the document. Select the check boxes for the options you want.
Top of Page
Need more help?
Everyone knows Clippy. But are you friends with Pilcrow? If you are, then you know more about Microsoft Word than most people do. Do you know about widow lines? The extended clipboard?
There are plenty of lesser-known Microsoft Word features that you should know about if you want to be truly proficient with the software. Here are some advanced Microsoft Word features that can make your work and life easier.
1. Be Distraction Free: Hide the Ribbon and Go Full Screen
Writers want peace. Since MS Word is packed full of features, it can feel a bit cluttered when you just want a distraction-free view of the text.
You can use a quick shortcut to hide the Ribbon. Press Ctrl + F1 to toggle the Ribbon from view.
You can also change the behavior of the Ribbon to hide automatically when you don’t need it. To do this, click the Ribbon Display Options icon (next to the minimize icon) and select Auto-hide Ribbon.
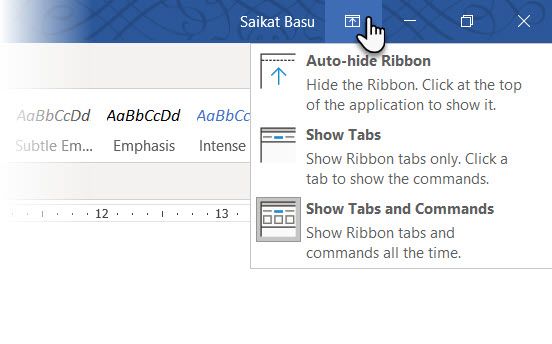
Distraction-free Reading
Distraction-free reading is a more specialized feature available in Word 2010 onwards. Though primarily designed for touch-enabled tablets, the Read Mode works well on an everyday laptop as well. To access it quickly, press Alt, followed by W + F simultaneously.
Optionally, use the buttons:
- View > Read Mode (on the Ribbon menu).
- The Read Mode button on the right (on the Status Bar).
You can double-tap with your finger or double-click with your mouse to zoom in and make graphics like tables, charts and images fill the screen.
2. Reorganize With the Outline View
Outlining your main ideas and completing that first draft quickly is the surefire tip for writing productivity. If used well, the Outline View can increase your productivity with large documents by 50%.
On the Ribbon, go to the View tab and click Outline.
Outline View helps you fine-tune the organization of complex documents by reordering text blocks and nine levels of headings. Outline View brings up a special toolbar called Outlining, with controls for promoting or demoting selected text. Use the controls to hide or display selected text.

- Want to get to a specific point in a long document? Switch to Outline View and jump to a specific heading level.
- Want to draft quickly? Plan out the main sections on Outline View and then switch to the other layouts to write the body.
- Want to reorganize a report by moving huge blocks of text? Drag and drop a heading to move not only that heading, but all the sublevels under it and the body text. Use the upward-downward arrows to work them.
- Want to quickly format headings? Use Headlines 1, 2, and 3 instead of changing the size and using uppercase.
Double-click anywhere and begin typing. You don’t need to bother with positioning a cursor if you don’t want to. This is the closest MS Word comes to freestyle writing. Click and Type has existed since Word 2002. The feature works only in the Print Layout view or in Web Layout view.
Though this is very useful for inserting text and graphics, you can also use it for impromptu brainstorming as a free-form mindmapping tool.
4. Convert Tables to Graphs in 3-Steps
Take your pick: a neatly formatted table with lots of data or a nicely designed chart visualizing that data for you?
Being visual creatures, it is often a no-brainer to opt for the latter. Word makes it easy to convert tabular information into a chart. When you don’t have too much of tabular data, create a chart in Word instead of over-killing with Excel. Select the table with the data and follow three steps:
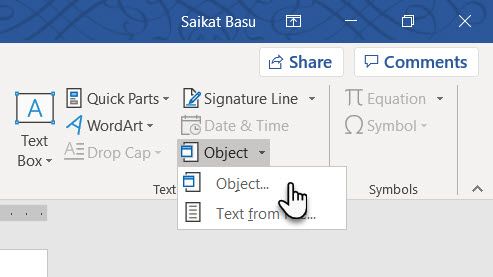
- Click on the Insert tab on the Ribbon.
- Click the Object tool within the Text group and open the Object dialog box.
- From the list of Object Types, choose Microsoft Graph Chart. Click OK.
Word displays the tabular data as a neat column chart. Modify the data sheet that appears.
You can also format this graph with a different chart type. To do this:
- Double-click your chart.
- Right-click in the white space that’s within the bounding box of the graphic.
- Select Chart Type.
You can also use Microsoft Word to create stunning flowcharts with the shapes feature.
5. Write Equations in Word
It’s not only Excel formulas that are amazing. The Equation Editor has always been an important feature of MS Word. In the latest versions of Word, it is simply known as Equation. To use it, choose Insert > Equation > Insert New Equation.
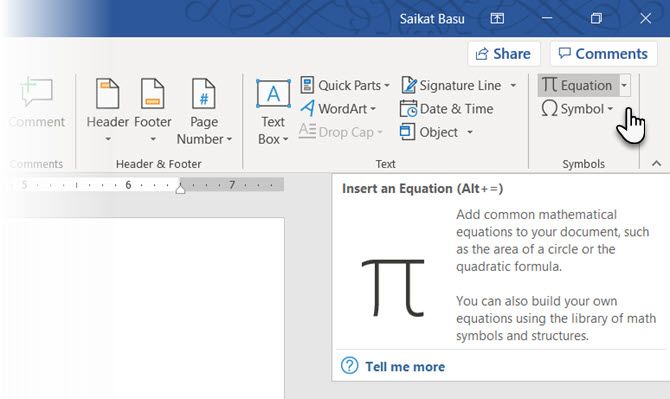
Use the Equation Toolbar to design your own advanced equations for mathematics, physics, or chemistry. Word gives you many well-known equations to insert with just a click.
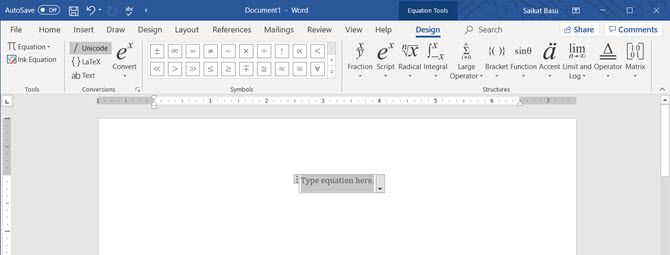
6. Hold 24 Items in the Clipboard
The Office clipboard can hold 24 items and its interoperable between all Office files. In the Home tab, click the little drop-down arrow next to Clipboard to reveal the panel on the left. For the shortcut, press Ctrl + C twice to open the Clipboard Panel.
This holding capacity enables you to cut and copy multiple elements and move them anywhere within the document or between open Office programs.
Use the clipboard’s Options to control its functions. For instance, you can disable the Show Status Near Taskbar When Copying that displays the number of items you’ve copied in the bottom-right corner of the Word window. It’s enabled by default.
7. Translate Languages on the Go
Microsoft Office uses Microsoft Translator to handle all translations. Use the Translate feature from the Review tab. Translate a word or a sentence. Or, translate the entire document and display it in a separate Word document.
The Translator tab appears on the right and you can choose and change languages. Use this sidebar to highlight each word and explore their meaning in full.
8. Beautify Fonts with Kerning
Kerning adjusts the space between two individual letters for a better visual look. When designing a document, each typeface requires its own specific kerning. Kerning becomes important when you are designing with large fonts on Word, like on an ebook cover.
Word has kerning switched off by default, and normally you don’t need to bother with it. But let’s say you need to submit a five-page homework. Save effort by increasing the width between the letters instead of writing fluff!
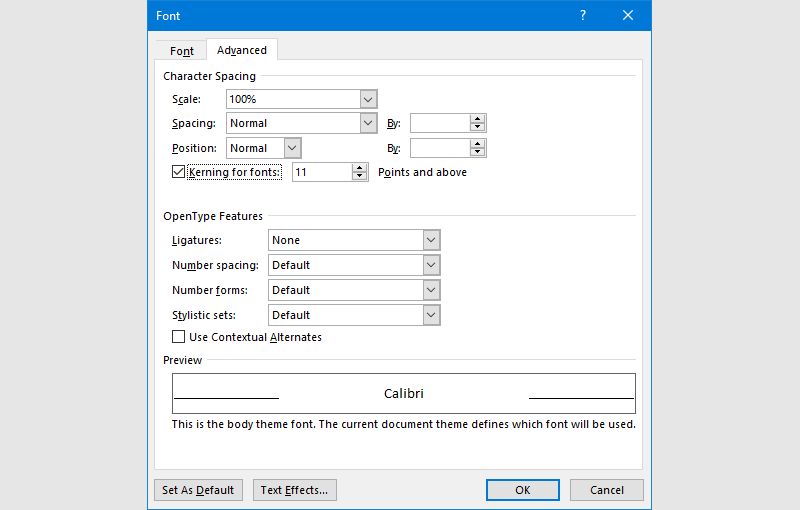
Click the little pop-out arrow on Font (on the Home tab). Alternatively, press Ctrl + D. Go to the Advanced tab. Select the checkbox for Kerning for fonts. Experiment by entering a small point size in the box. Remember, some typefaces and font sizes don’t look good with kerning.
9. Inspect Your Document
Today, an important MS Word feature is collaboration, but you have to pay attention to security too. The Document Inspector in Word helps you check your document for any information you want to keep private.
Whenever you create or even edit a document, some user information gets added to the file automatically. The Document Inspector helps you erase this kind of information before sharing a document.
To access the Document Inspector, go to File > Info > Inspect Document > Check for Issues > Inspect Document.
You can inspect hidden content by selecting the checkboxes. After the inspection, any categories with sensitive data gets an exclamation mark. The Remove All button for each category removes the data and finalizes the document.
10. Take the Benefits of Hidden Text
Hidden Text is a non-printing character attribute that has its usefulness. Hiding text can be useful in many situations:
- Create a simple quiz by hiding the answers.
- Control the layout for some specific printing job by inserting hidden text.
- Print two versions of a document. In one, hide portions of text. You don’t need to create two copies or delete any part of the document.
- Temporarily hide confidential information that you don’t want others to see.
On the flip side, we’ve shown how to add a watermark in Word for text that people can’t remove.
To hide or unhide text:
- Select the text you want to hide or the hidden text.
- Click Home > Font Dialog box > Font.
- Select or clear the Hidden checkbox.
To print hidden text:
- Go to the File tab > Options > Display.
- Select the Hidden text check box.
- Select the Print hidden text check box.
- Click Ok.
Non-printing characters are formatting marks, which enables you to troubleshoot and fine-tune the layout of a document. For instance, if words need to be single-spaced; your paragraphs have to be spaced with correct line breaks; all tabs should be lined up; table cells have to be formatted neatly, and so on.
Pilcrows, tab-markers, spaces, line breaks, page breaks, object anchors, and hidden text are just some of the non-printing elements that are handy for controlling the layout of a Word document. You can remove page breaks when needed, or display the non-printing characters by clicking the Pilcrow button on the Home tab. Alternatively, press Ctrl + *.
Use These Productivity Secrets in Word
Use these advanced Microsoft Word tips and you’ll speed up your workflow in no time. Whether you’re trying to get through a school essay, work project, or something personal, these tips will help you master Word.
There’s plenty more you can do with Word beyond these tips. For example, did you know you can create a fancy-looking cover page?

Sure, we all know how to use Microsoft Word, but I’m sure there are many of you out there who have never stopped to check out its more advanced features. Let’s take a tour!
It’s safe to say that virtually all translators are at least proficient with Microsoft Word, but how many of us have investigated its more advanced features? The following are some Word functions that I’ve found to be particularly useful for translators that you may not have noticed. The majority of these tricks are helpful for formatting documents neatly and tidily (and automatically), which is something that could otherwise eat up an inordinate amount of a project’s allotted time.
The steps and descriptions that appear here are written for the 2016 version of Word on a PC, but these features should exist in all versions of the software. If your interface differs, just search online for instructions for your version to find out exactly where to click to execute the same tasks.

Figure 1: Tab Stop Selector.
Click the tab stop selector (#1 above) to scroll through the selection of tab stops. I’ve circled the examples of tab stop placements: 2) Left tab stop; 3) Bar tab stop; 4) Center tab stop; 5) Decimal tab stop; and 6) Right tab stop.

Figure 2: Example of a header created using left, center, and right tab stops.

Figure 3: Example of a column of numbers aligned according to the decimal point using the decimal tab stop.

Figure 4: Example of table created using the bar tab stop.

Figure 5: Example of tab leaders.

Figure 6: Using the Find-Replace tool to search for highlighted text.

Figure 7: Using the Find-Replace tool to search for special characters.
Tab Stops
A tab stop sets the location where a cursor stops after a tab is inserted in the body of a text. Tab stops are useful for aligning pieces of text. To use them, click on the tab stop selector and scroll through the selections until you arrive at the desired tap stop. Then click on the appropriate spot on the ruler at the top of the page to place the tab stop. (See Figure 1.)
There are five different kinds of tab stops.
Left, Center, and Right: If you place a left, center, or right tab stop and then insert a tab in the document, any text that comes after the tab will be left-, center-, or right-aligned with that tab stop. (If your text is so long that it runs past the tab stop, Word will automatically use the next tab stop available. If no other tab stops have been set, Word will advance the cursor to the next half-inch mark on the ruler.) The left, center, and right tab stops are extremely useful for creating neatly aligned headers and footers, though they have many other uses as well that are limited only by your creativity. (See Figure 2.)
Decimal: The decimal tab stop aligns columns of numbers according to the decimal point, whether the decimal is explicitly typed out or merely implied mathematically. This tab stop must be reapplied to each paragraph (i.e., after every carriage return). You can apply it to multiple paragraphs at once by selecting all the desired paragraphs and then placing the tab stop. The decimal tab stop is helpful for creating neat columns of figures that have differing numbers of digits before or after the decimal point. (See Figure 3.)
Bar: Instead of aligning text, the bar tab stop inserts a vertical line or bar in the paragraph to which it’s applied. The resulting bar is handy for making neat, ad hoc columns. (See Figure 4.)
Tab Leaders
If you’ve ever tried to insert a row of dots or dashes that runs perfectly to the end of the page—for instance, in a table of contents—you know how much of a headache it can be to get everything to align perfectly, especially if you change the text font or size later. That’s where tab leaders come in. Tab leaders require the use of tab stops. (See Figure 2.) There are three different varieties of tab leaders: dots, dashes, and underscore. To create a tab leader, follow these steps:
- Place a right tab stop where you want the row to end. Then place your cursor at the end of the text. This is where the tab leader will start.
- Press the tab button on your keyboard. The cursor should jump to the right tab stop that you placed.
- Next, in the ribbon at the top of the screen, click Paragraph➔Tabs. (The ribbon is where a majority of Word’s commands are located and where settings are made. These items appear as buttons, input boxes, and menus. In earlier versions of Office for Mac, many of these commands were located on the Formatting Palette.)
- Under Leader, choose the style of tab leader you want (dots, dashes, or underscore). If you have multiple tab stops in the paragraph, all of them will appear in a list under Tab Stop Position and you’ll have to select which tab stop you want the tab leader to apply. (See Figure 5.)

Figure 8: Creating a Style

Figure 9: The SECTION button we created containing a set of formatting parameters.
In my work, I use tab leaders most frequently for tables of contents and French birth certificates, which commonly end every line with a row of dashes running all the way to the right margin as a way to ensure that no text can be added later.
Find–Replace
Everyone has used Word’s Find-Replace tool, but did you know you can search for more than just text?
Searching for Formatting: The Find-Replace tool can be used to search for text that is formatted in a particular way. Here’s how to do it:
- Press Ctrl + H to bring up the search box.
- Click More➔Format. Here you’ll find a variety of attributes for which you can search. For example, under Font, you can choose to search for text that is size 14 point, italicized, red, and in Arial font. Under Styles, you can look for text written in a particular style (discussed later).
For translators, the most relevant formatting attribute to search for is Highlight. In our line of work, it’s common to receive documents with portions of highlighted text, accompanied by instructions from the client to touch only those sections. Using Find-Replace not only makes the workflow straightforward, it can also be used to obtain an accurate word count at the end of the project, even if the highlights are particularly numerous or scattered. To obtain a word count of highlighted text:
- In the Find–Replace dialog box, place the cursor in the Find What field. (See Figure 6.)
- Under the More➔Format drop-down menu, choose Highlight. You’ll see the caption Highlight appear underneath the field.
The trick lies in doing the same thing again.
- With the cursor still in the same field, click Format➔Highlight. The caption under the field will change to Not Highlight.
- Leaving both the Find What and Replace With fields empty, click Replace All. This tells Word to find all the non-highlighted text and replace it with nothing (i.e., to delete the text).
Thus, all non-highlighted text is deleted, leaving behind only highlighted text, making it quick and easy to get a word count.
You can use the Find-Replace tool to search for special characters, many of them invisible to the naked eye but important to formatting (e.g., paragraph marks, tabs, page breaks, and non-breaking spaces). You can also use it to search for other characters that are visible, but don’t appear on the keyboard (e.g., en- and em-dashes). (See Figure 7.)
Styles
Styles are a great timesaver, especially in long documents with repeated formatting. In Word, a “Style” is simply a set of formatting parameters saved under a single name. For example, let’s say we want to format all section headers in a document the same way: in red, size 12 point, Times New Roman font, and indented half an inch from the left. Using Styles, we can save all those attributes under a single name. For this example, let’s save it under the name “SECTION.” A button with the same name is created automatically in the Style bar in the ribbon at the top of the screen, and from then on we can apply all the attributes to a piece of text with one or two clicks.
Here’s one way to create your own Style:
- Format a piece of text with all the attributes you want.
- Leave your cursor somewhere in that text, and click on the arrow in the bottom right corner of the Styles bar. (See Figure 8.)
- Click the New Style button in the bottom left corner of the Style menu that pops up. A dialog box will appear with the attributes of the text. You can then adjust the attributes manually, add more if desired, and name your Style. (Again, let’s call it “SECTION.”) Now click OK to save.
A button with your new style will appear in the Style menu and in the Style bar. (See Figure 9.)
To use your new Style, place your cursor in the text to which you wish to apply the Style. (No need to highlight any text; Word will apply the style automatically to the entire paragraph.) Click either one of the Style buttons (in the menu or in the bar), and voilà! Word applies the Style to your text.
You can alter the attributes of your newly created Style by right-clicking on the desired Style button and choosing Modify. This opens up the same dialog box as before, where you can change the font, size, color, etc. It’s also possible to change the definition of your Style from within the text. To do this:
- Change the format of any piece of text that has been given the SECTION Style.
- Make sure to leave the cursor somewhere in that text.
- Right-click on one of the SECTION Style buttons and choose Update SECTION to Match Selection.
In both cases, all text that has been given the SECTION Style will automatically be changed to match your new formatting. This spares you the tedium of having to go back and do it manually for each piece of text, potentially saving enormous time.
Save Time and Aggravation
Microsoft Word, like the rest of the software in the Office suite, contains far more features than a single person is ever likely to use. Nevertheless, learning a few of its specialized functions will help you save time and aggravation in the long run.
Andie Ho is a French>English translator for the food industry. She is an alumna of Kent State’s graduate translation program and began her career as a project manager before moving into translation full-time. Her background includes a bachelor’s degree in French, a minor in mathematics, a performance at Carnegie Hall, and a stint at a criminal forensics laboratory—all of which influence her translation work today. Contact: andie@andiehotranslations.com.
Asked By: Gilbert Simmons Date: created: Jun 10 2022
What is an advanced feature in Microsoft Word
Answered By: Daniel Brooks Date: created: Jun 12 2022
Use advanced Word options to customize editing tasks, document display, printing preferences, and more.
To choose your advanced Word options, select File > Options, and on the left pane, select Advanced.
Set up the way you select, replace, and format words and paragraphs..
Asked By: Jeremiah Bryant Date: created: Jun 03 2022
What are 10 features of Microsoft Word
Answered By: Ronald Roberts Date: created: Jun 05 2022
10 Supremely Useful Features in Microsoft WordConvert a List to a Table.Convert a Bulleted List to SmartArt.Create a Custom Tab.Quick Selection Methods.Add Placeholder Text.Changing Case.Quick Parts.Touch/ Mouse Mode in Word 2013.More items…
Asked By: Dennis Collins Date: created: Aug 18 2022
What are the 5 functions of Microsoft Word
Answered By: Walter Campbell Date: created: Aug 18 2022
Functions in Microsoft Word, Microsoft Excel and Microsoft…Open From M-Files. You can open a document for reading or editing directly from the document vault. … Save to M-Files. … Explore M-Files. … Check Out. … Check In. … Check In Changes. … Undo Checkout. … Insert Property.More items…
Asked By: Tyler Flores Date: created: Feb 12 2022
What are 3 new features in Microsoft Word
Answered By: Joshua Edwards Date: created: Feb 12 2022
Word 2019 gives you new ways to work with documents, like improved digital pen features, book-like page navigation, Learning Tools, and translation.
Asked By: George Richardson Date: created: Mar 01 2023
What are the types of Microsoft Word
Answered By: John Lee Date: created: Mar 04 2023
What are the different versions of Microsoft Word?Word 2019, released in 2018.Word 2016, released in 2016.Word 2013, released in 2013.Word 2010, released in 2010.Word 2007, released in 2006.Word 2003, released in 2003.Word 2002, released in 2001.Word 2000, released in 1999.More items…
Asked By: Donald Torres Date: created: Dec 02 2021
Answered By: Blake Gonzalez Date: created: Dec 05 2021
1 adj An advanced system, method, or design is modern and has been developed from an earlier version of the same thing. usu ADJ n (=up-to-date) Without more training or advanced technical skills, they’ll lose their jobs.
Asked By: Isaac Foster Date: created: Aug 15 2022
What is the important of MS Word
Answered By: Wallace Richardson Date: created: Aug 16 2022
The purpose of the MS Word is to allow the users to type and save documents. …Microsoft word is used to save documents. The documents can be copied to flash drive which serves as an external memory for your computer. This allows you to use the saved documents conveniently taking with you anywhere.
Asked By: Rodrigo Hall Date: created: Aug 13 2022
What are the advantages of MS Word
Answered By: Rodrigo Patterson Date: created: Aug 13 2022
Top 10 Benefits of Microsoft Word 2010Discover an improved search and navigation experience. … Work with others without having to wait your turn. … Access and share your documents from virtually anywhere. … Add visual effects to your text. … Turn your text into compelling diagrams. … Add visual impact to your document.More items…
Asked By: Samuel Jackson Date: created: Jul 03 2022
What are the features of MS Office
Answered By: Harry Richardson Date: created: Jul 06 2022
It mainly consists of Word, Excel, PowerPoint, Access, OneNote, Outlook and Publisher applications. Microsoft Office was primarily created to automate the manual office work with a collection of purpose-built applications.
Asked By: Eric Adams Date: created: Aug 06 2022
What are the 7 tabs of Microsoft Word
Answered By: Cyrus Kelly Date: created: Aug 08 2022
It comprises seven tabs; Home, Insert, Page layout, References, Mailing, Review and View. Each tab has specific groups of related commands. It gives you quick access to the commonly used commands that you need to complete a task.
Asked By: Colin Foster Date: created: Jan 03 2022
What are the main features of MS Word
Answered By: Leonars Price Date: created: Jan 05 2022
Features of MS Word This has options like font colour, font size, font style, alignment, bullets, line spacing, etc. All the basic elements which one may need to edit their document is available under the Home option. Tables, shapes, images, charts, graphs, header, footer, page number, etc.
Asked By: Daniel Allen Date: created: Jun 19 2022
How can I use Word for free
Answered By: Caleb James Date: created: Jun 20 2022
To start using Office for free, all you’ve got to do is open your browser, go to Office.com, and select the app you want to use. There’s online copies of Word, Excel, PowerPoint, and OneNote you can choose from, as well as contacts and calendar apps and the OneDrive online storage.
Asked By: Isaac Rodriguez Date: created: Jan 25 2023
What are the two advanced techniques in MS Word Brainly
Answered By: Isaac Stewart Date: created: Jan 27 2023
Answer. Answer: Copy, paste, and cut with keyboard shortcuts. …
Asked By: Jacob Roberts Date: created: Jan 11 2023
What are the 2 Advanced techniques in MS Word
Answered By: Bernard Johnson Date: created: Jan 12 2023
10 Tips and Tricks to Become a Master of Microsoft WordCopy, paste, and cut with keyboard shortcuts. … Quickly zoom in or out to save eye strain. … Delete entire words at a time. … Use Smart Lookup to search the Internet. … Remove unwanted formatting. … Tell the program exactly what you want to do.More items…
Asked By: Gilbert Davis Date: created: Jul 30 2022
Why is Microsoft Word so hard
Answered By: Joshua Bell Date: created: Jul 30 2022
Word has awful usability. Some tools and options are hard to find. For example, simple task like page numbering has poor options and even really basic ones are hidden. The other thing is that you cannot simply click yourself into spot where you want to go.
Related Question Answers
![]()
Oscar Lee
Professional
Baby Ezra
What does the name Ezra mean for a girl? The name Ezra is a girl’s name meaning «help».. Is Ezra a popular name? How Popular Is the Name Ezra? The name Ezra has gained popularity in recent years, becoming one of the top 100 boy names in the U.S. for the first time in 2015. What names go with Ezra? To me, Ezra pairs quite well with a lot of middle names. It works nicely with longer, classic names like: Ezra Alexander. Ezra Benjamin….And with the just-as-classic but less common:Ezra Percival.Ezra Roderick.Ezra Thaddeus. What does Eden mean? (Entry 1 of 2) 1 : paradise sense 2. 2 : the garden where according to the account in Genesis Adam and Eve first lived. 3 : a place of pristine or abundant natural beauty. What are good middle names for a boy? If you want to go with a good, established name,…
![]()
Henry Butler
Professional
Quick Answer: Can I Trust Outbyte PC Repair?
Is Windows 10 PC repair legit? The “Windows 10 PC Repair” pop-up is a browser-based scam that displays fake error messages to trick you into installing potentially unwanted programs on your computer.. How can I repair my Windows 10? How To Repair and Restore Windows 10Click Startup Repair.Click System Restore.Select your username.Type «cmd» into the main search box.Right click on Command Prompt and select Run as Administrator.Type sfc /scannow at command prompt and hit Enter.Visit this page and click Download tool now.More items…•Aug 19, 2019 What is Windows repair tool? Windows Repair is a utility that contains numerous mini-fixes for Windows. This tool will allow you to repair common issues with your computer such as firewall, file permission, and Windows Update problems. When using this tool you can select the particular fixes you would like to launch and start the repair process. Is Outbyte PC repair free? Outbyte PC Repair…
![]()
Joseph White
Professional
Can I Get A $10 000 Loan With Bad Credit?
What is the monthly payment on a 10000 loan? Your monthly payment on a personal loan of $10,000 at a 5.5% interest rate over a 1-year term would be $858.. What’s the easiest loan to get with bad credit? Payday loansPayday loans A payday loan is a small, short-term loan intended to cover expenses until your next payday, when you can pay it back. It’s the easiest loan to get with bad credit because it typically uses your paycheck or bank account, not credit history, to approve your loan. Does Kashable check credit? Does Kashable check my credit? Created with Sketch. Yes. Our algorithm uses a combination of employment and credit data to underwrite applicants. Which app gives loan instantly? Earnin1. Earnin. Earnin is an app that allows you to borrow against your next paycheck quickly without any fees or interest payments attached. If you have a job in which…
![]()
Fred Gray
Professional
Question: How Do I Fix Windows Error Recovery?
How do I repair Windows 7 without a disk? Restore without installation CD/DVDTurn on the computer.Press and hold the F8 key.At the Advanced Boot Options screen, choose Safe Mode with Command Prompt.Press Enter.Log in as Administrator.When Command Prompt appears, type this command: rstrui.exe.Press Enter.More items…. How do I repair Windows 10 without a disk? Here are the steps provided for each of you.Launch the Windows 10 Advanced Startup Options menu by pressing F11.Go to Troubleshoot > Advanced options > Startup Repair.Wait for a few minutes, and Windows 10 will fix the startup problem. How do I fix Windows startup error? You can access Startup Repair by clicking Troubleshoot > Advanced Options > Startup Repair on this menu. Windows will ask you for your password and attempt to automatically repair your PC. On Windows 7, you’ll often see the Windows Error Recovery screen if Windows can’t boot properly. How do I…
![]()
Timothy Martinez
Professional
Quick Answer: How Do I Start PC In Safe Mode?
How do I get my F8 key to work? Fix F8 Not Working In Windows 10Manually Re-enable F8 Key.Type CMD in the search bar and click Run as Administrator….Enter Safe Mode From Start Menu….Start Safe Mode By System Configuration….Enter Safe Mode When Windows Can’t Boot Normally….Start In Safe Mode When You Can’t Login to Desktop.May 6, 2020. How do you fix Windows 10 Cannot boot up? Windows 10 Won’t Boot? 12 Fixes to Get Your PC Running AgainTry Windows Safe Mode. The most bizarre fix for Windows 10 boot problems is Safe Mode. … Check Your Battery. … Unplug All Your USB Devices. … Turn Off Fast Boot. … Try a Malware Scan. … Boot to the Command Prompt Interface. … Use System Restore or Startup Repair. … Reassign Your Drive Letter.More items…•Jul 13, 2018 How do I fix Windows Safe Mode? Windows 10: Hold Shift while clicking Restart on…
![]()
Gavin Murphy
Guest
Which Software Is Used For Flashing Phones?
How can I flash my phone with the power button? Press and hold the Power button, then press the Volume Up button while still holding the Power button.Using the Volume buttons highlight Wipe data/factory reset.Press the Power button to select the option.Confirm by selecting Yes and let the phone do its thing.. What is the flash button on a home phone? A button on a telephone that takes the place of pressing and quickly letting go of the switch hook. It is used for various functions, including calling the attendant, call waiting, call transfer, conferencing and placing a line on hold. See switch hook. Which software is best for flashing Android phones? Sp Flash tool (SmartPhone Flash Tool) is the best tool for flashing MediaTek Android. It is free software to flash stock, cutom firmware, recovery files, and kernels etc. SmartPhone FlashTool is working with all MediaTek Android smartphones (MTK…
![]()
Rodrigo Miller
Guest
How Can I Get A 50000 Loan In One Day?
How do I get emergency money? 5 Ways to Get Some Emergency CashEmergency Loans.Friends or Family Members.0% APR Credit Cards.Home Equity Line of Credit (HELOC)Look to Nonprofit Programs for Help.Jun 25, 2020. Which bank gives instant loan? GT BankGT Bank. The GTBank Quick Credit is one loan option from GTBank that is very easy and super fast to get. You get your funds to your bank account within two hours of approval. The more exciting part of this loan is that you only get to dial a shortcode to apply. What credit score do I need for a $50000 loan? 650Credit score: Most lenders require a minimum credit score of 600, though some lenders may look at scores slightly lower. If you want to qualify for a personal loan of $50,000, your credit score should be 650 or higher. Where can I borrow a 20000 loan? Personal loans up to…
![]()
Walter Alexander
Guest
How Can I Borrow $50 Fast?
How can I make 500 dollars a week realistically? Take Surveys to Make 500 dollars fast.Sell your Stuff via Decluttr.Download Cashback Apps.Sell unused Gift Cards.Download Ibotta.Get Paid via the Top Rewards Site.Freelance on Fiverr.Make 500 Dollars Fast via Zippyloan.More items…. How can I make 500 dollars a day for free? How to Make 500 Dollars in a Day Online Free?Start Blogging. Blogging is one of the best ways to put your writing skills to good use. … Do Affiliate Marketing. Would you ever believe that you could set-up a business of your own without investing any money? … Make YouTube Your Career. … Freelancing Gigs.Mar 16, 2021 Where can I get money ASAP? Keep reading for 8 ways you can make some fast cash when you need money asap.Selling Items from Around Your House. … Pawn Valuables. … Try a Payday Loan. … Drive for RideShare Apps. … Rent Out…
![]()
Jesus Nelson
Guest
Question: What Is Preserve Force Encryption?
What is force encryption? Encryption is the process of encoding all user data on an Android device using symmetric encryption keys.Once a device is encrypted, all user-created data is automatically encrypted before committing it to disk and all reads automatically decrypt data before returning it to the calling process.. How do you bypass DM Verity? How to Disable DM Verity without TWRP RecoverySTEP 1: Get Stock Boot Image File. To begin with, you will have to get hold of the stock boot. … STEP 2: Install ADB | Enable Debugging. … STEP 3: Disable Preserve AVB 2.0/dm-verity. … STEP 4: Patch Stock Boot Image File. … STEP 5: Flash Patched Boot IMG File | Disable DM-Verity.Oct 16, 2020 How do I get rid of verified boot? Disabling Verified Bootdownload vbmeta.img in the attachment.on your computer, open cmd/terminal, and type : Code: adb reboot bootloader.after entering fastboot, type : Code: fastboot…
![]()
Cody Perry
Guest
Quick Answer: How Do I Start Windows In Recovery Mode?
Why is my computer in recovery mode? Usually this indicates that there has been either a change in the hardware (another hard drive added) or a change in the BIOS settings (TPM chip was turned off) on that computer….. Does Windows 10 have safe mode? There are two versions of safe mode: Safe Mode and Safe Mode with Networking. … Safe Mode with Networking adds the network drivers and services you’ll need to access the Internet and other computers on your network. How do you fix Windows 10 Cannot boot up? Windows 10 Won’t Boot? 12 Fixes to Get Your PC Running AgainTry Windows Safe Mode. The most bizarre fix for Windows 10 boot problems is Safe Mode. … Check Your Battery. … Unplug All Your USB Devices. … Turn Off Fast Boot. … Try a Malware Scan. … Boot to the Command Prompt Interface. … Use System Restore or…
![]()
Justin Foster
Professor
Question: Cash.Com
How can I get a small loan? Where to Get Small Personal Loans of $3,000 or LessWhere to find small personal loans.Most big banks and other major lenders set a minimum borrowing amount for personal loans….Start your search with LendingTree….Find small loans online….Get small-dollar loans from credit unions….Try a national bank for small loans….Avoid expensive small loans….Get a smart repayment plan.Jan 13, 2021. How can I get a loan with minutes? Register. Download & register on the EarlySalary app. Fill in a few basic details.Get Instant Approval. Get approval in minutes. Once approved upload your KYC documents on the app.Ready to Transfer. Once your KYC is in place, just select how much cash you want to transfer to your bank and you are set! Can I get a loan with a 450 credit score? You’ll find it very difficult to borrow with a 450 credit score, unless you’re looking for…
![]()
Keith Gonzales
Professor
Question: New Orleans Mother’S
What is debris at mothers in New Orleans? A po’ boy packed with baked ham, roast beef, the original debris with au jus gravy, and served dressed.Named for Ferdinand Stern, a regular.With toppings.At Mother’s, this means fresh shredded cabbage, pickles, and mayo; on meat sandwiches, we add Creole & yellow mustards.. What is a Ferdi sandwich? For the uninitiated, the Ferdi is a giant roll that is filled with homemade baked ham, roast beef, gravy, and ‘debris,’ Simon Landry’s name for the bits of roast beef that fell into the gravy. The sandwich ($10.75) was named for a regular who supposedly requested ham on his roast beef po’ boy. Who owns Mother’s Restaurant in New Orleans? Jerry AmatoJerry Amato, chef and owner of Mother’s Restaurant, dies at 65 | Where NOLA Eats | nola.com. You have permission to edit this article. Where can I buy Poboys in New Orleans? 10…
![]()
Owen Ramirez
Professor
Quick Answer: How Do I Permanently Flash TWRP?
How do I set TWRP as default recovery? Step One: Enable USB Debugging.Next, you’ll need to enable a few options on your phone….Step Two: Download TWRP for Your Phone.Next, head to TeamWin’s website and go to the Devices page….Step Three: Reboot Into Your Bootloader….Step Four: Flash TWRP to Your Phone….Step Five: Boot Into TWRP Recovery.Jul 3, 2017. Does Magisk wipe data? When installing Magisk you don’t need to wipe anything (data, dalvik, cache, system, etc). All you need is to install the Magisk zip. If you want to install a custom ROM, then it is recommended to wipe data, system and dalvik/cache. Can you use Magisk without root? Magisk can be downloaded on a non-rooted phone and it can help you to root your phone. Can I flash TWRP without root? TWRP stands for Team Win Recovery Project and is an open-source recovery software for Android devices and handsets. ……
![]()
Lawrence Alexander
Professor
Quick Answer: What Is Preserve Force Encryption Magisk?
What is the use of Disable force encryption? Disable Force Encryption (a.k.a DFE) is flashed during installing a custom rom to avoid the system encrypting /data partition when the devices boot for the first time.. How do I turn off encryption? 1 Answer. The only way to remove encryption on a previously encrypted Android device is to perform a full factory reset. This means wiping out everything, including contents of the /sdcard partition and losing all your media, so make sure to perform a back up first. How can I decrypt my phone without losing data? Found a way to decrypt without losing everythingin TWRP NANdroid backup your phone.still in TWRP (or booted up into ROM, doesn’t matter), copy everything to your computer. … in TWRP, wipe your /data partition. … still in TWRP, use the mount action to copy your NANdroid back to your phone from your computer.still in…
![]()
Gavin Walker
Professor
How Can I Flash Without A Computer?
Will rooting a phone unlock it? Rooting a phone will not carrier-unlock it, but it will let you customize the operating system or install a new one.Both types of unlock are legal, although a SIM unlock often requires help from the network/carrier.. What is the flash button on a home phone? A button on a telephone that takes the place of pressing and quickly letting go of the switch hook. It is used for various functions, including calling the attendant, call waiting, call transfer, conferencing and placing a line on hold. See switch hook. Can I install custom ROM without root? The custom ROM you flash does not need to be rooted either. In fact one can boot into TWRP from fastboot. So one does not even need TWRP on the device itself. How do I change my phone’s operating system? Updating your Android.Make sure your device is connected to…
![]()
Samuel Sanchez
User
Quick Answer: Why Does Xender Say Transfer Error?
Why is my Xender showing transfer error? Cause 1: When the Xender app isn’t connected to the WiFi hotspot connection, then you may get transfer error.Fix: You must ensure that the sender and receiver device is connected to the same WiFi hotspot.Check if your mobile data is turned off as it would sometimes don’t let the Xender app transfer files.. What happened Xender? SHAREit, Xender Chinese Apps Banned in India: The popular file sharing app, SHAREit has now been banned in India, due to its Chinese origin. Does iPhone have Xender? Download Xender on both iPhone and Android The transfer app needs to be downloaded and installed on both iPhone and Android phone. You can find it from Apple App Store and Google Play Store. iPhone users can download Xender file transfer app here. How do I connect my iPhone to Xender? Open Xender app on the Android device and…
![]()
Aaron Scott
User
Quick Answer: How Do I Flash Recovery?
Does Magisk wipe data? When installing Magisk you don’t need to wipe anything (data, dalvik, cache, system, etc).All you need is to install the Magisk zip.If you want to install a custom ROM, then it is recommended to wipe data, system and dalvik/cache.. Does TWRP root your phone? zip file that we can “flash” with TWRP. Doing so will grant you root access along with the management features of SuperSU’s Android app. So, to start, head to this link, which will take you to the latest version of SuperSU available for download. … Next, reboot your phone into TWRP recovery. How do I install recovery without a computer? The already-rooted device takes the place of the computer in this instance.Step 1Install ADB & Fastboot for Android. … Step 2Download TWRP for Your Device. … Step 3Install the Termux App. … Step 4Enable USB Debugging. … Step 5Connect the 2 Android…
![]()
Logan Martinez
User
Question: Can I Install Magisk Without TWRP?
How do I manually install Magisk? Once you boot into your custom recovery, follow these steps:In recovery mode, select the Install button.Find the folder where you download the zip file.Select the zip file.Swipe the slider to install Magisk.Tap Reboot System.. Does flashing Magisk wipe data? There’s no need to clear your data. Just flash magisk and you’ll be fine. Can I Unroot my phone after rooting? Any Phone that has only been rooted: If all you’ve done is root your phone, and stuck with your phone’s default version of Android, unrooting should (hopefully) be easy. You can unroot your phone using an option in the SuperSU app, which will remove root and replace Android’s stock recovery. Does a factory reset remove root? 1 Answer. No, root won’t be removed by factory reset. If you want to remove it, then you should flash stock ROM; or delete the su binary from…
![]()
Charles King
User
What Is Samsung DRK Repair?
How do you bypass DM Verity? How to Disable DM Verity without TWRP RecoverySTEP 1: Get Stock Boot Image File.To begin with, you will have to get hold of the stock boot….STEP 2: Install ADB | Enable Debugging….STEP 3: Disable Preserve AVB 2.0/dm-verity….STEP 4: Patch Stock Boot Image File….STEP 5: Flash Patched Boot IMG File | Disable DM-Verity.Oct 16, 2020. What is DM Verity? Android 4.4 and higher supports Verified Boot through the optional device-mapper-verity (dm-verity) kernel feature, which provides transparent integrity checking of block devices. dm-verity helps prevent persistent rootkits that can hold onto root privileges and compromise devices. What is device root key? The Device Root Key (DRK) is a device-unique asymmetric key that is signed by Samsung through an X. 509 certificate. … KNOX Workspace data, for example, is encrypted using such a key, and cannot be decrypted on any other devices. The Samsung Secure Boot key…
![]()
Sean King
User
Quick Answer: How Do I Fix Android Verification Failed?
How do I unblock my Samsung account? Once you click on Unlock, a pop-up window will appear asking to verify the password of your Samsung account.After you input your password, click on the NEXT button, the pop-up window will automatically close and another pop-up window will appear with the result of remotely unlocking your device.. How can I delete my Samsung account without password? The secure method you can try to remove Samsung’s account is to visit the reset Samsung website directly. On your computer or mobile browser, go to the login page and click on “Sign in.” Below the sign-in option, you will see the option “Forget ID or reset the password,” click on the link. How do I fix Samsung verification failed? Solution: Try starting the phone in recovery mode then from here perform the steps listed below.Remove the microSD card of the phone ( if you have…
Advanced Features of Microsoft Word — Computer Applications for Class 9 | Class 9 | Notes, Videos & Tests is part of Class 9 2023 for Computer Applications for Class 9 preparation. The notes and questions for Advanced Features of Microsoft Word — Computer Applications for Class 9 | Class 9 | Notes, Videos & Tests have been prepared according to
the Class 9 exam syllabus. Information about Advanced Features of Microsoft Word — Computer Applications for Class 9 | Class 9 | Notes, Videos & Tests covers all important topics for Class 9 2023 Exam. Find important definitions,
questions, notes, meanings, examples, exercises and tests below for Advanced Features of Microsoft Word — Computer Applications for Class 9 | Class 9 | Notes, Videos & Tests. Introduction of Advanced Features of Microsoft Word — Computer Applications for Class 9 | Class 9 | Notes, Videos & Tests in English is available as part of our Computer Applications for Class 9 for Class 9 & Advanced Features of Microsoft Word — Computer Applications for Class 9 | Class 9 | Notes, Videos & Tests in Hindi for Computer Applications for Class 9 course.
Download more important topics related with Advanced Features of Microsoft Word — Computer Applications for Class 9 | Class 9 | Notes, Videos & Tests, notes, lectures and mock test series for Class 9 Exam by signing up for free.
Part of the course

Notes, Videos & Tests you need for Advanced Features of Microsoft Word
Videos for Advanced Features of Microsoft Word — Computer Applications for Class 9 | Class 9
It is scientifically proven that the things we see stay for a longer period of time in our minds than the things we read. EduRev is providing videos for important topics in Advanced Features of Microsoft Word for Class 9. These videos are created by experts to give them in-depth knowledge of the topics and to clear a lot of concepts regarding that chapter. This will help them understand things by visualizing the tips and tricks and will make learning easy. These videos of Computer Applications for Class 9 are chosen to make the concept more clear. Provided here are the videos of the chapter:
- Advanced Features of Microsoft Word
Online Test for Computer Applications for Class 9 —
After completing the Advanced Features of Microsoft Word it becomes important for students to evaluate themselves how much they have learned from the chapter. Here comes the role of chapter-wise Tests of Advanced Features of Microsoft Word. EduRev provides you with three to four tests for each chapter. These MCQs (Multiple Choice Questions) for Class 9 are so designed to make them understand the types of questions that come during the exam. By attempting these tests one can not only evaluate themselves but can also make a good hold on Computer Applications for Class 9. Taking tests helps them manage time during the exam and also builds their confidence. For proper learning, we have provided here a number of Tests. Taking these tests will definitely help them improve your score.
- Test: Advanced Features of Microsoft Word
Extra questions for Computer Applications for Class 9 Advanced Features of Microsoft Word
Worksheet questions are the type of Extra questions related to Advanced Features of Microsoft Word.
These worksheet questions are designed by the experts for the preparation point of view. It is important for the students of Class 9 to go through
and practice these questions. This will not only build confidence but will also improve their understanding about the concepts used in Advanced Features of Microsoft Word.
There are different types of questions covered under the category of worksheet questions which will help them understand how a question can be mold in
different ways. Thus they are advised to practise Computer Applications for Class 9 questions to clear their concepts.
- Worksheet: Advanced Features of Microsoft Word
- Worksheet Solutions: Advanced Features of Microsoft Word
More chapters similar to Advanced Features of Microsoft Word for Class 9
The Complete Chapterwise preparation package of Computer Applications for Class 9 is created by the best Class 9 teachers for Class 9 preparation.
117 students are using this for Class 9 preparation.
Advanced Features of Microsoft Word | Computer Applications for Class 9
Frequently asked questions on Class 9 Preparation
-
What are the questions asked in Class 9 examinations?
As per the CBSE exam pattern for Class 9 2021, the type of questions asked in the examination are Very Short Answer (VSA) type, Short Answer(SA) type, and Long Answer (LA) type. There will be CBSE internal marks for Class 9 2022 of 20 marks for both the terms.
Information about Advanced Features of Microsoft Word — Computer Applications for Class 9 | Class 9 | Notes, Videos & Tests
In this chapter you can find the Advanced Features of Microsoft Word — Computer Applications for Class 9 | Class 9 | Notes, Videos & Tests defined & explained in the simplest way possible. Besides explaining types of Advanced Features of Microsoft Word — Computer Applications for Class 9 | Class 9 | Notes, Videos & Tests theory, EduRev gives you an ample number of questions to practice Advanced Features of Microsoft Word — Computer Applications for Class 9 | Class 9 | Notes, Videos & Tests tests, examples and also practice Class 9 tests.
Recommended Courses for Class 9 on EduRev
Home > Live Classes > Advanced Word Tutorial: Tips and Tricks in MS Word – Recorded Webinar
In this 1-hour class, we look at some of the Advanced features of Microsoft Word.
Microsoft Word is more powerful than you may think. In this Advanced Microsoft Word Tutorial, we take a look at some of the features that Word has that makes created awesome and professional-looking documents simple.
Once again, this advanced Word Tutorial was hosted by the excellent Deborah Ashby for Simon Sez IT.
Download the Files and follow along with this Advanced Word Tutorial:
If you are interested in learning more about Microsoft Word. Then take a look at the following free resources:
- How to Create and Print Envelopes in Word
- How to Create a Contents Page in Word
- How to Mail Merge in Word
- How to Print Labels in Word
To attend these classes live, become a Simon Sez IT Member.
Adam Lacey

Adam Lacey is an Excel enthusiast and online learning expert. He combines these two passions at Simon Sez IT where he wears a number of different hats.When Adam isn’t fretting about site traffic or Pivot Tables, you’ll find him on the tennis court or in the kitchen cooking up a storm.

We recently showed you how to set the user information in Word. Word also stores several additional advanced properties related to your documents. Some of these are displayed on the “Info” screen and you can change these properties.
NOTE: We used Word 2013 to illustrate this feature.
To access the dialog box that allows you to change the properties for the currently open document, click the “File” tab.

By default, the “Info” screen should display. If not, click “Info” at the top of the list of items on the left.
On the right side of the “Info” screen, click “Properties” and select “Advanced Properties” from the drop-down list.
A dialog box displays with the file name (without the file extension) on the title bar, showing you information about your document. To access the properties you can change, click the “Summary” tab.
Enter properties on the “Summary” tab such as “Title,” “Author,” “Company,” and “Keywords.” Keywords are also called tags and can be used to categorize and find your document more easily.
You are returned to the “Info” screen and the advanced properties you entered display. The keywords you entered are displayed as “Tags.”
You can also display and change the advanced properties in a “Document Information Panel” above the document. To show the panel, click “Properties” on the “Info” screen and select “Show Document Panel.”
You are automatically returned to your document where the “Document Information Panel” displays below the ribbon. For each property, there’s an edit box displaying the current value for the property and allowing you to change the values. You can also use the “Document Properties” button on the panel to access the properties dialog you can also use to edit the properties and view other information.
To close the panel, click the “X” button in the upper-right corner of the panel.
In a future article, we will be showing you how you can insert these advanced properties into your documents so they will automatically update when you change them.
READ NEXT
- › How to Insert Built-in and Custom Advanced Properties into a Word Document
- › Google Chrome Is Getting Faster
- › BLUETTI Slashed Hundreds off Its Best Power Stations for Easter Sale
- › The New NVIDIA GeForce RTX 4070 Is Like an RTX 3080 for $599
- › Mozilla Wants Your Feature Suggestions for Thunderbird
- › Expand Your Tech Career Skills With Courses From Udemy
- › How to Adjust and Change Discord Fonts
How-To Geek is where you turn when you want experts to explain technology. Since we launched in 2006, our articles have been read billions of times. Want to know more?
This blog post is about the well-known word processor Microsoft Word. In the blog post I will mention 5 advance features that you can use in Word.
1. Macros 
A macro is a predefined function which is activated by a single keystroke. For example you can record a macro and change the colour of text to red and save the key stroke as CTRL + R, when you press CTRL + R the colour of the text will change to red. The good thing about these as it can save you time when doing tasks
2. Symbols
Symbols can be entered into a document by going into a menu. This process may take up your time if you use the same symbol frequently. To save you time you can assign a symbol to a key. Like macros you just assign a key stroke and then the symbol will appear.
3. Background Colour
In word you can change the background colour. You can select a colour or a fill depending on what you want.
4.Envelopes
There is a special tool in Microsoft Word that will automatically create an envelope for you. All you need to do is insert your return address and the recipient’s address. But, if you want, you can also customize the envelope to suit your needs. Just go to Tools>Envelopes
5. Labels
All you need to do is provide the text you want on the  labels, pick a type of label, and then format the text to best fit the label you chose.
Now you are pro with word!
This entry was posted in Uncategorized. Bookmark the permalink.