
Word for Microsoft 365 Word 2021 Word 2019 Word 2016 Word 2013 Word 2010 Word 2007 More…Less
Underline words and the spaces between them
The quickest way to underline text is to press Ctrl+U and start typing. When you want to stop underlining, press Ctrl+U again.
You can also underline text and spaces in several other ways.
|
What do you want to do? |
Example |
|---|---|
|
Underline words and the spaces between them |
|
|
Underline words, but not the spaces between them |
|
|
Change the underline style and color |
|
|
Use a double underline |
|
|
Underline blank spaces |
|
|
Remove underlining |
text without underline |


-
Select the text that you want to underline.
-
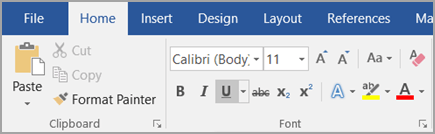
Go to Home > Underline. Or press Ctrl+U.

Underline words, but not the spaces between them
-
Select the text that you want to underline.
-
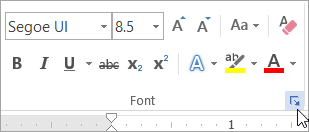
Go to Home and select Font dialog box launcher
.
-
Go to Font and select Words only in the Underline style drop-down list.
 .
.
Change the underline style and color
-
Select the text that you want to underline.
-
Go to Home and select Font dialog box launcher
.Tip: You can also use the keyboard shortcut Ctrl+D.
-
Use the Underline style drop-down list to select an underline style.
Use the Underline color drop-down list to change the color of the line.
Use a double underline
-
Select the text that you want to underline.
-
Go to Home and select Font dialog box launcher
.
-
Select double underline in the Underline style drop-down list.
Underline blank spaces
You can underline blank spaces by pressing Shift+Hyphen (-), but it is difficult to line up the underlines — if you are creating a fill-in form, for example. Also, if the AutoFormat option for changing underscore characters into border lines is turned on, pressing Shift+Hyphen (-) three or more times in a row will result in a line that extends the width of the paragraph, which may not be what you want.
A better way to underline blank spaces for a printed document is to use the Tab key and apply the underline formatting to the tab characters.
When you want to create an underline in an online form, insert table cells with the bottom border turned on.
Underline blank spaces for a printed document
To underline blank spaces for a printed document, use the Tab key and apply the underline formatting to the tab characters.
-
Go to Home > Show/Hide ¶ so that you can see the marks that indicate spaces and tab stops.
-
Press the Tab key.
-
Select the tab characters that you want to underline. A tab character looks like a small arrow.
-
Do one of the following:
-
Press Ctrl+U to apply a simple underline.
-
To apply a different style of underline, go to Home and select Font dialog box launcher
.Select Underline style to choose a different underline style.
-
Underline blank spaces for an online document
To create an underline in an online document or form, insert a table cell with the bottom border turned on. This method ensures that when someone types on the line, the line stays in place.
-
Click or tap where you want to insert a blank underline.
-
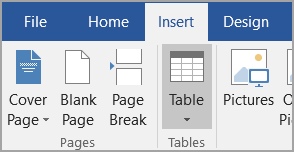
Go to Insert > Table.
-
Select the upper-left box to insert a 1×1 Table.
If you want to add introductory text, such as a name or Social Security Number, before the underline, insert a 2×1 Table.
To change the length of the line, move the pointer over the end of the table until it becomes a resize pointer
, and then move the arrow right or left to lengthen or shorten the line. -
Click or tap in the table (or in the second table cell if you created a 2×1 table).
-
The Table Tools appear. On the Design tab, select Borders > Borders and Shading.
-
Under Setting, select None.
-
Under Style, select the line type, color, and width that you want.
-
In the diagram under Preview, click or tap between the lower margin markers to add the bottom border. Make sure only the bottom line is displayed.
Note: If you prefer to view the table without the light gray gridlines that do not print, select the table, go to Layout next to the Table Design tab and select View Gridlines.
If you used a 2×1 table to make room for introductory text, you can type the text before the line.
 , and then move the arrow right or left to lengthen or shorten the line.
Remove underlining
To remove single underlining from words and spaces, select the underlined text and press Ctrl+U.
To remove other styles of underlining, press Ctrl+U twice.
Need more help?
Creating underline to certain sentence in Word 2016 can highlight the information you want to emphasize. Here I gathered 4 simple and pratical ways that can underline specific text in Word , let’s have a quick look.
1. Use Shortcut key to Underline Text
It may be the best known way of adding underline in Word. Select the content you want to emphasize, press Ctrl+U to underline it.

2. Underline Text with Font
Select the text, click the U symbal in Home tab. Or you can click the small black triangle next to it and choose the style of underline.

3. Underline Text with Table Border
1. Select the text, click the small black triangle next to Borders in Home.

2. But the underline created in this way will take up an entire line. For better result, you can click Insert tab and create a new table in the first place.

3. Input the content in the table, and resize it to adapt the text.

4. Right click the table and select Table Properties.

5. Click Borders and Shading.

6. Choose the style you like and disable the other three borders in Preview, then click OK.

6. Now you can see the result. Underline created in this way will be farther to the character than created by Ctrl+U.

4. Underline Text with Shapes
1. Click Insert – Shapes. Choose the straight line icon in Lines.

2. Underline the text directly. You can also choose the color of underline in Drawing Tools. If you feel difficult to draw a straight line, then press Shift key at the same time.

Copyright Statement: Regarding all of the posts by this website, any copy or use shall get the written permission or authorization from Myofficetricks.

Underlining seems like a simple enough task in Microsoft Word, but many times there’s more involved. You can underline words, spaces, words with spaces, and words without spaces. We’ll show you several ways to use underline in Word.
Many people reserve underlining for web links while others find it a good way to emphasize text in a document. Along with the options for underlining words and spaces, you can format it as a double, bold, or dotted line and remove an underline you’ve added. Let’s walk through it all!
Underline Words With Spaces
The most uncomplicated way to underline in Word is words with spaces. You may have a phrase, sentence, or paragraph you want to underline.
Select the text and then apply the underline one of these ways:
- Click the Underline button in the Font section of the Home tab.
- Press Ctrl+U on Windows or Control+U on Mac.

Underline Words Without Spaces
Underlining words without spaces takes a little more work, especially for sentences and paragraphs. You can select each word, one at a time, and then apply the underline as described above using the Underline button or keyboard shortcut. But there’s a faster way!
Select the text you want to underline, including the spaces. Right-click and pick “Font.”
In the Underline Style drop-down box, choose “Words Only.” You can see a preview at the bottom of the dialog box confirming that only the words are underlined and not the spaces. Then, click “OK.”
You should have your phrase, sentence, or paragraph with underlines only below the words.
Underline Only Spaces
Maybe you’re creating a document such as a printable form where you want to underline spaces to make a blank line. You’d think that inserting several spaces and applying the underline to them would be the way to go. Unfortunately, it doesn’t work. Here are two ways to underline spaces.
RELATED: How to Overline Text in Word
Method One: Use Tab Stops
You can use the default tab stops in Word which are 0.5 inches with each press of the Tab key. If you prefer, you can set up your own tab stops.
Press the Tab key the number of times necessary to cover the length you need. Then, select all of the tab stops you just inserted by dragging your cursor through them.
Click the Underline button in the ribbon or use a keyboard shortcut. You’ll then see your line, or underlined spaces.
Method Two: Use a Table
Another way to create underlined spaces is by inserting a table and adjusting the borders. Go to the Insert tab and select the Table drop-down arrow. Choose the first square which is the one-by-one table.
When the table appears, it should stretch the width of your document. If not, drag the right side so that it does. Right-click and choose “Table Properties.”
Click “Borders and Shading” at the bottom of the Table tab.
On the right side of the dialog box, click to remove the top and side borders, leaving only the bottom border. Click “OK” to apply the change.
You’ll then have a single line as your “underlined spaces.”
Change the Underline Format
You have a few different ways to change the format for your underline. You can pick a double underline, a bolder line, or a dotted line in a variety of styles. And you can change the line before or after you apply the underline to your text or spaces.
RELATED: How to Add a Dotted Line in a Microsoft Word Document
To change the line style at the time you apply the underline, select the text you want to underline. If you’ve already applied the underline, select all of the underlined text. Then, do one of the following.
Click the arrow next to the Underline button in the Font section of the Home tab. Select the line style you want to use.
Right-click the selected text and pick “Font.”Choose the line in the Underline Style drop-down box and click “OK.”
If you used the table method above to underline spaces, select the table and head back to Table Properties > Borders and Shading. Then, use the options in the Style drop-down box.
How to Remove an Underline
Removing an underline is as easy. Select the underlined text and click the Underline button in the Font section on the Home tab. This deselects the Underline button and removes the underline from your text.
Alternatively, you can use the shortcut Ctrl+U on Windows or Control+U on Mac.
Another way to remove an underline is to select the underlined text, right-click, and choose “Font.” Choose “None” in the Underline Style drop-down box and click “OK.”
If you inserted a table for underlined spaces, you can remove the table by right-clicking it and choosing “Delete Table.”
Knowing how to apply, format, and remove underlines in your Word documents is important if that’s your preferred method of emphasizing text. But you can also highlight text or apply a format like bold or italics.
READ NEXT
- › How to Adjust and Change Discord Fonts
- › BLUETTI Slashed Hundreds off Its Best Power Stations for Easter Sale
- › Google Chrome Is Getting Faster
- › Mozilla Wants Your Feature Suggestions for Thunderbird
- › Expand Your Tech Career Skills With Courses From Udemy
- › The New NVIDIA GeForce RTX 4070 Is Like an RTX 3080 for $599
Updated: 10/11/2021 by

To create an underline without any text in Microsoft Word, press Ctrl+U to start the underline, then, press Ctrl+Shift+spacebar to create non-breaking spaces. Press and hold this keyboard shortcut combination to add multiple underlines next to each other, creating an underline. For example, holding down Ctrl+Shift and pressing Spacebar five times would create an underline five characters long.
An example of how this could be used is for printable forms, for example: Name: .
In this article, let’s talk about the 7 useful ways to create a fillable field with underline in your Word document.
Once in a while, we would need to create some questionnaires. Therefore, it would be a needy demand to create a fillable field with underline. In the following content, there are 7 effectual methods which shall meet your requirements.
Method 1: Manually Draw a Line
- First off, put cursor at the place where the line goes and click “Insert” tab.
- Then click “Shapes” in “Illustration” group.
- Choose “Line” in “Lines” group.


Now there shall be a colored line. You can click on it and change the color to black by choosing a shape style under “Format” tab.
Method 2: Add Underline for Font
- To start with, enter a series of space and select them.
- Then click the expand button under “Home” tab to open the “Font” dialog box.
- Next choose an underline style and click “OK”.

- Now type on the selection and the text shall be underlined.


Method 3: Enter Underscore
- Firstly, click “Underline” under “Home” tab and choose one line style.

- Then press “Shift+ Underscore” to get a line.
- Then place cursor above the line and type the content. As you type, you will find the line gets longer and longer. So you need to trim the length afterwards.

Method 4: Insert a Paragraph Border
- To begin with, click the border icon under “Home” tab in “Paragraph” group.
- Then choose “Bottom Border”.


Here is the effect:
Method 5: Use a Table Border
- Click “Insert” tab first.
- Then click “Table”.
- Next choose “Draw Table” on the list.

- Draw a table of one row and one column with approximate height and width.
- Then select the table.
- Click “Design” tab then “Borders” Icon.
- First choose “No Border” and then “Bottom Border”.


Method 6: Create a Horizontal Line
- Type dash three times.
- Then press “Enter”.
Method 7: Run a Macro
- First and foremost, press “Alt+ F11” to open Word VBA editor quickly.
- Then click “Normal” and then “Insert”.
- Next click “Insert”.
- Then choose “Module”.

- Double click on the new module to open the editing space.
- Paste these codes there:

Sub CreateAFillableField()
  Dim objParagraph As Paragraph
  Dim objTable As Table

  'Initialization
  Set objTable = ActiveDocument.Tables.Add(Range:=Selection.Range, NumRows:=1, NumColumns:= _
    1, DefaultTableBehavior:=wdWord9TableBehavior, AutoFitBehavior:= _
    wdAutoFitFixed)
  objTable.Cell(1, 1).SetWidth ColumnWidth:=InchesToPoints(1.1), RulerStyle:=wdAdjustNone

  'Set Table borders invisible.
  Selection.Borders.Enable = False

  'Apply bottom border only to table.
  With Selection.Borders(wdBorderBottom)
    .LineStyle = Options.DefaultBorderLineStyle
    .LineWidth = Options.DefaultBorderLineWidth
    .Color = Options.DefaultBorderColor
  End With

  'Remove table caption.
  For Each objParagraph In ActiveDocument.Paragraphs
    If objParagraph.Range.Style = "Caption" Then
      objParagraph.Range.Delete
    End If
  Next objParagraph
End Sub
- Click “Run” button.


For easy use in the future, you can assign a button for the macro. You can refer to this article: How to Remove the Formatting of Pasted Texts with Macro and VBA in Your Word
Comparison of 7 Methods
| Methods | Advantages | Disadvantages |
| Method 1: Manually Draw a Line | You can drag the line to adjust its location. | 1. You will have to change the color to black.
2. The line can’t get longer automatically even if there is no enough space for the text. |
| Method 2: Add Underline for Font | 1. There is no extra space left on the line.
2. The line can get longer automatically if there is no enough space for the text. |
1. You can’t see the line until you enter text over it.
2. You can’t move the line. |
| Method 3: Enter Underscore | You can view the line. | 1. You have to apply underline to the space before creating the line.
2. You will have to reduce the line length since it gets longer as you type. 3. You can’t move the line. |
| Method 4: Insert a Paragraph Border | You can view the line. | 1. You can’t change the line length.
2. You can’t move the line. |
| Method 5: Use a Table Border | 1. You can move the line.
2. You can alter the line length. |
1. You have to remove unnecessary borders.
2. You have to remove the table caption. |
| Method 6: Create a Horizontal Line | You can view the line. | 1. You can’t change the line length.
2. You can only have it on the next paragraph of existing text. 3. You can’t move the line. |
| Method 7: Run a Macro | 1. You can view the line.
2. You can move the line. 3. You can change the length. 4. No need to delete table caption. 5. The quickest way to get a fillable field with underline |
You will have to assign the macro to a button if you want to use it quickly in the future. |
Address File Corruption Predicament
In everyday use of digital devices, file loss or corruption due to all kinds of reasons happens all the time. However, these seeming broken files are highly recoverable, for there is a specialized damaged Word docx repair tool, the last-ditch effort you can make to save your data.
Author Introduction:
Vera Chen is a data recovery expert in DataNumen, Inc., which is the world leader in data recovery technologies, including xls data error recovery tool and pdf repair software products. For more information visit www.datanumen.com