Once you start learning VBA one of the coolest things you can do is to write a VBA code to insert new a worksheet in a workbook.
Well, there is already a shortcut key to insert a new worksheet or you can also use the normal option but the benefit of using a VBA code is you can add multiple worksheets with a single click and you can also define that where you want to add it.
For this, you need to use the Sheets.Add method, and in this post, we will be learning how to use it to add one or more worksheets in a workbook.
Sheets.Add Method
Sheets.Add ([Before], [After], [Count], [Type])- Before: To add a new sheet before a sheet.
- After: To add the new sheet before a sheet.
- Count: Number of sheets to add.
- Type: Type of the sheet you want to add (LINK)
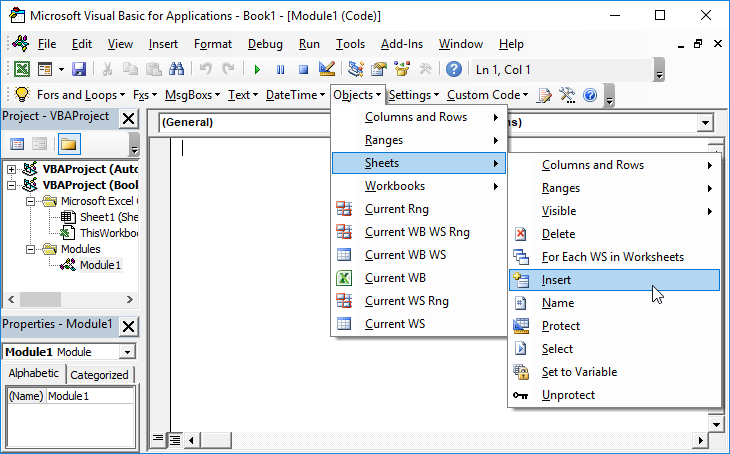
Open the visual basic editor and follow these steps.
- First, you need to enter Sheets.Add method.
- Then you need to define the place to add the new sheet (Before or After).
- Next thing is to enter the count of worksheets.
- In the end, the type of sheet.

Different Ways to Add New Sheets in a Workbook using a VBA Code
Below you have different ways to add a new sheet to a workbook:
1. Add a Single Sheet
To add a single sheet, you can use the below code, where you didn’t specify any argument.
Sub SheetAddExample1()
ActiveWorkbook.Sheets.Add
End Sub
This code tells Excel to add a sheet in the active workbook, but as you don’t have any argument it will use the default values and add one worksheet(xlWorksheet) before the active sheet.
Here’s one more way to write this, check out the below code.
Sub SheetAddExample2()
Sheets.Add
End Sub
As you are already in the active workbook you can use the below code as well. It does the same thing.
2. Add Multiple Sheets
To add multiple sheets in one go, you just need to define the COUNT argument with the number of sheets you want to add.
Sub AddSheets3()
Sheets.Add Count:=5
End Sub
Now the count of the sheets that you have defined is 5, so when you run this code it instantly adds the five new sheets in the workbook.
3. Add a Sheet with a Name
If you want to rename the sheet after adding it, you can use the following code:
Sub AddNewSheetswithNameExample1()
Sheets.Add.Name = "myNewSHeet"
End Sub
In the above code, we have used the name object (LINK) which helps you to specify the name of a sheet.
4. Add a Sheet with a Name from a Cell
You can also take the value to use as the sheet’s name from a cell.
Sub AddNewSheetswithNameExample2()
Sheets.Add.Name = Range("A1")
End Sub
In the above code, cell A1 is used to get the name for the new sheet.
5. Add a Sheet After/Before a Specific Sheet
As these arguments are already there in the Sheets.Add where you can specify the sheet to add a new sheet before or after it.
Sub AddSheetsExample5()
Sheets.Add Before:=Worksheets("mySheet")
Sheets.Add After:=Worksheets("mySheet")
End Sub
Now in the above code, you have two lines of code that you have used before and after an argument in the Sheet.Add method. So, when you run this code it adds two sheets one is before and one is after the “mySheet”.
6. Add a New Sheet at Beginning
By using the before argument using you can also add a sheet at the beginning of the sheets that you have in the workbook.
So basically, what we are going to do is we’re going to specify the sheet number instead of the sheet name.
Sub AddSheetsExample6()
Sheets.Add Before:=Sheets(1)
End Sub
In the above code, you have used sheet number (1) that tells VBA to add the sheet before the sheet which is in the first position in all the worksheets. In this way, it will always add the new sheet at the beginning.
7. Add a New Sheet at the End (After the Last Sheet)
To add a new sheet in the end you need to write the code in a different way. So, for this, you need to know how many sheets there in the workbook are so that you can add a new sheet at the end.
Sub AddSheetsExample8()
Sheets.Add After:=Sheets(Sheets.Count)
End Sub
In the above code, Sheet.Count returns the count of the sheets that you have in the workbook, and as you have defined the after argument it adds the new sheet after the last sheet in the workbook.
8. Add Multiple Sheets and use Names from a Range
The following code counts rows from the range A1:A7. After that, it loops to add sheets according to the count from the range and uses values from the range to name the sheet while adding it.
Sub AddSheetsExample9()

Dim sheets_count As Integer
Dim sheet_name As String
Dim i As Integer

sheet_count = Range("A1:A7").Rows.Count

For i = 1 To sheet_count
  sheet_name = Sheets("mySheet").Range("A1:A7").Cells(i, 1).Value
  Worksheets.Add().Name = sheet_name
Next i

End Sub
But with the above code, there could be a chance that the sheet name you want to add already exists or you have a blank cell in the name range.
In that case, you need to write a code that can verify if the sheet with the same name already exists or not and whether the cell from where you want to take the sheet name is blank or not.
If both conditions are fulfilled only then it should add a new sheet. Let me put it in steps two steps:
First, you need to write an Excel User Defined Function to check if a sheet with the same name already exists or not.
Function SheetCheck(sheet_name As String) As Boolean

Dim ws As Worksheet

SheetCheck = False

For Each ws In ThisWorkbook.Worksheets

    If ws.Name = sheet_name Then

        SheetCheck = True

    End If

Next

End Function
Second, you need to write a code using this function and that code should also check if the name cell is blank or not.
Sub AddMultipleSheet2()

Dim sheets_count As Integer
Dim sheet_name As String
Dim i As Integer

sheet_count = Range("A1:A7").Rows.Count

For i = 1 To sheet_count

    sheet_name = Sheets("mySheet").Range("A1:A10").Cells(i, 1).Value

    If SheetCheck(sheet_name) = False And sheet_name <> "" Then
    Worksheets.Add().Name = sheet_name
    End If

Next i

End Sub
Now in the above code, you have used the VBA IF Statement and in this statement, you have the sheet check function which checks for the sheet name and then you have a condition to check if the name cell has a blank value.
Sample File
More Tutorials on Worksheets
- VBA Worksheet – Excel VBA Examples – VBA Tutorial
In this Article
- Add Sheet
- Add Sheet with Name
- Create New Sheet with Name from a Cell
- Add Sheet Before / After Another Sheet
- Insert Sheet After Another Sheet
- Add Sheet To End of Workbook
- Add Sheet To Beginning of Workbook:
- Add Sheet to Variable
- More Add Sheet Examples
- Create Sheet if it Doesn’t Already Exist
- Create Worksheets From List of Names
- VBA Coding Made Easy
This tutorial will discuss how to add / insert worksheets using VBA.
This simple macro will add a Sheet before the ActiveSheet:
Sub Add ()
    Sheets.Add
End Sub
After inserting a Sheet, the new Sheet becomes the ActiveSheet. You can then use the ActiveSheet object to work with the new Sheet (At the bottom of this article we will show how to insert a new sheet directly to a variable).
ActiveSheet.Name = "NewSheet"Add Sheet with Name
You can also define a Sheet name as you create the new Sheet:
Sheets.Add.Name = "NewSheet"Create New Sheet with Name from a Cell
Or use a cell value to name a new Sheet:
Sheets.Add.Name = range("a3").valueAdd Sheet Before / After Another Sheet
You might also want to choose the location of where the new Sheet will be inserted. You can use the After or Before properties to insert a sheet to a specific location in the workbook.
Insert Sheet After Another Sheet
This code will insert the new sheet AFTER another sheet:
Sheets.Add After:=Sheets("Input")This will insert a new Sheet AFTER another sheet and specify the Sheet name:
Sheets.Add(After:=Sheets("Input")).Name = "NewSheet"Notice the extra parenthesis required in the second example (the first example will generate an error if the second parenthesis are added).
or Before:
Sheets.Add(Before:=Sheets("Input")).Name = "NewSheet"In these examples we explicitly named the Sheet used to determine the sheet location. Often you’ll want to use the Sheet Index number instead, so that you can insert the sheet to the beginning or end of the Workbook:
Add Sheet To End of Workbook
To add a Sheet to the end of the workbook:
Sheets.Add After:=Sheets(Sheets.Count)Add Sheet To Beginning of Workbook:
To add a Sheet to the beginning of the workbook:
Sheets.Add(Before:=Sheets(1)).Name = "FirstSheet"Add Sheet to Variable
This code assigns the new Sheet to a variable as the sheet is created:
Dim ws As Worksheet
Set ws = Sheets.Add
From here you can reference the new sheet with the variable ‘ws’:
ws.name = "VarSheet"More Add Sheet Examples
Create Sheet if it Doesn’t Already Exist
You might want to create a sheet only if it doesn’t already exist.
VBA Programming | Code Generator does work for you!
Create Worksheets From List of Names
The following routine will look at the contents of a single column set up Excel worksheets within the current workbook with these names. It makes a call to another function to see if a sheet with that name already exists, and if so the sheet isn’t created.
Private Sub CommandButton1_Click()

Call CreateWorksheets(Sheets("Sheet2").Range("A1:a10"))

End Sub

Sub CreateWorksheets(Names_Of_Sheets As Range)
Dim No_Of_Sheets_to_be_Added As Integer
Dim Sheet_Name As String
Dim i As Integer

No_Of_Sheets_to_be_Added = Names_Of_Sheets.Rows.Count

For i = 1 To No_Of_Sheets_to_be_Added

Sheet_Name = Names_Of_Sheets.Cells(i, 1).Value

'Only add sheet if it doesn't exist already and the name is longer than zero characters

If (Sheet_Exists(Sheet_Name) = False) And (Sheet_Name <> "") Then
    Worksheets.Add().Name = Sheet_Name
End If

Next i

End Sub
Function Sheet_Exists(WorkSheet_Name As String) As Boolean
Dim Work_sheet As Worksheet
Sheet_Exists = False
For Each Work_sheet In ThisWorkbook.Worksheets
If Work_sheet.Name = WorkSheet_Name Then
Sheet_Exists = True
End If
Next
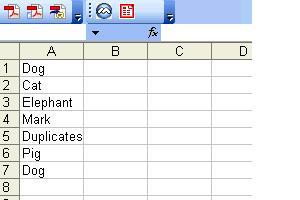
End FunctionSo if we have the following text in cells A1:A30 in Sheet 2:
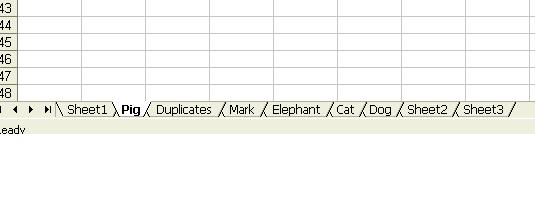
Then the following sheets will be created:
Note that although “Dog” appears twice, only one sheet is created.
To download the .XLS file for this tutorial, click here.
VBA Coding Made Easy
Stop searching for VBA code online. Learn more about AutoMacro – A VBA Code Builder that allows beginners to code procedures from scratch with minimal coding knowledge and with many time-saving features for all users!
Learn More!
<<Return to VBA Examples
Создание, копирование, перемещение и удаление рабочих листов Excel с помощью кода VBA. Методы Sheets.Add, Worksheet.Copy, Worksheet.Move и Worksheet.Delete.
Создание новых листов
Создание новых рабочих листов осуществляется с помощью метода Sheets.Add.
Синтаксис метода Sheets.Add
expression.Add [Before, After, Count, Type]
где expression — переменная, представляющая собой объект Sheet.
Компоненты метода Sheets.Add
- Before* — необязательный параметр типа данных Variant, указывающий на лист, перед которым будет добавлен новый.
- After* — необязательный параметр типа данных Variant, указывающий на лист, после которого будет добавлен новый.
- Count — необязательный параметр типа данных Variant, указывающий, сколько листов будет добавлено (по умолчанию — 1).
- Type — необязательный параметр типа данных Variant, указывающий тип листа: xlWorksheet** (рабочий лист) или xlChart (диаграмма), по умолчанию — xlWorksheet.
*Если Before и After не указаны, новый лист, по умолчанию, будет добавлен перед активным листом.
**Для создания рабочего листа (xlWorksheet) можно использовать метод Worksheets.Add, который для создания диаграмм уже не подойдет.
Примеры создания листов
|
1 2 3 4 5 6 7 8 9 10 11 12 13 14 15 16 17 18 19 20 |
‘Создание рабочего листа: Sheets.Add Worksheets.Add ThisWorkbook.Sheets.Add After:=ActiveSheet, Count:=2 Workbooks(«Книга1.xlsm»).Sheets.Add After:=Лист1 Workbooks(«Книга1.xlsm»).Sheets.Add After:=Worksheets(1) Workbooks(«Книга1.xlsm»).Sheets.Add After:=Worksheets(«Лист1») ‘Создание нового листа с заданным именем: Workbooks(«Книга1.xlsm»).Sheets.Add.Name = «Мой новый лист» ‘Создание диаграммы: Sheets.Add Type:=xlChart ‘Добавление нового листа перед ‘последним листом рабочей книги Sheets.Add Before:=Sheets(Sheets.Count) ‘Добавление нового листа в конец Sheets.Add After:=Sheets(Sheets.Count) |
- Лист1 в After:=Лист1 — это уникальное имя листа, указанное в проводнике редактора VBA без скобок.
- Лист1 в After:=Worksheets(«Лист1») — это имя на ярлыке листа, указанное в проводнике редактора VBA в скобках.
Создаваемый лист можно присвоить объектной переменной:
|
Dim myList As Object ‘В активной книге Set myList = Worksheets.Add ‘В книге «Книга1.xlsm» Set myList = Workbooks(«Книга1.xlsm»).Worksheets.Add ‘Работаем с переменной myList.Name = «Listok1» myList.Cells(1, 1) = myList.Name ‘Очищаем переменную Set myList = Nothing |
Если создаваемый лист присваивается объектной переменной, он будет помещен перед активным листом. Указать дополнительные параметры невозможно.
Копирование листов
Копирование рабочих листов осуществляется с помощью метода Worksheet.Copy.
Синтаксис метода Worksheet.Copy
expression.Copy [Before, After]
где expression — переменная, представляющая собой объект Worksheet.
Компоненты метода Worksheet.Copy
- Before* — необязательный параметр типа данных Variant, указывающий на лист, перед которым будет добавлена копия.
- After* — необязательный параметр типа данных Variant, указывающий на лист, после которого будет добавлена копия.
*Если Before и After не указаны, Excel создаст новую книгу и поместит копию листа в нее. Если скопированный лист содержит код в проекте VBA (в модуле листа), он тоже будет перенесен в новую книгу.
Примеры копирования листов
|
1 2 3 4 5 6 7 8 9 10 11 12 13 14 15 16 17 18 19 20 21 22 23 |
‘В пределах активной книги ‘(уникальные имена листов) Лист1.Copy After:=Лист2 ‘В пределах активной книги ‘(имена листов на ярлычках) Worksheets(«Лист1»).Copy Before:=Worksheets(«Лист2») ‘Вставить копию в конец Лист1.Copy After:=Sheets(Sheets.Count) ‘Из одной книги в другую Workbooks(«Книга1.xlsm»).Worksheets(«Лист1»).Copy _ After:=Workbooks(«Книга2.xlsm»).Worksheets(«Лист1») ‘Один лист активной книги в новую книгу Лист1.Copy ‘Несколько листов активной книги в новую книгу* Sheets(Array(«Лист1», «Лист2», «Лист3»)).Copy ‘Все листы книги с кодом в новую книгу ThisWorkbook.Worksheets.Copy |
* Если при копировании в новую книгу нескольких листов хотя бы один лист содержит умную таблицу — копирование невозможно. Один лист, содержащий умную таблицу, копируется в новую книгу без проблем.
Если рабочие книги указаны как элементы коллекции Workbooks, в том числе ActiveWorkbook и ThisWorkbook, листы нужно указывать как элементы коллекции Worksheets, использование уникальных имен вызовет ошибку.
Перемещение листов
Перемещение рабочих листов осуществляется с помощью метода Worksheet.Move.
Синтаксис метода Worksheet.Move
expression.Move [Before, After]
где expression — переменная, представляющая собой объект Worksheet.
Компоненты метода Worksheet.Move
- Before* — необязательный параметр типа данных Variant, указывающий на лист, перед которым будет размещен перемещаемый лист.
- After* — необязательный параметр типа данных Variant, указывающий на лист, после которого будет размещен перемещаемый лист.
*Если Before и After не указаны, Excel создаст новую книгу и переместит лист в нее.
Примеры перемещения листов
Простые примеры перемещения листов:
|
1 2 3 4 5 6 7 8 9 10 11 12 13 14 15 16 17 |
‘В пределах активной книги ‘(уникальные имена листов) Лист1.Move After:=Лист2 ‘В пределах активной книги ‘(имена листов на ярлычках) Worksheets(«Лист1»).Move Before:=Worksheets(«Лист2») ‘Размещение после последнего листа: Лист1.Move After:=Sheets(Sheets.Count) ‘Из одной книги в другую Workbooks(«Книга1.xlsm»).Worksheets(«Лист1»).Move _ After:=Workbooks(«Книга2.xlsm»).Worksheets(«Лист1») ‘В новую книгу Лист1.Move |
Если рабочие книги указаны как элементы коллекции Workbooks, в том числе ActiveWorkbook и ThisWorkbook, листы нужно указывать как элементы коллекции Worksheets, использование уникальных имен вызовет ошибку.
Перемещение листа «Лист4» в позицию перед листом, указанным как по порядковому номеру, так и по имени ярлыка:
|
Sub Peremeshcheniye() Dim x x = InputBox(«Введите имя или номер листа», «Перемещение листа «Лист4»») If IsNumeric(x) Then x = CLng(x) Sheets(«Лист4»).Move Before:=Sheets(x) End Sub |
Удаление листов
Удаление рабочих листов осуществляется с помощью метода Worksheet.Delete
Синтаксис метода Worksheet.Delete
expression.Delete
где expression — переменная, представляющая собой объект Worksheet.
Примеры удаления листов
|
‘По уникальному имени Лист1.Delete ‘По имени на ярлычке Worksheets(«Лист1»).Delete ‘По индексу листа Worksheets(1).Delete ‘В другой книге Workbooks(«Книга1.xlsm»).Worksheets(«Лист1»).Delete |
Если рабочие книги указаны как элементы коллекции Workbooks, в том числе ActiveWorkbook и ThisWorkbook, листы нужно указывать как элементы коллекции Worksheets, использование уникальных имен вызовет ошибку.
Как обратиться к рабочему листу, переименовать, скрыть или отобразить его с помощью кода VBA Excel, смотрите в этой статье.
Apart from cells and ranges, working with worksheets is another area you should know about to use VBA efficiently in Excel.
Just like any object in VBA, worksheets have different properties and methods associated with it that you can use while automating your work with VBA in Excel.
In this tutorial, I will cover ‘Worksheets’ in detail and also show you some practical examples.
So let’s get started.
All the codes I mention in this tutorial need to be placed in the VB Editor. Go to the ‘Where to Put the VBA Code‘ section to know how it works.
If you’re interested in learning VBA the easy way, check out my Online Excel VBA Training.
Difference between Worksheets and Sheets in VBA
In VBA, you have two collections that can be a bit confusing at times.
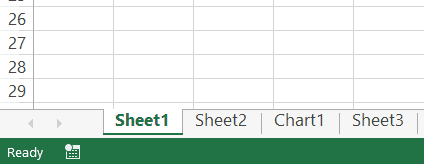
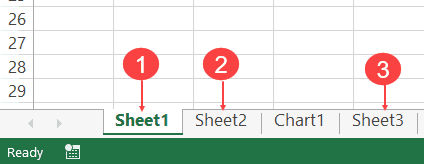
In a workbook, you can have worksheets and as well as chart sheets. The example below has three worksheets and one chart sheet.
In Excel VBA:
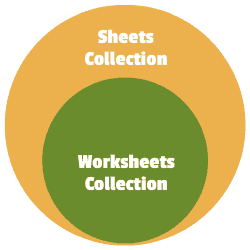
- The ‘Worksheets’ collection would refer to the collection of all the worksheet objects in a workbook. In the above example, the Worksheets collection would consist of three worksheets.
- The ‘Sheets’ collection would refer to all the worksheets as well as chart sheets in the workbook. In the above example, it would have four elements – 3 Worksheets + 1 Chart sheet.
If you have a workbook that only has worksheets and no chart sheets, then ‘Worksheets’ and ‘Sheets’ collection is the same.
But when you have one or more chart sheets, the ‘Sheets’ collection would be bigger than the ‘Worksheets’ collection
Sheets = Worksheets + Chart Sheets
Now with this distinction, I recommend being as specific as possible when writing a VBA code.
So if you have to refer to worksheets only, use the ‘Worksheets’ collection, and if you have to refer to all sheets (including chart sheets), the use the ‘Sheets’ collection.
In this tutorial, I will be using the ‘Worksheets’ collection only.
Referencing a Worksheet in VBA
There are many different ways you can use to refer to a worksheet in VBA.
Understanding how to refer to worksheets would help you write better code, especially when you’re using loops in your VBA code.
Using the Worksheet Name
The easiest way to refer to a worksheet is to use its name.
For example, suppose you have a workbook with three worksheets – Sheet 1, Sheet 2, Sheet 3.
And you want to activate Sheet 2.
You can do that using the following code:

Sub ActivateSheet()
Worksheets("Sheet2").Activate
End Sub
The above code asks VBA to refer to Sheet2 in the Worksheets collection and activate it.
Since we are using the exact sheet name, you can also use the Sheets collection here. So the below code would also do that same thing.
Sub ActivateSheet()
Sheets("Sheet2").Activate
End Sub
Using the Index Number
While using the sheet name is an easy way to refer to a worksheet, sometimes, you may not know the exact name of the worksheet.
For example, if you’re using a VBA code to add a new worksheet to the workbook, and you don’t know how many worksheets are already there, you would not know the name of the new worksheet.
In this case, you can use the index number of the worksheets.
Suppose you have the following sheets in a workbook:
The below code would activate Sheet2:
Sub ActivateSheet()
Worksheets(2).Activate
End Sub
Note that we have used index number 2 in Worksheets(2). This would refer to the second object in the collection of the worksheets.
Now, what happens when you use 3 as the index number?
It will select Sheet3.
If you’re wondering why it selected Sheet3, as it’s clearly the fourth object.
This happens because a chart sheet is not a part of the worksheets collection.
So when we use the index numbers in the Worksheets collection, it will only refer to the worksheets in the workbook (and ignore the chart sheets).
On the contrary, if you’re using Sheets, Sheets(1) would refer to Sheets1, Sheets(2) would refer to Sheet2, Sheets(3) would refer to Chart1 and Sheets(4) would refer to Sheet3.
This technique of using index number is useful when you want to loop through all the worksheets in a workbook. You can count the number of worksheets and then loop through these using this count (we will see how to do this later in this tutorial).
Note: The index number goes from left to right. So if you shift Sheet2 to the left of Sheet1, then Worksheets(1) would refer to Sheet2.
Using the Worksheet Code Name
One of the drawbacks of using the sheet name (as we saw in the section above) is that a user can change it.
And if the sheet name has been changed, your code wouldn’t work until you change the name of the worksheet in the VBA code as well.
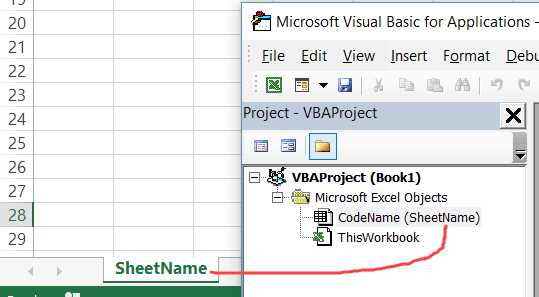
To tackle this problem, you can use the code name of the worksheet (instead of the regular name that we have been using so far). A code name can be assigned in the VB Editor and doesn’t change when you change the name of the sheet from the worksheet area.
To give your worksheet a code name, follow the below steps:
- Click the Developer tab.
- Click the Visual Basic button. This will open the VB Editor.
- Click the View option in the menu and click on Project Window. This will make the Properties pane visible. If the Properties pane is already visible, skip this step.
- Click on the sheet name in the project explorer that you want to rename.
- In the Properties pane, change the name in the field in front of (Name). Note that you can’t have spaces in the name.
The above steps would change the name of your Worksheet in the VBA backend. In the Excel worksheet view, you can name the worksheet whatever you want, but in the backend, it will respond to both the names – the sheet name and the code name.
In the above image, the sheet name is ‘SheetName’ and the code name is ‘CodeName’. Even if you change the sheet name on the worksheet, the code name still remains the same.
Now, you can use either the Worksheets collection to refer to the worksheet or use the codename.
For example, both the line will activate the worksheet.
Worksheets("Sheetname").Activate
CodeName.Activate
The difference in these two is that if you change the name of the worksheet, the first one wouldn’t work. But the second line would continue to work even with the changed name. The second line (using the CodeName) is also shorter and easier to use.
Referring to a Worksheet in a Different Workbook
If you want to refer to a worksheet in a different workbook, that workbook needs to be open while the code runs, and you need to specify the name of the workbook and the worksheet that you want to refer to.
For example, if you have a workbook with the name Examples and you want to activate Sheet1 in the Example workbook, you need to use the below code:
Sub SheetActivate()
Workbooks("Examples.xlsx").Worksheets("Sheet1").Activate
End Sub
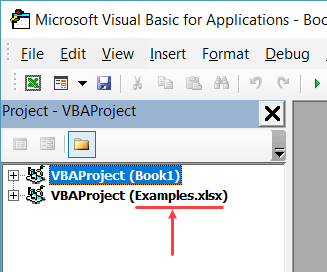
Note that if the workbook has been saved, you need to use the file name along with the extension. If you’re not sure what name to use, take help from Project Explorer.
In case the workbook has not been saved, you don’t need to use the file extension.
Adding a Worksheet
The below code would add a worksheet (as the first worksheet – i.e., as the leftmost sheet in the sheet tab).
Sub AddSheet()
Worksheets.Add
End Sub
It takes the default name Sheet2 (or any other number based on how many sheets are already there).
If you want a worksheet to be added before a specific worksheet (say Sheet2), then you can use the below code.
Sub AddSheet()
Worksheets.Add Before:=Worksheets("Sheet2")
End Sub
The above code tells VBA to add a sheet and then uses the ‘Before’ statement to specify the worksheet before which the new worksheet should to be inserted.
Similarly, you can also add a sheet after a worksheet (say Sheet2), using the below code:
Sub AddSheet()
Worksheets.Add After:=Worksheets("Sheet2")
End Sub
If you want the new sheet to be added to the end of the sheets, you need to first know how many sheets are there. The following code first counts the number of sheets, and the adds the new sheet after the last sheet (to which we refer using the index number).
Sub AddSheet()
Dim SheetCount As Integer
SheetCount = Worksheets.Count
Worksheets.Add After:=Worksheets(SheetCount)
End Sub
Deleting a Worksheet
The below code would delete the active sheet from the workbook.
Sub DeleteSheet()
ActiveSheet.Delete
End Sub
The above code would show a warning prompt before deleting the worksheet.
If you don’t want to see the warning prompt, use the below code:
Sub DeleteSheet()
Application.DisplayAlerts = False
ActiveSheet.Delete
Application.DisplayAlerts = True
End Sub
When Application.DisplayAlerts is set to False, it will not show you the warning prompt. If you use it, remember to set it back to True at the end of the code.
Remember that you can’t undo this delete, so use the above code when you’re absolutely sure.
If you want to delete a specific sheet, you can do that using the following code:
Sub DeleteSheet()
Worksheets("Sheet2").Delete
End Sub
You can also use the code name of the sheet to delete it.
Sub DeleteSheet()
Sheet5.Delete
End Sub
Renaming the Worksheets
You can modify the name property of the Worksheet to change its name.
The following code will change the name of Sheet1 to ‘Summary’.
Sub RenameSheet()
Worksheets("Sheet1").Name = "Summary"
End Sub
You can combine this with the adding sheet method to have a set of sheets with specific names.
For example, if you want to insert four sheets with the name 2018 Q1, 2018 Q2, 2018 Q3, and 2018 Q4, you can use the below code.
Sub RenameSheet()
Dim Countsheets As Integer
Countsheets = Worksheets.Count
For i = 1 To 4
Worksheets.Add after:=Worksheets(Countsheets + i - 1)
Worksheets(Countsheets + i).Name = "2018 Q" & i
Next i
End Sub
In the above code, we first count the number of sheets and then use a For Next loop to insert new sheets at the end. As the sheet is added, the code also renames it.
Assigning Worksheet Object to a Variable
When working with worksheets, you can assign a worksheet to an object variable, and then use the variable instead of the worksheet references.
For example, if you want to add a year prefix to all the worksheets, instead of counting the sheets and the running the loop that many numbers of times, you can use the object variable.
Here is the code that will add 2018 as a prefix to all the worksheet’s names.
Sub RenameSheet()
Dim Ws As Worksheet
For Each Ws In Worksheets
Ws.Name = "2018 - " & Ws.Name
Next Ws
End Sub
The above code declares a variable Ws as the worksheet type (using the line ‘Dim Ws As Worksheet’).
Now, we don’t need to count the number of sheets to loop through these. Instead, we can use ‘For each Ws in Worksheets’ loop. This will allow us to go through all the sheets in the worksheets collection. It doesn’t matter whether there are 2 sheets or 20 sheets.
While the above code allows us to loop through all the sheets, you can also assign a specific sheet to a variable.
In the below code, we assign the variable Ws to Sheet2 and use it to access all of Sheet2’s properties.
Sub RenameSheet()
Dim Ws As Worksheet
Set Ws = Worksheets("Sheet2")
Ws.Name = "Summary"
Ws.Protect
End Sub
Once you set a worksheet reference to an object variable (using the SET statement), that object can be used instead of the worksheet reference. This can be helpful when you have a long complicated code and you want to change the reference. Instead of making the change everywhere, you can simply make the change in the SET statement.
Note that the code declares the Ws object as the Worksheet type variable (using the line Dim Ws as Worksheet).
Hide Worksheets Using VBA (Hidden + Very Hidden)
Hiding and Unhiding worksheets in Excel is a straightforward task.
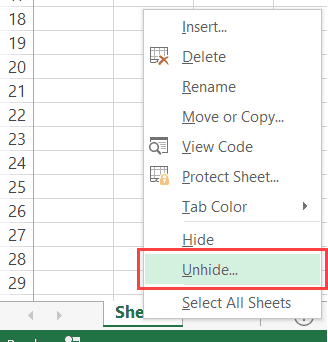
You can hide a worksheet and the user would not see it when he/she opens the workbook. However, they can easily unhide the worksheet by right-clicking on any sheet tab.
But what if you don’t want them to be able to unhide the worksheet(s).
You can do this using VBA.
The code below would hide all the worksheets in the workbook (except the active sheet), such that you can not unhide it by right-clicking on the sheet name.
Sub HideAllExcetActiveSheet()
Dim Ws As Worksheet
For Each Ws In ThisWorkbook.Worksheets
If Ws.Name <> ActiveSheet.Name Then Ws.Visible = xlSheetVeryHidden
Next Ws
End Sub
In the above code, the Ws.Visible property is changed to xlSheetVeryHidden.
- When the Visible property is set to xlSheetVisible, the sheet is visible in the worksheet area (as worksheet tabs).
- When the Visible property is set to xlSheetHidden, the sheet is hidden but the user can unhide it by right-clicking on any sheet tab.
- When the Visible property is set to xlSheetVeryHidden, the sheet is hidden and cannot be unhidden from worksheet area. You need to use a VBA code or the properties window to unhide it.
If you want to simply hide sheets, that can be unhidden easily, use the below code:
Sub HideAllExceptActiveSheet()
Dim Ws As Worksheet
For Each Ws In ThisWorkbook.Worksheets
If Ws.Name <> ActiveSheet.Name Then Ws.Visible = xlSheetHidden
Next Ws
End Sub
The below code would unhide all the worksheets (both hidden and very hidden).
Sub UnhideAllWoksheets()
Dim Ws As Worksheet
For Each Ws In ThisWorkbook.Worksheets
Ws.Visible = xlSheetVisible
Next Ws
End Sub
Related Article: Unhide All Sheets In Excel (at one go)
Hide Sheets Based on the Text in it
Suppose you have multiple sheets with the name of different departments or years and you want to hide all the sheets except the ones that have the year 2018 in it.
You can do this using a VBA INSTR function.
The below code would hide all the sheets except the ones with the text 2018 in it.
Sub HideWithMatchingText()
Dim Ws As Worksheet
For Each Ws In Worksheets
If InStr(1, Ws.Name, "2018", vbBinaryCompare) = 0 Then
Ws.Visible = xlSheetHidden
End If
Next Ws
End Sub
In the above code, the INSTR function returns the position of the character where it finds the matching string. If it doesn’t find the matching string, it returns 0.
The above code checks whether the name has the text 2018 in it. If it does, nothing happens, else the worksheet is hidden.
You can take this a step further by having the text in a cell and using that cell in the code. This will allow you to have a value in the cell and then when you run the macro, all the sheets, except the one with the matching text in it, would remain visible (along with the sheets where you’re entering the value in the cell).
Sorting the Worksheets in an Alphabetical Order
Using VBA, you can quickly sort the worksheets based on their names.
For example, if you have a workbook that has sheets for different department or years, then you can use the below code to quickly sort these sheets in an ascending order.
Sub SortSheetsTabName()
Application.ScreenUpdating = False
Dim ShCount As Integer, i As Integer, j As Integer
ShCount = Sheets.Count
For i = 1 To ShCount - 1
For j = i + 1 To ShCount
If Sheets(j).Name < Sheets(i).Name Then
Sheets(j).Move before:=Sheets(i)
End If
Next j
Next i
Application.ScreenUpdating = True
End Sub
Note that this code works well with text names and in most of the cases with years and numbers too. But it can give you the wrong results in case you have the sheet names as 1,2,11. It will sort and give you the sequence 1, 11, 2. This is because it does the comparison as text and considers 2 bigger than 11.
Protect/Unprotect All the Sheets at One Go
If you have a lot of worksheets in a workbook and you want to protect all the sheets, you can use the VBA code below.
It allows you to specify the password within the code. You will need this password to unprotect the worksheet.
Sub ProtectAllSheets()
Dim ws As Worksheet
Dim password As String
password = "Test123" 'replace Test123 with the password you want
For Each ws In Worksheets
ws.Protect password:=password
Next ws
End Sub
The following code would unprotect all the sheets in one go.
Sub ProtectAllSheets()
Dim ws As Worksheet
Dim password As String
password = "Test123" 'replace Test123 with the password you used while protecting
For Each ws In Worksheets
ws.Unprotect password:=password
Next ws
End Sub
Creating a Table of Contents of All Worksheets (with Hyperlinks)
If you have a set of worksheets in the workbook and you want to quickly insert a summary sheet which has the links to all the sheets, you can use the below code.
Sub AddIndexSheet()
Worksheets.Add
ActiveSheet.Name = "Index"
For i = 2 To Worksheets.Count
ActiveSheet.Hyperlinks.Add Anchor:=Cells(i - 1, 1), _
Address:="", SubAddress:=Worksheets(i).Name & "!A1", _
TextToDisplay:=Worksheets(i).Name
Next i
End Sub
The above code inserts a new worksheet and names it Index.
It then loops through all the worksheets and creates a hyperlink for all the worksheets in the Index sheet.
Where to Put the VBA Code
Wondering where the VBA code goes in your Excel workbook?
Excel has a VBA backend called the VBA editor. You need to copy and paste the code into the VB Editor module code window.
Here are the steps to do this:
- Go to the Developer tab.
- Click on the Visual Basic option. This will open the VB editor in the backend.
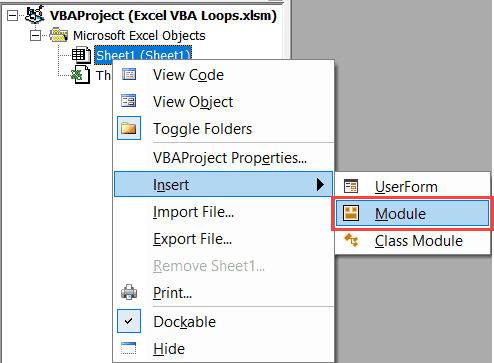
- In the Project Explorer pane in the VB Editor, right-click on any object for the workbook in which you want to insert the code. If you don’t see the Project Explorer go to the View tab and click on Project Explorer.
- Go to Insert and click on Module. This will insert a module object for your workbook.
- Copy and paste the code in the module window.
You May Also Like the Following Excel VBA Tutorials:
- Working with Workbooks using VBA.
- Using IF Then Else Statements in VBA.
- For Next Loop in VBA.
- Creating a User-Defined Function in Excel.
- How to Record a Macro in Excel.
- How to Run a Macro in Excel.
- Excel VBA Events – An Easy (and Complete) Guide.
- How to Create an Add-in in Excel.
- How to Save and Reuse Macro using Excel Personal Macro Workbook.
- Using Active Cell in VBA in Excel (Examples)
- How to Open Excel Files Using VBA (Examples)
Author: Oscar Cronquist Article last updated on October 16, 2022
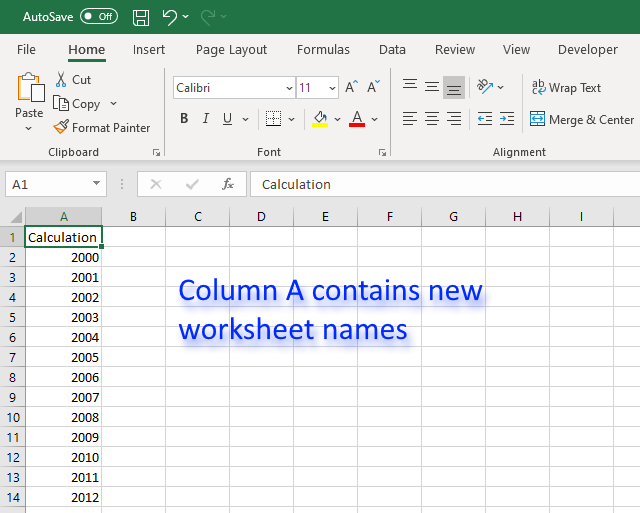
This article demonstrates a macro that inserts new worksheets based on names in a cell range. The cell range may have multiple columns if you like.
This macro allows you to create new worksheets very quickly.
Table of Contents
- Create new worksheets programmatically based on values in a cell range
[VBA]- How this macro works
- VBA macro
- Where to put the code
- Explaining code
- Get Excel file
- Create new worksheets based on a comma delimited list [VBA]
- VBA code
- Get Excel file
- Create new worksheets using an Input box [VBA]
- VBA code
- Get Excel file
- Copy worksheet template and rename [VBA]
1. Create new worksheets programmatically based on values in a cell range
1.1 How this macro works
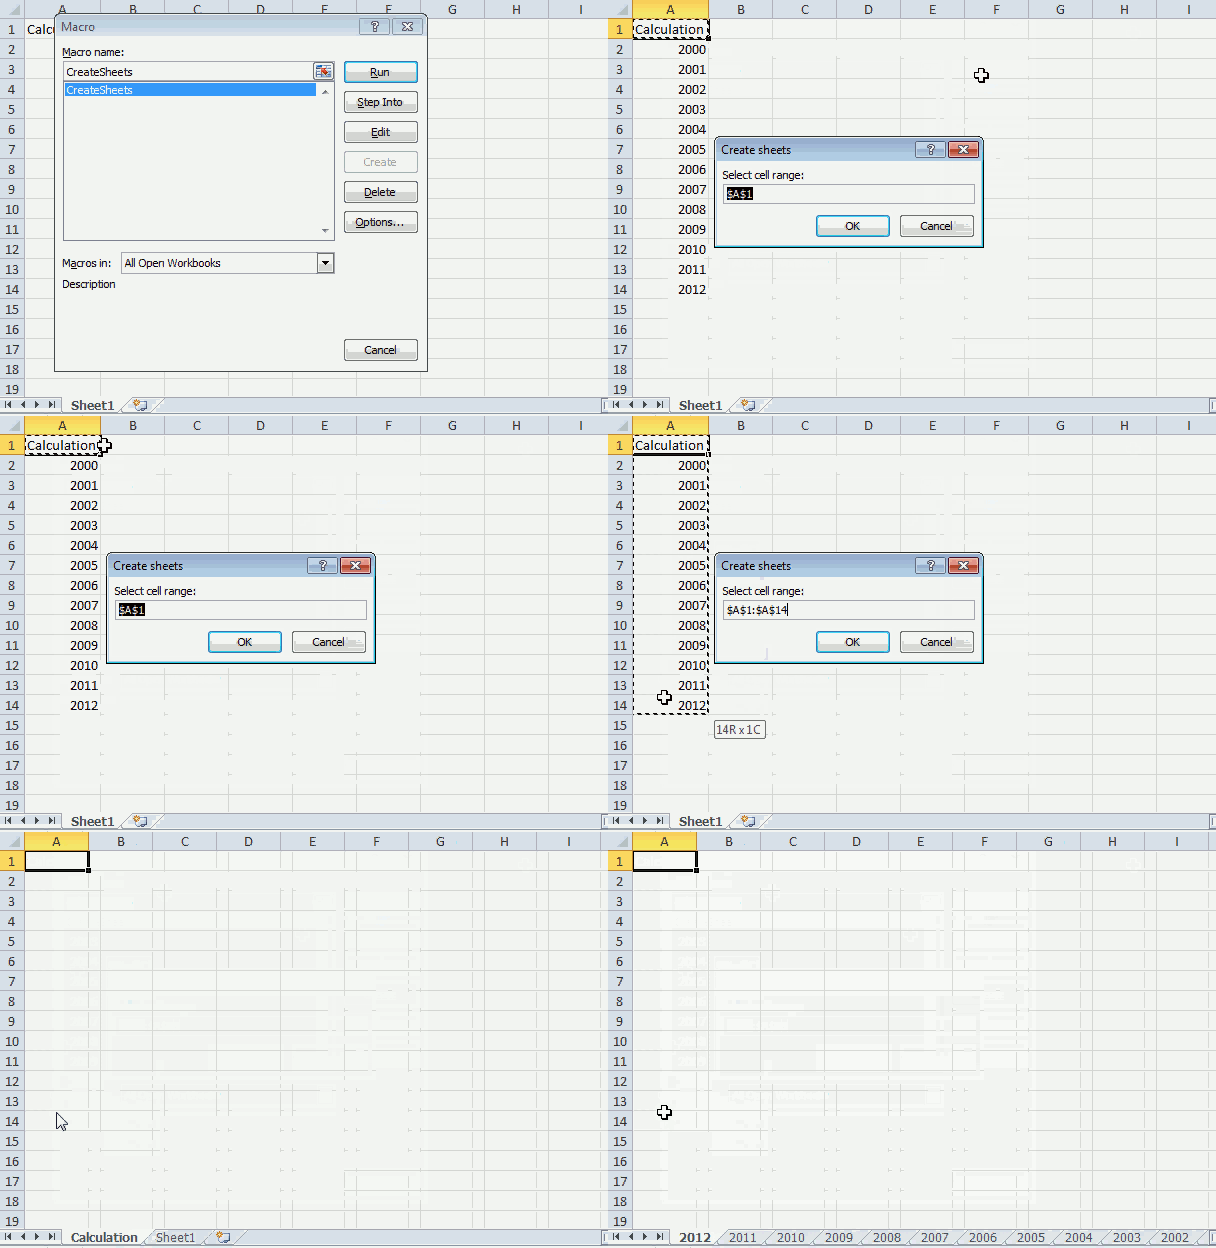
The animated image above shows how this macro works.
- Press Alt + F8 to open the Macro dialog box.
- Select macro CreateSheets.
- Press with mouse on «Run» button.
- An input box appears asking for a cell range.
- Select a cell range and press with left mouse button on the «OK» button.
- Worksheets are now added automatically to the workbook and named correspondingly after the values in the cell range.
Back to top
1.2 VBA macro
'Name macro
Sub CreateSheets()

'Dimension variables and declare data types
Dim rng As Range
Dim cell As Range

'Enable error handling
On Error GoTo Errorhandling

'Show inputbox to user and prompt for a cell range
Set rng = Application.InputBox(Prompt:="Select cell range:", _
Title:="Create sheets", _
Default:=Selection.Address, Type:=8)

'Iterate through cells in selected cell range
For Each cell In rng

    'Check if cell is not empty
    If cell <> "" Then

        'Insert worksheet and name the worksheet based on cell value
        Sheets.Add.Name = cell
    End If

'Continue with next cell in cell range
Next cell

'Go here if an error occurs
Errorhandling:

'Stop macro
End Sub
Back to top
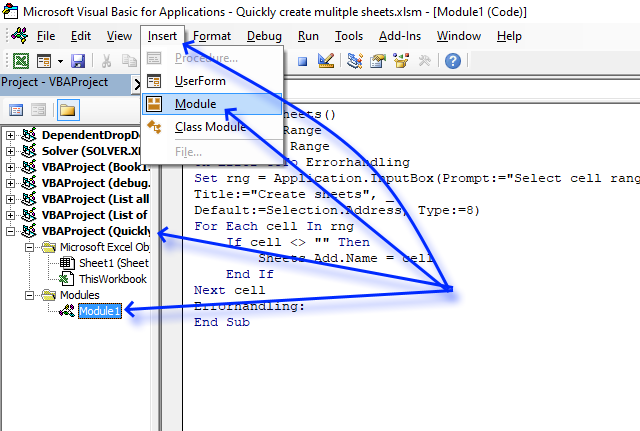
1.3 Where to put the code
- Copy above VBA code.
- Press Alt + F11 to open the Visual Basic Editor.
- Press with mouse on your workbook in the Project Explorer.
- Press with mouse on «Insert» on the menu.
- Press with mouse on «Module».
- Paste VBA code to code window, see image above.
Back to top
1.4 Explaining code
Creating procedures in excel is easy. Open the Visual Basic Editor using one of these instructions:
- Press Alt+F11
- Go to tab Developer and press with left mouse button on Visual basic «button»
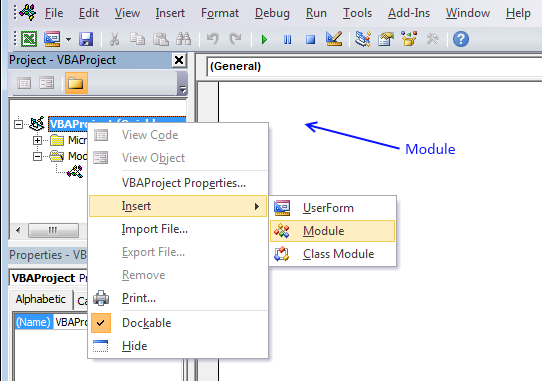
You create macro procedures in a module. First create a module. Press with right mouse button on on your workbook in the project explorer. Press with left mouse button on Insert | Module.
Sub CreateSheets()
Type: Sub CreateSheets() in the module. CreateSheets() is the name of the macro.
Dim rng As Range
Dim cell As Range
These lines declare rng and cell as range objects. A range object can contain a single cell, multiple cells, a column or a row. Read more about declaring variables.
On Error Goto Errorhandling
If the user selects something else than a cell range like a chart, this line makes the procedure go to Errorhandling.
Set rng = Application.InputBox(Prompt:=»Select cell range:», _
Title:=»Create sheets», _
Default:=Selection.Address, Type:=8)
The inputbox asks the user for a cell range. The cell range is stored in the range object rng.
For Each cell In rng
This stores each cell value from the range object rng to the cell object, one by one.
If cell <> «» Then
Checks if the cell variable is NOT empty. If the cell variable is empty the procedure goes to «End If» line. We can’t create a sheet with no name.
Sheets.Add.Name = cell
Creates a new sheet named with the value stored in the cell variable.
End If
The end of the If statement.
Next cell
Go back to the «For each» statement and store a new single cell in the cell object.
Errorhandling:
The procedure goes to this line if a line returns an error.
End Sub
All procedures must end with this line.
Back to top
1.5 Excel file
Back to top
Recommended reading
List all open workbooks and corresponding sheets (vba)
2. Create new worksheets programmatically based on a comma-delimited list
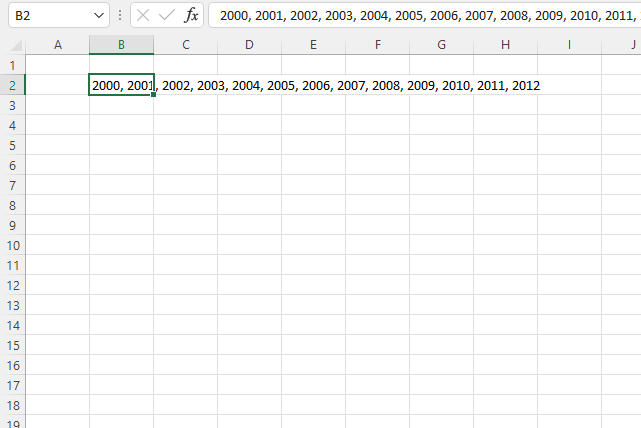
The image above shows a comma delimited list in cell B2, the macro below in section 2.1 lets you select a cell containing a comma delimiting list.
It splits the string based on the comma into an array of values. The values are then used to insert new worksheets with names based on those array values.
Back to top
2.1 VBA code
Sub CreateSheetsFromList()
Dim rng As Range
Dim cell As Range
Dim Arr As Variant

On Error GoTo Errorhandling
Set rng = Application.InputBox(Prompt:="Select cell:", _
Title:="Create sheets", _
Default:=Selection.Address, Type:=8)

Arr = Split(rng.Value, ", ")

For Each Value In Arr
    If Value <> "" Then
        Sheets.Add.Name = Value
    End If
Next Value
Errorhandling:
End Sub
Back to top
Where to put the code?
2.2 Excel file
Back to top
3. Create new worksheets using an Input box
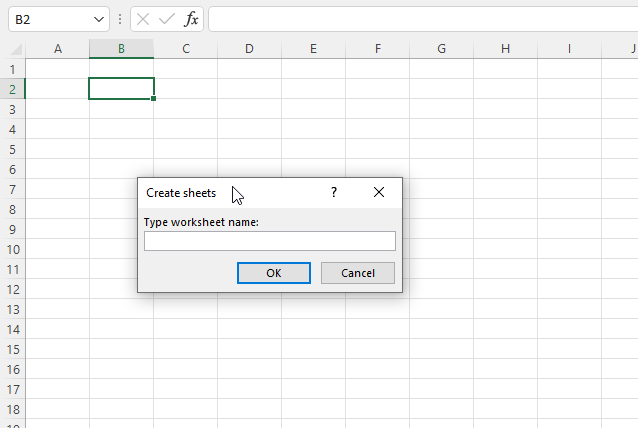
The following macro displays an input box allowing the Excel user to type a worksheet name, the worksheet is created when the «OK» button is pressed.
The macro stops if nothing is typed or the user presses the «Cancel» button. It shows a new input box each time a new worksheet is created.
Back to top
3.1 VBA code
Sub CreateSheetsFromDialogBox()
Dim str As String
Dim cell As Range
Dim Arr As Variant

On Error GoTo Errorhandling
Do
str = Application.InputBox(Prompt:="Type worksheet name:", _
Title:="Create sheets", Type:=3)
    If str = "" Or str = "False" Then
        GoTo Errorhandling:
    Else
        Sheets.Add.Name = str
    End If
Loop Until str = "False"

Errorhandling:
End Sub
Where to put the code?
Back to top
3.2 Excel file
Back to top
4. Copy the worksheet template and rename
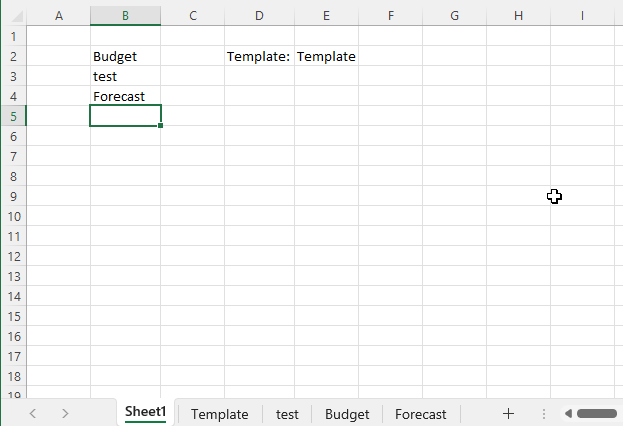
This example demonstrates an Event macro that copies a worksheet based on a value in cell E2 and renames it to a cell value in column B.
Is it possible to not just generate the new sheet from typing in a cell and name the sheet after the cell but to have the new sheet be a copy on a current sheet that is kind of like a template for a form?
4.1 VBA event code
'Event code that runs if a cell value is changed
Private Sub Worksheet_Change(ByVal Target As Range)

'Check if the cell value is in column B
If Not Intersect(Target, Range("B:B")) Is Nothing Then

    'Copy worksheet based on value in cell E2 in worksheet Sheet1 and put it last
    Sheets(Worksheets("Sheet1").Range("E2").Value).Copy , Sheets(Sheets.Count)

    'Rename worksheet to the value you entered.
    ActiveSheet.Name = Target.Value

End If

'Go back to worksheet Sheet1
Worksheets("Sheet1").Activate

End Sub
Back to top
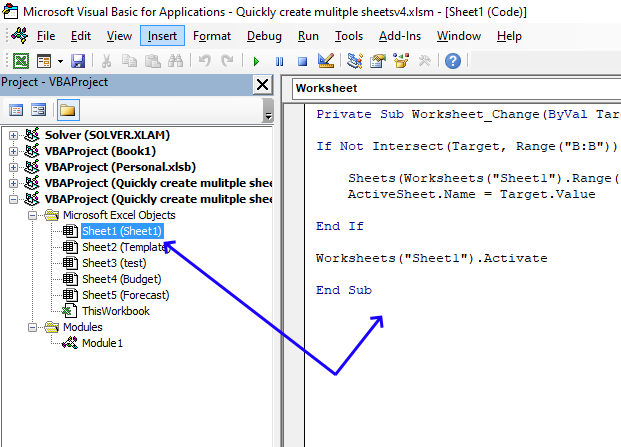
4.2 Where to put the event code?
- Press Alt + F11 to open the Visual Basic Editor.
- Double press with left mouse button on with the left mouse button on the worksheet name where you want to put the event code, in the worksheet Explorer shown in the image above.
- Paste event code to the code window, also shown in the image above.
- Return to Excel.
Remember to save the workbook as a macro-enabled workbook *.xlsm in order to attach the code to the workbook.
Back to top
4.3 How to run macro?
The event code runs whenever a new value is entered in column B. For example, type Trend in cell B5, then press Enter.
The macro automatically copies the worksheet «Template» given in cell E2 and renames it to Trend. That is all.
Back to top
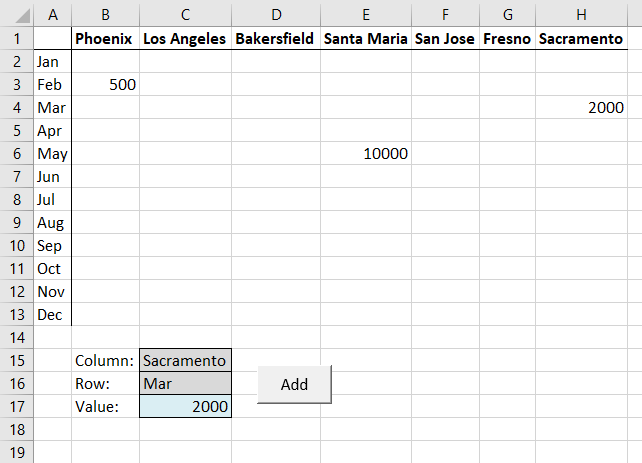
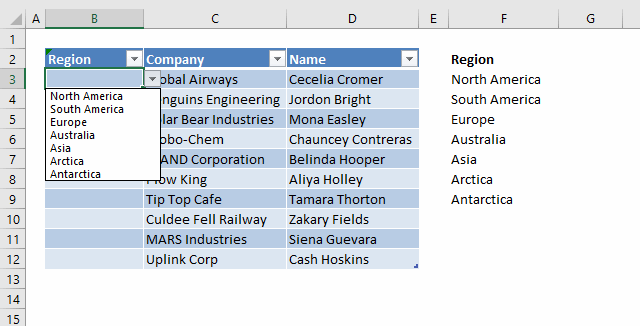
Apply drop-down lists dynamically
This article demonstrates how to automatically create drop-down lists if adjacent data grows, there are two methods explained here. The […]
Auto resize columns as you type
Excel does not resize columns as you type by default as the image above demonstrates. You can easily resize all […]
Automate data entry [VBA]
This article demonstrates how to automatically enter data in cells if an adjacent cell is populated using VBA code. In […]
Basic data entry [VBA]
In this small tutorial, I am going to show you how to create basic data entry with a small amount […]
Calendar with scheduling [vba]
Here is my contribution to all excel calendars out there. My calendar is created in Excel 2007 and uses both […]
Consolidate sheets [vba]
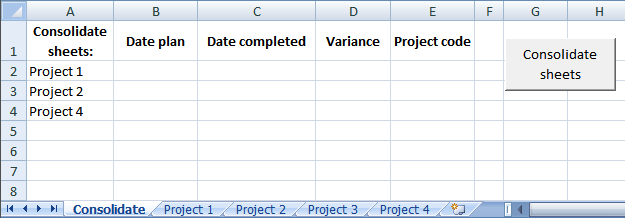
Question: I have multiple worksheets in a workbook. Each worksheets is project specific. Each worksheet contains almost identical format. The […]
Copy a dynamic cell range [VBA]
In this blog post, I will demonstrate some VBA copying techniques that may be useful if you don’t know the […]
Create a Print button [VBA]
This article describes how to create a button and place it on an Excel worksheet then assign a macro to […]
Edit invoice data [VBA]
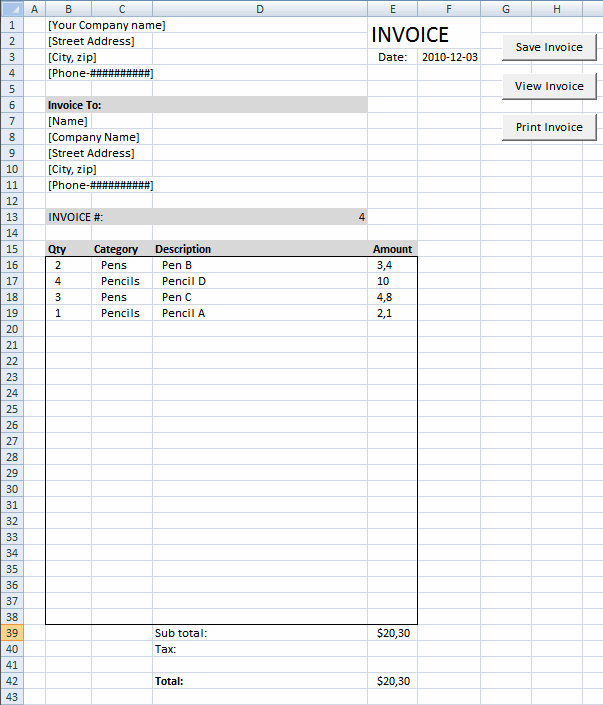
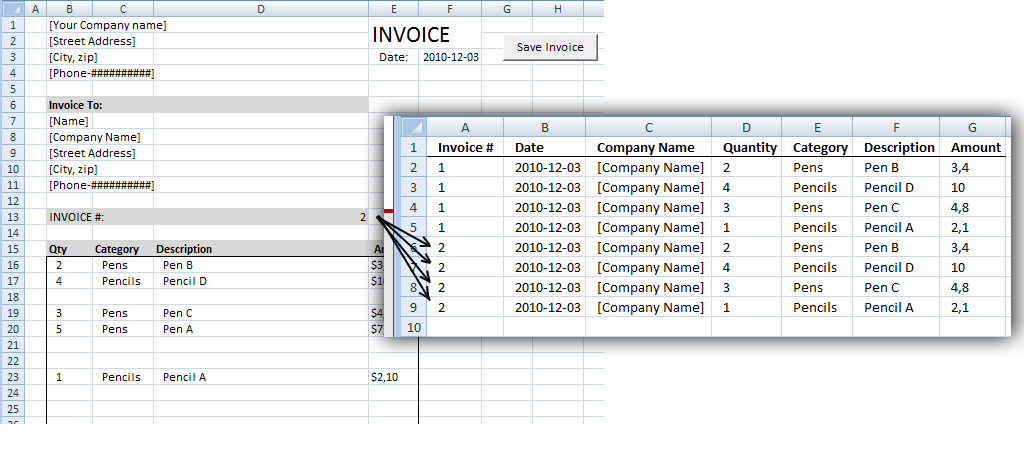
In a previos post:Excel vba: Save invoice data we added/copied data between sheets. This post describes how to overwrite existing […]
Excel calendar [VBA]
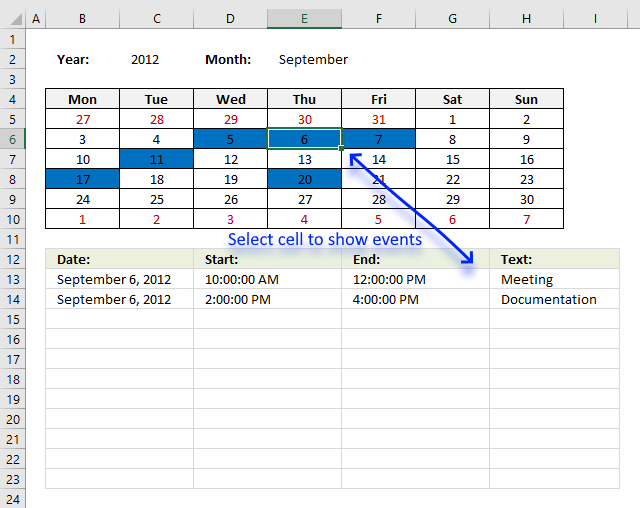
This workbook contains two worksheets, one worksheet shows a calendar and the other worksheet is used to store events. The […]
Hide specific columns programmatically
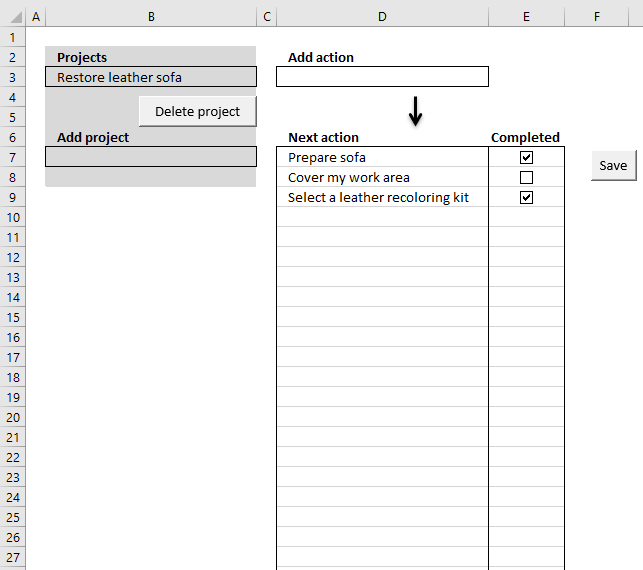
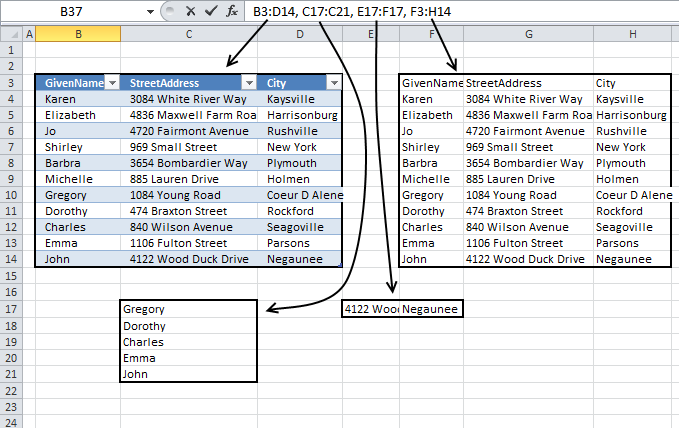
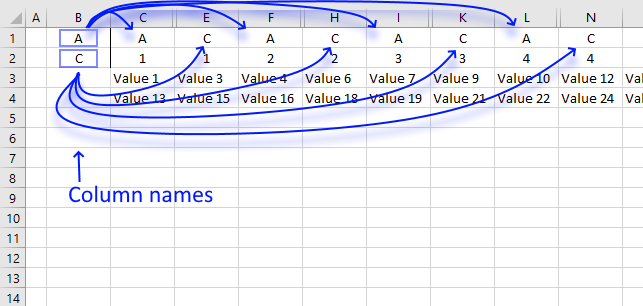
This article describes a macro that hides specific columns automatically based on values in two given cells. I am also […]
Hide specific worksheets programmatically
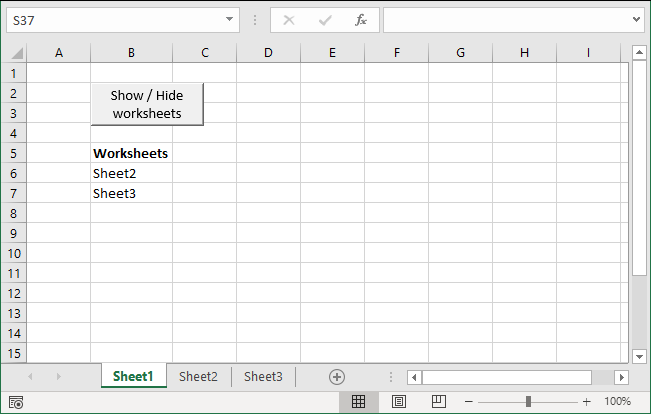
This article demonstrates techniques to hide and unhide worksheets programmatically. The image above shows the Excel window and the worksheet […]
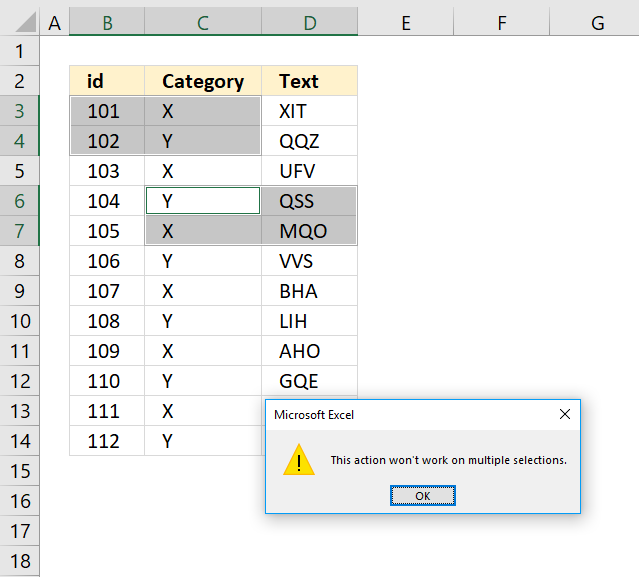
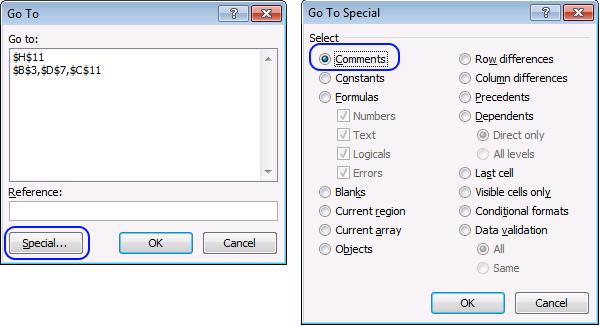
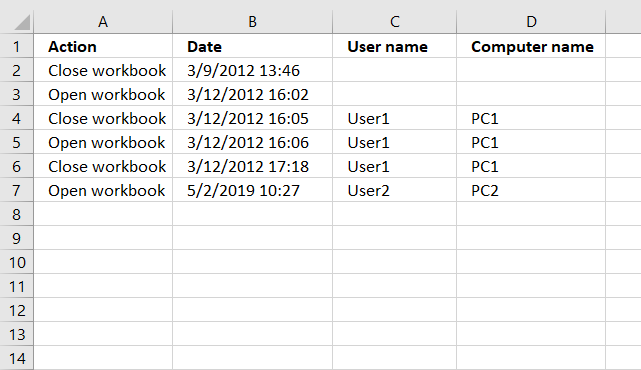
How to quickly select blank cells
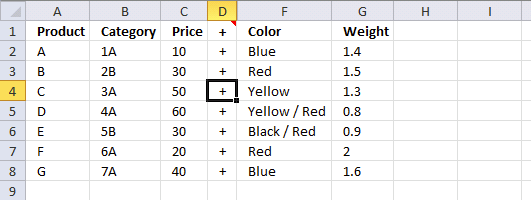
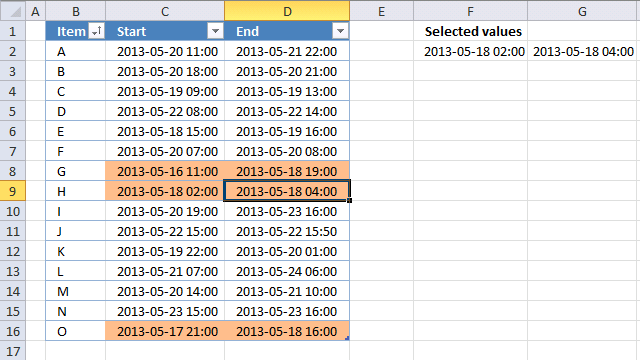
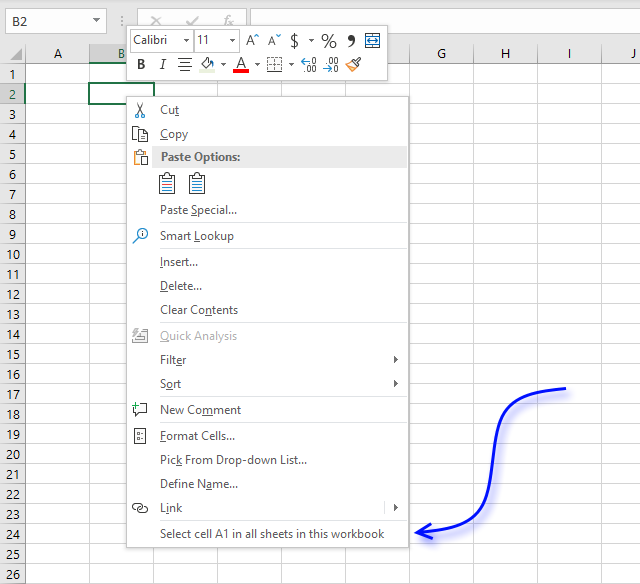
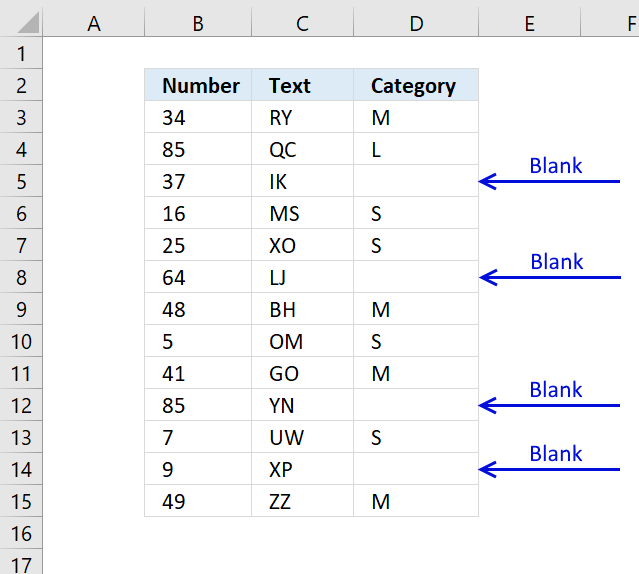
In this smaller example, column D (Category) has empty cells, shown in the picture above. If your column contains thousands of […]
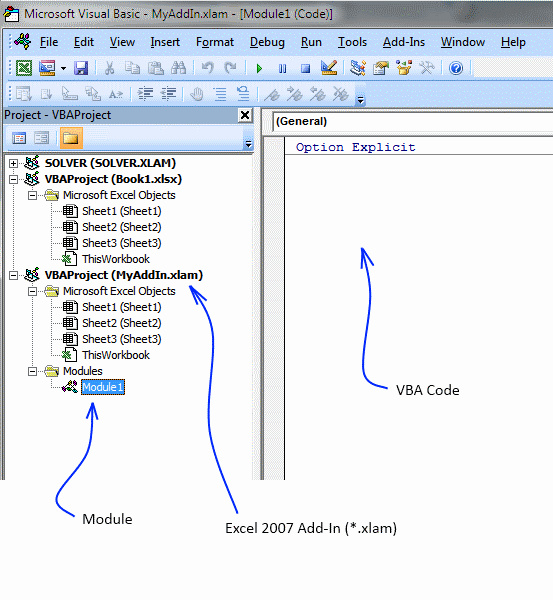
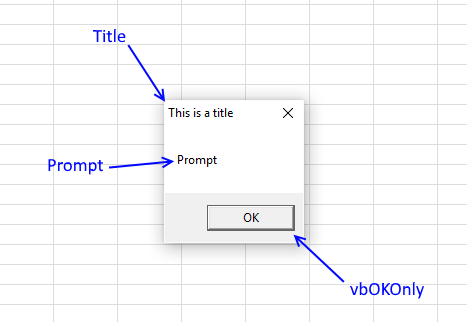
How to use DIALOG BOXES
A dialog box is an excellent alternative to a userform, they are built-in to VBA and can save you time […]
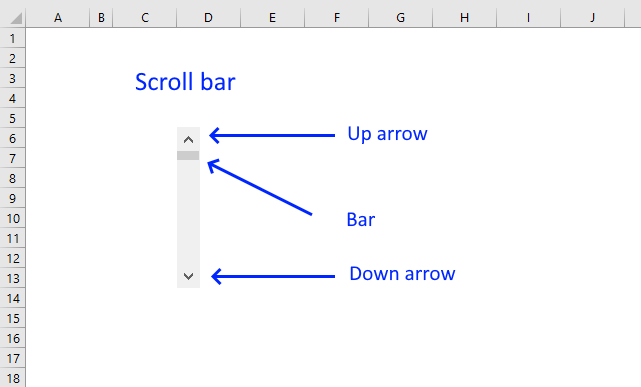
How to use the Scroll Bar
This article demonstrates how to insert and use a scroll bar (Form Control) in Excel. It allows the user to […]
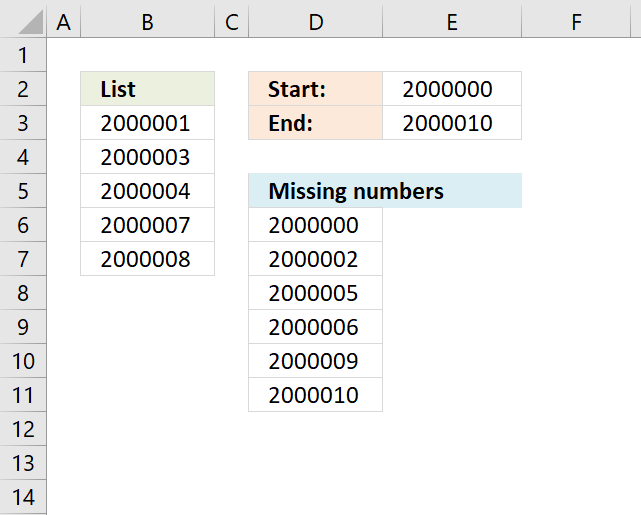
Identify missing numbers in a column
The image above shows an array formula in cell D6 that extracts missing numbers i cell range B3:B7, the lower […]
Locate a shape in a workbook
This article demonstrates how to locate a shape in Excel programmatically based on the value stored in the shape. The […]
Move a shape [VBA]
This article demonstrates how to move a shape, a black arrow in this case, however, you can use whatever shape […]
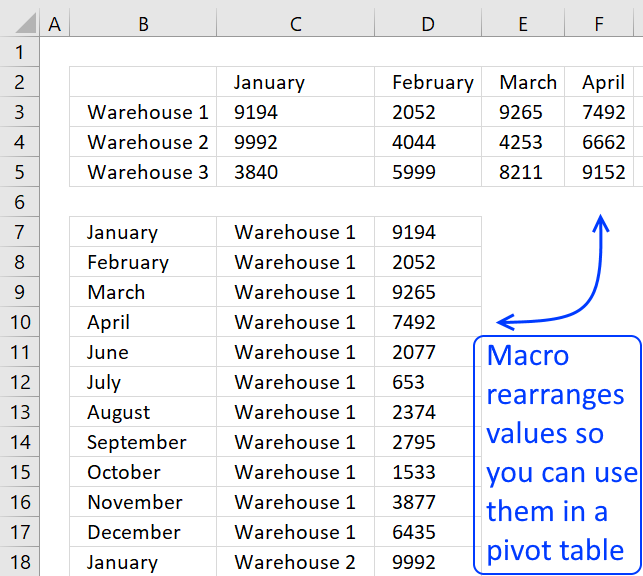
Normalize data [VBA]
To be able to use a Pivot Table the source data you have must be arranged in way that a […]
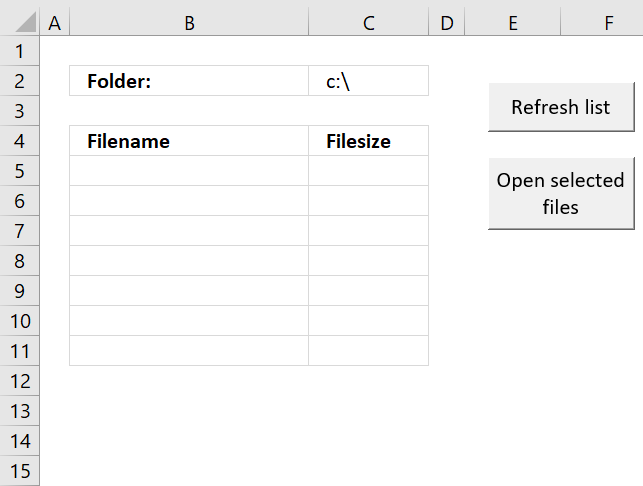
Open Excel files in a folder [VBA]
This tutorial shows you how to list excel files in a specific folder and create adjacent checkboxes, using VBA. The […]
Save invoice data [VBA]
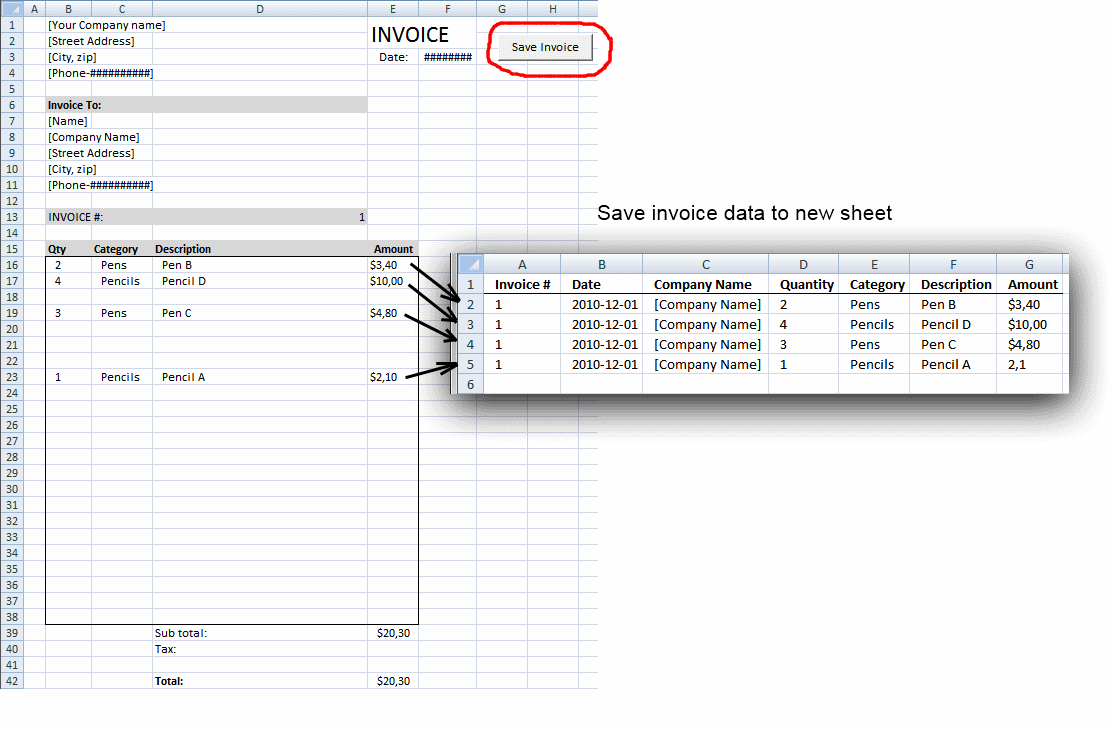
This article demonstrates a macro that copies values between sheets. I am using the invoice template workbook. This macro copies […]
Search two related tables [VBA]
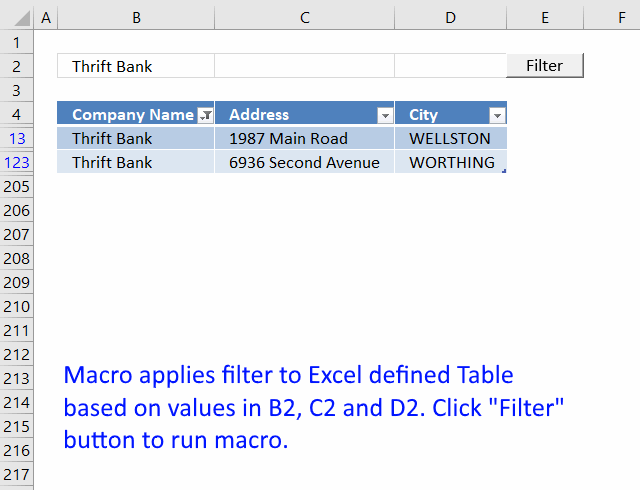
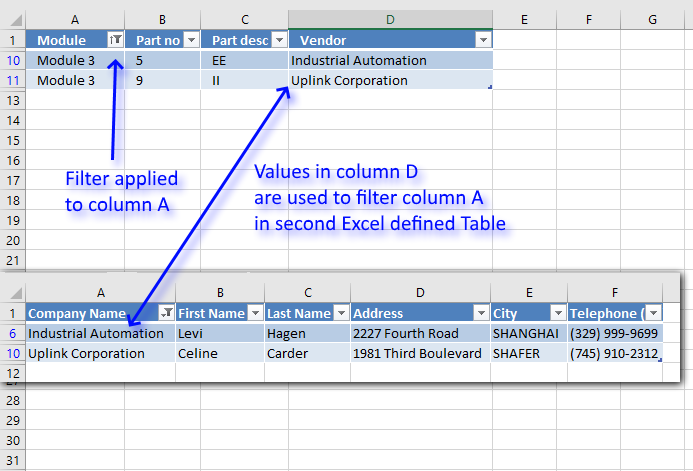
This article demonstrates a macro that automatically applies a filter to an Excel defined Table based on the result from […]
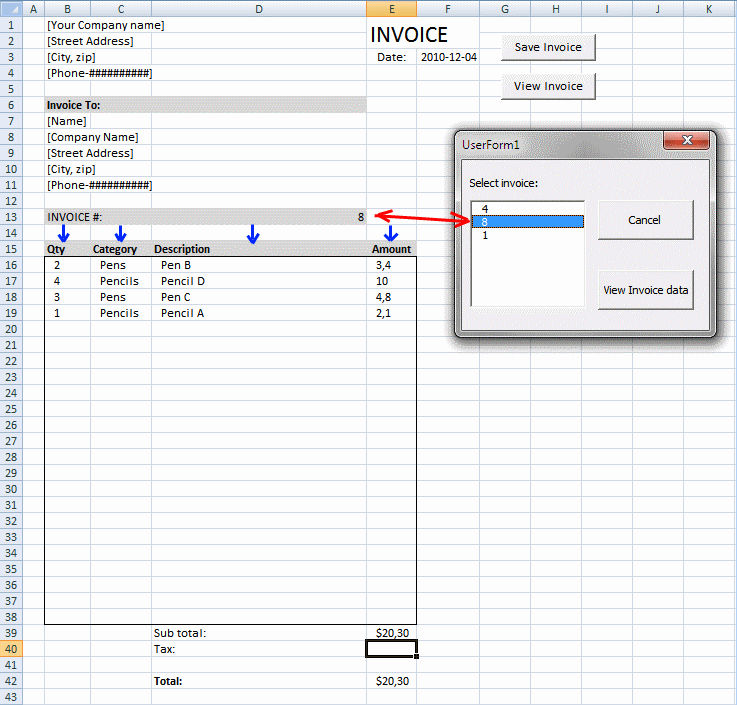
Select and view invoice [VBA]
This post demonstrates how to view saved invoices based on the invoice number using a userform. The userform appears when the […]
Toggle a macro on/off using a button
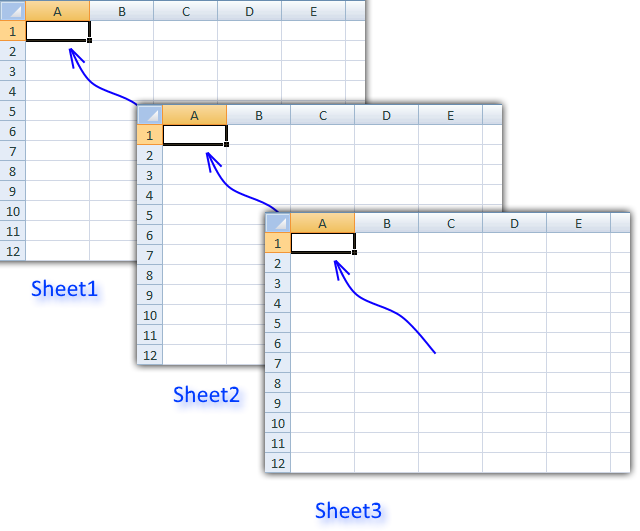
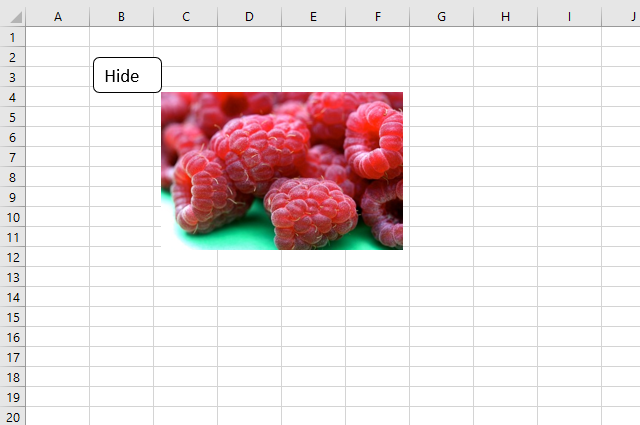
This article demonstrates how the user can run a macro by press with left mouse button oning on a button, […]
Working with COMBO BOXES [Form Controls]
This blog post demonstrates how to create, populate and change comboboxes (form control) programmatically. Form controls are not as flexible […]
Working with FILES
In this blog article, I will demonstrate basic file copying techniques using VBA (Visual Basic for Applications). I will also […]
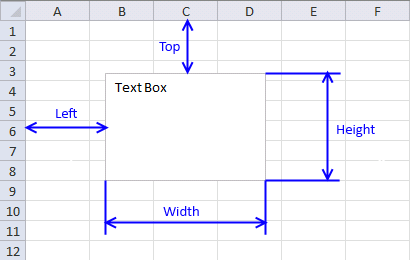
Working with TEXT BOXES [Form Controls]
There are two different kinds of text boxes, Form controls and ActiveX Controls. Form controls can only be used on […]
Latest updated articles.
More than 300 Excel functions with detailed information including syntax, arguments, return values, and examples for most of the functions used in Excel formulas.
More than 1300 formulas organized in subcategories.
Excel Tables simplifies your work with data, adding or removing data, filtering, totals, sorting, enhance readability using cell formatting, cell references, formulas, and more.
Allows you to filter data based on selected value , a given text, or other criteria. It also lets you filter existing data or move filtered values to a new location.
Lets you control what a user can type into a cell. It allows you to specifiy conditions and show a custom message if entered data is not valid.
Lets the user work more efficiently by showing a list that the user can select a value from. This lets you control what is shown in the list and is faster than typing into a cell.
Lets you name one or more cells, this makes it easier to find cells using the Name box, read and understand formulas containing names instead of cell references.
The Excel Solver is a free add-in that uses objective cells, constraints based on formulas on a worksheet to perform what-if analysis and other decision problems like permutations and combinations.
An Excel feature that lets you visualize data in a graph.
Format cells or cell values based a condition or criteria, there a multiple built-in Conditional Formatting tools you can use or use a custom-made conditional formatting formula.
Lets you quickly summarize vast amounts of data in a very user-friendly way. This powerful Excel feature lets you then analyze, organize and categorize important data efficiently.
VBA stands for Visual Basic for Applications and is a computer programming language developed by Microsoft, it allows you to automate time-consuming tasks and create custom functions.
A program or subroutine built in VBA that anyone can create. Use the macro-recorder to quickly create your own VBA macros.
UDF stands for User Defined Functions and is custom built functions anyone can create.
A list of all published articles.


