Word for Microsoft 365 Word 2021 Word 2019 Word 2016 Word 2013 Word 2010 Word 2007 More…Less
In this article
-
Add a cell
-
Add a row above or below
-
Add a column to the left or right
-
About the Table Tools contextual tabs
Add a cell
-
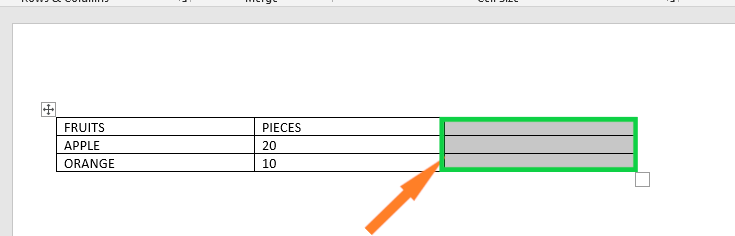
Click in a cell that is to the right of or above where you want to insert a cell.
-
Under Table Tools, click the Layout tab.
-
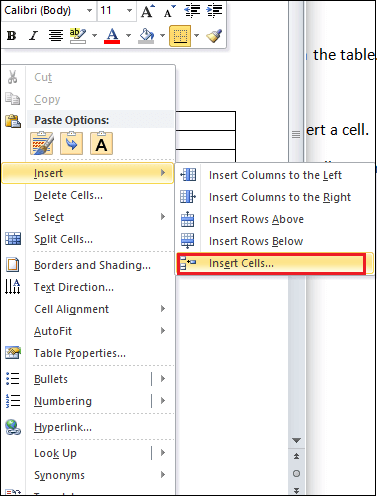
Click the arrow at the bottom, right-hand corner of the Rows & Columns section.
-
Click one of the following options.
Click
To
Shift cells right
Insert a cell and move all other cells in that row to the right.
Note: Word does not insert a new column. This may result in a row that has more cells than the other rows.
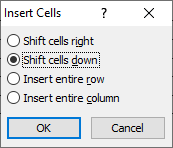
Shift cells down
Insert a cell and move the existing cells down one row. A new row is added at the bottom of the table.
Insert entire row
Insert a row above the cell that you clicked in.
Insert entire column
Insert a column to the left of the cell that you clicked in.
Top of Page
Add a row above or below
-
Click in a cell above or below where you want to add a row.
-
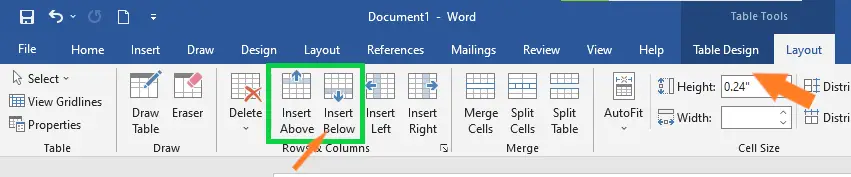
Under Table Tools, on the Layout tab, do one of the following:
-
To add a row above the cell, click Insert Above in the Rows and Columns group.
-
To add a row below the cell, click Insert Below in the Rows and Columns group.
-
Tip: To insert more than one row (or column) at the same time, select as many rows or columns as you want to add before you click the insert control. For example, to insert two rows above a row, first select two rows in your table and then click Insert Above.
Top of Page
Add a column to the left or right
-
Click in a cell to the left or right of where you want to add a column.
-
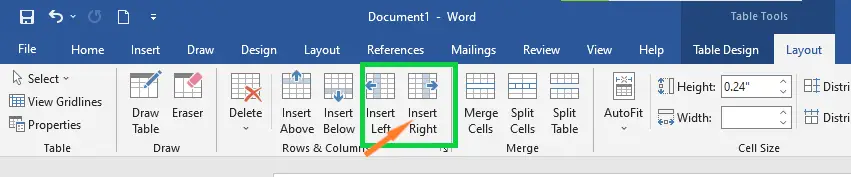
Under Table Tools, on the Layout tab, do one of the following:
-
To add a column to the left of the cell, click Insert Left in the Rows and Columns group.
-
To add a column to the right of the cell, click Insert Right in the Rows and Columns group.
-
Top of Page
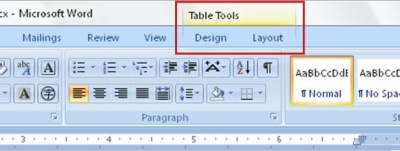
About the Table Tools contextual tabs
You will need to know where the Design and LayoutTable Tools contextual tabs are when working on the design and structural layout of a table. The Design and Layout tabs are only visible after you have clicked inside of a table, and appear at the top of the screen on the ribbon.
Top of Page
See Also
Delete a row, column, or cell from a table
Add columns and rows to a table
Keyboard shortcuts for Microsoft Word on Windows
Need more help?
Содержание
- Добавляем столбец в таблицу в Ворде
- Способ 1: Вкладки «Работа с таблицами»
- Способ 2: Мини-панель и контекстное меню
- Способ 3: Элементы вставки
- Заключение
- Вопросы и ответы

Для пользователей, которые не желают или попросту не нуждаются в том, чтобы осваивать все тонкости табличного процессора Excel, разработчики из Microsoft предусмотрели возможность создания таблиц в Word. Ранее мы уже писали о решении ряда задач из данной области, а сегодня затронем еще одну, простую, но от этого не менее актуальную тему – добавление столбцов.
Добавляем столбец в таблицу в Ворде
Необходимость расширения, а точнее, дополнения созданной в Microsoft Word таблицы может возникнуть по разным причинам, но в контексте нашей сегодняшней темы они не особо важны. Куда более важно то, как именно это можно сделать и какой из доступных вариантов наиболее прост и удобен в реализации. Для того чтобы это понять, необходимо подробно рассмотреть каждый из них, чем мы и займемся далее.
Читайте также: Создание таблиц в программе Майкрософт Ворд
Способ 1: Вкладки «Работа с таблицами»
После создания таблицы в документе, как и после добавления/вставки любых других, отличных от текста элементов, в Word появляются отдельные инструменты для работы с контентом данного типа. Группа вкладок «Работа с таблицами», которая становится доступной после ее создания, – это то, что поможет в решении нашей сегодняшней задачи.
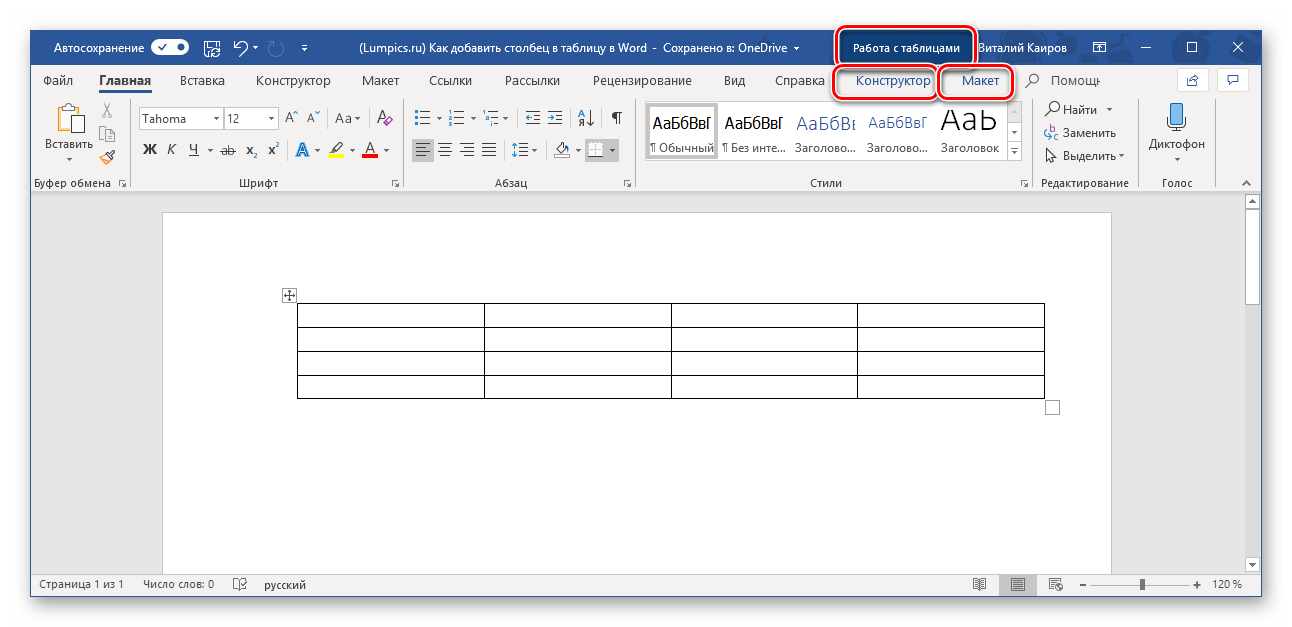
Примечание: Группа вкладок «Работа с таблицами» отображается в документе только тогда, когда активна сама таблица, то есть указатель курсора находится в целом на ней (полное выделение) или внутри любой из ячеек.
- Если вы только что создали таблицу, группа «Работа с таблицами», состоящая из вкладок «Конструктор» и «Макет», будет открыта автоматически. Если нет, самостоятельно перейдите во вторую.
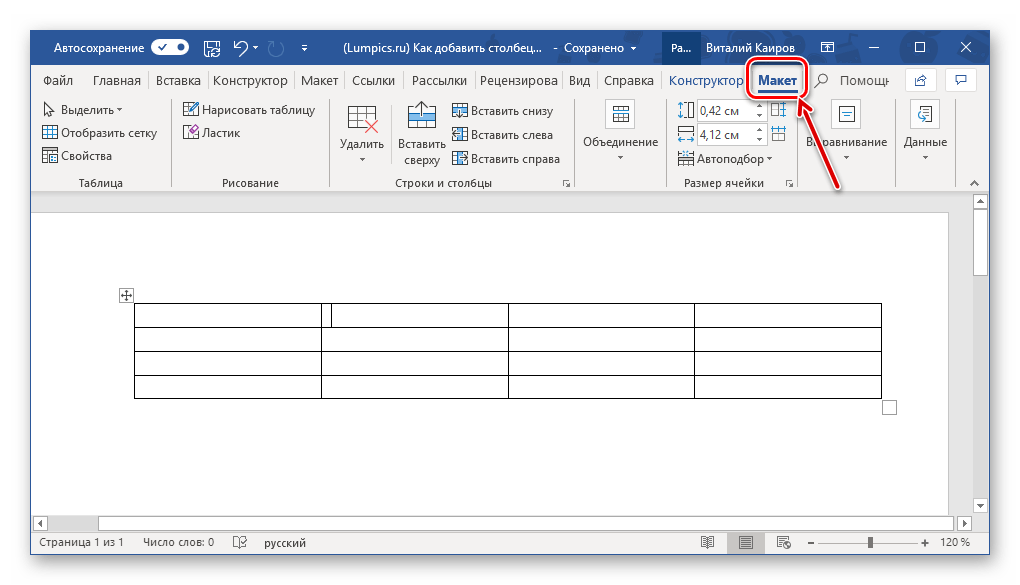
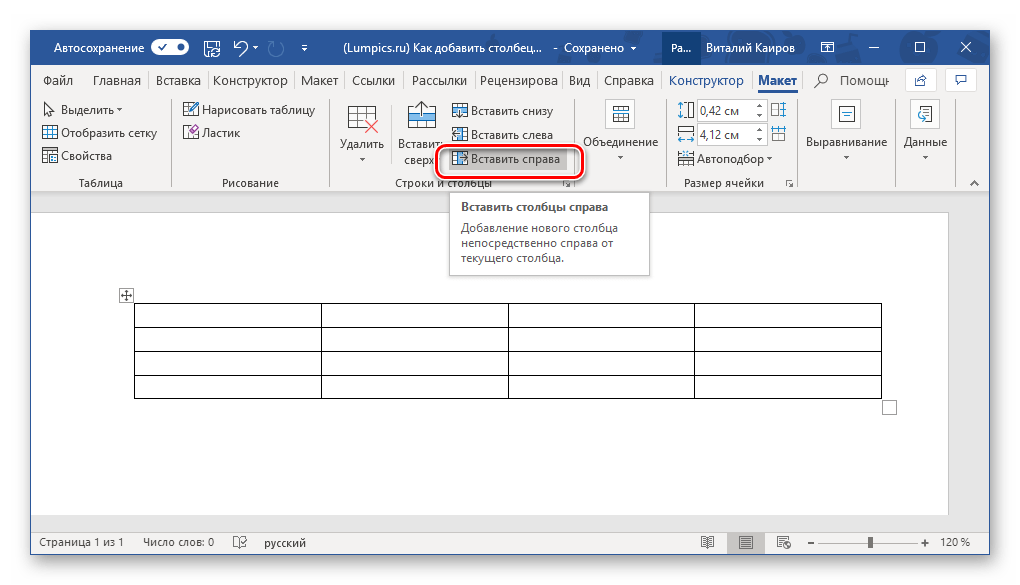
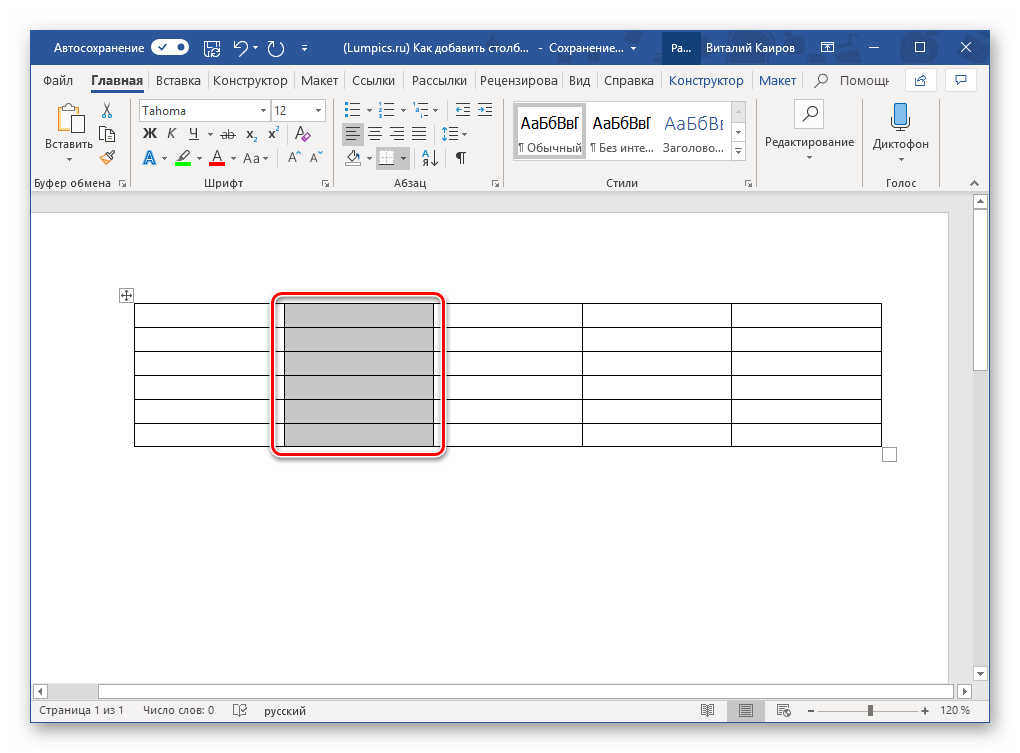
- Кликните левой кнопкой мышки (ЛКМ) по первой ячейке того столбца, справа или слева от которого необходимо вставить новый. В группе инструментов «Строки и столбцы» выберите один из двух вариантов – «Вставить слева» или «Вставить справа»,

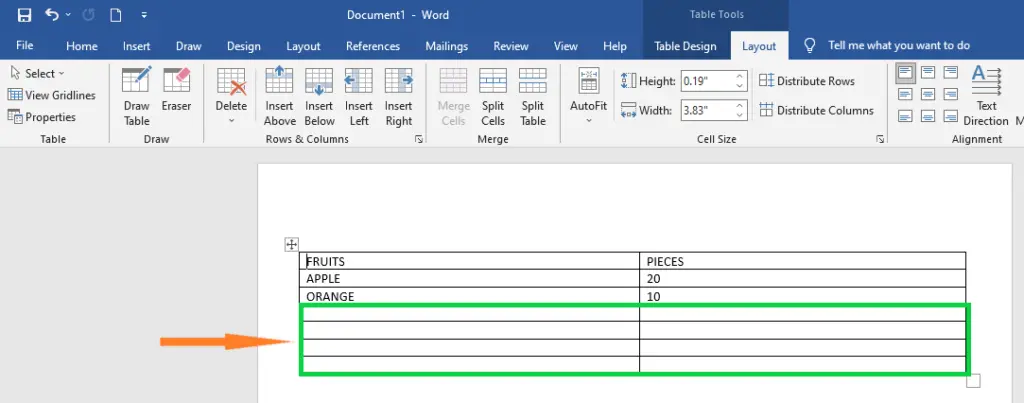
в зависимости от того, с какой стороны требуется добавить новую колонку. - Если потребуется, аналогичным образом добавьте в таблицу желаемое количество столбцов, после чего можно смело приступать к их заполнению.
Как вы наверняка могли заметить, все в том же разделе инструментов «Строки и столбцы» можно добавить не только колонки, но и новые строки в таблицу, а также удалять ее отдельные части или всю целиком.
Способ 2: Мини-панель и контекстное меню
Существует и несколько более простой способ добавления нового столбца в таблицу в документе Майкрософт Ворд, к тому же он доступен всегда, в какой бы вкладке программы вы не находились.
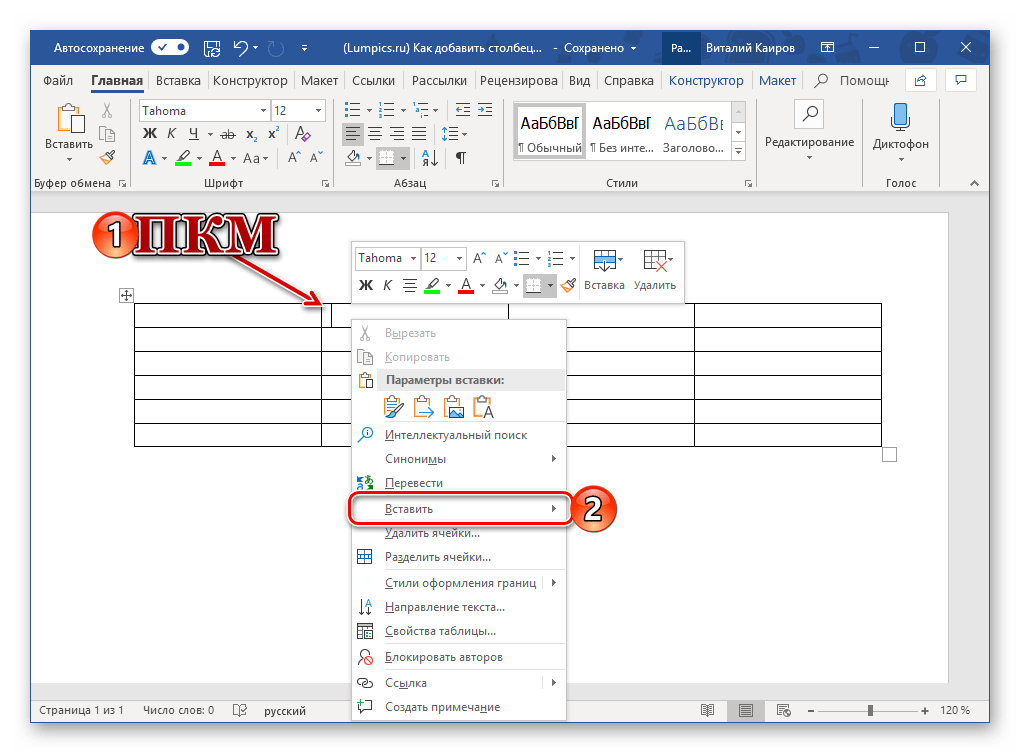
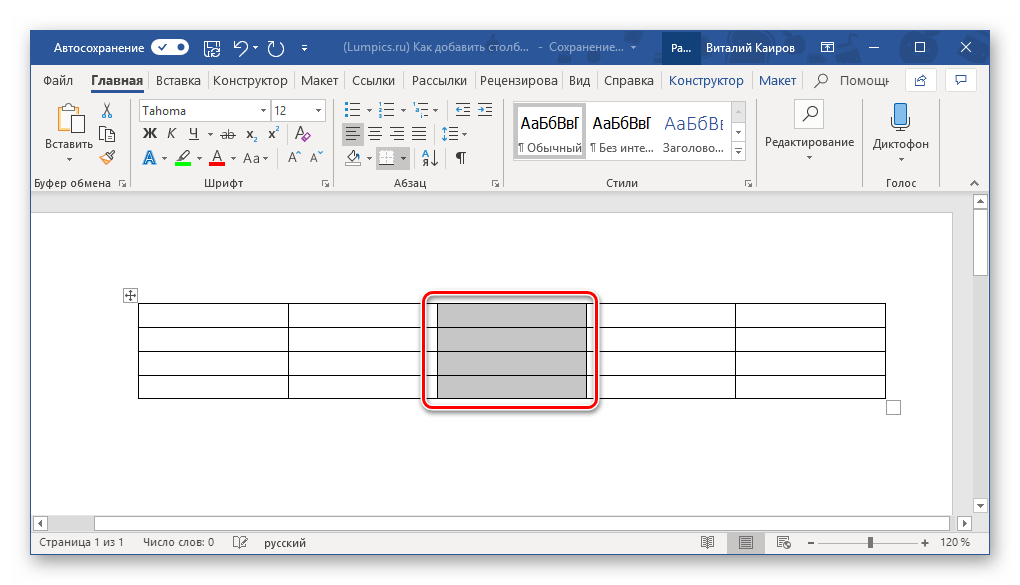
- Правой кнопкой мышки (ПКМ) кликните в той ячейке, рядом с которой требуется добавить столбец. Это действие вызовет контекстное меню, в котором следует навести указатель курсора на пункт «Вставить».
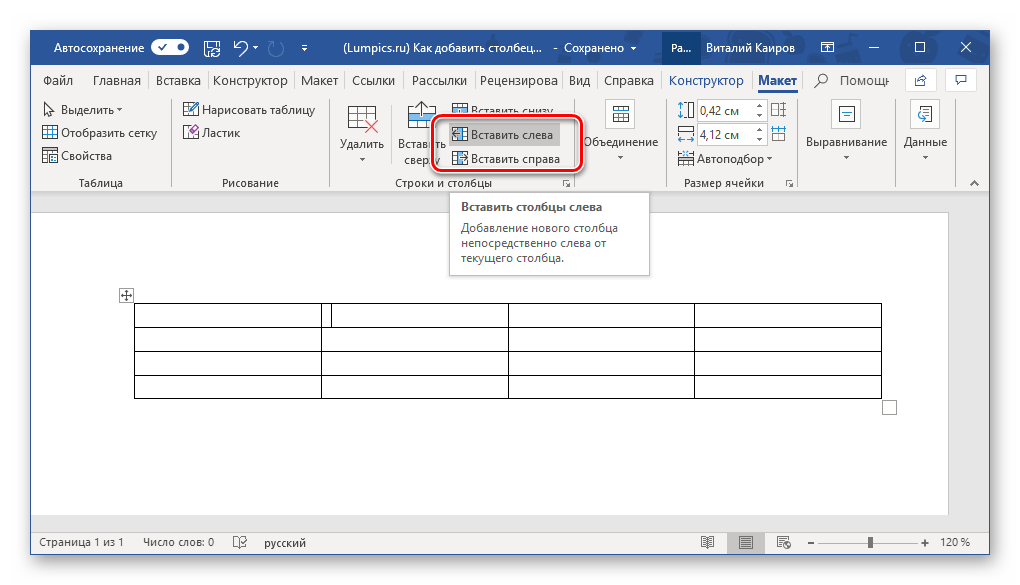
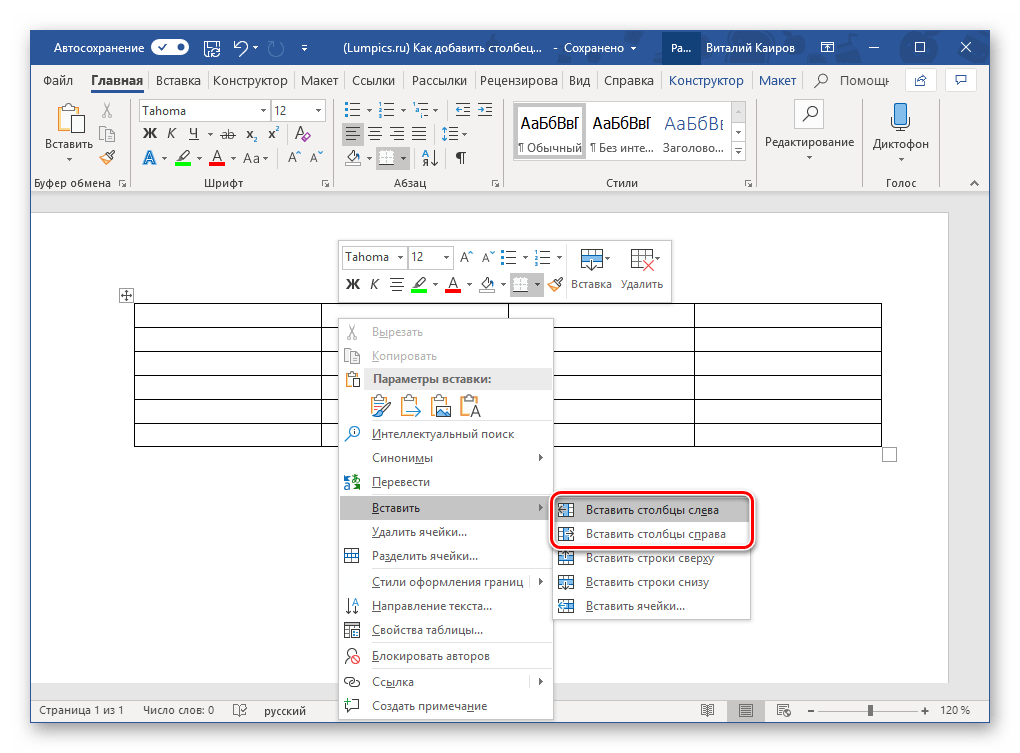
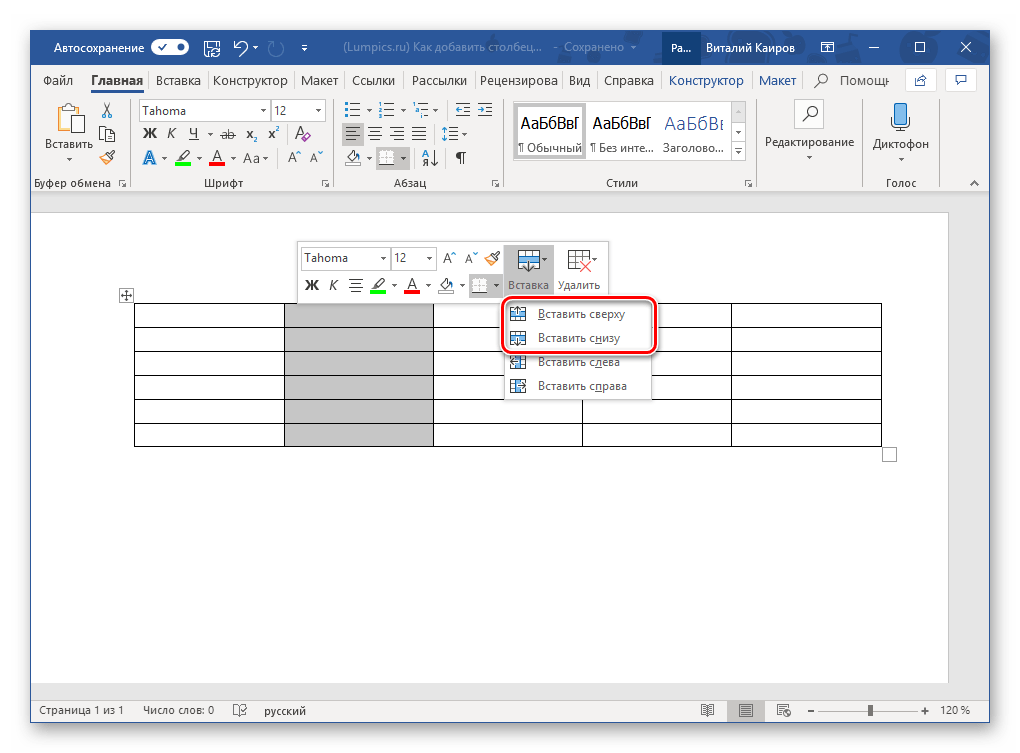
- Далее из перечня доступных вариантов выберите подходящий, в зависимости от того, где требуется добавить колонку:
- «Вставить слева»;
- «Вставить справа».

- Пустой столбец появится в таблице с той стороны, которую вы сами указали, но это не единственный быстрый вариант его добавления.
Нажатие ПКМ в ячейке таблицы вызывает не только контекстное меню, но и мини-панель с набором основных элементов управления.
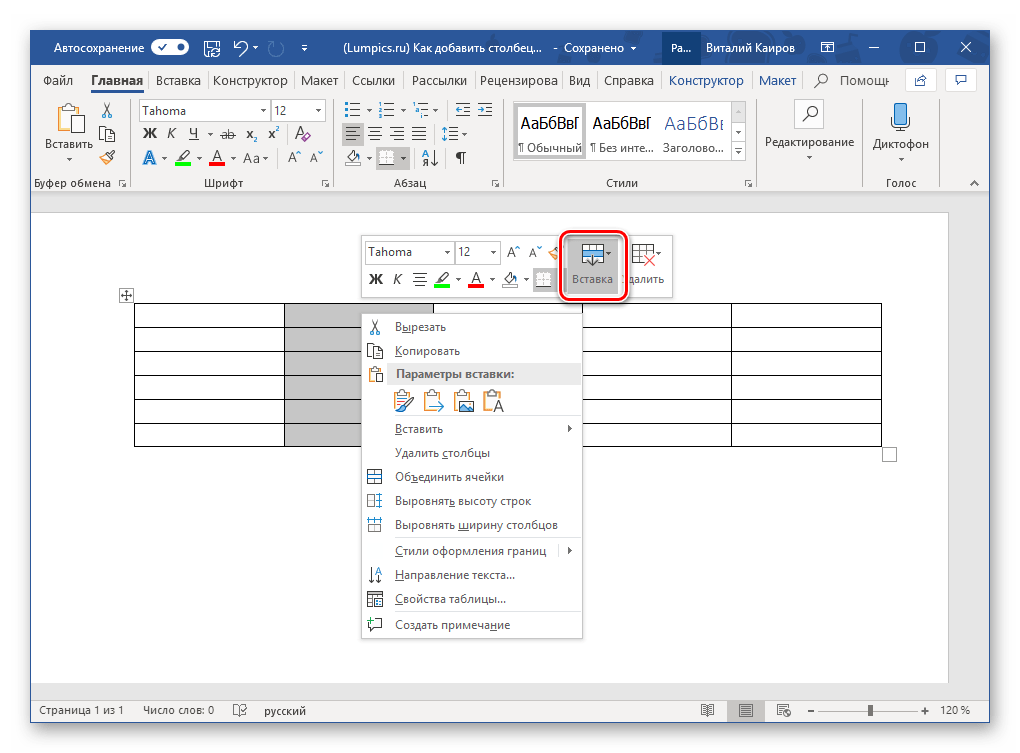
На ней есть кнопка «Вставка», а нажатие ЛКМ по ней вызывает схожее меню с доступными вариантами добавления столбцов и строк.
Каким из двух, практически идентичных вариантов одного и того же способа пользоваться, решать только вам.
Способ 3: Элементы вставки
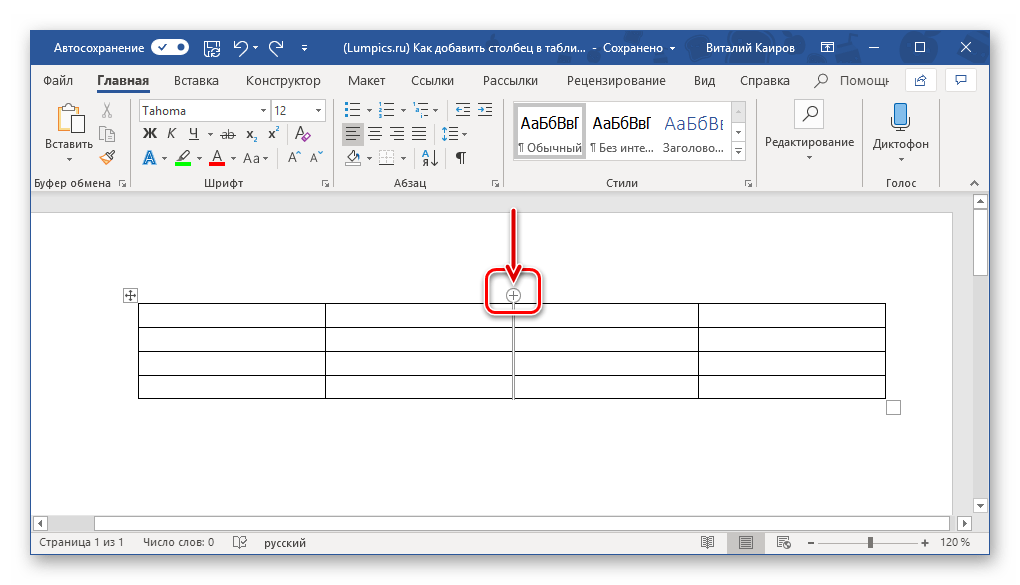
Если навести указатель курсора на ту точку таблицы, где ее внешняя граница (рамка) пересекается с границей столбца, вы увидите то, что получило название «Элемент вставки» — небольшой знак плюс, облаченный в кружок. Чтобы добавить пустую колонку, достаточно нажать по нему ЛКМ
Примечание: На устройствах с сенсорным экраном, при условии отсутствия мышки и/или тачпада, данная возможность работать не будет.

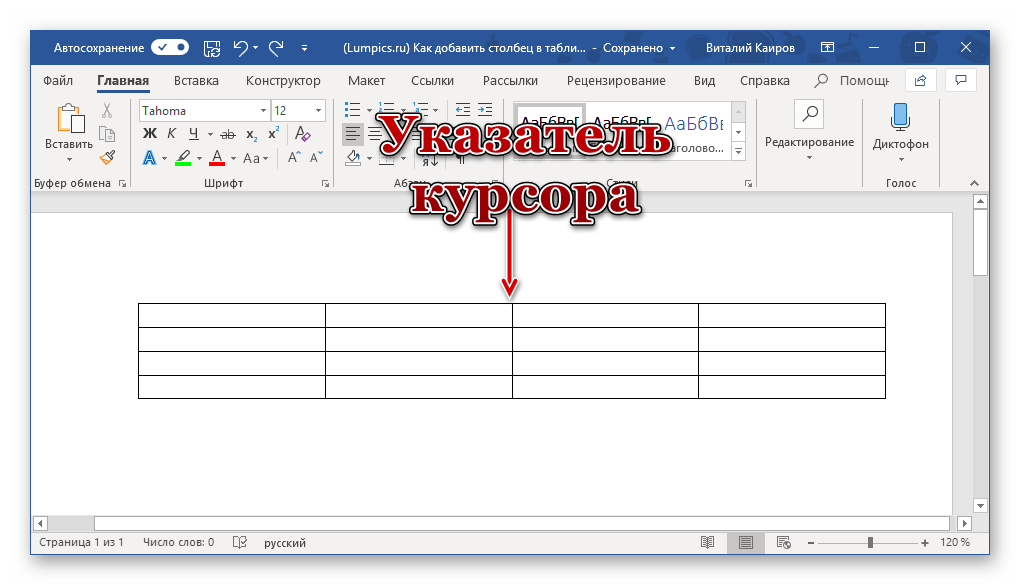
- Наведите указатель курсора на место, где пересекается верхняя граница таблицы и граница, разделяющая два столбца, между которыми необходимо добавить новый.
- Вы увидите небольшой круг со знаком «+» внутри (показан на скриншоте ниже). Нажмите по нему ЛКМ, чтобы вставить новую колонку в таблицу.
- Если есть такая необходимость, аналогичным образом добавьте необходимое количество столбцов.
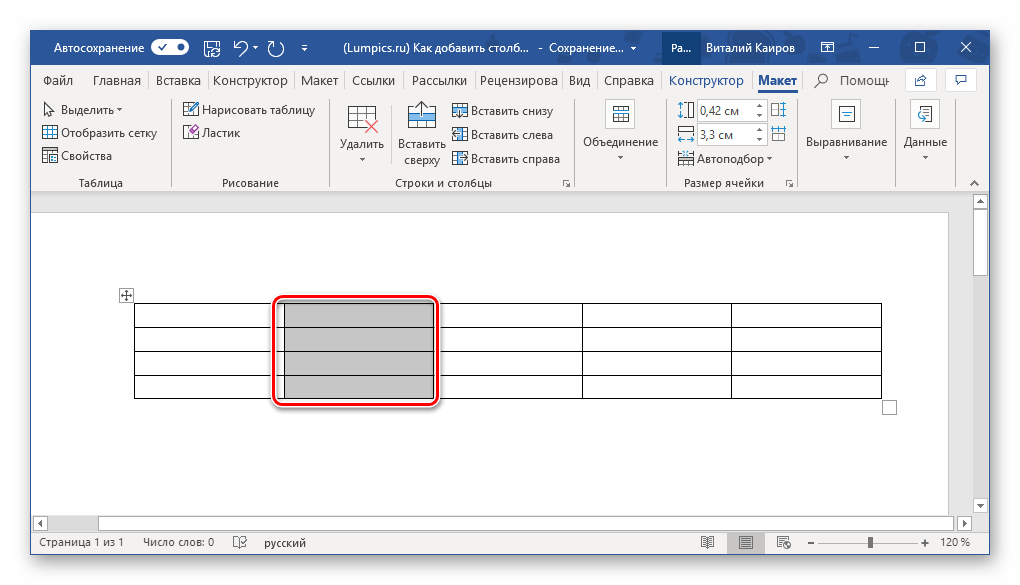
Совет: Для вставки нескольких столбцов одновременно, перед тем как отобразить элемент управления, выделите необходимое количество столбцов. Например, чтобы добавить три столбца, сначала выделите три столбца в таблице, а затем уже кликните по элементу управления вставкой.
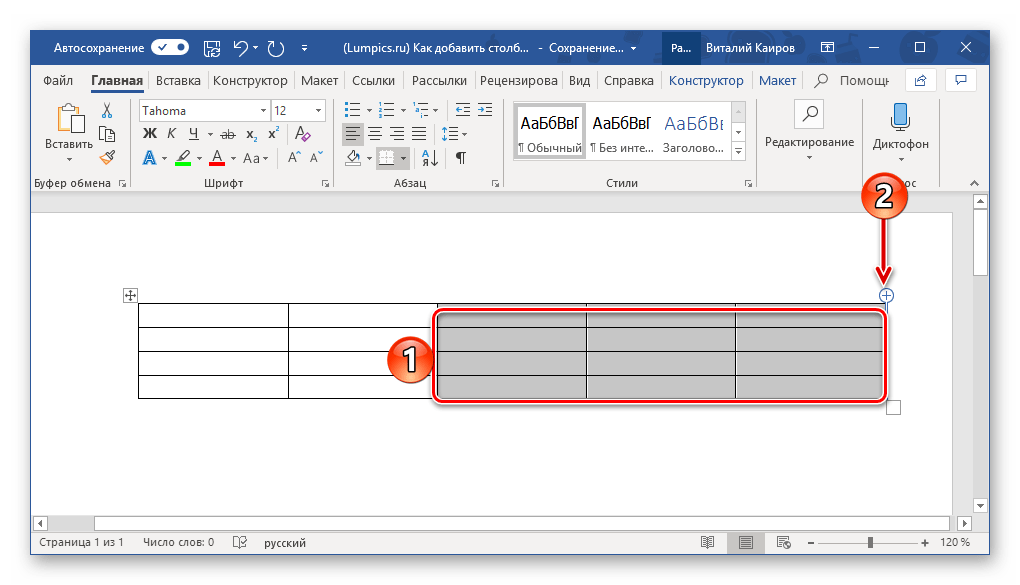
Это, наверное, самый простой и удобный способ решения нашей сегодняшней задачи. Очевидно, что с его помощью вы можете вставлять в таблицу не только столбцы, но и строки. Более подробно об этом и не только написано в отдельной статье на нашем сайте.
Читайте также: Как в Ворд добавить строки в таблицу
Заключение
Все рассмотренные нами способы добавления столбца в таблицу в Microsoft Word предельно просты и интуитивно понятны в своей реализации, поэтому просто выберите наиболее подходящий для себя.
Еще статьи по данной теме:
Помогла ли Вам статья?
To add a cell, row, and column to a table, first, you need to create a table in a Word document.
Create a Table
Tables are a combination of rows, columns, and cells. In a Word document, tables are used to organize and present information in a better way.
Note: Cells are the combination of rows and columns.
Follow the below instruction to add a table in a Word document —
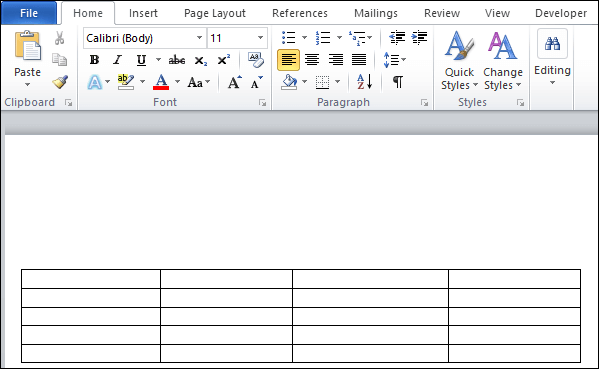
1. Open the new or an existing Word document.
2. Place the cursor in the document where you want to insert a table.
3. Go to the Insert tab on the Ribbon and click on the Table option in the Tables group.

4. An Insert table dialog box will appear on the screen. Select the numbers of rows and columns according to your requirement.
Note: In our case, we select four rows and five columns.
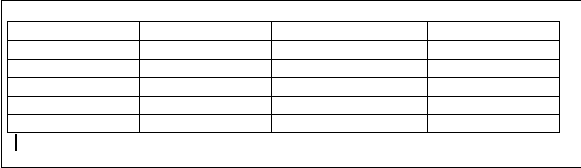
5. Press the Enter key from the keyboard or click to create the table.
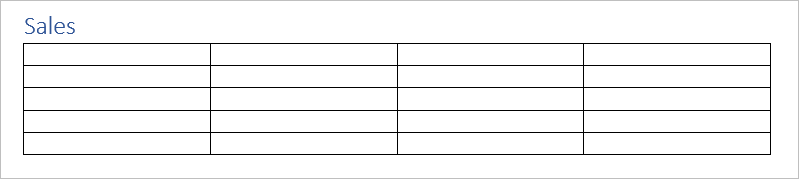
The screenshot below shows that a table with the rows and columns is inserted in the Word document.
Add a row above or below the table
Once you create a table in a Word document, you can able to add additional rows in your table based on your requirement.
Follow the below simple steps to add a row in the table —
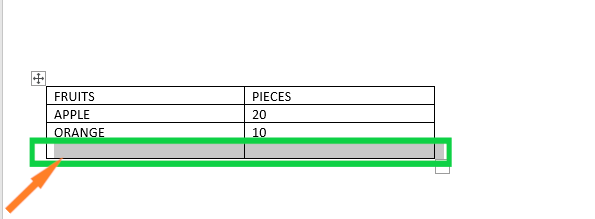
Step 1: Place cursor in the table where you want to add a row.
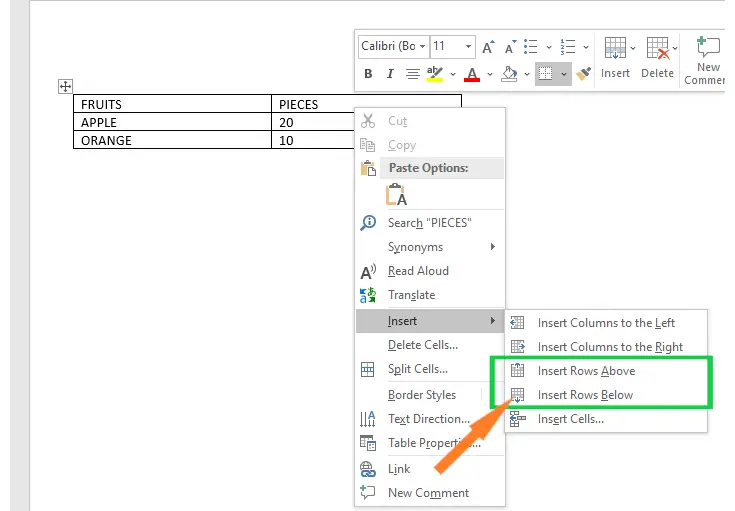
Step 2: Right-click on the selected area, the following dialog box will appear on the screen. Click on the drop-down menu associated with the Insert button.
- Click on the Insert Rows Above option to add a row above the selected row.
- Click on the Insert Rows Below option to add a row below the selected row.
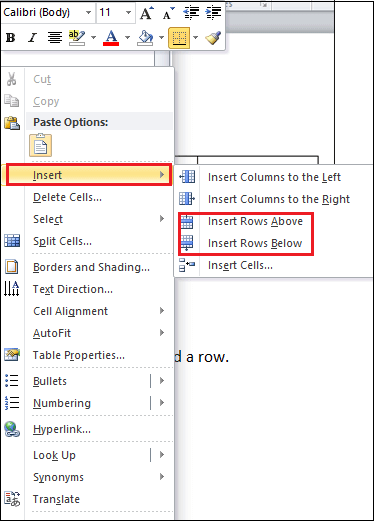
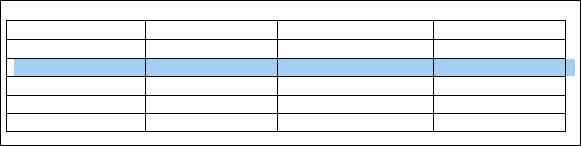
The screenshot below shows that a new row is added to the table.
Delete a Row from the table
1. Place the cursor in the row that you want to delete from the table.
2. Right-click on the selected row, a list of options will appear on the screen. Click on the on Delete Cells.
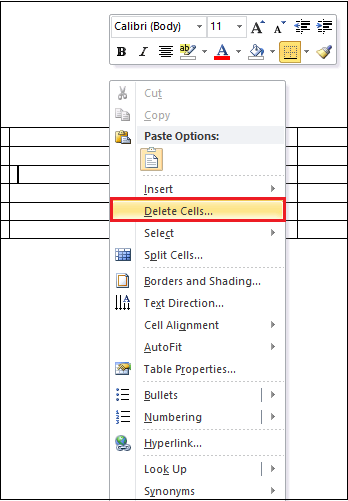
3. A small Delete cells dialog box will appear on the screen. Click on the Delete entire row radio button and then click on the OK.
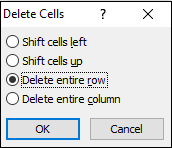
Now, you can see that your selected row is deleted from the table.
Add a column to the table
Adding additional columns in Word document is not a difficult task for you. Follow the below-mentioned steps to add a column to the table.
Step 1: Place cursor in the table where you want to add a column.
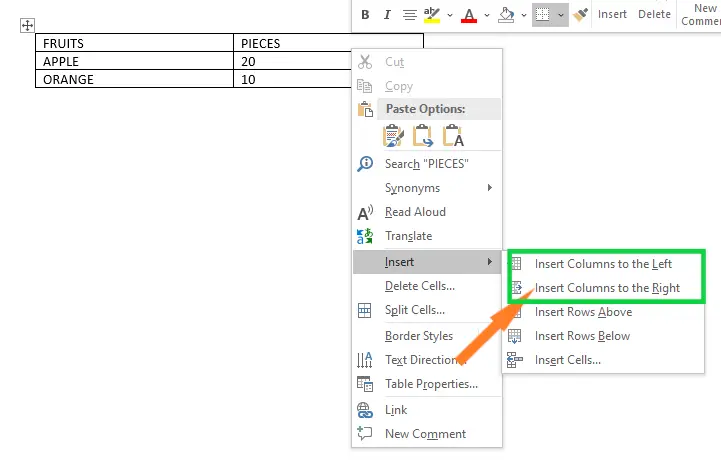
Step 2: Right-click on the table, a list of options will appears on the screen click on the drop-down icon associated with the Insert.
- Click on the Insert Columns to the Left to add the column left side of the table.
- Click on the Insert Column to the Right to add the column right side of the table.
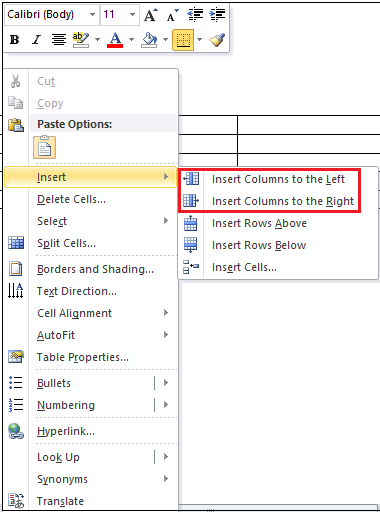
The screenshot below shows that column is added to the table.
Note: In our case, we want to insert the table right side of the selected column, so we use Insert Column to the Right option.
Delete a Column from the table.
In the Microsoft Word document, follow the below instructions to delete unnecessary columns from the table.
1. Place cursor in the column that you want to delete.
2. Right-click on the table, a list of options appear, click on the Delete cells.
3. A delete cells dialog box appears, click on the Delete entire column radio button.
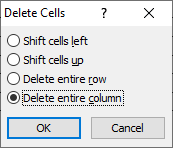
Now, you can see that the selected column is deleted from the table.
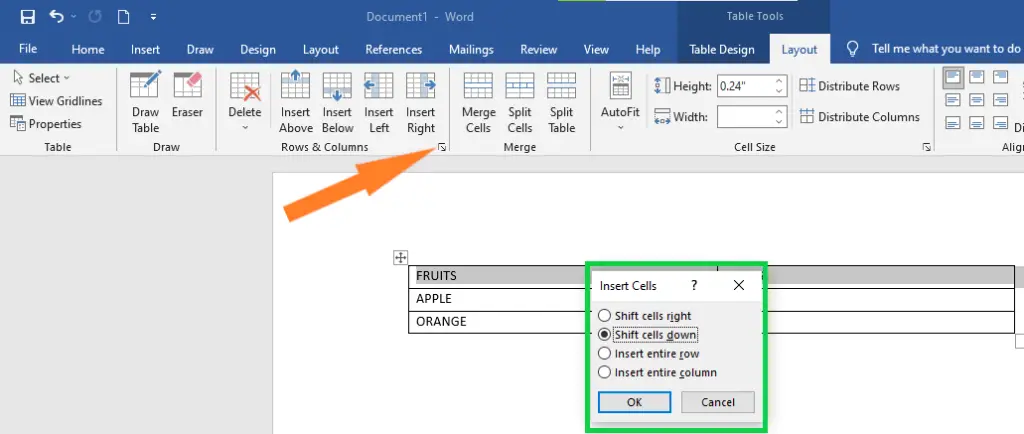
Add a Cell
Cell is a combination of rows and columns.
There are the following steps that you can use to add a cell to the table —
Step 1: Place cursor in the table where you want to insert a cell.
Step 2: Right-click on the table, a list of options will appears on the screen click on the drop-down icon associated with the Insert.
Step 3: Click on the Insert cells option.
Step 4: An Insert Cells dialog box will appear on the screen. Cslick on the Shift cells down radio button, and click on the OK button.
The screenshot below shows that a new cell is added to the table.

Insert and Edit a Table with Multiple Columns and Rows in Word
by Avantix Learning Team | Updated August 23, 2022
Applies to: Microsoft® Word® 2013, 2016, 2019, 2021 and 365 (Windows)
You can create a table in a Word document in 4 easy ways using the Ribbon. A table is a grid made up of columns and rows that intersect to form cells. You can insert text, numbers and images in a table. Once you have inserted a table, you can easily add and resize columns and rows and change table formatting.
It’s best to avoid using Draw Table to create a table since the table may not be created in a consistent way.
Note: Buttons and Ribbon tabs may display in a different way (with or without text) depending on your version of Word, the size of your screen and your Control Panel settings. For newer versions of Word, Ribbon tabs may appear with different names. For example, the Table Design tab may appear as Table Tools Design.
In the following example, a table with 4 columns and 5 rows has been inserted in a Word document:
Recommended article: 10 Microsoft Word Shortcuts for Moving Around in Tables
Do you want to learn more about Microsoft Word? Check out our virtual classroom or in-person classroom Word courses >
Create a table using the Table Grid
To insert a table using Insert Table and select columns and rows in the Table Grid:
- Click in the Word document where you want to insert a table.
- Click the Insert tab in the Ribbon.
- Click Table in the Tables group. A drop-down menu appears with a Table Grid.
- Hover over the grid until the number of columns and rows you want is selected.
- Click in the highlighted area of the grid to insert a table.
To insert a table, select cells in the Table Grid as follows:

Create a table using the Insert Table dialog box
To insert a table using the Insert Table dialog box:
- Click in the Word document where you want to insert a table.
- Click the Insert tab in the Ribbon.
- Click Table in the Tables group. A drop-down menu appears.
- Select Insert Table. A dialog box appears.
- Enter the number of columns and rows you want to create.
- Select the desired options below AutoFit behavior (typically Fixed column width: Auto).
- Click OK.
The Insert Table dialog box appears with options to select the number of columns and rows:

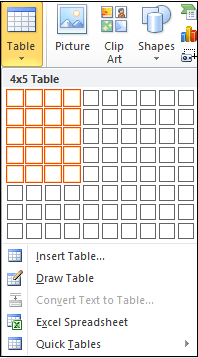
Create a table using Quick Tables
To insert a table using Quick Tables:
- Click in the Word document where you want to insert a table.
- Click the Insert tab in the Ribbon.
- Click Table in the Tables group. A drop-down menu appears.
- Select Quick Tables. A gallery appears.
- Click the table you want to insert.
Quick Tables appear in the Table drop-down menu:

Create a table by converting text to a table
If you have used tabs or other delimiters in paragraphs, you can convert the data into a table (if the delimiters are entered consistently). Wherever you have pressed Enter or Return to create a new paragraph, Word will create a new table row. You can use various delimiters to separate data but the most common are tabs, spaces or commas.
To convert delimited data to a table:
- Select the text that you want to convert.
- Click the Insert tab in the Ribbon.
- Click Table in the Tables group. A drop-down menu appears.
- Select Convert Text to Table. A dialog box appears.
- Enter the number of columns if necessary and ensure a delimiter is selected in the Separate text at area.
- Under AutoFit behavior, choose how you want your table to appear. Word chooses a width for the table columns by default. If you want a different column width, choose AutoFit to contents or AutoFit to window.
- Click OK.
In the Convert Text to Table dialog box, enter the number of columns as well as the delimiter:

Show table gridlines
Gridlines show the cell boundaries of a table on screen if table borders are not applied. Gridlines appear only on the screen and are not printed.
Gridlines are not visible when you view a document in a Web browser or in Print Preview.
To show table gridlines in a Word document:
- Click in a table.
- Click the Table Layout or Table Tools Layout tab in the Ribbon.
- In the Table group, check View Gridlines.
View Gridlines appears on the Table Tools Layout or Table Layout tab in the Ribbon:

Move around in a table
You can use the following keys to move from one cell to another in a table:
- Tab to move to the next cell to the right.
- Shift-Tab to move to the cell to left.
- Ctrl-Tab to tab within a cell.
Add a row or a column
To add a row in a table:
- Click in a cell that is located above or below where you want to add a row.
- Click the Table Layout or Table Tools Layout tab in the Ribbon.
- To add a row above the cell you clicked in, click Insert Above in the Rows and Columns group. To add a row below the cell you clicked in, in the Rows and Columns group, click Insert Below.
The commands to insert rows or columns appear on the Table Tools Layout or Table Layout tab in the Ribbon:

You can also right-click in a row and choose Insert from the drop-down menu and insert options from the sub-menu.
If you click in the last cell in a table and press Tab, Word will automatically add a row.
To add a column in a table:
- Click in a cell that is located to the right or left of where you want to add a column.
- Click the Table Layout or Table Tools Layout tab in the Ribbon.
- To add a column to the left of the cell you clicked in, click Insert Left in the Rows and Columns group. To add a column to the right of the cell you clicked in, in the Rows and Columns group, click Insert Right.
You can also right-click in a row and choose Insert from the drop-down menu and insert options from the sub-menu.
Delete a column or row
To delete a row or column:
- Select the row or column (drag over the cells or click to the left of a row or above a column when the arrow appears).
- Click the Table Layout or Table Tools Layout tab in the Ribbon.
- In the Rows & Columns group, click Delete. A drop-down menu applears.
- Click Delete Rows or Delete Columns as appropriate.
You can also right-click in a row or column and choose Delete from the drop-down menu and delete options from the sub-menu.
Change column width
To change column width:
- Select the column or columns you want to change.
- Click the Table Layout or Table Tools Layout tab in the Ribbon.
- Click Properties in the Table group. You can also right-click and choose Properties from the drop-down menu. A dialog box appears.
- Click the Column tab.
- Check Preferred Width.
- Type the new measurement for the column width. For example, typer 1.0″ or click the up and down arrows.
- Click OK.
The Table Properties dialog box appears as follows with the Column tab selected:

You can also drag the right line of a column to resize it.
Change row height
To change row height:
- Select the row or rows you want to change.
- Click the Table Layout or Table Tools Layout tab in the Ribbon.
- Click Properties in the Table group. You can also right-click and choose Properties from the drop-down menu. A dialog box appears.
- Click the Row tab.
- Check Specify Height.
- Type the new measurement for the row height. For example, type 1.0″ or click the up and down arrows.
- Specify row height as At Least or Exactly.
- Click OK.
The Table Properties dialog box appears as follows with the Row tab selected:

You can also drag the bottom line of a row to resize it.
Distribute rows and columns evenly
To distribute rows and columns evenly:
- Select the entire table by clicking the four-arrows that appear on the top left of the table.
- Click the Table Layout or Table Tools Layout tab in the Ribbon.
- Click Distribute Rows and / or Distribute Columns in the Cell Size group.
Apply a table style
To apply a table style:
- Click in the table.
- Click the Table Design or Table Tools Design tab in the Ribbon.
- Click a table style or click the More arrow to display the Table Styles gallery and click a style.
Table Styles gallery appears on the Table Tools Design or Table Design tab in the Ribbon:

To learn more about working with table styles, check out the article How to Format Microsoft Word Tables Using Table Styles (Ultimate Guide).
Subscribe to get more articles like this one
Did you find this article helpful? If you would like to receive new articles, JOIN our email list.
More resources
4 Ways to Delete a Table in Word
How to Make Columns in Word (Newspaper-style)
How to Insert Formulas and Functions in Word Tables
How to Keep a Microsoft Word Table Together on One Page
How to Delete a Page in Word (Remove Blank or Extra Pages)
Related courses
Microsoft Word: Intermediate / Advanced
Microsoft Excel: Intermediate / Advanced
Microsoft PowerPoint: Intermediate / Advanced
Microsoft Word: Long Documents Master Class
Microsoft Word: Styles, Templates and Tables of Contents
Microsoft Word: Designing Dynamic Word Documents Using Fields
VIEW MORE COURSES >
Our instructor-led courses are delivered in virtual classroom format or at our downtown Toronto location at 18 King Street East, Suite 1400, Toronto, Ontario, Canada (some in-person classroom courses may also be delivered at an alternate downtown Toronto location). Contact us at info@avantixlearning.ca if you’d like to arrange custom instructor-led virtual classroom or onsite training on a date that’s convenient for you.
Copyright 2023 Avantix® Learning
Microsoft, the Microsoft logo, Microsoft Office and related Microsoft applications and logos are registered trademarks of Microsoft Corporation in Canada, US and other countries. All other trademarks are the property of the registered owners.
Avantix Learning |18 King Street East, Suite 1400, Toronto, Ontario, Canada M5C 1C4 | Contact us at info@avantixlearning.ca
In this chapter, we’ll talk about How to add rows and columns in MS Word. As we talked about in the last chapter, a table is made up of columns on the left and rows on the right, with a cell at each intersection. This chapter will show you how to add and remove rows and columns from a table.
Table of contents
- What is row and column in MS Word?
- How To Add Rows and Columns in MS Word
- Add Table Rows Using Tab
- Add a column to the table
- Use the Ribbon Menu to Add Rows or Columns
- Use Delete Key to Remove Rows and Columns
- Summary
What is row and column in MS Word?
A Word table can have up to 63 columns in a Word document. This is the maximum number of columns that can be in a Word document. In addition, you can have as many rows as you want. Word Document, specifically, allows you to put 32, 767 rows in one table.
The following are the simple steps to add rows to a table in a word document. Once you create a table in a Word document, you will be able to add additional rows to your table based on your requirements.
- Step 1: Place cursor in the table where you want to add a row.
- Step 2: Right-click on the selected area, the following dialog box will appear on the screen. Click on the drop-down menu associated with the Insert button.
Click on the Insert Rows Above option to add a row above the selected row.
Click on the Insert Rows Below option to add a row below the selected row.
- The screenshot below shows that a new row is added to the table.

Add Table Rows Using Tab
Adding rows to your table is easiest if you put your cursor in the cell in the bottom-right corner of your table and then press Tab on your keyboard.
This will add a new row. When you want to add a row, you can choose the cell at the bottom right and press Tab again. If you choose another cell and press Tab, the cursor will move to the next cell. A new row is only automatically added to the last cell.
Add a column to the table
Adding more columns to a Word document is not hard for you to do. To add a column to the table, follow the steps below.
Step 1: Place the cursor where you want to add a column to the table.
Step 2: Right-click on the table, a list of options will show up. Click the drop-down arrow next to the Insert icon.
- Click on the Insert Columns to the Left to add the column left side of the table.
- Click on the Insert Column to the Right to add the column right side of the table.

- Step 3: The screenshot below shows that column is added to the table.

Use the Ribbon Menu to Add Rows or Columns
If you have a table in a Word document, you can use the ribbon menu to see more ways to add rows and columns.
Use the Layout tab in the top ribbon menu to get to these options. The only thing that’s not clear is why there are two tabs called Layout in the menu bar. You need to click the “Layout” tab, which is next to “Table Design” on the right.

When you choose this, you’ll see a list of table-related options here. Since our goal is to add rows and columns, we’ll pay attention to the “Rows & Columns” command group.

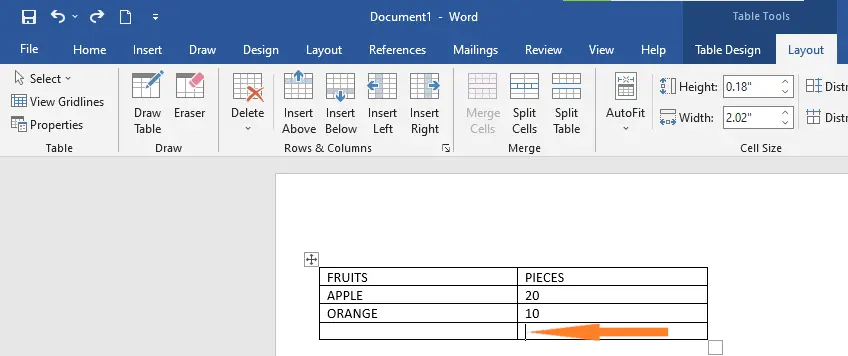
If you want to add a row above the cell you’ve chosen in your Microsoft Word table, click “Insert Above.” To add a row below the cell you’ve chosen, click “Insert Below.” Here, we will add a row to the bottom of the cell.
You can also quickly add columns with the buttons here. If you click “Insert Right,” a column will be added to the right of the cell. In the same way, “Insert Left” will add a column to the left of the cell that is currently selected. In our example, we are going to add a column to the right.
You can also click the arrow icon that’s to the right of the “Rows & Columns” command group to reveal a few more options.
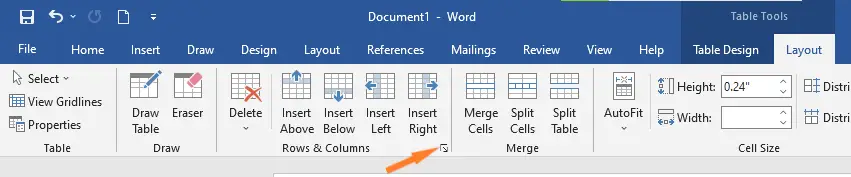
Here, you can add rows or columns by clicking “Insert entire row” or “Insert entire column.”
Use Delete Key to Remove Rows and Columns
The following steps are using Delete key to remove rows and columns in word document.
Summary
In the end, we’ve learned how to add rows and columns to a table in MS Word and what those terms mean. We also know that there are different ways to add rows and columns to a table, which we can use in our document to make it look more professional and presentable.
Meanwhile, if you want to learn more about working on tables, see the previous tutorial on how to create tables in Microsoft Word. In our format text and pages tutorial, you’ll also learn how to change page orientation and cover page etc. You can browse those guides if you are having a hard time formatting your documents.
We hope this tutorial helps you as you format your documents in MS Word.
PREVIOUS

NEXT