
Модуль python-docx предназначен для создания и обновления файлов с расширением .docx — Microsoft Word. Этот модуль имеет одну зависимость: сторонний модуль lxml.
Модуль python-docx размещен на PyPI, поэтому установка относительно проста.
# создаем виртуальное окружение, если нет
$ python3 -m venv .venv --prompt VirtualEnv
# активируем виртуальное окружение
$ source .venv/bin/activate
# ставим модуль python-docx
(VirtualEnv):~$ python3 -m pip install -U python-docx
Основы работы с файлами Microsoft Word на Python.
- Открытие/создание документа;
- Добавление заголовка документа;
- Добавление абзаца;
- Применение встроенного стиля в Microsoft Word к абзацу;
- Жирный, курсив и подчеркнутый текст в абзаце;
- Применение стилей Microsoft Word к символам текста (к прогону);
- Пользовательский стиль символов текста;
- Добавление разрыва страницы;
- Добавление картинки в документ;
- Чтение документов MS Word.
Открытие/создание документа.
Первое, что вам понадобится, это документ, над которым вы будете работать. Самый простой способ:
from docx import Document

# создание документа
document = Document()
# открытие документа
document = Document('/path/to/document.docx')
При этом создается пустой документ, основанный на «шаблоне» по умолчанию. Другими словами, происходит примерно то же самое, когда пользователь нажимает на иконку в Microsoft Word «Новый документ» с использованием встроенных значений по умолчанию.
При этом шрифт документа и его размер по умолчанию для всего документа можно задать следующим образом:
from docx import Document
from docx.shared import Pt

doc = Document()
# задаем стиль текста по умолчанию
style = doc.styles['Normal']
# название шрифта
style.font.name = 'Arial'
# размер шрифта
style.font.size = Pt(14)
document.add_paragraph('Текст документа')
Так же, можно открывать существующий документ Word и работать с ним при помощи модуля python-docx. Для этого, в конструктор класса Document() необходимо передать путь к существующему документу Microsoft Word.
Добавление заголовка документа.
В любом документе, основной текст делится на разделы, каждый из которых начинается с заголовка. Название таких разделов можно добавить методом Document.add_heading():
# без указания аргумента `level`
# добавляется заголовок "Heading 1"
head = document.add_heading('Основы работы с файлами Microsoft Word на Python.')
from docx.enum.text import WD_ALIGN_PARAGRAPH
# выравнивание посередине
head.alignment = WD_ALIGN_PARAGRAPH.CENTER
По умолчанию, добавляется заголовок верхнего уровня, который отображается в Word как «Heading 1». Если нужен заголовок для подраздела, то просто указываем желаемый уровень в виде целого числа от 1 до 9:
document.add_heading('Добавление заголовка документа', level=2)
Если указать level=0, то будет добавлен текст с встроенным стилем титульной страницы. Такой стиль может быть полезен для заголовка относительно короткого документа без отдельной титульной страницы.
Так же, заголовки разделов можно добавлять методом document.add_paragraph().add_run(), с указанным размером шрифта.
Например:
from docx import Document
from docx.shared import Pt

doc = Document()
# добавляем текст прогоном
run = doc.add_paragraph().add_run('Заголовок, размером 24 pt.')
# размер шрифта
run.font.size = Pt(24)
run.bold = True
doc.save('test.docx')
Добавление абзаца.
Абзацы в Word имеют основополагающее значение. Они используются для добавления колонтитулов, основного текста, заголовков, элементов списков, картинок и т.д.
Смотрим самый простой способ добавить абзац/параграф:
p = document.add_paragraph('Абзацы в Word имеют основополагающее значение.')
Метод Document.add_paragraph() возвращает ссылку на только что добавленный абзац (объект Paragraph). Абзац добавляется в конец документа. Эту ссылку можно использовать в качестве своеобразного «курсора» и например, вставить новый абзац прямо над ним:
prior_p = p.insert_paragraph_before(
          'Объект `paragraph` - это ссылка на только что добавленный абзац.')
Такое поведение позволяет вставить абзац в середину документа, это важно при изменении существующего документа, а не при его создании с нуля.
Ссылка на абзац, так же используется для его форматирования встроенными в MS Word стилями или для кастомного/пользовательского форматирования.
Пользовательское форматирование абзаца.
Форматирование абзацев происходит при помощи объекта ParagraphFormat.
Простой способ форматировать абзац/параграф:
from docx import Document
from docx.shared import Mm
from docx.enum.text import WD_ALIGN_PARAGRAPH

doc = Document()
# Добавляем абзац
p = doc.add_paragraph('Новый абзац с отступами и красной строкой.')
# выравниваем текст абзаца
p.alignment = WD_ALIGN_PARAGRAPH.JUSTIFY
# получаем объект форматирования
fmt = p.paragraph_format
# Форматируем:
# добавляем отступ слева
fmt.first_line_indent = Mm(15)
# добавляем отступ до
fmt.space_before = Mm(20)
# добавляем отступ слева
fmt.space_after = Mm(10)
doc.add_paragraph('Новый абзац.')
doc.add_paragraph('Еще новый абзац.')
doc.save('test.docx')
Чтобы узнать, какие параметры абзаца еще можно настроить/изменить, смотрите материал «Объект ParagraphFormat»
Очень часто в коде, с возвращенной ссылкой (в данном случае p) ничего делать не надо, следовательно нет смысла ее присваивать переменной.
Применение встроенного стиля в Microsoft Word к абзацу.
Стиль абзаца — это набор правил форматирования, который заранее определен в Microsoft Word, и храниться в редакторе в качестве переменной. По сути, стиль позволяет сразу применить к абзацу целый набор параметров форматирования.
Можно применить стиль абзаца, прямо при его создании:
document.add_paragraph('Стиль абзаца как цитата', style='Intense Quote')
document.add_paragraph('Стиль абзаца как список.', style='List Bullet')
В конкретном стиле 'List Bullet', абзац отображается в виде маркера. Также можно применить стиль позже. Две строки, в коде ниже, эквивалентны примеру выше:
document.add_paragraph('Другой стиль абзаца.').style = 'List Number'

# Эквивалентно

paragraph = document.add_paragraph('Другой стиль абзаца.')
# применяем стиль позже
paragraph.style = 'List Number'
Стиль указывается с использованием его имени, в этом примере имя стиля — 'List'. Как правило, имя стиля точно такое, как оно отображается в пользовательском интерфейсе Word.
Обратите внимание, что можно установить встроенный стиль прямо на результат document.add_paragraph(), без использования возвращаемого объекта paragraph
Жирный, курсив и подчеркнутый текст в абзаце.
Разберемся, что происходит внутри абзаца:
- Абзац содержит все форматирование на уровне блока, такое как — отступ, высота строки, табуляции и так далее.
- Форматирование на уровне символов, например полужирный и курсив, применяется на уровне прогона
paragraph.add_run(). Все содержимое абзаца должно находиться в пределах цикла, но их может быть больше одного. Таким образом, для абзаца с полужирным словом посередине требуется три прогона: обычный, полужирный — содержащий слово, и еще один нормальный для текста после него.
Когда создается абзац методом Document.add_paragraph(), то передаваемый текст добавляется за один прогон Run. Пустой абзац/параграф можно создать, вызвав этот метод без аргументов. В этом случае, наполнить абзац текстом можно с помощью метода Paragraph.add_run(). Метод абзаца .add_run() можно вызывать несколько раз, тем самым добавляя информацию в конец данного абзаца:
paragraph = document.add_paragraph('Абзац содержит форматирование ')
paragraph.add_run('на уровне блока.')
В результате получается абзац, который выглядит так же, как абзац, созданный из одной строки. Если не смотреть на полученный XML, то не очевидно, где текст абзаца разбивается на части. Обратите внимание на конечный пробел в конце первой строки. Необходимо четко указывать, где появляются пробелы в начале и в конце прогона, иначе текст будет слитный (без пробелов). Они (пробелы) автоматически не вставляются между прогонами paragraph.add_run(). Метод paragraph.add_run() возвращает ссылку на объект прогона Run, которую можно использовать, если она нужна.
Объекты прогонов имеют следующие свойства, которые позволяют установить соответствующий стиль:
.bold: полужирный текст;.underline: подчеркнутый текст;.italic: курсивный (наклонный) текст;.strike: зачеркнутый текст.
paragraph = document.add_paragraph('Абзац содержит ')
paragraph.add_run('форматирование').bold = True
paragraph.add_run(' на уровне блока.')
Получится текст, что то вроде этого: «Абзац содержит форматирование на уровне блока».
Обратите внимание, что можно установить полужирный или курсив прямо на результат paragraph.add_run(), без использования возвращаемого объекта прогона:
paragraph.add_run('форматирование').bold = True
# или
run = paragraph.add_run('форматирование')
run.bold = True
Передавать текст в метод Document.add_paragraph() не обязательно. Это может упростить код, если строить абзац из прогонов:
paragraph = document.add_paragraph()
paragraph.add_run('Абзац содержит ')
paragraph.add_run('форматирование').bold = True
paragraph.add_run(' на уровне блока.')
Пользовательское задание шрифта прогона.
from docx import Document
from docx.shared import Pt, RGBColor

# создание документа
doc = Document()
# добавляем текст прогоном
run = doc.add_paragraph().add_run('Заголовок, размером 24 pt.')
# название шрифта
run.font.name = 'Arial'
# размер шрифта
run.font.size = Pt(24)
# цвет текста
run.font.color.rgb = RGBColor(0, 0, 255)
# + жирный и подчеркнутый
run.font.bold = True
run.font.underline = True
doc.save('test.docx')
Применение стилей Microsoft Word к символам текста (к прогону).
В дополнение к встроенным стилям абзаца, которые определяют группу параметров уровня абзаца, Microsoft Word имеет стили символов, которые определяют группу параметров уровня прогона paragraph.add_run(). Другими словами, можно думать о стиле текста как об указании шрифта, включая его имя, размер, цвет, полужирный, курсив и т. д.
Подобно стилям абзацев, стиль символов текста будет определен в документе, который открывается с помощью вызова Document() (см. Общие сведения о стилях).
Стиль символов можно указать при добавлении нового прогона:
paragraph = document.add_paragraph('Обычный текст, ')
paragraph.add_run('текст с акцентом.', 'Emphasis')
Также можете применить стиль к прогону после его добавления. Этот код дает тот же результат, что и строки выше:
paragraph = document.add_paragraph()
paragraph.add_run('Обычный текст, ')
paragraph.add_run('текст с акцентом.').style = 'Emphasis'
Как и в случае со стилем абзаца, имя стиля текста такое, как оно отображается в пользовательском интерфейсе Word.
Пользовательский стиль символов текста.
from docx import Document
from docx.shared import Pt, RGBColor

# создание документа
doc = Document()
# задаем стиль текста по умолчанию
style = doc.styles['Normal']
# название шрифта
style.font.name = 'Calibri'
# размер шрифта
style.font.size = Pt(14)
p = doc.add_paragraph('Пользовательское ')
# добавляем текст прогоном
run = p.add_run('форматирование ')
# размер шрифта
run.font.size = Pt(16)
# курсив
run.font.italic = True
# добавляем еще текст прогоном
run = p.add_run('символов текста.')
# Форматируем:
# название шрифта
run.font.name = 'Arial'
# размер шрифта
run.font.size = Pt(18)
# цвет текста
run.font.color.rgb = RGBColor(255, 0, 0)
# + жирный и подчеркнутый
run.font.bold = True
run.font.underline = True
doc.save('test.docx')
Добавление разрыва страницы.
При создании документа, время от времени нужно, чтобы следующий текст выводился на отдельной странице, даже если последняя не заполнена. Жесткий разрыв страницы можно сделать следующим образом:
document.add_page_break()
Если вы обнаружите, что используете это очень часто, это, вероятно, знак того, что вы могли бы извлечь выгоду, лучше разбираясь в стилях абзацев. Одно свойство стиля абзаца, которое вы можете установить, — это разрыв страницы непосредственно перед каждым абзацем, имеющим этот стиль. Таким образом, вы можете установить заголовки определенного уровня, чтобы всегда начинать новую страницу. Подробнее о стилях позже. Они оказываются критически важными для получения максимальной отдачи от Word.
Жесткий разрыв страницы можно привязать к стилю абзаца, и затем применять его для определенных абзацев, которые должны начинаться с новой страницы. Так же можно установить жесткий разрыв на стиль заголовка определенного уровня, чтобы с него всегда начинать новую страницу. В общем, стили, оказываются критически важными для того, чтобы получить максимальную отдачу от модуля python-docx.
Добавление картинки в документ.
Microsoft Word позволяет разместить изображение в документе с помощью пункта меню «Вставить изображение«. Вот как это сделать при помощи модуля python-docx:
document.add_picture('/path/to/image-filename.png')
В этом примере используется путь, по которому файл изображения загружается из локальной файловой системы. В качестве пути можно использовать файловый объект, по сути, любой объект, который действует как открытый файл. Такое поведение может быть полезно, если изображение извлекается из базы данных или передается по сети.
Размер изображения.
По умолчанию, изображение добавляется с исходными размерами, что часто не устраивает пользователя. Собственный размер рассчитывается как px/dpi. Таким образом, изображение размером 300×300 пикселей с разрешением 300 точек на дюйм появляется в квадрате размером один дюйм. Проблема в том, что большинство изображений не содержат свойства dpi, и по умолчанию оно равно 72 dpi. Следовательно, то же изображение будет иметь одну сторону, размером 4,167 дюйма, что означает половину страницы.
Чтобы получить изображение нужного размера, необходимо указывать его ширину или высоту в удобных единицах измерения, например, в миллиметрах или сантиметрах:
from docx.shared import Mm

document.add_picture('/path/to/image-filename.png', width=Mm(35))
Если указать только одну из сторон, то модуль python-docx использует его для вычисления правильно масштабированного значения другой стороны изображения. Таким образом сохраняется соотношение сторон и изображение не выглядит растянутым.
Классы Mm() и Cm() предназначены для того, чтобы можно было указывать размеры в удобных единицах. Внутри python-docx используются английские метрические единицы, 914400 дюймов. Так что, если просто указать размер, что-то вроде width=2, то получится очень маленькое изображение. Классы Mm() и Cm() импортируются из подпакета docx.shared. Эти классы можно использовать в арифметике, как если бы они были целыми числами. Так что выражение, width=Mm(38)/thing_count, работает нормально.
Чтение документов Microsoft Word.
В модуле python-docx, структура документа Microsoft Word представлена тремя различными типами данных. На самом верхнем уровне объект Document() представляет собой весь документ. Объект Document() содержит список объектов Paragraph(), которые представляют собой абзацы документа. Каждый из абзацев содержит список, состоящий из одного или нескольких объектов Run(), представляющих собой фрагменты текста с различными стилями форматирования.
Например:
>>> from docx import Document
>>> doc = Document('/path/to/example.docx')
# количество абзацев в документе
>>> len(doc.paragraphs)
# текст первого абзаца в документе
>>> doc.paragraphs[0].text
# текст второго абзаца в документе
>>> doc.paragraphs[1].text
# текст первого прогона второго абзаца
>>> doc.paragraphs[1].runs[0].text
Используя следующий код, можно получить весь текст документа:
text = []
for paragraph in doc.paragraphs:
    text.append(paragraph.text)
print('nn'.join(text))
А так можно получить стили всех параграфов:
styles = []
for paragraph in doc.paragraphs:
    styles.append(paragraph.style)
Использовать полученные стили можно следующим образом:
# изменим стиль 1 параграфа на
# стиль взятый из 3 параграфа
doc.paragraphs[0].style = styles[2]
This article provides guidance on associating blank or custom templates to a Document library to enable users to easily create generic or highly customized Microsoft Office documents based on those templates. You will find this information especially useful if you want to enable the consistent use of specific types of documents such as expense reports, event-specific branded PowerPoint slides, or trip reports. After the custom templates are added to a Document library, the library itself can be saved as a template used to produce specific types of documents for a specific group within your organization such as human resources, legal, or IT.
What do you want to do?
-
Introduction
-
Create a content type for a document template
-
Display the new template as a choice when creating new documents
-
Save your customized library as a template
Introduction
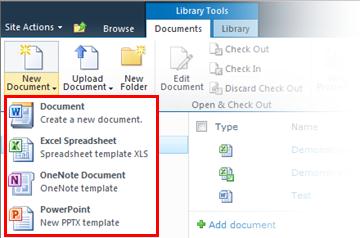
When you create a new document for any given document library, the default type of document template available to you is a Microsoft Word document. But what if you want to quickly add a Microsoft Excel worksheet, a Microsoft OneNote document, or a Microsoft PowerPoint presentation to your Document Library? And what if you want each document type to follow a particular template so that all documents of a certain type are consistent?
This article is divided into the two steps necessary for creating and then adding content types to be used as templates for various file types within a Document Library.
Create a content type for a document template
Note: You must be a site collection owner to successfully complete this procedure.
-
Go to the top level of the site collection and select Site Settings from the Site Actions menu.
-
Under the Galleries section of the Site Settings page, click Site content types.
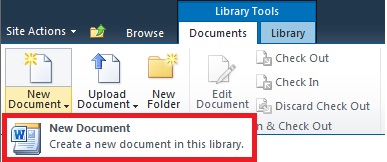
Note: Note that, by default, the New Word content type exists under the Group Work Content Types section. This is typically the choice that is available to you when adding a new document to any Document Library.

-
Click Create at the top of the Site Content Type settings page.
-
On the New Site Content Type page, do the following:
-
Type “PowerPoint” in the Name field.
-
Type “Create new presentation in this library” in the Description field.
-
Select Document Content Types from the Select parent content type from drop down list.
-
Select Document from the Parent Content Type drop-down list.
-
Click OK.
-
-
On the Site Content Types > PowerPoint page, under Settings, click Advanced Settings.
-
In the Document Template section, select Upload a new document template, click Browse, and then double-click a PowerPoint slide or template that you want to use.
Note: You must have Microsoft Office installed in order to create Office generated documents.
-
Click OK.
Note: You can also add a new Excel, OneNote or Word template by repeating the above steps for each file type.
Note: You can create multiple and different templates of the same file type.
Top of Page
Display the new template as a choice when creating new documents
Now that you have created content types for your PowerPoint, OneNote, and Excel templates, you need to add the content types to a Document Library. This step ensures that they will appear as choices from the New Document command on the ribbon.
-
Navigate to the library to which you want to associate the new content types.
-
On the Library tab of the ribbon, click Library Settings. If you are working with a list, click List Settings.
-
Under General Settings, click Advanced Settings.
-
In the Content Types section, click Yes under Allow management of content types, and then click OK.
-
On the Library Settings page, under Content Types, click Add from existing site content types.
-
On the Add Content Types page, select All Groups under Select site content types from.
-
Under Available Site Content Types, look for and select the new content types to associate to this library and click Add.
Note: You can multi-select content types by pressing the <CTRL> key while clicking on several content types in the list.
-
The next time you click New on the ribbon for the library you want to add items to, the new template content types appears as choices in the drop-down list.
Top of Page
Save your customized library as a template
Now that you have created content types for your PowerPoint, OneNote, and Excel templates and added them to the Document Library, you can save this library as a template. In this way, you won’t have to repeat the steps above if you want something similar for another Document Library.
Note: You must have Designer permissions to accomplish this task.
-
Go the Document Library that you want to save as a template.
-
Under Library Tools in the ribbon, click the Library tab.
-
In the Settings group of the ribbon, click Library Settings.
-
Under Permissions and Management, click Save document library as template.
-
Type the file name, the template name and template description in the fields provided.
-
If you want document libraries created from this new Document library template to include the items already in the document library, select the Include Content checkbox.
Top of Page
Need more help?
Return to VBA Code Examples
This tutorial will explain what a reference is and how to use them in the VBA Editor
If you are working in Excel VBA, and you wish to work with Objects available in a different application – like Microsoft Word for example, you need to add a reference to the object library of that application.
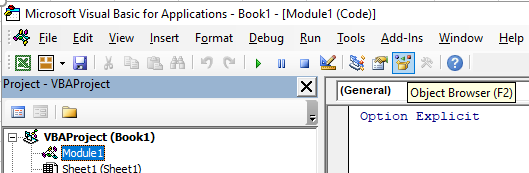
Adding a reference to your VBA Project
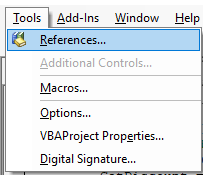
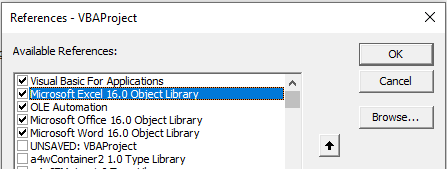
In the VBE Window, click on the Tools menu and then click References…
Scroll down through the list of references to find the one you want to use. In this case, the Microsoft Word 16.0 Object Library.
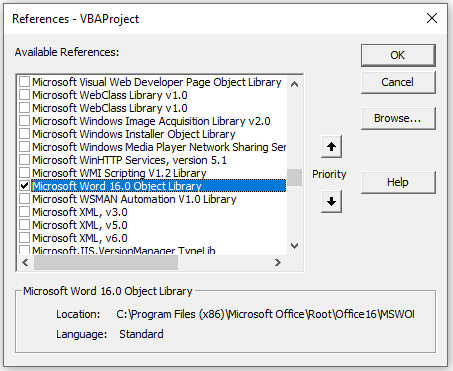
Click OK.
Viewing the Object Library
Once you have added a reference to the database, you can use the objects that are associated with the application to which you have referenced. The OBJECT LIBRARY for that particular application is now available for you to use within Excel.
Click on the Object Browser button on the Standard toolbar.
OR
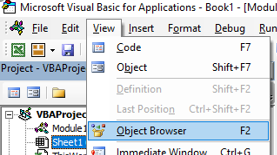
Click on the View menu, and select Object Browser.
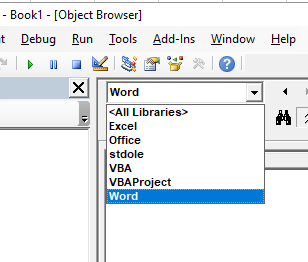
Select Word from the drop down list
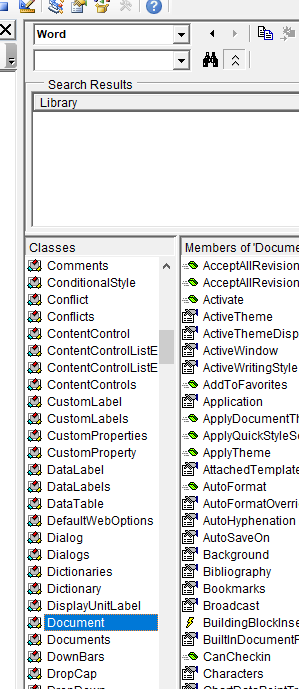
You will now be able to view all the objects as well as their methods and properties that you can now use within your the Excel VBA code.
Using the Reference in an Excel Procedure
Once you have created a reference, you can use the objects from the object library in your VBA code in Excel. The procedure below will create a new Word Document and make Word visible on your screen.
Sub CreateWordDocument()
   Dim wdApp As Word.Application
   Dim wdDoc As Word.Document
'open word
   Set wdApp = New Word.Application
'create a document
   Set wdDoc = wdApp.Documents.Add
'type some stuff
   wdApp.Selection.TypeText "Good morning Melanie!"
'show word on the screen
   wdApp.Visible = True
End Sub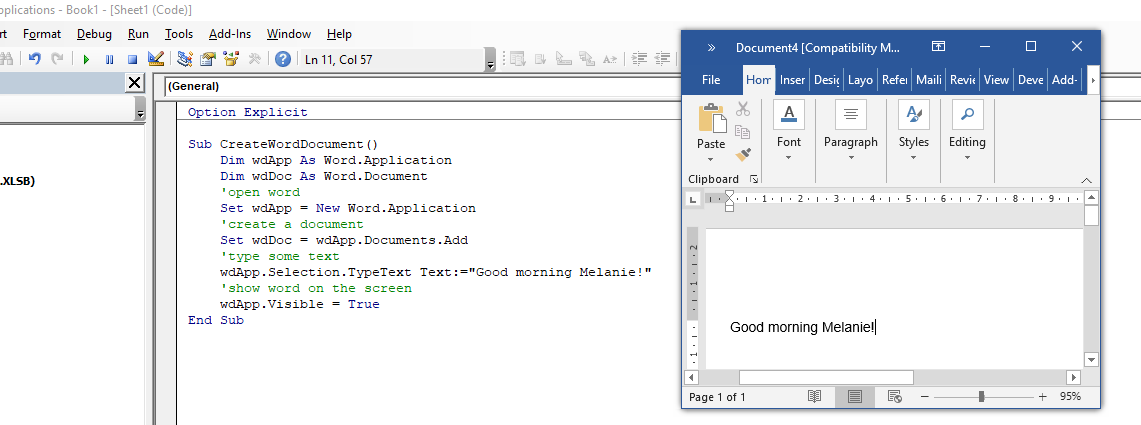
Early vs Late Binding
Adding a reference to an Object Library in your project is known as Early Binding. This makes all the objects from that Object Library available to be used programmatically in your VBA Project. As you have already added a reference to the Microsoft Word Object Library in the procedure above, we are able to ref directly to the Word Application and the Word Document when we declare the wdApp and wdDoc variables by using the New method.
However, you can still use the Object Library of a different application without adding a reference to it in your code. You would need to declare the wdApp and wdDoc variables as Objects and then you would need to use the CreateObject method rather than the New method to create a new instance of Microsoft Word.
Sub CreateWordDocument()
   Dim wdApp As Object
   Dim wdDoc As Object
'open word
   Set wdApp = CreateObject("Word.Application")
'create a document
   Set wdDoc = wdApp.Documents.Add
'type some text
   wdApp.Selection.TypeText Text:="Good morning Melanie!"
'show word on the screen
   wdApp.Visible = True
End Sub
Using Late Binding is useful if the program that you are creating is going to be used on multiple machines. If a user has a different version of Microsoft Office than you do they may not have the correct file on their PC for the Object Library. For example if you are using Excel version 16, but they are using Excel version 15, they may end up with a missing reference.
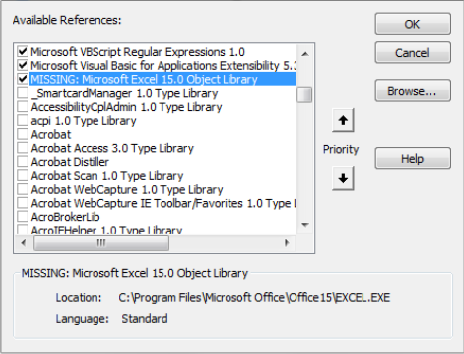
You can easily fix this by removing the tick next to the missing reference, and then scrolling down to find the correct reference and ticking that instead.
VBA Coding Made Easy
Stop searching for VBA code online. Learn more about AutoMacro — A VBA Code Builder that allows beginners to code procedures from scratch with minimal coding knowledge and with many time-saving features for all users!

Learn More!
In the context of SP Online or SP 2013, we visualize them to be omnipotent, or if not for this, then atleast have much more vigour than their predecessors. What also bestows to the pool of features is also the availability of the SharePoint Designer (SPD) 2013 workflow. However, a little use of workflows using SPD 2010 also can extend the OOTB capabilities.
Workflows need not just be visualized as a process to flow items or streamlines tasks among users, rather in the simplest form, a workflow can also update data in field.
This article sheds lights on exploiting the capability of SP Online in conjunction with a SPD 2010 workflow to dynamically create documents in a document library.
A SharePoint document library not only acts as a repository for documents, but it can also be used to dynamically generate documents as mentioned before. The process requires coupling the document library with a custom list with the same field definitions as the document library using a workflow and editing the document template to format it using Quick Parts to place fields of the document library.
Though the process is worthwhile to generate documented format of a list containing simple text, there are still some limitations to this way of creation, in the use of embedding pictures or styling text.
The following section details the entire process.
Creating a Custom List for feed
The process is verified to work well only with data of single or multiline text (selected as Plain Text).
For the purpose of demonstration, a simple document library is created with columns of type single and multiline text.

N.B.: In the document library, the Title column of the document library is renamed Member Name.
To feed to this document library, a list is created, with columns mapped to that of the document library.

N.B.: In this list, the Title column of the document library is renamed Member Name.
As mentioned earlier, the only restriction with using multiline text is the use of Plain Text as illustrated below.

SharePoint Custom Development
Customizing the Document Library
In the document library, go to Settings –> Advanced Settings and in the Document Template section, Edit Template.

The template is opened in the default word application. To format the document to use data from the columns of the document library, position the cursor in the document and from the menu, go to Insert –> Quick Parts –> Document Property and select the column.

Having formatted this template to place data as desired, save the template in the same location of the document library, but in docx format.

Upon exiting from the word application, modify the extension of the document template in the document library to point to the modified template (docx instead of
dotx).

The document template is now ready to display details corresponding to each row of the document library as data gets filled in.
The last task now remains to populate the document library.
Dynamically populating the Document Library
Having already created the custom list with columns mapped to that of the document library, create a workflow for the list, to copy list data to the document library. A single action SPD SP 2010 workflow suffices, by triggering it when items are created or modified in the list.
In the given example, the document library is named Biographies, while the list is named Biography Details.
In the list workflow, add an action to create item in the document library.

Click on the document library name to set each field from the corresponding field in the list for all the relevant columns.

Having done this, the final mapping will appear as in the below image.

While all other fields can be edited or removed as desired, the only catch in the mapping process is to set the Path and name (*) field that is a non-removable field. This field essentially points to the file path, and it is required that this be set as illustrated below.
N.B.: Here Member Name is nothing but the Title column (primary column) of the document library or the list.

The workflow is now ready to be saved and published.
As details begin being entered or modified in the list, the workflow will make corresponding changes in the data of the document library and create corresponding documents.
Время на прочтение
4 мин
Количество просмотров 11K
Рассмотрим пример простой программы на Python с помощью библотекы docx для автоматизации рабочего процесса, а именно автоматической вставки файлов (в данном случае изображений) и их подпись в документах Word (docx).
Данная статья будет интересна для начинающих изучающих Python, а также полезна для тех кто работает с большими объемами изображений, графиков, осциллограмм и тому подобное. В ней мы рассмотрим простой и удобный способ вставки изображений в Word и их подписью с помощью Python.
Я опишу свой максимально дубовый и непрофессиональный но простой код который Вы сможете повторить в своих проектах. (Полный код в низу статьи).
Цель
В жизни каждого инженера или аналитика или другого специалиста, наступает момент, когда нужно оформлять отчет. Часто это осциллограммы, графики, ВАХ или другие графические изображения. Отчет нужно оформить в вордовском файле, с приведением изображений и их подписью. Делать вручную это очень увлекательно и интересно долго, неэффективно, скучно и другие синонимы к етим словам.
Рассмотрим простой способ вставки изображений и их подписью в файл docx с помощью Python.
Начало написания программы
Сначала нам нужно добавить библиотеку docx для работы с файлами Word.
import docxДавайте создадим блок в коде в котором укажем название docx файла и путь к нему, а также путь к папке с изображениями. Чтобы в дальнейшем для удобства было достаточно внести изменения путь к файлам только в верху кода.
folder_doc = r'D:PITONProject'       # Папка в которой docx файл
name_doc = 'Report.docx'              # Название doc файла
folder_png = 'D:PITONProjectPng'    # Папка в которой находятся графики
Далее добавим объект doc из библиотеки и укажем путь к файлу с названием документа.
doc = docx.Document(folder_doc + name_doc)
# Указываем параметры которые задавали в коде раньше (путь и имя)
Формируем последовательность вставки файлов
Исходя из названия файлов (изображений) нам нужно определить в какой последовательности мы будем вставлять изображения в Word.
В моем случае ето: Test_number1_Outside_humidity_10_Outside_temperature_25. Отличие в названии файлов есть в числах возле названия параметра (их мы и будем менять в коде для автоматического заполнения файла).
Создаем массивы с значениями этих чисел:
test_number = [1, 2, 3, 4, 5]                           # Указываем номер теста
outside_humidity = [10, 20, 30, 40, 50, 60, 70, 80, 90] # Указываем влажность
outside_temperature = [25, 50, 75, 100]                 # Указываем температуру
Основная часть программы
После того как мы разобрались с тем, как мы будем идентифицировать изображение для последующей вставки, нам необходимо определиться в порядке в котором будут идти изображения. У меня все картинки будут идти в таком порядке: test_number, outside_humidity, outside_temperature. Вы же можете сделать произвольный порядок.
Для этой реализации используем цикл for, который будет перебирать все значение из массива по очереди.
for r in range(len(test_number)):
    for d in range(len(outside_humidity)):
        for i in range(len(outside_temperature)):
Далее стандартными средствами библиотеки добавляем картинки в файл и создаем подписи.doc.add_picture — добавляет изображения в файл Wordfolder_png — это путь к папке которую мы указывали вверху кода
После этого мы указываем точное название файлов в папке, но вместо значений которые меняются вставляем в фигурные скобки.
В функции .format указываем те значения переменных которые меняются в каждом файле и которые мы внесли в цикле for. Эти значения будут применяться к каждому файлу, где мы указывали фигурные скобки (в той же последовательности).
Для подписи файла используем такой же алгоритм.doc.add_paragraph — используем для записи параграфуdoc.add_paragraph(" ") — делаем отступ
doc.add_picture(folder_png + '/Test_number{}_Outside_humidity_{}_Outside_temperature_{}.png'
.format(test_number[r],outside_humidity[d], outside_temperature[i]))
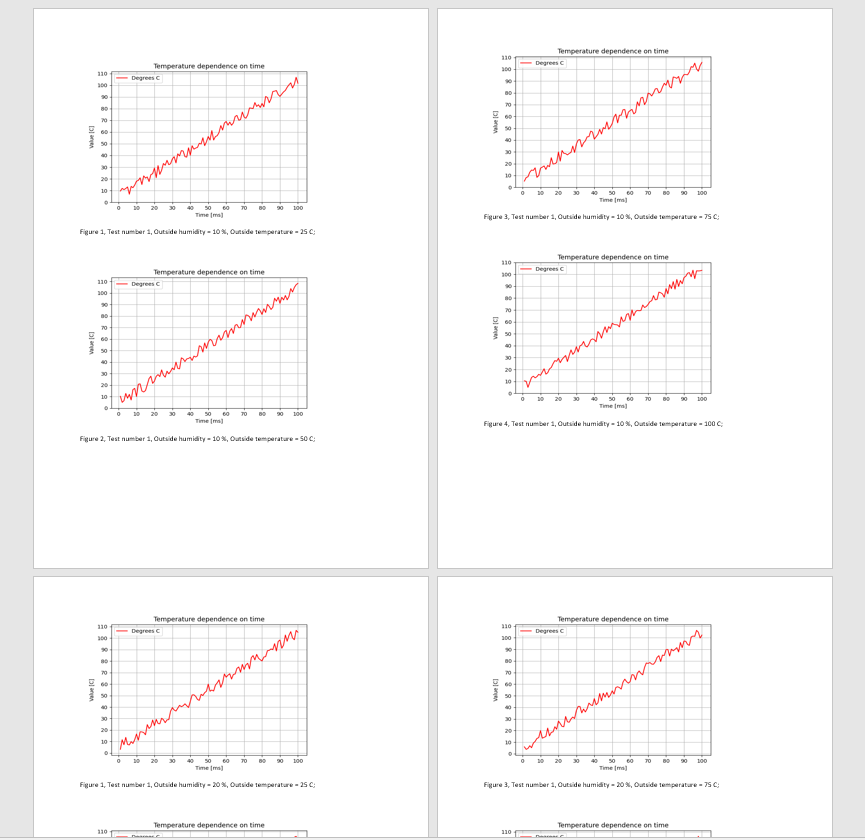
doc.add_paragraph("Figure {}, Test number {}, Outside humidity = {} %, Outside temperature = {} C;"
.format(i + 1, test_number[r], outside_humidity[d], outside_temperature[i]))
doc.add_paragraph(" ")Сохраняем файл
doc.save(folder_doc + name_doc)Меняем параметры изображения
Изображение будем вставлять размером 13.33 х 10 см, для этого воспользуемся дополнительными возможностями библиотеки docx.
Сначала напишем функцию которая будет конвертировать размер с inch в см.
def inch_to_cm(value):
    return value / 2.54
Теперь добавим данные параметры к основному коду:
doc.add_picture(folder_png + '/Test_number{}_Outside_humidity_{}_Outside_temperature_{}.png'
	.format(test_number[r],outside_humidity[d], outside_temperature[i]),
			width=docx.shared.Inches(inch_to_cm(13.330)),
				height=docx.shared.Inches(inch_to_cm(9)))
Результат
В данной папке находится 180 изображений:
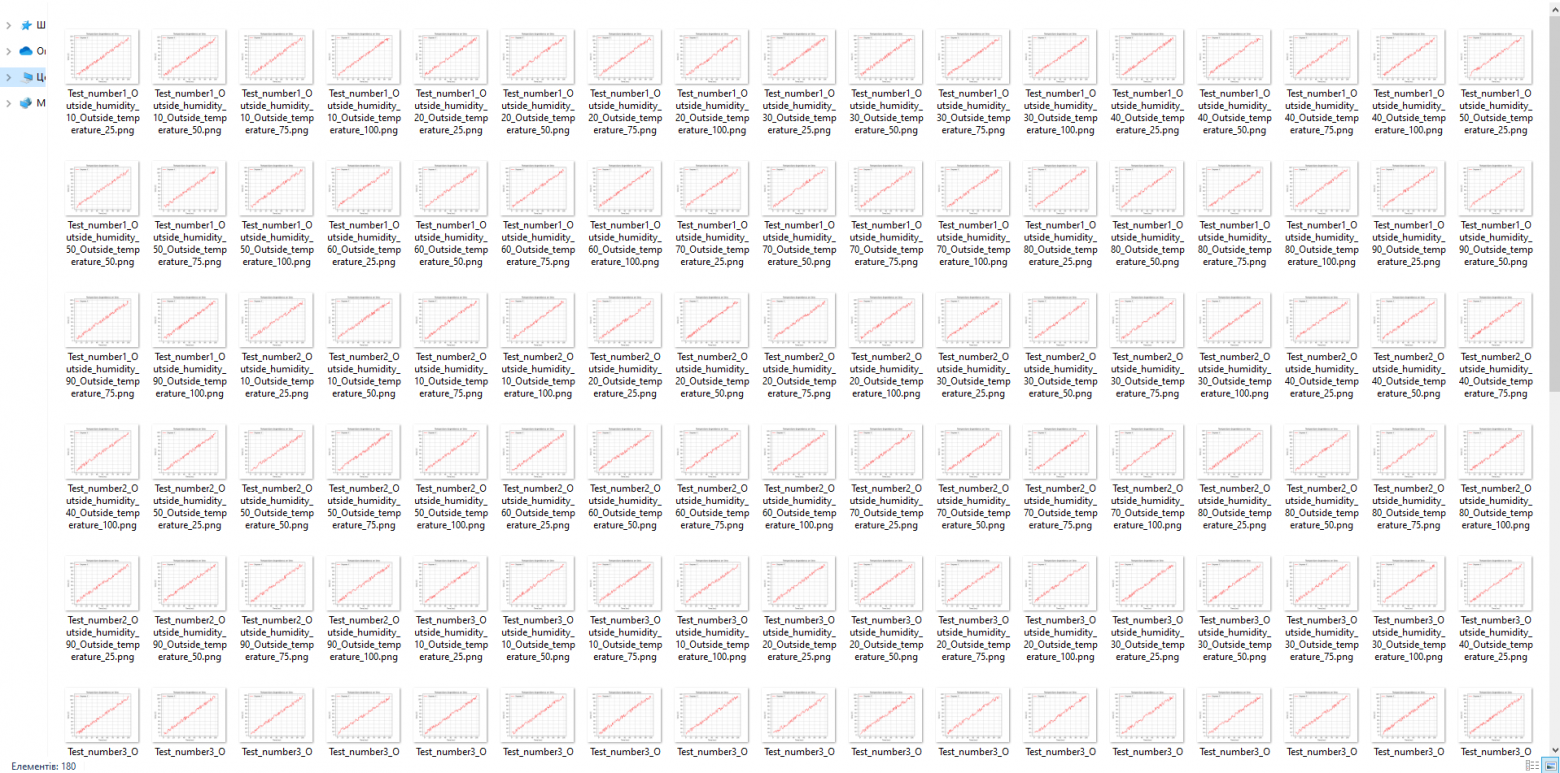
После запуска кода с помощью Python, в течение 5 секунд мы получаем следующий результат:
Вывод
Имея структурированные данные на базе данного кода с помощью Python и библиотеки docx можно в течение 10 минут написать свой код, который в течение нескольких секунд сделает всю грязную работу за Вас.
Разве не для этого придумывали компьютер?
Полный код программы
import docx

folder_doc = r'D:PITONProject'       # Папка в которой docx файл
name_doc = 'Report.docx'              # Название doc файла
folder_png = 'D:PITONProjectPng'    # Папка в которой находятся графики

doc = docx.Document(folder_doc + name_doc) # Указываем параметры которые задавали в коде раньше (путь и имя файла)

test_number = [1, 2, 3, 4, 5]                           # Указываем номер теста
outside_humidity = [10, 20, 30, 40, 50, 60, 70, 80, 90] # Указываем влажность
outside_temperature = [25, 50, 75, 100]                 # Указываем температуру

def inch_to_cm(value):
    return value / 2.54 # Конвертируем в см

for r in range(len(test_number)):
    for d in range(len(outside_humidity)):
        for i in range(len(outside_temperature)):

            # Test_number1_Outside_humidity_10_Outside_temperature_25
            doc.add_picture(folder_png + '/Test_number{}_Outside_humidity_{}_Outside_temperature_{}.png'.format(test_number[r],outside_humidity[d], outside_temperature[i]), width=docx.shared.Inches(inch_to_cm(13.330)), height=docx.shared.Inches(inch_to_cm(9)))
            doc.add_paragraph("Figure {}, Test number {}, Outside humidity = {} %, Outside temperature = {} C;" .format(i + 1, test_number[r], outside_humidity[d], outside_temperature[i]))
            doc.add_paragraph(" ")

doc.save(folder_doc + name_doc)