
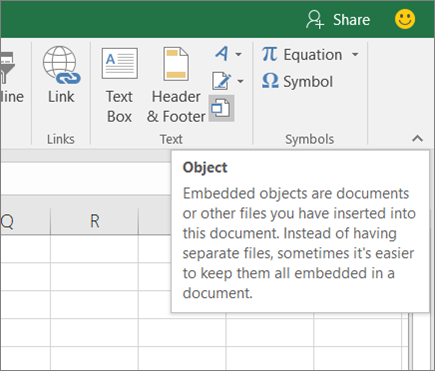
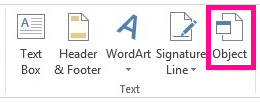
You can use Object Linking and Embedding (OLE) to include content from other programs, such as Word or Excel.
OLE is supported by many different programs, and OLE is used to make content that is created in one program available in another program. For example, you can insert an Office Word document in an Office Excel workbook. To see what types of content that you can insert, click Object in the Text group on the Insert tab. Only programs that are installed on your computer and that support OLE objects appear in the Object type box.
If you copy information between Excel or any program that supports OLE, such as Word, you can copy the information as either a linked object or an embedded object. The main differences between linked objects and embedded objects are where the data is stored and how the object is updated after you place it in the destination file. Embedded objects are stored in the workbook that they are inserted in, and they are not updated. Linked objects remain as separate files, and they can be updated.
Linked and embedded objects in a document
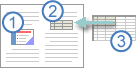
1. An embedded object has no connection to the source file.
2. A linked object is linked to the source file.
3. The source file updates the linked object.
When to use linked objects
If you want the information in your destination file to be updated when the data in the source file changes, use linked objects.
With a linked object, the original information remains stored in the source file. The destination file displays a representation of the linked information but stores only the location of the original data (and the size if the object is an Excel chart object). The source file must remain available on your computer or network to maintain the link to the original data.
The linked information can be updated automatically if you change the original data in the source file. For example, if you select a paragraph in a Word document and then paste the paragraph as a linked object in an Excel workbook, the information can be updated in Excel if you change the information in your Word document.
When to use embedded objects
If you don’t want to update the copied data when it changes in the source file, use an embedded object. The version of the source is embedded entirely in the workbook. If you copy information as an embedded object, the destination file requires more disk space than if you link the information.
When a user opens the file on another computer, he can view the embedded object without having access to the original data. Because an embedded object has no links to the source file, the object is not updated if you change the original data. To change an embedded object, double-click the object to open and edit it in the source program. The source program (or another program capable of editing the object) must be installed on your computer.
Changing the way that an OLE object is displayed
You can display a linked object or embedded object in a workbook exactly as it appears in the source program or as an icon. If the workbook will be viewed online, and you don’t intend to print the workbook, you can display the object as an icon. This minimizes the amount of display space that the object occupies. Viewers who want to display the information can double-click the icon.
Embed an object in a worksheet
-
Click inside the cell of the spreadsheet where you want to insert the object.
-
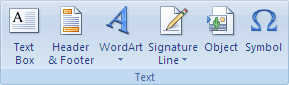
On the Insert tab, in the Text group, click Object
 .
. -
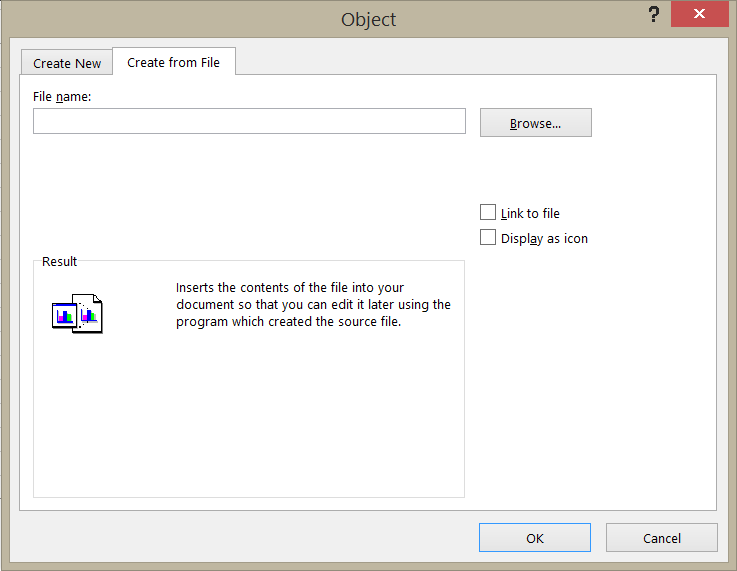
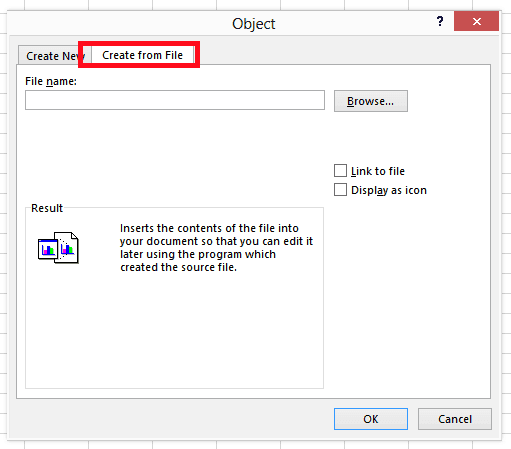
In the Object dialog box, click the Create from File tab.
-
Click Browse, and select the file you want to insert.
-
If you want to insert an icon into the spreadsheet instead of show the contents of the file, select the Display as icon check box. If you don’t select any check boxes, Excel shows the first page of the file. In both cases, the complete file opens with a double click. Click OK.
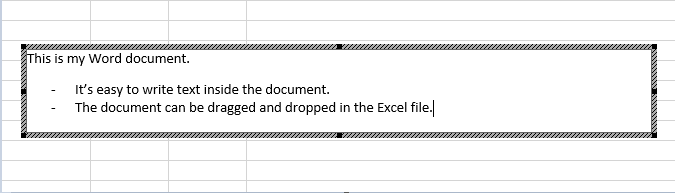
Note: After you add the icon or file, you can drag and drop it anywhere on the worksheet. You can also resize the icon or file by using the resizing handles. To find the handles, click the file or icon one time.
 .
.
Insert a link to a file
You might want to just add a link to the object rather than fully embedding it. You can do that if your workbook and the object you want to add are both stored on a SharePoint site, a shared network drive, or a similar location, and if the location of the files will remain the same. This is handy if the linked object undergoes changes because the link always opens the most up-to-date document.
Note: If you move the linked file to another location, the link won’t work anymore.
-
Click inside the cell of the spreadsheet where you want to insert the object.
-
On the Insert tab, in the Text group, click Object
. -
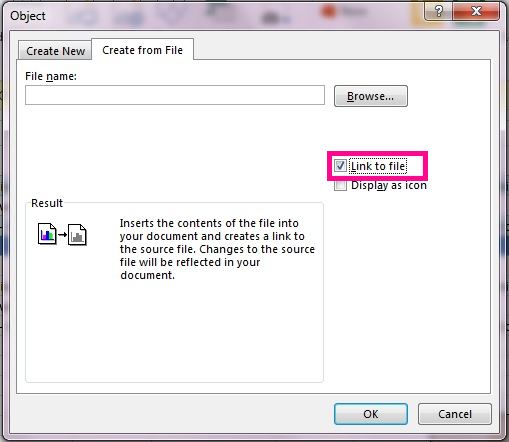
Click the Create from File tab.
-
Click Browse, and then select the file you want to link.
-
Select the Link to file check box, and click OK.
Create a new object from inside Excel
You can create an entirely new object based on another program without leaving your workbook. For example, if you want to add a more detailed explanation to your chart or table, you can create an embedded document, such as a Word or PowerPoint file, in Excel. You can either set your object to be displayed right in a worksheet or add an icon that opens the file.
-
Click inside the cell of the spreadsheet where you want to insert the object.
-
On the Insert tab, in the Text group, click Object
. -
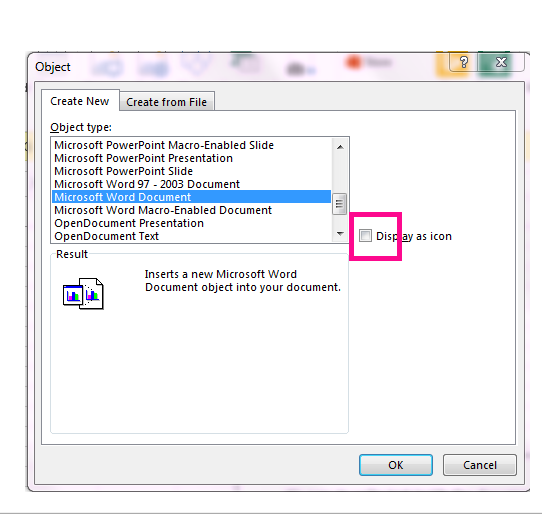
On the Create New tab, select the type of object you want to insert from the list presented. If you want to insert an icon into the spreadsheet instead of the object itself, select the Display as icon check box.
-
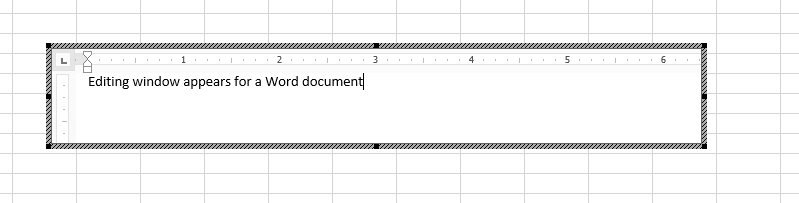
Click OK. Depending on the type of file you are inserting, either a new program window opens or an editing window appears within Excel.
-
Create the new object you want to insert.
When you’re done, if Excel opened a new program window in which you created the object, you can work directly within it.
When you’re done with your work in the window, you can do other tasks without saving the embedded object. When you close the workbook your new objects will be saved automatically.
Note: After you add the object, you can drag and drop it anywhere on your Excel worksheet. You can also resize the object by using the resizing handles. To find the handles, click the object one time.
Embed an object in a worksheet
-
Click inside the cell of the spreadsheet where you want to insert the object.
-
On the Insert tab, in the Text group, click Object.
-
Click the Create from File tab.
-
Click Browse, and select the file you want to insert.
-
If you want to insert an icon into the spreadsheet instead of show the contents of the file, select the Display as icon check box. If you don’t select any check boxes, Excel shows the first page of the file. In both cases, the complete file opens with a double click. Click OK.
Note: After you add the icon or file, you can drag and drop it anywhere on the worksheet. You can also resize the icon or file by using the resizing handles. To find the handles, click the file or icon one time.
Insert a link to a file
You might want to just add a link to the object rather than fully embedding it. You can do that if your workbook and the object you want to add are both stored on a SharePoint site, a shared network drive, or a similar location, and if the location of the files will remain the same. This is handy if the linked object undergoes changes because the link always opens the most up-to-date document.
Note: If you move the linked file to another location, the link won’t work anymore.
-
Click inside the cell of the spreadsheet where you want to insert the object.
-
On the Insert tab, in the Text group, click Object.
-
Click the Create from File tab.
-
Click Browse, and then select the file you want to link.
-
Select the Link to file check box, and click OK.
Create a new object from inside Excel
You can create an entirely new object based on another program without leaving your workbook. For example, if you want to add a more detailed explanation to your chart or table, you can create an embedded document, such as a Word or PowerPoint file, in Excel. You can either set your object to be displayed right in a worksheet or add an icon that opens the file.
-
Click inside the cell of the spreadsheet where you want to insert the object.
-
On the Insert tab, in the Text group, click Object.
-
On the Create New tab, select the type of object you want to insert from the list presented. If you want to insert an icon into the spreadsheet instead of the object itself, select the Display as icon check box.
-
Click OK. Depending on the type of file you are inserting, either a new program window opens or an editing window appears within Excel.
-
Create the new object you want to insert.
When you’re done, if Excel opened a new program window in which you created the object, you can work directly within it.
When you’re done with your work in the window, you can do other tasks without saving the embedded object. When you close the workbook your new objects will be saved automatically.
Note: After you add the object, you can drag and drop it anywhere on your Excel worksheet. You can also resize the object by using the resizing handles. To find the handles, click the object one time.
Link or embed content from another program by using OLE
You can link or embed all or part of the content from another program.
Create a link to content from another program
-
Click in the worksheet where you want to place the linked object.
-
On the Insert tab, in the Text group, click Object.
-
Click the Create from File tab.
-
In the File name box, type the name of the file, or click Browse to select from a list.
-
Select the Link to file check box.
-
Do one of the following:
-
To display the content, clear the Display as icon check box.
-
To display an icon, select the Display as icon check box. Optionally, to change the default icon image or label, click Change Icon, and then click the icon that you want from the Icon list, or type a label in the Caption box.
Note: You cannot use the Object command to insert graphics and certain types of files. To insert a graphic or file, on the Insert tab, in the Illustrations group, click Picture.
-
Embed content from another program
-
Click in the worksheet where you want to place the embedded object.
-
On the Insert tab, in the Text group, click Object.
-
If the document does not already exist, click the Create New tab. In the Object type box, click the type of object that you want to create.
If the document already exists, click the Create from File tab. In the File name box, type the name of the file, or click Browse to select from a list.
-
Clear the Link to file check box.
-
Do one of the following:
-
To display the content, clear the Display as icon check box.
-
To display an icon, select the Display as icon check box. To change the default icon image or label, click Change Icon, and then click the icon that you want from the Icon list, or type a label in the Caption box.
-
Link or embed partial content from another program
-
From a program other than Excel, select the information that you want to copy as a linked or embedded object.
-
On the Home tab, in the Clipboard group, click Copy.
-
Switch to the worksheet that you want to place the information in, and then click where you want the information to appear.
-
On the Home tab, in the Clipboard group, click the arrow below Paste, and then click Paste Special.
-
Do one of the following:
-
To paste the information as a linked object, click Paste link.
-
To paste the information as an embedded object, click Paste. In the As box, click the entry with the word «object» in its name. For example, if you copied the information from a Word document, click Microsoft Word Document Object.
-

Change the way that an OLE object is displayed
-
Right-click the icon or object, point to object typeObject (for example, Document Object), and then click Convert.
-
Do one of the following:
-
To display the content, clear the Display as icon check box.
-
To display an icon, select the Display as icon check box. Optionally, you can change the default icon image or label. To do that, click Change Icon, and then click the icon that you want from the Icon list, or type a label in the Caption box.
-
Control updates to linked objects
You can set links to other programs to be updated in the following ways: automatically, when you open the destination file; manually, when you want to see the previous data before updating with the new data from the source file; or when you specifically request the update, regardless of whether automatic or manual updating is turned on.
Set a link to another program to be updated manually
-
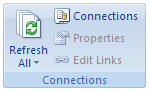
On the Data tab, in the Connections group, click Edit Links.
Note: The Edit Links command is unavailable if your file does not contain links to other files.
-
In the Source list, click the linked object that you want to update. An A in the Update column means that the link is automatic, and an M in the Update column means that the link is set to Manual update.
Tip: To select multiple linked objects, hold down CTRL and click each linked object. To select all linked objects, press CTRL+A.
-
To update a linked object only when you click Update Values, click Manual.
Set a link to another program to be updated automatically
-
On the Data tab, in the Connections group, click Edit Links.
Note: The Edit Links command is unavailable if your file does not contain links to other files.
-
In the Source list, click the linked object that you want to update. An A in the Update column means that the link will update automatically, and an M in the Update column means that the link must be updated manually.
Tip: To select multiple linked objects, hold down CTRL and click each linked object. To select all linked objects, press CTRL+A.
-
Click OK.
Issue: I can’t update the automatic links on my worksheet
The Automatic option can be overridden by the Update links to other documents Excel option.
To ensure that automatic links to OLE objects can be automatically updated:
-
Click the Microsoft Office Button
, click Excel Options, and then click the Advanced category. -
Under When calculating this workbook, make sure that the Update links to other documents check box is selected.
 , click Excel Options, and then click the Advanced category.
Update a link to another program now
-
On the Data tab, in the Connections group, click Edit Links.
Note: The Edit Links command is unavailable if your file does not contain linked information.
-
In the Source list, click the linked object that you want to update.
Tip: To select multiple linked objects, hold down CTRL and click each linked object. To select all linked objects, press CTRL+A.
-
Click Update Values.
Edit content from an OLE program
While you are in Excel, you can change the content linked or embedded from another program.
Edit a linked object in the source program
-
On the Data tab, in the Connections group, click Edit Links.
Note: The Edit Links command is unavailable if your file does not contain linked information.
-
In the Source file list, click the source for the linked object, and then click Open Source.
-
Make the changes that you want to the linked object.
-
Exit the source program to return to the destination file.
Edit an embedded object in the source program
-
Double-click the embedded object to open it.
-
Make the changes that you want to the object.
-
If you are editing the object in place within the open program, click anywhere outside of the object to return to the destination file.
If you edit the embedded object in the source program in a separate window, exit the source program to return to the destination file.
Note: Double-clicking certain embedded objects, such as video and sound clips, plays the object instead of opening a program. To edit one of these embedded objects, right-click the icon or object, point to object typeObject (for example, Media Clip Object), and then click Edit.
Edit an embedded object in a program other than the source program
-
Select the embedded object that you want to edit.
-
Right-click the icon or object, point to object typeObject (for example, Document Object), and then click Convert.
-
Do one of the following:
-
To convert the embedded object to the type that you specify in the list, click Convert to.
-
To open the embedded object as the type that you specify in the list without changing the embedded object type, click Activate.
-
Select an OLE object by using the keyboard
-
Press CTRL+G to display the Go To dialog box.
-
Click Special, select Objects, and then click OK.
-
Press TAB until the object that you want is selected.
-
Press SHIFT+F10.
-
Point to Object or Chart Object, and then click Edit.
Issue: When I double-click a linked or embedded object, a «cannot edit» message appears
This message appears when the source file or source program can’t be opened.
Make sure that the source program is available If the source program is not installed on your computer, convert the object to the file format of a program that you do have installed.
Ensure that memory is adequate Make sure that you have enough memory to run the source program. Close other programs to free up memory, if necessary.
Close all dialog boxes If the source program is running, make sure that it doesn’t have any open dialog boxes. Switch to the source program, and close any open dialog boxes.
Close the source file If the source file is a linked object, make sure that another user doesn’t have it open.
Ensure that the source file name has not changed If the source file that you want to edit is a linked object, make sure that it has the same name as it did when you created the link and that it has not been moved. Select the linked object, and then click the Edit Links command in the Connections group on the Data tab to see the name of the source file. If the source file has been renamed or moved, use the Change Source button in the Edit Links dialog box to locate the source file and reconnect the link.
Need more help?
You can always ask an expert in the Excel Tech Community or get support in the Answers community.
Dorothy wanted to learn how to insert objects into her Excel spreadsheets:
I believe that i have seen a Microsoft Excel worksheet that had a Word document embedded in it. Can you explain how can i insert Word files into Excel and in general how to embed file objects in Office? Just so you are aware, I am using Excel 365.
Thanks for the question. One of the key benefits of an integrated productivity suite, such as Office, is the ability to insert files of specific type into other files. For example – you can add Word document files into other Microsoft Office applications, namely Excel worksheets, Outlook emails and PowerPoint presentations.
This quick tutorial is aimed at explaining how you can embed Word objects (being a document, presentation, diagram, notebook) into Excel. You can use a similar process when adding docx files to PowerPoint or to other Word files.
Inserting Word docs into Microsoft Excel sheets
- First off, go ahead and open Microsoft Excel.
- Then hit File, and navigate to the Open tab.
- Now search and open for your Excel workbook. (Tip – consider pinning files for easier access in the future).
- In your Excel file, navigate to your the tab in Excel into which you would like to add the attachment/embed.
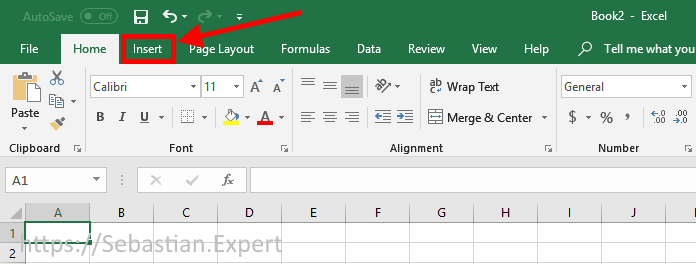
- From the Ribbon, hit Insert.
- In the right hand side of the Ribbon, hit Object (located in the Text group of the Insert tab).
- At this point, you can either add a new Word file to your worksheet or an existing one. Select Create a new file and pick Microsoft Word as the object type from the drop down list to add a brand new document or select Create from file to add an existing file to the spreadsheet.
- Now, go ahead and adjust the look and feel of your embedded object so it will fit your spreadsheet layout.
- Next, hit OK.
- And obviously, don’t forget to save your Excel spreadsheet on your computer, network drive or OneDrive.
Adding Word as attachments into Excel files
In a similar fashion you are able to insert your Word doc as an attachment to the worksheet.
Follow steps 1-6 above, but be sure of highlighting the Display as Icon and Link to File check-boxes before moving to step 8. Your document will displayed as an icon on your spreadsheet, which you can double click to open it.
Linking to a file from Word and Excel
As shown above, by using the Link to File feature, you can easily link to any embedded file or icon in your spreadsheet or document.
Notes:
- As shown above, embedded files can also be displayed as links or icons in your spreadsheet.
- The process we just outlined applies for adding any type of files (including if needed, image, graphs, equation objects and so forth) into an Excel spreadsheet.
Embedding Word documents into Excel on macOS
- Open Excel for macOS.
- Navigate and open your spreadsheet.
- Go to the Insert tab.
- Now, go ahead and hit Select Object.
- The Insert Object form will appear:

- Select Microsoft Word document to insert a brand new file, or hit the From file button to add an existing doc to your worksheet.
- Last hit OK, and don’t forget to save your file.
Finally, now that you know everything about embedding Word documents into spreadsheets, you might want to learn how to insert Excel sheets into Word docs.
Note:
- If you are using Microsoft Office on MAC, you’ll be able to embed Word documents into Excel for MAC, but not into PowerPoint presentations nor Visio diagrams.
Copying Word content into an Excel spreadsheet
A reader asked whether he is able to copy and paste between Word an Excel. A very prevalent use case for that is when you have content in a Word table and you would like to paste it into your spreadsheet. This is possible, but with a couple caveats / tricks mostly related to the pasted content formatting:
- Assuming that you have a table in your Word document, highlight it, then hit the right mouse click and hit Copy.
- Open your Excel spreadsheet and navigate to the place you would like to paste your table.
- Right click and use the Paste Options menu to set the formatting of your pasted data.
- Alternatively, use Paste Special (also available in your right mouse button) to paste as text, HTML or embed the content as a “live” Word object.
This article will show you how to easily add/attach file like PDF, Word or any other to Excel spreadsheet.
Applies to: Excel, Excel 2013, Excel 2016, Excel 2019, Excel 365, Office 365
-
Go to Insert tab

Excel 2016/2019/365 — Home tab
-
Click Object button placed in Text group.
Narrow window

Insert Object button — narrow window
Medium width window

Insert Object button — medium width window
Maximum width window
Insert Object button — max width window
-
Click Create from file and browse for the file.

Click to enlarge


Updated: 02/01/2021 by
When creating a spreadsheet in Microsoft Excel, you can use the included tool to make sure all of your words are spelled right. Sometimes, Excel does not recognize correctly-spelled words because they’re not included in its dictionary data. Consequently, you need to add them manually.
In Microsoft Excel, there are two ways to add a new word to the dictionary. Select a link below for the method you want to use and follow the steps provided.
Add new word through a custom dictionary
- In the Ribbon, click the File tab, then click Options.
- In the Excel Options window, click the Proofing option in the left navigation pane.
- Under the When correcting spelling in Microsoft Office programs header, make sure the box is unchecked for the Suggest from main dictionary only option.
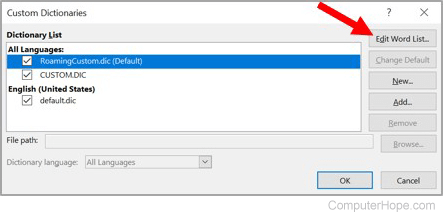
- Click the Custom Dictionaries button.
- In the Custom Dictionaries window, select the dictionary set as the default dictionary, then click the Edit Word List button.
- Type the word you want to add in the Word(s) text field.
- Click the Add button to add the word to the Microsoft Excel dictionary.
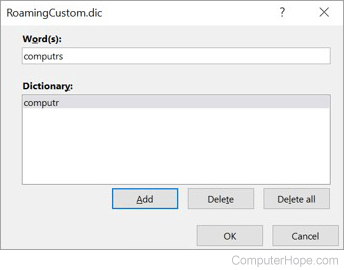
- Click the OK button on each of the open windows to save the dictionary changes.
Add new word during a spell check
- To run spell check in an Excel spreadsheet, in the Ribbon, click Review, then click Spelling, or push the F7 button on your keyboard.
- In the Spelling window that opens, any misspelled words appear. If the word is valid, click the Add to Dictionary option.

If I want to add some word before each number of a column, how can I do that.
10 s 123

24 c 235

33 s 345

46 s 346

59 s 546

62 c 277
I mean : for example I put the word «k» before each number in the first column and get
k10 s 123

k24 c 235

k33 s 345

k46 s 346

k59 s 546

k62 c 277
asked Feb 24, 2011 at 20:01
![]()
- Select All cells that want to change.
- right click and select
Format cell. - In category select
Custom. - In Type select
Generaland insert this formol —-> «k»@
answered Aug 19, 2014 at 9:41
![]()
ar.gorginar.gorgin
4,63511 gold badges58 silver badges97 bronze badges
Insert a column, for instance a new A column. Then use this function;
=»k»&B1
and copy it down.
Then you can hide the new column A if you need too.
answered Feb 24, 2011 at 20:43
![]()
Mike MengellMike Mengell
2,3022 gold badges21 silver badges35 bronze badges
Following Mike’s answer, I’d also add another step. Let’s imagine you have your data in column A.
- Insert a column with the word you want to add (column B, with k)
- apply the formula (as suggested by Mike) that merges both values in column C (C1=A1+B1)
- Copy down the formula
- Copy the values in column C (already merged)
- Paste special as ‘values’
- Remove columns A and B
Hope it helps.
Ofc, if the word you want to add will always be the same, you won’t need a column B (thus, C1=»k»+A1)
Rgds
answered Feb 24, 2011 at 20:53
![]()
Tiago CardosoTiago Cardoso
2,0371 gold badge13 silver badges31 bronze badges
3
Save a copy of your spreadsheet first (just in case).
-
Insert two new columns to the left of the numbered column.
-
Put a k in the first row of the first (new) column.
-
Copy it (the k).
-
Go to the original first column (now the third column) and leave your cursor on the first row that has data.
-
Hit ctrl and down arrow (at the same time) to jump to the bottom of the populated data range for your original first column.
-
Left arrow twice to get to the new first column, the one with a k at the very top.
-
Hit Ctrl-shift-up arrow to go to the first cell with data populated (the original k you put in), highlighting all the cells in-between your starting and ending point.
-
Use paste (ctrl-v, right-click or whatever your preferred method), and it’ll fill all those cells with a k.
-
Then use the «Concatenate» formula in the second column. Its two arguments will be the column of Ks (column A, first column) and the column with the numbers in it.
-
This will get you a column with the results of the K column and your numbers.
Hope this helps! The ctrl-shift-arrow and ctrl-arrow shortcuts are amazing for working with large datasets in Excel.
answered Dec 28, 2012 at 21:14
![]()
0
- Insert a column left to the column in question(adding column A beside column B).
- Provide the value you want to append in 1st cell of column A
- Insert a column right to the column in question ( column C)
- Add this formula -> =CONCATENATE(«A1″,»B1»)
- Drag it down to apply to all values in column
- You will find concatenated values in column C
This worked for me !
answered Aug 27, 2019 at 4:57
![]()