
WordArt is a quick way to make text stand out with special effects. You begin by picking a WordArt style from the WordArt gallery on the Insert tab, and then customize the text as you wish.


Try it!
-
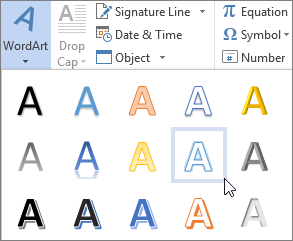
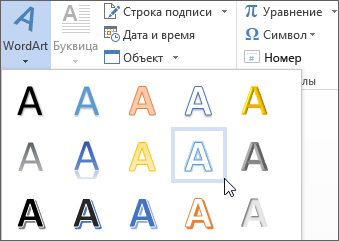
Click Insert > WordArt, and pick the WordArt style you want.

In the WordArt gallery, the letter A represents the different designs that are applied to all text you type.
Note: The WordArt icon is located in the Text group, and it may appear different depending on the program you’re using and the size of your screen. Look for one of these icons:
-
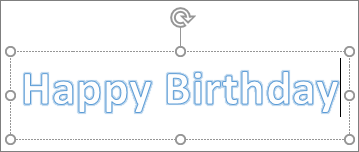
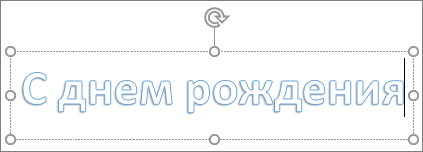
The placeholder text «Your text here» appears, with the text highlighted.
Enter your own text to replace the placeholder text.


Tips:
-
You can enter entire sentences, and even paragraphs, as WordArt. (You may have to change the font size for longer text.) And in Word, you can also convert existing text to WordArt in Word.
-
You can include symbols as WordArt text. Click the location for the symbol, and on the Insert tab, click Symbol, and pick the symbol you want.
Do more things with WordArt
Select a heading below to open it and see the detailed instructions.
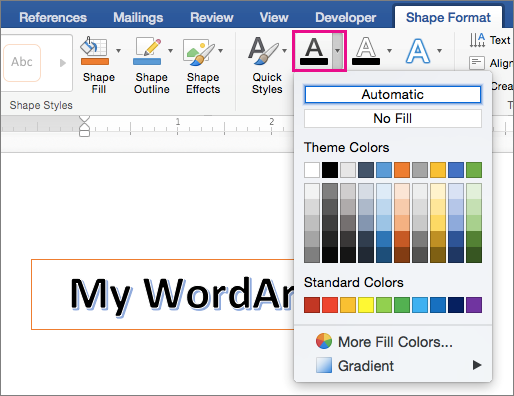
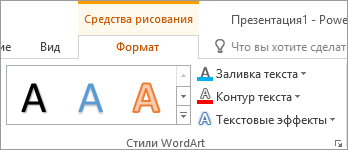
You might have tried using shape styles to change the shape of WordArt and then were puzzled that the text didn’t change. Use the text options in the WordArt Styles group instead. Shape styles and effects apply to the box and background surrounding your WordArt, not to the WordArt text. So, to add effects to your WordArt, such as shadows, rotation, curves, and fill and outline colors, you use the options in the WordArt Styles group, including Text Fill, Text Outline, and Text Effects.
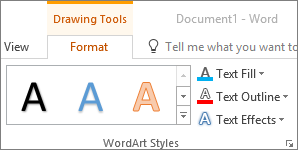
Note: Depending on your screen size, you might only see the icons for WordArt Styles.

-
Select the WordArt text or letters to change.
The Drawing Tools Format tab appears.
-
On the Drawing Tools Format tab, click Text Fill or Text Outline, and pick the color you want.
-
Click outside of your text box to see the effect.
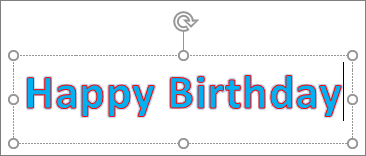
In this example, a light blue text fill and a red text outline were applied.

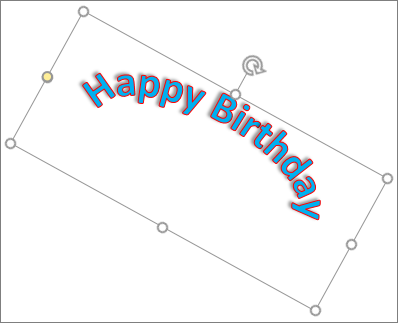
You can curve text around a circular object.
90 seconds
-
Select the WordArt text or letters to change.
The Drawing Tools Format tab appears.
-
To create a curved effect, on the Drawing Tools Format tab, click Text Effects >Transform and pick the one you want.
Important: The Text Effects
menu is not the same as the Shape Effects menu. If you don’t see Transform at the bottom of the menu, make sure you’ve clicked the Text Effects menu.In this example, the first curved transform effect is selected.
-
Click outside of your text box to see the effect.
Use the Text Effects menu to create other effects, such as shadow, reflection, glow, bevels, and 3-D rotation. This example shows WordArt with a curved transform effect and a shadow applied.
 menu is not the same as the Shape Effects
  menu. If you don’t see Transform at the bottom of the menu, make sure you’ve clicked the Text Effects menu.

-
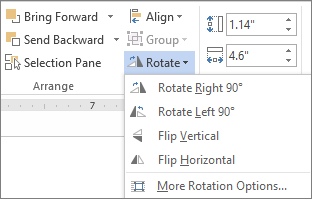
To rotate WordArt text to any angle, select it, and then drag the circular rotation handle at the top of the box.
-
To flip WordArt or rotate it 90 degrees, click the Drawing Tools Format tab, click Rotate in the Arrange group, and then select an option.
To change the font size or style of your WordArt text:
-
Select the WordArt text or letters to change.
-
On the Home tab, select options in the Font group, such as font style, font size, or underline.
-
In your Word document, select the text to convert to WordArt.
-
On the Insert tab, click WordArt, and then pick the WordArt you want.
Double-click the WordArt that you want to remove, and then press Delete.
Insert WordArt
-
Click where you want to insert decorative text in a document.
-
On the Insert tab, in the Text group, click WordArt.
-
Click any WordArt style, and start to type.
Do more things with WordArt
Select a heading below to open it and see the detailed instructions.
-
Click anywhere in the WordArt text that you want to change.
-
Under Drawing Tools, on the Format tab, click any option.
For example, you can change the direction of the WordArt text by clicking Text Direction in the Text group and choosing a new direction for the text.
Double-click the WordArt that you want to remove, and then press Delete.
Add WordArt
Excel
-
On the Insert tab, in the Text group, click WordArt, and then click the WordArt style that you want.
-
Enter your text.
-
You can add a fill or effect to a shape or text box as well as the text in the WordArt.
-
If you have a chart in your 2007 Office release document, you can replace the chart title with WordArt to give the title additional emphasis.
-
Outlook
-
On the Insert tab, in the Text group, click WordArt, and then click the WordArt style that you want.
-
Type your text in the Text box.
You can add a fill or effect to a shape or text box as well as the text in the WordArt.
PowerPoint
-
On the Insert tab, in the Text group, click WordArt, and then click the WordArt style that you want.
-
Enter your text.
-
You can add a fill or effect to a shape or text box as well as the text in the WordArt.
-
If you have a chart in your 2007 Office release document, you can replace the chart title with WordArt to give the title additional emphasis.
-
Publisher
-
On the Objectstoolbar, click Insert WordArt
. -
In the WordArt Gallery, click the WordArt that you want, and then click OK.
-
Type your text in the Text box.
If you want to change the text in the WordArt, double-click the WordArt that you want to change, and then type the new text in the Text box.
 .
.Word
-
On the Insert tab, in the Text group, click WordArt, and then click the WordArt style that you want.
-
Type your text in the Text box.
You can add a fill or effect to a shape or text boxas well as the text in the WordArt.
Do more things with WordArt
Select a heading below to open it and see the detailed instructions.
Excel
Do one or more of the following:
-
To change the text, select it, and then make the changes that you want.
-
To change the font, see Change the font or font size in Excel or Change the color of text in a worksheet.
-
To add an effect to WordArt, see Add or delete a fill, outline, or effect for text or WordArt.
-
To rotate the WordArt, see Rotate or flip a picture, shape, text box, or WordArt in Excel 2007.
-
To resize the WordArt, see Change the size of a picture, shape, text box, or WordArt.
-
To align the WordArt, see Align or arrange a picture, shape, text box, or WordArt.
-
To move the WordArt, see Move a picture, shape, text box, or WordArt.
For more information about selecting WordArt, see Select a shape or other object.
Outlook
Do one or more of the following:
-
To change the text, select it, and then make the changes that you want.
-
To change the font, see Change the size or formatting of text.
-
To add an effect to WordArt, see Add or delete a fill, outline, or effect for text or WordArt.
-
To rotate the WordArt, see Rotate or flip a picture, shape, text box, or WordArt in Outlook 2007.
-
To resize the WordArt, see Change the size of a picture, shape, text box, or WordArt.
-
To align the WordArt, see Align or arrange a picture, shape, text box, or WordArt.
-
To move the WordArt, see Move a picture, shape, text box, or WordArt.
For more information about selecting WordArt, see Select a shape or other object.
PowerPoint
Do one or more of the following:
-
To change the text, select it, and then make the changes that you want.
-
To add an effect to WordArt, see Add or delete a fill, outline, or effect for text or WordArt.
-
To rotate the WordArt, see Rotate or flip a picture, shape, text box, or WordArt in PowerPoint 2007.
-
To resize the WordArt, see Change the size of a picture, shape, text box, or WordArt.
-
To align the WordArt, see Align or arrange a picture, shape, text box, or WordArt.
-
To move the WordArt, see Move a picture, shape, text box, or WordArt.
For more information about selecting WordArt, see Select a shape or other object.
Publisher
Do one or more of the following:
-
To change the text, select it, and then make the changes that you want.
-
To change the font, see Change the font size or Change the color of text.
-
To add an effect to WordArt, see Add or delete a fill, outline, or effect for text or WordArt.
-
To resize the WordArt, see Change the size of a picture, shape, text box, or WordArt.
-
To align the WordArt, see Align or arrange a picture, shape, text box, or WordArt.
-
To move the WordArt, see Move a picture, shape, text box, or WordArt.
For more information about selecting WordArt, see Select a shape or other object.
Word
Do one or more of the following:
-
To change the text, select it, and then make the changes that you want.
-
To change the font, see Change the font size.
-
To add an effect to WordArt, see Add or delete a fill, outline, or effect for text or WordArt.
-
To rotate the WordArt, see Rotate or flip a picture, shape, or WordArt.
-
To resize the WordArt, see Change the size of a picture, shape, text box, or WordArt.
-
To align the WordArt, see Align or arrange a picture, shape, text box, or WordArt.
-
To move the WordArt, see Move a picture, shape, text box, or WordArt.
For more information about selecting WordArt, see Select a shape or other object.
Excel
When you remove the WordArt style from your text, the text remains and changes to plain text.
-
Select the WordArt text that you want to remove the WordArt style from.
-
Under Drawing Tools, on the Format tab, in the WordArt Styles group, click the More button
, and then click Clear WordArt.To remove the WordArt style from part of your text, select the text that you want to remove the WordArt style from, and then follow the steps above.
 , and then click Clear WordArt.
PowerPoint
When you remove the WordArt style from your text, the text remains and changes to plain text.
-
Select the WordArt text that you want to remove the WordArt style from.
-
Under Drawing Tools, on the Format tab, in the WordArt Styles group, click the More button
, and then click Clear WordArt.To remove the WordArt style from part of your text, select the text that you want to remove the WordArt style from, and then follow the steps above.
Do the following for all programs listed in the Applies To at the top of the article.
-
Double-click the WordArt that you want to remove to select it, and then press Delete.
-
In Office for Mac 2016 or later, select the Insert tab on the Ribbon.
or
In Office for Mac 2011, select Insert on the toolbar.
-
Select WordArt, and pick the WordArt style you want.
In the WordArt gallery, the letter A represents the different designs that are applied to all text you type.
-
Enter your text.

Tip: You can also include symbols as WordArt text. To do so, click the location in your document for the symbol, and on the Insert tab, click Advanced Symbol, and pick the symbol you want.
Do more things with WordArt
Select a heading below to open it and see the detailed instructions.
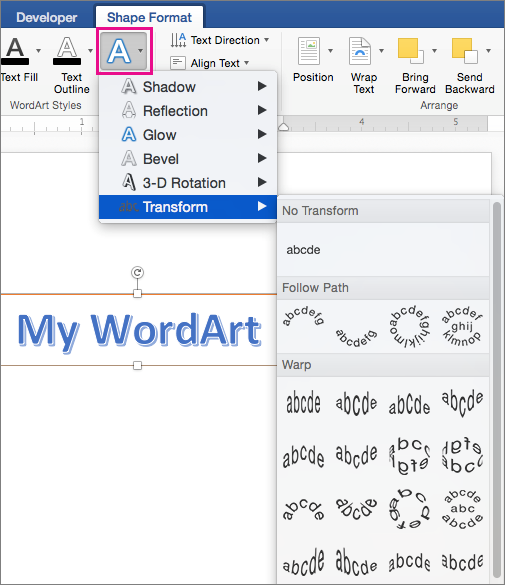
To create curved or circular WordArt text, you add a Transform text effect.
-
Select the WordArt.
When you do that, the Shape Format tab appears.
-
Click Text Effects > Transform and pick the effect you want.

To change the color of the WordArt text, you change the Text Fill.
-
Select the WordArt text or letters to change.
When you do that, the Shape Format tab appears.
-
Click Text Fill, and pick the color you want.
Tip: To change the outline of the WordArt text, on the Shape Format tab, click Text Outline.
-
Select the text to convert to WordArt.
-
On the Insert tab, click WordArt, and then pick the WordArt style you want.
In Microsoft 365 for the web you can see WordArt that’s already in your document, presentation, or worksheet, but to add more WordArt you need to open or edit the doc in the desktop version of Word, PowerPoint, or Excel.
In Microsoft 365 for the web, you can use the Font features on the Home tab to change the font color and size, and apply bolding, italics, or underlines to your text.
If you don’t have the desktop version of Word or PowerPoint, you can try it or buy it in the latest version of Office now.
Стили WordArt обеспечивают быстрый способ выделения текста с помощью специальных эффектов. Стиль WordArt можно выбрать в коллекции WordArt на вкладке Вставка, а затем настроить текст по желанию.


Проверьте, как это работает!
-
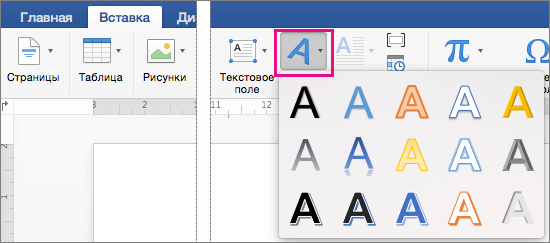
Откройте вкладку Вставка, нажмите кнопку WordArt и выберите нужный стиль WordArt.
В коллекции WordArt буква А представляет разные варианты дизайна, применяемые ко всему введенному тексту.
Примечание: Значок WordArt находится в группе Текст и может выглядеть по-разному в зависимости от используемой программы и размеров экрана. Ищите один из следующих значков:
-
Появится выделенный замещающий текст «Поместите здесь ваш текст».
Введите вместо замещающего текста свой собственный.


Советы:
-
В качестве объектов WordArt можно вводить целые предложения и даже абзацы. (Если текст слишком длинный, может потребоваться изменить размер шрифта.) В приложении Word вы также можете преобразовать существующий текст в объект WordArt.
-
Можно включить символы как текст WordArt. Щелкните место для символа, а затем на вкладке Вставка нажмите кнопку Символ и выберите нужный символ.
Дополнительные действия с объектами WordArt
Щелкните заголовок раздела ниже, чтобы открыть подробные инструкции.
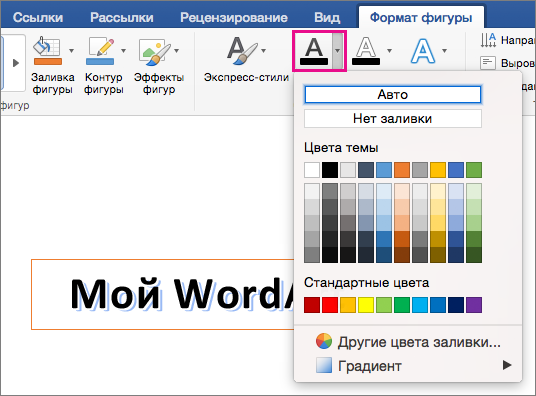
Возможно, вы пытались использовать стили фигур, чтобы изменить форму объекта WordArt, но текст не изменялся. Используйте вместо этого параметры текста в группе Стили WordArt. Стили и эффекты фигуры применяются только к полю и фону, окружающим текст WordArt, но не к самому тексту. Таким образом, чтобы добавить эффекты к объекту WordArt, например тени, поворот, изгиб, а также цвета заливки и контура, следует использовать параметры в группе Стили WordArt, в том числе Заливка текста, Контур текста и Текстовые эффекты.
Примечание: В зависимости от размера экрана могут отображаться только значки стилей WordArt.
-
Выделите текст или буквы WordArt, которые нужно изменить.
Откроется вкладка Средства рисования — Формат.
-
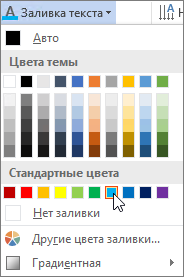
На вкладке Средства рисования — Формат нажмите кнопку Заливка текста или Контур текста и выберите нужный цвет.
-
Щелкните за пределами текстового поля, чтобы увидеть результат.
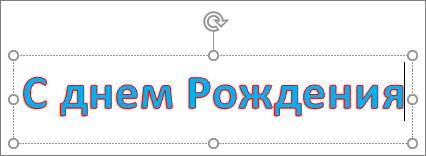
В этом примере применены голубая заливка текста и красный контур.
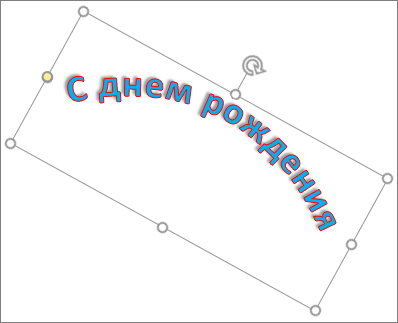
Текст может быть изогнут вокруг какого-либо круглого объекта.
90 секунд
-
Выделите текст или буквы WordArt, которые нужно изменить.
Откроется вкладка Средства рисования — Формат.
-
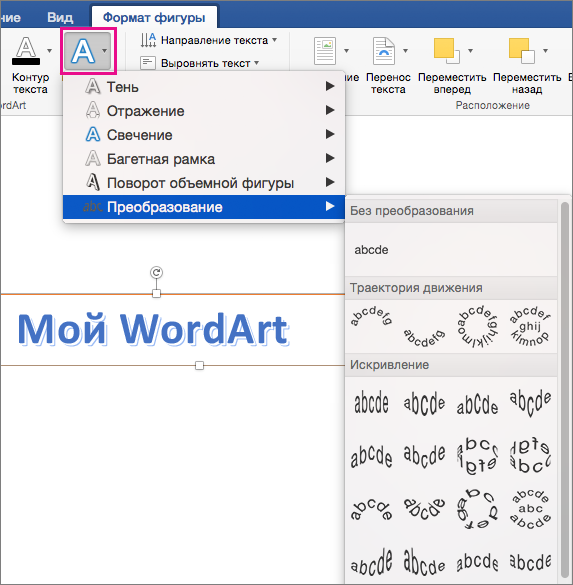
Чтобы создать эффект изгиба, на вкладке Средства рисования — Формат выберите пункт Текстовые эффекты > Преобразовать и выберите нужный вариант.
Важно:
Текстовые эффекты и Эффекты фигуры — это разные меню. Если внизу меню нет команды Преобразовать, убедитесь в том, что открыли именно меню Текстовые эффекты.В этом примере выбран первый эффект изгиба.
-
Щелкните за пределами текстового поля, чтобы увидеть результат.
Используйте меню Текстовые эффекты, чтобы создать другие эффекты, такие как тень, отражение, подсветка, рельеф и поворот объемной фигуры. В этом примере показан объект WordArt с примененными эффектами искривления и тени.
 и Эффекты фигуры
  — это разные меню. Если внизу меню нет команды Преобразовать, убедитесь в том, что открыли именно меню Текстовые эффекты.
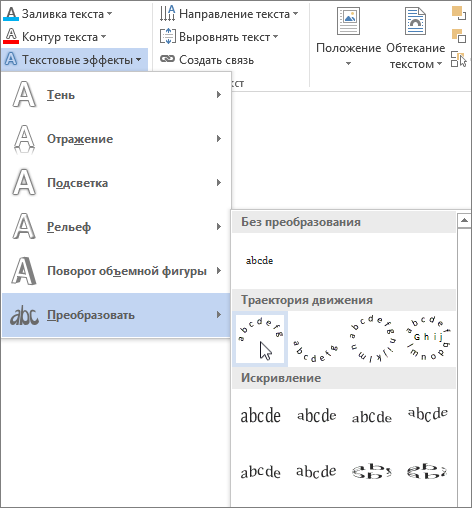

-
Чтобы повернуть текст WordArt на любой угол, выделите его и перетащите круглый маркер поворота в верхней части поля.
-
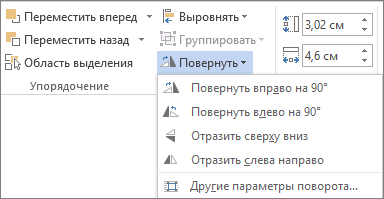
Чтобы отразить текст WordArt или повернуть его на 90 градусов, выберите вкладку Средства рисования — Формат, нажмите кнопку Повернуть в группе Упорядочение и выберите один из вариантов.
Чтобы изменить размер или начертание шрифта текста WordArt, выполните указанные ниже действия.
-
Выделите текст или буквы WordArt, которые нужно изменить.
-
На вкладке Главная выберите параметры в группе Шрифт, такие как начертание, размер шрифта или подчеркивание.
-
В документе Word выделите текст, который нужно преобразовать в объект WordArt.
-
На вкладке Вставка нажмите кнопку WordArt и выберите нужный стиль WordArt.
Дважды щелкните объект WordArt, который нужно удалить, затем нажмите клавишу DELETE.
Вставка текста WordArt
-
Щелкните документ там, где хотите вставить декоративный текст.
-
На вкладке Вставка в группе Текст щелкните элемент WordArt.
-
Выберите любой стиль WordArt и начните вводить текст.

Дополнительные действия с объектами WordArt
Щелкните заголовок раздела ниже, чтобы открыть подробные инструкции.
-
Щелкните текст WordArt, который вы хотите изменить.
-
В разделе Средства рисования перейдите на вкладку Формат и выберите нужный элемент.
Например, чтобы изменить направление текста WordArt, в группе Текст щелкните Направление текста и выберите новое направление.
Дважды щелкните объект WordArt, который нужно удалить, затем нажмите клавишу DELETE.
Добавление объекта WordArt
Excel
-
На вкладке Вставка в группе Текст нажмите кнопку WordArt и выберите нужный стиль WordArt.
-
Введите текст.
-
Вы можете добавить заливку или эффект к фигуре или надписи, а также текст в объект WordArt.
-
Если в документе 2007 Office (выпуск) есть диаграмма, для выделения ее заголовка можно заменить его объектом WordArt.
-
Outlook
-
На вкладке Вставка в группе Текст нажмите кнопку WordArt и выберите нужный стиль WordArt.
-
Введите текст в поле Текст.
Вы можете добавить заливку или эффект к фигуре или надписи, а также текст в объект WordArt.
PowerPoint
-
На вкладке Вставка в группе Текст нажмите кнопку WordArt и выберите нужный стиль WordArt.
-
Введите текст.
-
Вы можете добавить заливку или эффект к фигуре или надписи, а также текст в объект WordArt.
-
Если в документе 2007 Office (выпуск) есть диаграмма, для выделения ее заголовка можно заменить его объектом WordArt.
-
Publisher
-
На панели инструментов Объекты нажмите кнопку Вставить объект WordArt
. -
В списке Коллекция WordArt выберите нужный объект WordArt, а затем нажмите кнопку ОК.
-
Введите текст в поле Текст.
Для изменения текста в объекте WordArt дважды щелкните объект, а затем введите новый текст в поле Текст.
 .
.Word
-
На вкладке Вставка в группе Текст нажмите кнопку WordArt и выберите нужный стиль WordArt.
-
Введите текст в поле Текст.
Вы можете добавить заливку или эффект к фигуре или надписи, а также текст в объект WordArt.
Дополнительные действия с объектами WordArt
Щелкните заголовок раздела ниже, чтобы открыть подробные инструкции.
Excel
Выполните одно или несколько из указанных ниже действий.
-
Чтобы изменить текст, выделите его, а затем внесите необходимые изменения.
-
Сведения о том, как изменить шрифт, см. в статье Изменение шрифта или размера шрифта в Excel или Изменение цвета текста на листе.
-
Чтобы добавить эффект, см. статью Добавление и удаление заливки, контура и эффектов для надписей и объектов WordArt.
-
Чтобы повернуть объект WordArt, см. статью Поворот или отражение рисунка, фигуры, надписи или объекта WordArt в Excel 2007.
-
Чтобы изменить размер объекта WordArt, см. статью Изменение размера рисунка, фигуры, надписи или объекта WordArt.
-
Чтобы выровнять объект WordArt, см. статью Выравнивание или расположение рисунка, фигуры, надписи или объекта WordArt.
-
Чтобы переместить объект WordArt, см. статью Перемещение рисунка, фигуры, надписи или объекта WordArt.
Дополнительные сведения о выделении объектов WordArt см. в статье Выделение фигур и других объектов.
Outlook
Выполните одно или несколько из указанных ниже действий.
-
Чтобы изменить текст, выделите его, а затем внесите необходимые изменения.
-
Чтобы узнать, как изменить шрифт, см. статью Изменение размера и форматирование текста.
-
Чтобы добавить эффект, см. статью Добавление и удаление заливки, контура и эффектов для надписей и объектов WordArt.
-
Чтобы узнать, как повернуть объект WordArt, см. статью Поворот и отражение рисунка, фигуры, надписи или объекта WordArt в Outlook 2007.
-
Чтобы изменить размер объекта WordArt, см. статью Изменение размера рисунка, фигуры, надписи или объекта WordArt.
-
Чтобы выровнять объект WordArt, см. статью Выравнивание или расположение рисунка, фигуры, надписи или объекта WordArt.
-
Чтобы переместить объект WordArt, см. статью Перемещение рисунка, фигуры, надписи или объекта WordArt.
Дополнительные сведения о выделении объектов WordArt см. в статье Выделение фигур и других объектов.
PowerPoint
Выполните одно или несколько из указанных ниже действий.
-
Чтобы изменить текст, выделите его, а затем внесите необходимые изменения.
-
Чтобы добавить эффект, см. статью Добавление и удаление заливки, контура и эффектов для надписей и объектов WordArt.
-
Чтобы повернуть объект WordArt, см. статью Поворот или отражение рисунка, фигуры, надписи или объекта WordArt в PowerPoint 2007.
-
Чтобы изменить размер объекта WordArt, см. статью Изменение размера рисунка, фигуры, надписи или объекта WordArt.
-
Чтобы выровнять объект WordArt, см. статью Выравнивание или расположение рисунка, фигуры, надписи или объекта WordArt.
-
Чтобы переместить объект WordArt, см. статью Перемещение рисунка, фигуры, надписи или объекта WordArt.
Дополнительные сведения о выделении объектов WordArt см. в статье Выделение фигур и других объектов.
Publisher
Выполните одно или несколько из указанных ниже действий.
-
Чтобы изменить текст, выделите его, а затем внесите необходимые изменения.
-
Чтобы изменить шрифт, см. статью Изменение размера шрифта или Изменение цвета текста.
-
Чтобы добавить эффект, см. статью Добавление и удаление заливки, контура и эффектов для надписей и объектов WordArt.
-
Чтобы изменить размер объекта WordArt, см. статью Изменение размера рисунка, фигуры, надписи или объекта WordArt.
-
Чтобы выровнять объект WordArt, см. статью Выравнивание или расположение рисунка, фигуры, надписи или объекта WordArt.
-
Чтобы переместить объект WordArt, см. статью Перемещение рисунка, фигуры, надписи или объекта WordArt.
Дополнительные сведения о выделении объектов WordArt см. в статье Выделение фигур и других объектов.
Word
Выполните одно или несколько из указанных ниже действий.
-
Чтобы изменить текст, выделите его, а затем внесите необходимые изменения.
-
Чтобы изменить шрифт, см. статью Изменение размера шрифта.
-
Чтобы добавить эффект, см. статью Добавление и удаление заливки, контура и эффектов для надписей и объектов WordArt.
-
Чтобы повернуть объект WordArt, см. статью Поворот или отражение рисунка, фигуры или объекта WordArt.
-
Чтобы изменить размер объекта WordArt, см. статью Изменение размера рисунка, фигуры, надписи или объекта WordArt.
-
Чтобы выровнять объект WordArt, см. статью Выравнивание или расположение рисунка, фигуры, надписи или объекта WordArt.
-
Чтобы переместить объект WordArt, см. статью Перемещение рисунка, фигуры, надписи или объекта WordArt.
Дополнительные сведения о выделении объектов WordArt см. в статье Выделение фигур и других объектов.
Excel
При удалении стиля WordArt из надписи сама надпись остается в виде обычного текста.
-
Выделите текст WordArt, из которого вы хотите удалить стиль WordArt.
-
В разделе Средства рисования на вкладке Формат в группе Стили WordArt нажмите кнопку Дополнительные параметры
, а затем выберите Очистить WordArt.Для удаления стиля WordArt из части текста выделите текст, а затем выполните шаги, описанные выше.
 , а затем выберите Очистить WordArt.
PowerPoint
При удалении стиля WordArt из надписи сама надпись остается в виде обычного текста.
-
Выделите текст WordArt, из которого вы хотите удалить стиль WordArt.
-
В разделе Средства рисования на вкладке Формат в группе Стили WordArt нажмите кнопку Дополнительные параметры
, а затем выберите Очистить WordArt.Для удаления стиля WordArt из части текста выделите текст, а затем выполните шаги, описанные выше.
Эти действия относятся ко всем программам, перечисленным в разделе «Применяется к» вверху этой статьи.
-
Дважды щелкните объект WordArt, чтобы выделить его, а затем нажмите клавишу DELETE.
-
В Office для Mac 2016 или более поздней версии на ленте откройте вкладку Вставка.
Или
В Office для Mac 2011 на панели инструментов выберите пункт Вставка.
-
Нажмите кнопку WordArt и выберите нужный стиль WordArt.
В коллекции WordArt буква А представляет разные варианты дизайна, применяемые ко всему введенному тексту.
-
Введите текст.
Совет: В текст WordArt можно также преобразовать символы. Для этого щелкните в документе место для символа, а затем на вкладке Вставка нажмите кнопку Дополнительные символы и выберите нужный символ.
Дополнительные действия с объектами WordArt
Щелкните заголовок раздела ниже, чтобы открыть подробные инструкции.
Для создания изогнутого или кругового текста WordArt добавьте текстовый эффект Преобразование.
-
Выделите текст WordArt.
После этого появится вкладка Формат фигуры.
-
Щелкните Текстовые эффекты > Преобразование и выберите нужный эффект.

Чтобы изменить цвет текста WordArt, настройте параметр Заливка текста.
-
Выделите текст или буквы WordArt, которые нужно изменить.
После этого появится вкладка Формат фигуры.
-
Щелкните Заливка текста и выберите нужный цвет.
Совет: Чтобы изменить контур текста WordArt, на вкладке Формат фигуры щелкните Контур текста.
-
Выделите текст, к которому нужно применить стиль WordArt.
-
На вкладке Вставка нажмите кнопку WordArt и выберите нужный стиль WordArt.
В Microsoft 365 для Интернета вы можете просматривать объекты WordArt, которые уже содержатся в документе, презентации или на листе, но чтобы добавить другие объекты WordArt, нужно открыть или изменить файл в классической версии Word, PowerPoint или Excel.
Чтобы изменить цвет или размер шрифта, применить к тексту полужирное, курсивное или подчеркнутое начертание, в Microsoft 365 для Интернета можно использовать команды из группы Шрифт на вкладке Главная.
Если у вас нет классического приложения Word или PowerPoint, вы можете скачать пробную версию или купить его в составе последней версии Office.
Элементы WordArt – это декоративный текст, применяемый, как правило, для красивого оформления статей в MS Word. Вставить такой текст можно в любую часть статьи, также можно изменять угол наклона текста и прочие параметры.
Содержание:
- Добавление элементов WordArt в MS Word
- Оформление элементов WordArt в MS Word
- Первый пример изменения направления текста:
- Второй пример изменения направления текста:
- Видео версия статьи
Для того, чтобы добавить фигуры WordArt в MS Word, переходим во вкладку «Вставка» и выбираем пункт «WordArt». Ставим курсор мыши в то место, где хотим разместить фигуры WordArt (их можно перенести, если Вы уже вставили их в другом месте) и в появившемся поле пишем все, что нашей душе угодно.
 Например, нам нужно сделать красивый заголовок для статьи о животных.

Оформление элементов WordArt в MS Word
Для данного типа текста применимы те же виды форматирования, что и для обычного, т.е. его также можно сделать курсивом, жирным, подчеркнутым, можно изменять шрифт и регистр букв – разница лишь в самом внешнем виде текста (наличие тени, бликов, переходов и пр.). Для того, чтобы изменить направление текста, чтобы надпись была, скажем, сверху вниз или сбоку, достаточно просто выделить набранный Вами текст в указанном поле, после чего мы автоматически попадаем на вкладку форматирования и жмем на иконку «Направление текста», далее из приведенных вариантов, выбираем необходимый нам.
 На этой же вкладке можно изменить и оформление уже набранного в WordArt текста, и добавить фон, а также добавить интересные эффекты.
Первый пример изменения направления текста:

Второй пример изменения направления текста:
Если Вы хотите, чтоб текст был под некоторым углом и предложенные варианты Вас не устраивают, можно повернуть текст вручную. Для этого жмем на поле с текстом и зажав зеленый маячок вверху границы поля, поворачиваем в нужную сторону на нужный угол. Этим же способом можно и передвинуть текст в любое другое место, только перемещение начинаем зажав курсор мыши в виде крестика из стрелочек.

Как упоминалось выше, Вы можете выбрать любую форму, вид и направление текста, добавить/убрать тень и зеркальное отражение и пр. в меню «Текстовые эффекты» на вкладке средств рисования, появляющейся при нажатии на поле с текстом WordArt.
В этом видео показано как вставить фигуры WordArt в MS Word:
Рекомендуем смотреть видео в полноэкранном режиме, в настойках качества выбирайте 1080 HD, не забывайте подписываться на канал в YouTube, там Вы найдете много интересного видео, которое выходит достаточно часто. Приятного просмотра!
С уважением, авторы сайта Компьютерапия
Понравилась статья? Поделитесь ею с друзьями и напишите отзыв в комментариях!
-
Go to Insert > WordArt
-
Pick the WordArt style you want.
-
Type your text.
Note: To convert existing text to WordArt, select the text, and then select Insert > WordArt.
Change the color
-
Select the WordArt text to change.
-
On Shape Format or Drawing Tools Format, select Text Fill or Text Outline, and pick the color you want.
-
Click or tap outside of your text box to see the effect.
Choose a text effect
-
Select the WordArt text to change.
-
Go to Shape Format or Drawing Tools Format > Text Effects >Transform.
-
Pick the effect you want.
-
Click outside of your text box to see the effect.
For more on shaping WordArt, see Curve text around a circle or other shape.
Rotate it
-
Select the WordArt, and then drag the circular rotation handle at the top of the box.
-
To flip WordArt or rotate it 90 degrees, go to Shape Format or Drawing Tools Format > Rotate, and then select an option.
-
Select the WordArt text to change.
-
Go to Home and select options such as font style, font size, or underline.
Double-click the WordArt that you want to remove, and then press Delete.
-
Go to Insert > WordArt.
-
Pick the WordArt style you want.
-
Type your text.
Note: To convert existing text to WordArt, select the text, and then select Insert > WordArt.
-
Select the WordArt text to change.
When you do that, the Shape Format tab appears.
-
Go to Shape Format > Text Fill, and pick the color you want.
-
To change the outline of the WordArt text, go to Shape Format > Text Outline and pick a color.
In Word for the web you can see WordArt that’s already in your document, but to add more WordArt you need to open or edit the doc in the desktop version of Word.
You can use the Font features on the Home tab to change the font color and size, and apply bolding, italics, or underlines to your text.
In this article we will show you how to use word art in google slides presentation.
What is Word Art in Google Slides?
WordArt is an application in Microsoft Office that enables you to create and edit a text with special effects like textures, fonts, colors, size, alignment and more. It can be added to any slide. In this tutorial I will teach you how to add WordArt objects in google slides presentation and how you can modify the WordArt styles by changing the color, font, textures, sizes and so on. At the end of this tutorial, you will learn enough features to enhance your google slides presentation using WordArt.
If you are interested to learn about how you can use word art in Google Docs, please follow the article below.
How to Do Word Art in Google Docs (Complete Guide)
How to Use Word Art in Google Slides
In this lesson, you’ll learn how to insert WordArt on your google slides and modify it.
Step 1: open an untitled presentation.
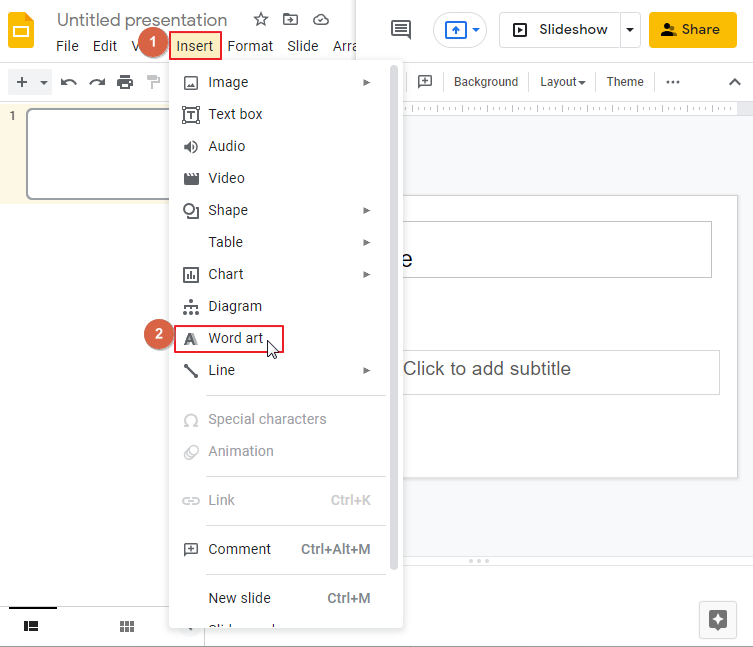
Step 2: Add the texts that you want to use in word art. Click on Insert > Click on Word Art.
Step 3: As soon as you click on word art, a small text box will appear at the top o the slide. Type the text that you want to use as word art.
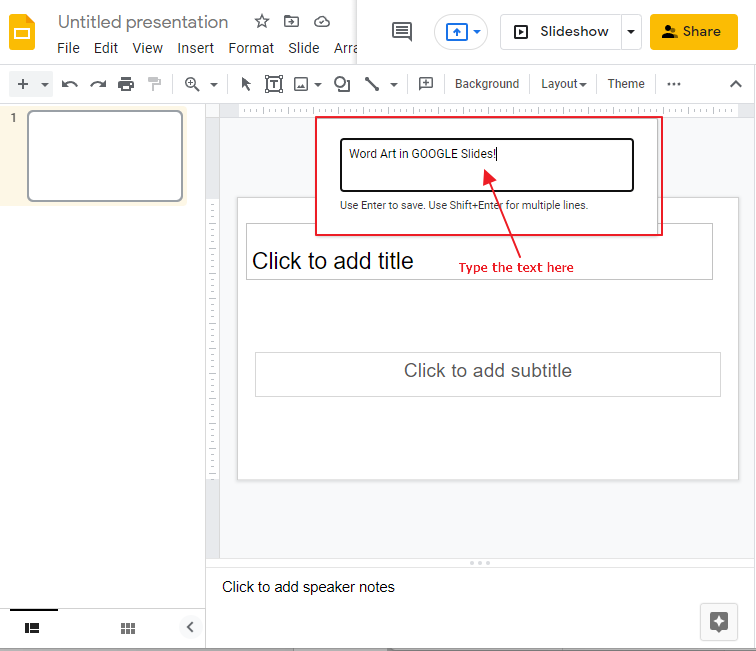
Press Enter when done. So that the text will appear on your slide.
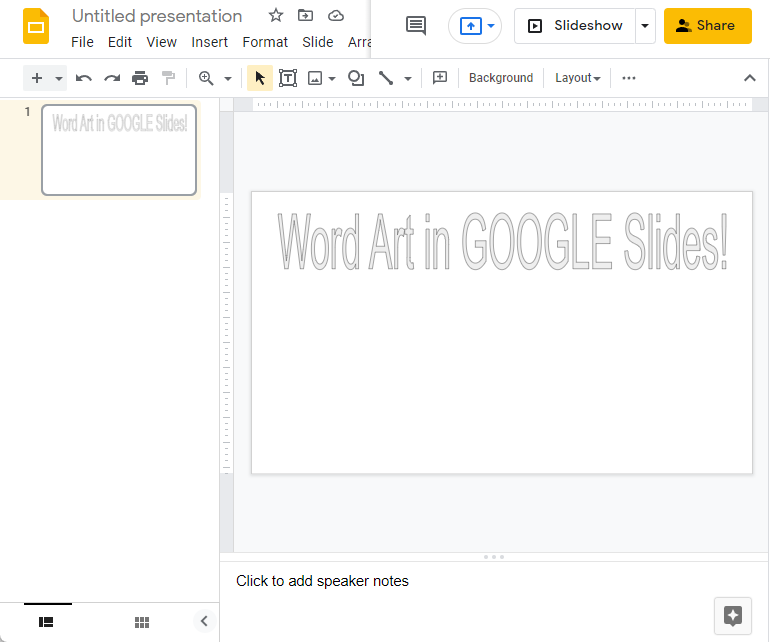
Step 4: Now you can fill colors in the word art to make it look appealing. Select the text so that the fil color icon enables. Click on Fill color. Select a color according to your desire.
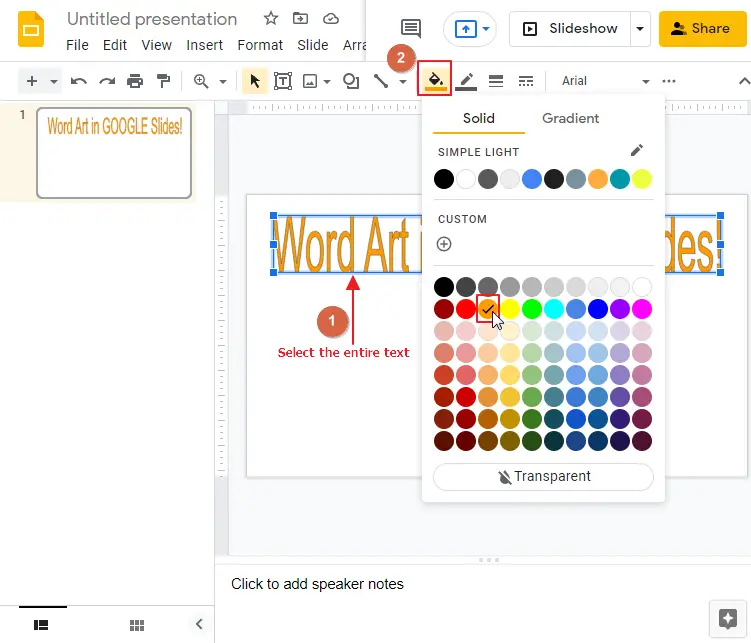
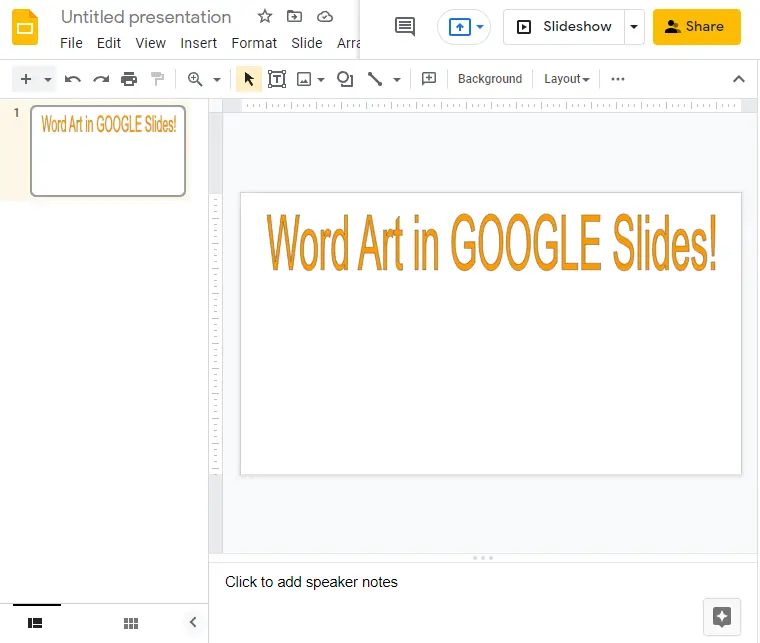
Step 5: As soon as you select a color. The color is applied to your word art. You can change the color anytime as well if you don’t like the existing color. So the final look is,
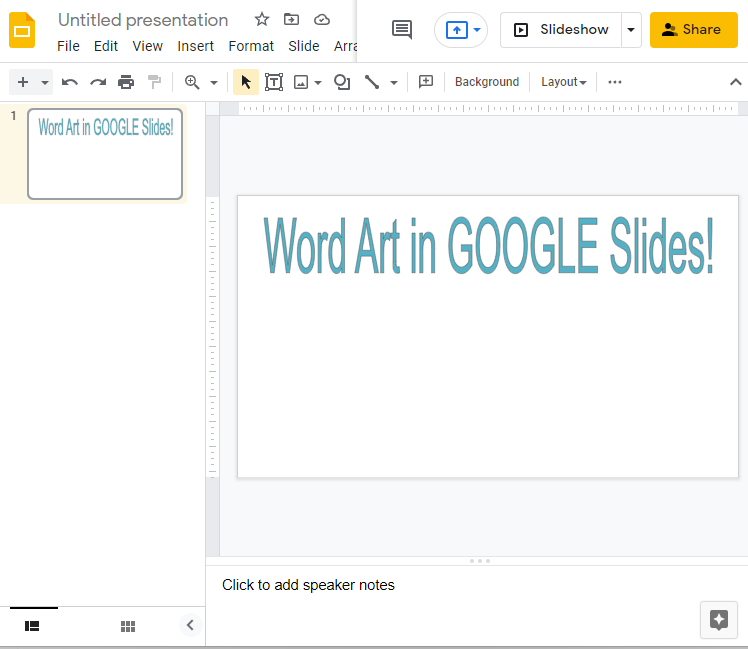
Another example with different color,
Another thing you can do is, adding some effect to your word art.
How to Do or Add Word Art Effect in Google Slides
Step 1: Select the text so that Format Option enables. Click on Format options.
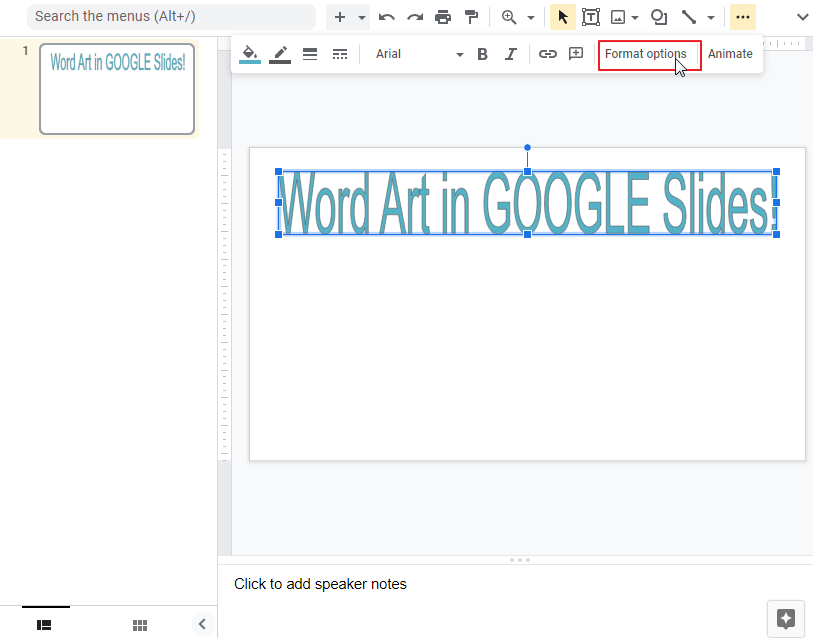
Inside Format option there are,
- Size and rotation
- Position
- Drop shadow
- Reflect
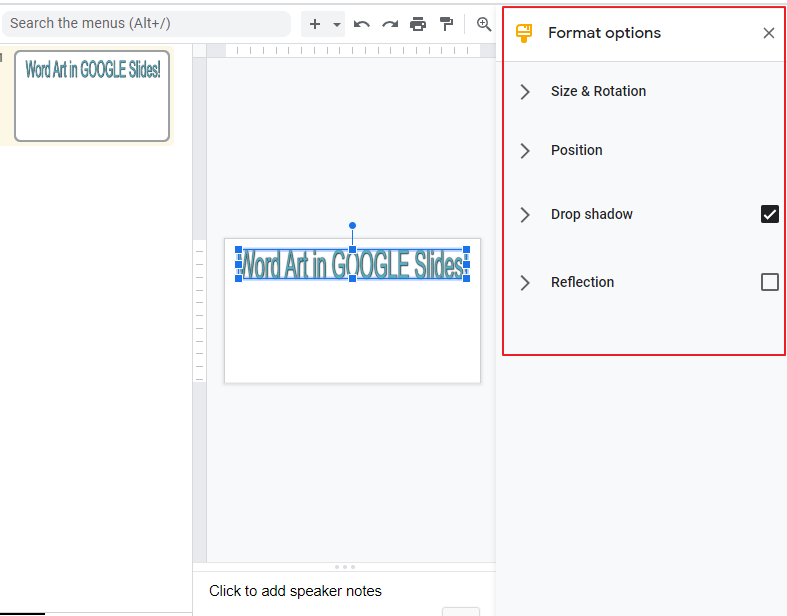
NOTE: you can change size and rotation, position if needed by changing parameters from the above mentioned Format options available in google slides.
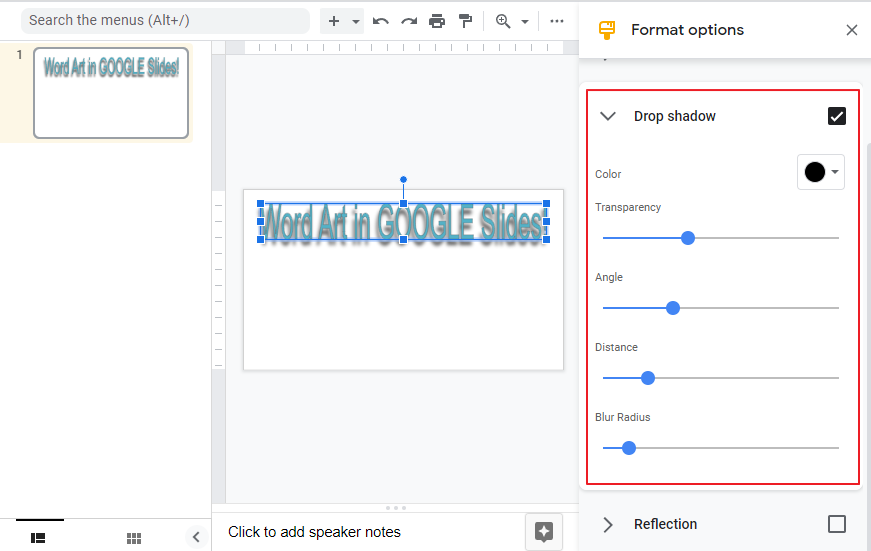
Step 2: I am going to focus on shadow. To add shadow, Click on Drop shadow option. There are Transparency, Angle, Distance, Blur Radius. Set the options according to your desire so that the effects will appear in your Word Art.
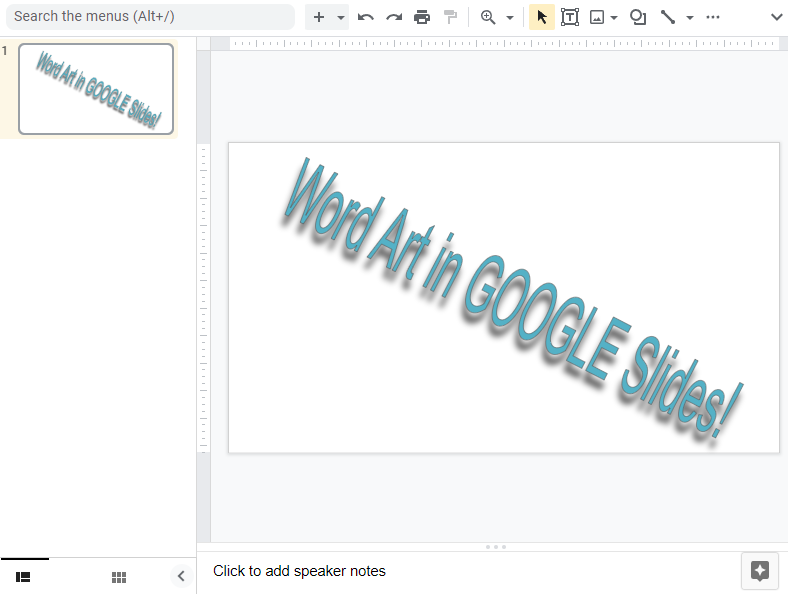
Notice that, there is a little handle up at the top of the word art text box.
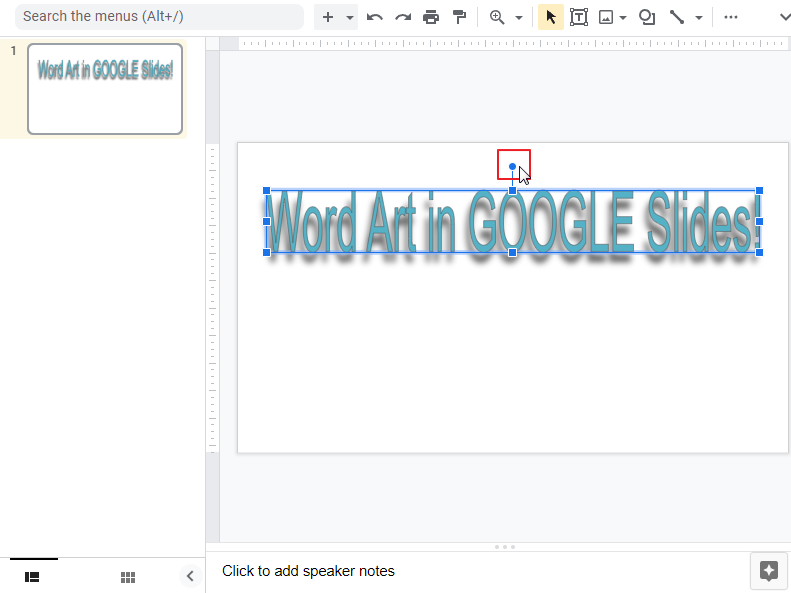
Select the handle to move the word art to right or left. You can change the angle to any extent you want.
Conclusion
Well. That’s it! We hope you enjoyed the article as much as I did. In case you missed some concepts or if you want to learn more about this topic please feel free to check our other lectures in this series.
![]()