
Insert a table of contents
A table of contents in Word is based on the headings in your document.

Create the table of contents
-
Put your cursor where you want to add the table of contents.
-
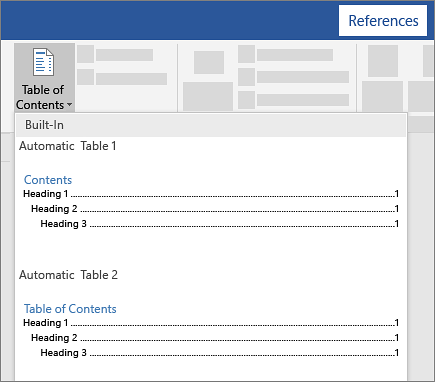
Go to References > Table of Contents. and choose an automatic style.

-
If you make changes to your document that affect the table of contents, update the table of contents by right-clicking the table of contents and choosing Update Field.
To update your table of contents manually, see Update a table of contents.
If you have missing entries
Missing entries often happen because headings aren’t formatted as headings.
-
For each heading that you want in the table of contents, select the heading text.
-
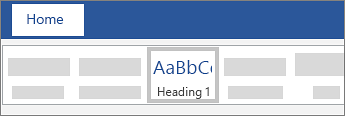
Go to Home > Styles, and then choose Heading 1.
-
Update your table of contents.
To update your table of contents manually, see Update a table of contents.
Create the table of contents
Word uses the headings in your document to build an automatic table of contents that can be updated when you change the heading text, sequence, or level.
-
Click where you want to insert the table of contents – usually near the beginning of a document.
-
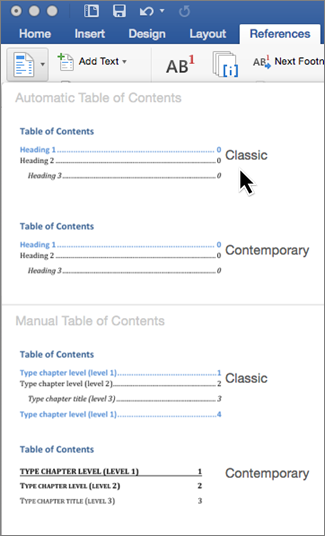
Click References > Table of Contents and then choose an Automatic Table of Contents style from the list.
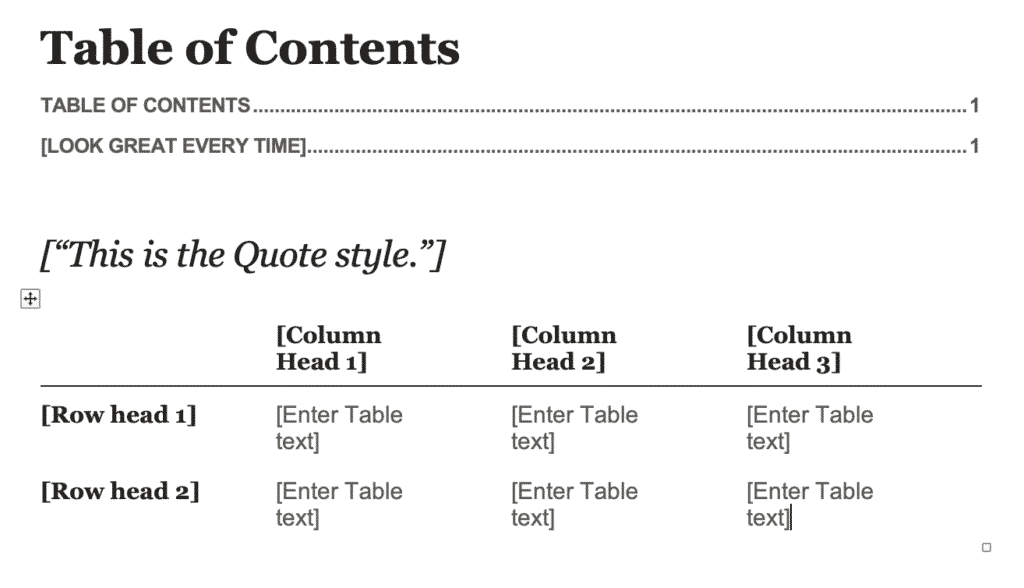
Note: If you use a Manual Table of Contents style, Word won’t use your headings to create a table of contents and won’t be able to update it automatically. Instead, Word will use placeholder text to create the look of a table of contents so you can manually type each entry into the table of contents. To update your manual table of contents, see Update a table of contents.
If you want to Format or customize your table of contents, you can. For example, you can change the font, the number of heading levels, and whether to show dotted lines between entries and page numbers.
If you have missing entries
Missing entries often happen because headings aren’t formatted as headings.
-
For each heading that you want in the table of contents, select the heading text.
-
Go to Home > Styles, and then choose Heading 1.
-
Update your table of contents.
To update your table of contents manually, see Update a table of contents.
Word uses the headings in your document to build an automatic table of contents that can be updated when you change the heading text, sequence, or level.
-
Click where you want to insert the table of contents—usually near the beginning of the document.
-
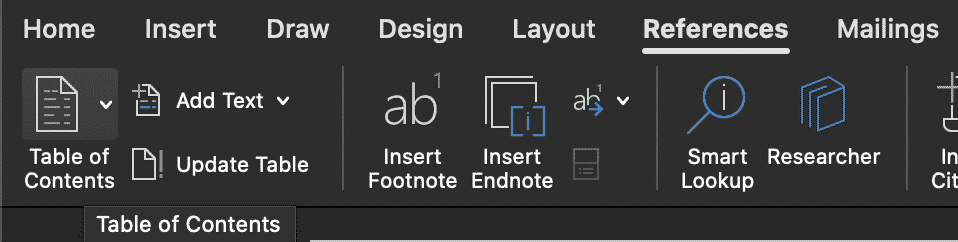
On the toolbar ribbon, select References.
-
Near the left end, select Insert Table of Contents. (Or select Table of Contents > Insert Table of Contents.
The table of contents is inserted, showing the headings and page numbering in your document.
If you make changes to your document that affect the table of contents, you can update it by right-clicking the table and selecting Update Table of Contents.
Get the learning guide
For a hands-on guide that steps you through the process of creating a table of contents, download our Table of Contents tutorial. Or, in desktop Word, go to File > New, and search for table of contents.
See Also
Update a table of contents
Need more help?
![]()
Download Article
![]()
Download Article
- Adding a Table of Contents
- Updating the Table of Contents
- Stylizing the Table of Contents
- Video
|
|
|
This wikiHow teaches you how to customize and update the table of contents in your Word document. When you create a table of contents in Word, page numbers are added automatically based on the headings you’ve added to each section. Word makes it easy to customize the way the page numbers and section titles appear on the table. If you make changes to your document that affects your section headers or page numbers, you’ll need to choose the Update Table option so the table of contents remains correct.
-
1
Format the headings of each section of your document. Word’s table of contents builder automatically generates a table of contents based on the headings in your document.[1]
This means each section that you want represented in your table of contents must have a properly-formatted heading.- If a section should appear as a primary section in the table of contents, select its heading, click the Home tab, and then select Heading 1 on the «Styles» panel.
- To add a sub-section to the primary section in the table of contents, give that section a Heading 2 header: Select its heading and choose Heading 2 from the Styles section.
- You can can also use Heading 3, Heading 4, etc., to add even more pages to your table of contents.
- Make sure any page you want to include in the table of contents has a heading.
-
2
Click the location where you want to insert the table of contents. Typically this will be at the beginning of your document.
Advertisement
-
3
Click the References tab. It’s at the top of Word.
-
4
Click Table of Contents on the toolbar. It’s at the upper-left corner of Word. A list of Table of Contents styles will expand.
-
5
Select an automatic style template. Several style options appear for your table of contents—choose one of the suggested styles to get started. Once selected, this will add a table of contents that lists the page numbers for each of your formatted sections.


Advertisement
-
1
Click the References tab. It’s at the top of Word.[2]
- Use this method if you’ve made a change (changing a heading, adding/removing pages) to your document and need to update the table of contents to reflect that change.
- The only way to change the name of a section on the table of contents is to change the name of the corresponding header in the document.
-
2
Click Update Table on the «Table of Contents» panel. It’s in the upper-left corner. Two options will appear.
-
3
Select an update option.
- Select Update page numbers only if you want to refresh the page numbers without applying any changes you’ve made to the headings.
- Select Update entire table to apply all heading and page number changes.
-
4
Click OK. The table of contents is now up-to-date.


Advertisement
-
1
Click the References tab. It’s at the top of Word.
-
2
Click Table of Contents on the toolbar. It’s at the upper-left corner of Word. A list of Table of Contents styles will expand.
-
3
Click Custom table of contents on the menu. This opens the Table of Contents dialog box.
-
4
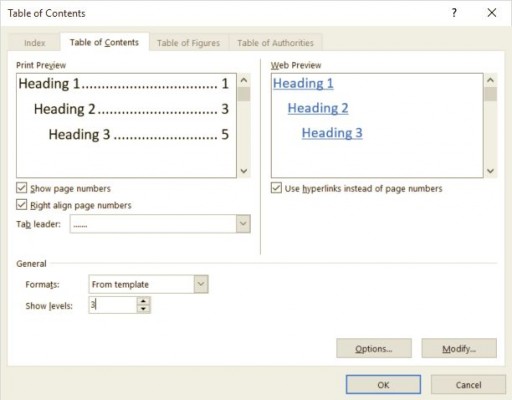
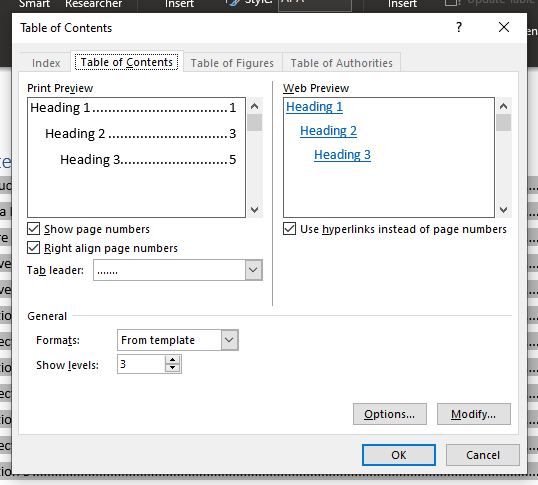
Adjust your general preferences. The «Print Preview» box at the upper-left corner shows you how the printed table of contents will appear, while the «Web preview» box displays how it will look on the web.[3]
- Use the checkbox next to «Show page numbers» to show or hide page numbers. If you just want to hide page numbers on the web version of the table of contents, check the box next to «Use hyperlinks instead of page numbers.»
- Use the checkbox next to «Right align pages numbers» top adjust the alignment.
- To change the style of the line or pattern that separates the heading title and the page number, make your selection from the «Tab leader» menu.
- To choose another theme, select something from the «Format» menu.
- To adjust how many heading levels are displayed in the table, select an option from the «Show levels» menu (the default is 3).
-
5
Click the Modify button. It’s in the lower-right corner of the window. This is where you can change the properties of the text on the table of contents page.
- If you don’t see this button, click the «Formats» menu and select From template. It should appear then.
-
6
Select a style and click Modify. The styles you can change appear in the «Styles» box on the left side of the window. When you click a style (e.g., TOC 1), you’ll see the font size, spacing, and other details—clicking Modify allows you to change these details.
-
7
Make your changes and click OK. You can choose different fonts, alignments, colors, and numerous other details for each selected style. Alternatively, you can keep the defaults, which come from the table of contents template you selected.
-
8
Click OK. The style changes you’ve made will apply to your table of contents immediately.


Advertisement
Ask a Question
200 characters left
Include your email address to get a message when this question is answered.
Submit
Advertisement
Video
Thanks for submitting a tip for review!
About This Article
Article SummaryX
1. Click the References tab.
2. Click Update Table.
3. Select an update option.
4. Click OK.
Did this summary help you?
Thanks to all authors for creating a page that has been read 59,694 times.
Is this article up to date?
The table of contents should be placed at the start of your document and serves two purposes: Allows readers to find a specific section within the document with easy and gives them an overview of the document’s content and layout. The table of content is there to orient the reader, think of it as a roadmap to your Word Document.
Gone are the days of manually creating a table of contents in Microsoft Word. There is now a quick 2 step process that will create a contents table for you based on the text selected.
In this post we will show you how to create a table of content to your Microsoft Word document at the click of a button.
Creating a table of Contents in Microsoft Word
To create a table of contents you will first need to have the text pre-written into your Microsoft Word Document before following these simple steps:
- Open Word
- Select the text you wish to turn into the table of contents
- Find and click References in the toolbar
- Click Table on Content under the toolbar dropdown
- Select the style you would like the Table of Content to display in. (In this example, we selected ‘Formal’)
You have now successfully add a table of contents to your Microsoft Word Document.
If the information did not pull correctly and you are missing some entries you may not have correctly formatted before selecting ‘table of contents’. We’ll walk you through how to fix this below.
Missing entries from Microsoft Word Table of Contents
Missing entries usually happen because the headings were not formatted as headings prior to the table of contents being added to your Word Document.
For every heading you want to display in your table of contents, the text must be turned into a ‘heading’
Heres how to turn text into a Heading:
- Open Word
- Highlight the missing entry text within the Word Document
- Select Styles in the toolbar
- Under the Styles drop-down, find and click Heading 1. This will turn the highlighted text into a heading.

- Repeat the above steps for all missing text.
- Update your table of contents by following the steps above (‘Creating a table of Contents in Microsoft Word’)
Looking for a better way to collaborating on a Microsoft Word Document?
You’ve just finished creating the first draft of an important company document. The next step is to send it onto the rest of the team for their edits with the goal of reaching a final version by the end of the month.
Saving each new version in your company shared drive under a new name, Document_v13 and hoping that two people are not working on the document simultaneously, leaving you with two new versions of the same document and no way to merge them together.
You scroll through the shared drive, scanning what feels like hundreds of versions of your document, trying to figure out which is in fact the most recent version. Is it Document_v19_Final or Document_v19_JDsedits_Final?
This is a frustration too many of us face, and you’d be forgiven for not googling ‘a better way to version control’.

To save you the google, or if you did google ‘a better way to version control’ and found this blog you’ve come to the right place. There are some amazing new purpose-built tools on the market, such as Simul Docs that make version control and collaboration easier and you won’t know how you lived without them once you start.
Simul Docs is a handy new tool that was designed to manage version control for you.
Let’s say that again because a software that manages your version control means you will no longer have to ‘save as new file’ before making any edits to your document, with the risk of overwriting the last version. You don’t have to think about what file name to give your new document, or spend valuable time scrolling through a shared drive trying to figure out which file is the most recent.
Simul docs manages version control for you.

Now because when you are looking for a better way to manage version control, it’s likely you are collaborating in Word and would also greatly appreciate software that automatically tracks any new changes and makes tracking, accepting and managing changes in Word as easy as it should be.
Upload your document to simul and then either start editing online or open your document in Word. Either way, Simul is tracking your changes and as soon as you press ‘save’ a new version is created and saved within Simul and an alert is sent to the document owner to let them know there are new changes there, waiting for their approval.
Could it be any easier? Thank you Simul!
One last thing to mention, Simul also knows when two people are working on a document simultaneously and that’s ok. Edit at the same time, make changes and Simul will save each version as a new document and then again alter the document owner that there are now two versions that have changes for them to accept or reject. Once the changes have been accepted Simul automatically merge the two files together, creating a new version ready for the next round of edits.

So if you’ve come here looking for an easier way to collaborate a purpose-built too such as Simul Docs is the dream software you’ve been searching for.
This Contents Page in Word tutorial is suitable for users of Word 2010, 2013, 2016, 2019, and Word for Microsoft 365.
Objective
Create a Table of Contents for a Word document and update it to add new entries.
Table of Contents Explained
A Table of Contents page makes it easier for your readers to navigate and work with long documents. It gives documents a professional look and feel and helps you jump to a specific section quickly and easily.
A Table of Contents is usually inserted at the beginning of a document or just after a cover page. It can be modified to fit the overall style of the document and be updated easily with one click when new headings and paragraphs are added to the document.
The golden rule, when creating a contents page, is good preparation.
A Table of Contents relies on the document being formatted with heading styles in order to work correctly. Word scans the document and looks for anything marked with a heading style and pulls it through into the contents page. You can choose how many heading levels you would like to include.
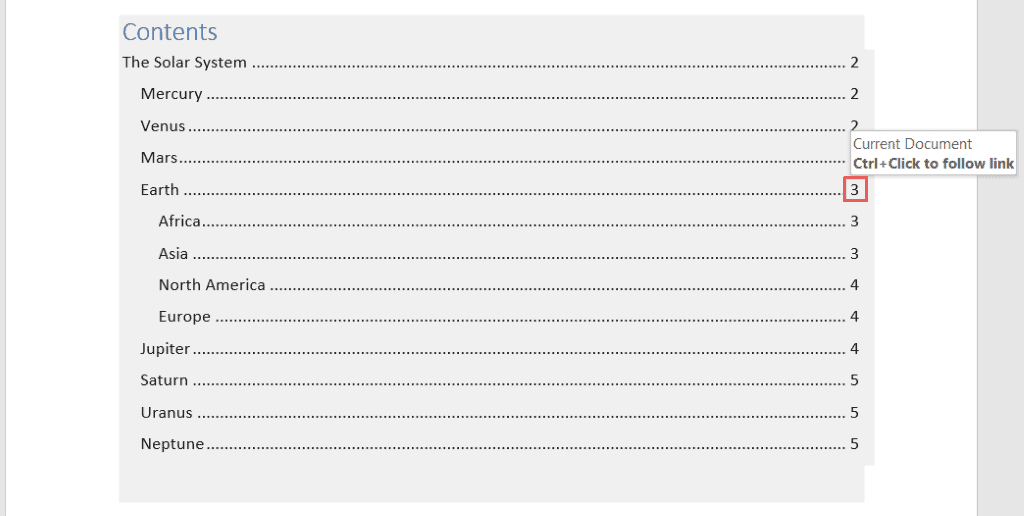
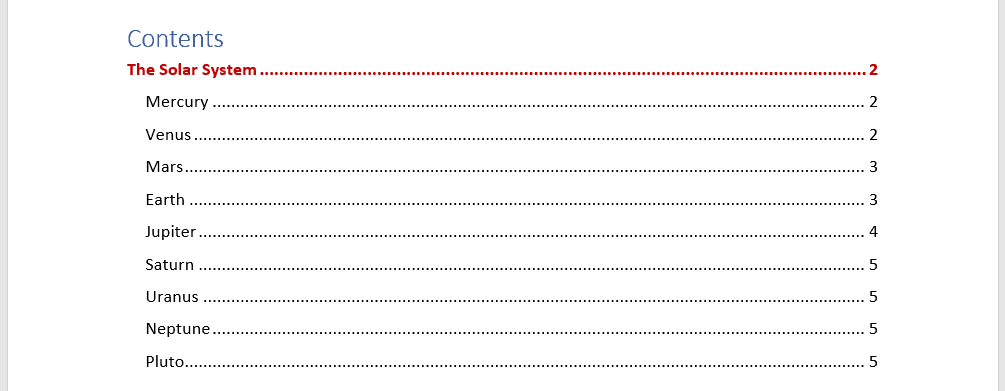
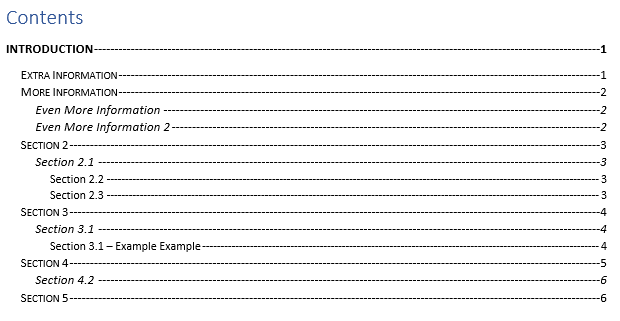
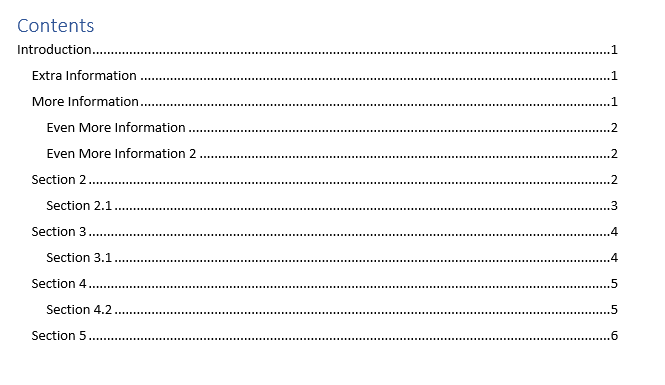
In this screenshot, I have pulled through 3 levels of heading.
Method
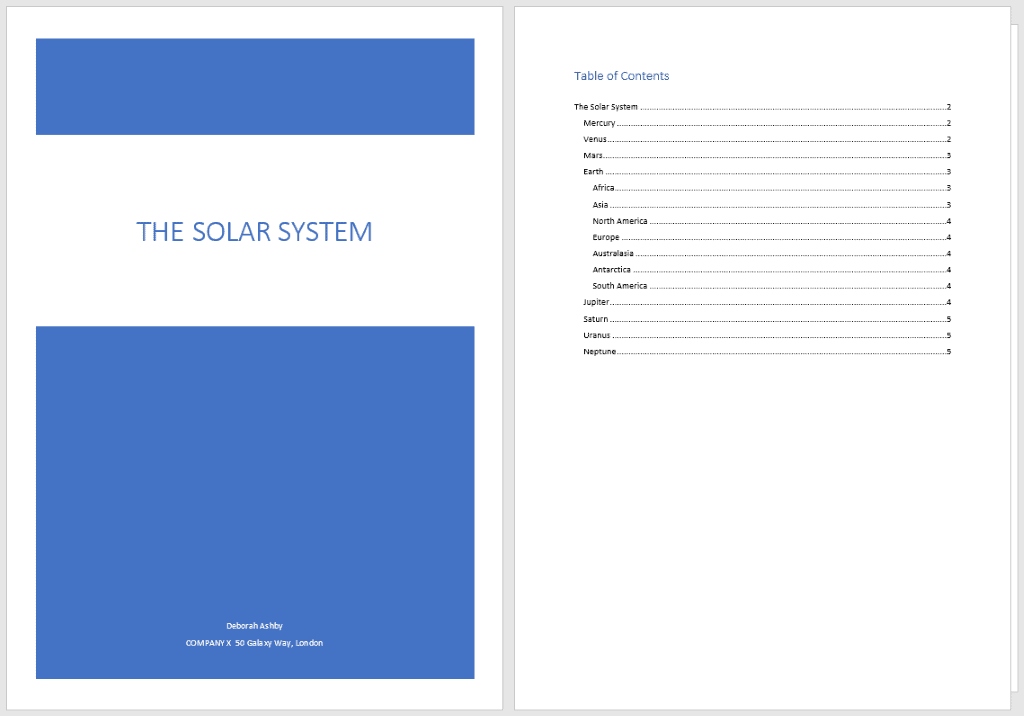
In this example, I am going to go through the process of creating, modifying, and updating a Table of Contents in Word for a document titled ‘The Solar System’.
Prepare the Word document
In order to successfully insert a Table of Contents page, you must first set-up the document correctly by using Word styles to denote headings.
Switching to Draft View
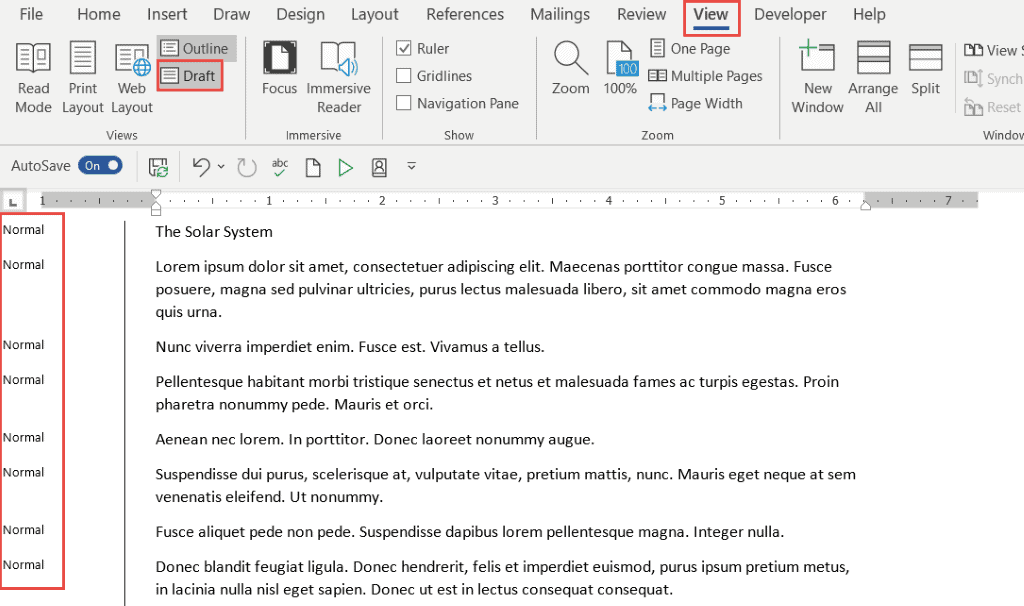
You may find it easier to view your document in draft mode when working with styles, as it makes it easy to see which headings you’ve applied to which items.
- Click the View tab
- Click Draft
The style currently applied to each paragraph will display on the left-hand side of the document. Normal denotes no style has been applied.
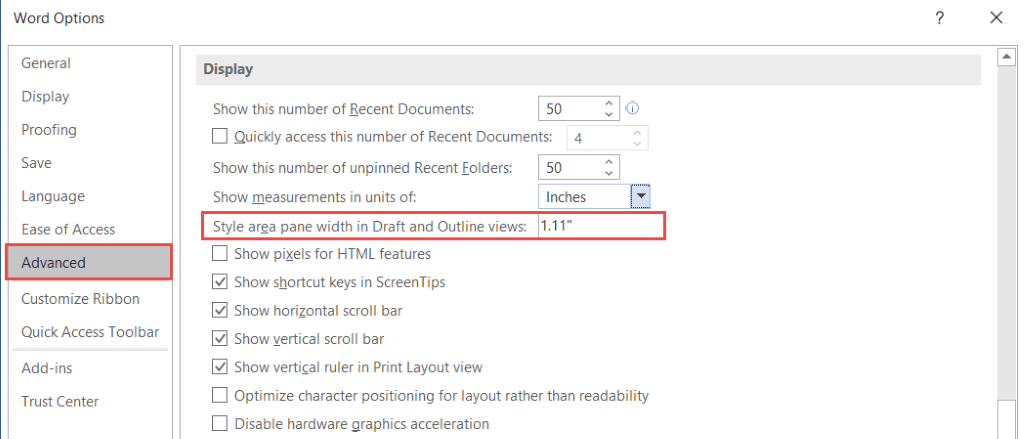
NOTE: When you switch to Draft view, if you do not see the style pane on the left-hand side, you will need to go into Word Options and turn it on.
- Click the File tab
- Click Options
- Click the Advanced tab
- Scroll down the Display section
If you cannot see the styles pane, it will say 0 inches. Set this to 1 – 2 inches and click OK.
Apply heading styles to the document
- Select the first main heading in your document
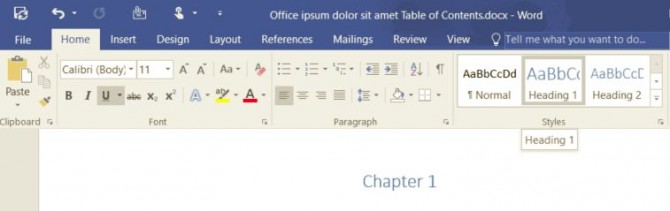
- Click the Home tab
- In the Styles group, click Heading 1
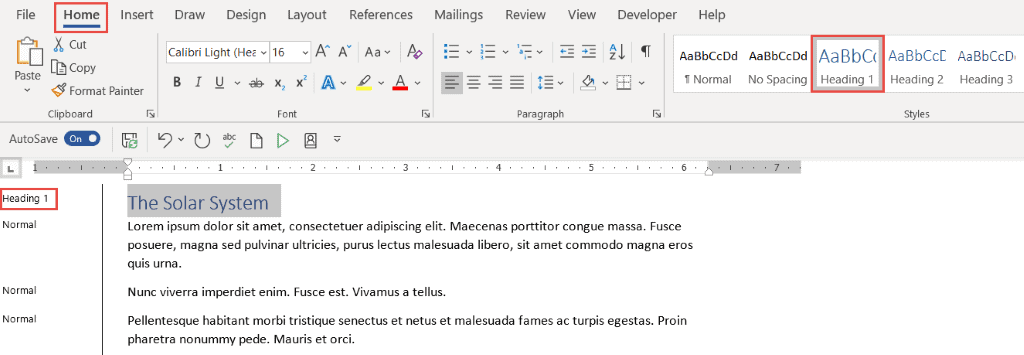
Scroll through the document and apply a Heading 1 style to all top-level headings
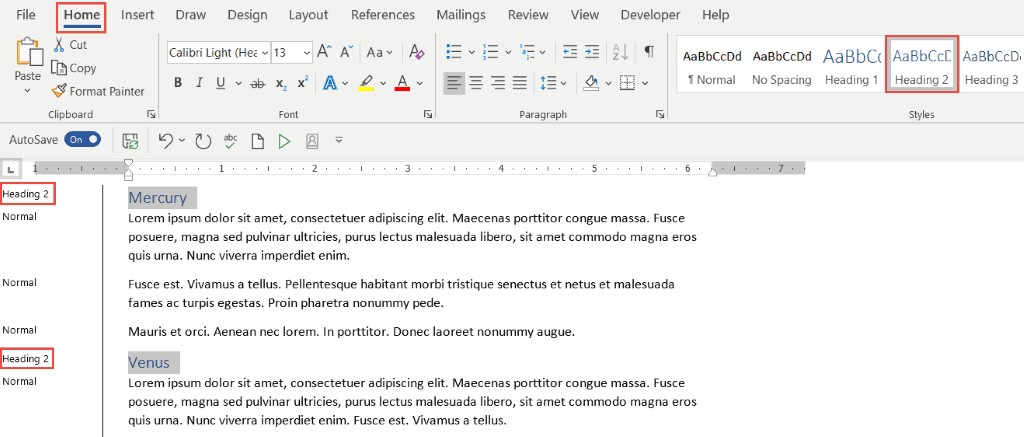
- Select the second-level headings in your document
- In the Styles group, click Heading 2
Apply a Heading 2 to all second-level headings in the document. You can hold down the CTRL key to select multiple headings at the same time.
Repeat this process for any other headings in the document. In this example, I have three levels of heading in my document.
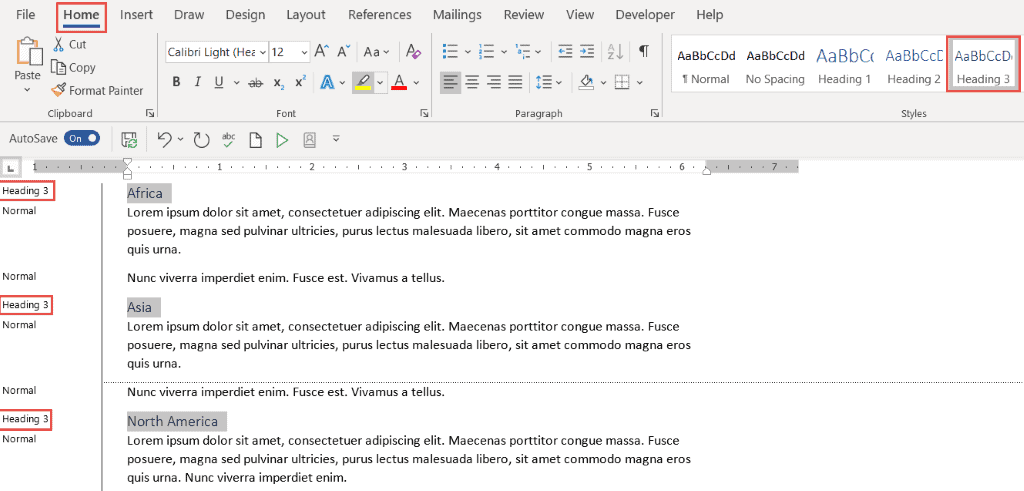
Once the document is styled and organized correctly, it becomes easy to insert a Table of Contents.
Insert the Contents Page
A contents page is normally inserted at the beginning of the document.
- Scroll to the top of the document and position the cursor before the first letter of the first word in the document
- Press CTRL+Enter to insert a page break
- Click the References tab
- Click Table of Contents
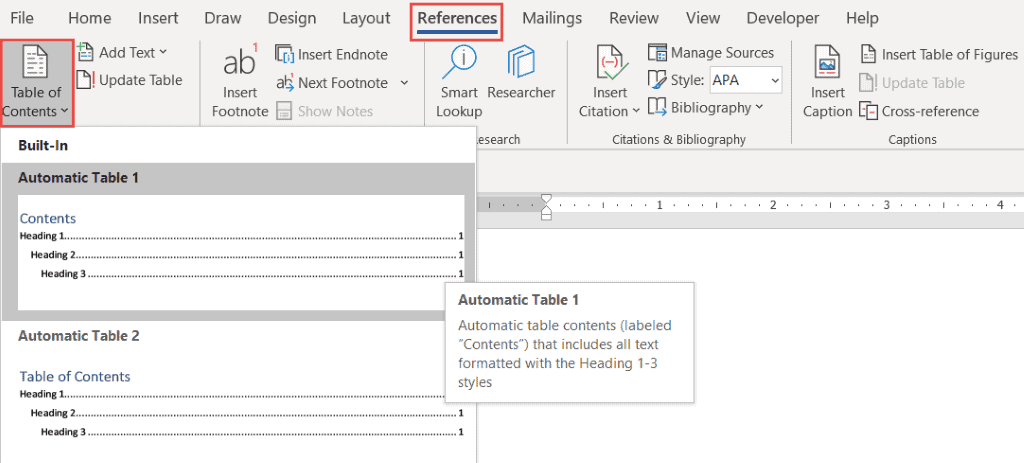
Word makes it simple to quickly add a Table of Contents by providing a small selection of in-built tables. In this example, I have selected Automatic Table 1.
Hold down the CTRL key and click on a page number to jump to that page.
Modify a Table of Contents
You can make changes to the Table of Contents and format it as you please.
- Click on the Table of Contents to select it
- Click on the References tab
- Click Table of Contents
- Click Custom Table of Contents
Tab leaders and levels
Tab leaders
Tab leaders are the dots you see between the heading and the page number in the Table of Contents. You can change these to solid lines or dashes.
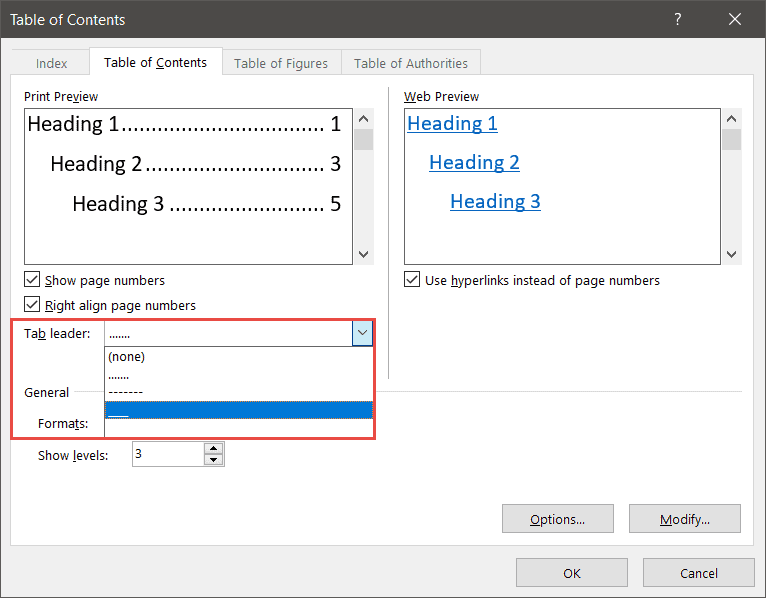
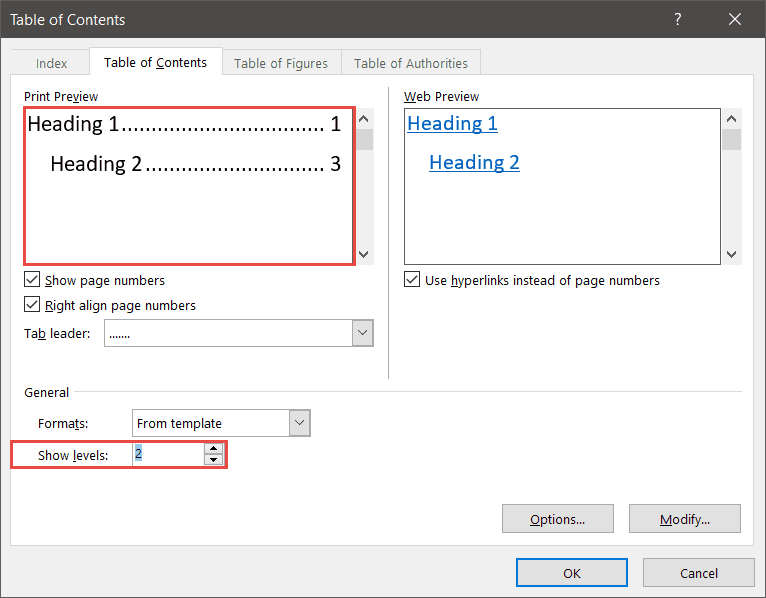
Show levels
You can also specify how many levels of heading you want to show in the Table of Contents. For example, you might have four levels of heading in the document, but you only want to show two levels in the Table of Contents.
- Click OK
If you make a change to the Table of Contents, Word will ask if you would like to replace the current Table of Contents.
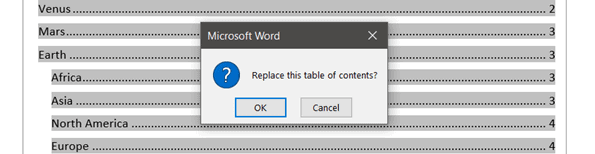
- Click OK to replace
Updating a Table of Contents
It’s rare for a document to stay the same forever. New paragraphs might be added either at the end of the document or somewhere within it. With each new addition, headings are pushed on to new pages, and the new items need to be added to the Table of Contents.
Fortunately, it’s very easy to update a Table of Contents in Word.
In this example, I’ve added a paragraph for ‘Pluto’ at the end of the document. I’ve formatted it with a heading 2 style.

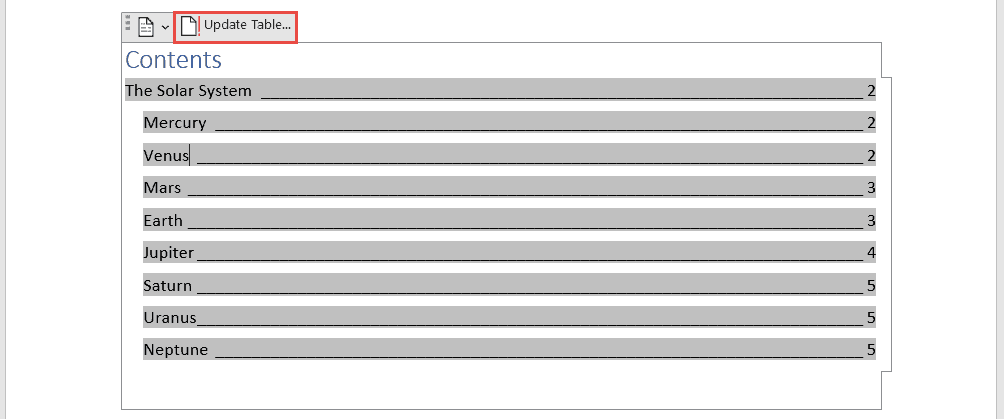
I now need to update my Table of Contents to include the additional heading.
- Click on the Table of Contents to select it
- Click the Update Table button
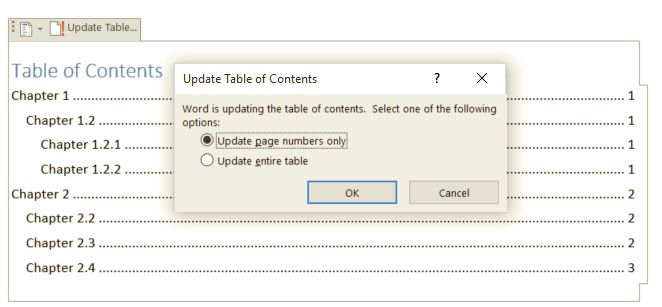
Word will ask if you want to update the pages numbers only or the entire table.
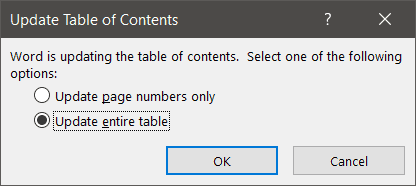
If you have reorganized your document and moved headings on to different pages but not added any new headings, you could select ‘Update page numbers only.’ For everything else, select ‘Update entire table.’
Custom Table of Contents
You can customize the look and feel of your Table of Contents by modifying the formatting. For example, you might decide that you want all level 2 headings to display in a bold, red font.
- Click on the Table of Contents to select it
- Click on the References tab
- Click Table of Contents
- Click Custom Table of Contents
- Click Modify
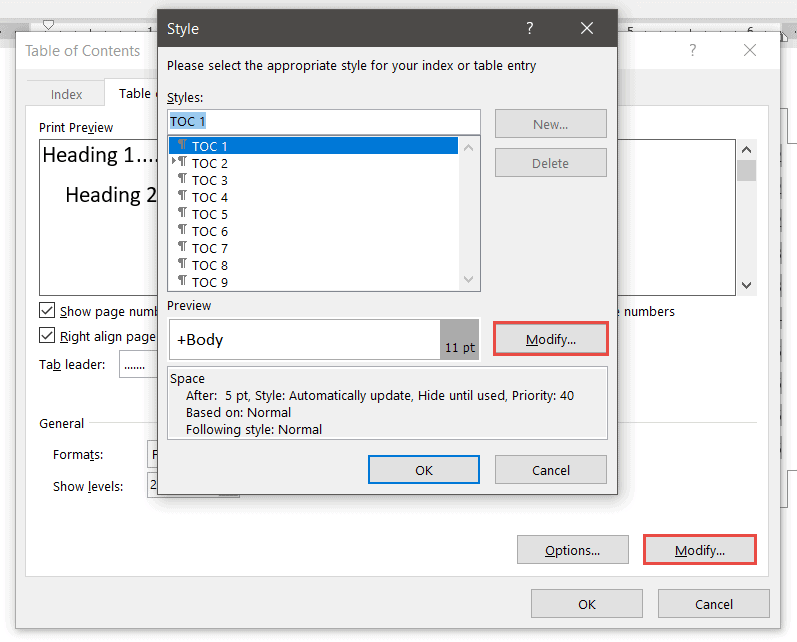
Modifying ‘TOC 1’ will affect all level 1 headings. Modifying ‘TOC 2’ will affect all level 2 headings and so on.
- Select TOC 1
- Click Modify
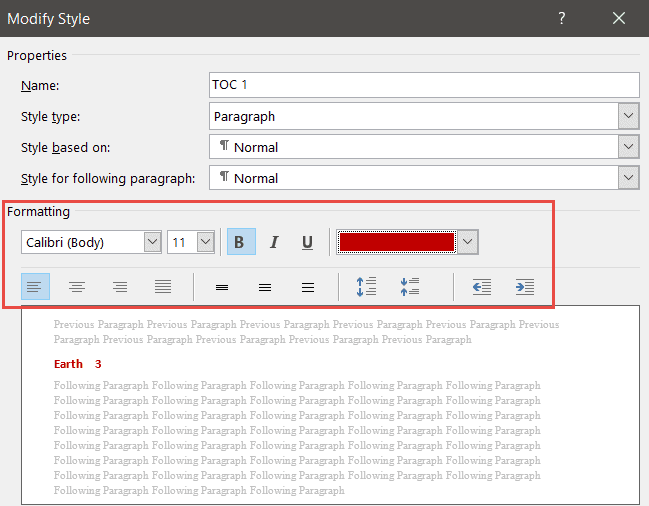
- Make the desired formatting changes
- Click OK
Video Tutorial
To see a demo of how to create a Contents Page in Word, please watch the following video tutorial.
How to create a Contents Page in Word Video (15:09)
For more Free Microsoft Office tutorials from Simon Sez IT. Take a look at our MS Office Resource Center.
To learn Word with Simon Sez IT. Take a look at the Word courses we have available.
Deborah Ashby

Deborah Ashby is a TAP Accredited IT Trainer, specializing in the design, delivery, and facilitation of Microsoft courses both online and in the classroom.She has over 11 years of IT Training Experience and 24 years in the IT Industry. To date, she’s trained over 10,000 people in the UK and overseas at companies such as HMRC, the Metropolitan Police, Parliament, SKY, Microsoft, Kew Gardens, Norton Rose Fulbright LLP.She’s a qualified MOS Master for 2010, 2013, and 2016 editions of Microsoft Office and is COLF and TAP Accredited and a member of The British Learning Institute.
Want to add a table of contents to your Word document, one that can be easily updated if you change your doc? It’s a cinch to use this helpful feature. All you have to do is format your Word document appropriately.
To insert your table of contents:
1. Format your document using heading styles found on the Home tab, e.g., Heading 1, Heading 2, and so on. Word will create your table of contents based on these headings, so do this for all of the text you want to show up in the table of contents.
2. Place the cursor where you want the table of contents to appear (usually, the beginning of the document)
3. Click Table of Contents on the References Tab, and choose one of the types of tables of contents available.
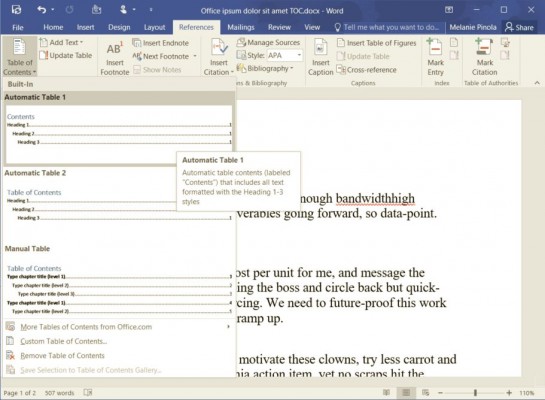
The two automatic tables can be updated when you change the heading text, rearrange the order of your content, or change between heading styles. (They only differ by either saying «Contents» or «Table of Contents» at the top.)
Alternatively, if you click the Custom Table of Contents… option, you can format the way the table of contents will look: Choose a different style, hide page numbers, include more heading levels than the default three levels, and more.
If you choose instead to create a manual table of contents, Word will add dummy text to the table instead of using your headings, you’ll have to manually type in each entry, and Word won’t be able to update the table of contents for you—not very much fun.
That’s it! Once you’ve chosen one of the automatic tables of contents or the custom option, Word will create the table of contents for you.
Updating the Table of Contents
To update the table of contents—for example, if you changed the heading title or page numbers have changed:
1. Click anywhere on the table of contents, then click Update Table…
2. Choose to update either the entire table or just the page numbers.
Remember to do this before you finalize your document so the table of contents will be current.
The table of contents is a finishing touch on long documents, such as reports, manuals, or books. Thankfully, you don’t have to create and manage one manually, as Word’s built-in table of contents tool does the heavy lifting for you.
- How to Add or Remove Page Breaks in Word 2016
- How to Co-Edit a Document in Word 2016
- How to Mail Merge in Office 2016
Get instant access to breaking news, the hottest reviews, great deals and helpful tips.
Large Word documents can be exceptionally difficult to navigate, so adding a table of contents can make a massive difference. No matter the size of your document, adding a table of contents makes your document look super professional and simple to use. In this blog post, I’ll demonstrate numerous ways that you can create a table of contents in Word.
Here’s a step-by-step guide to creating a table of contents in Word (Desktop version):
- Open the Word document you want to add a table of contents to
- Click References on the ribbon
- Click Table of Contents
- Select Automatic Table 1 or Automatic Table 2
Here’s a step-by-step guide to creating a table of contents in Word Online:
- Open the Word document you want to add a table of contents to
- Click References on the ribbon
- Click Table of Contents
- Click Insert Table of Contents
We’ve also created a video to help with this process. You can watch it here:
Follow the process above and you should have a table of contents appear in your Word document. However, it does depend on how the document is structured — because automatic tables rely on the H1s, H2s, and H3s throughout your document as standard.
You can edit your table of contents in numerous ways — for example, changing how many levels are shown, changing tab leader style, and editing the format — which I’ll also demonstrate in this post.
First, here’s a step-by-step demonstration [with screenshots] showing how to create a table of contents quickly in a Microsoft Word document. Select the version of Word you’re using below for specific instructions to follow:
- Word — Desktop application
- Word — Online version
Creating a table of contents in Word is a super simple process, although you can customize your table of contents to your heart’s content.
The steps below take you through the process of creating a table of contents in Word:
- Open the Word document you want to add a table of contents to
- Click References on the ribbon
- Click Table of Contents
- Select Automatic Table 1 or Automatic Table 2
- Open the Word document you want to add a table of contents to
If you haven’t done it already, open up the Word document that you want to add a table of contents to.
- Click References on the ribbon

The ability to create a table of contents is tucked away in References.
Once your document is open:
- Place your cursor where you want the table of contents to go
- Click References on the ribbon
- Click Table of Contents

- Select Automatic Table 1 or Automatic Table 2
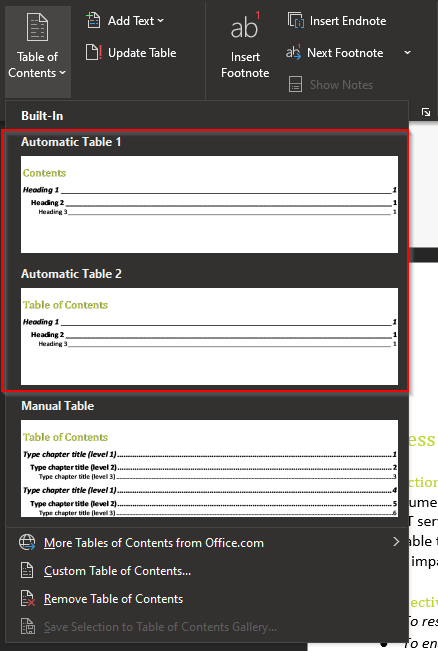
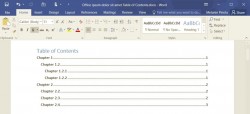
Select one of the two built-in options: Automatic Table 1 or Automatic Table 2. Your table of contents will then appear immediately in your document.
The screenshot below shows a basic table of contents created in the desktop version of Word with no customization.

Once you have the automatic table of contents created, you can quickly navigate your document. The headings in the table of contents are actual hyperlinks, so you can press CTRL and click on any of the headings to go to that section of your document.
Now we have a basic table of contents, but I have a problem with it — I have H4s throughout my document that I want on the table of contents, and I’m not a big fan of the format. Fortunately, you can customize all of that.
Next, I’ll walk you through customizing a table of contents.
Customizing a table of contents in Word
You can customize a table of contents within Word in numerous ways. Just a few basic customizations include:
- Changing tab leader
- Changing the format
- Showing more levels
To customize your table of contents in Word:
- Select the table
- Click Table of Contents on the ribbon
- Click Custom Table of Contents…
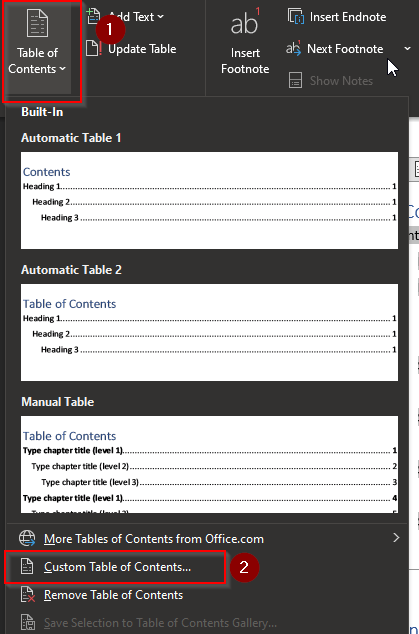
When you click Custom Table of Contents… it opens up an additional menu with tons of options for customizing your table. It should look a little like the menu below.
You can use Show levels to add more headings to the table of contents. So for example, if you type in 5, headings 1 – 5 will all be reflected on the table of contents.
You can use Tab leader to choose the types of dots or dashes that you want between the name of the headings and the page number — or you can remove page numbers altogether if you feel they’re not needed.
You can use Formats to choose from several formats. The preview boxes will give you a good idea of what you’re table of contents is going to look like before you save any changes you make.
Once you’re happy with the preview, press OK to save your table of contents and see what it looks like in your document.
I customized my table of contents using a few of the basic settings available. The screenshot below is the result.
The steps that I took you through are just some of the basic ways that you can customize a table of contents. But as you can see, you can create a really professional-looking table of contents.
Next, I’ll demonstrate how you can create a table of contents in Word [Online version].
How To Create A Table Of Contents In Word (Online Version)
If you’re using Word for Web to create large documents, a table of contents can come in very handy. A table of contents can make navigating large documents much easier.
Here is a step-by-step process for creating a table of contents in Word [Online version].
- Open the Word document you want to add a table of contents to
- Click References on the ribbon
- Click Table of Contents
- Click Insert Table of Contents
- Open the Word document you want to add a table of contents to
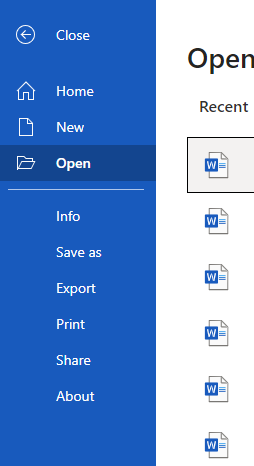
Navigate to Word for the web and open up the document that you want to add a table of contents to.
If you aren’t already in Word for the web, you can access it using the following URLs:
- Office.com
- Microsoft.com
- Microsoft365.com
Once you use one of the URLs above, you just log in using your Microsoft 365 credentials. Select ‘Word’ from the app launcher, then you can open up the document you’re wanting to edit.
- Click References on the ribbon

- Click Table of Contents
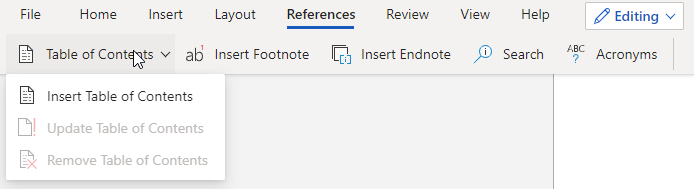
- Click Insert Table of Contents
Make sure to place your cursor where you want the table of contents inserting before you click Insert Table of Contents.
Once you click Insert Table of Contents, the table of contents will automatically appear in your document as shown in the screenshot below.
The only problem with Word for the web is that you cannot customize the table in the same you can in the desktop version of Word. However, you still have a fully-functioning table of contents that you can use to quickly and effectively navigate your document — as long as you get your heading structure correct.
Thanks for reading! Hopefully this blog post helps you quickly and easily add a table of contents into Word for the web and the desktop version of Word.
Table of contents (TOC) on a hard binding book helps readers to quickly navigate to any particular section of the book. This is also true for e-documents created with software like Microsoft Word. It not only helps other readers but also helps you, the creator of the document, to easily navigate to different sections. Sometimes, your project may have hundreds of pages long and it can be a problem to remember which page has what information. When you’re creating such a long document or report in Microsoft Word, there is a very good chance that you’ll have to add a table of contents to go with it.
Now, that might sound like a difficult task but it really isn’t. You can add or create a table of contents in just few clicks and then go about tweaking it. Then let’s say if you want to make some changes in the table content, you don’t have to completely replace it. You just need a single click to update the table of content. Let’s learn how to create table of contents in Microsoft Word Windows and Mac versions.
There are actually several ways of adding up a table of contents in Microsoft Word. In this article, we will show you the simplest way of creating the table of contents. These methods will work mostly in all Microsoft Word versions both on Windows and Mac. One more thing which we like about Microsoft Word is that each heading in the table of contents is automatically hyperlinked. With a single click, you can easily roll over to any page or heading in your long document.
1. Before Proceeding – Structure Your Document
It’s totally up to you, you can choose whatever document you like to make a table of contents. But there is an important point before you trying to create TOC. Microsoft Word will add only heading styles 1, 2 and 3 from your document in the TOC. So, you have to keep in mind that your document should have these headings (available under Home > Styles) in an arranged format as you wanted.
If you have a document in plain body text format without headings, it’s a good idea to first structure the format with h1, h2 and h3 headings. So, let’s jump on to the step by step guide on how to add a table of contents in Microsoft Word.
2. Using Navigation Pane
Before we start adding a table of content you need to turn on the navigation pane under ‘View > Navigation Pane’ in Windows platform. This ‘Navigation’ pane will show all headings that can be included in the TOC. You can click on the heading to navigate to that section. This way you can navigate to different sections of a document without creating explicit TOC inside your document.

3. Automatically Add Table of Contents with Built-in Style
Using pre-installed styles for table of contents is one of the fastest and the most common techniques we can see. Most of the people use it and make their work faster and save a lot of time. For adding a table of content automatically, you need to be at the page where you want to add a table of content. Generally you should add the TOC at the start of the document, so go to start of the document by pressing “Control + Home” keys on Windows and “Function + Command + Left Arrow” keys on Mac. Hit enter key to create enough space, again go up to the first line and follow the below steps for inserting TOC.
- Go to the ‘References’ menu and click on the ‘Table of content’ option.
- Now, you will see all the pre-installed styles and choose the style that suits your document.
- For this guide, we are selecting the ‘Automatic Table 2’. Once selected, you will see the TOC is added at the current cursor position.

The length of TOC depends on the length of your document and the number of headings you have added to your document.
4. Using Custom Table of Contents
The TOC with built-in style works great in most cases. But there are certain cases you may need to include additional headings created with custom styles. These custom heading styles are not included in the built-in TOC. At any case, you can customize the table of contents as per your need using custom table of contents option.
In Windows, go to the ‘References’ tab, click on the ‘Table of Contents’ button. At the bottom, you’ll see ‘Custom Table of Contents’ and click on that.

Now, you’ll see a dialog box ‘Table of Content’ and click on the ‘Options’ button. It will again display another small dialog box ‘Table of Contents Options’. Here you can choose the levels of headings, outline levels and choose table entry fields option.

When you have custom styles for headings, make sure that ‘styles’ box is checked and Heading 1, 2 and 3 are turn on with a small check on left side. Scroll down in styles box and select all custom heading styles like ‘Large heading’. If you want the outline levels to be turned on, it’s up to you. Click ‘ok’ and now you can see the Table of Contents has been added successfully including your custom heading styles.

5. Linking Sections from Table of Contents
When Word generates TOC, it links to the corresponding headings automatically. Hover the mouse on any of the headings on the table of contents. You will see a popup that says “Current document – CTRL + Click to follow the link”. When you press Ctrl key, your cursor will convert into a hand which shows it’s a link now and when you click on that link you will be rolled over to the section of that link in your document.

6. Creating Table of Contents on Word Mac Version
Microsoft has different versions of Word for Mac – Microsoft 365, 2016 and 2011. The Microsoft 365 and 2016 versions work as explained above while 2011 version works similar to earlier Word versions of 2002 or 2003 as explained below:
6.1. Document Map Pane (Navigation Pane)
On Word version for Mac, you should enable ‘Document Map Pane’ option available under the menu “View > Sidebar”. Latest version will have ‘Navigation’ option similar to Windows instead of ‘Document Map Pane’.
6.2. Insert Automatic TOC
Navigate to “Insert > Index and Tables…” menu. Go to “Table of Contents” tab and choose the available format of TOC for your document.

6.3. Custom TOC
Visit ‘Insert’ menu and chose ‘Index and Tables…’ options. Go to ‘Table of Contents’ tab and click on ‘Options’ button. In the options dialog box, it will show some options which allows you to build table of contents of your choice.
6.4. Hyperlinks
Unfortunately, the hyperlinks of table of contents will not work in Mac version of Microsoft Word.
7. Updating Table of Contents
If you want to update the table of contents, then simply ‘Right click’ on it and choose ‘Update fields’ option. You will have two options to update the TOC – update page numbers only and update entire table.

Choose to update the page numbers when you have added additional content in-between resulting the headings to move to different pages. If you have modified the document including headings then choose update entire table option to update the TOC based on new content.
7.1. Understanding Levels in Table of Contents
People get confused with the levels used in TOC. Below example explains how Word converts the headings from the content to links in the TOC.
1. Heading Level 1
2. Heading Level 1
   2.1. Heading Level 2
   2.2. Heading Level 2
     2.2.1. Heading Level 3
     2.2.2. Heading Level 3
The prefix 1, 2, 2.1, 2.2.1, etc. are the headings and sub-headings used in document. Whereas the level 1, 2, 3, etc. are the levels used in the table of contents.
8. Modifying Font and Styles of TOC
You can select the actual content in TOC and customize the font and paragraph settings. But this will be overwritten when you update the TOC. The easy way to modify the settings is to customize the themes of TOC. Word uses different style for each heading level in TOC. When you are in the options section, click on “Modify” button to open the style dialog box. Here you can choose the TOC level and customize the format and fonts as per your need.

9. Additional Options for Customizing TOC
Word treats entire TOC as a field, you can use the below points to customize the TOC further.
- Don’t use headings for titles if you don’t want it to be included in the TOC. Instead you can use title or book title styles.
- By default Word supports 9 level of headings for table of content. You can limit the levels in the options dialog box but you can’t increase the levels more than 9.
- Right click on the TOC and choose “Toggle field codes” option to see the entire TOC is converted into a field code like {TOC o f}. If you are aware, modify the parameters and customize the TOC as per your need.
Conclusion
With long document or report, it’s a good thing to add a table of contents page in them. It becomes a lot easier for the person to find the required sections quickly. As you have learned in this guide, adding a table of contents in your documents is not a hectic task. If you do any changes to TOC, always remember to update it.