
Insert a worksheet
-
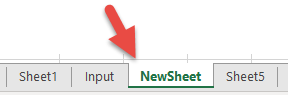
Select the New Sheet plus icon
 at the bottom of the workbook.
 -
Or, select Home > Insert > Insert Sheet.
 at the bottom of the workbook.
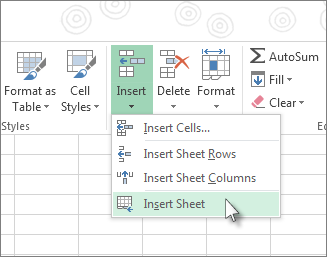
Rename a worksheet
-
Double-click the sheet name on the Sheet tab to quickly rename it.
-
Or, right-click on the Sheet tab, click Rename, and type a new name.
Move a worksheet
-
To move the tab to the end, right-click the Sheet tab then Move or Copy > (move to end) > OK .
-
Or, click and drag to tab to any spot.
Delete a worksheet
-
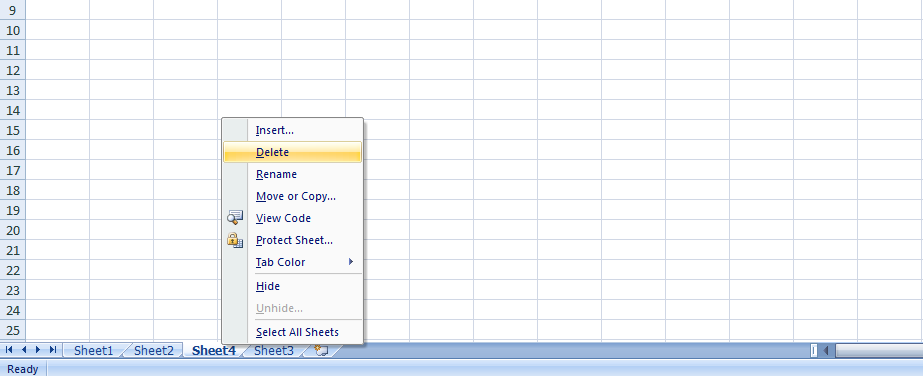
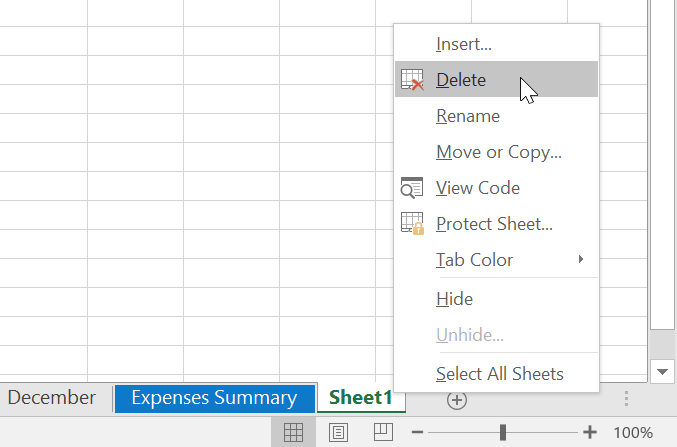
Right-click the Sheet tab and select
Delete. -
Or, select the sheet, and then select Home > Delete > Delete Sheet.
 Delete.
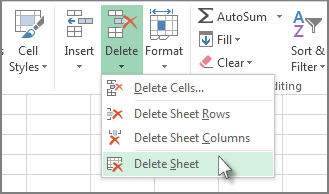
Note: Sheet tabs are displayed by default. If you don’t see them, click Options > Advanced > Display options for this workbook > Show Sheet tabs.
To insert a new worksheet, do one of the following:
-
To quickly insert a new worksheet at the end of the existing worksheets, click the Insert Worksheet tab at the bottom of the screen.
-
To insert a new worksheet in front of an existing worksheet, select that worksheet and then, on the Home tab, in the Cells group, click Insert, and then click Insert Sheet.
Tip: You can also right-click the tab of an existing worksheet, and then click Insert. On the General tab, click Worksheet, and then click OK.
Note: To change the order of the worksheets in a workbook, click the tab of the worksheet that you want to move, and then drag it to the location that you want.


What do you want to do?
-
Insert multiple worksheets at the same time
-
Change the default number of worksheets in a new workbook
-
Insert a new sheet that is based on a custom template
-
Rename a worksheet
-
Delete one or more worksheets
Insert multiple worksheets at the same time
-
Hold down SHIFT, and then select the same number of existing sheet tabs of the worksheets that you want to insert in the open workbook.
For example, if you want to add three new worksheets, select three sheet tabs of existing worksheets.
-
On the Home tab, in the Cells group, click Insert, and then click Insert Sheet.
Tip: You can also right-click the selected sheet tabs, and then click Insert. On the General tab, click Worksheet, and then click OK.
-
To change the order of the worksheets in a workbook, click the tab of the worksheet that you want to move, and then drag it to the location that you want.
Change the default number of worksheets in a new workbook
-
Click the File tab.
What and where is the Microsoft Backstage Button?
For more information about the Microsoft Backstage Button, see What and where is the Backstage?
-
Under Excel, click Options.
-
In the General category, under When creating new workbooks, in the Include this many sheets box, enter the number of sheets that you want to include by default when you create a new workbook.
-
Click any other tab to return to your file.
Insert a new sheet that is based on a custom template
-
If needed, create the worksheet template that you want to base a new worksheet on.
How to create a worksheet template
-
Select the worksheet that you want to use as a template.
-
Click the File tab.
-
Under Info, click Save As.
-
In the File name box, type the name of the worksheet template.
-
To create a custom worksheet template, type the file name that you want to use.
-
To create the default worksheet template, type sheet.
Note: Custom templates are automatically saved in the Templates folder. The default worksheet template, sheet.xltx or sheet.xltm, should be saved in the XLStart folder, which is usually C:Program FilesMicrosoft OfficeOffice14XLStart.
-
-
Do one of the following:
-
On a computer that is running Windows Vista, in the list, click Excel Template or Excel Macro-Enabled Template.
-
On a computer that is running Microsoft Windows XP, in the Save as type box, click Excel Template or Excel Macro-Enabled Template.
-
-
Click Save.
-
-
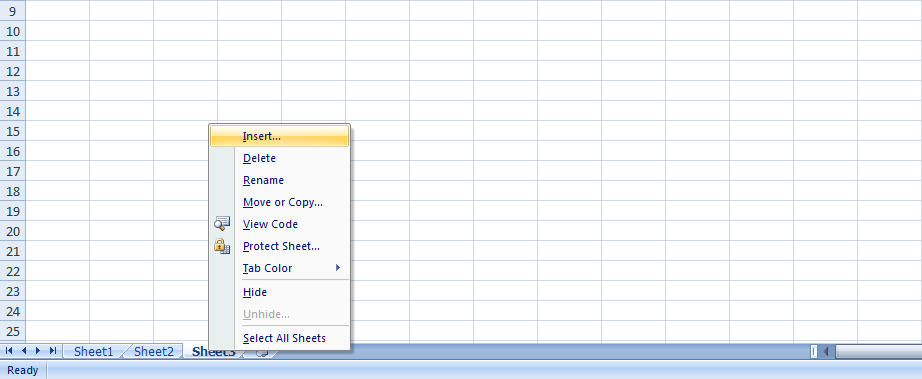
Right-click the sheet tab of a worksheet, and then click Insert.
-
Double-click the template for the type of sheet that you want.
Rename a worksheet
-
On the Sheet tab bar, right-click the sheet tab that you want to rename, and then click Rename Sheet.
-
Select the current name, and then type the new name.
Tip: You can include the name of the sheet when you print the worksheet.
How to print sheet names
-
On the Insert tab, in the Text group, click Header & Footer.
-
In the Page Layout View, click the location where you want the sheet name to appear.
-
In the Header & Footer elements group, click Sheet Name
.
-
 .
.Delete one or more worksheets
-
Select the worksheet or worksheets that you want to delete.
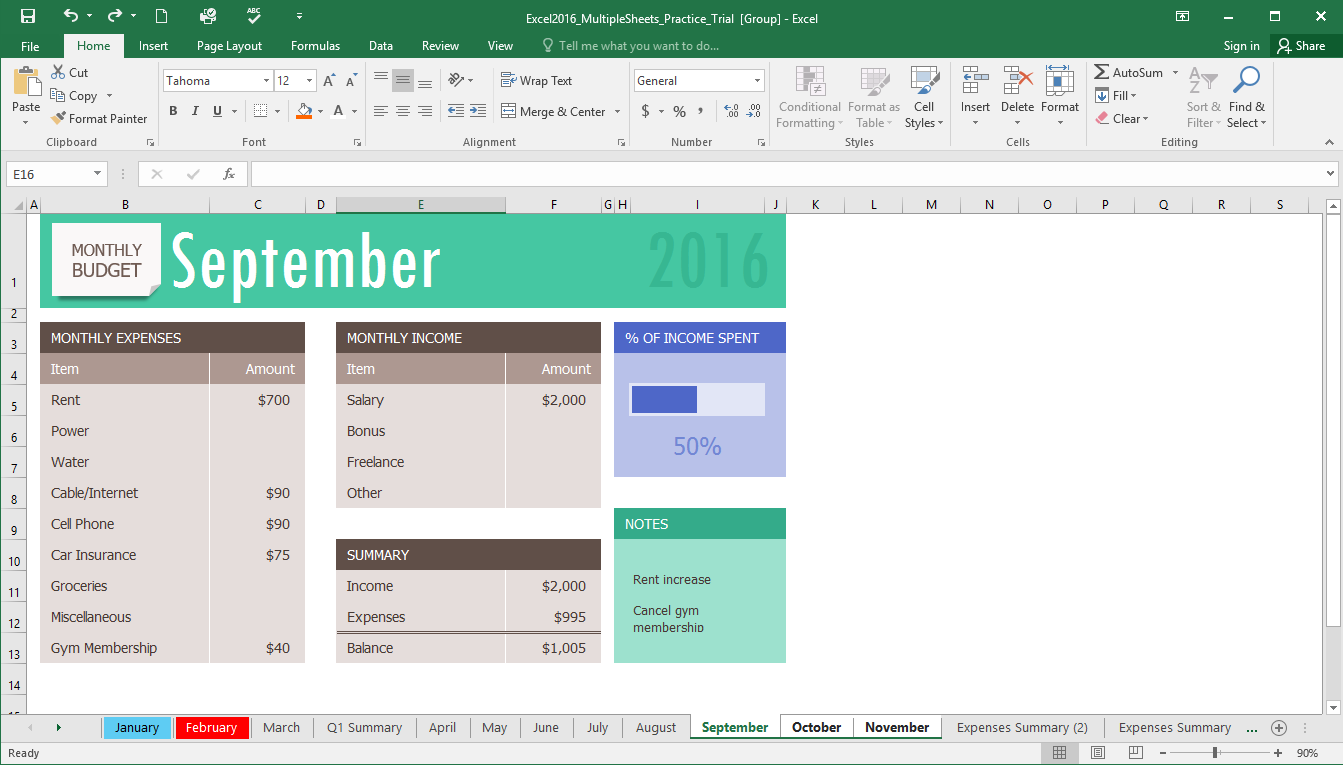
Tip: When multiple worksheets are selected, [Group] appears in the title bar at the top of the worksheet. To cancel a selection of multiple worksheets in a workbook, click any unselected worksheet. If no unselected sheet is visible, right-click the tab of a selected sheet, and then click Ungroup Sheets on the shortcut menu.
-
On the Home tab, in the Cells group, click the arrow next to Delete, and then click Delete Sheet.
Tip: You can also right-click the sheet tab of a worksheet or a sheet tab of any selected worksheets that you want to delete, and then click Delete Sheet.
Содержание
- Group worksheets
- In this article
- Group selected worksheets
- Ungroup selected worksheets
- Group all worksheets
- Ungroup all worksheets
- Excel VBA Worksheets.Add Method to add new worksheet
- Excel VBA Worksheets.Add Method to add new worksheet
- Syntax of Excel VBA Worksheets.Add Method
- Example 1 – Add new worksheet after specific worksheet
- Example 2 – Add new worksheet and move to the end of worksheet
- Example 3 – Add new worksheet and move to the first worksheet
- Example 4 – add new worksheet if not exist
- VBA Routine to Add and Name Worksheets
- Add Sheet
- Add Sheet with Name
- Create New Sheet with Name from a Cell
- Add Sheet Before / After Another Sheet
- Insert Sheet After Another Sheet
- Add Sheet To End of Workbook
- Add Sheet To Beginning of Workbook:
- Add Sheet to Variable
- More Add Sheet Examples
- Create Sheet if it Doesn’t Already Exist
- Create Worksheets From List of Names
- VBA Coding Made Easy
- VBA Code Examples Add-in
- Worksheets in Excel
- Characteristics of a good worksheet
- View a Worksheet
- Rename a Worksheet
- Insert a Worksheet
- Delete a Worksheet
- Example
Group worksheets
You can quickly perform tasks on multiple worksheets at the same time by grouping worksheets together. If you group a set of worksheets, any changes you make on one worksheet are made in all the other worksheets in the group in the exact same location on the worksheets. If you want to create, for example, standard tables or calculations on a large number of worksheets, grouping can save you a lot of time. This works best if the worksheets already have identical data structures.
In this article
Group selected worksheets
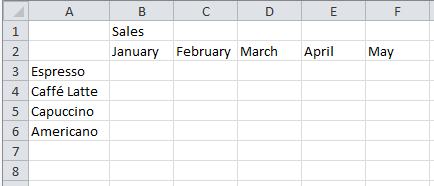
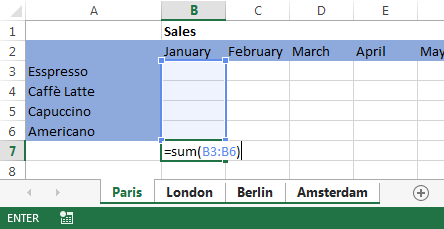
In the example below, a workbook has multiple worksheets for different cities. All the worksheets have identical structures showing sales of coffee drinks.
To perform the same tasks for a particular set of worksheets, follow the steps below.
Press and hold down the Ctrl key, and click the worksheet tabs you want to group.

Tip: If you want to group consecutive worksheets, click the first worksheet tab in the range, press and hold the Shift key, and click the last worksheet tab in the range.
Now, suppose you want to add the same formula to cell B7 on both the “Paris” and “London” worksheets. When grouped, the change will happen on both worksheets when either worksheet is modified. For example, a formula change to the Paris worksheet is automatically made to the London worksheet:
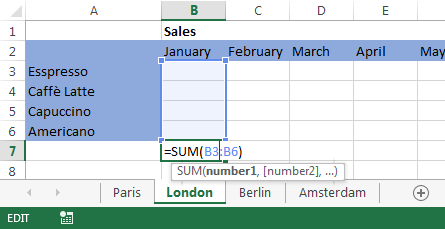
Note: When you group worksheets, the name of the workbook changes to include [Group].
Tip: Customers like tips. When you have a good tip to share, include it.
Ungroup selected worksheets
If you don’t want to apply specific tasks to a particular set of worksheets, ungroup selected worksheets.
Press and hold the Ctrl key, and click the worksheet tabs you want to ungroup.
Group all worksheets
You can easily group all the worksheets in a workbook.
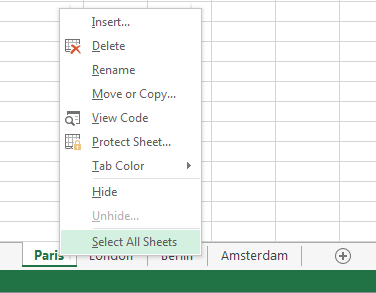
Right-click any worksheet tab.
Click Select All Sheets.

Note: When you group all worksheets, browsing through the worksheets ungroups them. You can browse through the grouped worksheets without ungrouping them if you don’t select all worksheets.
Ungroup all worksheets
When you’ve made all the changes, you can ungroup the worksheets.
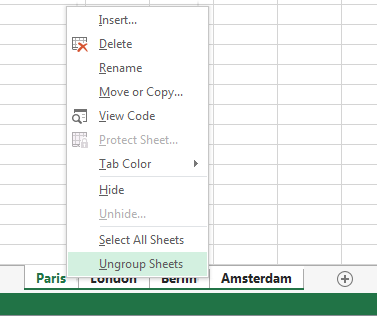
Right-click any worksheet tab in the group.
Click Ungroup Sheets.
Tip: To ungroup all worksheets, you can also click any worksheet tab outside the group.
Источник
Excel VBA Worksheets.Add Method to add new worksheet
This tutorial explains how to add new work sheets using Worksheets.Add Method in Excel VBA, or add new worksheets at the back or before specific worksheet
You may also want to read:
Excel VBA Worksheets.Add Method to add new worksheet
Excel VBA Worksheets.Add Method is to add new worksheet in a workbook.
Syntax of Excel VBA Worksheets.Add Method
| Before | Optional. Add new worksheet before specific worksheet |
| After | Optional, add new worksheet after specific worksheet |
| Count | Optional. Number of worksheets to add, default is 1 |
| Type | Optional. Worksheet type, default is xlWorksheet |
| xlWorksheet |
| xlChart |
| xlExcel4MacroSheet |
| xlExcel4IntlMacroSheet |
If Before and After are not specified, worksheet is added before Active worksheet (the worksheet you selected before running the Add Method).
Example 1 – Add new worksheet after specific worksheet
The below code add new worksheet after Sheet8
Example 2 – Add new worksheet and move to the end of worksheet
The below code makes use of Worksheets(Worksheets.Count) to find the last worksheet. Worksheets(Index) returns the Nth worksheet from left to right.
Example 3 – Add new worksheet and move to the first worksheet
Example 4 – add new worksheet if not exist
The below code makes use of a custom Function called wsExist to check if a worksheet already exists, returns TRUE if exists, FALSE if not exist.
Источник
VBA Routine to Add and Name Worksheets
In this Article
This tutorial will discuss how to add / insert worksheets using VBA.
Add Sheet
This simple macro will add a Sheet before the ActiveSheet:
After inserting a Sheet, the new Sheet becomes the ActiveSheet. You can then use the ActiveSheet object to work with the new Sheet (At the bottom of this article we will show how to insert a new sheet directly to a variable).
Add Sheet with Name
You can also define a Sheet name as you create the new Sheet:
Create New Sheet with Name from a Cell
Or use a cell value to name a new Sheet:
Add Sheet Before / After Another Sheet
You might also want to choose the location of where the new Sheet will be inserted. You can use the After or Before properties to insert a sheet to a specific location in the workbook.
Insert Sheet After Another Sheet
This code will insert the new sheet AFTER another sheet:
This will insert a new Sheet AFTER another sheet and specify the Sheet name:
Notice the extra parenthesis required in the second example (the first example will generate an error if the second parenthesis are added).
In these examples we explicitly named the Sheet used to determine the sheet location. Often you’ll want to use the Sheet Index number instead, so that you can insert the sheet to the beginning or end of the Workbook:
Add Sheet To End of Workbook
To add a Sheet to the end of the workbook:
Add Sheet To Beginning of Workbook:
To add a Sheet to the beginning of the workbook:
Add Sheet to Variable
This code assigns the new Sheet to a variable as the sheet is created:
From here you can reference the new sheet with the variable ‘ws’:
More Add Sheet Examples
Create Sheet if it Doesn’t Already Exist
You might want to create a sheet only if it doesn’t already exist.
Create Worksheets From List of Names
The following routine will look at the contents of a single column set up Excel worksheets within the current workbook with these names. It makes a call to another function to see if a sheet with that name already exists, and if so the sheet isn’t created.
So if we have the following text in cells A1:A30 in Sheet 2:
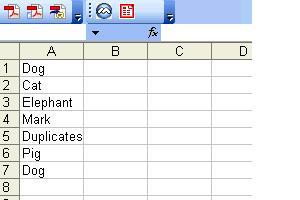
Then the following sheets will be created:
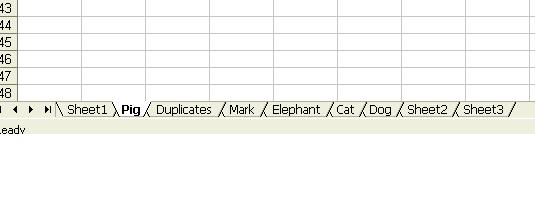
Note that although “Dog” appears twice, only one sheet is created.
VBA Coding Made Easy
Stop searching for VBA code online. Learn more about AutoMacro – A VBA Code Builder that allows beginners to code procedures from scratch with minimal coding knowledge and with many time-saving features for all users!

VBA Code Examples Add-in
Easily access all of the code examples found on our site.
Simply navigate to the menu, click, and the code will be inserted directly into your module. .xlam add-in.
Источник
Worksheets in Excel
A spreadsheet is a grid-based file that organizes data and performs calculations using scalable entries. These are used all over the world to create tables for personal and business purposes. It contains rows and columns of cells and can be used to organize, calculate, and sort data. Spreadsheet data can include text, formulas, references, and functions, as well as numeric values.
A spreadsheet has evolved over the years from a simple grid to a powerful tool that functions as a database or app, performing numerous calculations on one sheet. Using a spreadsheet, you can figure out your mortgage payments over time or determine how depreciation affects your business’s taxes. You can also merge data between several sheets and then visualize it in color-coded tables for better understanding. It can be intimidating for new users to use a spreadsheet program because of all the new features.
A worksheet is a collection of cells(It is a basic data unit in the worksheet), where you can store and manipulate data. By default, every workbook contains at least one worksheet in it. It is easier to organize and locate information in your workbook by using multiple worksheets when working with many data. Adding information to multiple worksheets simultaneously is also easily accomplished by grouping worksheets. In Excel, worksheets can easily be added, renamed, and deleted. Spreadsheet applications like Microsoft Excel are fantastic for maintaining long data lists, budgets, sales figures, etc. A worksheet contains 1 048576 rows, 16384 columns, and 17,179,869,184 cells per worksheet.
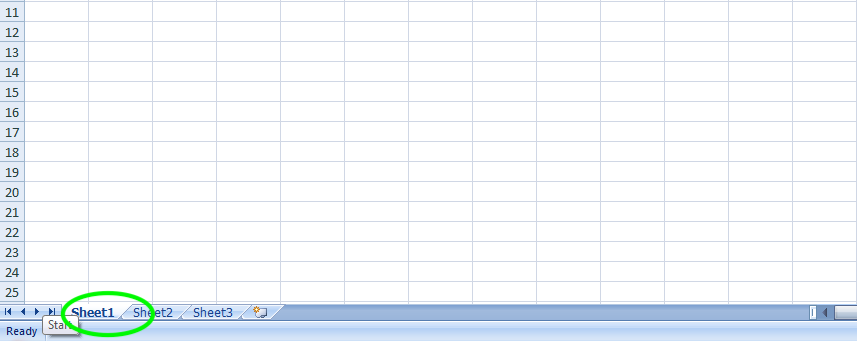
When the Excel program is opened for the first time, the user sees three blank worksheets in the workbook. The screenshot below shows the first worksheet with three tabs at the bottom left corner named Sheet1, Sheet2, and Sheet3. If a workbook contains many worksheets, arrows will also make it easier to view the worksheet tabs.
It is not necessary to delete the two unused worksheets if you’re only using one worksheet – most people don’t bother. Newer versions of Excel save workbooks as xlsx files. Older versions xls extension.
Can we have more than one Excel worksheet in one workbook? According to Microsoft, it’s limited by the number of memory slots on your computer. This is useful if you’re linking data from one worksheet to another, and especially if you’re grouping worksheets that are extremely closely related. However, using the worksheet tabs back and forth can become confusing.
Characteristics of a good worksheet
- An appealing worksheet should have specific titles that indicate what it is about as well as pictures or other clipart to draw some attention.
- It is important that the paper and the writing are in good contrast so that eye strain is minimized.
- Users should be able to do the worksheet independently by following the directions with examples.
- Despite the fact that the worksheet needs to illuminate a pattern in problem solving or usage, it shouldn’t grind an idea into dust.
- Once the worksheet has been completed, the user should be able to explain how it was formed or what it was meant to teach: the answer to this question should be linked to the worksheet’s title.
View a Worksheet
To view a worksheet, click on a worksheet’s tab to view it. Worksheet names and/or many worksheet tabs may not allow the workbook window to display all tabs, so use the arrows on the left of each tab to navigate left or right, or right-click on any arrow and select the worksheet to show from the list.
Click on worksheet to view a worksheet
Rename a Worksheet
To rename a worksheet, follow the following steps:
Step 1: Right-click on the current tab you will get a list.
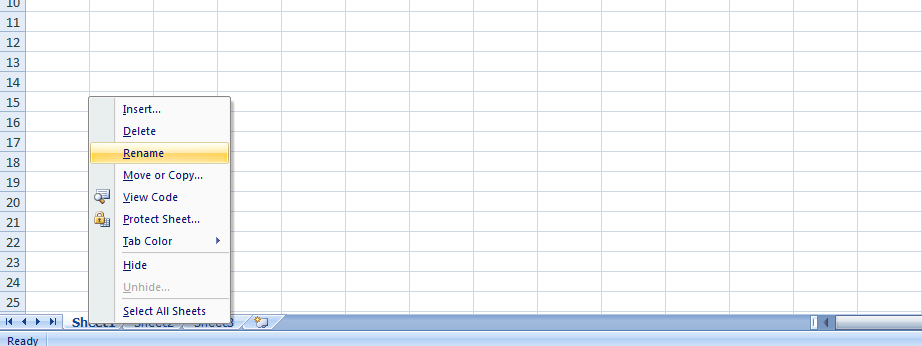
Step 2: Now in this list select Rename option and then typing a new name.
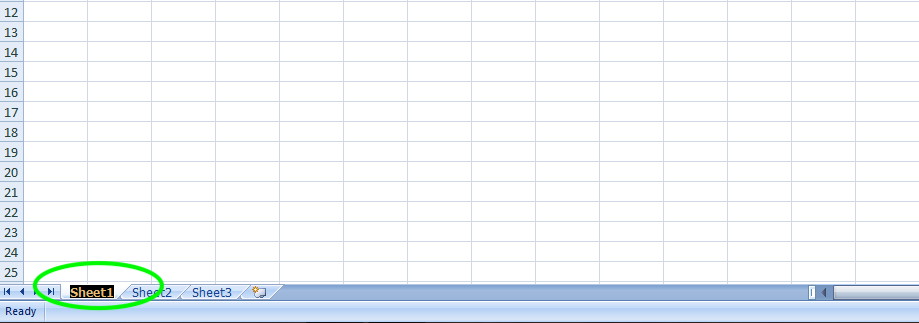
You can also rename the worksheet by double-clicking on the tab.
Insert a Worksheet
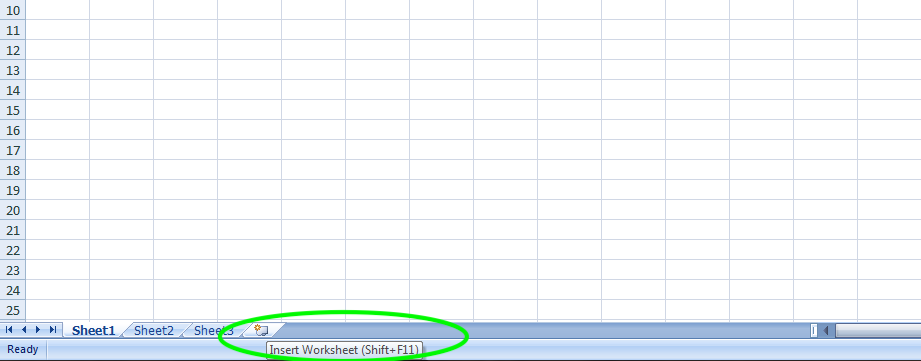
One of the fastest ways to insert a worksheet in a workbook is to click on the small tab to the right of the last worksheet tab. The worksheet can then be moved to a different position if necessary.
Alternative Method to insert a Worksheet
As an alternative, you can add a new worksheet left of an existing worksheet by using the following steps:
Step 1: Right-click on the tab of the existing worksheet that is just to the right of where you want the new worksheet to be placed. Whenever a spreadsheet is inserted into a worksheet, Excel inserts it to the left.
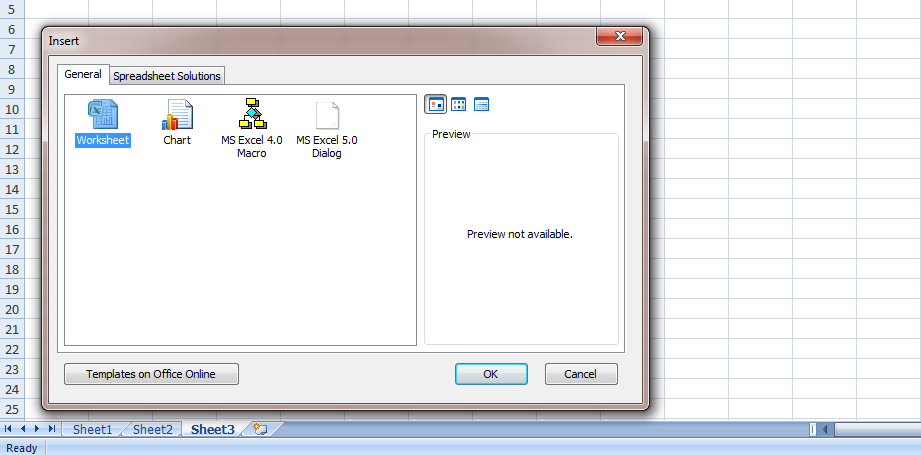
Step 2: A dialogue box open, here select worksheet.
Step 3: Press OK and your new worksheet is add on the left of the current worksheet.
So this is how you can insert new worksheet.
Delete a Worksheet
To delete a worksheet, follow the following steps:
Step 1: Right-click on the current tab(or the tab that your want to delete) you will get a list.
Step 2: Now in this list select the Delete option and your list will be deleted.
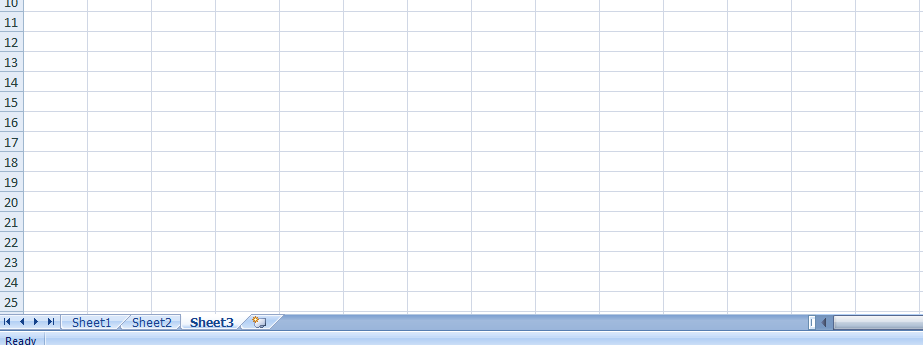
So this is how you can delete worksheets.
Example
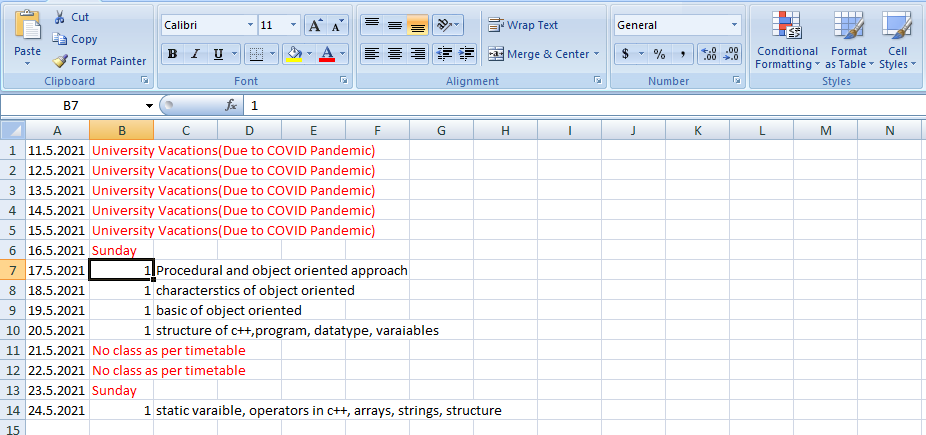
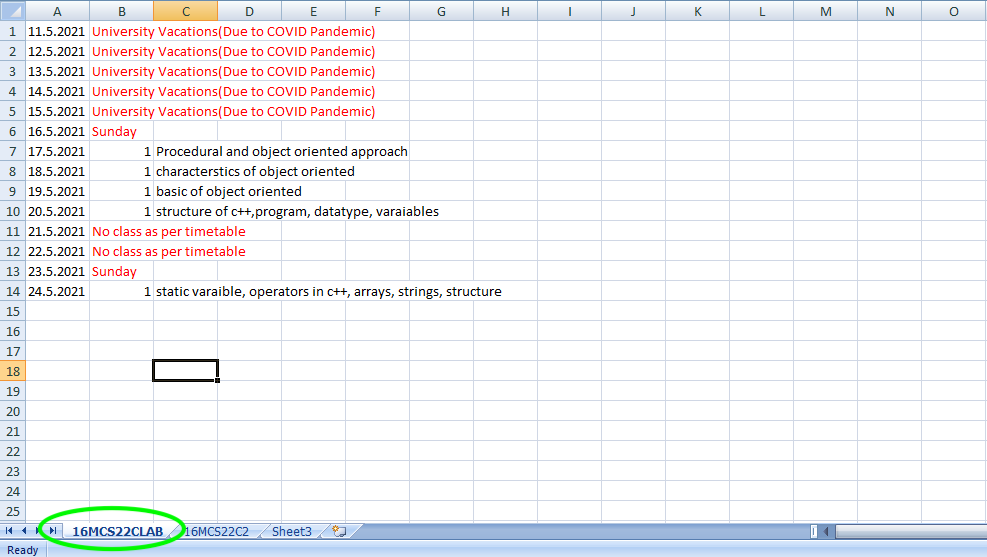
Now, let’s take a working example. Here, I am creating a lesson plan for c++ subject:
Now if I want to teach more than 1 subject then I need to include or insert one more worksheet and for inserting a new worksheet click on the small tab to the right of the last worksheet tab.
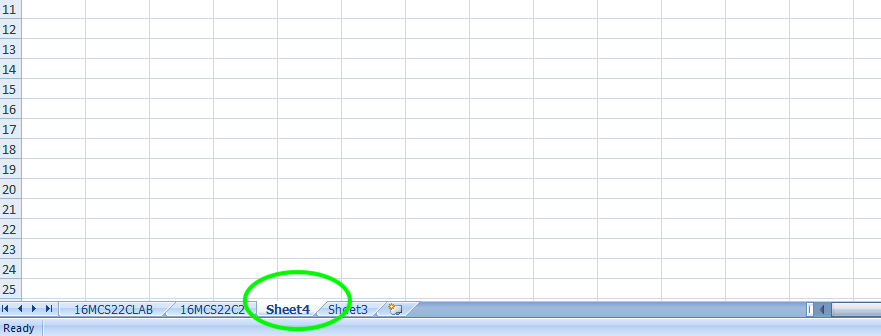
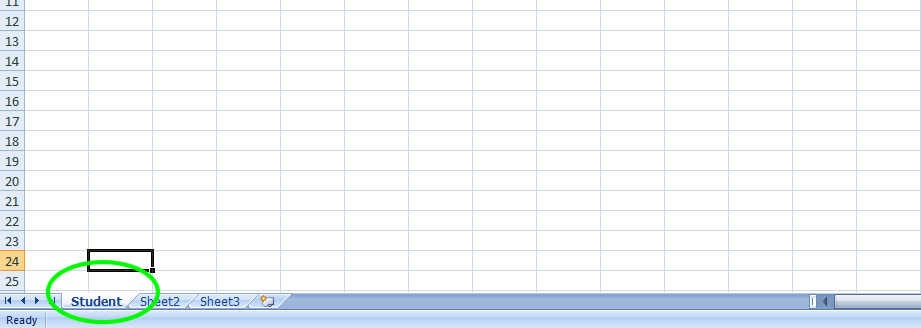
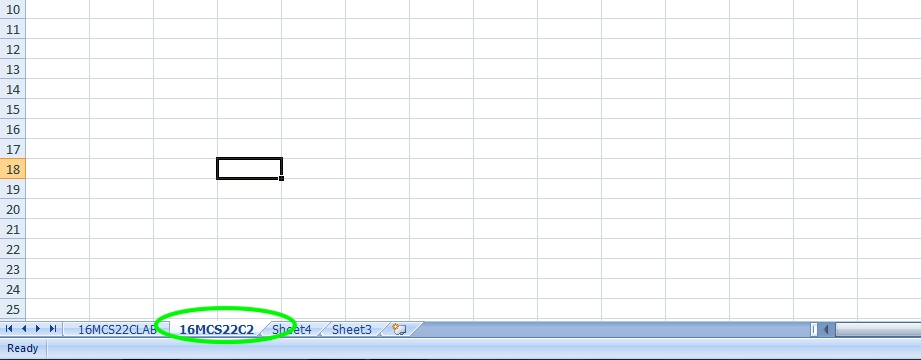
Now, if we want to rename that file then we can rename the spreadsheet tab by right-clicking it, selecting Rename option from the context menu, and then typing a new name. Here, I rename that sheet1 with 16MCS22CLAB.
Now, if I want to view the 16MCS22C2 worksheet then click on a worksheet’s tab to view it.
Now, after some time I don’t need the 16MCS22CLAB file. So, to delete that file and for deleting a file, select the Delete option from the context menu by right-clicking the worksheet tab.
Источник
Save time with these handy keyboard and mouse shortcuts
Updated on December 2, 2020
What to Know
- Add one worksheet: Press Shift+F11 or select Plus (+) next to the sheet tabs. Or, go to Home > Insert > Insert Sheet.
- Add multiple sheets: Press Ctrl+Shift+PgDn (right) or Ctrl+Shift+PgUp (left) to select adjacent worksheets, then press Shift+F11.
- Or, select a sheet, press and hold Ctrl, select adjacent sheets, then right-click on the last tab and select Insert > Worksheet > OK.
This article explains how to add new worksheets to your Excel workbooks quickly and easily using keyboard and mouse shortcuts. Instructions cover Excel 2019, 2016, 2013, 2010, and 2007.
Insert Single Worksheets with Keyboard Shortcuts
There are two different keyboard key combinations you can use to insert a new worksheet in Excel: Shift+F11 and Alt+Shift+F1. Choose the keyboard shortcut that’s most comfortable for you to access.
To insert a worksheet using Shift+F11, follow these steps:
-
Press and hold the Shift key on the keyboard.
-
Press and release the F11 key.
-
Release the Shift key. A new worksheet is inserted into the current workbook to the left of all existing worksheets.
-
To add multiple worksheets, press Shift+F11 for each additional worksheet.
Insert Multiple Worksheets With Keyboard Shortcuts
To add multiple worksheets at one time using the above keyboard shortcuts, highlight the number of existing worksheet tabs to tell Excel how many new sheets are to be added before applying the keyboard shortcut.
The selected worksheet tabs must be adjacent to each other for this method to work.
To select multiple sheets, use the Shift key and your mouse or use one of these keyboard shortcuts:
- Ctrl+Shift+PgDn selects sheets to the right.
- Ctrl+Shift+PgUp selects sheets to the left.
Here’s an example of how to insert three new worksheets:
-
Select one worksheet tab in the workbook to highlight it.
-
Press and hold Ctrl+Shift.
-
Press and release the PgDn key twice to highlight the two sheets to the right. Three sheets are highlighted.
-
Press Shift+F11 to insert the new worksheets (see the instructions above if you need help). Three new worksheets are added to the workbook to the left of the existing worksheets.
Insert Single Worksheets With the Sheet Tabs
To add a single worksheet using the mouse, select the Plus (+) icon next to the sheet tabs at the bottom of the Excel screen. The new sheet is inserted to the right of the currently active sheet.
In Excel 2010 and 2007, the New Sheet icon is an image of a worksheet but it’s still located next to the sheet tabs at the bottom of the screen.
Insert Multiple Worksheets With the Sheet Tabs
While it’s possible to add multiple worksheets by selecting New Sheet several times, there’s another way to use a dialog box. With this method, the new worksheets are added to the right of all existing worksheets.
To use the Insert dialog box to add multiple worksheets:
-
Select a sheet tab to highlight it.
-
Press and hold the CTRL key.
-
Select additional adjacent sheet tabs to highlight them. Highlight the same number of sheet tabs as the number of new sheets you want to add.
-
Right-click on the last sheet tab you selected and select Insert to open the Insert dialog box.
-
Select Worksheet in the Insert dialog box, then select OK to add the new sheets and close the dialog box.
Insert Single Worksheets With the Ribbon Bar
Another method to add a new worksheet is to use the Insert option located on the Home tab of the ribbon bar in Excel. If you’re more comfortable with visual controls, you may find this option the easiest.
Follow these steps to insert a single worksheet using the Insert command:
-
Select the Home tab.
-
Select the Insert drop-down arrow to open the drop-down menu of options.
-
Select Insert Sheet to add a new sheet to the left of the active sheet.
Insert Multiple Worksheets with the Ribbon Bar
It’s also possible to insert multiple worksheets using the Insert command on the ribbon bar. Here’s how:
-
Select a sheet tab to highlight it.
-
Press and hold the CTRL key.
-
Select additional adjacent sheet tabs to highlight them. Highlight the same number of sheet tabs as the number of new sheets you want to add.
-
Select the Home tab.
-
Select the Insert drop-down arrow to open the drop-down menu of options.
-
Select Insert Sheet to add the new worksheets to the left of the active sheet.
Thanks for letting us know!
Get the Latest Tech News Delivered Every Day
Subscribe
EXPLANATION
This tutorial explains and provides step by step instructions on how to insert multiple worksheets after a specific sheet using Excel, VBA and Shortcut methods.
Excel Methods: Using Excel you can insert multiple worksheets after a specific sheet with a ribbon or sheet option.
VBA Methods: Using VBA you can insert multiple worksheets after a specific sheet by referencing to a Worksheets or Sheets object.
You can also enter the sheet’s name, after which you want to insert the new worksheets, directly into the VBA code or reference to a cell that contains the name of the sheet, after which you want to insert the new worksheets.
In addition, you can also directly enter into the VBA code the number of worksheets that you want to insert or reference to a cell that contains a value that represents the number of new worksheets you want to insert.
It is our preference to apply the later method (cell reference) given that it offers the ability to change the number of worksheets to insert by simply changing the value that is in the cell that is referenced in the VBA code, instead of needing to directly change the VBA code every time you need to change the number of new worksheets to insert.
Shortcut Method: Using a Shortcut you can insert multiple worksheets after a specific sheet by selecting the number of new worksheets you want to insert after the sheet that you want to insert the new worksheets and actioning the shortcut.
ADDITIONAL NOTES
Note 1: Using the ribbon or sheet option, the new worksheets will be inserted in front of the active sheet.
Lesson 9: Working with Multiple Worksheets
/en/excel/understanding-number-formats/content/
Introduction
Every workbook contains at least one worksheet by default. When working with a large amount of data, you can create multiple worksheets to help organize your workbook and make it easier to find content. You can also group worksheets to quickly add information to multiple worksheets at the same time.
Optional: Download our practice workbook.
Watch the video below to learn more about using multiple worksheets.
To insert a new worksheet:
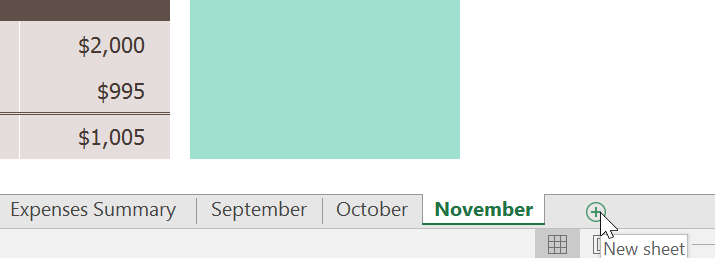
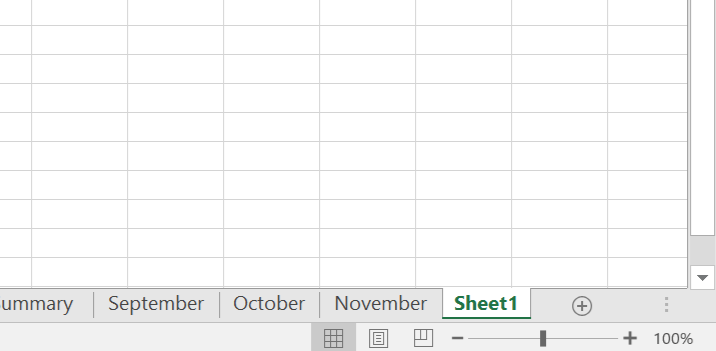
- Locate and select the New sheet button near the bottom-right corner of the Excel window.

- A new blank worksheet will appear.

By default, any new workbook you create in Excel will contain one worksheet, called Sheet1. To change the default number of worksheets, navigate to Backstage view, click Options, then choose the desired number of worksheets to include in each new workbook.
To copy a worksheet:
If you need to duplicate the content of one worksheet to another, Excel allows you to copy an existing worksheet.
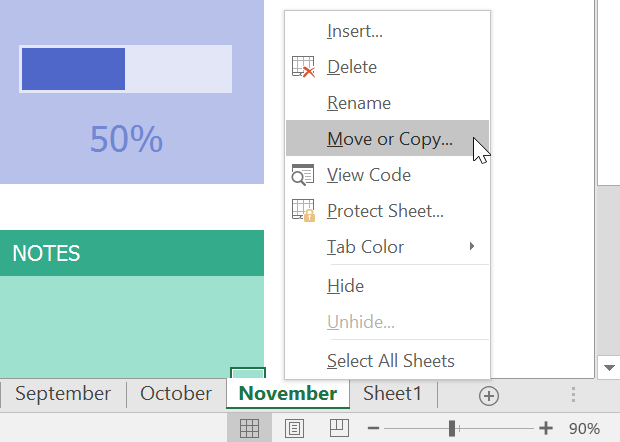
- Right-click the worksheet you want to copy, then select Move or Copy from the worksheet menu.

- The Move or Copy dialog box will appear. Choose where the sheet will appear in the Before sheet: field. In our example, we’ll choose (move to end) to place the worksheet to the right of the existing worksheet.
- Check the box next to Create a copy, then click OK.

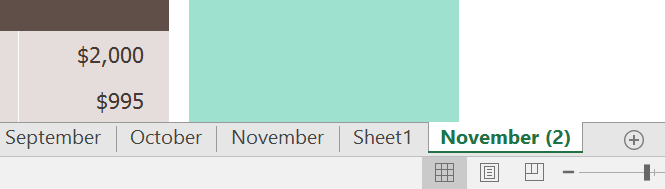
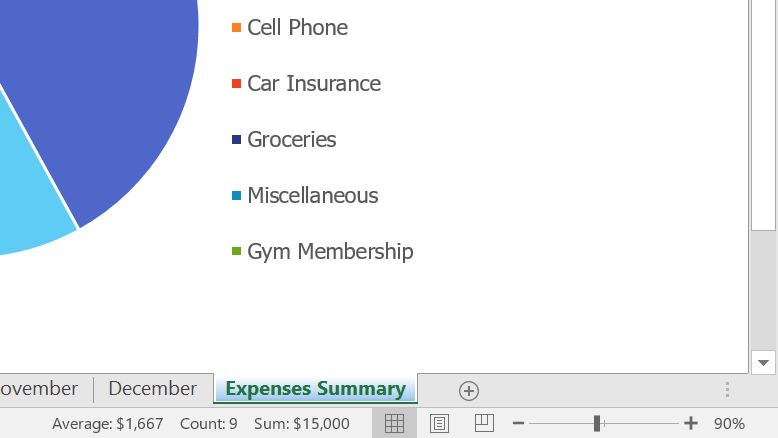
- The worksheet will be copied. It will have the same title as the original worksheet, as well as a version number. In our example, we copied the November worksheet, so our new worksheet is named November (2). All content from the November worksheet has also been copied to the new worksheet.


You can also copy a worksheet to an entirely different workbook. You can select any workbook that is currently open from the To book: drop-down menu.
To rename a worksheet:
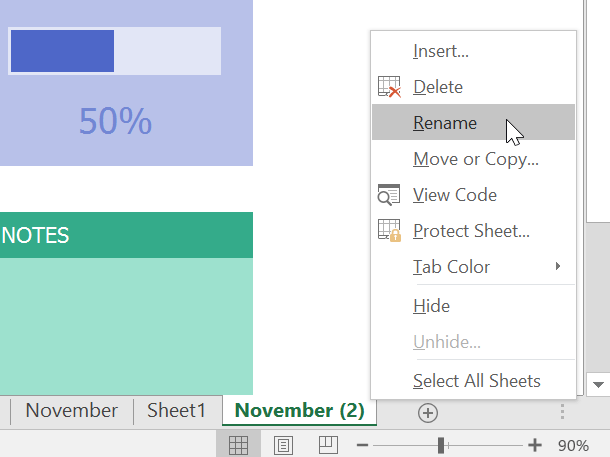
- Right-click the worksheet you want to rename, then select Rename from the worksheet menu.

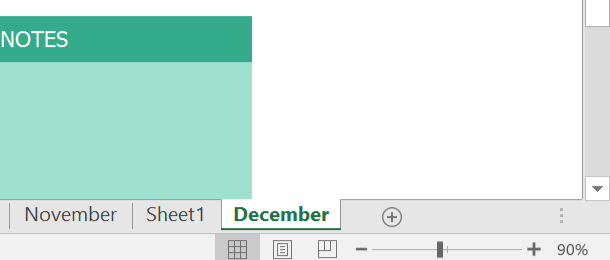
- Type the desired name for the worksheet.
- Click anywhere outside the worksheet tab, or press Enter on your keyboard. The worksheet will be renamed.

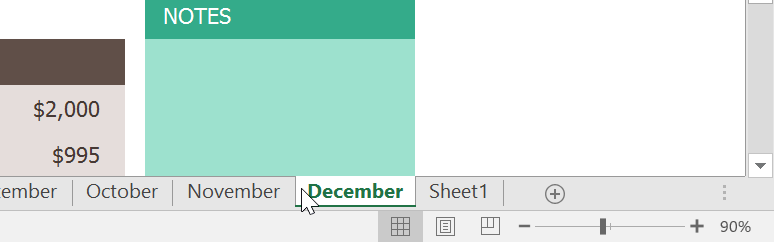
To move a worksheet:
- Click and drag the worksheet you want to move until a small black arrow appears above the desired location.

- Release the mouse. The worksheet will be moved.

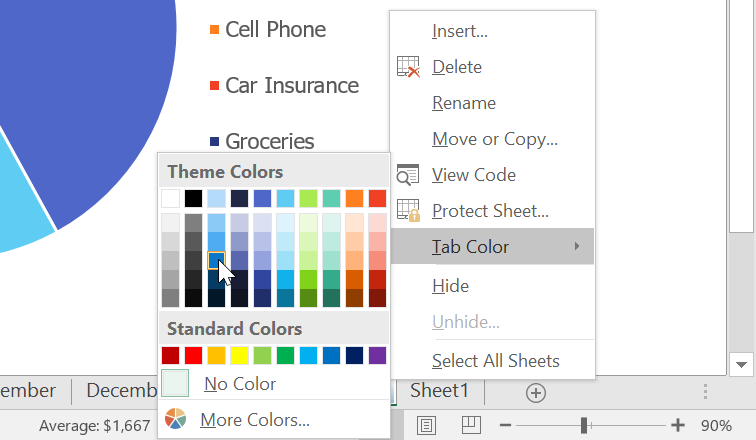
To change the worksheet tab color:
- Right-click the desired worksheet tab, and hover the mouse over Tab Color. The Color menu will appear.
- Select the desired color.

- The worksheet tab color will be changed.

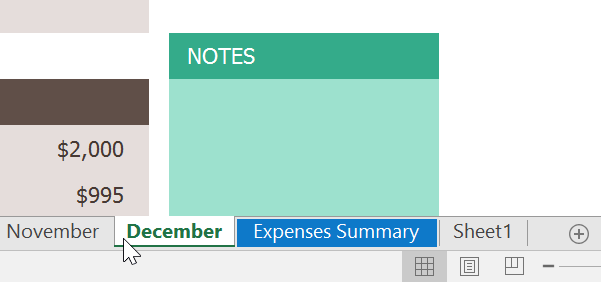
The worksheet tab color is considerably less noticeable when the worksheet is selected. Select another worksheet to see how the color will appear when the worksheet is not selected.
To delete a worksheet:
- Right-click the worksheet you want to delete, then select Delete from the worksheet menu.

- The worksheet will be deleted from your workbook.

If you want to prevent specific worksheets from being edited or deleted, you can protect them by right-clicking the desired worksheet and selecting Protect Sheet from the worksheet menu.
Switching between worksheets
If you want to view a different worksheet, you can simply click the tab to switch to that worksheet. However, with larger workbooks this can sometimes become tedious, as it may require scrolling through all of the tabs to find the one you want. Instead, you can simply right-click the scroll arrows in the lower-left corner, as shown below.

A dialog box will appear with a list of all of the sheets in your workbook. You can then double-click the sheet you want to jump to.

Watch the video below to see this shortcut in action.
Grouping and ungrouping worksheets
You can work with each worksheet individually, or you can work with multiple worksheets at the same time. Several worksheets can be combined into a group. Any changes made to one worksheet in a group will be made to every worksheet in that group.
To group worksheets:
- Select the first worksheet you want to include in the worksheet group.

- Press and hold the Ctrl key on your keyboard. Select the next worksheet you want in the group.

- Continue to select worksheets until all of the worksheets you want to group are selected, then release the Ctrl key. The worksheets are now grouped.


While worksheets are grouped, you can navigate to any worksheet within the group. Any changes made to one worksheet will appear on every worksheet in the group. However, if you select a worksheet that is not in the group, all of your worksheets will become ungrouped.
To ungroup worksheets:
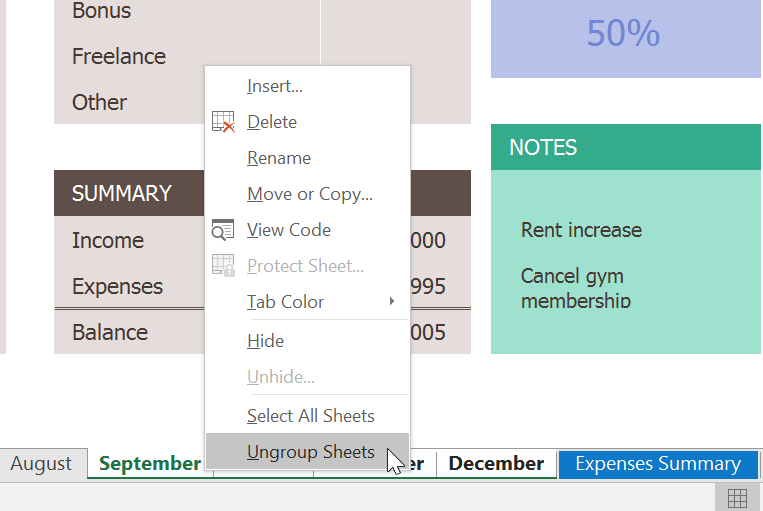
- Right-click a worksheet in the group, then select Ungroup Sheets from the worksheet menu.

- The worksheets will be ungrouped. You can also click any worksheet not included in the group to ungroup all worksheets.

Challenge!
- Open our practice workbook.
- Insert a new worksheet, and rename it Q1 Summary.
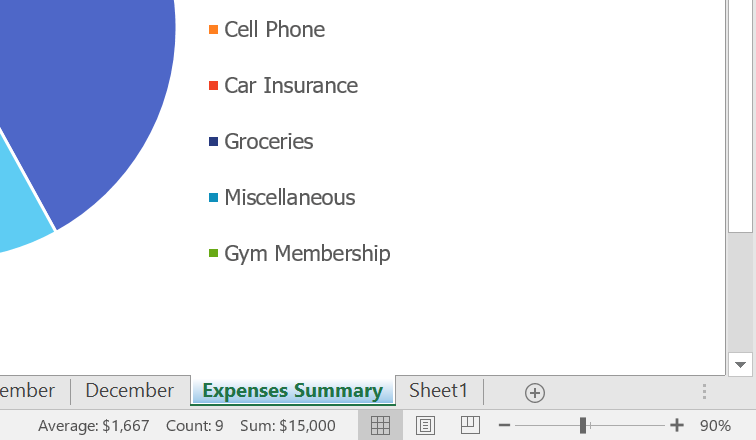
- Move the Expenses Summary worksheet to the far right, then move the Q1 Summary worksheet so it is between March and April.
- Create a copy of the Expenses Summary worksheet by right-clicking the tab. Don’t just copy and paste the content of the worksheet into a new worksheet.
- Change the color of the January tab to blue and the color of the February tab to red.
- Group the worksheets September, October, and November.
- When you’re finished, your workbook should look something like this:

/en/excel/using-find-replace/content/
This tutorial explains how to add new work sheets using Worksheets.Add Method in Excel VBA, or add new worksheets at the back or before specific worksheet
You may also want to read:
Excel VBA Worksheets.Copy Method to copy worksheet
Excel VBA Worksheets.Add Method is to add new worksheet in a workbook.
Syntax of Excel VBA Worksheets.Add Method
Worksheets.Add([Before],[After],[Count],[Type])
| Before | Optional. Add new worksheet before specific worksheet | ||||
| After | Optional, add new worksheet after specific worksheet | ||||
| Count | Optional. Number of worksheets to add, default is 1 | ||||
| Type | Optional. Worksheet type, default is xlWorksheet
|
If Before and After are not specified, worksheet is added before Active worksheet (the worksheet you selected before running the Add Method).
Example 1 – Add new worksheet after specific worksheet
The below code add new worksheet after Sheet8
Set newWS = ThisWorkbook.Worksheets.Add(After:=Worksheets("Sheet8"))
Example 2 – Add new worksheet and move to the end of worksheet
The below code makes use of Worksheets(Worksheets.Count) to find the last worksheet. Worksheets(Index) returns the Nth worksheet from left to right.
Set newWS = ThisWorkbook.Worksheets.Add(After:=Worksheets(Worksheets.Count))
Example 3 – Add new worksheet and move to the first worksheet
Set newWS = ThisWorkbook.Worksheets.Add(Before:=Worksheets(1))
Example 4 – add new worksheet if not exist
The below code makes use of a custom Function called wsExist to check if a worksheet already exists, returns TRUE if exists, FALSE if not exist.
Sub createWS()
    Dim ws, newWS As Worksheet
    For Each ws In ActiveWorkbook.Worksheets
        If wsExists("worksheet1") Then
           counter = 1
        End If
    Next ws

    If counter = 0 Then
        Set newWS = ThisWorkbook.Worksheets.Add(After:=Worksheets(Worksheets.Count))
        newWS.Name = "worksheet1"
    End If
End Sub

Function wsExists(wksName As String) As Boolean
    On Error Resume Next
    wsExists = CBool(Len(Worksheets(wksName).Name) > 0)
    On Error GoTo 0
End Function
Outbound References
https://msdn.microsoft.com/en-us/library/office/microsoft.office.interop.excel.worksheets.add.aspx?f=255&MSPPError=-2147217396
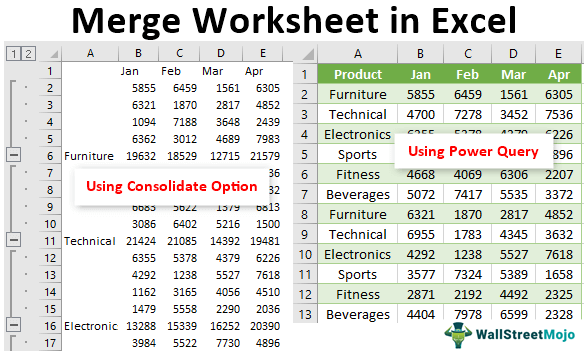
Merging multiple sheets into one worksheet is a tough task, but thankfully we have a feature called “Consolidate” in Excel. Excel 2010 onwards, we can use “Power Query” as a worksheet merger. This article will show you how to merge worksheets into one.
Table of contents
- Merge Worksheet in Excel
- Merger Worksheet Using Consolidate Option
- Merge Worksheets by Using Power Query
- Things to Remember
- Recommended Articles
Getting the data in multiple worksheets is common but combining all the worksheet data at once is the job of the person who receives the data in different sheets.
Merger Worksheet Using Consolidate Option
The easiest and quickest way to merge multiple worksheets data into one is by using the in-built feature of excel “Consolidate.” For example, look at the below data in Excel sheets.
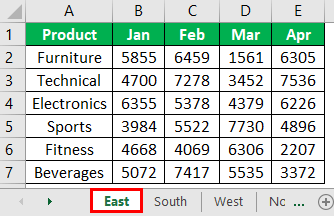

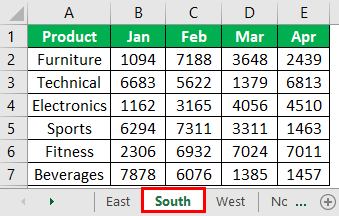
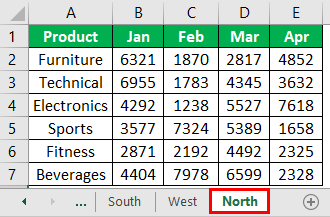
The above image has four worksheets comprising four different regions’ product-wise sales numbers across months.
We need to create one single sheet from the four above to show all the summary results. Then, follow the below steps to consolidate worksheets.
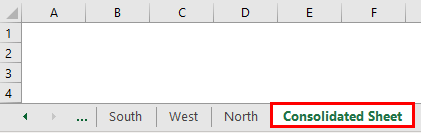
Step 1: We must first create a new worksheet and name it a “Consolidated Sheet.“
Step 2: We must now place a cursor in the first cell of the worksheet.
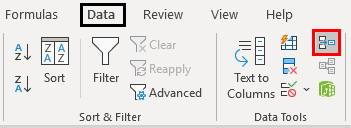
- Then, go to the “Data” tab.
- Click on the “Consolidate” option.
Step 3: As a result, this will open up below the “Consolidate” window.
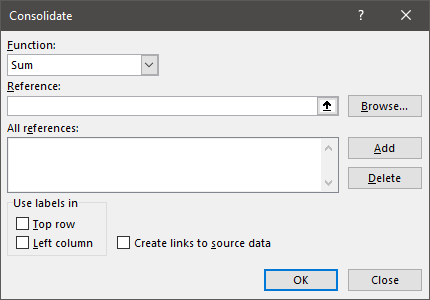
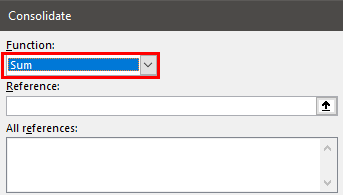
Step 4: Since we are consolidating all the four region data, choose the option of “Sum” under the function drop-down list in excelA drop-down list in excel is a pre-defined list of inputs that allows users to select an option.read more.
Step 5: Next, we need to choose the reference range from the first sheet to the last sheet. Place the cursor inside the reference box, go to the “East” sheet, and choose the data.
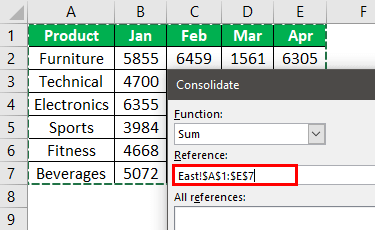
Step 6: Click on the “Add” button to add the first reference area.
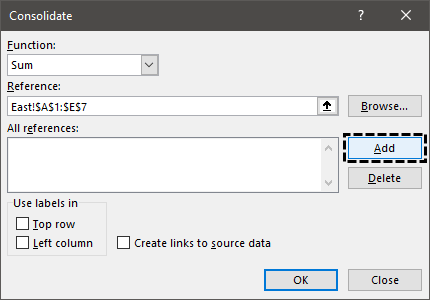
Now, this is added to the reference list.

Step 7: Next, we have to go to the “South” sheet, and the reference range would have been selected automatically.
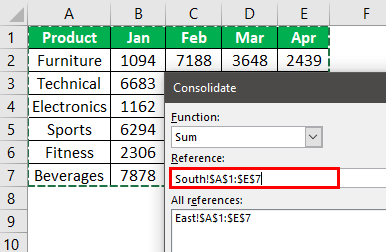
Step 8: Click on “Add” again, and the second sheet reference is added to the list. Like this, we can repeat the same for all the sheets.
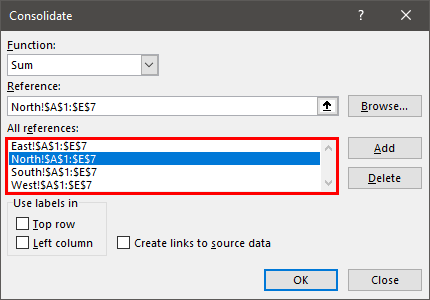
Now, we have added all four sheets of references. One more thing, while selecting each selected region range, including the row headerExcel Row Header is the grey column on the left side of column 1 in the worksheet that contains the numbers (1, 2, 3, etc.). To hide or reveal row and column headers, press ALT + W + V + H.read more and column header of the data table, to bring the same into the consolidated sheet, we must check the boxes of “Top Row” and “Left Column” and “Create links to Source Data.”
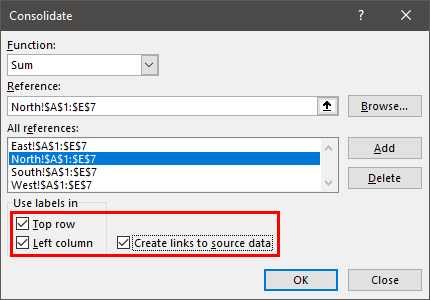
Click on “OK.” We will have a summary table like the one below.
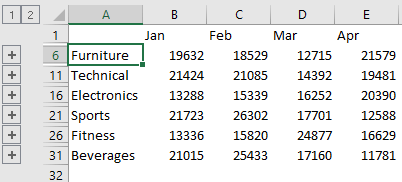
As we can see above, we have two grouped sheets, 1 and 2. If we click on 1, it will show all the region’s consolidated table, and if we click on 2, it will show the breakup of each zone.

It looks fine, but this is not the merging of worksheets. So, merging is combining all the worksheets into one without any calculations; we need to use the “Power Query” option.
Merge Worksheets by Using Power Query
The “Power Query” option is an add-in for ExcelAn add-in is an extension that adds more features and options to the existing Microsoft Excel.read more 2010 and 2013 versions. It is a built-in feature for Excel 2016 onwards versions.
Follow the steps to merge worksheets using Excel’s “Power Query” option.
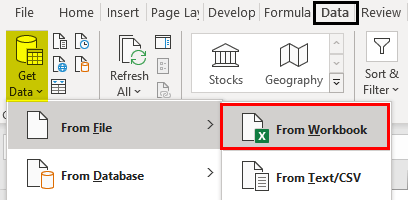
- We must go to the “Data” tab. Then, from the “Get Data,” select “From File,” “From Workbook.”

- Then, we must select the sheet and then transform it into a Power Query Editor.
We need to convert all the data tables into Excel tables. We have converted each data table into an Excel table and named East, South, West, and North by their region names.
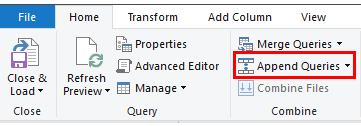
- First, we must go to any of the sheets. Then, under the “Power Query,” click on “Append Queries.”

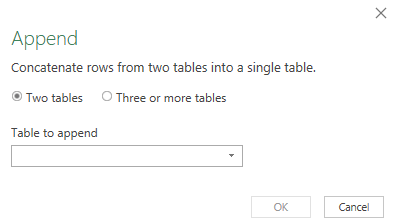
- Now, this will open up the “Append” window.

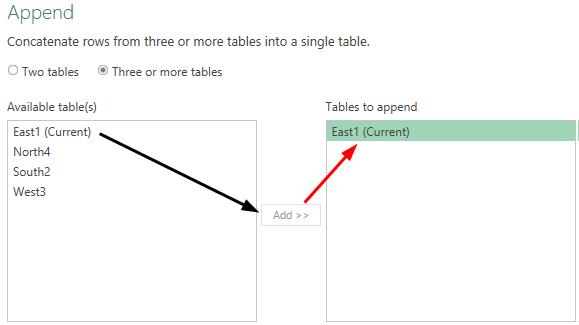
- Here, we need to merge more than one table, so we must choose the “Three or more tables” option.

- Then, select the table “East 1 (Current)” and click on the “Add” button.

For other region tables, we need to repeat the same steps. - After this, click on “OK,” and it will open the “Power Query Editor” window.

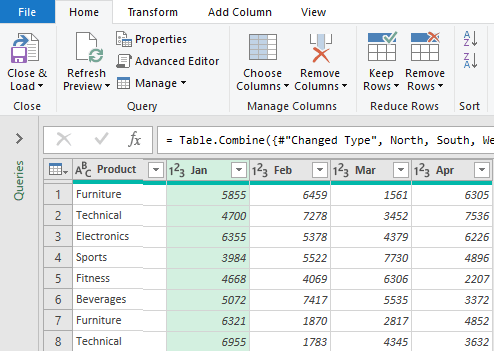
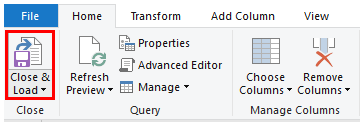
- Finally, we must click on the “Close and Load” option.

Consequently, this will merge all the sheets into one in a new worksheet of the same workbook.

Things to Remember
- The Power Query in excelPower Query is an excel tool used to import data from different sources, transform (change) it as required, and return a refined dataset in the workbook.read more is available for Excel 2010 and 2013 versions as an “Add-in.” From Excel 2016 onwards, this is a built-in tab.
- We can use the “Consolidate” option to consolidate different worksheets into one sheet based on arithmetic calculations.
- We need to convert the data into excel table formatExcel comes with a number of table styles that you may quickly apply to a table format. In Excel, you can design and use a new custom table style of your choice. read more for the “Power Query” merge.
Recommended Articles
This article has been a guide to Excel Worksheet Merge. Here, we discuss merging worksheets into one using the “Consolidate” and “Power Query” options and practical examples. You may learn more about Excel from the following articles: –
- Power Query Tutorial
- Column Merge Excel
- Examples of Combine Cells in Excel
- Merge Tables Excel
- Unmerge Cells Excel
How to Insert a New Worksheet in Excel (2023 Guide)
When you create a new Excel workbook, you automatically create an Excel worksheet. That’s like hitting two birds with one stone 😀
However, it’s important to note that an Excel workbook is different from an Excel worksheet.
An Excel workbook is an Excel file that contains one or more worksheets. These worksheets (also called spreadsheets) consist of cells organized into rows and columns. It’s where we do the work of storing, organizing, and calculating data.
Today, learn more about Excel worksheets so you can make them work for you. In this article, you’ll learn the best ways how to insert a new worksheet in Excel, and how to rename or delete it as well 😊
Let’s go!
Add worksheet with mouse clicks
To add a new worksheet, you need to first create a new Excel workbook. You can also open an existing Excel file on your computer.
For our example, let’s create a new blank workbook.
By creating a new blank workbook, a new blank worksheet is seen on your screen 👇

If you want to see your worksheets, just look at the Sheets Tab at the bottom left of your Excel window👀umn.

Let’s add another Excel sheet to our new workbook.
All you have to do is to click the plus icon (+) next to Sheet 1.

And that’s it! You will be automatically directed to the new worksheet you can work on 😊

Simply click the plus icon if you want to add more worksheets to the workbook. The sheet name will follow as Sheets 1, 2, 3, and so on. The newly added worksheet will be the rightmost sheet in your Excel sheet tab.
One new sheet in one click 👍
Add worksheet using right-click menu option
Alternatively, you can also insert a new worksheet using the right-click menu option. Here’s how to do that 👇
- Right-click on the Sheet2 tab.
- Select Insert.

The Insert dialog box will appear. It will show you what you can insert.
- Click Worksheet.
- Finally, click OK.

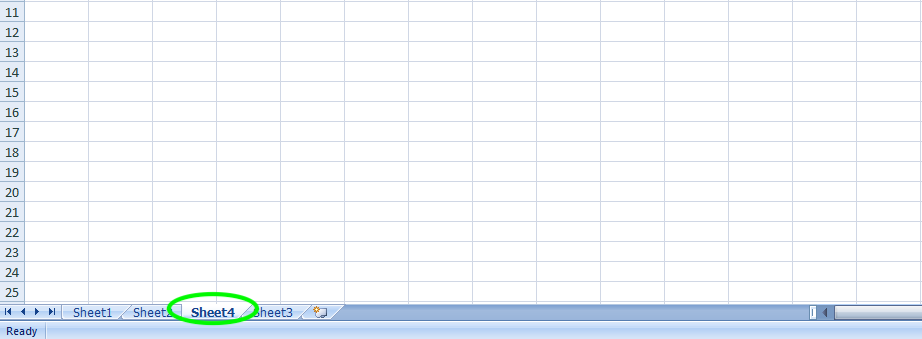
The new worksheet will be inserted before the selected sheet tab. In our case, between Sheets 1 and 2.

You might be saying: “This isn’t in order.” 🤔 and you’re right.
But you don’t need to worry. You can move a sheet tab to where you want it to be.
Move your worksheet
To move an Excel worksheet, you just need to press on that sheet tab and drag.

Alternatively, you can also right-click on the sheet tab to find the Move or Copy option to move or copy the worksheet 😊
Add worksheet with a keyboard shortcut
If you don’t want to insert worksheets using your mouse, you can also use the keyboard shortcut.
Keyboard shortcuts or shortcut keys can perform the same tasks and functions in Excel without having to use your mouse. Many users find keyboard shortcuts in Excel help them work more efficiently and also feel like an Excel PRO 😎
The keyboard shortcut to insert a new worksheet is Shift + F11.
Let’s use this keyboard shortcut to insert a new worksheet into our workbook.
- Click Sheet 3 in the sheet tab.
- Press the Shift key and F11 on your keyboard. Make sure you hold down the Shift key before hitting the F11 key.

The new sheet is inserted before sheet 3 in the tab, that quick ⚡

If you want to insert multiple worksheets, just press the keys on your keyboard multiple times as well.
Many Microsoft Office users find keyboard shortcuts very helpful for them to work more efficiently. Aside from that, keyboard shortcuts are of great help for users with vision and mobility disabilities. They prefer keyboard shortcuts better than using touch screens or using a mouse 😊
Add a worksheet from the ribbon menu
Of course, the most obvious method to add worksheets to your workbook is using the Insert button in the Home tab of the Excel ribbon.
To insert a new worksheet from the ribbon menu, follow these easy steps.
- Click on the Home Tab.

- Click the Insert button in the Cells group.

- From the drop-down list, select the Insert Sheet option.

And there you have it! One new worksheet is ready for you to use 😀

This may be the best time to rename your worksheets.
Renaming your worksheets
Renaming the worksheets in your workbook will keep your workbook organized and save you time in finding the data you want 👍
To rename your worksheets, double-click on their sheet tab like this.

Or do this 2-step method.
- Right-click on the sheet tab.
- Select Rename in the menu.

Now, we can then go ahead and type.
Let’s say this workbook will be a list of employees in each department. We can label the worksheets this way 😀

Sometimes, there are worksheets we no longer need or want to delete. It could be duplications or a blank one that we wish to eliminate. To do that, continue to scroll down 👇
Delete your worksheets
To delete your Excel Worksheet, right-click on the worksheet tab and select the delete option from the dialog box as shown below.

That’s it – Now what
Well, now you know how to work your way with worksheets in Microsoft Excel. From inserting one or multiple worksheets to organizing them so you won’t be lost in your workbooks 👍
The next time you want to insert a new sheet, try using the keyboard shortcut to feel like the Excel PRO you are on your way to becoming 😎
If your goal is to learn how to keep your data organized or level up your Excel skills, then my free Excel Intermediate training is for YOU!
I’ll be sending you FREE lessons about How to effectively clean your data, and the most important Excel functions like IF, SUMIF, and VLOOKUP 🚀
Click here to join my free email course and become an Excel PRO!
Other resources
Did you know that you can group multiple worksheets in your workbook? Learn how by clicking this link!
Want to learn more keyboard shortcuts? We’ve written 11 Best Excel Shortcuts you’ll ever need. It comes with practical examples too. Click here to learn more.
I hope you find this helpful 👋
Frequently asked questions
To create a new sheet with the same format as an existing worksheet, right-click on the sheet tab of the worksheet you want to copy. Then select the Move or Copy option.
Tick the checkbox “Create a copy” in the Move and Copy dialog box. Finally, click OK.
You can press Shift + F11 keys to insert a new worksheet. Then double-click the tab of the current worksheet to rename it.
Kasper Langmann2023-01-09T08:31:53+00:00
Page load link