
Create a document in Word

With Word on your PC, Mac, or mobile device, you can:
-
Create documents from scratch, or a template.
-
Add text, images, art, and videos.
-
Research a topic and find credible sources.
-
Access your documents from a computer, tablet, or phone with OneDrive.
-
Share your documents and work with others.
-
Track and review changes.
Create a document
-
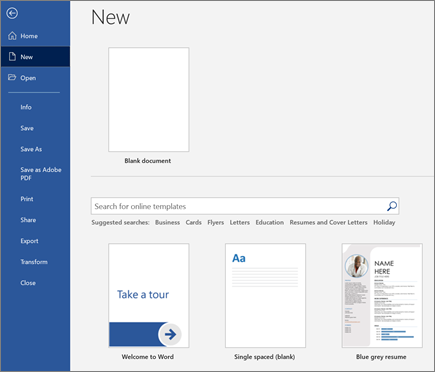
On the File tab, click New.
-
In the Search for online templates box, enter the type of document you want to create and press ENTER.
Tip: To start from scratch, select Blank document. Or, for practice using Word features, try a learning guide like Welcome to Word, Insert your first table of contents, and more.
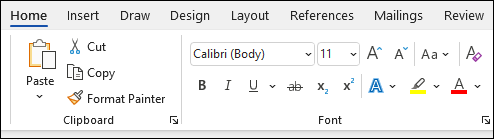
Add and format text
-
Place the cursor and type some text.
-
To format, select the text and then select an option: Bold, Italic, Bullets, Numbering, and more.
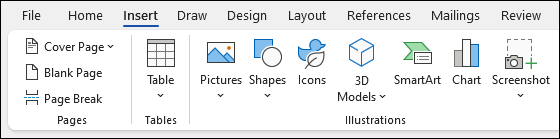
Add Pictures, Shapes, SmartArt, Chart, and more
-
Select the Insert tab.
-
Select what you want to add:
-
Tables — select Table, hover over the size you want, and select it.
-
Pictures — select Pictures, browse for pictures from your computer, select a stock image, or even search Bing.
Note:
Older versions of Word may have Online Pictures on the ribbon next to Pictures. -
Shapes — select Shapes, and choose a shape from the drop-down.
-
Icons — select Icons, pick the one you want, and select Insert.
-
3D Models — select 3D Models, choose from a file or online source, go to the image you want, and select Insert.
-
SmartArt — select SmartArt, choose a SmartArt Graphic, and select OK.
-
Chart — select Chart, select the chart you want, and select OK.
-
Screenshot — select Screenshot and select one from the drop-down.
-
Next:
Save your document to OneDrive in Word
Need more help?
Want more options?
Explore subscription benefits, browse training courses, learn how to secure your device, and more.
Communities help you ask and answer questions, give feedback, and hear from experts with rich knowledge.
Find solutions to common problems or get help from a support agent.
Microsoft Word is a word processor developed by Microsoft. It was first released on October 25, 1983,[9] under the name Multi-Tool Word for Xenix systems.[10][11][12] Subsequent versions were later written for several other platforms including: IBM PCs running DOS (1983), Apple Macintosh running the Classic Mac OS (1985), AT&T UNIX PC (1985), Atari ST (1988), OS/2 (1989), Microsoft Windows (1989), SCO Unix (1990), macOS (2001), Web browsers (2010), iOS (2014) and Android (2015). Using Wine, versions of Microsoft Word before 2013 can be run on Linux.
 |
|

Microsoft Office 365 version of Microsoft Word, with the new redesign applied |
|
| Developer(s) | Microsoft |
|---|---|
| Initial release | October 25, 1983; 39 years ago (as Multi-Tool Word) |
| Stable release |
2209 (16.0.15629.20208) |
| Repository | none |
| Written in | C++ (back-end)[2] |
| Operating system |
|
| Platform | IA-32, x64, ARM, ARM64 |
| Type | Word processor |
| License | Trialware |
| Website | microsoft.com/en-us/microsoft-365/word |

Word for Mac running on macOS Ventura (13.2) |
|
| Developer(s) | Microsoft |
|---|---|
| Stable release |
16.64 (Build 22081401) |
| Repository | none |
| Written in | C++ (back-end), Objective-C (API/UI)[2] |
| Operating system | macOS |
| Type | Word processor |
| License | Proprietary software plus services |
| Website | products.office.com/word |

Screenshot of Microsoft Word for Android 13 |
|
| Original author(s) | Microsoft Corporation |
|---|---|
| Developer(s) | Microsoft Corporation |
| Initial release | January 29, 2015; 8 years ago[5] |
| Stable release |
16.0.15427.20090 |
| Repository | none |
| Operating system | Android Pie and later |
| License | Proprietary commercial software |
| Website | products.office.com/word |
| Developer(s) | Microsoft Corporation |
|---|---|
| Initial release | March 27, 2014; 9 years ago[7] |
| Stable release |
2.63.2 |
| Repository | none |
| Operating system | iOS 14 or later IPadOS 14 or later |
| License | Proprietary commercial software |
| Website | products.office.com/word |
| Developer(s) | Microsoft |
|---|---|
| Repository | none |
| Operating system | Windows 10 and later, Windows 10 Mobile |
| Type | Word processor |
| License | Freemium |
| Website | www.microsoft.com/store/productId/9WZDNCRFJB9S |
Commercial versions of Word are licensed as a standalone product or as a component of Microsoft Office suite of software, which can be purchased either with a perpetual license or as part of a Microsoft 365 subscription.
HistoryEdit
OriginsEdit
In 1981, Microsoft hired Charles Simonyi, the primary developer of Bravo, the first GUI word processor, which was developed at Xerox PARC.[13] Simonyi started work on a word processor called Multi-Tool Word and soon hired Richard Brodie, a former Xerox intern, who became the primary software engineer.[13][14][15]
Microsoft announced Multi-Tool Word for Xenix[13] and MS-DOS in 1983.[16] Its name was soon simplified to Microsoft Word.[10] Free demonstration copies of the application were bundled with the November 1983 issue of PC World, making it the first to be distributed on-disk with a magazine.[10][17] That year Microsoft demonstrated Word running on Windows.[18]
Unlike most MS-DOS programs at the time, Microsoft Word was designed to be used with a mouse.[16] Advertisements depicted the Microsoft Mouse and described Word as a WYSIWYG, windowed word processor with the ability to undo and display bold, italic, and underlined text,[19] although it could not render fonts.[10] It was not initially popular, since its user interface was different from the leading word processor at the time, WordStar.[20] However, Microsoft steadily improved the product, releasing versions 2.0 through 5.0 over the next six years. In 1985, Microsoft ported Word to the classic Mac OS (known as Macintosh System Software at the time). This was made easier by Word for DOS having been designed for use with high-resolution displays and laser printers, even though none were yet available to the general public.[21] It was also notable for its very fast cut-and-paste function and unlimited number of undo operations, which are due to its usage of the piece table data structure.[22]
Following the precedents of LisaWrite and MacWrite, Word for Mac OS added true WYSIWYG features. It fulfilled a need for a word processor that was more capable than MacWrite.[23] After its release, Word for Mac OS’s sales were higher than its MS-DOS counterpart for at least four years.[13]
The second release of Word for Mac OS, shipped in 1987, was named Word 3.0 to synchronize its version number with Word for DOS; this was Microsoft’s first attempt to synchronize version numbers across platforms. Word 3.0 included numerous internal enhancements and new features, including the first implementation of the Rich Text Format (RTF) specification, but was plagued with bugs. Within a few months, Word 3.0 was superseded by a more stable Word 3.01, which was mailed free to all registered users of 3.0.[21] After MacWrite Pro was discontinued in the mid-1990s, Word for Mac OS never had any serious rivals. Word 5.1 for Mac OS, released in 1992, was a very popular word processor owing to its elegance, relative ease of use, and feature set. Many users say it is the best version of Word for Mac OS ever created.[21][24]
In 1986, an agreement between Atari and Microsoft brought Word to the Atari ST[25] under the name Microsoft Write. The Atari ST version was a port of Word 1.05 for the Mac OS[26][27] and was never updated.
The first version of Word for Windows was released in 1989. With the release of Windows 3.0 the following year, sales began to pick up and Microsoft soon became the market leader for word processors for IBM PC-compatible computers.[13] In 1991, Microsoft capitalized on Word for Windows’ increasing popularity by releasing a version of Word for DOS, version 5.5, that replaced its unique user interface with an interface similar to a Windows application.[28][29] When Microsoft became aware of the Year 2000 problem, it made Microsoft Word 5.5 for DOS available for free downloads. As of February 2021, it is still available for download from Microsoft’s website.[30]
In 1991, Microsoft embarked on a project code-named Pyramid to completely rewrite Microsoft Word from the ground up. Both the Windows and Mac OS versions would start from the same code base. It was abandoned when it was determined that it would take the development team too long to rewrite and then catch up with all the new capabilities that could have been added at the same time without a rewrite. Instead, the next versions of Word for Windows and Mac OS, dubbed version 6.0, both started from the code base of Word for Windows 2.0.[24]
With the release of Word 6.0 in 1993, Microsoft again attempted to synchronize the version numbers and coordinate product naming across platforms, this time across DOS, Mac OS, and Windows (this was the last version of Word for DOS). It introduced AutoCorrect, which automatically fixed certain typing errors, and AutoFormat, which could reformat many parts of a document at once. While the Windows version received favorable reviews (e.g., from InfoWorld[31]), the Mac OS version was widely derided. Many accused it of being slow, clumsy, and memory intensive, and its user interface differed significantly from Word 5.1.[24] In response to user requests, Microsoft offered Word 5 again, after it had been discontinued.[32] Subsequent versions of Word for macOS are no longer direct ports of Word for Windows, instead featuring a mixture of ported code and native code.
Word for WindowsEdit
Word for Windows is available stand-alone or as part of the Microsoft Office suite. Word contains rudimentary desktop publishing capabilities and is the most widely used word processing program on the market. Word files are commonly used as the format for sending text documents via e-mail because almost every user with a computer can read a Word document by using the Word application, a Word viewer or a word processor that imports the Word format (see Microsoft Word Viewer).
Word 6 for Windows NT was the first 32-bit version of the product,[33] released with Microsoft Office for Windows NT around the same time as Windows 95. It was a straightforward port of Word 6.0. Starting with Word 95, each release of Word was named after the year of its release, instead of its version number.[34]
Word 2007 introduced a redesigned user interface that emphasized the most common controls, dividing them into tabs, and adding specific options depending on the context, such as selecting an image or editing a table.[35] This user interface, called Ribbon, was included in Excel, PowerPoint and Access 2007, and would be later introduced to other Office applications with Office 2010 and Windows applications such as Paint and WordPad with Windows 7, respectively.[36]
The redesigned interface also includes a toolbar that appears when selecting text, with options for formatting included.[37]
Word 2007 also included the option to save documents as Adobe Acrobat or XPS files,[37] and upload Word documents like blog posts on services such as WordPress.
Word 2010 allows the customization of the Ribbon,[38] adds a Backstage view for file management,[39] has improved document navigation, allows creation and embedding of screenshots,[40] and integrates with online services such as Microsoft OneDrive.[41]
Word 2019 added a dictation function.
Word 2021 added co-authoring, a visual refresh on the start experience and tabs, automatic cloud saving, dark mode, line focus, an updated draw tab, and support for ODF 1.3.
Word for MacEdit
The Mac was introduced on January 24, 1984, and Microsoft introduced Word 1.0 for Mac a year later, on January 18, 1985. The DOS, Mac, and Windows versions are quite different from each other. Only the Mac version was WYSIWYG and used a graphical user interface, far ahead of the other platforms. Each platform restarted its version numbering at «1.0».[42] There was no version 2 on the Mac, but version 3 came out on January 31, 1987, as described above. Word 4.0 came out on November 6, 1990, and added automatic linking with Excel, the ability to flow text around graphics, and a WYSIWYG page view editing mode. Word 5.1 for Mac, released in 1992 ran on the original 68000 CPU and was the last to be specifically designed as a Macintosh application. The later Word 6 was a Windows port and poorly received. Word 5.1 continued to run well until the last Classic MacOS. Many people continue to run Word 5.1 to this day under an emulated Mac classic system for some of its excellent features, such as document generation and renumbering, or to access their old files.
Microsoft Word 2011 running on OS X
In 1997, Microsoft formed the Macintosh Business Unit as an independent group within Microsoft focused on writing software for Mac OS. Its first version of Word, Word 98, was released with Office 98 Macintosh Edition. Document compatibility reached parity with Word 97,[32] and it included features from Word 97 for Windows, including spell and grammar checking with squiggles.[43] Users could choose the menus and keyboard shortcuts to be similar to either Word 97 for Windows or Word 5 for Mac OS.
Word 2001, released in 2000, added a few new features, including the Office Clipboard, which allowed users to copy and paste multiple items.[44] It was the last version to run on classic Mac OS and, on Mac OS X, it could only run within the Classic Environment. Word X, released in 2001, was the first version to run natively on, and required, Mac OS X,[43] and introduced non-contiguous text selection.[45]
Word 2004 was released in May 2004. It included a new Notebook Layout view for taking notes either by typing or by voice.[46] Other features, such as tracking changes, were made more similar with Office for Windows.[47]
Word 2008, released on January 15, 2008, included a Ribbon-like feature, called the Elements Gallery, that can be used to select page layouts and insert custom diagrams and images. It also included a new view focused on publishing layout, integrated bibliography management,[48] and native support for the new Office Open XML format. It was the first version to run natively on Intel-based Macs.[49]
Word 2011, released in October 2010, replaced the Elements Gallery in favor of a Ribbon user interface that is much more similar to Office for Windows,[50] and includes a full-screen mode that allows users to focus on reading and writing documents, and support for Office Web Apps.[51]
Word 2021 added real-time co-authoring, automatic cloud saving, dark mode, immersive reader enhancements, line focus, a visual refresh, the ability to save pictures in SVG format, and a new Sketched style outline.
File formatsEdit
| DOC | Legacy Word document |
|---|---|
| DOT | Legacy Word templates |
| WBK | Legacy Word document backup |
| DOCX | XML Word document |
| DOCM | XML Word macro-enabled document |
| DOTX | XML Word template |
| DOTM | XML Word macro-enabled template |
| DOCB | XML Word binary document |
Filename extensionsEdit
Microsoft Word’s native file formats are denoted either by a .doc or .docx filename extension.
Although the .doc extension has been used in many different versions of Word, it actually encompasses four distinct file formats:
- Word for DOS
- Word for Windows 1 and 2; Word 3 and 4 for Mac OS
- Word 6 and Word 95 for Windows; Word 6 for Mac OS
- Word 97 and later for Windows; Word 98 and later for Mac OS
(The classic Mac OS of the era did not use filename extensions.)[52]
The newer .docx extension signifies the Office Open XML international standard for Office documents and is used by default by Word 2007 and later for Windows as well as Word 2008 and later for macOS.[53]
Binary formats (Word 97–2007)Edit
During the late 1990s and early 2000s, the default Word document format (.DOC) became a de facto standard of document file formats for Microsoft Office users.[citation needed] There are different versions of «Word Document Format» used by default in Word 97–2007.[54] Each binary word file is a Compound File,[55] a hierarchical file system within a file. According to Joel Spolsky, Word Binary File Format is extremely complex mainly because its developers had to accommodate an overwhelming number of features and prioritize performance over anything else.
As with all OLE Compound Files, Word Binary Format consists of «storages», which are analogous to computer folders and «streams», which are similar to computer files. Each storage may contain streams or other storage. Each Word Binary File must contain a stream called the «WordDocument» stream and this stream must start with a File Information Block (FIB).[57] FIB serves as the first point of reference for locating everything else, such as where the text in a Word document starts, ends, what version of Word created the document and other attributes.
Word 2007 and later continue to support the DOC file format, although it is no longer the default.
XML Document (Word 2003)Edit
The .docx XML format introduced in Word 2003[58] was a simple, XML-based format called WordProcessingML or WordML.
The Microsoft Office XML formats are XML-based document formats (or XML schemas) introduced in versions of Microsoft Office prior to Office 2007. Microsoft Office XP introduced a new XML format for storing Excel spreadsheets and Office 2003 added an XML-based format for Word documents.
These formats were succeeded by Office Open XML (ECMA-376) in Microsoft Office 2007.
Cross-version compatibilityEdit
Opening a Word Document file in a version of Word other than the one with which it was created can cause an incorrect display of the document. The document formats of the various versions change in subtle and not-so-subtle ways (such as changing the font or the handling of more complex tasks like footnotes). Formatting created in newer versions does not always survive when viewed in older versions of the program, nearly always because that capability does not exist in the previous version.[59] Rich Text Format (RTF), an early effort to create a format for interchanging formatted text between applications, is an optional format for Word that retains most formatting and all content of the original document.
Third-party formatsEdit
Plugins permitting the Windows versions of Word to read and write formats it does not natively support, such as international standard OpenDocument format (ODF) (ISO/IEC 26300:2006), are available. Up until the release of Service Pack 2 (SP2) for Office 2007, Word did not natively support reading or writing ODF documents without a plugin, namely the SUN ODF Plugin or the OpenXML/ODF Translator. With SP2 installed, ODF format 1.1 documents can be read and saved like any other supported format in addition to those already available in Word 2007.[59][60][61][62][63] The implementation faces substantial criticism, and the ODF Alliance and others have claimed that the third-party plugins provide better support.[64] Microsoft later declared that the ODF support has some limitations.[65]
In October 2005, one year before the Microsoft Office 2007 suite was released, Microsoft declared that there was insufficient demand from Microsoft customers for the international standard OpenDocument format support and that therefore it would not be included in Microsoft Office 2007. This statement was repeated in the following months.[66][67][68][69] As an answer, on October 20, 2005, an online petition was created to demand ODF support from Microsoft.[70]
In May 2006, the ODF plugin for Microsoft Office was released by the OpenDocument Foundation.[71] Microsoft declared that it had no relationship with the developers of the plugin.[72]
In July 2006, Microsoft announced the creation of the Open XML Translator project – tools to build a technical bridge between the Microsoft Office Open XML Formats and the OpenDocument Format (ODF). This work was started in response to government requests for interoperability with ODF. The goal of the project was not to add ODF support to Microsoft Office, but only to create a plugin and an external toolset.[73][74] In February 2007, this project released a first version of the ODF plugin for Microsoft Word.[75]
In February 2007, Sun released an initial version of its ODF plugin for Microsoft Office.[76] Version 1.0 was released in July 2007.[77]
Microsoft Word 2007 (Service Pack 1) supports (for output only) PDF and XPS formats, but only after manual installation of the Microsoft ‘Save as PDF or XPS’ add-on.[78][79] On later releases, this was offered by default.
Features and flawsEdit
Among its features, Word includes a built-in spell checker, a thesaurus, a dictionary, and utilities for manipulating and editing text. It supports creating tables. Depending on the version, it can perform simple calculations, and supports formatting formulas and equations.
The following are some aspects of its feature set.
TemplatesEdit
Several later versions of Word include the ability for users to create their formatting templates, allowing them to define a file in which: the title, heading, paragraph, and other element designs differ from the standard Word templates.[80] Users can find how to do this under the Help section located near the top right corner (Word 2013 on Windows 8).
For example, Normal.dotm is the master template from which all Word documents are created. It determines the margin defaults as well as the layout of the text and font defaults. Although Normal.dotm is already set with certain defaults, the user can change it to new defaults. This will change other documents which were created using the template.[81] It was previously Normal.dot.[82]
Image formatsEdit
Word can import and display images in common bitmap formats such as JPG and GIF. It can also be used to create and display simple line art. Microsoft Word added support[83] for the common SVG vector image format in 2017 for Office 365 ProPlus subscribers and this functionality was also included in the Office 2019 release.
WordArtEdit
An example image created with WordArt
WordArt enables drawing text in a Microsoft Word document such as a title, watermark, or other text, with graphical effects such as skewing, shadowing, rotating, stretching in a variety of shapes and colors, and even including three-dimensional effects. Users can apply formatting effects such as shadow, bevel, glow, and reflection to their document text as easily as applying bold or underline. Users can also spell-check text that uses visual effects and add text effects to paragraph styles.
MacrosEdit
A macro is a rule of pattern that specifies how a certain input sequence (often a sequence of characters) should be mapped to an output sequence according to a defined process. Frequently used or repetitive sequences of keystrokes and mouse movements can be automated. Like other Microsoft Office documents, Word files can include advanced macros and even embedded programs. The language was originally WordBasic, but changed to Visual Basic for Applications as of Word 97.
This extensive functionality can also be used to run and propagate viruses in documents. The tendency for people to exchange Word documents via email, USB flash drives, and floppy disks made this an especially attractive vector in 1999. A prominent example was the Melissa virus, but countless others have existed.
These macro viruses were the only known cross-platform threats between Windows and Macintosh computers and they were the only infection vectors to affect any macOS system up until the advent of video codec trojans in 2007.[citation needed] Microsoft released patches for Word X and Word 2004 that effectively eliminated the macro problem on the Mac by 2006.
Word’s macro security setting, which regulates when macros may execute, can be adjusted by the user, but in the most recent versions of Word, it is set to HIGH by default, generally reducing the risk from macro-based viruses, which have become uncommon.
Layout issuesEdit
Before Word 2010 (Word 14) for Windows, the program was unable to correctly handle ligatures defined in OpenType fonts.[84] Those ligature glyphs with Unicode codepoints may be inserted manually, but are not recognized by Word for what they are, breaking spell checking, while custom ligatures present in the font are not accessible at all. Since Word 2010, the program now has advanced typesetting features which can be enabled,[85] OpenType ligatures,[86] kerning and hyphenation (previous versions already had the latter two features). Other layout deficiencies of Word include the inability to set crop marks or thin spaces. Various third-party workaround utilities have been developed.[87]
In Word 2004 for Mac OS X, support of complex scripts was inferior even to Word 97[88] and Word 2004 did not support Apple Advanced Typography features like ligatures or glyph variants.[89]
Issues with technical documentsEdit
Microsoft Word is only awkwardly suitable for some kinds of technical writing, specifically, that which requires mathematical equations,[90] figure placement, table placement and cross-references to any of these items.[citation needed] The usual workaround for equations is to use a third-party equation typesetter.[citation needed] Figures and tables must be placed manually; there is an anchor mechanism but it is not designed for fully automatic figure placement and editing text after placing figures and tables often requires re-placing those items by moving the anchor point and even then the placement options are limited.[citation needed] This problem is deeply baked into Word’s structure since 1985 as it does not know where page breaks will occur until the document is printed.[citation needed]
Bullets and numberingEdit
Microsoft Word supports bullet lists and numbered lists. It also features a numbering system that helps add correct numbers to pages, chapters, headers, footnotes, and entries of tables of content; these numbers automatically change to correct ones as new items are added or existing items are deleted. Bullets and numbering can be applied directly to paragraphs and converted to lists.[91] Word 97 through 2003, however, had problems adding correct numbers to numbered lists. In particular, a second irrelevant numbered list might have not started with number one but instead resumed numbering after the last numbered list. Although Word 97 supported a hidden marker that said the list numbering must restart afterward, the command to insert this marker (Restart Numbering command) was only added in Word 2003. However, if one were to cut the first item of the listed and paste it as another item (e.g. fifth), then the restart marker would have moved with it and the list would have restarted in the middle instead of at the top.[92]
Word continues to default to non-Unicode characters and non-hierarchical bulleting, despite user preference for Powerpoint-style symbol hierarchies (e.g., filled circle/emdash/filled square/endash/emptied circle) and universal compatibility.
AutoSummarizeEdit
Available in certain versions of Word (e.g., Word 2007), AutoSummarize highlights passages or phrases that it considers valuable and can be a quick way of generating a crude abstract or an executive summary.[93] The amount of text to be retained can be specified by the user as a percentage of the current amount of text.
According to Ron Fein of the Word 97 team, AutoSummarize cuts wordy copy to the bone by counting words and ranking sentences. First, AutoSummarize identifies the most common words in the document (barring «a» and «the» and the like) and assigns a «score» to each word – the more frequently a word is used, the higher the score. Then, it «averages» each sentence by adding the scores of its words and dividing the sum by the number of words in the sentence – the higher the average, the higher the rank of the sentence. «It’s like the ratio of wheat to chaff,» explains Fein.[94]
AutoSummarize was removed from Microsoft Word for Mac OS X 2011, although it was present in Word for Mac 2008. AutoSummarize was removed from the Office 2010 release version (14) as well.[95]
Other platformsEdit
Word for mobileEdit
Word Mobile[96] is a word processor that allows creating and editing documents. It supports basic formatting, such as bolding, changing font size, and changing colors (from red, yellow, or green). It can add comments, but can’t edit documents with tracked changes. It can’t open password-protected documents; change the typeface, text alignment, or style (normal, heading 1); create bulleted lists; insert pictures; or undo.[97][98][99] Word Mobile is neither able to display nor insert footnotes, endnotes, page headers, page footers, page breaks, certain indentation of lists, and certain fonts while working on a document, but retains them if the original document has them.[100] In addition to the features of the 2013 version, the 2007 version on Windows Mobile also has the ability to save documents in the Rich Text Format and open legacy PSW (Pocket Word).[100] Furthermore, it includes a spell checker, word count tool, and a «Find and Replace» command. In 2015, Word Mobile became available for Windows 10 and Windows 10 Mobile on Windows Store.[101]
Support for Windows 10 Mobile version ended in January 12, 2021.[102]
Word for the webEdit
Word for the web is a free lightweight version of Microsoft Word available as part of Office on the web, which also includes web versions of Microsoft Excel and Microsoft PowerPoint.
Word for the web lacks some Ribbon tabs, such as Design and Mailings. Mailings allows users to print envelopes and labels and manage mail merge printing of Word documents.[103][104] Word for the web is not able to edit certain objects, such as: equations, shapes, text boxes or drawings, but a placeholder may be present in the document. Certain advanced features like table sorting or columns will not be displayed but are preserved as they were in the document. Other views available in the Word desktop app (Outline, Draft, Web Layout, and Full-Screen Reading) are not available, nor are side-by-side viewing, split windows, and the ruler.[105]
Password protectionEdit
Three password types can be set in Microsoft Word,
- Password to open a document[106]
- Password to modify a document[106]
- Password restricting formatting and editing[107]
The second and third password types were developed by Microsoft for convenient shared use of documents rather than for their protection. There is no encryption of documents that are protected by such passwords and the Microsoft Office protection system saves a hash sum of a password in a document’s header where it can be easily accessed and removed by the specialized software. Password to open a document offers much tougher protection that had been steadily enhanced in the subsequent editions of Microsoft Office.
Word 95 and all the preceding editions had the weakest protection that utilized a conversion of a password to a 16-bit key.
Key length in Word 97 and 2000 was strengthened up to 40 bit. However, modern cracking software allows removing such a password very quickly – a persistent cracking process takes one week at most. Use of rainbow tables reduces password removal time to several seconds. Some password recovery software can not only remove a password but also find an actual password that was used by a user to encrypt the document using the brute-force attack approach. Statistically, the possibility of recovering the password depends on the password strength.
Word’s 2003/XP version default protection remained the same but an option that allowed advanced users to choose a Cryptographic Service Provider was added.[108] If a strong CSP is chosen, guaranteed document decryption becomes unavailable and, therefore, a password can’t be removed from the document. Nonetheless, a password can be fairly quickly picked with a brute-force attack, because its speed is still high regardless of the CSP selected. Moreover, since the CSPs are not active by default, their use is limited to advanced users only.
Word 2007 offers significantly more secure document protection which utilizes the modern Advanced Encryption Standard (AES) that converts a password to a 128-bit key using a SHA-1 hash function 50,000 times. It makes password removal impossible (as of today, no computer that can pick the key in a reasonable amount of time exists) and drastically slows the brute-force attack speed down to several hundreds of passwords per second.
Word’s 2010 protection algorithm was not changed apart from the increasing number of SHA-1 conversions up to 100,000 times and consequently, the brute-force attack speed decreased two times more.
ReceptionEdit
This section needs expansion. You can help by adding to it. (December 2021)
Initial releases of Word were met with criticism. Byte in 1984 criticized the documentation for Word 1.1 and 2.0 for DOS, calling it «a complete farce». It called the software «clever, put together well and performs some extraordinary feats», but concluded that «especially when operated with the mouse, has many more limitations than benefits … extremely frustrating to learn and operate efficiently».[109] PC Magazine‘s review was very mixed, stating: «I’ve run into weird word processors before, but this is the first time one’s nearly knocked me down for the count» but acknowledging that Word’s innovations were the first that caused the reviewer to consider abandoning WordStar. While the review cited an excellent WYSIWYG display, sophisticated print formatting, windows, and footnoting as merits, it criticized many small flaws, very slow performance, and «documentation produced by Madame Sadie’s Pain Palace». It concluded that Word was «two releases away from potential greatness».[110]
Compute!’s Apple Applications in 1987 stated that «despite a certain awkwardness», Word 3.01 «will likely become the major Macintosh word processor» with «far too many features to list here». While criticizing the lack of true WYSIWYG, the magazine concluded that «Word is marvelous. It’s like a Mozart or Edison, whose occasional gaucherie we excuse because of his great gifts».[111]
Compute! in 1989 stated that Word 5.0’s integration of text and graphics made it «a solid engine for basic desktop publishing». The magazine approved of improvements to text mode, described the $75 price for upgrading from an earlier version as «the deal of the decade» and concluded that «as a high-octane word processor, Word is worth a look».[112]
During the first quarter of 1996, Microsoft Word accounted for 80% of the worldwide word processing market.[113]
Release historyEdit
| Legend: | Old version, not maintained | Older version, still maintained | Current stable version |
|---|
Microsoft Word 2010 running on Windows 7
| Year released | Name | Version | Comments |
|---|---|---|---|
| 1989 | Word for Windows 1.0 | 1.0 | Code-named Opus[114] |
| 1990 | Word for Windows 1.1 | 1.1 | For Windows 3.0.[115] Code-named Bill the Cat[citation needed] |
| 1990 | Word for Windows 1.1a | 1.1a | On March 25, 2014, Microsoft made the source code to Word for Windows 1.1a available to the public via the Computer History Museum.[116][117] |
| 1991 | Word for Windows 2.0 | 2.0 | Included in Office 3.0. |
| 1993 | Word for Windows 6.0 | 6.0 | Version numbers 3, 4, and 5 were skipped, to bring Windows version numbering in line with that of DOS, Mac OS, and WordPerfect (the main competing word processor at the time). Also, a 32-bit version for Windows NT only. Included in Office 4.0, 4.2, and 4.3. |
| 1995 | Word for Windows 95 | 7.0 | Included in Office 95 |
| 1997 | Word 97 | 8.0 | Included in Office 97 |
| 1998 | Word 98 | 8.5 | Included in Office 97 |
| 1999 | Word 2000 | 9.0 | Included in Office 2000 |
| 2001 | Word 2002 | 10.0 | Included in Office XP |
| 2003 | Microsoft Word 2003 | 11.0 | Included in Office 2003 |
| 2006 | Microsoft Word 2007 | 12.0 | Included in Office 2007; released to businesses on November 30, 2006, released worldwide to consumers on January 30, 2007. Extended support until October 10, 2017. |
| 2010 | Word 2010 | 14.0 | Included in Office 2010; skipped 13.0 due to triskaidekaphobia.[118] |
| 2013 | Word 2013 | 15.0 | Included in Office 2013 |
| 2016 | Word 2016 | 16.0 | Included in Office 2016 |
| 2019 | Word 2019 | 16.0 | Included in Office 2019 |
| 2021 | Word 2021 | 16.0 | Included in Office 2021 |
| Year released | Name | Version | Comments |
|---|---|---|---|
| 1985 | Word 1 | 1.0 | |
| 1987 | Word 3 | 3.0 | |
| 1989 | Word 4 | 4.0 | Part of Office 1.0 and 1.5 |
| 1991 | Word 5 | 5.0 |
|
| 1992 | Word 5.1 | 5.1 |
|
| 1993 | Word 6 | 6.0 |
|
| 1998 | Word 98 | 8.5 |
|
| 2000 | Word 2001 | 9.0 |
|
| 2001 | Word v. X | 10.0 |
|
| 2004 | Word 2004 | 11.0 | Part of Office 2004 |
| 2008 | Word 2008 | 12.0 | Part of Office 2008 |
| 2010 | Word 2011 | 14.0 | Part of Office 2011; skipped 13.0 due to triskaidekaphobia.[118] |
| 2015 | Word 2016 | 16.0 | Part of Office 2016; skipped 15.0 |
| 2019 | Word 2019 | 16.0 | Part of Office 2019 |
| 2021 | Word 2021 | 16.0 | Included in Office 2021 |
| Year released | Name | Version | Comments |
|---|---|---|---|
| 1983 | Word 1 | 1.0 | Initial version of Word |
| 1985 | Word 2 | 2.0 | |
| 1986 | Word 3 | 3.0 | Removed copy protection |
| 1987 | Word 4 | 4.0 | |
| 1989 | Word 5 | 5.0 | |
| 1991 | Word 5.1 | 5.1 | |
| 1991 | Word 5.5 | 5.5 | First DOS version to use a Windows-like user interface |
| 1993 | Word 6 | 6.0 | Last DOS version. |
| Platform | Year released | Name | Comments |
|---|---|---|---|
| Atari ST | 1988 | Microsoft Write | Based on Microsoft Word 1.05 for Mac OS |
| OS/2 | 1989 | Microsoft Word 5.0 | Word 5.0 ran both under DOS and OS/2 dual-mode as a native OS/2 application |
| OS/2 | 1991 | Microsoft Word 5.5 | Word 5.5 ran both under DOS and OS/2 dual-mode as a native OS/2 application |
| OS/2 | 1990 | Microsoft Word for OS/2 Presentation Manager version 1.1 | |
| OS/2 | 1991 | Microsoft Word for OS/2 Presentation Manager version 1.2[citation needed] | |
| SCO Unix | 1990 | Microsoft Word for Unix version 5.0[119] | |
| SCO Unix | 1991 | Microsoft Word for Unix version 5.1[120] |
ReferencesEdit
- ^ «Update history for Microsoft Office 2019». Microsoft Docs. Retrieved April 13, 2021.
- ^ a b «C++ in MS Office». cppcon. July 17, 2014. Archived from the original on November 7, 2019. Retrieved June 25, 2019.
- ^ «System requirements for Office». Office.com. Microsoft. Retrieved March 30, 2019.
- ^ «Update history for Office for Mac». Microsoft Docs.
- ^ Lardinois, Frederic (January 29, 2015). «Microsoft’s Office For Android Tablets Comes Out Of Preview». TechCrunch. Retrieved January 28, 2023.
- ^ «Microsoft Word: Write, Edit & Share Docs on the Go APKs». APKMirror.
- ^ Cunningham, Andrew (March 27, 2014). «Microsoft brings Office to iPad, makes iPhone version free to all». Ars Technica. Retrieved January 27, 2023.
- ^ «Microsoft Word». App Store.
- ^ «Version 1.0 of today’s most popular applications, a visual tour – Pingdom Royal». Pingdom. June 17, 2009. Archived from the original on August 13, 2018. Retrieved April 12, 2016.
- ^ a b c d A. Allen, Roy (October 2001). «Chapter 12: Microsoft in the 1980s» (PDF). A History of the Personal Computer: The People and the Technology (1st ed.). Allan Publishing. pp. 12/25–12/26. ISBN 978-0-9689108-0-1. Retrieved November 7, 2010.
- ^ «Microsoft Office online, Getting to know you…again: The Ribbon». Archived from the original on May 11, 2011.
- ^ «The history of branding, Microsoft history». Archived from the original on May 28, 2009.
- ^ a b c d e Edwards, Benj (October 22, 2008). «Microsoft Word Turns 25». PC World. Archived from the original on July 4, 2012. Retrieved November 7, 2010.
- ^ Tsang, Cheryl (1999). Microsoft First Generation. John Wiley & Sons. ISBN 978-0-471-33206-0.
- ^ Schaut, Rick (May 19, 2004). «Anatomy of a Software Bug». MSDN Blogs. Archived from the original on February 1, 2010. Retrieved December 2, 2006.
- ^ a b Markoff, John (May 30, 1983). «Mouse and new WP program join Microsoft product lineup». InfoWorld. p. 10. Retrieved November 7, 2010.
- ^ Pollack, Andrew (August 25, 1983). «Computerizing Magazines». The New York Times. Retrieved April 24, 2013.
- ^ Lemmons, Phil (December 1983). «Microsoft Windows». BYTE. p. 48. Retrieved October 20, 2013.
- ^ Advertisement (December 1983). «Undo. Windows. Mouse. Finally». BYTE. pp. 88–89. Retrieved October 20, 2013.
- ^ Peterson, W.E. Pete (1994). Almost Perfect: How a Bunch of Regular Guys Built Wordperfect Corporation. Prima Publishing. ISBN 0-7881-9991-9.
- ^ a b c d e f Knight, Dan (May 22, 2008). «Microsoft Word for Mac History». Low End Mac. Retrieved November 7, 2010.
- ^ «The Piece Table».
- ^ Brand, Stewart (1989). Whole Earth Software Catalog. ISBN 9780385233019.
For a year, I waited for a heavier-duty word processor than MACWRITE. I finally got it— WORD.
- ^ a b c Schaut, Rick (February 26, 2004). «Mac Word 6.0». Buggin’ My Life Away. MSDN Blogs. Archived from the original on May 14, 2004. Retrieved June 21, 2010.
- ^ «Atari announces agreement with Microsoft». Atarimagazines.com. April 25, 2008. Retrieved June 21, 2010.
- ^ «Feature Review: Microsoft Write». Atarimagazines.com. April 25, 2008. Retrieved June 21, 2010.
- ^ «Today’s Atari Corp.: A close up look inside». Atarimagazines.com. April 25, 2008. Retrieved June 21, 2010.
- ^ Miller, Michael J. (November 12, 1990). «First Look: Microsoft Updates Look of And Adds Pull-Down Menus to Character-Based Word 5.5». InfoWorld. p. 151. Retrieved November 7, 2010.
- ^ Needleman, Raphael (November 19, 1990). «Microsoft Word 5.5: Should You Fight or Switch?». InfoWorld. p. 106. Retrieved November 7, 2010.
- ^ «Microsoft Word 5.5 for MS-DOS (EXE format)». Microsoft Download Center. Retrieved August 19, 2011.
- ^ «War of the Words». InfoWorld. February 7, 1994. pp. 66–79. Retrieved November 7, 2010.
- ^ a b Lockman, James T.W. (May 15, 1998). «UGeek Software Review: Microsoft Office 98 Gold for Macintosh». Archived from the original on December 3, 2010. Retrieved November 7, 2010.
- ^ Rose, Daniel. «Microsoft Office for Windows NT». DanielSays.com – Daniel’s Legacy Computer Collections. Archived from the original on January 27, 2015. Retrieved May 15, 2015.
- ^ Ericson, Richard (October 11, 2006). «Final Review: The Lowdown on Office 2007». Computerworld. Retrieved November 8, 2010.
- ^ Lowe, Scott (December 11, 2006). «An introduction to the Microsoft Office 2007 ribbon interface». TechRepublic. Retrieved December 14, 2021.
- ^ Shultz, Greg (February 25, 2009). «Be ready for new and improved applets in Windows 7». TechRepublic. Archived from the original on December 14, 2021. Retrieved December 14, 2021.
- ^ a b Lowe, Scott (January 26, 2007). «Explore what is new and different in Microsoft Word 2007». TechRepublic. Retrieved December 14, 2021.
- ^ Mendelson, Edward (May 11, 2010). «Microsoft Office 2010». PC Magazine. Retrieved November 8, 2010.
- ^ Mendelson, Edward (May 11, 2010). «Microsoft Office 2010: Office 2010’s Backstage View». PC Magazine. Archived from the original on December 2, 2010. Retrieved November 8, 2010.
- ^ Mendelson, Edward (May 11, 2010). «Microsoft Office 2010: Lots of Graphics Options». PC Magazine. Archived from the original on April 24, 2010. Retrieved December 14, 2021.
- ^ «Introduction to Word Web App». Microsoft. Retrieved November 8, 2010.
- ^ «Microsoft Word 1.x (Mac)». WinWorld. Retrieved December 22, 2021.
- ^ a b McLean, Prince (November 12, 2007). «Road to Mac Office 2008: an introduction (Page 3)». AppleInsider. Archived from the original on July 7, 2011. Retrieved November 7, 2010.
- ^ Tetrault, Gregory (January 2001). «Review: Microsoft Office 2001». ATPM: About This Particular Macintosh. Retrieved November 7, 2010.
- ^ Negrino, Tom (February 1, 2002). «Review: Microsoft Office v. X». MacWorld. Archived from the original on August 18, 2010. Retrieved November 7, 2010.
- ^ Lunsford, Kelly; Michaels, Philip; Snell, Jason (March 3, 2004). «Office 2004: First Look». MacWorld. Archived from the original on June 25, 2010. Retrieved November 7, 2010.
- ^ Friedberg, Steve (May 25, 2004). «Review: Microsoft Office». MacNN. Archived from the original on April 5, 2010. Retrieved November 7, 2010.
- ^ McLean, Prince (November 14, 2007). «Road to Mac Office 2008: Word ’08 vs Pages 3.0». AppleInsider. Retrieved November 7, 2010.
- ^ McLean, Prince (November 12, 2007). «Road to Mac Office 2008: an introduction (Page 4)». AppleInsider. Archived from the original on July 7, 2011. Retrieved November 7, 2010.
- ^ McLean, Prince (March 29, 2010). «New Office 11 for Mac sports dense ribbons of buttons». AppleInsider. Retrieved November 7, 2010.
- ^ Dilger, Daniel Eran (October 25, 2010). «Review: Microsoft’s Office 2011 for Mac (Page 2)». Apple Insider. Archived from the original on October 28, 2010. Retrieved November 7, 2010.
- ^ Oakley, Howard (May 2, 2015). «.why .the .extensions? Quirks in the naming of files and folders». The Eclectic Light Company. Archived from the original on February 26, 2020. Retrieved February 26, 2020.
Macs used to be the only computers that did not need filename extensions…on classic Mac systems, you can name applications, documents, and most other files almost anything that you like, as the name is not linked in any way to the type of thing that file is.
- ^ «DOCX Transitional (Office Open XML), ISO 29500:2008-2016, ECMA-376, Editions 1-5». loc.gov. January 20, 2017. Retrieved July 9, 2019.
- ^ «5 Appendix A: Product Behavior» (PDF). [MS-DOC]: Word (.doc) Binary File Format (PDF). Redmond, WA: Microsoft. Archived from the original on January 10, 2015. Retrieved January 10, 2015.
- ^ «2.1 File Structure» (PDF). [MS-DOC]: Word (.doc) Binary File Format (PDF). Redmond, WA: Microsoft. Archived from the original on January 10, 2015. Retrieved January 10, 2015.
- ^ «2.1.1 WordDocument Stream» (PDF). [MS-DOC]: Word (.doc) Binary File Format (PDF). Redmond, WA: Microsoft. Archived from the original on January 10, 2015. Retrieved January 10, 2015.
- ^ «What You Can Do with Word XML [Word 2003 XML Reference]». MSDN. 2004.
- ^ a b Casson, Tony; Ryan, Patrick S. (May 1, 2006). «Open Standards, Open Source Adoption in the Public Sector, and Their Relationship to Microsoft’s Market Dominance». In Bolin, Sherrie (ed.). Standards Edge: Unifier or Divider?. Sheridan Books. p. 87. SSRN 1656616.
- ^ «Microsoft Expands List of Formats Supported in Microsoft Office, May 21, 2008». News Center. Microsoft. May 21, 2008. Retrieved April 24, 2013.
- ^ Fulton, Scott M. III (May 21, 2008). «Next Office 2007 service pack will include ODF, PDF support options». Betanews.
- ^ Andy Updegrove (May 21, 2008). «Microsoft Office 2007 to Support ODF – and not OOXML, May 21, 2008». Consortiuminfo.org. Retrieved June 21, 2010.
- ^ «Microsoft: Why we chose ODF support over OOXML, 23 May 2008». Software.silicon.com. Archived from the original on July 21, 2009. Retrieved June 21, 2010.
- ^ «Fact-sheet Microsoft ODF support» (PDF). odfalliance. Archived from the original (PDF) on June 11, 2009. Retrieved May 24, 2009.
Microsoft Excel 2007 will process ODF spreadsheet documents when loaded via the Sun Plug-In 3.0 for Microsoft Office or the SourceForge «OpenXML/ODF Translator Add-in for Office,» but will fail when using the «built-in» support provided by Office 2007 SP2.
- ^ Microsoft. «What happens when I save a Word 2007 document in the OpenDocument Text format?». Archived from the original on March 18, 2010. Retrieved April 5, 2010.
- ^ Goodwins, Rupert (October 3, 2005). «Office 12 to support PDF creation, 3 October 2005». News.zdnet.co.uk. Archived from the original on July 23, 2009. Retrieved June 21, 2010.
- ^ Marson, Ingrid (October 6, 2005). «Microsoft ‘must support OpenDocument’, 6 October 2005». News.zdnet.co.uk. Archived from the original on July 25, 2009. Retrieved June 21, 2010.
- ^ March 23, 2006, Gates: Office 2007 will enable a new class of application Mass. holding tight to OpenDocument – ZDNet Archived July 21, 2009, at the Wayback Machine
- ^ «May 08, 2006 – Microsoft Office to get a dose of OpenDocument». Zdnet.com.au. Archived from the original on July 22, 2009. Retrieved June 21, 2010.
- ^ OpenDocument Fellowship (October 20, 2005). «OpenDocument Support: Tell Microsoft You Want It!, 20 October 2005». Opendocumentfellowship.com. Archived from the original on March 23, 2008. Retrieved June 21, 2010.
- ^ «Coming soon: ODF for MS Office, May 04, 2006». Linux-watch.com. May 4, 2006. Retrieved June 21, 2010.
- ^ LaMonica, Martin (May 5, 2006). «Microsoft Office to get a dose of OpenDocument». CNET News. Retrieved June 21, 2010.
- ^ «Microsoft Expands Document Interoperability, July 5, 2006». Microsoft.com. July 5, 2006. Archived from the original on February 4, 2007. Retrieved June 21, 2010.
- ^ Jones, Brian; Rajabi, Zeyad (July 6, 2006). «Open XML Translator project announced (ODF support for Office)». Brian Jones: Office Solutions. Microsoft. Archived from the original on January 18, 2010. Retrieved April 24, 2013.
- ^ LaMonica, Martin (February 1, 2007). «Microsoft to release ODF document converter». CNet News. Retrieved April 24, 2013.
- ^ Lombardi, Candace (February 7, 2007). «Sun to release ODF translator for Microsoft Office». CNET. Retrieved June 21, 2010.
- ^ Paul, Ryan (July 7, 2007). «Sun releases ODF Plugin 1.0 for Microsoft Office, July 07, 2007». Arstechnica.com. Retrieved June 21, 2010.
- ^ «Download details: 2007 Microsoft Office Add-in: Microsoft Save as PDF or XPS». Microsoft.com. November 8, 2006. Retrieved June 21, 2010.
- ^ Microsoft to remove PDF support from Office 2007 in wake of Adobe dispute, Friday, June 2, 2006 Microsoft to remove PDF support from Office 2007 in wake of Adobe dispute | TG Daily Archived February 1, 2009, at the Wayback Machine
- ^ Klein, Matt. «Word Formatting: Mastering Styles and Document Themes». How-To Geek. Retrieved July 9, 2019.
- ^ «Change the Normal template (Normal.dotm )». support.microsoft.com. Retrieved May 20, 2021.
- ^ in-depth explanation of Normal.dot Archived June 20, 2005, at the Wayback Machine
- ^ «Edit SVG images in Microsoft Office 365». Office Support. Microsoft. Retrieved February 4, 2019.
- ^ What’s new in Word 2010. Retrieved July 1, 2010.
- ^ Improving the look of papers written in Microsoft Word. Retrieved May 30, 2010.
- ^ How to Enable OpenType Ligatures in Word 2010, Oreszek Blog, May 17, 2009.
- ^ Such as «How to delete a blank page in Word». Sbarnhill.mvps.org. Archived from the original on May 5, 2010. Retrieved June 21, 2010.
- ^ Alan Wood. «Unicode and Multilingual Editors and Word Processors for Mac OS X».
- ^ Neuburg, Matt (May 19, 2004). «TidBITS : Word Up! Word 2004, That Is». Db.tidbits.com. Archived from the original on July 8, 2012. Retrieved June 21, 2010.
- ^ «Automatically numbering equations and other equation-related questions in Word for Mac 2011». Microsoft Community. February 6, 2013.
- ^ McGhie, John (March 26, 2011). «Word’s numbering explained». word.mvps.org.
- ^ Aldis, Margaret (March 26, 2011). «Methods for restarting list numbering». Word.mvps.org.
- ^ «How To Access Auto Summarize in Microsoft Word 2007». Sue’s Word Tips. December 14, 2011. Retrieved July 9, 2019.
- ^ Gore, Karenna (February 9, 1997). «Cognito Auto Sum». Slate. Retrieved June 21, 2010.
- ^ Changes in Word 2010 (for IT pros). Technet.microsoft.com (May 16, 2012). Retrieved July 17, 2013.
- ^ Word Mobile
- ^ Ralph, Nate. «Office for Windows Phone 8: Your handy starter guide». TechHive. Archived from the original on October 15, 2014. Retrieved August 30, 2014.
- ^ Wollman, Dana. «Microsoft Office Mobile for iPhone hands-on». Engadget. Retrieved August 30, 2014.
- ^ Pogue, David (June 19, 2013). «Microsoft Adds Office for iPhone. Yawn». The New York Times. Retrieved August 30, 2014.
- ^ a b Unsupported Features in Word Mobile. Microsoft. Retrieved September 21, 2007.
- ^ Koenigsbauer, Kirk; Microsoft 365, Corporate Vice President for (July 29, 2015). «Office Mobile apps for Windows 10 are here!». Microsoft 365 Blog. Retrieved July 11, 2020.
- ^ Office Apps for Windows 10 Mobile: End of Support for Windows Phones
- ^ Bradley, Tony (February 2, 2015). «Office Online vs. Office 365: What’s free, what’s not, and what you really need». PC World. Archived from the original on July 24, 2017. Retrieved July 16, 2020.
- ^ Ansaldo, Michael (September 28, 2017). «Microsoft Office Online review: Work with your favorite Office formats for free». PC World. Retrieved October 31, 2019.
- ^ «Differences between using a document in the browser and in Word». Office Support. Microsoft. Archived from the original on November 7, 2017. Retrieved November 1, 2017.
- ^ a b «Password protect documents, workbooks, and presentations». Microsoft Office website. Microsoft. Retrieved April 24, 2013.
- ^ «How to Restrict Editing in Word 2010/2007». Trickyways. June 22, 2010. Retrieved April 24, 2010.
- ^ «How safe is Word encryption. Is it secure?». Oraxcel.com. Archived from the original on April 17, 2013. Retrieved April 24, 2013.
- ^ Cameron, Janet (September 1984). «Word Processing Revisited». BYTE (review). p. 171. Retrieved October 23, 2013.
- ^ Manes, Stephen (February 21, 1984). «The Unfinished Word». PC Magazine. p. 192. Retrieved October 19, 2021.
- ^ McNeill, Dan (December 1987). «Macintosh: The Word Explosion». Compute!’s Apple Applications. pp. 54–60. Retrieved September 14, 2016.
- ^ Nimersheim, Jack (December 1989). «Compute! Specific: MS-DOS». Compute!. pp. 11–12.
- ^ «Data Stream». Next Generation. No. 21. Imagine Media. September 1996. p. 21.
- ^ Opus Development Postmortem
- ^ «Microsoft Word 1.x (Windows) – Stats, Downloads and Screenshots :: WinWorld». WinWorld. Retrieved July 3, 2016.
- ^ Shustek, Len (March 24, 2014). «Microsoft Word for Windows Version 1.1a Source Code». Retrieved March 29, 2014.
- ^ Levin, Roy (March 25, 2014). «Microsoft makes source code for MS-DOS and Word for Windows available to public». Official Microsoft Blog. Archived from the original on March 28, 2014. Retrieved March 29, 2014.
- ^ a b «Office 14». Office Watch. June 1, 2007.
For the sake of superstition the next version of Office won’t be called ’13’.
{{cite web}}: CS1 maint: url-status (link) - ^ Marshall, Martin (January 8, 1990). «SCO Begins Shipping Microsoft Word 5.0 for Unix and Xenix». InfoWorld. p. 6. Retrieved May 20, 2021.
- ^ «Microsoft Word: SCO announces Word for Unix Systems Version 5.1». EDGE: Work-Group Computing Report. March 11, 1991. p. 33. Retrieved May 20, 2021 – via Gale General OneFile.
Further readingEdit
- Tsang, Cheryl. Microsoft: First Generation. New York: John Wiley & Sons, Inc. ISBN 978-0-471-33206-0.
- Liebowitz, Stan J. & Margolis, Stephen E. Winners, Losers & Microsoft: Competition and Antitrust in High Technology Oakland: Independent Institute. ISBN 978-0-945999-80-5.
External linksEdit
- Microsoft Word – official site
- Find and replace text by using regular expressions (Advanced) — archived official support website
Background
Back in the late 80’s early 90’s I wrote some software called Rendezvous and sold it as shareware. I wrote it in Clipper (a dBase III compiler). It’s purpose was generally for lead generation and outbound telemarketing. Telemarketing using databases was relatively new at the time. For general lead processing one of the better strategies was to call the prospective customer, follow up immediately with a brochure or letter and then call them back in few days hopefully before your letter got thrown in the bin. Being pre-Windows you had to construct your printout using printer control codes etc; a nightmare in the days of dot matrix, daisy wheel, line printers and soon laser and ink jet printers.
The dominant word processor at the time was WordPerfect; it had an incredibly powerful merge language and an ever increasing array of printer drivers, so armed with a WordPerfect SDK I entered the world of document generation, and I rewrote my Rendezvous program to work with WordPerfect. My connection with WordPerfect for document generation lasted for many years, but WordPerfect was a company that was slow to embrace Windows and staffed by engineers rather than marketers. Much to the disappointment of many people at the time, Microsoft Word soon came to dominate.
For authors of document generation systems the transition to Microsoft Word was a difficult time. With Word you had to live with a very very basic mail merge facility and some WordBasic. It wasn’t until VBA came along in 1997 that things improved slightly – but only slightly. The WordPerfect merge language was truly superior; you could do most anything with it albeit in a clumsy macro sort of way. But one of the strong features for document generation automation was that the logic for creating documents was embedded in the document template. Developers (or End Users) could create a data source (called a WordPerfect Secondary file, which with some tweaking could in include data from multiple tables), and could create templates called Primary files. Because of this Word’s popularity with users meant that no matter how much harder it was to automate the generation of complex documents, for everyday use it was so much easier than WordPerfect – Word hastened the demise of specialist word processing operator. The fact that users were no longer specialists, document generation was in large measure handed over to developers who controlled document automation from outside the document. Today document generation is mostly in the hands of large developer-centric organisations. This leaves the smaller developer somewhat in a quandary of how to generate documents from their custom software in a financially painless way for their clients.
For the Access developer where are we now.
Microsoft Access reports
In many cases a Microsoft Access Report is all that it needed, especially if there is never any need to manually edit a resultant document. It can be printed or saved to PDF.
Export to Word
An editable document can be created by exporting an Access report to Word. This can be done two ways:
Interactively
By selecting the appropriate action from the Ribbon.
This will create an RTF formatted report named the same as the report it was based on and saved in the user’s document folder
Using VBA code
Using the Northwind database as an example the code might be:
[sourcecode language=”VB” gutter=”false”]
DoCmd.OpenReport «Invoice», acViewPreview, , _
«[Order ID]=» & Me.[Order ID]
DoCmd.OutputTo acOutputReport, «Invoice», acFormatRTF, _
CurrentProject.Path & «Inv» & Me.[Order_ID] & «.rtf», True
[/sourcecode]
This gives you control of the name of the document and its location, you can even force Word to accept it as a Word .doc file just by naming the output as .doc
[sourcecode language=”VB” gutter=”false”]
DoCmd.OpenReport «Invoice», acViewPreview, , _
«[Order ID]=» & Me.[Order ID]
DoCmd.OutputTo acOutputReport, «Invoice», acFormatRTF, _
CurrentProject.Path & «Inv» & Me.[Order_ID] & «.doc», True
[/sourcecode]
My favourite though is to allow the user to choose the name and location by outputting to a .dot file in the user’s temporary folder.
[sourcecode language=”VB” gutter=”false”]
DoCmd.OpenReport «Invoice», acViewPreview, , _
«[Order ID]=» & Me.[Order ID]
DoCmd.OutputTo acOutputReport, «Invoice», acFormatRTF, _
Environ(«temp») & «Inv» & Me.[Order_ID] & «.dot», True
[/sourcecode]
No matter how you cut it though, there are problems with this. The RTF is an old Microsoft proprietary format which Microsoft abandoned in terms of development after 2008. It lacks styles, lists etc, so the output from Access is not at all MS Word-centric, in addition (or subtraction) the export from Access does not include the graphics and charts from the report, so even just logos on letters, invoices etc are a problem; and similarly subreports are not included so only the main report is exported. With the RTF export formatting often changes, especially at the end of the report.
Essentially data for exporting a report to a Word document needs to be flat, with one table, or one query providing the data. There can be many records on a page.
Word Mail Merge
Another alternative that is also relatively easy is to use Word mail merge, A merge template document is created and then merged with data which can be interactively directly from a table or a query.
Merge is very good for multiple form letters, address labels for envelopes or even email. The process and results are very different to Exporting to Word.
The steps for mail merge are:
- Set up a data set, a table, a query, address list or a file CSV, Tab etc.
- Create a form letter and connect the data to it
- Add placeholders for the merge fields, and save the merge template
- Connect the form letter to the data set (table, query, file)
- Preview and perform the merge
The advantages of Mail merge over Exporting to Word include being able to use the full feature set of Word, styles, graphics (but not dynamic charts), and intelligent Word fields, conditional, including boilerplate assembly.
It is possible to use VBA and Word Automation to automate a mail merge such as:
[sourcecode language=”VB” gutter=”false”]
Dim objWord As Word.Document
Set objWord = GetObject(«C:MyMerge.doc», «Word.Document»)
objWord.Application.Visible = True
‘ Set the mail merge data source as the Northwind database.
objWord.MailMerge.OpenDataSource _
Name:=»C:Program FilesMicrosoft » & _
«OfficeOfficeSamplesNorthwind.mdb», _
LinkToSource:=True, _
Connection:=»TABLE Customers», _
SQLStatement:=»SELECT * FROM [Customers]»
‘ Execute the mail merge.
objWord.MailMerge.Execute
[/sourcecode]
Word Mail Merge is generally based on one record per document, so for example an Invoice like the one in Northwind would be very hard to create, and more complex structures impossible. But on the plus side you can make the documents attractive.
Populate book marks with data with VBA
Another way of creating documents is to use Word documents with Bookmarks. The basic idea with this is to create a Word document and insert named bookmarks where data needs to appear, and then using Word Automation to open the document, find the bookmarks and insert the required text at each bookmark. You can also insert other structures such as tables, so an Invoice like the one in the Northwind Invoice can be created.
An advantage of this is the full range of Word formatting features are available. Because the data is driven by programming code “pushing” data to the form, data can come from multiple data sets, eg invoice headers and invoice lines controlled by programming code. The disadvantage of this though is the amount of programming code needed to achieve a complex document and the general detachment of the template from the data can make the document more difficult to maintain. Often Add-Ins are used to make the insertion of bookmarks into the template easier for users (and developers). code, and where the users is not given so much say.
The basic VBA code for this is:
[sourcecode language=”VB” gutter=”false”]
Dim objWord As Word.Document
Set objWord = GetObject(«C:MyTemplate.docx», «Word.Document»)
objWord.Application.Visible = True
With objWord.ActiveDocument.Bookmarks
.Item(“Bookmarkname”).Range.Text = “Data to insert”
… etc etc
End With
[/sourcecode]
Custom Document Properties and Fields
Word comes with a number of predefined Document Properties such as Author, Pages, etc. From the File – Info – Properties – Advanced Properties, you can view the inbuilt properties and assign values to them, and you can create custom properties and assign the type and value to them and add them to the document.
The basic idea of using custom documents is that you create these properties and then using Insert QuickParts – Fields – DocProperty and choose the property you wish to insert.
From Access you would use something like the following code to populate the document with data.
[sourcecode language=”VB” gutter=”false”]
Dim objWord As Word.Document
Set objWord = GetObject(«C:MyTemplate.docx», «Word.Document»)
objWord.Application.Visible = True
With objWord.ActiveDocument.CustomDocumentProperties
Add Name:=»CustomerNumber», _
LinkToContent:=False, _
Type:=msoPropertyTypeNumber, _
Value:=1000
End With
[/sourcecode]
An advantage of using document properties over bookmarks is that you can refer to a document property from many places in the document, so if data needs to repeated multiple time, you only have to update the property value once and everything update. With Bookmarks you have have a differently named bookmark for every location, and creating multiple record documents can be problematic
As in using Bookmarks, the management of this can get quite complex. Personally I do not like Access to do so much work other than just providing the data. To achieve this it is possible of course to pull the data from inside Word, and link to the data in Access (or other databases), and similarly populate bookmarks or document properties, however this generally means that the report selection is handled from with Word, however since my applications are usually driven from Access I usually prefer it the other way around. But this is an option.
Visual Studio and specialist third party .NET libraries
Products such as Aspose provide tools for building documents, and generally this is less of an option for Access developers.
Specialist document merging systems
Products such as HotDocs and Windward are probably the most likely ones than an Access developer is likely to use.
The disadvantage of these systems is the cost and potential complexity of integration into an Access application. I have not used HotDocs, but I have used Windward extensively, and Windward is my favoured program for document generation. However they are generally too expensive for simple projects. They both have an Add-In for Microsoft Word which appears on a Word Ribbon. Options from the Ribbon allow connection to a data source (files or various databases), which allows a document to be marked up using drag and drop, and that process is quite easy so end users can generally feel comfortable with them, but also can handle more complex operation. So creation of templates can be with the user, or by or in collaboration with the developer. The generation of documents can occur directly from within Word, but generally for anything serious they require a server component, which may be on a local or remote machine. I am familiar with Windward as it supports XML and allows XPath statements and functions for accessing data. Both products can use SQL statements when connected to SQL databases, and ODBC data sources.
HotDocs is more likely to be used in applications where there is more human interaction in the document assembly. This perhaps makes it a stronger contended for legal merging where there is considerable individuality about the documents but nonetheless based on a precedent document. HotDocs also works with WordPerfect which was my previous favourite document generating platform.
Windward is very good for complex documents and can include dynamic charts, and boilerplating of parts of the document.
Both products generate Word documents which are standalone, discrete from the original data they were based on..
The market for document generation is always widening, and a relatively new class of products CCM (Customer Communication Management) which often are more oriented to the generation of digital content, also can produce Word documents. Products of this type include OpenText, Ecrion, Kofax, and many more.
Microsoft Word 2003 XML Markup and XSLT
When Microsoft released Word 2003, they entered into a brand new era of using XML as the underlying structure for Word documents in place of the Microsoft proprietary binary file .DOC format. One of the reason for this was customer demand for long term storage of documents in non-proprietary formats so that content could be readily accessed in the future. Microsoft gave no real tools for creating documents using XML, but did allow you to attach XML tags to documents, the major purpose of this was to allow extraction of data from a document, but also (perhaps unintentionally) opened the possibility of merging data with documents using XSLT, which meant that Word itself is not needed to create the finally merged document, other than to open, view and print it. Microsoft Word was never good being used as a server application however XSLT was available both on client side and server side of all the major operating systems. Microsoft without much fanfare released a command line too called the Microsoft Office Word 2003 WordML XSLT Inference Tool, which generated am XSLT template from the XML marked up document. With this you could use almost any XSLT processor to merge XML data and the template to create a Word .DOCX file.
There were two problems with this.
The XSLT file generated from the Microsoft Office Word 2003 XSLT Inference Tool. could not itself be opened by Word, nor opened intelligently from any other program. If you needed to make even minor edits to the template you really had to go back to the original source document and start the transformation process from scratch. Often it was necessary to manually edit the XSLT to get the desired results, so having to start from scratch each time could be quite an impost. But the fact that Microsoft had committed to this technology, and had provided some tools was an encouraging thing. I used this quite extensively until an additional problem popped up
The first problem was an annoyance, but the second a killer. In May 2007 Microsoft was successfully sued for infringing a patent regarding XML markup by the company i4i and it founder Michel Vulpe. As part of the settlement in 2010 Microsoft released an update as part of the normal Windows and Office updates to remove the XML tagging in Office 2003, and 2007 and was precluded from using the technology in Office 2010. Although XML is open, specific implementation of it can be subject to copyright.
Once an XSLT template had been created using the Word 2003 XSLT Inference tool though, it was still possible to generate a new document based on it, because Word was not again involved until after the document was generated, and that document was no longer dependant on the template or the data source. As soon as the document was opened in Word, the markup itself was removed with a helpful message from Microsoft, but that was already too late, the document had been populated with the data and the XSLT did its job. But it meant that these template could no longer be created, nor old ones edited.
Because an XSLT processor and not Word was used for the “merging” of the XML data with the XSLT template, the process was very useful for server side generation. Word like the other Office programs, are not suitable for running as server processes.
Word Content Controls
In Word 2007, Microsoft introduced Content Controls. Content Controls are a little like Word Fields. The various templates supplied with Microsoft Word 2007, 2010 and 2013 include Content Controls which prompt the user to add information from the keyboard Content Controls can also be bound/mapped to XML element forming part of the document file structure. Microsoft changed the layout of the Word DOCX file, so that rather than being directly an XML file it is a package of components, packaged and compressed together. To look at the file structure of a Word document the easiest way is to rename the document extension to .ZIP, and then open it with an archive package like WinZip, 7-Zip, WinRAR. In the Word 2003 XML document format, the document was itself only an XML conforming to the WordML XML vocabulary, graphics etc formed part of the document’s XML data. With the later version graphic files are saved in the package file and referenced by the content XML. Similarly you can add an XML document to the package, and you can then bind this to Content Controls. In Word 2013 Microsoft did some tweaking to the Content Controls and now they are far more useful for document generation.
See other blog article Document Generation using Word Content Controls
Chapter 1. Creating, Opening, and Saving Documents
Every Word project you createâwhether itâs a personal letter, a TV sitcom script, or a thesis in microbiologyâbegins and ends the same way. You start by creating a document, and you end by saving your work. Sounds simple, but to manage your Word documents effectively, you need to know these basics and beyond. This chapter shows you all the different ways to create a new Word documentâlike starting from an existing document or adding text to a predesigned templateâand how to choose the best one for your particular project.
Youâll also learn how to work faster and smarter by changing your view of your document. If you want, you can use Wordâs Outline view when youâre brainstorming, and then switch to Print view when youâre ready for hard copy. This chapter gets you up and running with these fundamental tools so you can focus on the important stuffâyour words.
Tip
If youâve used Word before, then youâre probably familiar with opening and saving documents. Still, you may want to skim this chapter to catch up on the differences between this version of Word and the ghosts of Word past. Youâll grasp some of the big changes just by examining the figures. For more detail, check out the gray boxes and the notes and tipsâlike this one!
Launching Word
The first time you launch Word after installation, the program asks you to confirm your name and initials. This isnât Microsoftâs nefarious plan to pin you down: Word uses this information to identify documents that you create and modify. Word uses your initials to mark your edits when you review and add comments to Word documents that other people send to you (Section 16.3).
You have three primary ways to fire up Word, so use whichever method you find quickest:
-
Start menu. The Start button in the lower-left corner of your screen gives you access to all programs on your PCâWord included. To start Word, choose Start â All Programs â Microsoft Office â Microsoft Office Word. -
Quick Launch toolbar. The Quick Launch toolbar at the bottom of your screen (just to the right of the Start menu) is a great place to start programs you use frequently. Microsoft modestly assumes that youâll be using Word a lot, so it usually installs the Word icon in the Quick Launch toolbar. To start using Word, just click the W icon, and voilá!Tip
When you donât see the Quick Launch toolbar, hereâs how to display it: On the bar at the bottom of your screen, right-click an empty spot. From the menu that pops up, choose Toolbars â Quick Launch. When youâre done, icons for some of your programs appear in the bottom bar. A single click fires up the program.
-
Opening a Word document. Once youâve created some Word documents, this method is fastest of all, since you donât have to start Word as a separate step. Just open an existing Word document, and Word starts itself. Try going to Start â My Recent Documents, and then, from the list of files, choose a Word document. You can also double-click the documentâs icon on the desktop or wherever it lives on your PC.
Tip
If you need to get familiar with the Start menu, Quick Launch toolbar, and other Windows features, then pick up a copy of Windows XP: The Missing Manual, Second Edition or Windows Vista: The Missing Manual.
So, what happens once youâve got Wordâs motor running? If youâre a newcomer, youâre probably just staring with curiosity. If youâre familiar with previous versions of Word, though, you may be doing a double take (Figure 1-1). In Word 2007, Microsoft combined all the old menus and toolbars into a new feature called the ribbon. Click one of the tabs above the ribbon, and you see the command buttons change below. The ribbon commands are organized into groups, with the name of each group listed at the bottom. (See Figure 1-1 for more detail on the ribbon.)
Creating a New Document
When you start Word without opening an existing document, the program gives you an empty one to work in. If youâre eager to put words to page, then type away. Sooner or later, though, youâll want to start another new document. Word gives you three ways to do so:
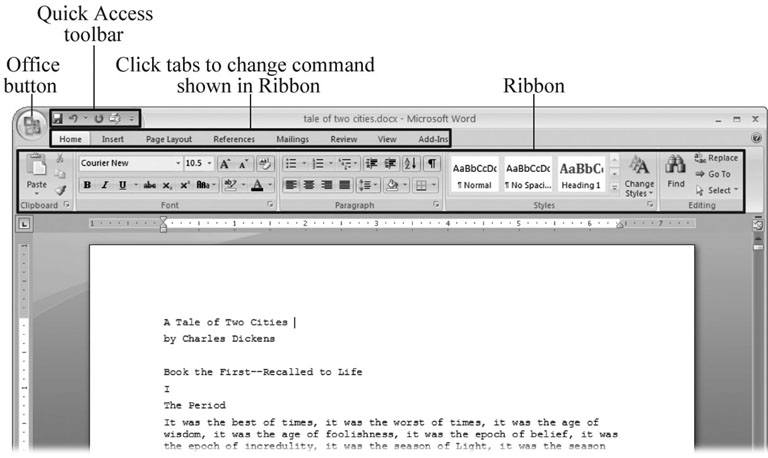
Figure 1-1. When you start Word 2007 for the first time, it may look a little top-heavy. The ribbon takes up more real estate than the old menus and toolbars. This change may not matter if you have a nice big monitor. But if you want to reclaim some of that space, you can hide the ribbon by double-clicking the active tab. Later, when you need to see the ribbon commands, just click a tab.
-
Creating a new blank document. When youâre preparing a simple documentâlike a two-page essay, a note for the babysitter, or a press releaseâa plain, unadorned page is fine. Or, when youâre just brainstorming and youâre not sure what you want the final document to look like, you probably want to start with a blank slate or use one of Wordâs templates (more on that in a moment) to provide structure for your text.
-
Creating a document from an existing document. For letters, resumes, and other documents that require more formatting, why reinvent the wheel? You can save time by using an existing document as a starting point (Section 1.2.2). When you have a letter format that you like, you can use it over and over by editing the contents.
-
Creating a document from a template (Section 1.2.3). Use a template when you need a professional design for a complex document, like a newsletter, a contract, or meeting minutes. Templates are a lot like formsâthe margins, formatting, and graphics are already in place. All you do is fill in your text.
Tip
Microsoft provides a mind-boggling number of templates with Word, but theyâre not the only source. You can find loads more on the Internet, as described in Section 5.2.1. Your employer may even provide official templates for company documents.
To start your document in any of the above ways, click the Windows logo in the upper-left corner of the screen. Thatâs Office 2007âs new
Office button. Click it, and a drop-down menu opens, revealing commands for creating, opening, and saving documents. Next to these commands, you see a list of your Word documents. This list includes documents that are open, as well as those that youâve recently opened.
The Office button is also where you go to print and email your documents (Figure 1-2).
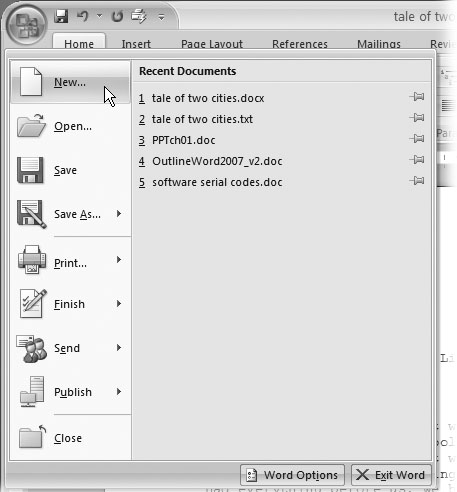
Figure 1-2. The phrase most frequently uttered by experienced Word fans the first time they start Word 2007 is, âOkay, whereâs my File menu?â Never fear, the equivalent of the File menu is still thereâitâs just camouflaged a bit. Clicking the Office button (the one that looks like a Windows logo) reveals the commands you use to create, open, and save Word documents.
Creating a New Blank Document
Say you want a new blank document, just like the one Word shows you when you start the program. No problemâhere are the steps:
-
Choose Office button â New.
The New Document dialog box appears.
-
In the upper-left corner of the large âCreate a new Word documentâ panel, click âBlank documentâ (Figure 1-3).
The New Document box presents a seemingly endless number of options, but donât panic. The âBlank documentâ option you want is on the left side of the first line.
-
At the bottom of the New Document dialog box, click Create.
The dialog box disappears, and youâre gazing at the blank page of a new Word document.
Better get to work.
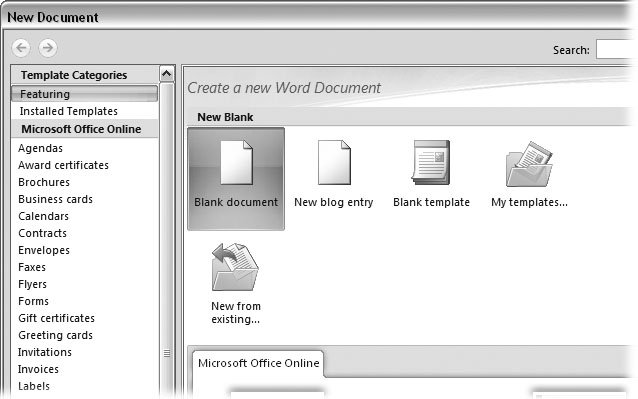
Figure 1-3. Open the New Document box (Office button â New, or Alt+F, N), and Word gives you several ways to create a new document. Click âBlank documentâ to open an empty document, similar to the one Word shows when you first start the program. Or you can click âNew from existingâ to open a document that you previously created under a new name.
Creating a New Document from an Existing Document
A blank Word document is sort of like a shapeless lump of clay. With some work, you can mold it to become just about anything. Often, however, you can save time by opening an existing document thatâs similar to the one you want to create. Imagine that you write the minutes for the monthly meetings of the Chief Executive Officerâs Surfing Association (CEOSA). When itâs time to write up the June minutes, itâs a lot faster to open the minutes from May. You keep the boilerplate text and all the formatting, but you delete the text thatâs specific to the previous month. Now all you have to do is enter the text for June and save the document with a new name:
JuneMinutes.docx.
Note
The .docx extension on the end of the filename is Word 2007âs new version of .doc. The switch from three-letter to four-letter filename extensions indicates a change in the way Word stores documents. (If you need to share documents with folks using earlier versions of Word, choose Office button â Save As â Word 97-2003 document when you save the file. See the box in Section 1.2.3 for details.)
Word gives you a âNew from existingâ document-creation option to satisfy your desire to spend more time surfing and less time writing meeting minutes. Hereâs how to create a new document from an existing document:
-
Choose Office button â New (Alt+F, N) to open the New Document window. Then click âNew from existingâ¦â (it sits directly below the âBlank documentâ button).
The three dots at the end of the buttonâs title tell you that thereâs another dialog box to come. And sure enough, when you click âNew from existingâ¦â, it opens another box, appropriately titled New from Existing Document (Figure 1-4). This box looksâand worksâlike a standard Windows Open File box. It lets you navigate to a specific folder and open a file.
-
On your computer, find the existing document youâre using for a model.
You can use the bar on the left to change the folder view. Word starts you in your My Documents folder, but you can switch to your desktop or your My Computer icon by clicking the icons on the left. Double-click folder icons in the large window to open them and see their contents.
-
Click to select the file, and then click Create New (in the lower-right corner). (Alternatively, just double-click the fileâs icon to open it. This trick works in all Open File boxes.)
Instead of the usual Open button at the bottom of the box, the button in the New from Existing Document box reads Create Newâyour clue that this box behaves differently in one important respect: Instead of opening an existing file, youâre making a copy of an existing file. Once open, the fileâs name is something like Document2.docx instead of the original name. This way, when you save the file, you donât overwrite the original document. (Still, itâs best to save it with a new descriptive name right away.)
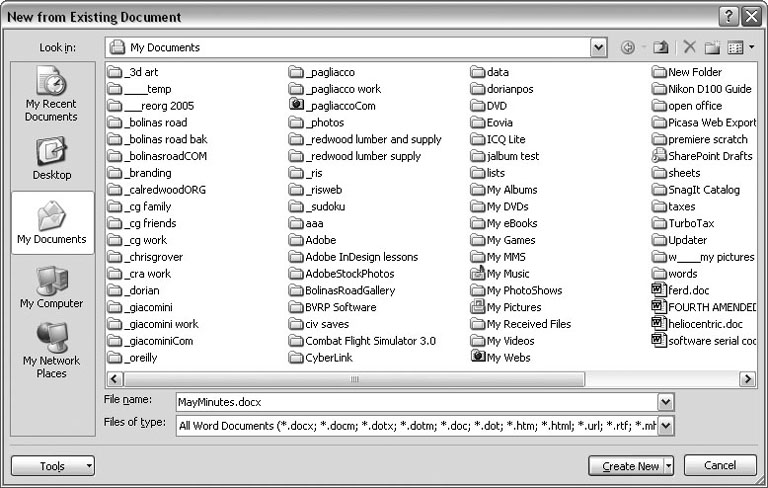
Figure 1-4. Use the New from Existing Document box to find an existing Word document that youâd like to open as a model for your new document. When you click Create New at bottom-right, Word opens a new copy of the document, leaving the original untouched. You can modify the copy to your heartâs content and save it under a different file name.
Tip
Windowsâ Open File boxes, like New from Existing Document, let you do a lot more than just find files. In fact, they let you do just about anything you can do in Windows Explorer. Using keyboard shortcuts, you can cut (Ctrl+X), copy (Ctrl+C), and paste (Ctrl+V) files. A right-click displays a shortcut menu with even more commands, letting you rename files, view Properties dialog boxes, and much more. You can even drag and drop to move files and folders.
Creating a New Document from a Template
Say youâre creating meeting minutes for the first time. You donât have an existing document to give you a leg up, but you do want to end up with handsome, properly formatted minutes. Word is at your serviceâwith
templates. Microsoft provides dozens upon dozens of prebuilt templates for everything from newsletters to postcards. Remember all the busy stuff in the New Document box in Figure 1-3? About 90 percent of the items in there are templates.
In the previous example, where you use an existing document to create the meeting minutes for the Chief Executive Officerâs Surfing Association (CEOSA), each month you open the minutes from the previous month. You delete the information that pertains to the previous month and enter the current monthâs minutes. A template works pretty much the same way, except itâs a generic document, designed to be adaptable to lots of different situations. You just open it and add your text. The structure, formatting, graphics, colors, and other doodads are already in place.
Note
The subject of Word templates is a lengthy one, especially when it comes to creating your own, so thereâs a whole chapter devoted to that topicâChapter 20.
Hereâs how to get some help from one of Microsoftâs templates for meeting minutes:
-
Choose Office button â New (Alt+F, N) to open the New Document window.
On the left of the New Document box is a Template Categories list. The top entry on this list is Installed Templatesâthe ones Word has installed on your computer.
You could use any of these, but you also have a world of choice waiting for you online. On its Web site, Microsoft offers hundreds of templates for all sorts of documents, and you can access them right from the New Document box. If you have a fast Internet connection, then itâs just as quick and easy to use an online template as it is using the ones stored on your computer. In fact, youâll use an online template for this example.
Note
If you canât connect to the Internet right now, then simply choose one of the installed templates instead. Click Create, and then skip to step 4.
-
Scroll down the Template Categories list to the Microsoft Office Online heading. Under this heading, select Minutes.
In the center pane, youâll see all different types of minutes templates, from PTA minutes to Annual shareholderâs meeting minutes (Figure 1-5). When you click a templateâs icon, a preview appears in the pane on the right.

Figure 1-5. The New Document box lists prebuilt templates that live at Microsoft Office Online in categories like Agendas, Brochures, Calendars, and Minutes. Below the thumbnail you see an estimate of how long it takes to download the template from the Microsoft Office Online Web site. A rating, from 0 to 5 stars, tells you what other people think of the template (the rating system is kind of like the one at Amazon.com).
-
When youâre done perusing the various styles, click the Formal Meeting Minutes icon. (After all, CEOSA is a very formal organization.) Then click Download.
Word downloads and opens the document.
-
Start writing up the minutes for the CEO Surfers.
To follow the templateâs structure, replace all the words in square brackets ([ ]) with text relevant to CEOSA.
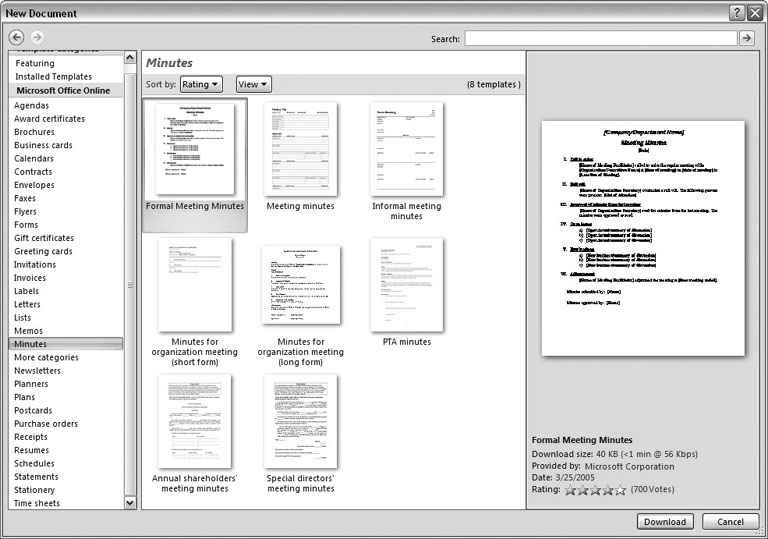
Tip
If youâd rather not download the Formal Meeting Minutes template every time you use it, then you can save the file on your computer as a Word template. The steps for saving files are just around the corner in Section 1.5.
Opening an Existing Document
If youâve mastered creating a document from an existing document and creating a document from a template, youâll find that opening an existing document is a snap. The steps are nearly identical.
-
Choose Office button â Open (Alt+F, O). In the Open window (Figure 1-6), navigate to the folder and file you want to open.
The Open window starts out showing your My Documents folder, since thatâs where Word suggests you save your files. When your documentâs in a more exotic location, click the My Computer icon, and then navigate to the proper folder from there.
Tip
When you open a document youâve used recently, you may see its name right on the Office button â Recent Documents menu. If so, simply click to open it without a trip to the Open dialog box.
-
With the file selected, click Open in the lower-right corner.
The Open box goes away and your document opens in Word. Youâre all set to get to work. Just remember, when you save this document (Alt+F, S or Ctrl+S), you write over the previous file. Essentially, you create a new, improved, and only copy of the file you just opened. If you donât want to write over the existing document, use the Save As command (Alt+F, A), and then type a new name in the File Name text box.
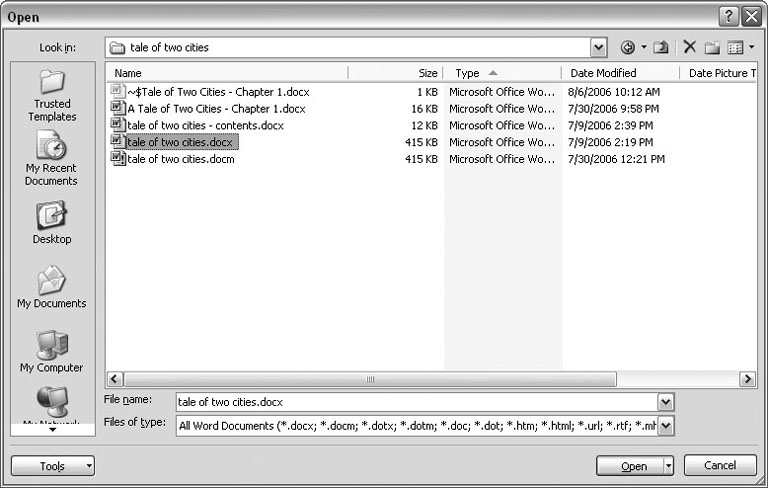
Figure 1-6. This Open dialog box shows the contents of the tale of two cities folder, according to the âLook inâ box at the top. The file tale of two cities. docx is selected, as you can see in the âFile name boxâ at the bottom of the window. By clicking Open, Mr. Dickens is ready to go to work.
Tip
Opening a file in Word doesnât mean youâre limited to documents created in Word. You can choose documents created in other programs from the Files of Type drop-down menu at the bottom of the Open dialog box. Word then shows you that type of document in the main part of the window. You can open Outlook messages (.msg), Web pages (.htm or .html), or files from other word processors (.rtf, .mcw, .wps).
Your Different Document Views
Now that you know a handful of ways to create and open Word documents, itâs time to take a look around the establishment. You may think a documentâs a documentâjust look at it straight on and get your work done. Itâs surprising, though, how changing your view of the page can help you work faster and smarter. When youâre working with a very long document, you can change to Outline view and peruse just your documentâs headlines without the paragraph text. In Outline view, you get a better feeling for the manuscript as a whole. Likewise, when youâre working on a document thatâs headed for the Web, it makes sense to view the page as it will appear in a browser. Other times, you may want to have two documents open on your screen at once (or on each of your two monitors, you lucky dog), to make it easy to cut and paste text from one to the other.
The key to working with Wordâs different view options is to match the view to the job at hand. Once you get used to switching views, youâll find lots of reasons to change your point of view. Find the tools you need on the View tab (Figure 1-7). To get there, click the View tab (Alt+W) on the ribbon (near the top of Wordâs window). The tab divides the view commands into four groups:
-
Document Views. These commands change the big picture. For the most part, use these when you want to view a document in a dramatically different way: two pages side by side, Outline view, Web layout view, and so on. -
Show/Hide. The Show/Hide commands display and conceal Word tools like rulers and gridlines. These tools donât show when you print your document; theyâre just visual aids that help you when youâre working in Word. -
Zoom. As you can guess, the Zoom tools let you choose between a close-up and a long shot of your document. Getting in close makes your words easier to read and helps prevent eyestrain. But zooming out makes scrolling faster and helps you keep your eye on the big picture.Tip
In addition to the Zoom tools on the ribbon, handy Zoom tools are available in the windowâs lower-right corner. Check out the + (Zoom In) andâ(Zoom Out) buttons and the slider in between them. See Section 1.4.3 for the details on using them.
-
Window. In the Window group, youâll find creative ways to organize document windows on your screenâlike split views of a single document or side-by-side views of two different documents.
All the commands in the View tabâs four groups are covered in the following pages.
Note
This section provides the short course on viewing your Word documents. For even more details and options for customizing your Word environment, see Chapter 17.
Figure 1-7. The View tab is your document-viewing control center. Look closely, and you see itâs divided into four groups with names at the bottom of the ribbon: Document Views, Show/Hide, Zoom, and Window. To apply a view command, just click the button or label.
Document Views: Five Ways to Look at Your Manuscript
Word gives you five basic document views. To select a view, go to the View tab (Alt+W) and choose one of the Document Views on the left side of the ribbon (Figure 1-8). You have another great option for switching from one view to another thatâs always available in the lower-right corner of Wordâs window. Click one of the five small buttons to the left of the slider to jump between Print Layout, Full Screen Reading, Web Layout, Outline, and Draft views. Each view has a special purpose, and you can modify them even more using the other commands on the View tab.
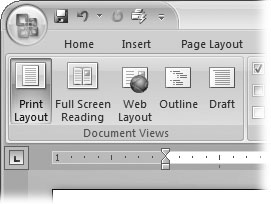
Figure 1-8. On the left side of the View tab, you find the five basic document views: Print Layout, Full Screen Reading, Web Layout, Outline, and Draft. You can edit your document in any of the views, although they come with different tools for different purposes. For example, Outline view provides a menu that lets you show or hide headings at different outline levels.
Note
Changing your view in no way affects the document itselfâyouâre just looking at the same document from a different perspective.
-
Print Layout (Alt+W, P). The most frequently used view in Word, Print Layout, is the one you see when you first start the program or create a new blank document. In this view, the page you see on your computer screen looks much as it does when you print it. This viewâs handy for letters, reports, and most documents headed for the printer.
-
Full Screen Reading (Alt+W, F). If youâd like to get rid of the clutter of menus, ribbons, and all the rest of the word-processing gadgetry, then use Full Screen Reading view. As the name implies, this viewâs designed primarily for reading documents. It includes options you donât find in the other views, like a command that temporarily decreases or increases the text size. In the upper-right corner you see some document-proofing tools (like a text highlighter and an insert comment command), but when you want to change or edit your document, you must first use the View Options â Allow Typing command. For more details on using Word for reviewing and proofing, see Chapter 16. -
Web Layout (Alt+W, L). This view shows your document as if it were a single Web page loaded in a browser. You donât see any page breaks in this view. Along with your text, you see any photos or videos that youâve placed in the documentâjust like a Web page. Section 13.2 has more details on creating Web pages with Word. -
Outline (Alt+W, U). For lots of writers, an outline is the first step in creating a manuscript. Once theyâve created a framework of chapters and headings, they dive in and fill out the document with text. If you like to work this way, then youâll love Outline view. Itâs easy to jump back and forth between Outline view and Print Layout view or Draft view, so you can bounce back and forth between a macro and a micro view of your epic. (For more details on using Wordâs Outline view, see Section 8.1.) -
Draft (Alt+W, V). Hereâs the no-nonsense, roll-up-your-sleeves view of your work (Figure 1-9). You see most formatting as it appears on the printed page, except for headers and footers. Page breaks are indicated by a thin dotted line. In this view, itâs as if your document is on one single roll of paper that scrolls through your computer screen. This viewâs a good choice for longer documents and those moments when you want to focus on the words without being distracted by page breaks and other formatting niceties.
Show and Hide Window Tools
Word gives you some visual aids that make it easier to work with your documents. Tools like rulers and gridlines donât show up when you print your document, but they help you line up the elements on the page. Use the ruler to set page margins and to create tabs for your documents. Checkboxes on the View tab let you show or hide tools, but some tools arenât available in all the views, so theyâre grayed out. You canât, for example, display page rulers in Outline or Full Screen Reading views.
Use the checkboxes in the Show/Hide group of the View tab (Figure 1-10) to turn these tools on and off:
-
Ruler. Use the ruler to adjust margins, set tabs, and position items on your page. For more detail on formatting text and paragraphs, see Chapter 4.
-
Gridlines. When you click the Gridlines box, it looks like you created your document on a piece of graph paper. This effect isnât too helpful for an all-text document, but it sure comes in handy if youâre trying to line up photos on a page.

Figure 1-9. In Draft view, you see most text and paragraph formatting, but headers, footers, and other distracting page formatting features are hidden. Your text appears as a continuous scroll, with the margins hidden. Page breaks appear as dotted lines.
-
Message Bar. The Message Bar resides directly under the ribbon, and itâs where you see alerts about a documentâs behavior. For example, when a document is trying to run a macro and your Word settings prohibit macros, an alert appears in the Message Bar. Click the checkbox to show or hide the Message Bar. -
Document Map. If you work with long documents, youâll like the Document Map. This useful tool appears to the left of your text (you can see it in Figure 1-10), showing the documentâs headings at various levels. Click the little + andâbuttons next to a heading to expand or collapse the outline. Click a heading, and you jump to that location in your document. -
Thumbnails. Select the Thumbnails option, and you see little icons of your documentâs pages in the bar on the left. Click a thumbnail to go to that page. In general, thumbnails are more useful for shorter documents and for pages that are visually distinctive. For longer documents, youâll find the Document Map easier to use for navigation.
Zooming Your View In and Out
When youâre working, do you ever find that you sometimes hold pages at armâs length to get a complete view, and then, at other times, you stick your nose close to the page to examine the details? Wordâs Zoom options (Figure 1-11) let you do the same thing with your screenâbut without looking nearly as silly.
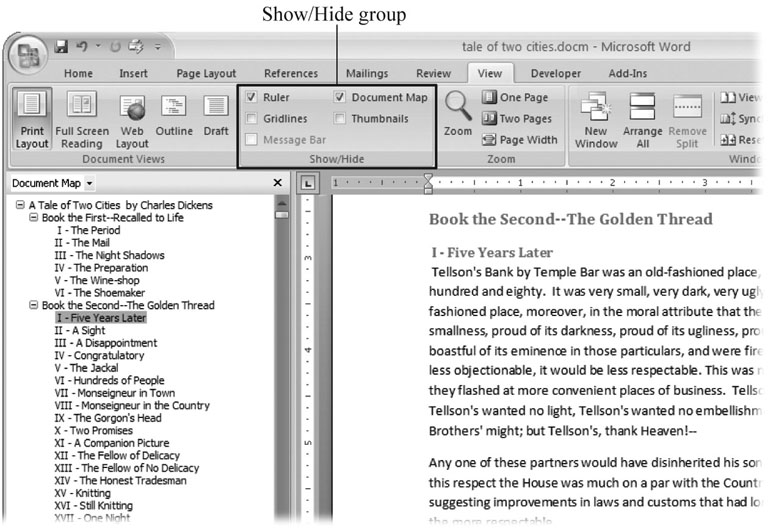
Figure 1-10. Use the Show/Hide group on the View tab to display or conceal Word tools. The Ruler gives you a quick and easy way to set tabs and margins. The Document Map is particularly helpful when you work with longer documents because it displays headings in the bar on the left of the screen. In the left pane, you can see that Mr. Dickens wrote more than his fair share of chapters.
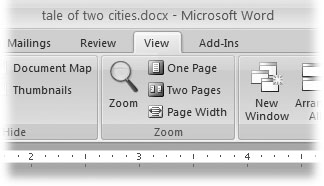
Figure 1-11. The Zoom group of options lets you view your document close up or at a distance. The big magnifying glass opens the Zoom dialog box with more controls for fine-tuning your zoom level. For quick changes, click one of the three buttons on the right: One Page, Two Pages, or Page Width.
Note
Even though the text appears to get bigger and smaller when you zoom, youâre not actually changing the document in any way. Zoom is similar to bringing a page closer so you can read the fine print. If you want to actually change the font size, then use the formatting options on the Home tab (Alt+H, FS).
On the View tab, click the big magnifying glass to open the Zoom dialog box (Figure 1-12). Depending on your current Document View (see Section 1.4), you can adjust your view by percentage or relative to the page and text (more on that in a moment). The options change slightly depending on which Document View youâre using. The Page options donât really apply to Web layouts, so theyâre grayed out and inactive if youâre in the Web Layout view.
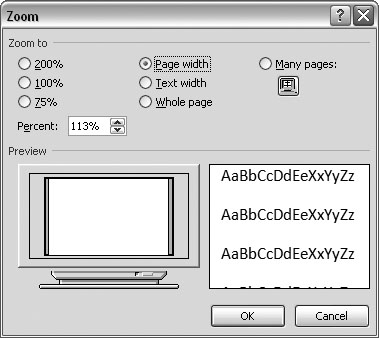
Figure 1-12. The Zoom dialog box lets you choose from a variety of views. Just click one of the option buttons, and then click OK. The monitor and text sample at the bottom of the Zoom box provide visual clues as you change the settings.
Zooming by percentage
In the boxâs upper-left corner, you find controls to zoom in and out of your document by percentage. The view varies depending on your computer screen and settings, but in general, 100% is a respectable, middle-of-the-road view of your document. The higher the percentage, the more zoomed in you are, and the bigger everything looksâvice versa with a lower percentage.
The three radio buttons (200%, 100%, and 75%) give you quick access to some standard settings. For in-between percentages (like 145%), type a number in the box below the buttons, or use the up-down arrows to change the value. For a quick way to zoom in and out without opening a dialog box, use the Zoom slider (Figure 1-13) in the lower-right corner of your window. Drag the slider to the right to zoom in on your document, and drag it to the left to zoom out. The percentage changes as you drag.
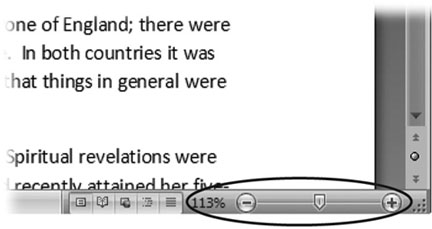
Figure 1-13. The Zoom slider at the bottom of the document window gives you a quick and easy way to change your perspective. Drag the slider to the right to zoom in on your document, and drag it to the left to zoom out. To the left of the slider are five View buttons: Print Layout, Full Screen Reading, Web Layout, Outline, and Draft (Section 1.4.2). Since the first button is selected, this document is in Print Layout view.
Zooming relative to page or text
Not everyoneâs a number person. (Thatâs especially true of writers.) So you may prefer to zoom without worrying about percentage figures. The Zoom dialog box (on the View tab, click the magnifying-glass icon) gives you four radio buttons with plain-English zoom settings:
Page width. Click this button, and the page resizes to fill the screen from one side to the other. Itâs the fastest way to zoom to a text size that most people find comfortable to read. (You may have to scroll, though, to read the page from top to bottom.)
Text width. This button zooms in even farther, because it ignores the margins of your page. Use this one if you have a high-resolution monitor (or youâve misplaced your reading glasses).
Whole page. When you want to see an entire page from top to bottom and left to right, click this button. Itâs great for getting an overview of how your headings and paragraphs look on the page.
Many pages. This view is the equivalent of spreading your document out on the floor, and then viewing it from the top of a ladder. You can use it to see how close you are to finishing that five-page paper, or to inspect the layout of a multi-page newsletter.
Warning
When youâre zoomed out to Whole or âMany pagesâ view, watch those fingers on the keyboard. You can still make changes to your text in these views, even though you canât see what youâre doing.
Changing page view from the ribbon
The ribbon offers radio buttons for three popular page views. (You can see them back in Figure 1-11, to the Zoom toolâs right.) Theyâre a quick and dirty way to change the number of pages you see onscreen without fiddling with zoom controls.
-
One Page. This view shows the entire page in Wordâs document window. If your screen is large enough, you can read and edit text in this view. -
Two Pages. In this view, you see two pages side by side. This viewâs handy when youâre working with documents that have two-page spreads, like booklets. -
Page Width. This button does the exact same thing as the Page Width button in the Zoom dialog box (Section 1.4.3). Itâs more readable than the One Page and Two Page options, because the page fills the screen from edge to edge, making the text appear larger.
The Window Group: Doing the Splits
Back when dinosaurs roamed the earth and people used typewriters (or very early word processors), you could work on only one document at a timeâthe one right in front of you. Although Word 2007 has more options for viewing multiple documents and multiple windows than ever, some folks forget to use them. Big mistake. If you ever find yourself comparing two documents or borrowing extensively from some other text, then having two or more documents visible on your screen can double or triple your work speed.
The commands for managing multiple documents, views, and windows are in the View tabâs Window group (Figure 1-14).
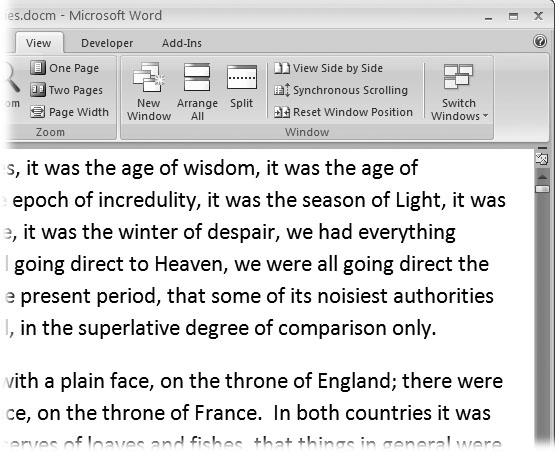
Figure 1-14. In the Window group, the three commands on the leftâNew Window, Arrange All, and Splitâlet you open and view your work from multiple vantage points. The commands in the middleâView Side by Side, Synchronous Scrolling, and Reset Window Positionâare helpful when reviewing and comparing documents. The big Switch Windows button lets you hop from one document to another.
-
New Window (Alt+W, N). When youâre working on a long document, sometimes you want to see two different parts of the document at the same time, as if they were two separate documents. You may want to keep referring to what you said in the Introduction while youâre working in Chapter 5. Or perhaps you want to keep an Outline view open while editing in Draft view. Thatâs where the New Window command comes in. When you click this button (or hit this keystroke), youâve got your document open in two windows that you can scroll independently. Make a change to one window, and it immediately appears in the other. -
Arrange All (Alt+W, A). Greatânow youâve got documents open in two or more windows, but it takes a heck of a lot of mousing around and window resizing to get them lined up on your screen at the same time. Click Arrange All and, like magic, your open Word document windows are sharing the screen, making it easy to work on one and then the other. Word takes an egalitarian approach to screen real estate, giving all windows an equal amount of property (Figure 1-15). -
Split (Alt+W, S). The Split button divides a single window so you can see two different parts of the same documentâparticularly handy if youâre copying text from one part of a document to another. The other advantage of the Split command is that it gives you more room to work than using Arrange All for multiple windows because it doesnât duplicate the ribbon, ruler, and other Word tools (Figure 1-16).
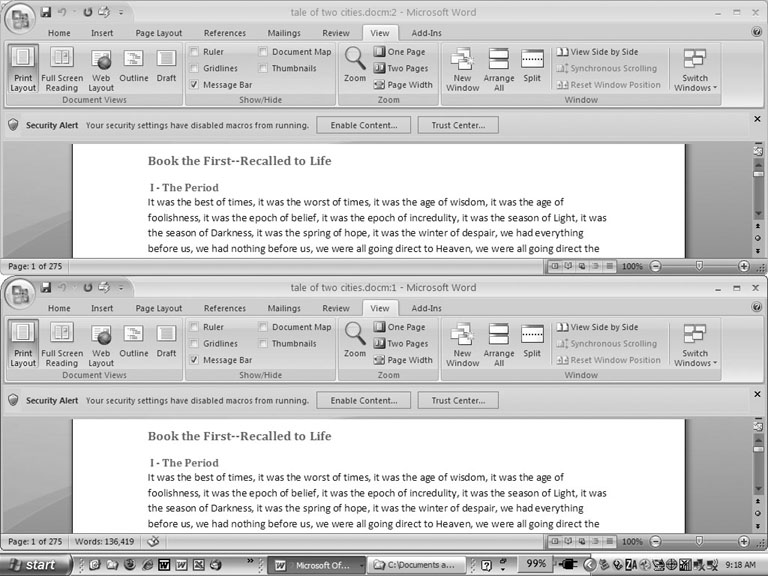
Figure 1-15. One downside of Office 2007âs ribbon: It takes up more space on your computerâs screen than menus or even the older button bars. When you open a couple of windows, youâre not left with much space to do your work, especially when youâre working on an ultra-portable laptop or a computer with a small screen. You can double-click the active tab to hide the ribbon, but in most cases, youâre better off working with a split screen, as shown in Figure 1-16.
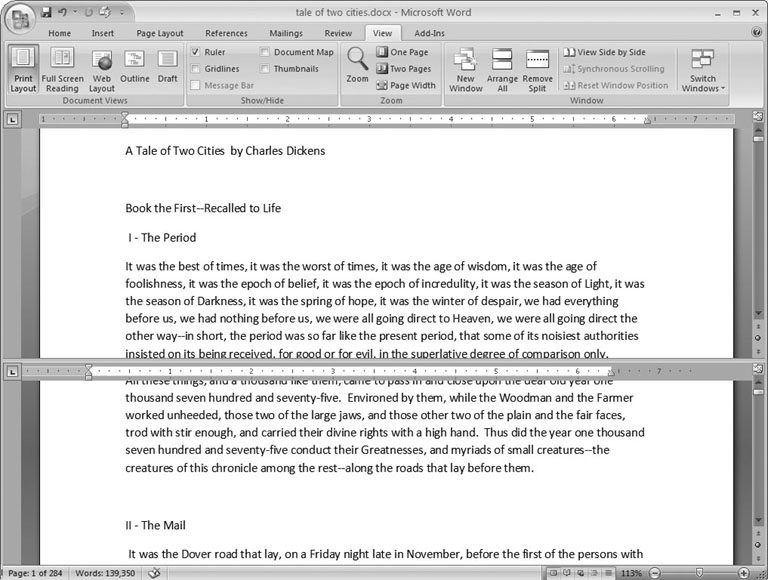
Figure 1-16. When youâre viewing two different parts of a single document, use the Split command; it leaves you more room to work than two separate windows, as shown in Figure 1-15. Each section of the split window has a scroll bar, so you can independently control different parts of your document. If you want to fine-tune your split, just drag the middle bar exactly where you want it. When youâre done, click Remove Split to return to a single screen view.
Viewing multiple windows
One common reason for wanting to see two documents or more on your screen at once is so you can make line-by-line comparisons. Imagine you have two Word documents that are almost identical, but you have to find the spots where there are differences. A great way to make those differences jump out is to put both versions on your screen side by side and scroll through them. As you scroll, you can see differences in the paragraph lengths and the line lengths. Here are the commands to help you with the process:
-
View Side by Side (Alt+W, B). Click the View Side by Side command and Word arranges two windows vertically side by side. As you work with side-by-side documents, you can rearrange windows on your screen by dragging the very top of the Window frame. You can resize the windows by pointing to any edge of the frame. When you see a double arrow, just drag to resize the window. Synchronous Scrolling (described next) is automatically turned on. -
Synchronous Scrolling (Alt+W, Y). The Synchronous Scrolling feature keeps multiple document windows in lock step. When you scroll one window, the other windows automatically scroll too. Using the same button or keystroke, you can toggle Synchronous Scrolling on and off as you work with your documents.
-
Reset Windows Position (Alt+W, T). If youâve moved or resized your document windows as described earlier under View Side by Side, then you can click this button to reset your view so the windows share the screen equally.
Saving and Closing Documents
From the earliest days of personal computing, the watchword has been âsave early, save often.â Thereâs nothing more frustrating than working half the day and then having the Great American Novel evaporate into the digital ether because your power goes out. So, here are some tips to protect your work from disasters human-made and natural:
-
Name and save your document shortly after you first create it. Youâll see the steps to do so later in this section.
-
Get in the habit of doing a quick save with Alt+F, S (think File Save) when you pause to think or get up to go to the kitchen for a snack. (Note for old-timers: Ctrl+S still works for a quick save too.)
-
If youâre leaving your computer for an extended period of time, save and close your document with Alt+F, C (think File Close).
The Many Ways to Save Documents
Itâs the Microsoft Way to give you multiple ways to do most everything. Whether thatâs because the companyâs programmers believe in giving you lots of choices, or because they canât make up their minds about the best way to do something is a question best left to the philosophers. But the point is, you do have a choice. You donât have to memorize every keystroke, button, and command. Especially with saving, the important thing is to find a way you like and stick with it. Hereâs a list of some ways you can save the document youâre working on:
Saving by keyboard shortcut
-
Ctrl+S. If youâre an old hand at Word, this keyboard shortcut may already be burned in your brain. It still works with Word and other Office programs. This command quickly saves the document and lets you get back to work.
-
Alt+F, S. This keyboard shortcut does the exact same thing as Ctrl+S. Unlike Ctrl+S, though, you get visual reminders of which keys to press when you press the Alt key. See the box above.
Saving by menu command
-
Office button â Save. If you donât want to use keyboard shortcuts, you can mouse your way to the same place using menus. Like the options above, this command saves your file with its current name.
-
Office button â Save As. The Save As option lets you save your file with a new name (Figure 1-17). When you use this command, you create a new document with a new name that includes any changes youâve made. (The individual steps are described in the next section.)

Figure 1-17. Use Office button â Save As to save your file with a new name or in a different file format. In this example, the Word file tale of two cities is being saved as an HTML type fileâa format used for Web pages.
-
Office button â Close. When you close a document, Word checks to see if youâve made any changes to the file. When youâve made changes, Word always asks whether youâd like to save the document (Figure 1-18).
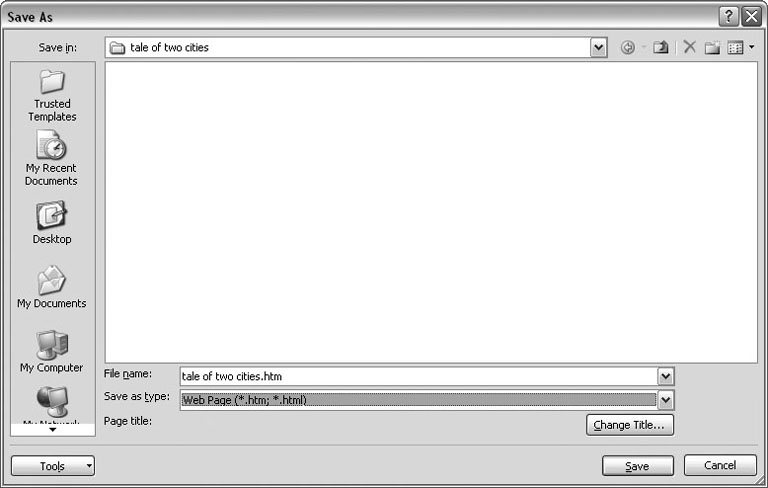
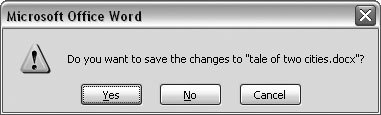
Figure 1-18. When you see this message box, you have three choices: Yes saves your document before closing it; No closes your document without saving it; Cancel leaves your document open without saving it.
Saving with a new name
When you save a new document or save a document with a new name (Save As), youâve got three things to consider: a filename, a file location, and a file format.
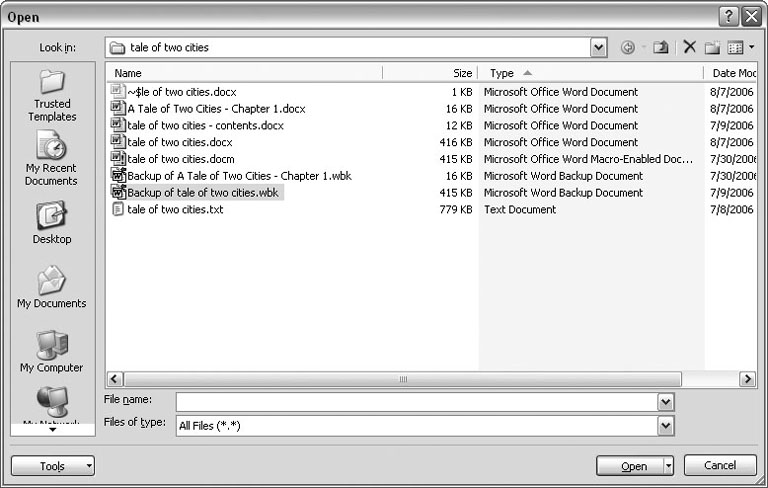
Figure 1-19. To open a backup file, choose All Files (*.*) in the âFiles of typeâ drop-down menu at the bottom of the Open dialog box. Look for a file that begins with the words âBackup of.â Double-click to open the file.
Here are the steps for saving a file, complete with a new name:
-
Choose Office button â Save As to open the Save As box.
You use the Save As command when youâre saving a file with a new name. Word also displays the Save As box the first time you save a new document.
-
Use the âSave inâ drop-down list or double-click to open folders in the window to find a location to store your file.
The buttons in the upper-right corner can also help you navigate. See the details in Figure 1-21. Word doesnât care where you save your files, so you can choose your desktop or any folder on your computer.

Figure 1-20. When you canât open a file with a normal Open command, click the arrow to the right of the Open button, and choose Open and Repair from the drop-down menu. Some parts of your file may still be damaged, but you can usually recover most of your work.
Tip
The more files you save on your computer, the more helpful it is to have a logical folder and file system. If you keep hundreds of Word documents, you may want to have different folders named: letters, memos, reports, and newsletters.
-
At the bottom of the Save As dialog box, type a name in the File name box.
Word accepts long names, so you donât need to skimp. Use a descriptive name that will help you identify the file two weeks or two years from now. A good name saves you time in the long run.
-
Use the âSave as typeâ box to choose a file type.
In most cases you donât need to change the file type. Word automatically selects either .docx or .docm depending on the contents of your file, but Word can save files in over a dozen different formats. If youâre sharing the file with someone whoâs using an older version of Word, then choose Word 97-2003 Document to save the document in .doc format. If youâre sharing with someone who uses a Mac or Linux computer, then you may want to use the more universal Rich Text Format (.rtf).
Tip
If you want to use your document as a template in the future, then choose Word Template (.dotx). Use the Word Macro-Enabled format (.dotm) if youâve created any macros (Section 19.2).
Unless youâre sharing your file with someone using an older version of Word or a different operating system or making a template, stick with the new standard Word file types .docx (for normal Word files) and .docm (for files that run macros). See the box in Section 1.2.3 for a complete rundown.
-
Click Save.
Word does the rest. All you need to do is remember where you saved your work.
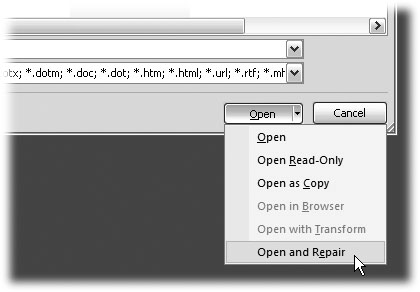
Figure 1-21. The Save As dialog box has all the controls you need to navigate to any location on your computerâincluding five nifty buttons in the upper-right corner. From left to right: The left arrow button steps you backward through your past locations (just like the back button in a Web browser). The up arrow takes you out to the folder enclosing the one youâre in now. The X button deletes folders and filesâbe careful with it. Click the folder with the star in the corner to create a new folder.
Get Word 2007: The Missing Manual now with the O’Reilly learning platform.
O’Reilly members experience books, live events, courses curated by job role, and more from O’Reilly and nearly 200 top publishers.